Home Gardening

Outdoor Gardening

Organic Gardening

Modern Gardening

Urban Gardening

Gardening Business

Home Blog Page 4

Nutrient Management for Tower Gardens: How to Mix Your Nutrients for Tower Farms

0

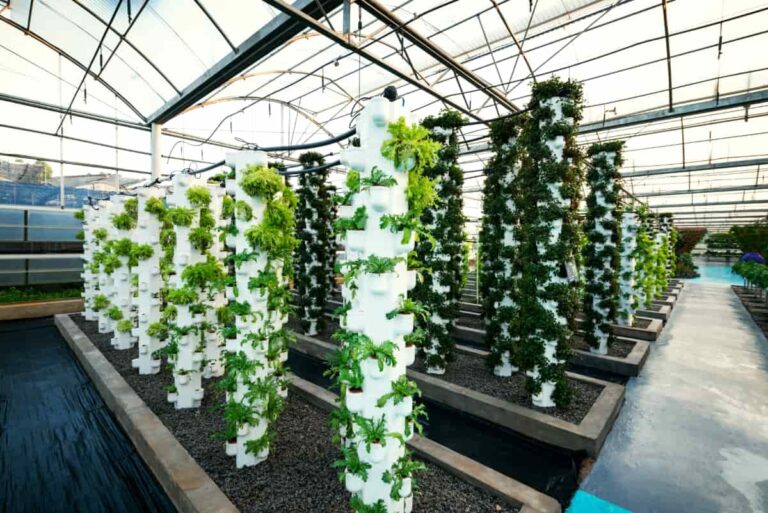
Proper nutrient management is crucial for the success of your Tower Garden. By understanding the needs of your plants and following best practices for mixing nutrients, you can ensure that they receive the essential elements they require to thrive. 
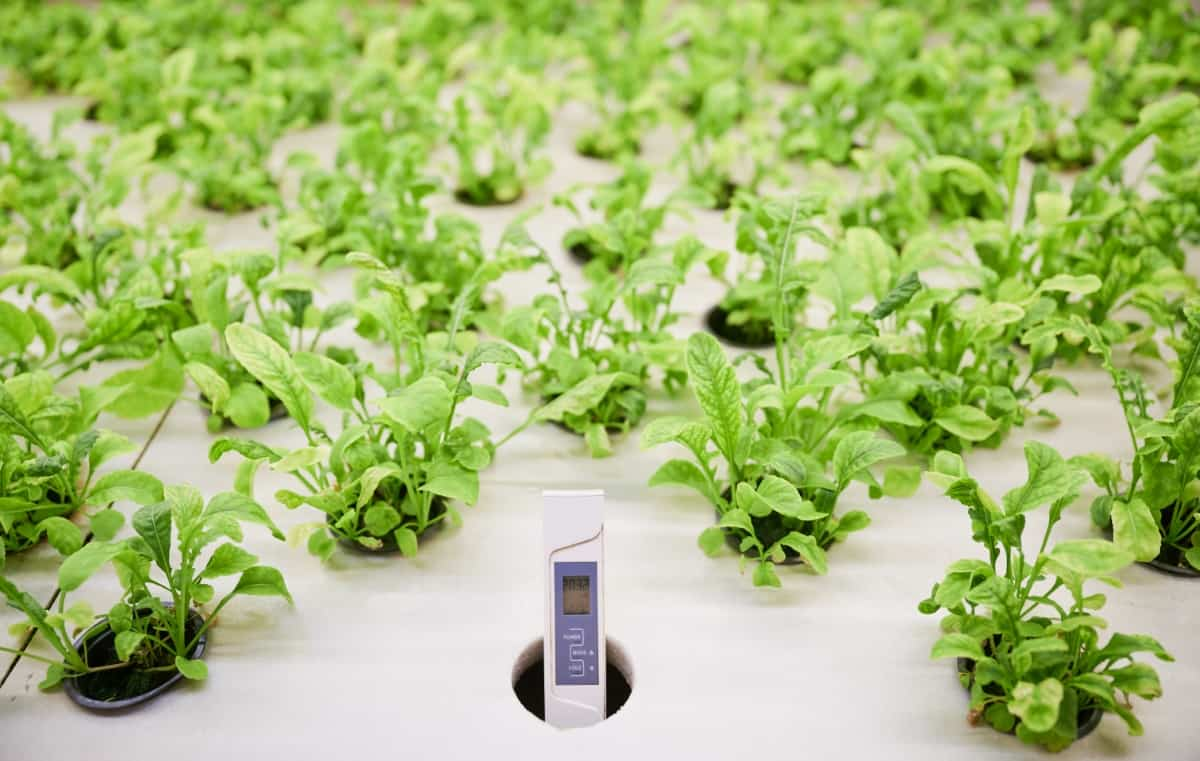
Nutrient Management for Tower Gardens

Nutrient Management for Tower Gardens

Choosing the Right Nutrients for Your Tower Garden Farm 

Choosing the right nutrients for your Tower Garden farm is a crucial step in ensuring healthy plant growth and maximum yield. When it comes to choosing the best nutrients for your Tower Garden, there are a few key factors to consider. Different plants have varying nutrient requirements, so it’s important to choose a formula that meets their specific needs. Whether you’re growing leafy greens, herbs, or fruit-bearing crops like Tomatoes or Peppers, there are specialized nutrient blends designed to support their growth. 

Importance of Nutrient Ratios and Concentrations 

When it comes to nutrient management for your Tower Garden farm, understanding the importance of nutrient ratios and concentrations is crucial. Each plant has specific nutrient requirements, and providing the right balance is essential for optimal growth and productivity. The Tower Garden nutrient recipe is the secret sauce for growing healthy and thriving plants in your vertical farm. One popular organic nutrient solution tower garden is compost tea. 

Nutrient ratios refer to the proportion of different elements in a fertilizer solution. These elements include macronutrients like nitrogen, phosphorus, and potassium, as well as micronutrients such as iron and manganese. The correct Nutrient ratios for Tower Garden ensure that plants get all the necessary nutrients in appropriate amounts. 

Concentration, on the other hand, refers to the strength or dilution of the nutrient solution. It is important to measure and maintain proper concentration levels because too little or too much can have detrimental effects on plant health. Regular testing of your reservoir will help you determine if adjustments are needed. 

Preparing the Nutrient Reservoir 

When it comes to nutrient management for your Tower Garden farm, one crucial step is preparing the nutrient reservoir. This is where you mix your chosen nutrients with water to create a solution that will provide essential elements for plant growth. To start, make sure you have a clean and sanitized reservoir. Any residue or contaminants can affect the health of your plants. Once clean, fill the reservoir with fresh water, leaving enough room for the nutrient solution. 

Mixing the Nutrients with Water 

Tower Garden nutrient mixing with water is a key step in ensuring your plants receive the proper nourishment they need to thrive. To start, fill your reservoir with clean, filtered water. Once filled, it’s time to add the nutrients. Follow the manufacturer’s instructions carefully and measure out the recommended amount of each nutrient. To mix your DIY Tower Garden nutrient solution, start by dissolving the base minerals in water according to package instructions.

It’s crucial to measure accurately, as too much or too little can harm your plants. Once dissolved, adjust the pH level using pH-up or pH-down solutions until it reaches an optimal range for your specific crop. When mixing, always add one nutrient at a time while stirring continuously. This will help ensure an even distribution of all essential elements throughout your solution.

In case you missed it: Vertical Farming with Tower Farms in Italy
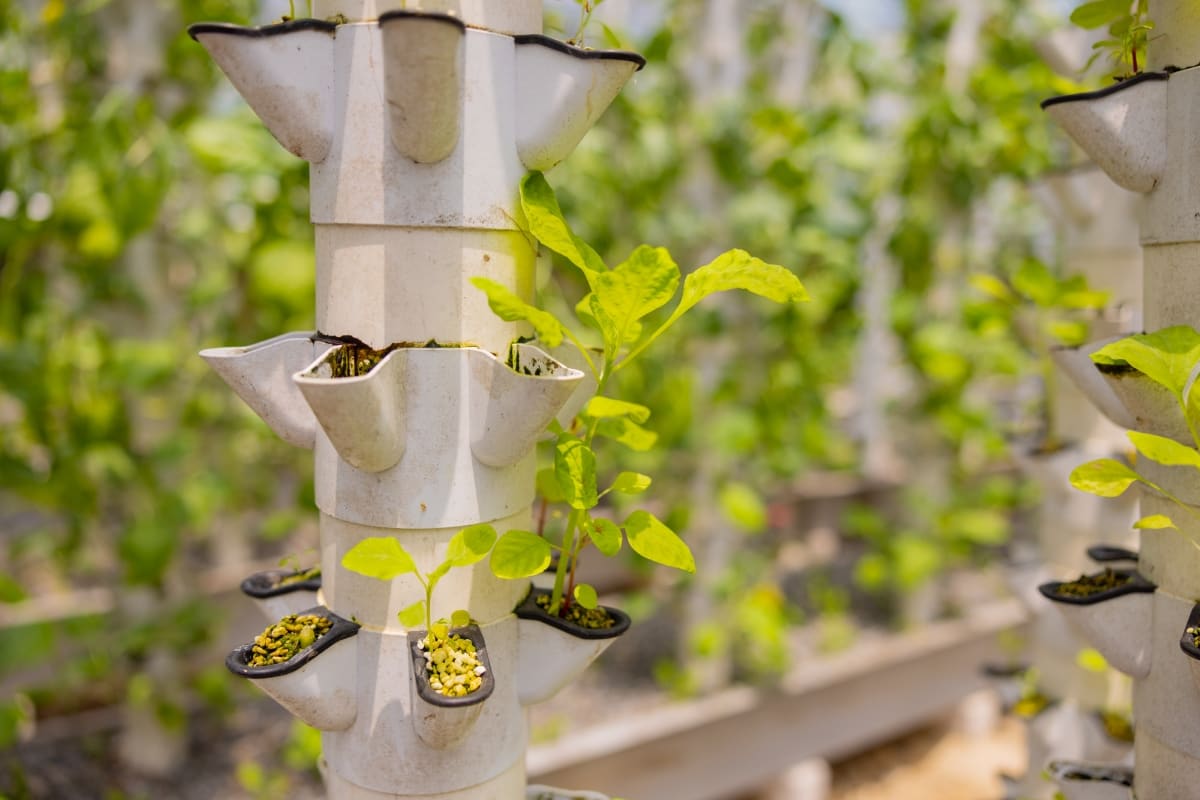
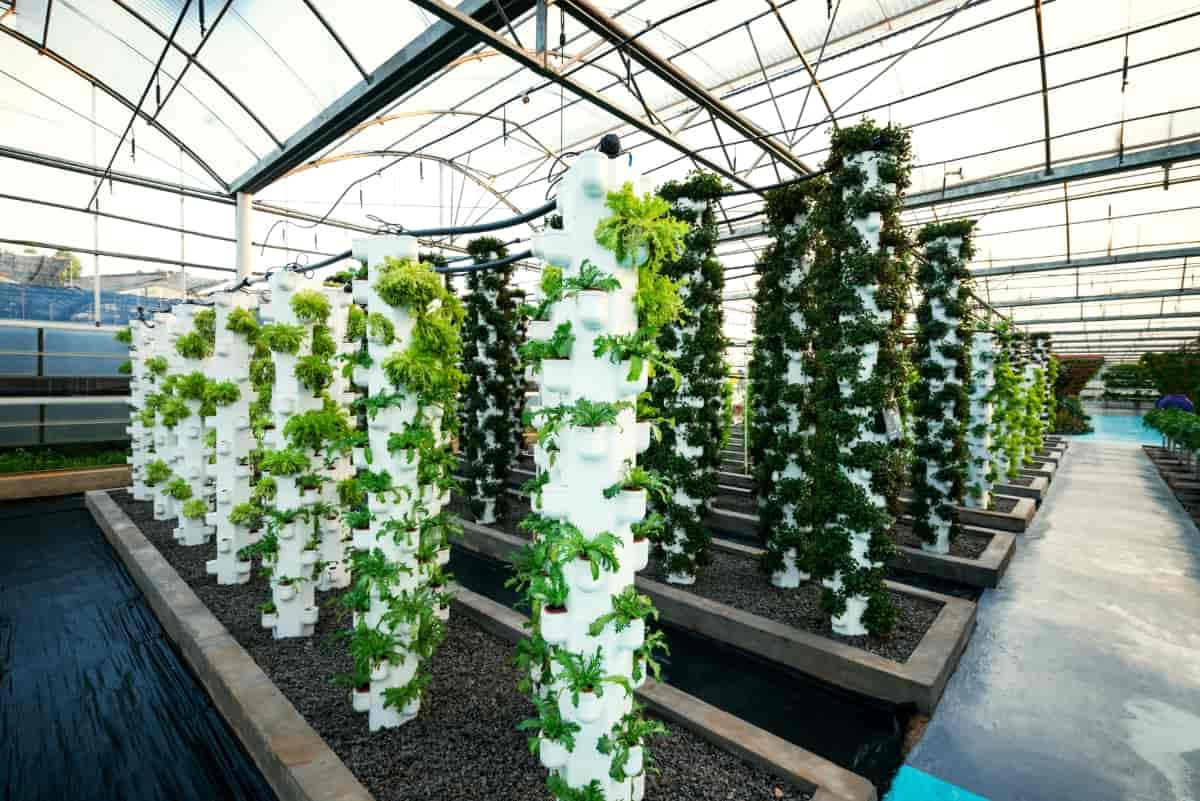
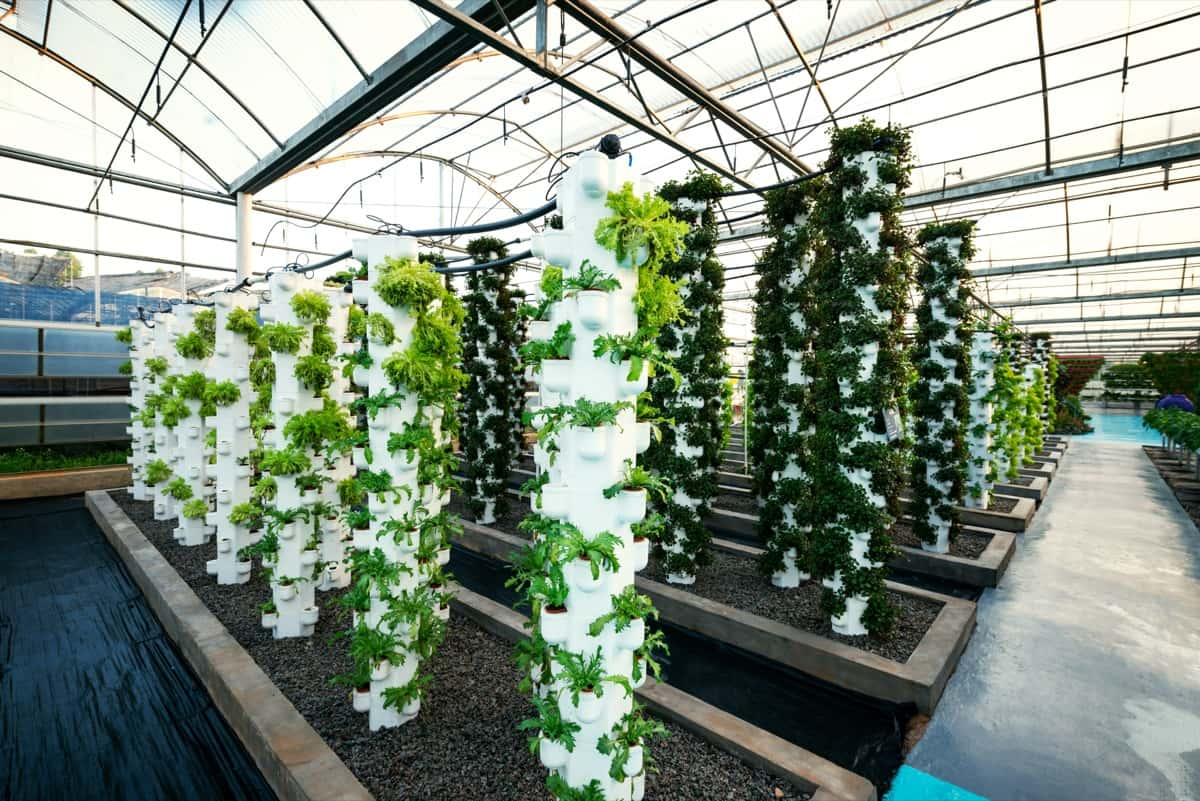
Vertical Garden with Green Plants

Be gentle when stirring to prevent excessive foaming or splashing that could lead to inaccurate measurements. After adding all necessary nutrients, allow them to dissolve fully before testing and adjusting their levels if needed. Regular monitoring is key here – check pH levels regularly using a reliable meter or test kit and make any necessary adjustments by adding pH up or down solutions. 

Monitoring and Adjusting Nutrient Levels 

Providing the perfect nutrient mix for vertical farming requires careful attention and ongoing monitoring. It ensures that plants receive the right amount of nutrients to support their growth and development. Regular monitoring allows you to assess the nutrient levels in the reservoir, identify any deficiencies or excesses, and make necessary adjustments. To monitor nutrient levels, you can use an electrical conductivity meter or a pH meter. These tools help measure the concentration of nutrients in the solution and determine if it falls within optimal ranges.

Maintaining proper nutrient ratios is vital, as imbalances can cause plant death. Adjusting nutrient levels involves adding more concentrated nutrients or diluting them with water, depending on your readings. Start by making small changes and retest until desired levels are reached. Tower Garden’s nutrient schedule can vary depending on the stage of growth and specific plant requirements. 

Maintaining Proper pH Levels 

One crucial aspect of nutrient management in Tower Gardens is maintaining proper pH levels. The pH level tells the acidity or alkalinity of your nutrient solution. It directly affects the availability and absorption of nutrients by your plants. To ensure optimal plant growth, you regularly monitor and adjust the pH level regularly. A range between 5.8 and 6.2 is ideal for most plants grown in hydroponic systems like Tower Gardens. 

When the pH level deviates from this range, it can cause nutrient deficiencies or toxicities as certain nutrients become less available or more concentrated. This imbalance can stunt plant growth and reduce overall productivity. To maintain proper pH levels, you may need to use a pH meter or test kit to measure the acidity/alkalinity accurately.  

Proper Aeration and Agitation of Nutrient Solution 

Proper aeration and agitation of the nutrient solution in your Tower Garden farm are vital for ensuring optimal plant growth. When the nutrients are mixed with water, they need to be well-oxygenated to provide sufficient oxygen to the roots. To achieve proper aeration, you can use an air pump or air stone in your nutrient reservoir.

These devices create bubbles that continuously agitate the solution, keeping it well-oxygenated. The movement of the solution also helps distribute nutrients evenly throughout the system. Adequate aeration and agitation also help prevent algae growth in your Tower Garden. Algae thrive in stagnant water, but providing constant movement disrupts their growth cycle. 

Regular Maintenance and Replacement of Nutrient Solution 

Regular maintenance and replacement of nutrient solutions are crucial for the health and productivity of your tower garden. As plants absorb nutrients from the solution, their levels can become depleted over time. To ensure optimal growth, it’s important to monitor and replace the nutrient solution regularly. One key aspect of regular maintenance is checking the nutrient levels in your reservoir.  

When it comes to replacing the nutrient solution, it’s recommended to do so every 1-2 weeks. This ensures that your plants always have access to fresh and balanced nutrients. Before adding a new solution, make sure to clean the reservoir thoroughly to prevent any buildup or contamination. 

In case you missed it: How to Grow Cauliflower in Aeroponic Towers
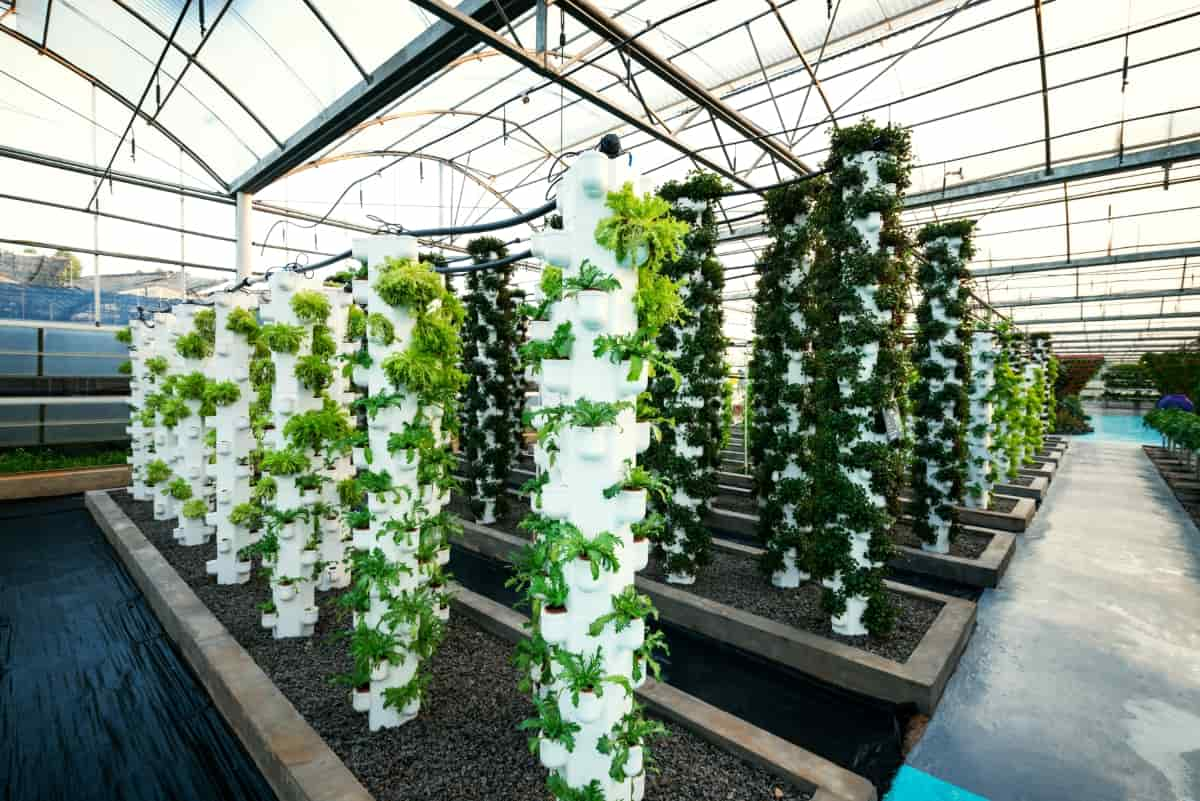
Greenhouse Vegetables

In addition to replacing the entire solution, you may also need to top up with water between changes. Evaporation and plant uptake can lead to a decrease in volume, so monitoring water levels is important. Remember that maintaining proper pH levels is essential for nutrient availability and absorption by plants. Regularly test and adjust pH as necessary using appropriate solutions or additives. 

Diagnosing Nutrient-Related Issues 

When it comes to nutrient management in Tower Garden farm, it’s important to be proactive in identifying any issues that may arise. By closely monitoring your plants and being aware of their nutrient needs, you can catch potential problems early on. One common issue is nutrient deficiency, which manifests as yellowing or discoloration of leaves. A lack of specific nutrients such as nitrogen, phosphorus, or potassium can cause this.

By observing the symptoms and comparing them to deficiency charts or guides, you can pinpoint the problem nutrient and make the necessary adjustments. On the other hand, over-fertilization can also occur if nutrient concentrations are too high. This often leads to leaf burn or necrosis. Adjusting the concentration levels accordingly will help alleviate this issue. 

Additionally, pH imbalances can impact nutrient availability for plants. If pH levels are too high or too low, certain nutrients may become locked up in the soil or hydroponic solution, making them inaccessible to plant roots. Another factor to consider is water quality. Poor water quality with high mineral content or heavy metals can negatively affect plant health and nutrient uptake. Conducting regular water tests will help identify any potential issues related to water quality. 

Optimizing Plant Growth with Proper Nutrient Management 

Proper nutrient management is crucial for optimizing plant growth in Tower Gardens. One key aspect of proper nutrient management is understanding the needs of different plant varieties. Each type of plant requires a different combination of nutrients to thrive. Researching and selecting the appropriate nutrient blend for your crop will set a solid foundation for success. 

Another important factor to consider is the timing and concentration of nutrients applied. Regular monitoring and adjustment are vital for maintaining optimal nutrient levels in Tower Gardens. Regularly check pH levels and adjust as necessary to keep them within the recommended range for your crops. Additionally, monitor electrical conductivity levels to ensure that nutrient concentrations are maintained at suitable levels. 

In case you missed it: How to Grow Leeks on Tower Gardens: Step-By-Step Guide for Beginners
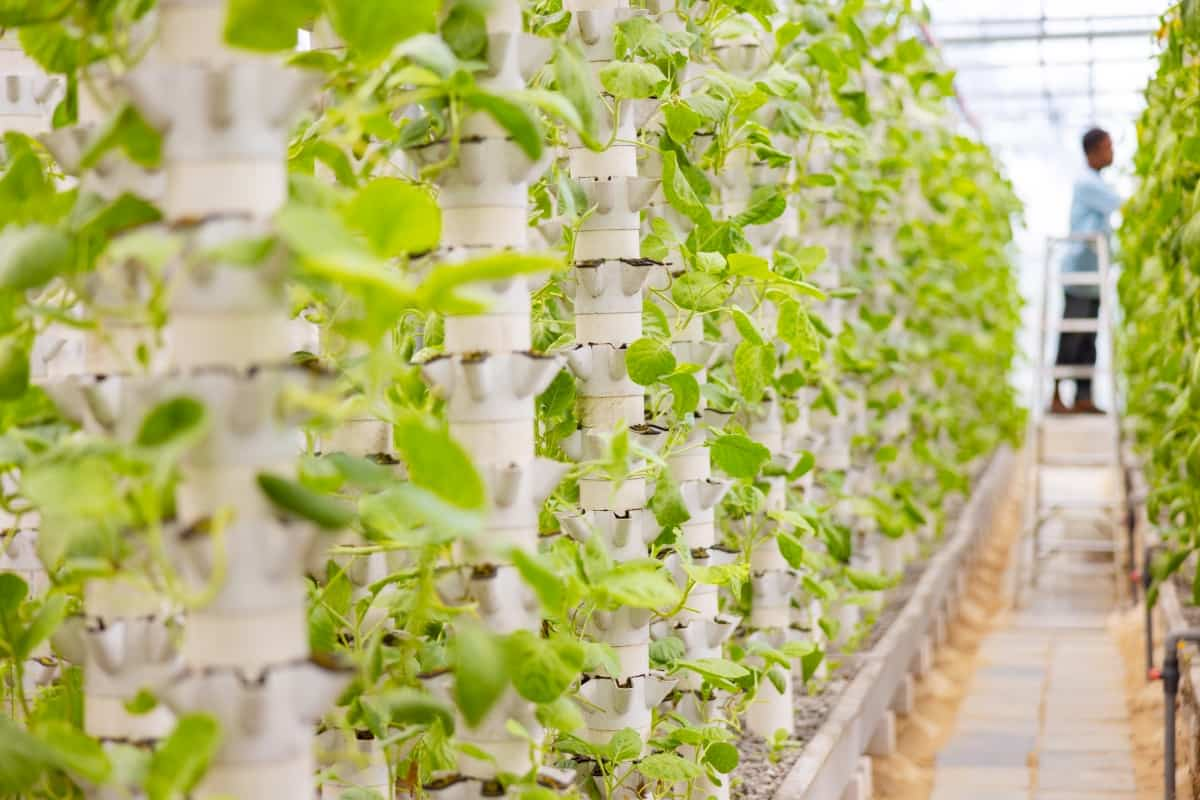
Plants Growing in Hydroponic Towers

Conclusion 

Nutrient management is a crucial aspect of maintaining a successful Tower Garden farm. By choosing the right nutrients and maintaining proper ratios and concentrations, you can provide your plants with the essential nutrients they require to grow. By implementing these practices for nutrient management in your Tower Garden farm, you can optimize plant growth while minimizing waste. The result will be healthier crops with higher yields—making your tower farming venture even more rewarding. 

Vertical Tower Farming in Portugal: Sustainable Agriculture in Portugal Urban Areas  

0

Vertical farming is a cutting-edge agricultural practice that has gained significant attention in recent years. It involves growing crops in vertically hydroponic or aeroponic systems without the need for soil. This innovative method maximizes space utilization and allows year-round cultivation of various crops, regardless of weather conditions. With their compact design and efficient use of resources, Tower Farms offers numerous benefits for farmers in Portugal. 

Vertical Tower Farming in Portugal

Vertical Tower Farming in Portugal  

Innovative Approaches to Aeroponic Tower Farming in Portugal’s Urban Areas 

Portugal has been embracing innovative approaches to aeroponic tower farming in its urban areas, revolutionizing the way food is grown and consumed. In Porto, Lisbon, and other urban centers across Portugal, unused spaces such as rooftops and abandoned buildings are being transformed into productive farms. These aeroponic tower farms utilize advanced technology to cultivate crops in a soil-free environment. 

By utilizing vertical space effectively, these tower farms maximize crop yields while minimizing water usage. The plants are nurtured with a precise blend of water and nutrient-rich mist delivered directly to their roots. This method eliminates the need for excessive amounts of water commonly used in traditional farming methods. 

Sustainable Agriculture: How Portugal is Embracing Vertical Aeroponic Farming 

Portugal is leading the way in sustainable agriculture with its embrace of vertical aeroponic farming. This innovative approach to farming allows crops to grow vertically in tower structures, using a fraction of the land and water resources compared to traditional agriculture methods.

A key factor contributing to the success of tower farms in Portugal is their ability to maximize crop yield. By utilizing Portugal vertical farming aeroponics, Portugal can optimize crop yields while reducing environmental impact. Aeroponic towers provide plants with nutrients and water through misting, eliminating the need for soil and minimizing water usage.

This Sustainable vertical farming Portuguese model ensures that every drop of water is utilized successfully, making it an ideal solution for countries facing drought or limited arable land. Vertical aeroponic farming also offers numerous benefits in urban areas where space is limited. By growing crops vertically, cities can produce fresh and healthy food locally, reducing reliance on imports and lowering carbon emissions associated with transportation. 

Optimizing Crop Yields in Portugal’s Aeroponic Tower Farms 

With limited space and a growing population, maximizing productivity is crucial for sustainable agriculture. In aeroponic tower farms, crops are grown vertically using nutrient-rich mist instead of soil. This innovative approach allows farmers to take advantage of every square inch available and produce more food compared to traditional farming methods. 

Several factors come into play to optimize Crop yield enhancement in aeroponic Portugal. First and foremost is the precise control over environmental conditions such as temperature, humidity, and light intensity. These parameters can be fine-tuned to create the ideal growing environment for each crop type. 

In case you missed it: Vertical Farming with Tower Farms in Italy

Spiral Vertical Garden with Green Plants

Another important aspect is the careful selection of plant varieties that are well-suited for vertical farming. By choosing cultivars that have been specifically bred or adapted for this method, farmers can ensure higher yields and better overall quality. Additionally, an efficient irrigation system plays a vital role in maximizing crop production. In aeroponic towers, water usage is significantly reduced compared to conventional agriculture, thanks to the closed-loop system where excess water gets recirculated back into the reservoir. 

The Future of Farming: Portugal’s Journey into Vertical Aeroponics 

One of the key advantages of vertical aeroponic farming is its ability to optimize crop yields. By utilizing tall towers that stack plants vertically, farmers can make the most out of limited urban spaces. This means that even in densely populated areas like Lisbon or Porto, fresh produce can be grown locally and sustainably. But it’s not just about maximizing space; technology also plays a crucial role in Portuguese vertical farms. Aeroponics, which involves misting plant roots with nutrient-rich water instead of soil, allows for precise control over growing conditions.

This level of precision ensures optimal growth and minimizes resource wastage, such as water and fertilizers. Moreover, Portuguese agriculture vertical aeroponics has significant environmental benefits. By reducing reliance on traditional agricultural practices that often contribute to deforestation and land degradation, these farms help preserve natural habitats while producing high-quality food all year round. 

Challenges and Solutions in Establishing Aeroponic Towers for Vertical Farming in Portugal 

A major challenge in Portuguese aeroponic towers is the initial investment needed to establish a vertical farm. The cost of purchasing and installing the tower systems can be high, especially for small-scale farmers or entrepreneurs looking to enter the industry. However, there are funding options available through government grants and agricultural programs that can help offset these costs. Another challenge lies in obtaining suitable land for setting up vertical farms.

In urban areas where space is limited, finding adequate land can be a struggle. However, some creative solutions have been implemented, such as repurposing abandoned buildings or using rooftop spaces for cultivation. Water scarcity is another concern when it comes to aeroponic farming in Portugal. With water being a precious resource, finding sustainable ways to conserve and optimize water usage is crucial. Implementing advanced irrigation systems and recycling techniques can help mitigate this issue. 

Integrating Technology in Portuguese Vertical Farms: The Role of Aeroponics 

Aeroponics, growing plants without soil by spraying nutrient-rich mist directly onto their roots, plays a crucial role in these high-tech vertical farms. In Portuguese vertical farms, sensors and automation systems monitor various environmental factors. This data is then analyzed to provide precise adjustments that promote ideal growing conditions for each specific crop. With technology in Portugal’s vertical aeroponics at their fingertips, farmers can fine-tune every aspect of cultivation to achieve maximum efficiency. 

Moreover, integrating technology in vertical farms allows for real-time monitoring and control over water consumption. Water scarcity is an important issue globally but particularly relevant for Portugal with its arid climate. Aeroponic systems precisely deliver nutrients and water directly to plant roots while reducing wastage significantly compared to traditional soil-based agriculture methods. 

In case you missed it: Vertical Gardening Frequently Asked Questions (FAQs)

Vertical Garden with Green Plants

The Environmental Impact of Vertical Farming with Aeroponic Towers in Portugal 

Vertical farming using aeroponic towers offers a sustainable solution to traditional agriculture practices, and it also has several positive Environmental impacts on aeroponic farming in Portugal. Water usage is significantly reduced compared to conventional farming methods. With aeroponics, plants are misted with nutrient-rich water instead of being submerged in soil. This allows for precise control over the amount of water used, minimizing waste. 

Additionally, vertical farming decreases the need for pesticides and herbicides. In traditional agriculture, chemicals are often sprayed on crops to ward off pests and weeds. However, in a controlled environment like an aeroponic tower farm, these harmful substances can be eliminated or drastically reduced. This not only benefits human health but also prevents chemical runoff into nearby rivers and streams. 

Furthermore, vertical farming helps combat deforestation by reducing the demand for land expansion. As Urban aeroponic farming in Portugal, agricultural land becomes scarce. By utilizing vertical space rather than horizontal land area for cultivation purposes, we can preserve valuable forests and natural habitats. 

Moreover, transportation emissions are minimized through localized food production. With traditional agriculture systems that rely on long-distance shipping of produce from rural farms to urban centers, carbon emissions increase due to transportation activities. However, by establishing vertical farms within cities themselves or in proximity to urban areas, as in Portugal’s case, this problem is mitigated as there is no need for extensive transportation networks. 

Educational Initiatives and Workshops on Vertical Farming with Aeroponics in Portugal 

In recent years, there has been a surge in educational initiatives focused on Aeroponic farming education in Portugal. These initiatives aim to educate farmers, students, and even urban dwellers about the benefits of this revolutionary farming technique. Workshops are being conducted across the country where experts share their knowledge and experiences with participants. These workshops cover various aspects of vertical aeroponic farming, including crop selection, planting techniques, nutrient management, pest control strategies, and more. 

The goal is to equip individuals with the skills needed to establish their tower farms or work within existing ones. Participants learn practical techniques that they can apply in real-life scenarios. From understanding optimal lighting conditions for different crops to mastering irrigation systems tailored for aeroponic towers – attendees gain hands-on experience during these workshops. 

In case you missed it: How to Build a Vertical Garden With PVC Pipes: Cheap, DIY Making Ideas, Tips, and Techniques

Greenhouse Vegetables

Conclusion 

Vertical farming with aeroponic towers is revolutionizing the agriculture industry in Portugal. As urban areas continue to expand, innovative approaches like vertical farming are essential for sustainable food production. The use of aeroponics technology allows farmers to optimize crop yields and minimize environmental impact. 

Vertical Farming with Tower Farms in Italy

0

Vertical farming with Tower Farms is revolutionizing agriculture in Italy, offering a sustainable and efficient way to produce food. By utilizing vertical space, these innovative systems can maximize crop yields while minimizing resource usage. Vertical farming methods in Italy offer numerous benefits for Italian agriculture – increased crop yields, reduced resource consumption, and improved food quality – all within a compact footprint.  

Vertical Farming with Tower Farms in Italy

Vertical Farming with Tower Farms in Italy

Exploring New Vertical Farming Methods with Tower Farms in Italy 

Vertical farming has emerged as an advanced solution to address the challenges of traditional agriculture. In Italy, this trend is gaining popularity with the introduction of Tower Farms – a revolutionary method that allows crops to be grown vertically in urban areas. Instead of sprawling fields, these systems stack plants on top of each other in towers, maximizing limited land resources. Italy’s embrace of Tower Farms is driven by its commitment to sustainable practices and its desire to reduce reliance on imports.

With its diverse climate and fertile soil, Italy has long been known for its agricultural prowess. However, changing weather patterns and increasing urbanization have posed significant challenges to traditional farming methods. By exploring new vertical farming techniques like Tower Farms, Italy is adapting to these changes while simultaneously improving food security and reducing environmental impact. These farms can be set up anywhere – from abandoned warehouses in bustling cities to rooftops overlooking picturesque landscapes. 

How Tower Farms are Transforming Urban Farming in Italy 

Tower farms utilize hydroponic technology to cultivate crops in vertically stacked layers within enclosed environments. By maximizing space and resources, tower farms can produce a high yield of fresh fruits, vegetables, and herbs all year round. One of the key advantages of tower farms is their ability to be set up virtually anywhere – from rooftop gardens to abandoned warehouses. Moreover, tower farms provide optimal growing conditions by controlling factors like temperature, humidity, light intensity, and nutrient delivery.

This precision ensures that plants receive exactly what they need for healthy growth without relying on pesticides or herbicides. In addition to addressing environmental concerns, these vertical farming systems also contribute significantly towards improving food security in densely populated cities like Rome and Milan. With limited arable land available within city limits, tower farms offer a sustainable solution by producing fresh produce locally throughout the year. 

Italy’s Shift to Sustainable Farming with Tower Farm Technology 

Italy, known for its rich agricultural heritage and exquisite cuisine, is now embracing a new era of sustainable farming through the implementation of tower farm technology. This innovative approach to urban agriculture has revolutionized the way crops are grown in densely populated areas. Tower farms offer a vertical solution to limited space by utilizing stacked levels of growing trays. These vertical structures maximize land use efficiency and allow farmers to cultivate crops all year round, regardless of external environmental factors.

In case you missed it: Growing Carolina Reaper Chili Peppers on a Tower Garden Vertically

Plants growing in hydroponic garden

By adopting tower farm technology, Italy is not only addressing the challenges posed by urbanization but also reducing its reliance on traditional farming methods that often require vast amounts of water and pesticides. The shift towards sustainable farming practices aligns perfectly with Italy’s commitment to preserving its natural resources and promoting eco-friendly initiatives. Furthermore, tower farm technology enables farmers to have greater control over their crop production.

By closely monitoring variables such as temperature, lighting, and nutrient levels within each tower unit, they can optimize plant growth while minimizing waste. This shift towards Sustainable tower farming technology in Italy has already yielded promising results in terms of both economic viability and environmental impact. Tower farms have been shown to produce higher yields compared to traditional agriculture while significantly reducing water consumption. This translates into increased profitability for farmers and reduced strain on local water sources. 

The Success Story of Tower Farms in Italian Urban Agriculture 

The success story of Tower Farms in Italian urban agriculture is a testament to the power of innovation and sustainability. These Successful urban tower farms in Italy have revolutionized the way food is grown in urban areas, providing fresh produce year-round, regardless of climate or location. One of the key factors contributing to their success is their efficient use of space. In densely populated cities like Milan and Rome, where land for traditional farming is scarce, Tower Farms offers a viable solution.

By stacking plants vertically in hydroponic towers, these farms can grow large quantities of crops in a fraction of the space required by conventional farms. Another factor that has contributed to their success is the ability to control every aspect of the growing process. With advanced technology and precise monitoring systems, conditions such as temperature, humidity, and nutrient levels optimize plant growth.

This level of control not only ensures consistent quality but also minimizes water usage and eliminates the need for harmful pesticides or herbicides. Furthermore, Tower Farms provides a sustainable alternative to traditional farming methods that often rely heavily on fossil fuels for transportation and require vast amounts of water resources. By locating these vertical farms within or near urban centers, they significantly reduce food miles while promoting local production and reducing carbon emissions. 

Improving Food Security in Italy with Vertical Tower Farms 

One such solution gaining traction is food security in Italy’s tower farms. This revolutionary method of agriculture allows crops to be grown year-round, regardless of weather conditions. Vertical tower farms utilize vertical space efficiently by stacking plants on multiple layers on top of each other, maximizing land use. By growing crops indoors using controlled environments, tower farms eliminate the reliance on traditional soil-based farming methods that are vulnerable to pests, diseases, and climate change.

In case you missed it: How to Build a Vertical Garden With PVC Pipes: Cheap, DIY Making Ideas, Tips, and Techniques

Spiral Vertical Garden with Green Plants in a Greenhouse

Instead, hydroponic systems provide nutrients directly to plant roots through water solutions. Tower farms also employ advanced technology, such as LED lighting systems that simulate natural sunlight for optimal growth. This means that farmers have greater control over crop quality and yield throughout the year. 

Case Studies: The Impact of Tower Farms in Italian Vertical Farming 

One of the most exciting aspects of Italian vertical farming case studies is the opportunity to study and analyze its impact on traditional agriculture. Several case studies have revealed fascinating insights into how this innovative farming method is revolutionizing food production.  In a recent study conducted by an agricultural research institute, it was found that Tower Farms significantly increased crop yields compared to conventional farming methods.

The controlled environment inside the towers allows for optimal conditions for plant growth and healthier crops. Another case study focused on water usage in Tower Farms. It was discovered that these vertical farms use less water than traditional agriculture methods. This reduction in water consumption not only helps conserve this precious resource but also reduces the strain on local water supplies.

Furthermore, a case study examined the economic viability of implementing Tower Farms on a larger scale. It concluded that despite initial investment costs, these farms can generate substantial profits due to their high yield potential and year-round production capabilities. 

Adapting Traditional Italian Crops to New Vertical Farming Techniques 

Italy is renowned for its rich agricultural heritage, with traditional crops vertically farming Italy like tomatoes, basil, and grapes and playing a pivotal role in the country’s cuisine. However, as urbanization continues to sweep across Italy’s landscape, the need for innovative farming methods has become increasingly apparent. Enter vertical farming and tower farms – an exciting new approach that allows farmers to grow crops vertically in stacked layers.

This revolutionary technique presents a unique opportunity to adapt traditional Italian crops to meet the demands of modern agriculture. With vertical farming, farmers can optimize space utilization by growing crops upwards instead of outwards. By utilizing hydroponic systems that provide essential nutrients directly to plant roots without soil, these farms offer a controlled environment where temperature and lighting conditions can be tailored precisely. 

This precision allows farmers to create ideal growing conditions for specific crop varieties regardless of seasonal limitations. For instance, using vertical farming techniques enables growers to cultivate vine-ripened tomatoes year-round rather than relying on external factors. Moreover, vertical farming offers advantages beyond increased yield and extended growing seasons. 

Technological Advancements in Italy’s Tower Farming Industry 

Italy has been at the forefront of technological advancements in vertical farming, particularly with the use of tower farms. These innovative systems have revolutionized the way crops are grown and cultivated, maximizing space and resources while minimizing environmental impact. One significant technological advancement in Italy is the integration of smart sensors and automation technology into tower farms.

These sensors monitor crucial factors such as temperature, humidity, and nutrient levels in real time, ensuring optimal growing conditions for plants. Automation systems control irrigation cycles and adjust lighting schedules based on plant needs, reducing human intervention while maintaining crop quality. 

Another breakthrough is the implementation of precision farming techniques within tower farms. Through data analysis and advanced algorithms, farmers can precisely tailor irrigation amounts and nutrient solutions to each plant’s requirements. This not only maximizes yields but also minimizes water usage and fertilizer waste—a vital step towards sustainable agriculture. 

In case you missed it: How to Start Indoor Vertical Garden with Stunning Spider Plants

Vertical Planters with Green Leafy Plants in a Greenhouse

Evaluating the Environmental and Economic Benefits of Tower Farms in Italy 

Tower farms have gained significant attention in the field of urban agriculture, not only for their ability to grow crops vertically but also for the environmental and economic benefits they bring. One of the key Environmental benefits of Italian tower farms is their efficient use of space. By stacking plants on top of each other, tower farms maximize land utilization, making them ideal for urban areas with limited available land. 

In terms of environmental impact, tower farms offer several advantages. They significantly reduce water usage compared to traditional farming methods. The closed-loop hydroponic system used in tower farms recirculates water and nutrients efficiently, minimizing waste and conserving resources. Additionally, since tower farms are typically located within or near cities, transportation distances are reduced drastically, which reduces carbon emissions associated with food transport. 

Educational Programs and Workshops on Vertical Farming and Tower Farms in Italy 

The growing popularity of Vertical farming education opportunities in Italy has led to the development of educational programs and workshops that aim to educate individuals about this innovative form of agriculture. These programs provide valuable knowledge and practical skills to aspiring farmers, entrepreneurs, and even students interested in sustainable farming practices. 

Through these educational initiatives, participants can learn about various aspects of vertical farming, including crop selection, cultivation techniques, hydroponics systems, pest management strategies, and more. Workshops often include hands-on activities where attendees can get their hands dirty while learning how to grow crops vertically. 

One notable program is the “Vertical Farming Academy,” which offers comprehensive courses on all aspects of vertical farming. Participants gain a deep understanding of the technology behind tower farms as well as practical insights into running successful vertical farms. The academy also provides networking opportunities with industry experts and fellow enthusiasts.

Conclusion 

Tower Farms is transforming urban farming in Italy on multiple fronts – from improving food security to promoting sustainability. As this technology continues to evolve, there is no doubt that it will play a vital role in shaping the future of agriculture, not just in Italy but across the globe.

Top 10 Steps to Growing Kentia Palm: How to Plant and Care Guide

0

Growing a Kentia Palm can be a rewarding experience that adds beauty and elegance to any indoor or outdoor space. With patience, dedication, and a little bit of knowledge, Kentia Palm Care Guide, you can watch your Kentia Palm thrive and flourish over time. Bring home this tropical beauty and enjoy all the benefits that come with having a stunning Kentia Palm plant in your life. 

Leafy green potted Kentia palm

Top 10 Steps to Growing Kentia Palm

Right Soil for Your Kentia Palm: Step-by-Step Guide 

When it comes to Kentia Palm Growth Requirements, choosing the right soil is crucial for its overall health and growth. This elegant plant thrives in well-draining soil that retains some moisture but doesn’t become waterlogged. Make sure to choose the best soil for Kentia Palm that is specifically designed for palm plants. These mixes are typically formulated with ingredients like peat moss, perlite, and vermiculite, which provide excellent drainage. 

Optimal Lighting Conditions for Thriving Kentia Palms 

  1. Bright Indirect Light: Kentia palms prefer indirect light, which means they must be placed near a window where they can get indirect sunlight throughout the day.  
  2. Rotate Regularly: Rotate your Kentia palm every few months so all sides receive an equal amount of light. 
  3. Artificial Lighting: If you want to grow Kentia Palms Indoors, you can supplement with artificial grow lights specifically designed for indoor plants. Place these lights about 12 inches above the plant and keep them on for 10-12 hours each day. 

Watering Your Kentia Palm: How Much and How Often? 

Watering your Kentia Palm is crucial to its overall health and vitality. When it comes to the Kentia Palm Watering Schedule, make sure to saturate the soil thoroughly until water drains out from the bottom of the pot to ensure all roots get enough moisture. In terms of frequency, it’s best to water your Kentia Palm when the top few inches of soil feel dry.  

Best Fertilizer for Kentia Palm’s Growth 

One essential aspect of caring for your Kentia palm is providing it with the right nutrients. Choosing the best fertilizer will help ensure its optimal growth and overall health. When selecting a fertilizer, look for one specifically formulated for palm trees. Avoid using general-purpose fertilizers as they may not provide all the necessary nutrients in the right proportions. 

To promote healthy growth, opt for a slow-release fertilizer designed to release nutrients gradually. This helps prevent nutrient burn or excessive feeding, which can harm your Kentia palm. Apply the fertilizer every three months during spring and summer when growth is most active. Be sure to water your palm thoroughly before applying the fertilizer to prevent root burn. 

In case you missed it: Creating a Tropical Oasis: 14 Palm Tree Varieties for Your Landscape

Kentia or howea forsteriana

The Ideal Temperature and Humidity for Kentia Palm Care 

When it comes to Kentia Palm’s Ideal Temperature, a range between 15°C and 29°C is ideal for these majestic plants. They can tolerate slightly cooler temperatures but may suffer if exposed to frost or extreme heat. In terms of humidity, Kentia palms prefer higher levels of moisture in the air.

Aim for a humidity level of around 50-70% to keep your palm happy and healthy. It’s important not only to provide an optimal temperature and humidity range but also to ensure consistent conditions for your Kentia palm. Avoid placing it near drafts or vents that can create fluctuations in temperature or dry out the leaves.  

Repotting Your Kentia Palm: Best Practices and Timing 

Repotting your Kentia palm is an essential step in its care and maintenance.  Timing is crucial when repotting Techniques for Kentia Palm. Generally, it’s recommended to repot every two or three years, preferably during spring or early summer when the plant is actively growing. This timing ensures that your palm has enough time to acclimate and establish itself before winter sets in. 

When choosing a new pot for your Kentia palm, opt for one that is slightly larger than its current container. This will give the roots room to spread without overwhelming them with excessive space. Make sure the pot contains drainage holes at the bottom so excess water can escape, preventing root rot. Before transferring your palm into its new home, prepare a well-draining soil mix consisting of peat moss, perlite, and sand.

To begin repotting, gently remove your Kentia palm from its current container by loosening any tightly packed soil around its roots. Carefully untangle any circling or bound-up roots using your fingers or a small tool if necessary. Place some fresh soil mixture at the bottom of the new pot before positioning your Kentia palm in it at a similar depth as before. Fill in around the sides with additional soil until firmly anchored but not compacted too tightly. 

Pruning and Maintenance Tips for a Healthy Kentia Palm 

Pruning and maintaining your Kentia palm is essential for keeping it healthy and looking its best. When it comes to Kentia Palm Pruning Advice, make sure to use clean and sharp pruning scissors. This will prevent any damage or tearing of the fronds. Start by removing any brown or dry leaves at the base of the plant, as these can attract pests and diseases. Next, focus on removing any yellowing or damaged fronds higher up on the plant.

Cut them off at their base, being careful not to cut into healthy green foliage. Remember that over-pruning can be detrimental to your palm’s health, so only trim what is necessary. In addition to regular pruning, maintenance tasks like dusting and cleaning the leaves are important for optimal growth. Wipe down each leaf gently using a damp cloth to remove dust buildup that can hinder photosynthesis. 

Another crucial aspect of caring for your Kentia palm is inspecting it regularly for signs of pests or diseases. Common issues include spider mites, mealybugs, and scale insects. If you notice any infestation or disease symptoms such as discoloration or wilting leaves, take prompt action by treating them with appropriate insecticides or fungicides specifically formulated for palms. 

Common Pests and Diseases in Kentia Palms and How to Treat Them 

Kentia palms are generally hardy plants, but they can still fall victim to a few common pests and diseases. It’s important to keep an eye out for these issues so you can address them promptly and ensure the health of your beloved palm. One common pest that affects Kentia palms is spider mites. These tiny insects thrive in dry conditions and can cause discoloration and webbing on the leaves.

When it comes to Kentia Palm Pest Control, regularly mist the leaves with water or use insecticidal soap. Another pesky critter that may infest your Kentia palm is mealybugs. These small white bugs feed on plant sap, causing stunted growth. To eliminate mealybugs, wipe them off with rubbing alcohol or apply neem oil to affected areas. 

In case you missed it: How to Get More Potatoes Per Plant: 11 Potato Growth Hacks for a High Yield

Fresh green fronds of a potted Kentia palm plant

Mildew also affects kentia palms, especially if they’re kept in humid environments without proper ventilation. Remove infected leaves immediately and improve air circulation around the palm by trimming nearby foliage or using a fan. Root rot is another issue that can plague Kentia palms if they’re overwatered or planted in poorly draining soil. Allow the soil to dry between waterings and ensure good drainage by using a well-draining potting mix. 

Propagating Kentia Palms 

Propagating Kentia Palms is an exciting way to expand your plant collection and share the beauty of these stunning palms with others. One popular method of propagating Kentia Palms is through seed propagation. To start, collect ripe seeds from mature palm trees. Soak the seeds in warm water for a day or two to soften their hard outer shell. Then, plant them in well-draining soil mixed with sand or perlite to improve drainage. 

Another method of propagation involves division. Carefully separate the offshoots or suckers that grow at the base of mature palms using a sharp knife or pruning shears. Make sure each division has its roots before planting it in a suitable potting mix. It’s important to note that patience is key when propagating Kentia Palms – they are not known for their fast growth rate. Keep your newly propagated plants in bright but indirect light, provide regular watering (without overwatering), and maintain moderate humidity levels. 

How to Grow Kentia Palm in Pots 

Kentia palms are not only beautiful additions to any indoor space, but they can also thrive in pots. Growing a Kentia palm in a pot allows you to have the flexibility of moving it around and finding the perfect spot for it in your home. Choose a pot that contains good drainage holes. This will prevent water from sitting stagnant and causing root rot. Additionally, make sure the pot is big enough for the palm to grow comfortably. 

Next, select a well-draining potting mix that is formulated specifically for tropical plants. Avoid heavy soils as they can retain too much moisture and lead to overwatering issues. When planting your Kentia palm in a pot, ensure that the root ball is placed at an appropriate depth – about two inches below the rim of the container. 

In terms of watering, allow the top few inches or so of soil to dry out before watering again. Overwatering can be detrimental to Kentia palms, so be mindful not to keep their roots constantly wet. Kentia palms thrive best when placed near bright but indirect light sources such as north or east-facing windows. However, avoid placing them directly under intense sunlight as this may scorch their leaves. 

To maintain healthy growth, consider fertilizing potted Kentia palm every 2-3 months during its active growing season (spring and summer). Regularly inspect your potted Kentia palm for signs of pests such as spider mites or mealybugs. If detected early on, these pests can usually be treated by wiping down affected areas with mild soap or using organic pest control methods like neem oil spray. 

In case you missed it: How to Propagate Calathea Plant: Ways to Grow from Water, Soil, Division, and Cuttings

Palm Howea Kentia pot

Conclusion 

Growing a Kentia palm can be a rewarding and fulfilling experience. With the right Kentia Palm Seasonal Care and attention, these beautiful plants can thrive and bring a touch of tropical elegance to any space. Remember to choose the appropriate soil, provide optimal lighting conditions, water your plant correctly, and fertilize it regularly. 

Tips That Will Make You Utilize Your Garden More Often

0

Having a garden is a wonderful addition to any home. It offers a serene space to relax, unwind, and connect with nature. However, many people fail to make the most out of their gardens, often neglecting them due to various reasons. In this article, we will provide you with some valuable tips that will help you utilize your garden more often and create a beautiful outdoor space to enjoy.

Tips That Will Make You Utilize Your Garden More Often

Create Cozy Outdoor Living Spaces

To make your garden more inviting, consider creating cozy outdoor living spaces. Invest in comfortable furniture, such as lounge chairs, hammocks, or a dining set, where you can relax and enjoy meals with family and friends. By incorporating these elements, you’ll be more motivated to spend time outdoors, whether it’s for reading, entertaining, or simply soaking up the sunshine. Gazebos are the perfect place to create a cozy sitting space, or creating a cozy porch for example. 

Enhance Privacy And Security

Privacy and security are essential factors that can significantly impact your garden utilization. No one wants to relax in a space that feels exposed or insecure. Consider installing fences, hedges, or trellises to provide privacy from neighbors and passersby. Additionally, proper outdoor lighting and security measures, such as motion sensor lights or cameras, can make you feel safer and more comfortable in your garden, especially during evenings and nights.

Add Functional Features

To truly make the most of your garden, add functional features that cater to your interests and hobbies. For example, if you enjoy cooking, create an outdoor kitchen area with a barbecue grill or a pizza oven. If you love gardening, allocate a specific area for planting flowers, herbs, or vegetables. By tailoring your garden to suit your passions, you’ll find more reasons to spend time in it.

In case you missed it: How to Grow Leeks on Tower Gardens: Step-By-Step Guide for Beginners

Couple Repotting FLowers in Backyard

Embrace Outdoor Entertainment

Transform your garden into an entertainment hub by incorporating elements that promote fun and relaxation. Consider installing a fire pit for cozy evenings or a hot tub for therapeutic soaking. These additions will encourage you to utilize your garden year-round, even during colder months. Furthermore, if you have children, create a dedicated play area with swings, a trampoline, or a sandbox to keep them engaged and entertained.

Utilize Garden Structures

Garden structures, such as log cabins and gazebos, can greatly enhance your garden’s functionality and aesthetics. A log cabin from Tuin offers a versatile solution, providing extra space for hobbies, storage, or even as a guest room or home office for example. Gazebos create a focal point in your garden, offering shade and protection from the elements. By incorporating these structures, you can make your garden more versatile and appealing.

Engage in Outdoor Activities

One of the best ways to utilize your garden is by engaging in outdoor activities. Whether it’s practicing yoga, playing sports, or gardening, these activities not only make your garden more productive but also provide physical and mental health benefits. Dedicate specific areas for various activities, such as a designated sports area or a meditation corner, to encourage regular participation.

In case you missed it: Best Low-Maintenance Fruit Varieties for Busy Gardeners

Managing Outdoor Home Garden

Incorporate Lighting and Decor

Illuminate your garden with well-placed lighting to create a warm and inviting ambiance. String lights, lanterns, and solar-powered fixtures can add a magical touch to your outdoor space. Additionally, incorporate garden decor such as colorful planters, statues, or wind chimes to add personality and character. Adding these subtle details can enhance the warmth and pleasure of your garden.

How to Grow Cauliflower in Aeroponic Towers

0

Growing Cauliflower in vertical aeroponic towers offers a host of benefits, making it the best choice for home gardeners and commercial growers alike. The unique combination of vertical gardening and aeroponics allows for efficient use of space, water, and nutrients while maximizing plant growth and minimizing disease risks.

Grow Cauliflower in Aeroponic Towers

By following the beginner vertical farming Cauliflower guide on how to set up a vertical aeroponic tower specifically designed for Cauliflower cultivation, you can create the best environment for your plants to thrive. Remember to regularly monitor the pH levels, nutrient solution, and overall health of your Cauliflower plants to ensure optimal growth. 

Grow Cauliflower in Aeroponic Towers

Step-By-Step Guide to Growing Cauliflower in Vertical Aeroponic Towers 

Growing Cauliflower in vertical aeroponic towers is a unique and innovative way to cultivate this nutritious vegetable. With the right techniques and tools, you can enjoy a bountiful harvest of fresh Cauliflower year-round. To start, choose healthy Cauliflower seedlings or seeds from a reputable source. Ensure they are disease-free and have strong root systems. Prepare your vertical tower system by setting up the necessary infrastructure, such as sturdy frames, nutrient reservoirs, and vertical growing trays. 

Next, create an optimal environment for your Cauliflower plants. Provide them with ample light using LED grow lights positioned at appropriate heights. When it comes to nutrient management, aeroponics allows for precise control over the nutrients delivered to each plant’s roots. Use a balanced hydroponic nutrient solution specifically formulated for leafy greens like Cauliflower. Implement preventive measures like introducing beneficial insects or using organic pest control methods when necessary.

Water usage is an essential consideration in vertical aeroponic farming systems. Make sure your system has efficient water circulation mechanisms to minimize wastage while providing adequate hydration to the plant’s root systems. As your Cauliflowers near maturity, closely monitor their progress by observing changes in the color and size of their heads (curds). Harvest Cauliflower heads when they reach full size but before they begin to loosen or separate into florets. 

Maximizing Yield: Advanced Techniques for Cauliflower Cultivation in Aeroponic Systems 

When it comes to growing Cauliflower in aeroponic systems, several advanced Cauliflower aeroponic techniques can help you maximize your yield. One technique that has proven successful is optimizing the nutrient solution for Cauliflower plants. By providing the right balance of nutrients such as nitrogen, phosphorus, and potassium, you can promote vigorous growth and development. Regular monitoring of the nutrient levels and adjusting them accordingly will help maintain optimal conditions for your plants. 

Another important factor to consider is temperature control. Cauliflower thrives in cool temperatures ranging from 15°C to 21°C. Proper spacing is also crucial when cultivating Cauliflower in vertical aeroponic towers. Giving each plant enough room ensures they have access to ample light and air circulation, which promotes better overall health. Additionally, pruning any overcrowded or damaged leaves helps redirect energy towards producing larger heads. 

Beginner’s Insights: Getting Started with Cauliflower on Vertical Farming Towers 

Getting started with growing Cauliflower aeroponic vertical towers can be a rewarding venture for beginners. The innovative approach of aeroponic systems offers a unique way to cultivate this versatile vegetable, maximizing space and yield. It’s important to choose the right variety of Cauliflower that is suitable for vertical farming. Look for compact varieties that have been bred specifically for indoor cultivation. These varieties will thrive in the controlled environment provided by the vertical farming towers. 

In case you missed it: How to Grow Cauliflower from Seed to Harvest: A Complete Guide for Beginners

Cauliflower Growing in The Field

Before planting, ensure that your tower system is properly set up and functioning optimally. This includes checking the nutrient delivery system, ensuring proper lighting and ventilation, and monitoring temperature and humidity levels. When it comes to planting Cauliflower seeds or seedlings in the tower system, follow the instructions provided by the seed supplier or nursery.  

Regular monitoring of nutrient levels is crucial in ensuring the healthy growth of Cauliflower plants in aeroponic towers. Maintain a balanced nutrient solution specific to Cauliflower’s needs throughout its growth cycle. Pest control is another important aspect to consider when growing Cauliflower on vertical farming towers. Implement integrated pest management strategies like regular scouting, physical barriers, beneficial insects, and organic pesticides if necessary. 

Nutrient Management for Healthy Cauliflower Growth in Aeroponic Vertical Farms 

Aeroponic Cauliflower nutrient management plays a critical role in ensuring healthy Cauliflower growth in aeroponic vertical farms. With the absence of soil, it is essential to provide the plants with all the necessary nutrients they need to thrive. In an aeroponic system, the nutrient solution is delivered to the plant roots through a fine mist or fog. It also allows for better nutrient uptake efficiency compared to traditional soil-based cultivation. 

To achieve healthy Cauliflower growth, it is important to maintain a balanced nutrient solution tailored specifically for this crop. The solution should include essential elements and trace minerals like iron and zinc. Regular monitoring of nutrient levels is crucial to prevent deficiencies or toxicities that can hinder plant growth. 

It’s worth noting that different stages of Cauliflower growth require varying nutrient ratios. During vegetative growth, higher nitrogen levels promote leafy foliage development. As the plants transition into flowering and head formation stages, adjusting the nutrient composition by increasing phosphorus and potassium stimulates proper flower initiation and overall head quality. 

Innovative Pest Control Strategies for Cauliflower in Vertical Aeroponic Towers 

Pests can be a real nuisance when growing Cauliflower in vertical aeroponic towers. These tiny intruders have the potential to wreak havoc on your precious crop if left unchecked. One effective method of pest control in vertical Cauliflower farming is companion planting. For example, Marigolds emit a scent that repels many common garden pests. Planting them near your Cauliflowers can help deter these unwanted visitors. 

Another innovative approach is the use of beneficial insects. Introducing predatory insects like ladybugs or lacewings into your vertical farming system can help control pest populations naturally. These helpful bugs feed on common Cauliflower pests like aphids and caterpillars, reducing their numbers without the need for harmful pesticides. Regular monitoring of your vertical aeroponic towers is also crucial for the early detection of any pest problems. Inspect leaves regularly for signs of damage or infestation and take immediate action if necessary. 

Environmental Benefits of Growing Cauliflower on Aeroponic Vertical Towers 

Vertical aeroponic towers offer numerous environmental benefits in aeroponic Cauliflower. These systems require significantly less space compared to traditional farming methods. By utilizing vertical space efficiently, farmers can grow more Cauliflower in a smaller footprint, allowing for increased food production without encroaching on natural habitats or valuable farmland. Another key advantage is the reduction in water usage. Aeroponics uses a misting system that delivers water and nutrients directly to the plant’s roots, minimizing wastage and evaporation.

This targeted approach ensures that each Cauliflower plant receives optimal hydration while conserving this precious resource. Additionally, vertical aeroponic towers eliminate the need for soil. This eliminates concerns related to soil erosion, contamination from pesticides or herbicides, and depletion of nutrient-rich topsoil. The absence of soil also reduces the risk of disease transmission between plants since pathogens are often present in the soil. 

Optimizing Water Usage for Cauliflower Growth in Vertical Aeroponic Farming 

Water efficiency in Cauliflower aeroponics is crucial for successful Cauliflower growth in vertical aeroponic farming. With this innovative cultivation method, it becomes even more important to ensure that the plants receive adequate hydration without wasting water. One approach to optimizing water usage is through careful monitoring and control of irrigation systems.

In case you missed it: 19 Common Cauliflower Plant Problems: How to Fix Them, Solutions, and Treatment

Freshly Picked Cauliflowers

By using sensors and timers, farmers can precisely regulate the amount and frequency of watering based on the specific needs of Cauliflower plants. This helps prevent overwatering or underwatering, both of which can negatively impact crop health. 

Troubleshooting Common Issues in Aeroponic Cauliflower Vertical Farming 

Cauliflower cultivation in vertical aeroponic towers offers a multitude of benefits, but like any farming method, it is not without its challenges. By troubleshooting vertical Cauliflower farming, you will get a bountiful yield. One potential issue is nutrient deficiency. Since aeroponic systems deliver nutrients directly to the roots, it’s important to ensure a well-balanced nutrient solution.

Monitor your plants closely for signs of yellowing leaves or stunted growth, which may indicate a lack of essential minerals. Adjust your nutrient solution accordingly based on Cauliflower’s specific needs. Another challenge can be maintaining proper pH levels. Cauliflower prefers slightly acidic conditions with a pH range between 6 and 7. Regularly test the pH of your water or nutrient solution and make adjustments if necessary, using pH adjusters such as vinegar or citric acid.

Temperature fluctuations can also impact Cauliflower growth. Extreme temperatures can cause stress and affect overall plant health. Ensure that your vertical farm has adequate ventilation and consider implementing temperature control measures such as fans or misting systems to maintain optimal growing conditions. Inadequate lighting is another common issue in indoor vertical farming setups. Cauliflower requires sufficient light for photosynthesis and healthy development. 

Harvesting and Post-Harvest Care for Cauliflower Grown in Vertical Aeroponic Systems 

Harvesting aeroponic tower Cauliflower is a rewarding experience, but it requires some careful techniques to ensure the best quality produce. To begin, visually inspect each head of Cauliflower to determine if it is ready for harvest. Look for heads that are firm, dense, and have a vibrant white color. Avoid harvesting heads with any discoloration or soft spots, as they may not be at their peak freshness. Cut the head of the Cauliflower using a sharp knife just below the base where it meets the leaves.

Be cautious not to damage neighboring plants during this process. After harvesting, gently clean each head by removing any outer leaves and debris. Rinse them under cool water to remove any remaining dirt or pests. Once cleaned, allow the heads to air dry before storing them. Proper post-harvest care is essential for maintaining the taste and texture of your freshly harvested Cauliflower. Store the heads in a cool environment with high humidity levels – around 0-2°C with 90-95% humidity is ideal. 

In case you missed it: Growing Hydroponic Cauliflower, Planting, and Care

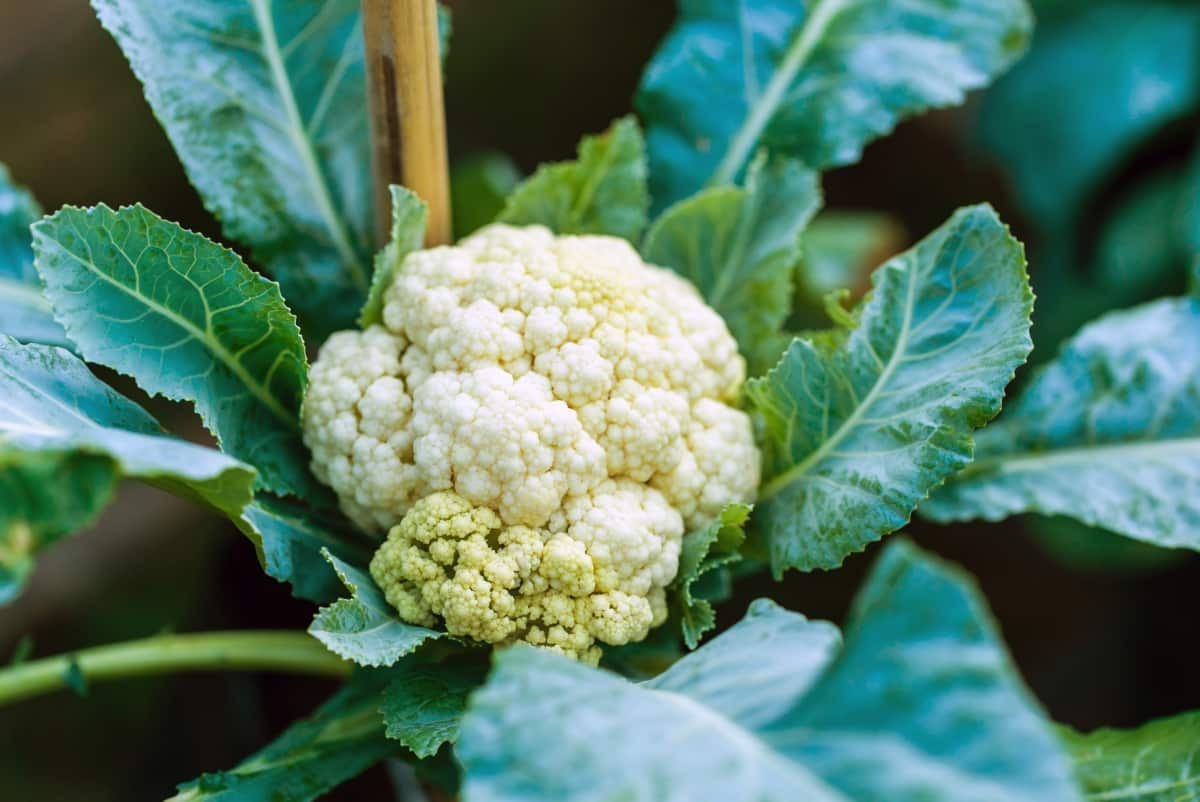
Cauliflower

Conclusion 

Growing Cauliflower in vertical aeroponic towers offers numerous advantages for farmers and the environment alike. With a step-by-step guide to cultivation, advanced techniques for maximizing yield, and valuable insights for beginners, anyone can embark on this exciting journey of vertical farming. 

How to Grow Leeks on Tower Gardens: Step-By-Step Guide for Beginners

0

Tower gardening is a unique and innovative way to grow plants vertically, maximizing space and yield. It involves using a vertical structure, such as a tower garden system, to stack multiple growing levels on top of each other. This allows for efficient use of limited space, making it ideal for urban gardens or small backyard setups.

How to Grow Leeks on Tower Gardens

By maximizing space through vertical gardening techniques like growing Leeks in tower gardens, you can enjoy fresh produce right at your fingertips throughout the year – regardless of whether you have ample outdoor space or not. With beginner’s guide tower garden Leeks, you’ll be enjoying homegrown Leeks in no time. 

How to Grow Leeks on Tower Gardens

A Beginner’s Guide to Cultivating Leeks in Tower Gardens: Step-By-Step Instruction 

Make sure your tower garden is set up in an area that receives at least six hours of sunlight per day. To get started, plant Leek seeds or seedlings about six inches apart in your tower garden. Make sure to leave enough space for them to grow vertically as they mature. Water your Leeks regularly, but be careful not to overwater them. As your Leeks begin to grow, it’s important to provide support by gently tying them together using twine or soft plant ties.

This helps prevent them from bending or falling over as they reach their full height. To encourage healthy growth and maximize yield, consider adding a balanced organic fertilizer every few weeks during the growing season. This will ensure that your Leeks receive all the necessary nutrients for optimal development.

Keep an eye out for any pests or diseases that may affect your Leeks. Common culprits include aphids, slugs, and leaf miners. Utilize organic pest control methods like introducing beneficial insects or using natural sprays if needed. Once your Leek stalks have reached around one inch in diameter (usually after about three months), you can start harvesting by gently pulling them out of the ground one at a time.  

Advanced Techniques for Enhancing Leek Growth in Tower Gardening Systems 

When it comes to growing Leeks in a vertical tower gardening system, there are a few advanced tower garden Leeks growing techniques you can employ to maximize your yield and ensure robust growth. One such technique is companion planting. For example, pairing Leeks with Carrots or Onions helps deter pests and maximizes space utilization. Another technique to enhance Leek’s growth is through proper pruning.

As the Leeks grow taller, it’s essential to trim off any side shoots or flower buds that may develop. This encourages the plant’s energy to focus on bulb development rather than producing seeds. Additionally, using organic fertilizers enriched with phosphorus and potassium can significantly boost Leek growth. To prevent common issues like bolting or splitting, consider providing consistent moisture levels by utilizing drip irrigation systems or self-watering mechanisms within your tower garden setup.  

The Benefits of Growing Leeks on a Tower Garden: Health, Efficiency, and Sustainability 

Growing Leeks on a Tower Garden offers numerous benefits that go beyond just having fresh, homegrown produce. One of the key benefits of tower garden Leeks is that it maximizes space utilization. Tower Gardens are designed to be compact yet efficient, allowing you to grow more plants in a smaller area compared to traditional gardening methods. 

In addition to saving space, Tower Gardens also enhances plant growth by providing optimal conditions for Leek cultivation. The vertical design allows for better airflow and light penetration, which helps prevent diseases and promote healthy plant development. Plus, the automated watering system ensures consistent hydration without any guesswork or manual labor involved. 

Troubleshooting Common Challenges When Growing Leeks in Vertical Tower Gardens 

Leek cultivation in a vertical tower garden can present its fair share of challenges, but with the right knowledge and techniques, you can overcome them and enjoy a bountiful harvest. One common issue that growers face is overcrowding. Leeks need space to grow, so it’s important not to plant too many seedlings close together. Give each Leek enough room to develop properly and receive adequate airflow. 

In case you missed it: How to Start Leeks Gardening for Beginners

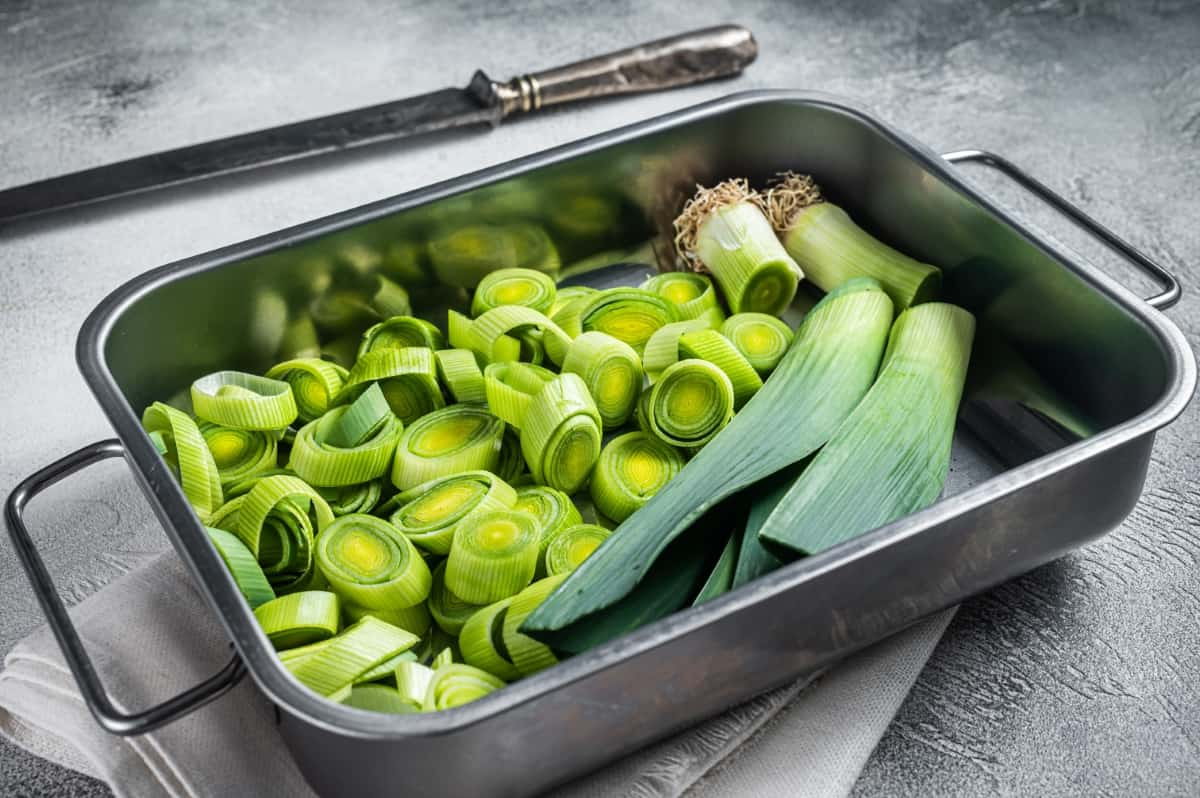
Chopped Green Leek Onion

Another challenge is nutrient deficiency. Leeks are heavy feeders, especially when grown vertically. Ensure your tower garden has a balanced nutrient mix, and regularly check for signs of deficiencies such as yellowing leaves or stunted growth. Adjust your nutrient solution accordingly to ensure optimal health and productivity.

Pests can also be problematic when growing Leeks in tower gardens. Aphids, onion flies, and thrips are some common pests that may attack your plants. Implement organic pest control methods like introducing beneficial insects or using neem oil spray to keep these pests at bay. Inadequate watering can lead to uneven growth or even rotting roots in Leeks. Monitor soil moisture levels closely and water consistently without overwatering the plants. 

Innovative Watering and Nutrient Strategies for Healthy Leeks in Tower Gardens 

Watering and providing nutrients to your Leeks in a Tower Garden is crucial for ensuring their healthy growth. Consider implementing a drip irrigation system in your Tower Garden. This method delivers water to the plant’s root zone, minimizing waste and maximizing efficiency. By using a timer, you can ensure consistent watering without any guesswork. In addition to regular watering, it’s important to provide your Leeks with the right balance of nutrients.

One innovative approach is foliar feeding – spraying liquid fertilizer directly onto the leaves. This allows for quick absorption by the plant, boosting its overall health and vitality.
Another strategy worth exploring is hydroponics – growing plants in nutrient-rich water instead of soil. Tower Gardens are well-suited for this technique since they already utilize a vertical design that maximizes space utilization.

Hydroponics not only conserves water but also provides precise control over nutrient levels, resulting in healthier and more productive levels. Furthermore, consider incorporating compost tea into your watering routine. Compost tea is created by steeping organic matter (such as compost or worm castings) in water until beneficial microbes multiply.

When applied to your tower garden, it enriches the soil with nutrients while promoting microbial activity and improving overall soil health. Applying organic mulch around your Leek plants helps maintain moisture levels in the soil while suppressing weeds. It also acts as insulation during temperature fluctuations and adds valuable organic matter back into the growing environment. 

How to Start Growing Leeks on a Tower Garden: Essential Equipment and Setup 

  1. Tower Garden: The heart of your vertical garden, this self-contained system allows you to grow plants without soil. 
  2. Seedlings or Seeds: Choose healthy Leek seedlings or seeds from a reputable source. Start by germinating them in a seed tray before transferring them to your Tower Garden.
  3. Nutrient Solution: Leeks require proper nutrition to thrive, so invest in a high-quality hydroponic nutrient solution specifically formulated for leafy greens.
  4. pH Testing Kit: Regularly monitor the pH level of your nutrient solution using a testing kit, as Leeks prefer slightly acidic conditions between 6-7 pH.

Setting up Leek Tower Garden is easy. Assemble the tower according to the manufacturer’s instructions and ensure all parts are secure. Fill the reservoir with water and add the recommended amount of nutrient solution based on the size of your garden.

Insert net pots into designated holes on each planting port and place young Leek seedlings gently into each pot filled with growing medium. Adjust the height of each planting port as needed throughout growth stages to accommodate increasing root length. Turn on the pump system and set timer intervals based on plant needs (usually 15 minutes every hour). 

From Seed to Harvest: A Comprehensive Timeline for Growing Leeks on Tower Gardens 

When it comes to Leek’s growth timeline in tower gardens, starting with the right seeds is crucial when growing Leeks on your tower garden. Look for varieties that are known to thrive in vertical gardening systems, such as “King Richard” or “Tadorna.” Sowing the seeds indoors about 8-10 weeks before the last frost date. 

Once the seedlings have grown to a height of around 6 inches and developed several leaves, it’s time to transplant them into your tower garden. Make sure each plant is properly spaced and has enough room to grow vertically. As the Leeks continue to grow, regularly check their moisture levels and adjust watering accordingly. Leeks prefer consistently moist soil but can’t tolerate waterlogged conditions.  

Around 2-3 months after transplantation, you’ll start noticing significant growth in your Leeks. At this stage, provide additional support by tying them gently to vertical supports within your tower garden using soft twine or plant clips. Throughout their growth cycle, monitor your Leeks closely for any signs of pests or diseases.

In case you missed it: Growing Leeks from Seed, Roots in Containers

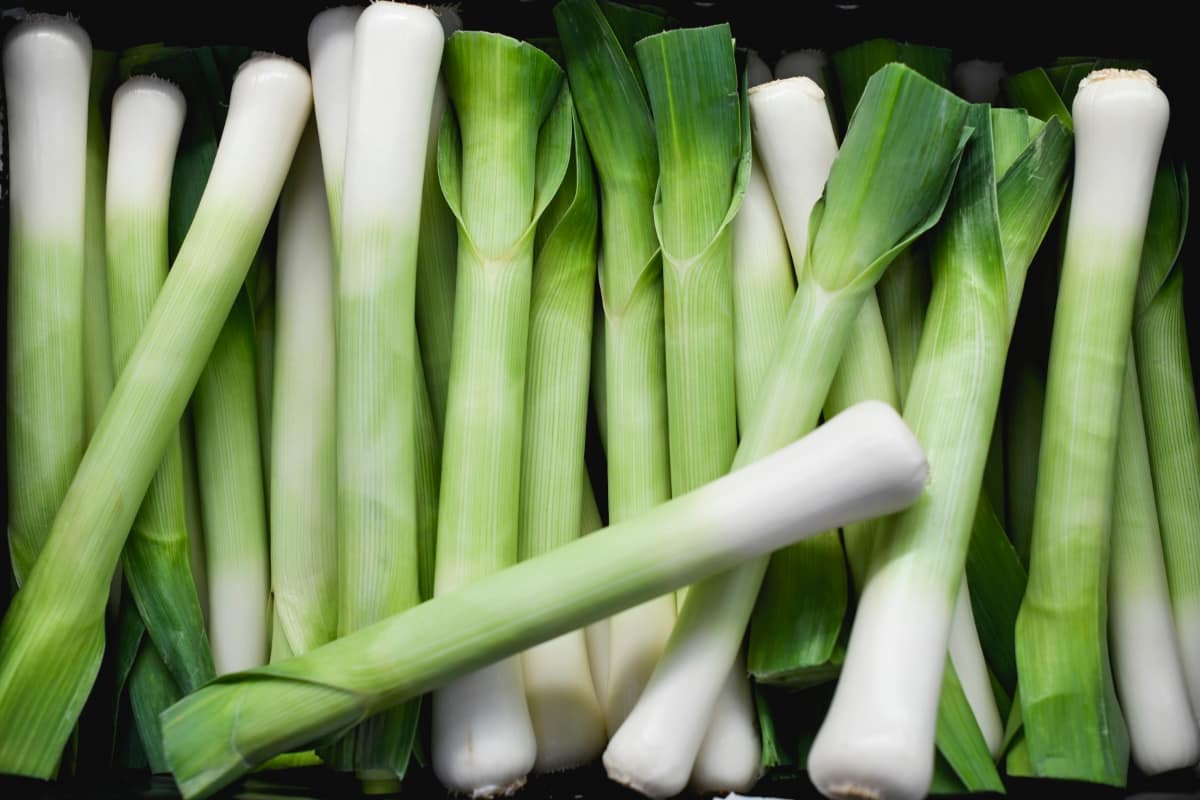
Fresh Leeks

Regularly inspect both leaves and stems for common issues like aphids or fungal infections. Implement organic pest control methods if necessary. When harvested at maturity (around 90-120 days after transplantation), Leeks should be firm yet tender with white bases and green tops. Loosen the soil around each plant before gently pulling them from the ground – being mindful not to damage neighboring plants’ roots. 

Organic Pest Control and Disease Management for Leeks in Tower Gardening 

Pest control and disease management are crucial aspects of successful Leek cultivation in tower gardens. By opting for Organic pest control for tower garden Leeks, you can ensure the health of your plants while minimizing harm to beneficial insects and the environment.
To start, prevention is key. Regularly inspect your tower garden for signs of pests or diseases. Remove any infected or damaged leaves promptly to prevent further spread.

Implementing good hygiene practices, such as cleaning tools and equipment regularly, will also help minimize potential pest problems. One effective method is companion planting. Interplanting Leeks with herbs like Basil or Chives can deter pests naturally due to their strong scents. Additionally, attracting beneficial insects by planting flowers nearby can help keep harmful pests at bay.

If pests do become an issue despite preventive measures, consider using natural remedies such as neem oil or insecticidal soaps that are safe for both humans and the environment. These products target specific pests without harming beneficial insects. Disease management requires careful attention as well. Ensure proper airflow around your tower garden by spacing out plants appropriately and avoiding overcrowding. This helps reduce humidity levels that can contribute to fungal infections. 

Harvesting and Storing Homegrown Leeks from Your Tower Garden: Best Practices and Tips 

Harvesting and storing homegrown Leeks from your Tower Garden is an exciting and rewarding experience. It’s important to know when your Leeks are ready for harvest. Typically, they reach maturity around 90-120 days after planting. Look for thick stems and a height of about 12 inches as indicators that they’re ripe for picking. Gently loosen the soil around the Leek before carefully pulling it out by grasping it near the bottom. 

Once harvested, it’s crucial to handle your Leeks with care. Avoid washing them immediately, as moisture can promote spoilage during storage. Instead, gently brush off any excess dirt or debris using a soft brush or cloth. Trim off any damaged or discolored parts, leaving about an inch of greenery intact.

Now comes the crucial step: proper storage. Leeks prefer cool temperatures between 0-4°C with high humidity levels around 95%. If possible, store them in a refrigerator crisper drawer wrapped loosely in plastic wrap or placed inside perforated plastic bags to maintain moisture levels while allowing airflow. 

In case you missed it: Growing Hydroponic Spring Onions – A Full Guide

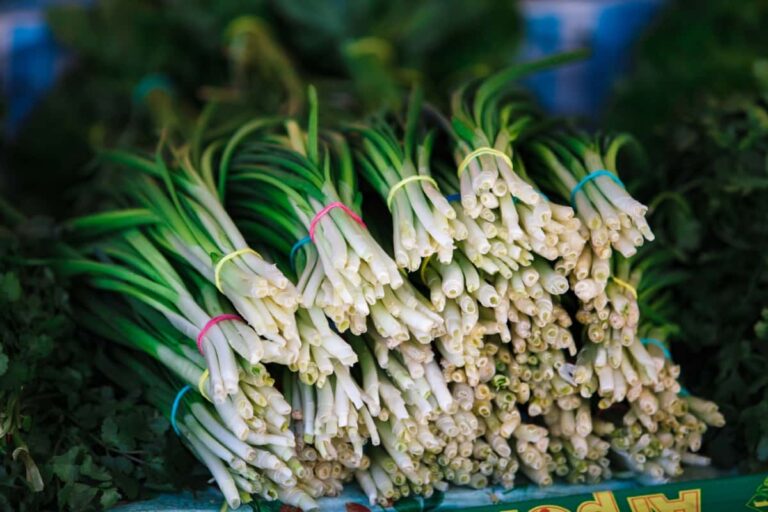
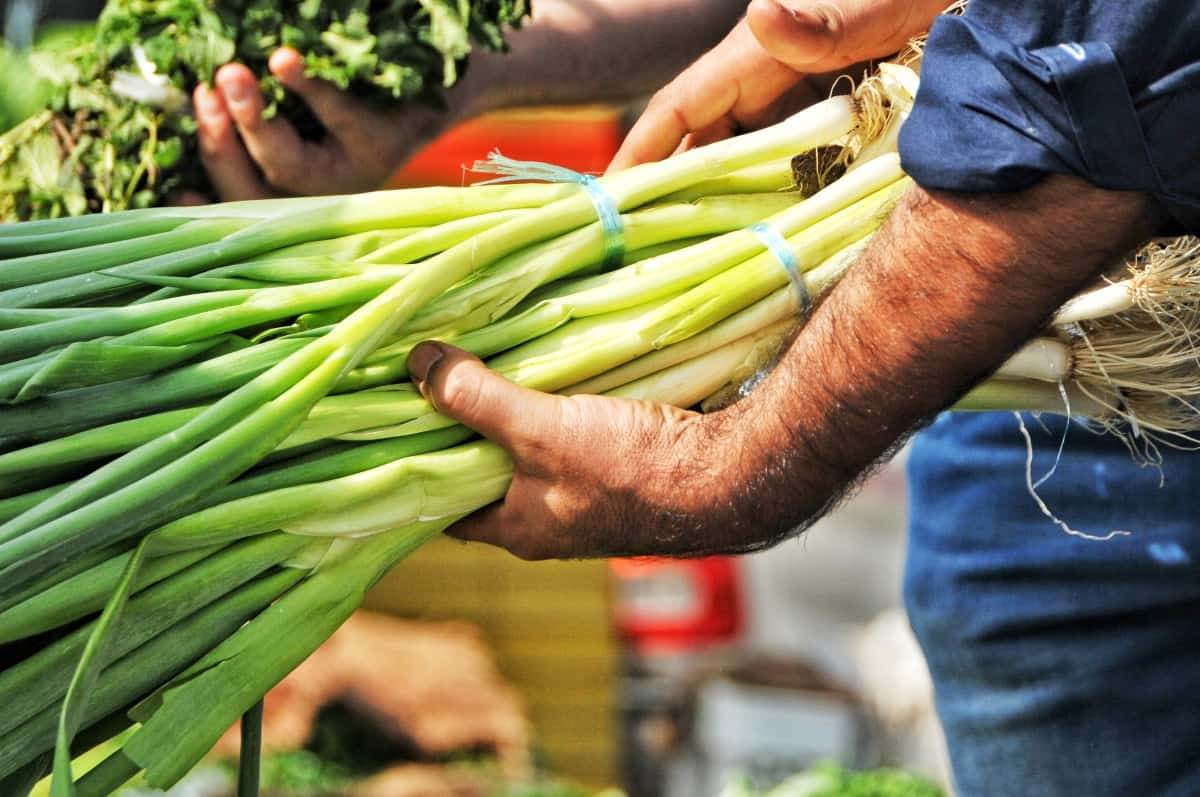
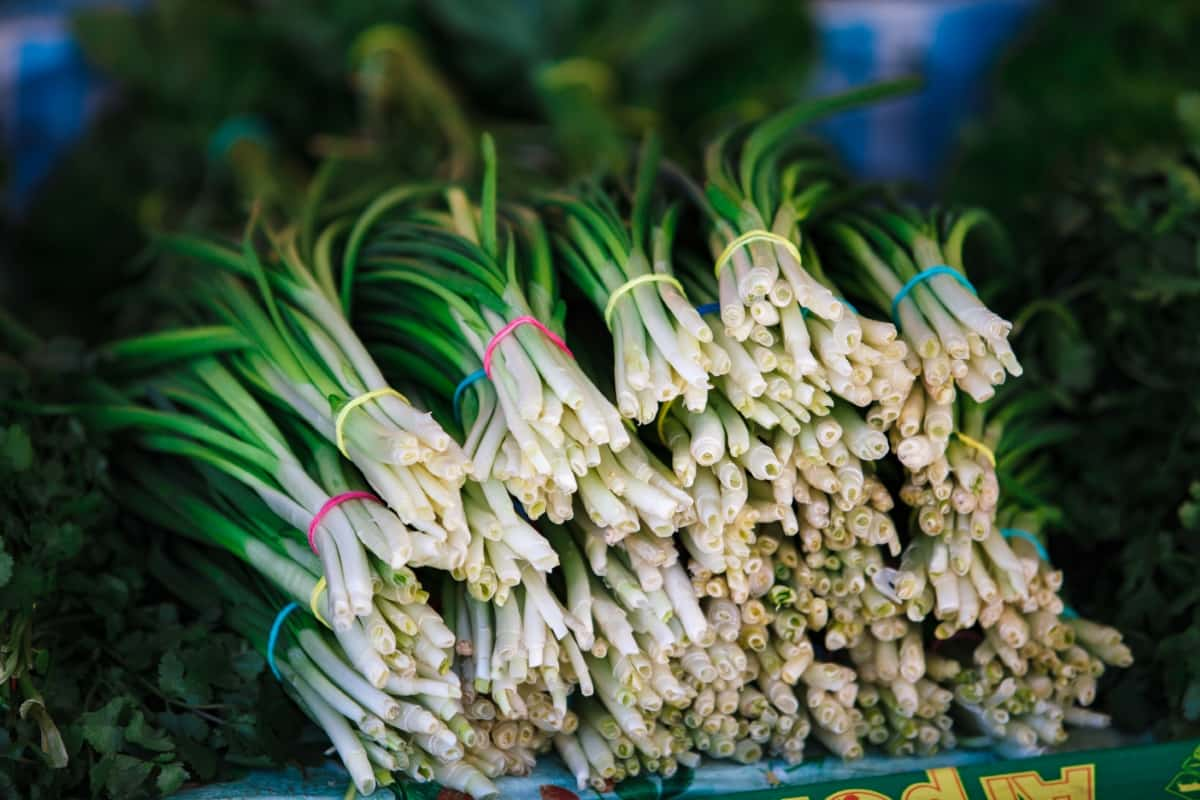
Fresh Green Onions

Conclusion 

Growing Leeks vertically on Tower Gardens offers a multitude of benefits, from maximizing space and yield to promoting efficiency and sustainability. By following the step-by-step instructions, you can embark on your journey of cultivating flavorful Leeks at home.

As you gain experience with tower gardening systems, advanced techniques such as enhancing Leek growth and implementing innovative watering strategies will take your harvest to new heights. Troubleshooting tower garden Leeks, allowing for a seamless growing experience. By embracing vertical Leek gardening techniques, you open endless possibilities for creating an abundant supply of fresh Leeks right at home. 

Growing Carolina Reaper Chili Peppers on a Tower Garden Vertically

0

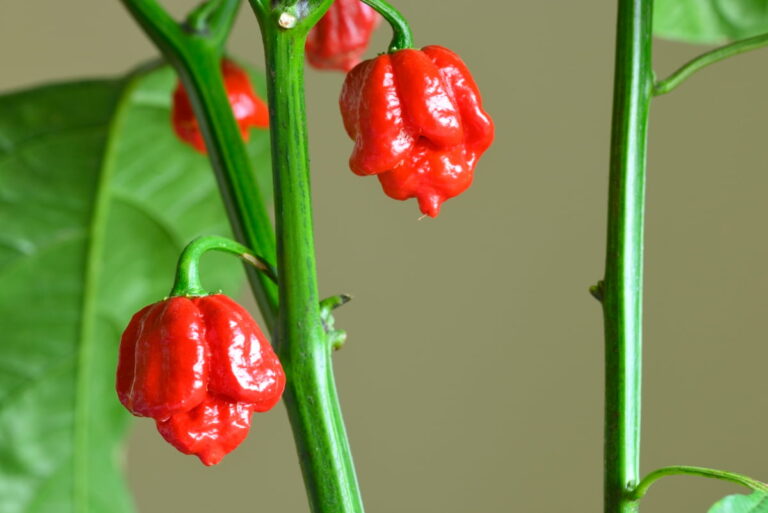
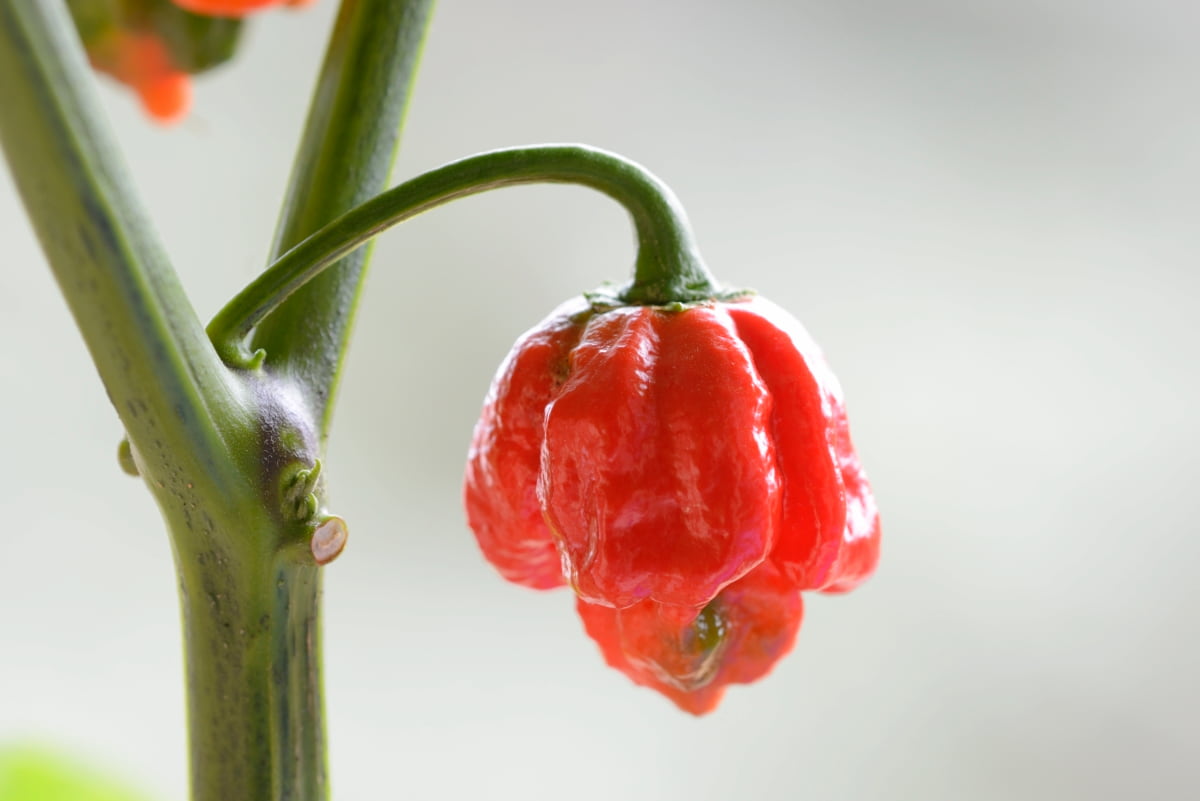
The Carolina Reaper Chili Pepper is one of the hottest peppers in the world, known for its fiery taste and intense heat. Growing Carolina Reaper Chili Peppers in a Tower Garden is an exciting and rewarding experience. With their fiery heat and unique flavor, these peppers can add a spicy kick to any dish. Plus, the convenience of growing them in your backyard with a Tower Garden makes it even more enjoyable.

Growing Carolina Reaper Chili Peppers on a Tower Garden

Growing Carolina Reaper Chili Peppers in a vertical garden, like the Tower Garden, can be a game-changer for spice enthusiasts. This unique cultivation method allows you to maximize space and enjoy an abundant harvest of these fiery beauties. From saving space to reducing water usage, this method allows you to maximize your harvest while minimizing resources. With these Tower Garden spicy pepper growing tips in mind, you’ll be well on your way to enjoying a bountiful harvest of fiery peppers.

Growing Carolina Reaper Chili Peppers on a Tower Garden

Selecting the Right Tower Garden System

When it comes to growing Carolina Reaper Chili Peppers, selecting the right Tower Garden system is crucial. First and foremost, consider the size of the Tower Garden system. If you have limited space, a compact model would be ideal. On the other hand, if you have ample room in your backyard or patio, a larger system may be more suitable.

Another factor to consider is the type of support structure provided by the Tower Garden system. Some models include built-in trellises or cages for training your Chili Pepper plants as they grow taller. This can help prevent them from drooping or breaking under their weight.

Preparing the Growing Medium

Preparing the growing medium is an essential step in successfully growing Carolina Reaper Chili Peppers in a Tower Garden. The right medium will provide the necessary nutrients and support for healthy plant growth. To begin, choose a high-quality potting mix specifically designed for container gardening. A well-draining mix is crucial to prevent waterlogged roots, which can lead to root rot. Before planting, moisten the potting mix with water to ensure proper hydration.

This will create an ideal environment for seedlings or seeds to establish themselves. Next, consider adding some organic matter, such as compost or worm castings, into the mix. This will enrich the soil with additional nutrients and promote beneficial microbial activity. Mixing in perlite or vermiculite can also improve drainage and aeration of the growing medium. These additives help prevent compaction and allow oxygen to reach plant roots more easily.

Choosing the Ideal Location

Choosing the ideal location for growing Carolina Reaper Chili Peppers is crucial to their success. These fiery little fruits thrive in warm, sunny environments with plenty of direct sunlight. Look for a spot in your garden that receives 6-8 hours of full sun each day. When selecting the location, consider factors such as wind exposure and soil quality. The Carolina Reaper plants prefer sheltered areas where they are protected from strong winds that can damage delicate foliage or knock over the tower system.

Starting from Seeds or Seedlings

When it comes to growing Carolina Reaper Chili Peppers in a Tower Garden, you have the option of starting from seeds or seedlings. Both methods have their advantages and considerations. If you choose to start from seeds, select high-quality seeds and have more control over the entire growing process. However, it does require more patience as germination can take 7 to 14 days.

On the other hand, if you opt for seedlings, you save time and jumpstart your garden. Seedlings are already established plants that are ready to be transplanted into your Tower Garden system. This method gives you a head start in terms of growth and allows for quicker harvesting.

Planting and Spacing

When it comes to planting Carolina Reaper in vertical gardens, you have two options: starting from seeds or seedlings. Starting from seeds allows you to have more control over the entire growing process, but it does require patience, as seeds can take a few weeks to germinate. If you choose to start from seedlings, make sure they are healthy and sturdy before transplanting them into your Tower Garden system

In case you missed it: Homemade Insecticide for Chilli Plants: DIY Remedies for Natural Pest Control for Chili Peppers

Carolina Reaper Hot Pepper

When it comes to spacing, give each plant enough room to thrive. Carolina Reaper plants can grow quite large, so be mindful of their potential size when determining the distance between each plant. A general guideline is to space them about 18-24 inches apart in all directions.

Nutrient Management

Nutrient Management is a crucial aspect of growing Carolina Reaper Chili Peppers in a Tower Garden. These fiery peppers require specific nutrients to thrive and produce their signature heat. To effectively manage the nutrient needs of your Carolina Reaper Chili Peppers, it’s important to start with high-quality fertilizers that are specifically formulated for hydroponic systems.

These fertilizers are designed to provide all the essential macro and micronutrients that your plants need for optimal growth. One important factor in nutrient management is maintaining the correct pH level in your growing medium. The ideal pH range for Carolina Reaper Chili Peppers is between 5.8 and 6.3.

Regularly testing and adjusting the pH will help ensure that your plants can efficiently absorb nutrients from the solution. As your plants grow, they will have different nutrient requirements at each stage of development. During vegetative growth, nitrogen-rich fertilizers promote leafy growth, while phosphorus-rich fertilizers encourage flowering and fruit set during the reproductive phase.

Watering Techniques

Proper watering is important for the successful growth of Carolina Reaper Chili Peppers in a Tower Garden. One effective method is drip irrigation, which delivers water directly to the plant’s roots while minimizing wastage. This technique ensures that each plant receives an adequate amount of water without saturating the surrounding soil.

Another option is using a timer-controlled system that provides regular and automated watering intervals. This maintains a consistent moisture level in the growing medium, preventing both drought stress and waterlogged conditions. It’s important to monitor humidity levels in your growing area as well. High humidity can cause fungal diseases, so proper ventilation or dehumidifiers may be necessary in humid climates.

When watering, it’s best to do so early in the day or late afternoon when temperatures are cooler. This allows plants ample time to dry before nightfall, reducing the risk of disease development. Young seedlings generally need less frequent watering than established plants with larger root systems.

Pruning and Training Methods

Pruning and training your Carolina Reaper Chili Pepper plants is essential for promoting healthy growth, maximizing yields, and maintaining an organized garden. One important method of pruning is removing suckers or side shoots that develop in the leaf axils. These little branches may seem harmless at first, but they divert valuable energy away from fruit production. By regularly pinching off these suckers, you allow more nutrients to be directed toward developing larger fruits.

In case you missed it: How To Grow Chilli Plants At Home (Pepper/Mirchi)

Carolina Reaper Hot Pepper

Another technique to consider is topping or cutting back the main stem. This encourages lateral branching and helps create a bushier plant. Pruning should be done carefully with clean tools to avoid introducing diseases into your garden. Training methods like staking or trellising are also effective ways to support your Chili Pepper plants as they grow taller. Using stakes or cages helps prevent stems from bending under the weight of heavy fruit clusters.

Pest and Disease Management

These fiery peppers are not only loved by humans but also attract unwanted attention from pests and diseases. With proper management techniques, you can keep these pesky invaders at bay. Look out for common culprits like aphids, spider mites, and whiteflies. If you spot any unwelcome visitors, take immediate action to prevent them from spreading further.

One effective method is using natural predators such as ladybugs or lacewings that feed on garden pests. You can introduce them into your Tower Garden to control populations naturally without resorting to harmful chemicals. Another preventive measure is maintaining good hygiene practices.

Clear away fallen leaves or debris that could harbor pests or diseases. Keep the area around your Tower Garden clean and tidy. Additionally, consider applying organic sprays or insecticidal soaps if pest populations become unmanageable. Just remember to follow instructions carefully and use these products sparingly to minimize any potential harm to beneficial insects. Early detection allows for prompt treatment if necessary.

Harvesting and Storage

When it comes to harvesting Carolina Reaper Chili Peppers, timing is everything. These fiery fruits are ready for picking when they have reached their full, vibrant red color. Gently twist the pepper from the stem to avoid damaging the plant. Once you’ve harvested your precious peppers, it’s time to think about storage. Properly storing your Carolina Reaper Chili Peppers will ensure that you can enjoy their intense heat for months to come.

 One option is to dry your peppers. String them up using thread, and hang them in a cool, well-ventilated area out of direct sunlight. Alternatively, you can use a food dehydrator or even an oven set on low temperature. If dried Chilies aren’t your thing, freezing is another great option for preserving their spiciness. Remove the stems and seeds before placing them in freezer bags or containers.

In case you missed it: Growing Hydroponic Chilli, Requirements, Benefits

Hottest Chili Pepper

Conclusion

Growing Carolina Reaper Chili Peppers in a Tower Garden is not only an exciting and rewarding experience, but it also allows you to enjoy the many benefits that come with homegrown produce. Carolina Reaper Chili’s vertical farming methods offer a unique and efficient way to grow these fiery peppers.

From their fiery flavor to their numerous health benefits, these peppers are truly a delight for spice lovers. By setting up a Tower Garden specifically designed for growing Chili Peppers, you can create the perfect environment for your plants to thrive. With proper care and attention, you’ll be rewarded with bountiful harvests of these scorching hot beauties.

How to Propagate Weeping Fig (Ficus Benjamina): In Water, Cutting, Soil, Air, and Rooting Hormone

0

Propagation refers to the act of making more plants through various methods, such as taking cuttings or dividing roots. Propagating a Weeping Fig can be an exciting and rewarding experience. Whether you choose to propagate in water, soil, or air with the help of a rooting hormone or propagate a weeping fig without a rooting hormone, each method offers its unique benefits.

How to Propagate Weeping Fig

No matter which method you decide to try, remember that patience is key when propagating Weeping Figs. It may take some time for roots to develop and new growth to appear. But with proper care and attention, you’ll soon have thriving Weeping Fig plants ready to enhance your indoor or outdoor space.

How to Propagate Weeping Fig: A Step-by-step Guide

Best Soil Mix for Weeping Fig Propagation

When it comes to propagating Weeping Figs indoors, choosing the correct soil mix is crucial for success. The ideal potting mix for Weeping Fig propagation should provide good drainage while retaining enough moisture for root development. A popular choice among gardeners is a mixture of peat moss, perlite, and vermiculite. This combination creates a well-draining medium that helps prevent waterlogged roots. Peat moss holds moisture without becoming overly compacted, allowing air circulation around the roots.

Another option is to use a mixture of potting soil and sand. This blend provides adequate drainage while still retaining some moisture. Sand helps to loosen the soil and improve its ability to drain excess water. Some gardeners prefer adding organic matter like compost or well-rotted manure to their soil mix. This enriches the growing medium with nutrients and promotes healthy root growth.

Weeping Fig Propagation from Cuttings

Weeping Fig propagation from stem cuttings is a popular and effective method of growing new plants. With just simple steps, you can easily propagate Weeping Figs and expand your indoor garden. To begin, select a healthy branch or stem from the parent plant. Make sure it has several nodes, which are the areas where leaves attach to the stem. Using sharp pruning shears, make a clean cut just below a node. Next, remove any leaves near the bottom of the cutting.

This will help prevent excessive moisture loss while encouraging root development. If desired, you can also dip the cutting in rooting hormone to promote faster rooting. Prepare a small pot with a well-drained soil mix. Moisten the soil slightly before inserting the cutting about an inch deep into it. Place the pot in a warm area with bright but indirect light. Maintain consistent moisture by lightly misting or watering as needed to keep the soil slightly damp but not soggy. After several weeks, you should start seeing roots forming at the base of your cutting.

Rooting Hormone for Weeping Fig Propagation

Rooting hormone is a useful tool when it comes to propagating plants, including the Weeping Fig. This natural or synthetic substance can help stimulate root growth and increase the chances of success in propagation. When using rooting hormone for Weeping Fig propagation, it’s important to choose the right type. There are different strengths available, so be sure to select one that is appropriate for your specific needs. To use rooting hormone on your Weeping Fig cuttings, dip the freshly cut end into the powder or gel before placing it in soil or water.

In case you missed it: Fig Growing Tips, Techniques, Ideas, and Secrets

Ficus Benjamina

This will help encourage root development and improve overall success rates. While rooting hormone can increase your chances of successful propagation, it’s not always necessary. Weeping Figs are known for their ability to root easily without any additional assistance. However, if you want to give your cuttings an extra boost of encouragement, using rooting hormone can be beneficial. Remember that proper care and attention during the entire propagation process are key factors in achieving successful results with Weeping Figs.

Weeping Fig Propagation in Water

Growing new plants from cuttings is an effective way to propagate Weeping Figs in water. It’s a simple and effective way to propagate this beautiful houseplant. First, choose a healthy stem cutting from your Weeping Fig plant. Make sure the cutting has at least three or four leaves and is about 4-6 inches long. Next, fill a glass with clean, room-temperature water. Place the cutting into the water, making sure that at least one node (where the leaf was attached) is submerged.

You can use small stones or pebbles to help keep it upright if necessary. Now, find a bright spot in your home where your cutting will receive indirect sunlight. Change the water every week or whenever it starts to look murky. After a few weeks, you should start to see roots forming on your Weeping Fig cutting. Once these roots are about an inch long, you can transfer your plant into the soil if desired.

Weeping Fig Propagation Timeline

Weeping Fig propagation can be an exciting and rewarding process, but it’s important to understand that it takes time. The first step in the Weeping Fig propagation timeline is selecting a healthy parent plant and taking cuttings. Once you have your cuttings, remove any lower leaves and dip the ends in the rooting hormone if desired. Then, place them in water or a well-draining soil mix.

Over the next few weeks, you’ll start to see some signs of progress. New growth may appear at the nodes of your cuttings, indicating that roots are beginning to form. As time goes on, continue to care for your cuttings by providing them with adequate light conditions and maintaining appropriate temperature and humidity levels. Regularly check their moisture levels to ensure they don’t dry out.

Within several months, you should start to see significant root development on your propagated Weeping Figs. At this point, they are ready for transplanting into their pots or directly into the garden if weather permits. Remember, every plant is unique, and there may be variations in timing depending on environmental factors such as temperature and humidity levels.

Air Layering Weeping Fig Propagation Method

Air layering is a popular method of propagating Weeping Fig plants. It may sound complicated, but with a little patience and creating optimal conditions for propagating Weeping Fig plants, you can successfully propagate your Weeping Fig using air layering. To start, select a healthy branch that is flexible enough to bend without breaking. Make an upward cut about one-third of the way through the branch and remove any leaves or buds in that area. Apply rooting hormone to encourage root growth.

In case you missed it: Fig Gardening For Beginners – How To Start, FAQs

Fertilizing Ficus Benjamina

Next, wrap moist sphagnum moss around the cut section of the branch and secure it with plastic wrap or aluminum foil. This will create a humid environment for root development. Be sure to keep the moss moist throughout the process. After a few weeks, roots should begin to form within the moss. Once they are well-established, carefully cut below the rooted section and pot it up in a well-draining soil mix.

Weeping Fig Propagation in Perlite

Weeping Fig propagation in perlite is a popular method among plant enthusiasts due to its high success rate. Perlite, which is a lightweight volcanic rock, provides the best drainage for the roots of the Weeping Fig plant. To propagate your Weeping Fig in perlite, start by taking a stem cutting from a mature and healthy plant. Make sure the cutting has at least two nodes. Next, fill a small container with moist perlite and make a hole in the center using your finger or a pencil.

Insert the cutting into the hole and place the container in a warm location. Mist the cutting regularly to maintain humidity levels around it. Within a few weeks, you can observe new roots forming on your Weeping Fig cutting. Once these roots are about an inch long or longer, you can carefully transplant the rooted cutting into well-draining potting soil. Continue to care for it as you would a mature Weeping Fig plant.

Temperature and Humidity Requirements

When it comes to temperature requirements, Weeping Figs prefer a range between 15-24°C. They can tolerate slightly cooler temperatures but will suffer if exposed to anything below 10°C. Humidity is equally important for Weeping Fig propagation. These plants originate from regions with high humidity levels, so replicating those conditions is essential. Aim for a relative humidity level of around 50-60%.

Weeping Fig Propagation Light Conditions

Light is a crucial factor when it comes to propagating Weeping Figs. When propagating, it’s important to provide the right amount of light for successful growth. Ideally, place your Weeping Fig cuttings or newly propagated plants in an area that receives bright but filtered sunlight throughout the day. If you’re growing Weeping Figs indoors, placing it near a north or east-facing window is best. This will ensure that it gets sufficient light without being exposed to direct sun rays.

On the other hand, if you’re growing your Weeping Fig outdoors, find a spot with dappled shade or where it will receive only partial sunlight during the day. Excess direct sunlight can cause leaf burn and hinder propagation success. Remember to monitor your plant closely and adjust its location accordingly if you notice any signs of stress, like yellowing leaves or leaf drop. Providing consistent and appropriate lighting conditions will help promote healthy growth during the propagation process.

In case you missed it: How to Grow Fig Trees/Fruits from Seed to Harvest: Check How this Guide Helps Beginners

Transplanting a Houseplant Into a New Pot

Conclusion

Propagation of Ficus benjamina plants can be rewarding and allow you to create new life and expand your plant collection. Each method has its advantages and success rates. Water propagation is an easy way to start with minimal supplies needed. Cutting propagation allows you to produce multiple new plants from one parent plant. Soil propagation provides a more traditional approach that mimics natural growth conditions. Only some attempts will be successful, but with practice and care, you can enjoy watching your Weeping Fig thrive as it grows from these propagated offspring.

How to Propagate Monstera in Water

0

Monstera propagation is an exciting way to grow new plants and expand your green family. When it comes to propagating Monstera, one of the key decisions you’ll need to make is whether to use water or soil for the process. Successful Monstera water propagation involves placing a Monstera cutting in a container filled with water until roots grow. This method allows you to monitor root growth closely and provides a visually appealing display as the roots sprout and elongate underwater.

How to Propagate Monstera in Water

On the other hand, soil propagation involves planting the cutting directly into a well-draining potting mix. This method mimics natural conditions more closely and can lead to faster overall growth. When deciding between water or soil propagation, consider factors such as your experience level, available resources, and desired outcome. Guide for water propagation of Monstera may be better suited for beginners seeking an engaging visual experience.

How to Propagate Monstera in Water

Selecting the Right Cutting for Water Propagation

When it comes to rooting Monstera plants in water, selecting the right cutting is essential for success. You should choose a healthy and mature stem that has at least one node. Look for a Monstera node cutting with several leaves on it, as this indicates that the plant is well-established and can handle being propagated. Avoid using cuttings with yellow or damaged leaves, as these may not have enough energy to produce roots.

It’s also important to consider the length of the cutting. Aim for a stem that is at least 6-8 inches long, as shorter cuttings may not have enough stored nutrients to support root development. When taking your cutting, use clean and sharp pruning shears to make a clean cut. This will promote new growth and encourage root formation.

Preparing the Water for Monstera Propagation

Preparing the water for Monstera propagation is a crucial step in ensuring successful root development. First, you’ll want to use filtered or distilled water to avoid any harmful chemicals that can hinder growth. Chlorinated tap water may not be ideal for your cuttings. Next, select a clean container free from any residue or contaminants. A glass jar or vase works well, as it allows you to monitor root growth easily. Fill the container with about 2-3 inches of water – enough to submerge the bottom nodes of your Monstera cutting.

To give your cuttings an extra boost, you can add some rooting hormone to the water. However, it’s important to follow the instructions on the rooting hormone package and not exceed recommended doses. Change out the water every 7-10 days to prevent stagnation and keep it fresh for optimal oxygen levels. When changing the water, gently rinse off any algae or debris that may have accumulated on your cutting or in the container.

Placing the Monstera Cutting in Water: Best Practices

Placing the Monstera cutting in water is a crucial step in propagating this beautiful plant. To ensure successful root development, there are a few best practices to follow. Choose a glass or jar that is tall enough to accommodate the length of your cutting. The container should have a wide opening to allow for easy insertion of the cutting. Next, fill the container with water at room temperature. It’s important not to use chlorinated tap water as it can hinder root growth. Instead, opt for filtered or distilled water.

In case you missed it: How to Propagate Philodendron: With Water, Soil, Air, and Division

Monstera deliciosa

Before placing the cutting in water, make sure to trim any leaves that would be submerged. Gently insert the cut end of the stem into the water, making sure it is fully submerged but without any leaves touching the liquid surface. You may need to use small weights or clips to hold larger cuttings upright if they tend to float. Find a suitable location for your container where it can receive bright, indirect light.

Monitoring Root Growth During Water Propagation

One of the most exciting aspects of propagating Monstera in water is watching the roots develop and grow. Patience is key. While some cuttings may sprout roots within weeks, others may take several months to show any signs of growth. To monitor root growth, regularly inspect your Monstera cuttings by gently lifting them out of the water. Look for small white or light-colored nodules emerging from the stem nodes. These are early indicators that roots are forming.

Another way to gauge root development is by observing changes in leaf appearance. As roots begin to grow, you may notice an increase in leaf size or new leaves unfurling. This indicates that the cutting has established a strong enough root system to support foliage growth. Remember to keep an eye on water quality as well. If it becomes murky or foul-smelling, it could indicate bacterial or fungal issues, which can hinder root development.

Transferring Monstera Cuttings from Water to Soil

First, prepare a well-draining potting mix for your Monstera. You can create equal parts of perlite, peat moss, and regular potting soil. Next, gently remove the Monstera cutting from the water, being careful not to damage its delicate roots. Give it a quick rinse with clean water to remove any remaining residue or algae. In the prepared soil mixture, dig a small hole and place the cutting into it.

Make sure that at least an inch or two of its roots are buried thoroughly after planting around the roots and provide hydration for your new plant. Place your potted Monstera in a location with bright indirect light and maintain consistent watering as needed. It’s important to monitor your newly transferred Monstera closely during this period of adjustment. Keep an eye out for any signs of stress or wilting, which may indicate that additional care is required.

Troubleshooting Common Issues in Water Propagation

Stagnant Water: One common issue you may encounter during water propagation is stagnant water. If the water becomes cloudy or develops a foul odor, it could indicate bacterial growth. To remedy this, replace the water every few days and ensure that your container has good airflow.

Root Rot: Another issue with Monstera water propagation is root rot, which happens when the roots are constantly submerged in water without enough oxygen. To prevent this, make sure there are air holes in your container and avoid overwatering.

In case you missed it: How to Propagate Calathea Plant: Ways to Grow from Water, Soil, Division, and Cuttings

Swiss cheese roots

Lack of Root Growth: If you notice that your Monstera cutting isn’t developing roots after several weeks, it may be due to low humidity or insufficient light. Consider misting the leaves regularly or using a humidity dome to create a more suitable environment for root development.

Mold or Fungus: Mold or fungus growth on the cutting can hinder root growth and impact overall plant health. Ensure proper ventilation and cleanliness by periodically wiping down the container with diluted hydrogen peroxide or vinegar solution.

Pale Leaves: Pale leaves on your Monstera cutting could indicate inadequate nutrients in the water or lack of sunlight exposure. You might want to consider adding a diluted liquid fertilizer to promote healthy leaf coloration.

Tips for Successful Monstera Water Propagation

  • Choose healthy cuttings: When selecting cuttings for water propagation of Monstera, make sure they come from a healthy and mature Monstera plant. Look for leaves that are free from damage or disease.
  • Use filtered or distilled water: It’s best to use filtered or distilled water to provide optimal conditions for your Monstera cutting.
  • Place the cutting in indirect light: While Monsteras love bright, indirect light, it’s important not to expose the cuttings to direct sunlight during the rooting process. Too much sun can cause stress and inhibit root growth.
  • Change the water regularly: To prevent bacterial growth and ensure oxygen availability, change the water every 7-10 days.
  • Maintain consistent temperature and humidity: Monsteras thrive in warm and humid environments, so aim to keep the temperature around 21-24°C with humidity levels of 60% or higher.
  • Be patient: Rooting in water can take several weeks or even months, so be patient throughout the process. Check on your cutting regularly, but avoid disturbing it too often, as this can disrupt root formation.
  • Consider using rooting hormone: If you want to speed up the rooting process, you can dip your Monstera cutting in a rooting hormone before placing it in water. This may increase success rates and encourage quicker root development.

Comparing Water Propagation to Other Methods

When propagating Monstera plants, there are a few different methods you can try. While water propagation is popular among plant enthusiasts, it’s important to understand how it compares to other methods. One commonly used method for propagating Monstera is soil propagation. This involves placing the cutting directly into a pot filled with moist soil and waiting for the roots to develop. Soil propagation can be effective, but it requires more patience and careful monitoring of moisture levels.

Another option is using sphagnum moss for propagation. With this method, you wrap the cutting in damp moss and secure it with a plastic bag or container. The moss helps retain moisture while allowing air circulation around the cutting. Compared to these methods, water propagation has its advantages. For one, it allows you to monitor root growth easily since the roots are visible in the water. Additionally, water provides constant hydration without risking overwatering or underwatering.

However, there are also some downsides to consider when choosing water propagation. One potential issue is that prolonged exposure to water can make roots weaker compared to those grown in soil or moss. Additionally, transferring cuttings from water to soil may require extra care and attention. Some people find success with one method, while others prefer another based on their experience and environment.

Frequently Asked Questions (FAQ) on Monstera water propagation

Can I Propagate My Monstera in Water if it Has Aerial Roots?

Yes, absolutely! Monstera cuttings with aerial roots tend to root faster in water compared to those without. Place the cutting with the aerial root into a jar of water and watch as it develops new roots.

In case you missed it: How to Propagate Elderberries from Cuttings: A Step-by-Step Process Guide

Caring indoor plants

Do I Need to Change the Water During Propagation?

It’s recommended to change the water every week or two to prevent any potential buildup of bacteria or algae that could hinder root development. Be sure to use room temperature or lukewarm water when changing it.

Should I Use Any Additives or Rooting Hormones in the Water?

While not necessary, some people choose to add a small amount of liquid fertilizer or rooting hormone diluted in their propagation jar. This can provide extra nutrients and stimulate root growth.

Conclusion

Monstera plants are popular houseplants that have gained widespread popularity in recent years. With their large and unique leaves featuring distinctive holes, they add a touch of tropical beauty to any indoor space. The method for propagating Monstera in water is a rewarding and fascinating process that allows you to grow new plants from cuttings.

Monstera propagation timeline in water depends on several factors. This method offers several advantages, such as being able to monitor root growth closely and ensuring the cutting gets the right amount of moisture.

Steps to Growing Onions in Aquaponics: Explore from How to Plant to Harvest

0

Growing Onions in aquaponics is a unique and rewarding way to cultivate this versatile and flavorful vegetable. Aquaponics combines hydroponics with aquaculture (raising fish), creating a symbiotic system where the fish waste provides the required nutrients for the plants. In contrast, the plants filter and purify the water for the fish.

Growing Onions in Aquaponics

Growing Onions in Aquaponics

Selecting the Right Aquaponic System for Onions Cultivation

When it comes to growing Onions in aquaponics, selecting the right system is crucial for success. There are various types of aquaponic systems available, each with its advantages and limitations. One option is the media-based system, which uses a grow bed filled with a medium like gravel or expanded clay pellets. This type of system provides good support for Onion plants and allows their roots to spread out comfortably. However, be sure to choose a media that doesn’t retain too much moisture, as Onions prefer well-drained conditions.

Another option is the nutrient film technique system, where water containing nutrients flows continuously over the plant roots through shallow channels. This method works well for smaller Onion varieties but may not be suitable for larger ones that require deeper root penetration. A third option is the raft or deep-water culture system, where plants float on rafts in nutrient-rich water. While this method can work for Onions, it’s important to ensure adequate spacing between plants and regular pruning of foliage to prevent overcrowding.

Choosing the Best Varieties of Onions for Aquaponic Farming

Choosing the best varieties of Onions for aquaponic farming is an important decision that can greatly impact your success in this type of cultivation. When selecting Onion varieties for aquaponics, it’s essential to consider their growth habits. Some onions are better suited for long-day regions where they require more daylight hours to lighten up properly. Examples include Walla Walla and Spanish Onions.

On the other hand, short-day varieties like Vidalia and Texas Sweet are ideal for regions with shorter daylight periods. Another factor to consider is the size of the Onion bulbs you desire. If you prefer smaller-sized bulbs, go for shallots or pearl Onions. For larger bulbs suitable for culinary use or storage purposes, choose varieties such as Yellow Globe or Red Baron.

Essential Water Quality Parameters for Onions Growth in Aquaponics

Water quality is a crucial factor in the success of growing Onions in an aquaponics system. Aquaponics combines hydroponics and aquaculture, creating a symbiotic environment where plants and fish thrive together. First and foremost, it’s important to maintain proper pH levels for optimal Onion growth. Onions prefer slightly acidic conditions with a pH range of 6-7. Regular monitoring of pH levels is essential to ensure that they remain within this range. Another important parameter to consider is water temperature.

Onions thrive best in temperatures between 15-24°C. Maintaining consistent water temperature throughout the year can be achieved by using appropriate heating or cooling systems. In addition to pH and temperature, dissolved oxygen levels should be monitored regularly. Onions require adequate oxygen availability for their root development and nutrient uptake.

In case you missed it: Top 12 Fruits to Grow in Aquaponics

bunch of fresh onions

Proper aeration techniques, such as using air stones or diffusers, can help maintain optimum oxygen levels in the water. Nutrient concentration is another critical aspect when it comes to water quality parameters for Onions in aquaponics. Essential nutrients like nitrogen, phosphorus, potassium, calcium, magnesium, iron, and trace elements must be present in sufficient quantities for healthy Onion growth.

Providing Essential Nutrients for Aquaponic Onions

When it comes to growing Onions in an aquaponic system, providing the right nutrients is crucial for their healthy growth and development. Since aquaponics combines hydroponics (growing plants in water) with aquaculture (raising fish), the nutrient requirements of both plants and fish need to be considered. One of the key nutrients required by Onions is nitrogen, which plays a key role in promoting leafy growth. In an aquaponic system, this can be provided by the waste produced by the fish.

As they excrete ammonia-rich urine, beneficial bacteria convert it into nitrites and then nitrates – a form that can be readily absorbed by plants. Phosphorus is another essential nutrient needed for bulb development and root formation in Onions. It can be obtained from organic matter such as decomposed plant material or fish feed particles that settle at the bottom of your system’s grow bed. Potassium is crucial for overall plant health and helps with disease resistance. This nutrient can come from various sources like potassium carbonate or wood ash derived from burning untreated wood.

Lighting Requirements for Growing Onions in an Aquaponic System

When it comes to growing Onions in an aquaponic system, providing the right amount of lighting is crucial for their growth and development. Onions are considered a high-light crop, which means they require at least 12-14 hours of direct sunlight or artificial light per day. In an indoor aquaponic setup, you can use LED grow lights to provide the necessary light intensity and spectrum for optimal Onion growth.

It’s important to position the grow lights at the correct distance from the Onion plants. Too close, and they may burn; too far away, and they won’t receive enough light. Generally, keeping the lights about 6-8 inches above the plants is a good starting point. As Onions grow taller, you’ll need to raise the lights accordingly to ensure even coverage and prevent any shading or elongation of the stems. This will help promote strong stem development and bulb formation.

Temperature and Climate Control for Optimal Onions Growth

Temperature and climate control play a crucial role in ensuring the optimal growth of Onions in an aquaponic system. Onions are cool-weather crops that thrive best in moderate temperatures. It is important to maintain the right temperature range for successful cultivation. Ideally, the air temperature for growing Onions should be between 15°C and 24°C. Onion plants also require a stable climate with consistent humidity levels. High humidity can cause to fungal diseases, while low humidity can cause dehydration and stunted growth.

It’s essential to monitor and adjust humidity levels accordingly by using ventilation systems or misters. In addition to air temperature, water temperature plays a significant role in Onion cultivation. The ideal water temperature for Onion roots is around 20°C. Cold water slows down root development, while warm water can lead to stress and nutrient deficiencies.

In case you missed it: Top 20 Flowers To Grow In Aquaponics

colorful onions

Planting and Spacing: Best Practices for Onions in Aquaponics

Planting and spacing are crucial factors to consider when growing Onions in an aquaponics system. Properly planting the Onion bulbs ensures a strong start for growth, while adequate spacing allows each plant to receive enough nutrients and light for optimal development. To begin, select healthy Onion bulbs with firm and dry outer skins. Gently separate the individual cloves from the bulb without damaging them. Make sure each clove has roots attached or sprouting shoots.

Next, prepare your aquaponic grow bed by filling it with a suitable media such as expanded clay pellets or coconut coir. Create small holes in the media where you will plant each Onion clove. Place one clove in each hole, making sure that the pointed end is facing upward. The top of the clove should be slightly above the surface of the media. Cover gently with additional media to secure the cloves in place.

For proper spacing, leave about 4-6 inches between each planted clove. This distance allows sufficient room for roots to develop and prevents overcrowding, which can cause competition for resources among plants. As your Onions grow, ensure they receive adequate water and nutrient supply through regular monitoring of your aquaponic system’s parameters. Adjust pH levels if necessary to maintain an optimal range between 6-7.

Maintenance and Care

  • Regular monitoring: Keep a close eye on the water quality parameters. These factors can greatly affect the health of your Onion plants.
  • Water circulation: Ensure proper water circulation within the system to provide oxygen to the roots of your Onions.
  • Pruning and thinning: Regularly prune any dead or yellowing leaves from your Onion plants to prevent disease spread and maintain good airflow around the plants. Additionally, thin out crowded areas by removing smaller bulbs so that each plant has enough space to grow.
  • Pest control: Monitor for pests such as aphids or thrips that might attack your Onion plants. Consider introducing beneficial insects like ladybugs or implementing organic pest control methods if necessary.
  • Nutrient supplementation: While aquaponics systems naturally provide nutrients through fish waste, it’s important to regularly test nutrient levels and supplement them if needed using organic fertilizers specifically formulated for hydroponic/aquaponic systems.
  • Weed management: Keep a vigilant eye on weeds that may compete with your Onions for resources like light and nutrients. Remove any unwanted vegetation promptly but gently so as not to disturb the delicate root system of your Onions.

When and How to Harvest Onions in Aquaponics

When it comes to harvesting Onions in aquaponics, timing is everything. You can harvest onions when they reach the required size. To harvest your onions, gently lift them from the grow bed, shake them off, and trim back the foliage to about an inch above the bulb. This will help them cure properly and reduce moisture loss during storage.

In case you missed it: Top 25 Vegetables To Grow In Aquaponics

Growing onions in a greenhouse

Conclusion

Growing Onions in aquaponics can be a rewarding and efficient way to cultivate this versatile vegetable. By selecting the right aquaponic system, choosing suitable onion varieties, ensuring optimal water quality parameters, providing essential nutrients and lighting requirements, and maintaining proper temperature and climate control, you can create the ideal environment for onions to thrive.

How to Propagate Philodendron: With Water, Soil, Air, and Division

0

Philodendrons are beautiful and popular houseplants that can bring lush greenery to any indoor space. If you’re looking to expand your Philodendron collection or share these lovely plants with friends, understanding the basics of Philodendron propagation is essential. With Philodendrons, there are several methods you can choose from, depending on your preferences and the resources available. By understanding Philodendron Propagation in Different Mediums, you’ll have the knowledge needed to grow new plants from existing ones successfully. 

How to Propagate Philodendron

How to Propagate Philodendron

Choosing the Right Propagation Method for Philodendron 

When it comes to propagating your beloved Philodendron plants, choosing the right method is crucial for success. There are several propagation methods you can explore, each with its benefits and considerations. One popular method is Stem Cuttings Propagation of Philodendrons. This involves taking a healthy stem cutting and placing it in water or soil until roots develop. Stem cuttings are relatively easy to work with, making them a great option for beginners. 

Air layering is another effective method that works well for Philodendron plants with thick stems or aerial roots. By creating an incision on the stem and wrapping it in moist sphagnum moss or soil, new roots will form at that point. Division Propagation of Philodendron Plants involves separating mature Philodendron plants into smaller sections that have their root systems intact. This allows you to multiply your collection quickly while maintaining strong individual plants.  

Step-By-Step Guide to Propagating Philodendron Through Stem Cuttings 

Water Propagation Techniques for Philodendron 

Philodendron Propagation in Water is an effective method for propagating Philodendron plants. It’s a simple technique that can yield impressive results with just a bit of patience and care. To start, select a healthy stem cutting from your Philodendron plant. Make sure it has at least two nodes. Remove any lower leaves near the bottom node to create a clean cut. Next, place the cutting in a glass or jar filled with water. Make sure the bottom node is submerged while leaving the upper portion of the cutting exposed to air.

This allows for easy access to oxygen while encouraging root growth. Find a bright but indirect light location for your water-propagated Philodendron cutting. Change out the water every few days or whenever it starts to look murky. Be patient as you wait for roots to develop. It may take several weeks or even months before you see signs of new growth below the surface of the water. Once roots have formed and reached about two inches in length, you can transfer your Philodendron cutting into the soil if desired or continue growing it in water indefinitely.  

Soil Propagation: A Comprehensive Approach for Philodendron 

Philodendron Propagation in Soil is a tried-and-true method that can yield great results. This approach involves taking stem cuttings from a mature plant and placing them directly into a well-draining potting mix. To start, gather your materials – a clean pair of pruning shears, a small pot filled with moist potting mix, and rooting hormone powder (optional). Choose a healthy stem that has several nodes present. 

Use sharp shears or some other tool cut one of the leaf nodes. Remove any lower leaves or branches from the cutting to minimize moisture loss and encourage root growth. Next, create a small hole in the prepared potting mix using your finger or pencil. Gently insert the cutting into the hole. Press down gently to secure it in place. 

In case you missed it: How to Propagate Calathea Plant: Ways to Grow from Water, Soil, Division, and Cuttings

Philodendron

After planting, provide good hydration by watering it so the soil gets settled. Place your potted cutting in an area with bright indirect light. Keep an eye on moisture levels by checking regularly; water when needed, but be careful not to overwater as this can cause rotting. Within a few weeks or months, you should start seeing new growth emerging from the top of your Philodendron cutting. 

Air Layering: An Effective Method for Propagating Philodendron 

Air layering is an effective way for propagating Philodendron plants. To begin, select a healthy stem on your Philodendron that is about 1/4 to 1/2 inch in diameter. Make a small upward cut into the stem about halfway through its thickness. Dust some rooting hormone onto the exposed area to encourage root growth. Next, take a handful of moist sphagnum moss and wrap it around the wounded section of the stem. Secure it in place with plastic wrap, making sure to seal off both ends tightly.

Over time, check on your air-layered Philodendron regularly and keep the moss moist by spraying it with water as needed. You should start seeing roots forming within six weeks to three months. Once sufficient roots have developed, carefully remove the air-layered section from the parent plant by cutting just below where new roots have formed. Pot up your newly propagated Philodendron in well-draining soil and provide indirect light. 

Division Propagation: How to Divide and Multiply Philodendron Plants 

One of the most effective methods for propagating Philodendron plants is through division. This technique involves separating a mature plant into multiple smaller ones, each with its root system. Not only does division allow you to multiply your Philodendron collection, but it also helps rejuvenate older plants by promoting new growth. 

To begin the division process, carefully remove the Philodendron from its pot and gently shake off any excess soil. Look for natural separations or clusters of stems that can be easily divided. Using clean gardening shears, cut through these sections, ensuring that each new plant has at least one healthy stem and root system. 

Before repotting the newly divided plants, prepare fresh containers with a well-draining potting mix. Make sure to choose pots that are slightly larger than the size of each plant’s root ball. Gently place each section in its container and fill in any gaps with additional soil. After repotting, water thoroughly to help settle the soil around the roots and promote establishment. Place your newly divided Philodendrons in a warm location– this will encourage healthy growth. 

Tips for Successful Propagation of Rare or Uncommon Philodendron  

Research and Understand: When propagating rare or uncommon Philodendron varieties, it’s crucial to gather as much information as possible about their specific needs and requirements. Take the time to research the best propagation methods, Optimal Conditions for Philodendron Propagation, and any unique traits of these plants. 

Patience is Key: Rare Philodendrons may take longer to propagate compared to more common varieties. Don’t rush the process; be patient and give them the necessary time they need to establish roots and grow into healthy plants. 

Provide Ideal Conditions: Ensure that your rare Philodendrons are kept in a warm, humid environment with indirect sunlight. Creating a mini greenhouse using plastic bags or misting regularly can help maintain high humidity levels during propagation. 

Use High-Quality Tools and Materials: Investing in good-quality tools such as sharp pruning shears will ensure clean cuts when taking stem cuttings or dividing plants. Additionally, using sterile soil mixtures specifically formulated for houseplants can minimize the risk of pests or diseases affecting your precious Philodendrons. 

Consider Using Rooting Hormones: Some rare Philodendron varieties might benefit from the application of rooting hormones before planting cuttings in soil or water propagation mediums. These hormones can encourage faster root development and increase success rates. 

Water Properly: Avoid overwatering before and after Propagation, especially with sensitive rare species that may be prone to rotting if left sitting in excess moisture for too long. It’s essential to find a balance between providing enough hydration without drowning the plant. 

In case you missed it: How to Propagate Rubber Plant: Ways to Grow Ficus Elastica from Water, Soil, and Cuttings

Repotting Philodendron

Troubleshooting Common Issues in Philodendron Propagation 

Propagation is an exciting process, but sometimes issues can arise along the way. One issue you might encounter is root rot. This can happen if the cutting is overwatered or if it’s sitting in water for too long. To prevent root rot use a well-draining soil and water only when the top inch of soil feels dry. Another problem that may arise is leaf yellowing or browning. This could be a sign of improper lighting or nutrient deficiency. Place your cuttings in a spot with bright indirect light and consider using a balanced fertilizer to provide essential nutrients.

Wilting leaves can also be a concern during propagation. This could indicate inadequate humidity levels or excessive heat exposure. Mist the leaves regularly or place a clear plastic bag over the cutting. If your cuttings fail to root even after several weeks, it could be due to low temperatures or a lack of rooting hormone. Make sure your cuttings are kept at a warm temperature, between 18-24°C, and try applying rooting hormone to encourage root development.  

Advanced Techniques for Accelerating Philodendron Growth from Cuttings 

If you’re a Philodendron enthusiast looking to take your propagation skills to the next level, some advanced techniques can help accelerate the growth of your cuttings. These methods require a bit more knowledge and effort but can yield impressive results. One advanced technique is using rooting hormones. These hormones contain synthetic auxins that stimulate root development in plant cuttings.

In case you missed it: How to Grow Fuchsias in Pots: Propagation, Planting, and Care

Separate Sprout of Foliage Plant

By applying a small amount of rooting hormone to the base of your Philodendron cutting before planting it in soil or water, you can encourage faster and stronger root growth. Additionally, misting or fogging systems can be used to increase humidity around your Philodendron cuttings. Higher humidity levels promote faster growth by reducing moisture loss through evaporation and encouraging root formation. 

Conclusion 

Propagating Philodendron allows you not only to increase your plant collection but also to share the joy of growing these stunning foliage plants with others. Experimentation is key in finding what works best for your circumstances while keeping in mind that every plant is unique in its response to different propagation methods. 

How to Propagate Calathea Plant: Ways to Grow from Water, Soil, Division, and Cuttings

0

Calathea plants are known for their stunning foliage and vibrant colors, making them the best choice among plant enthusiasts. If you’re looking to expand your collection or share these beautiful plants with friends, understanding how to propagate Calathea is essential. Propagation is creating new plants from existing ones. There are many easy ways to propagate the Calathea plant at home, each with its advantages and requirements.  

How to Propagate Calathea Plant

By understanding the different methods available for propagating Calathea plants, you can choose one that suits your preferences and skill level as a gardener. Each technique has its own set of guidelines that need careful attention to achieve successful results – so make sure to do thorough research beforehand. 

How to Propagate Calathea Plant

Choosing the Right Method for Propagating Calathea Plants 

When it comes to propagating your Calathea plants indoors or outdoors, there are several methods you can choose from. Each method has its advantages and considerations, so it’s important to select the one that best suits your needs and preferences. One popular method is propagation through division.

This involves separating a mature plant into smaller sections, each with its roots and leaves. Another method is propagation through stem cuttings. This technique involves taking a healthy stem cutting from the mother plant and encouraging it to develop roots of its own. Stem cuttings are great for creating new plants quickly and efficiently. 

Propagating Calathea Plants from Division 

Division is the most effective way to propagate your Calathea plants. This method involves separating the plant into two or more smaller sections, each with its root system. To begin, choose a healthy, mature Calathea plant that has multiple stems or clumps. Carefully remove it from pot and gently shake off any excess soil.

Next, inspect the roots and identify natural divisions where you can separate the plant. Using clean gardening shears, carefully cut through these divisions, ensuring that each section has both roots and foliage. Once divided, replant each section in a suitable container filled with well-draining potting mix. Place them in a warm and humid environment with indirect light for optimal growth. Mist regularly to maintain moisture levels but avoid overwatering. 

Steps for Dividing Calathea Plants 

  1. Prepare your tools: You’ll need a sharp, clean knife or garden shears and some sterilized potting soil or peat moss. 
  2. Choose a healthy plant: Select a mature Calathea plant with multiple stems or clumps of leaves. Gently loosen the root ball and carefully lift the plant out. 
  3. Separate the roots: Use your hands or a clean knife to separate the roots into smaller sections. 
  4. Plant each section in its container: Fill small pots with fresh potting soil or peat moss and place each divided section into its container. 
  5. Water thoroughly: After planting, water each division well, ensuring that moisture reaches all parts of the soil. 
  6. Provide proper care: Place your newly divided Calathea plants in an area with bright indirect light and maintain consistent humidity levels by misting regularly. 

In case you missed it: How to Propagate Rubber Plant: Ways to Grow Ficus Elastica from Water, Soil, and Cuttings

Tropical house plant

Propagating Calathea Plants from Stem Cuttings 

One popular method of propagating Calathea plants is through stem cuttings. First, select a healthy Calathea plant with strong stems. Make sure the parent plant has several leaves and is free from any signs of disease or pests. Next, prepare your tools. You will need sharp pruning shears or scissors for taking the stem cuttings. Identify a suitable stem on the parent plant that you want to propagate.

Look for a section that has at least two nodes – these are small bumps where roots will eventually develop. Using your pruning shears or scissors, make a clean cut just below one node and another clean cut just above another node. Remove lower leaves near the bottom of the cutting to prevent them from rotting in water or soil. Once you have prepared your stem cutting, fill a small container with water or moist potting mix.

Place the cutting in the container, ensuring that at least one node is submerged in water or buried in soil. Check regularly for root development by gently tugging on the cutting. If there is resistance, it means roots have formed. After roots have developed, transfer your newly rooted Calathea into its pot filled with well-draining potting mix. Keep it consistently moist but not soggy while providing filtered sunlight. 

Rooting Calathea Plant Cuttings 

One of the most popular methods for propagating Calathea plants is through stem cuttings. This can be a fun and rewarding way to expand your collection or share your love for these beautiful tropical plants with others. To start, you’ll want to select a healthy and mature Calathea plant from which to take your cuttings. Using pruning shears, make a clean cut just below a node – this is where new roots will eventually form. Remove any excess leaves on the lower portion of the cutting to prevent moisture loss. 

Next, prepare a small container filled with soil or water if you prefer water propagation. If using soil, create a hole in the center large enough for the cutting to fit snugly. Dip the bottom end of your cutting into rooting hormone powder or gel. Then, carefully place it into the prepared hole in either soil or water, making sure it’s stable and upright. 

Propagating Calathea Plants in Water 

One of the easiest and most popular methods for propagating Calathea plants is through water propagation. Propagating Calathea plants in water involves placing a cutting or a division of the plant in a container filled with water until it develops roots. To start, select a healthy stem cutting or division from your Calathea plant. Ensure that it has at least two nodes, as this is where the roots will grow from. Remove any leaves near the bottom of the cutting to prevent them from sitting in water. 

Next, fill a jar with clean water and place the cutting inside. Make sure that at least one node is submerged in the water while keeping the top portion above. After some time, usually around 2-4 weeks, small white roots emerge from the submerged node. Once these roots are about an inch long, you can transplant your propagated Calathea into the soil. 

In case you missed it: How to Propagate Elderberries from Cuttings: A Step-by-Step Process Guide

leaves of the Calathea orbifolia tropical plant

Propagating Calathea Plants in Soil 

When it comes to propagating your Calathea plants, using soil as a propagation medium is a reliable and straightforward method. This approach allows the plant to establish strong roots and grow into a healthy new specimen. To get started, choose a well-draining potting mix that retains moisture without becoming waterlogged. Fill a small container with this soil mixture and moisten it slightly, ensuring that it is evenly damp throughout. Next, select a healthy stem or rhizome from the parent plant for propagation.

Make sure there are at least two or three nodes present on the cutting, as these are where the new roots will develop. Gently insert the cutting into the soil, making sure that one or two nodes are buried below the surface. Press down lightly around the base of the cutting to secure it in place. Place your newly potted cutting in an area with bright but indirect sunlight. Avoid exposing it to direct sunlight. Maintain consistent humidity by covering the pot with a plastic bag or placing it inside a greenhouse-like enclosure. 

Frequently Asked Questions (FAQ) on Calathea Propagation

When is the Best Time to Propagate Calathea Plants? 

The ideal time to propagate Calathea plants is during spring when they are actively growing. This ensures that the plant has enough energy to produce new roots and establish itself. 

Can I Propagate My Calathea Plant from Leaf Cuttings? 

While it’s possible to propagate some plants from leaf cuttings, this method doesn’t work well for Calatheas. These plants prefer other propagation methods, such as division or stem cuttings. 

How Long Does it Take for a Calathea Cutting to Root?

Rooting times can vary depending on the specific conditions, but generally, it takes around 2 to 4 weeks for a Calathea cutting to develop roots. It’s important to maintain high humidity levels and provide proper care during this period. 

In case you missed it: Common Mistakes Gardeners Make When Propagating Plants from Cuttings

Calathea indoor pot

Conclusion 

Propagating Calathea plants can be a rewarding and fulfilling experience for plant enthusiasts. By understanding the specific needs of your Calathea plant and selecting the appropriate propagation method, you can successfully grow new plants and expand your collection. Remember to provide optimal conditions such as indirect light, high humidity, and well-draining soil to ensure the survival and growth of your propagated Calathea plants. 

How to Propagate Rubber Plant: Ways to Grow Ficus Elastica from Water, Soil, and Cuttings

0

Rubber plants, with their glossy leaves and striking appearance, have become the best choice for indoor gardening enthusiasts. If you’re looking to expand your Rubber plant collection or share the joy of growing these beautiful plants with others, understanding the basics of Rubber plant propagation is essential. Propagation is creating new plants from existing ones. There are several methods you can use to propagate rubber plants successfully.

How to Propagate Rubber Plant

One common method is water propagation, where you place the cutting in water until roots form before transferring it to the soil. Rubber plant propagation in water can be an exciting way to witness root development firsthand. Propagating Rubber plants in the soil mix is another technique that many gardeners prefer.

In this method, you take the cutting and directly plant it into moist soil mixtures specially formulated for propagating houseplants like Rubber plants.  When it comes to successful Rubber plant propagation in various environments, there are a few tips worth noting. First and foremost, maintaining optimal temperature and humidity levels during the rooting process greatly enhances success rates. 

How to Propagate Rubber Plant: A Step-By-Step Guide

Best Practices for Rooting Rubber Plant Cuttings in Water 

When it comes to Rubber plant propagation in water, one of the most popular methods is rooting Rubber plant cuttings in water. This method is not only simple but also highly effective. Choose healthy and mature stems for your cuttings. Look for stems that have at least three leaves and are free from any signs of disease or damage. Using clean scissors, make a clean cut just below a leaf node. 

Remove the lower leaves from the cutting to prevent them from rotting in the water. Leave two or three leaves at the top intact, as these will provide energy for new root growth. Fill a clear glass or jar with fresh tap water and place your cutting inside so that about an inch of the stem is submerged. Make sure no leaves touch the water, as this can lead to rotting. 

Place your glass or jar near a bright but indirect light source. Change the water every few days to keep it fresh and oxygenated. Patience is key when rooting Rubber plant cuttings in water. It typically takes a few weeks to see roots forming at the base of your cutting. Once you notice well-established roots growing, you can transfer your cutting into the soil if desired. 

Soil Propagation Techniques for Rubber Plants 

When it comes to propagating Rubber plants, one of the most popular methods is using soil. This technique requires a bit more patience and care compared to water propagation, but it can yield great results. To start, you will need a well-draining potting mix that is rich in organic matter. Choose a pot that contains drainage holes to prevent waterlogging. Before planting your cutting, make sure to prepare the soil by moistening it slightly. 

Next, take a healthy stem cutting from your Rubber plant. Make sure it’s about 4-6 inches long and has several nodes on it. Now, create a small hole using your finger or a pencil and gently insert the cutting into it. Press down lightly around the cutting to ensure good contact with the soil. After planting, place your potted cutting in an area with bright, indirect light.

Avoid direct sunlight, as this can scorch young plants. Maintain consistent moisture levels by watering when the top inch of soil feels dry. In just a few weeks, you should start seeing new growth emerging from your planted Rubber plant cutting. Keep caring for it diligently by providing sufficient light and keeping an eye on moisture levels. Remember that every plant is unique and may respond differently to propagation techniques.  

Tips for Successful Rubber Plant Propagation in Various Environments 

When it comes to propagating Rubber plants from cuttings, success can depend on the environment in which you choose to grow them. First and foremost, temperature is key. The optimal temperature for Rubber plant propagation ranges from 15-27°C. It’s important to find a location that provides consistent warmth throughout the day. In addition to temperature, humidity plays an important role in successful propagation.

In case you missed it: How to Grow and Care for Rubber Plants Indoors: A Beginners Guide

Ficus Elastic Plant

Rubber plants prefer high humidity levels of around 50-60%. If you live in a dry climate or have low humidity indoors, consider using a humidifier or placing your cuttings near a tray filled with water. Lighting conditions also need careful consideration. Place your cuttings near a window where they will receive filtered light, or use artificial grow lights if necessary. Watering is another crucial factor for successful propagation. Make sure not to overwater your Rubber plant cuttings, as this can cause root rot. 

Common Mistakes to Avoid when Propagating Rubber Plants 

When it comes to propagating Rubber plants, there are a few common mistakes that many people make. One of the biggest errors is not properly preparing the cutting before planting it. It’s important to remove any leaves from the bottom of the cutting and make a clean cut at a 45-degree angle. Another mistake to avoid is overwatering your newly propagated Rubber plant. While it’s crucial to keep the soil moist, too much water causes root rot and hinders growth.

It’s best to let the soil dry out slightly between waterings. In addition, avoid placing your Rubber plant in direct sunlight immediately after propagation. While these plants do enjoy bright light, they can be sensitive during this early stage of growth. Start by placing them in an area with indirect or filtered light until they become more established. Furthermore, using low-quality or incorrect soil can also impede successful propagation. Rubber plants thrive in well-draining soil that retains moisture without becoming waterlogged.  

Enhancing Success Rates in Rubber Plant Propagation 

When it comes to propagating Rubber plants indoors, there are a few key factors that can greatly enhance your success rates. First and foremost, it’s important to choose healthy parent plants for propagation. Look for mature and disease-free Rubber plants with strong stems and vibrant leaves. This will give your cuttings the best chance of thriving. Next, make sure to take clean and sharp cuttings from the parent plant. Clean cuts reduce the risk of infection and promote faster rooting.

In case you missed it: Black Pepper Varieties in India: Different Types of Black Peppers

Rubber Plant

To further boost success rates, consider using a rooting hormone when propagating your Rubber plant cuttings. Rooting hormones in Rubber plant propagation contain growth-promoting substances that stimulate root development, increasing the chances of successful propagation. Proper care during root formation is crucial for enhancing success rates as well. Maintain a consistent level of moisture while avoiding overwatering. Providing adequate light levels without exposing the cuttings to direct sunlight is also important. 

Exploring Different Methods of Propagating Rubber Plants 

One common method is leaf propagation. Take a healthy leaf from a mature Rubber plant and place it in water or soil until roots start to form. Leaf propagation can be a slow process, but it often yields successful results. Another option is air layering. This technique involves making an incision on the stem of the Rubber plant and wrapping it with moist moss or another rooting medium. The wrapped section is then covered with plastic wrap to create a humid environment that encourages root growth.

If you’re feeling more adventurous, you could try using stem cuttings for propagation. Simply cut off a piece of the stem below a node and place it in water or soil until roots develop. Stem cuttings have higher success rates than leaf propagation but require careful attention to watering and humidity levels. Grafting is yet another method worth exploring if you want to propagate variegated Rubber plants. By joining two different plants together, usually through grafting tape or clips, you can combine desirable traits from both varieties into one plant. 

Advanced Techniques for Propagating Variegated Rubber Plants 

Variegated Rubber plants, with their striking foliage patterns of white and green or yellow and green, are highly sought after by plant enthusiasts. If you’re looking to propagate these beauties, there are a few advanced techniques that can help increase your success rate. One method is air layering, which involves creating a small wound on the stem and surrounding it with moist sphagnum moss or perlite. This encourages roots to form at the wounded area while still attached to the parent plant.

In case you missed it: Best Fertilzer for Black Pepper Plants: Nutrient Management in Black Pepper/Piper Nigrum Farms  

Ficus Leaves

Once roots have developed sufficiently, you can cut below the rooted section and pot it up as a new plant. Another technique is using hormone rooting powder or gel when taking a leaf or stem cuttings from variegated Rubber plants. Additionally, temperature control can play a crucial role in propagating variegated Rubber plants. These plants thrive in warm temperatures between 15-27°C, so maintaining consistent warmth throughout the process is important for optimal growth. 

Conclusion 

Propagating Rubber plants can be a rewarding and fulfilling experience for both beginner and experienced gardeners alike. By understanding the basic principles of propagation and following the step-by-step techniques, you can successfully grow new Rubber plants from water, soil, and cuttings. Experiment with different methods of propagation to find what works best for you. With patience, care, and a little bit of trial and error, you’ll soon have a collection of beautiful Rubber plant offspring that will bring life and greenery into your home or garden. 

How to Increase Watermelon Fruit Size: Management for Getting Bigger Watermelons

0

Watermelon is the quintessential summer fruit that brings back memories of lazy days by the pool and backyard barbecues. There’s nothing quite like sinking your teeth into a juicy slice on a hot day. Managing the size of your Watermelon fruits is crucial if you want to enjoy a bountiful harvest with large and flavorful melons. It involves understanding the factors that affect Watermelon fruit size and implementing techniques to maximize growth. 

How to Increase Watermelon Fruit Size

How to Increase Watermelon Fruit Size

Optimizing Soil Nutrients for Larger Watermelon Fruits 

One of the key factors in achieving larger Watermelon fruits is optimizing soil nutrients. By providing your Watermelon plants with the right balance of essential nutrients, you can ensure their healthy growth and maximize fruit size. First and foremost, it’s important to conduct a soil test before planting your Watermelon seeds or seedlings. This will help you determine the current nutrient levels in your soil and identify deficiencies that need to be addressed. Based on the results, you can then make targeted adjustments to optimize soil fertility. 

Nitrogen is crucial for foliage development when fertilizing Watermelons, while phosphorus promotes root growth and flower formation. Potassium plays a key role in overall plant health and fruit quality. In addition to macronutrients like nitrogen, phosphorus, and potassium, micronutrients also play a vital role in supporting optimal plant growth. These include elements like iron, manganese, zinc, copper, boron, etc., which are required by plants in smaller quantities but are equally important. 

Maximizing Sunlight Exposure for Bigger and Better Watermelon Fruits 

One crucial factor in growing bigger and better Watermelon fruits is maximizing sunlight exposure. Sunlight is like fuel for plants, providing them with the energy they need to produce larger fruits. It’s important to choose a location that receives ample sunlight throughout the day.

Watermelons thrive in full sun, so make sure there are no obstructions, such as trees or buildings, that may shade your plants. Proper spacing between plants is essential to ensure each plant gets enough sunlight. Crowded plants can block each other’s access to light, leading to smaller fruits. Give each Watermelon plant enough room to spread out and receive adequate sun exposure. 

The Role of Pruning in Increasing Watermelon Fruit Size 

Pruning plays a crucial role in increasing Watermelon fruit size. One important aspect of pruning is removing excess foliage. Watermelon plants tend to grow vigorously, resulting in dense foliage that limits sunlight penetration. Thinning out some leaves allows more sunlight to reach the developing fruits. Sunlight is vital for photosynthesis, which fuels fruit growth and sugar production. 

Another benefit of pruning is improving air circulation within the canopy. Dense foliage creates a humid microclimate that can promote disease development and hinder fruit growth. Pruning helps create space between plants, allowing better airflow and reducing the risk of diseases like powdery mildew or fungal infections. Additionally, pruning helps manage vine length. Controlling the vine’s growth by trimming excessive shoots redirects nutrients to fewer fruits, promoting their size and quality.

In case you missed it: The Ultimate Guide to the Top 16 Best Watermelon Varieties

Watermelon

It also makes harvesting easier by preventing an overly tangled mess of vines. Timing is crucial when pruning Watermelon plants. It’s best to start early in the growing season before excessive vegetative growth occurs but after seedlings are well-established. Regular maintenance throughout the season ensures optimal vine health and fruit development. 

Irrigation Techniques for Larger Watermelon Fruits 

Irrigation plays a crucial role in the growth and development of Watermelon fruits. To ensure larger fruit size, it is important to implement effective irrigation techniques. It’s essential to provide consistent and adequate moisture throughout the growing season. Watermelons have high water requirements, especially during hot summer months. Therefore, regular watering is necessary to prevent stress and promote optimal fruit development. 

Drip irrigation is highly recommended for Watermelon cultivation as it delivers water to the plant roots, minimizing evaporation and maximizing efficiency. This method also helps reduce weed growth by targeting only the desired area. Additionally, proper timing of irrigation is vital for bigger fruits. Watermelons require more water during flowering and fruit set stages compared to other phases of growth. By providing sufficient moisture at these critical periods, you can support healthy pollination and enhance fruit development. 

Fertilizer Application for Bigger Watermelon Fruits 

When it comes to growing bigger Watermelons, proper fertilizer application is essential for achieving bigger and juicier fruits. It’s important to choose a fertilizer that is specifically formulated for Watermelon plants. Look for one with a higher ratio of nitrogen to encourage vegetative growth during the early stages. As the plants start producing flowers and setting fruit, switch to a fertilizer with a higher ratio of phosphorus and potassium. These nutrients promote flower development and enhance fruit enlargement. 

To ensure optimal absorption, apply fertilizers evenly around each plant, avoiding direct contact with leaves or stems. You can either use granular fertilizers by broadcasting them on the soil surface or opt for liquid fertilizers applied through regular irrigation. Remember that overfertilization can be detrimental to your Watermelon crop. Follow manufacturer instructions regarding dosage rates and frequency of application. 

Watermelon Fruit Thinning: When, How, and Why to Thin Fruits for Optimal Growth 

When it comes to growing Watermelons, size does matter. One of the key techniques in achieving larger Watermelon fruits is fruit thinning. Fruit thinning simply means removing some of the developing fruits from the plant. This practice allows the remaining fruits to receive more nutrients and resources, resulting in better growth and bigger size.

It’s best to begin this process when the fruits are still small – around the size of a tennis ball. At this stage, you can evaluate which ones have the potential for optimal growth. To properly thin your Watermelon fruits, gently remove any excess or misshapen ones with pruning shears or scissors. Aim for spacing between each remaining fruit so they have enough room to expand without crowding each other out. 

Monitoring and Controlling Pests and Diseases for Larger Watermelon Fruits 

When it comes to growing Watermelon fruits, one of the key challenges that farmers face is dealing with pests and diseases. These unwanted visitors can cause stunted growth and smaller fruits. However, by implementing proper monitoring and control measures, you can ensure that your Watermelon fruits grow big and healthy. 

In case you missed it: Watermelon Growing Tips, Tricks, Ideas, and Secrets

Watermelon on Vine

Look out for common issues such as aphids, spider mites, powdery mildew, or bacterial wilt. If you spot any symptoms like yellowing leaves or unusual spots on the fruit, take immediate action. There are several methods you can employ to control these problems effectively. One approach is using natural predators like ladybugs or beneficial insects that feed on harmful pests. You can also opt for organic sprays or insecticidal soaps to keep pest populations in check without harming the environment. 

Harvesting Watermelon Fruits at the Right Time: The Importance of Timing for Maximizing Fruit Size and Quality 

Harvesting Watermelon fruits at the right time is crucial for maximizing fruit size and quality. The timing of when to harvest can greatly impact the taste, texture, and overall appeal of your Watermelons. One key factor to consider is the ripeness of the fruit. Watermelons should be harvested when they are fully matured but not overripe. This can be determined by examining several indicators such as skin color, tendril drying, and thumping sound. When a Watermelon reaches its peak ripeness, its skin will turn dull instead of glossy.

Additionally, if you notice that the tendril closest to the fruit has completely dried up or turned brown, this is a good sign that it’s ready to harvest. Thumping or tapping on a ripe Watermelon should produce a deep, hollow sound rather than a high-pitched one. This indicates that the flesh inside is firm and juicy. Timing also plays a role in ensuring optimal sweetness and flavor. If you wait too long to harvest your Watermelons, they may become overly sweet or even mushy. On the other hand, harvesting too early can result in underdeveloped flavors. 

Temperature Management for Bigger Watermelon Fruits 

  1. Choose the right location: Plant your Watermelon vines where they will receive ample sunlight throughout the day. This will ensure optimal growth and fruit development. 
  2. Monitor soil temperature: Use a soil thermometer to check the temperature of your Watermelon patch regularly. The ideal range is between 24-29°C. If it drops below this range, consider using row covers or mulch to retain heat. 
  3. Protect from extreme heat: High temperatures above 35°C can negatively impact fruit set and size. Provide shade during peak hours or use shade cloth to protect delicate young fruits. 
  4. Avoid frost damage: Watermelons are sensitive to frost, so make sure that all dangers of frost have passed before planting your seedlings outdoors. 
  5. Proper ventilation: Good air circulation around the plants helps regulate temperature and reduce disease pressure, so avoid overcrowding and prune any excessive foliage if necessary. 

Watermelon Tree Maintenance and Training for Increased Fruit Size 

  1. Pruning: Regular pruning helps maintain the shape and structure of the tree, allowing better air circulation and sunlight penetration. 
  2. Trellising: Using a trellis system can support the weight of growing Watermelons, preventing them from touching the ground where they may rot or become damaged. This also allows more space for other fruits to develop on the vine. 
  3. Pollination Assistance: Watermelon trees rely on bees for pollination, so it’s important to attract these beneficial insects to your orchard by planting flowers nearby or using bee-friendly techniques. 
  4. Mulching: Applying mulch around the base of your Watermelon trees helps conserve moisture, suppress weeds, and regulate soil temperature – all factors that contribute to healthier plant growth. 
  5. Pest Control: Regularly monitor your trees for signs of pests or diseases. Implement appropriate measures like natural predators or organic sprays if necessary to protect your fruits. 

In case you missed it: 22 Common Problems of Watermelon Plants: How to Fix Them, Solutions, and Treatments

Ripe Watermelon on Vine

Conclusion 

Increasing Watermelon fruit size requires careful management and attention to various factors such as soil nutrients, sunlight exposure, pruning, irrigation techniques, fertilizer application, fruit thinning, pest and disease control, timing of harvest, temperature management, and tree maintenance. By optimizing these aspects in your orchard or garden, you can enhance the growth and development of your Watermelon fruits. 

How to Increase Apple Fruit Size: Management for Getting Bigger Apple Fruits in Your Orchard  

0

Achieving bigger Apple fruits requires a holistic approach that encompasses proper pruning techniques, effective thinning methods, appropriate irrigation and fertilization practices, and vigilant pest and disease management efforts. By understanding the factors affecting Apple fruit size and implementing these strategies accordingly in your orchard maintenance routine year after year, you can enjoy the satisfaction of harvesting larger and better Apples. 

How to Increase Apple Fruit Size

How to Increase Apple Fruit Size

Optimizing Soil Nutrients for Larger Apple Fruits 

Optimizing soil nutrients is crucial for producing larger Apple fruits in your orchard. By providing the right balance of essential elements, you can ensure that your trees have everything they need to grow big and healthy. One key nutrient for Apple fruit size is nitrogen. This element plays a vital role in promoting leaf growth and overall tree vigor. In addition to nitrogen, other macronutrients like phosphorus and potassium are also important for Apple fruit development.

Phosphorus aids in root development, while potassium helps regulate water movement and improves fruit quality. Micronutrients such as iron, zinc, manganese, copper, boron, and molybdenum are equally important for optimal Apple growth. These trace elements may be required only in small quantities but play a significant role in various metabolic processes within the plant. 

Maximizing Sunlight Exposure for Bigger and Better Apple Fruits 

When it comes to growing Apple trees, maximizing sunlight exposure is crucial for achieving bigger and better fruits. To ensure maximum sunlight exposure, it’s important to plant your Apple trees in a location where they will get full sun for at least six to eight hours per day. Proper tree spacing is also essential for maximizing sunlight penetration.

By giving each tree enough space to grow and spread its branches, you can prevent overcrowding and allow sunlight to reach all parts of the tree canopy evenly. Regular pruning plays a significant role in optimizing sunlight exposure as well. Removing excess branches and thinning out dense foliage helps improve air circulation within the canopy while allowing more sunlight to penetrate through. 

The Role of Pruning in Increasing Apple Fruit Size 

Pruning plays a vital role in increasing Apple fruit size. By selectively removing certain branches, you can direct the tree’s energy toward producing larger and higher-quality fruits. Pruning helps to improve air circulation, allowing sunlight to penetrate deep into the tree. This exposure to sunlight is crucial for photosynthesis and fruit development. Additionally, proper spacing between branches ensures that each Apple receives an adequate amount of light. 

Furthermore, pruning helps maintain a balanced ratio between vegetative growth and fruit production. By removing excessive shoots, more nutrients are directed toward developing larger fruits rather than supporting unnecessary foliage. By keeping it at a manageable height and width, you can easily access all parts during harvest time without damaging any branches or causing stress to the tree. 

Irrigation Techniques for Larger Apple Fruits 

When it comes to growing larger Apple fruits, irrigation techniques play a crucial role. Providing the right amount of water at the right time is essential for optimal fruit development. First and foremost, it’s important to ensure that your Apple trees receive an adequate water supply throughout the growing season. This means monitoring soil moisture levels regularly and adjusting irrigation accordingly. Too much or too little water can have negative effects on fruit size and quality. 

In case you missed it: Top 20 Steps To Boost Your Apple Fruit Yield: Fruit Size Increase Tips, and Ideas

Red Apples

One effective technique is drip irrigation, which delivers water directly to the root zone of each tree. Another technique is mulching around the base of Apple trees. Mulch conserve soil moisture by reducing evaporation, moderates soil temperature fluctuations, and suppresses weed growth. Organic mulches are ideal as they break down over time, adding nutrients to the soil. 

Fertilizer Application for Bigger Apple Fruits 

Proper fertilization is key to achieving larger and healthier Apple fruits in your orchard. By providing the right nutrients at the right time, you can give your Apple trees the boost they need to produce bigger fruits. Apply a balanced fertilizer when the buds are just beginning to swell. This will provide a nutrient-rich foundation for growth throughout the season. Consider using organic fertilizers that release nutrients slowly over time. These types of fertilizers promote long-term soil health and reduce the risk of nutrient leaching.

Remember that more is not always better when it comes to fertilizing Apple trees. Over-fertilization can cause excessive vegetative growth at the expense of fruit development. Follow recommended dosage rates and monitor your trees’ response closely. In addition to timing and dosage, consider the specific nutrient needs of Apple trees. They require a balanced blend of nitrogen, phosphorus, and potassium, as well as micronutrients like magnesium, calcium, iron, and zinc. 

Apple Fruit Thinning: When, How, and Why to Thin Fruits for Optimal Growth 

When it comes to growing Apple trees, one of the key factors in achieving larger Apple fruit size is proper fruit thinning. Thinning fruits simply means removing some of the developing Apples from the tree. This process allows the remaining fruits to receive more nutrients and energy from the tree, resulting in bigger and higher-quality Apples at harvest time. It’s recommended to start thinning about 4-6 weeks after petal fall.

At this stage, you can easily identify which fruits are well-formed and healthy versus those that may be misshapen or damaged. To properly thin your Apple fruits, gently twist or snap off the undesired ones using your thumb and forefinger. Be sure to leave enough space between each remaining fruit so they have room to grow without touching each other. By reducing excessive fruit load through thinning, you encourage consistent production cycles. 

Monitoring and Controlling Pests and Diseases for Larger Apple Fruits 

Pests and diseases can wreak havoc on Apple trees, stunting growth and reducing fruit size. That’s why it’s crucial to monitor and control these issues in your orchard. Regular scouting is essential to catch any signs of infestation or disease early on. One way to monitor pests is by setting up sticky traps throughout the orchard. These traps will attract insects, giving you an idea of which pests are present and their population levels.

By knowing what pests are around, you can take appropriate action to control them. Integrated pest management practices involve cultural practices such as maintaining good sanitation in the orchard, removing fallen fruits, and pruning infected branches. In addition to monitoring pests, it’s also important to keep a close eye out for signs of diseases like Apple scab and powdery mildew. Regularly inspect leaves, branches, and fruits for any abnormalities or discoloration. 

Harvesting Apple Fruits at the Right Time: The Importance of Timing for Maximizing Fruit Size and Quality 

When it comes to harvesting Apple fruits, timing is everything. Picking the Apples at the right time is crucial for maximizing both their size and quality. Look out for changes in color. As Apples ripen, they go through a series of color transformations. The fruit will gradually change from green to its characteristic hue – whether that be red, yellow, or any other shade, depending on the variety. Keep an eye on this color progression, as it can indicate when the fruit is nearing maturity. 

In case you missed it: How to Grow Apples for Beginners: A Guide to Planting to Harvesting

Harvesting Fresh Apples

Another important aspect to consider is firmness. If it feels too soft or mushy, then it’s likely overripe and should have been harvested earlier. On the other hand, if it feels excessively firm, give it some more time before picking. Furthermore, pay attention to the seed color and texture inside the Apple. As Apples mature, their seeds typically turn brown rather than white or pale colored like those found in unripe fruits. 

Temperature Management for Bigger Apple Fruits 

To ensure optimal fruit size, it is important to manage the temperature effectively in your orchard. During the growing season, Apples thrive in moderate temperatures ranging from 15 to 23°C. Extreme heat or cold can adversely affect fruit development. High temperatures can cause sunburn on the fruits, while frost and freezing temperatures can damage tender buds and young fruits. 

To protect your Apple trees from extreme temperatures, consider implementing some strategies. One effective method is mulching around the base of the tree with organic materials like straw or wood chips. This helps regulate soil temperature by insulating roots against extreme heat or cold. Another technique is using shade cloth or reflective covers to shield Apple trees from excessive sunlight during peak summer months. This reduces stress on the plants and prevents sunscald on developing fruits. 

Apple Tree Maintenance and Training for Increased Fruit Size 

Proper maintenance and training of Apple trees play a crucial role in achieving larger fruit size. By implementing the right techniques, you can encourage healthy growth and maximize fruit production. Regular pruning is essential to maintain an open canopy that allows sunlight to penetrate the tree’s inner branches. This not only promotes better photosynthesis but also ensures uniform fruit development throughout the tree.

Pruning also helps remove diseased or damaged branches, improving overall tree health. When it comes to training your Apple trees, proper support systems like trellises or stakes are necessary to prevent branch breakage under heavy fruit loads. Additionally, regularly thinning out excess fruits during the early stages of development allows energy resources to be distributed more effectively among remaining fruits – resulting in larger-sized Apples. 

In case you missed it: How to Control Pests and Diseases in Apple Trees: Causes, Symptoms, Chemical, and Biological Management

Fresh Ripe Apples

Regular soil testing should be conducted to ensure optimal nutrient uptake. Proper irrigation techniques such as drip or sprinkler systems help provide consistent moisture levels without overwatering – a key factor in preventing cracking or splitting of fruits. Pest control measures need to be implemented promptly using organic methods whenever possible. Maintaining a clean orchard floor by removing fallen leaves and debris reduces pest habitat and prevents disease spread. 

Conclusion 

Increasing the size of Apple fruits in your orchard requires a combination of various factors working together. By optimizing soil nutrients and ensuring proper sunlight exposure, you can provide the ideal conditions for Apple trees to produce larger fruits. By implementing these strategies consistently in your orchard management practices, you can enhance not only the size but also the overall quality of your Apple harvests.

Remember that patience is key; it may take several seasons before you see significant improvements in fruit size. With dedication and careful attention to detail, your efforts will be rewarded with bountiful yields of deliciously large Apples year after year. 

Best Fertilizer for Black Pepper Plants: Nutrient Management in Black Pepper/Piper Nigrum Farms  

0

Black Pepper plants, known for their aromatic and spicy fruits, require proper nutrient management to thrive. One crucial aspect of this management is the use of fertilizers. Fertilizers play an essential role in providing essential nutrients that Black Pepper plants need to grow vigorously and produce high-quality peppercorns. In this blog post, let us go through the best fertilizer for black pepper plants

Best Fertilzer for Black Pepper Plants

Best Fertilzer for Black Pepper Plants

Nutritional Needs of Black Pepper Plants 

Black Pepper plants are perennial vines that require specific nutritional needs to thrive and produce high-quality peppercorns. Understanding the nutritional requirements of Black Pepper plants is key to successful cultivation and a bountiful harvest. One crucial nutrient that Black Pepper plants need is nitrogen. Nitrogen plays a vital role in promoting vegetative growth and enhancing overall plant development. Adequate nitrogen supply ensures healthy foliage and robust vine growth. 

Another important nutrient for Black Pepper plants is phosphorus. Phosphorus aids in root development, flowering, and fruiting. It also assists in energy transfer within the plant, contributing to increased yields. Black Pepper plants benefit from regular applications of phosphorus-rich fertilizers during their growing season. 

Potassium is another key nutrient needed by Black Pepper plants for optimal growth. Potassium regulates water movement within the plant cells, improves disease resistance, enhances flower quality, and promotes fruit ripening. Adequate potassium levels ensure sturdy stems and healthy fruit development. In addition to these primary macronutrients (nitrogen, phosphorus, potassium), Black Pepper plants also require micronutrients such as iron, zinc, manganese, copper, and boron for proper growth and development. 

Organic Fertilizers for Black Pepper Plants 

Organic fertilizers are a popular choice for Black Pepper plants due to their natural composition and environmentally friendly benefits. One excellent organic fertilizer option is compost. Compost not only adds essential nutrients but also improves soil structure and fertility. Another organic choice is seaweed-based fertilizers. Seaweed contains high levels of potassium, which is crucial for enhancing fruiting in Black Pepper plants.

Additionally, it provides trace minerals that contribute to overall plant health and vigor. Fish emulsion is yet another organic fertilizer option for Black Pepper plants. This liquid fertilizer is made from fermented fish waste and has high nitrogen content, promoting healthy foliage growth. Bone meal contains phosphorus and calcium, two vital elements needed by Black Pepper plants during flowering and fruit development stages. It ensures robust root growth as well. 

Synthetic Fertilizers for Black Pepper Plants 

When it comes to nutrient management in Black Pepper farms, synthetic fertilizers can play a crucial role. One of the key advantages of synthetic fertilizers is their precise nutrient composition. This targeted approach ensures that Black Pepper plants receive optimal nutrition without any guesswork.

In case you missed it: Black Pepper Varieties in India: Different Types of Black Peppers

Fresh Pepper Plant

Moreover, synthetic fertilizers often release nutrients quickly, making them readily available for uptake by the plant’s roots. This fast-acting characteristic can be particularly beneficial during periods when immediate nutrient supplementation is required or when faced with specific deficiencies. 

Nitrogen-Based Fertilizer for Black Pepper Plants 

Nitrogen is responsible for photosynthesis and healthy leaf formation. Additionally, nitrogen promotes vigorous vegetative growth, leading to healthier and more productive plants. When choosing a nitrogen-based fertilizer for your Black Pepper plants, there are several options available. One popular choice is ammonium sulfate, which provides readily available nitrogen to the plants.

Another option is urea, a common synthetic fertilizer that contains high levels of nitrogen. It’s important to note that while synthetic fertilizers can provide quick results by supplying nutrients directly to the plant roots, they may have long-term negative impacts on soil health. Therefore, organic alternatives such as composted manure or fish emulsion can be considered. 

Phosphorus-Rich Fertilizer for Black Pepper Plants 

Phosphorus is an important nutrient for the growth and development of Black Pepper plants. It plays a key role in including energy transfer, root development, and flowering. Therefore, providing an adequate supply of phosphorus-rich fertilizer is vital for optimal growth and yield. When choosing a phosphorus-rich fertilizer for your Black Pepper plants, it’s important to consider its availability and solubility. Easily soluble phosphorus fertilizers can be quickly taken up by the plant roots, ensuring efficient nutrient uptake. 

One popular phosphorus-rich fertilizer option is bone meal. This slow-release characteristic makes it ideal for long-term nutrient management in Black Pepper farms. Another commonly used option is rock phosphate. Although it has lower solubility compared to other forms of fertilizers, rock phosphate can still provide a sustainable source of phosphorus to Black Pepper plants when applied correctly. It requires microbial activity in the soil to break down and release the nutrients gradually. 

In addition to these organic options, synthetic phosphorous fertilizers are also available on the market. These fertilizers often contain concentrated levels of phosphorous compounds that the plants can readily absorb. Remember that while providing adequate amounts of phosphorous through fertilizer applications is important, it’s equally crucial not to overdo it.

Potassium-Based Fertilizer for Black Pepper Plants 

Potassium plays a crucial role in various physiological processes, including photosynthesis, water regulation, and nutrient uptake. One popular option for potassium-based fertilizers is potassium sulfate. This fertilizer contains potassium and sulfur, both essential elements for plant growth.

Potassium sulfate is easily absorbed by the plant’s roots, ensuring quick availability of this important nutrient. Another option to consider is the muriate of potash (potassium chloride). While it provides a concentrated source of potassium, it’s important to note that excessive chlorine content may harm sensitive crops or soil microorganisms. Therefore, it’s crucial to apply muriate of potash cautiously and in appropriate amounts. 

Micronutrient Fertilizers for Black Pepper Plants 

Micronutrients play a key role in the growth and development of Black Pepper plants. These essential elements are required in smaller quantities compared to macronutrients, but they are equally important for maintaining plant health and maximizing yields. One micronutrient that is particularly beneficial for Black Pepper plants is iron.

Iron is responsible for photosynthesis – the process by which plants convert sunlight into energy. Another micronutrient that Black Pepper plants need is manganese. Manganese aids in various metabolic processes within the plant, including enzyme activation and nitrogen metabolism. A deficiency of manganese can lead to reduced fruit set and poor-quality berries. 

In case you missed it: Growing Black Pepper from Cuttings, Seed (Kali Mirch)

Black Pepper Plant with Peppercorns

Zinc is yet another vital micronutrient required by Black Pepper plants. It plays a significant role in hormone synthesis, protein formation, and carbohydrate metabolism. Zinc deficiency can result in distorted leaf growth and weak stems. Farmers often use fertilizers specifically formulated with high concentrations of iron, manganese, zinc, or other necessary trace elements. These fertilizers provide targeted nutrition to meet the specific needs of Black Pepper plants throughout their growing cycle. 

Slow-Release Fertilizers for Black Pepper Plants 

One benefit of using slow-release fertilizers is that they reduce the frequency of application. Instead of needing to apply fertilizer every few weeks, you can simply apply it once and let it gradually release its nutrients over time. This not only saves time and effort but also prevents excessive nutrient accumulation in the soil. Another advantage is that slow-release fertilizers promote better root development.

The gradual release allows for sustained nutrient availability, which encourages strong and healthy root growth. Well-developed roots are crucial for Black Pepper plants as they help with water absorption and anchoring the plant securely in the soil. Additionally, slow-release fertilizers minimize nutrient loss through leaching or runoff. Since these fertilizers slowly break down, there is less chance for excess nutrients to be washed away by rainwater or irrigation. This means more efficient use of resources and reduced environmental impact. 

Best Practices for Fertilizing Black Pepper Plants 

When it comes to fertilizing Black Pepper plants, there are a few key practices that can help ensure their healthy growth and optimum yield. First and foremost, it’s important to understand the specific nutritional needs of Black Pepper plants. This will guide you in selecting the right type and amount of fertilizer. One crucial practice is to provide a balanced nutrient management approach.

Black Pepper plants require nitrogen, phosphorus, potassium, and various micronutrients for optimal growth. Timing is another vital factor when it comes to fertilization. It’s best to apply fertilizers during the active growing season or just before new shoots emerge. Proper application techniques also play a key role in effective fertilization. Avoid applying excessive fertilizer at once, as this can cause nutrient imbalances or even damage the roots of your Black Pepper plants.

In case you missed it: Growing Peppers in Grow Bags: Planting from Seed and Care

Freshly Harvested Peppercorns

Instead, divide your fertilizer applications into multiple smaller doses throughout the growing season. Regular soil testing is a recommended practice for monitoring nutrient levels in your Black Pepper farm. By knowing exactly what nutrients are lacking or excessive in your soil, you can adjust your fertilizer application accordingly. 

Conclusion 

Proper nutrient management is crucial for the successful cultivation of Black Pepper plants. By understanding their nutritional needs and using the right fertilizers in the correct dosage and application methods, farmers can ensure optimal growth and yield. By following best practices in nutrient management and avoiding pitfalls when using fertilizers on Black Pepper plants, farmers can maximize crop productivity while minimizing negative impacts on the environment. Remember that every farm is unique, with its own set of conditions and challenges.  

Black Pepper Varieties in India: Different Types of Black Peppers

0

Black Pepper has held a special place in Indian cuisine and culture. From its ancient origins to its widespread use today, this spice continues to captivate taste buds with its unique flavors and aromas. In India, several varieties of Black Pepper showcase different flavor profiles and characteristics. 

Black Pepper Varieties in India

Black Pepper Varieties in India

Malabar Garbled 

Malabar Garbled is one of the most popular and widely recognized varieties of Black Pepper in India. This unique variety is known for its bold flavor and rich aroma. What sets Malabar Garbled apart is its distinct taste profile. It has a robust and sharp flavor with hints of citrus and earthy undertones. This makes it perfect for adding depth to savory dishes or enhancing the flavors of soups, stews, and curries.  

Tellicherry Garbled Special Extra Bold (TGSEB) 

Tellicherry Garbled Special Extra Bold (TGSEB) is a premium variety of Black Pepper that originates from India. The distinguishing feature of Tellicherry Garbled Special Extra Bold lies in its large size and bold appearance. The peppercorns are carefully handpicked when they reach their optimum ripeness, ensuring maximum flavor and aroma. They undergo a meticulous process of sun-drying, which helps to intensify their pungent taste. 

What sets Tellicherry Garbled Special Extra Bold apart from other varieties is its unique garbling technique. During this process, any impurities or foreign particles are meticulously removed to ensure only the finest peppers make it to your plate. This attention to detail ensures that every bite delivers an explosion of spicy goodness. 

Wynad Special 

Wynad Special is a unique variety of Black Pepper those hails from the picturesque region of Wynad. This variety is known for its bold and robust flavor profile, making it the best choice among spice enthusiasts. The climate and soil conditions in Wynad contribute to the distinct characteristics of this pepper. The rich volcanic soil and ample rainfall create an ideal environment for the pepper vines to thrive.

As a result, Wynad Special peppers are known for their intense aroma and strong taste. One notable feature of Wynad Special is its size. These peppercorns are larger compared to other varieties, which adds to their visual appeal. They have a dark brown color with a wrinkled skin texture that indicates maturity. 

Panniyur-1 

Panniyur-1 is a popular variety of Black Pepper cultivated in India. This unique variety is known for its distinctive flavor profile and aromatic qualities. The Panniyur-1 Black Pepper berries are medium-sized with a wrinkled surface. They have a rich, robust flavor that adds depth to any dish. The aroma of this particular variety is strong and pungent, making it perfect for enhancing the taste of various cuisines. 

One notable characteristic of Panniyur-1 Black Pepper is its high piperine content. Piperine is the compound responsible for the spiciness and heat in Black Peppers. The cultivation process of Panniyur-1 involves careful attention to detail and traditional farming practices passed down through generations. Farmers in the Panniyur region take pride in producing high-quality Black Peppers that meet strict standards. 

Panniyur-5 

Panniyur-5 is a unique variety of Black Pepper that hails from the Panniyur region in India. What sets Panniyur-5 Black Pepper apart from other varieties is its distinctive aroma and taste. It has a strong and pungent flavor with hints of earthiness and spice. The peppercorns themselves are slightly larger compared to other varieties, giving them a visually appealing appearance. 

One of the reasons why Panniyur-5 stands out is because it undergoes a meticulous selection process during harvesting. Only the best quality berries are chosen, ensuring that each batch maintains high standards of taste and aroma. Because of its rich flavor profile, Panniyur-5 is often used in various culinary applications.  

Panniyur-8 

Panniyur-8 is a unique variety of Black Pepper that originates from India. This variety is renowned for its bold and aromatic flavor profile, making it highly sought after in the culinary world. One distinctive feature of Panniyur-8 Black Pepper is its large size. The peppercorns are noticeably bigger compared to other varieties, which adds visual appeal to any dish they are added to.

In case you missed it: Growing Black Pepper from Cuttings, Seed (Kali Mirch)

Black Peppercorn

Furthermore, this larger size also means that each peppercorn packs a powerful punch of flavor. In terms of taste, Panniyur-8 offers a delightful combination of heat and sweetness. It has a robust spiciness that lingers on the palate without being overwhelming.  

Panniyur-10 

It is known for its distinct flavor, which sets it apart from other types of Black Peppers. The Panniyur-10 variety is grown using organic farming methods used during cultivation. This makes it a healthier choice for those who prefer organic foods. One notable characteristic of Panniyur-10 Black Pepper is its size. The peppercorns are relatively larger compared to other varieties, making them visually appealing and easier to handle in cooking. Its spicy kick adds depth and warmth to any dish to which it is added. 

Kuthiravally 

Kuthiravally is a unique variety of Black Pepper that originates from India. It is known for its distinct flavor and aroma, making it highly sought after by spice enthusiasts. The Kuthiravally pepper is a medium-sized fruit with a wrinkled surface, giving it an interesting appearance. Its taste profile is characterized by a subtle heat and hints of citrus notes, which adds depth to any dish it is used in. What sets Kuthiravally apart from other best Black Pepper varieties is its versatility. Due to its popularity and demand, Kuthiravally pepper cultivation has significantly increased over the years.  

Karimunda 

Karimunda is a unique variety of Black Pepper found in India. It is known for its distinct aroma and flavor, making it highly sought after in the culinary world. Karimunda peppers are handpicked when they are fully ripe and then sun-dried to enhance their flavor. The drying process also contributes to their dark brown color and wrinkled texture. 

One of the key characteristics that sets Karimunda apart from other varieties is its bold spiciness. When added to dishes, it imparts a strong and intense heat that adds depth and complexity to any recipe. This makes it particularly popular among those who enjoy fiery flavors. 

Kalluvally 

Kalluvally, a variety of Black Pepper found in India, is known for its distinct flavor and aroma. The unique soil composition and climatic conditions of this region contribute to the exceptional quality of Kalluvally Black Pepper. The berries of Kalluvally are plump and round with a dark brown color. When dried, they turn into small, wrinkled peppercorns that pack a punch in terms of flavor.  

Alleppey Green Extra Bold (AGEB) 

Alleppey Green Extra Bold (AGEB) is a popular variety of Black Pepper that originates from India. The unique characteristics of Alleppey Green Extra Bold make it stand out among other varieties of Black Pepper. The large size of the peppercorns ensures a strong flavor profile when used in culinary preparations.  

Balankotta 

Balankotta is a unique variety of Black Pepper that originates from India. Known for its distinct aroma and flavor, Balankotta pepper is highly sought after by spice enthusiasts and chefs alike. What sets Balankotta apart is its intense heat combined with a rich, earthy taste. Not only does Balankotta excite your taste buds with its fiery kick, but it also possesses numerous health benefits. 

Arakkulam Munda 

Arakkulam Munda is a unique Black Pepper variety that hails from the lush green forests of Kerala, India. This Black Pepper has a rich history and cultural significance.  One distinguishing feature of Arakkulam Munda is its bold size, which sets it apart from other varieties. The larger size makes it visually appealing and adds an extra burst of flavor when used in cooking or seasoning dishes.

In case you missed it: Growing Peppers in Grow Bags: Planting from Seed and Care

Freshly Harvested Peppercorns

The climate and soil conditions of Arakkulam provide just the right environment for cultivating this special variety. The combination of ample rainfall, fertile soil, and skilled farming techniques contributes to its exceptional quality. 

Conclusion 

The diversity of Black Pepper varieties in India reflects the country’s rich agricultural heritage and geographical diversity. Whether you’re looking to add depth to your dishes or enhance your health through natural remedies, these different types of Black Peppers offer something unique for everyone. Next time you reach for that jar of Black Pepper in your kitchen cabinet, consider exploring the wide range of options available from various regions across India. Experimenting with different flavors can elevate your culinary creations to new heights. 

How to Increase Strawberry Fruit Size: Fruit Size Management for Getting Bigger Strawberry Fruits

0

When it comes to growing strawberries, one of the key factors that determines their quality is their size. Larger strawberries not only look more appealing but also tend to have a better taste and texture. That’s why many Strawberry growers are interested in finding ways to increase fruit size in their orchards.

How to Increase Strawberry Fruit Size

Remember to implement these practices consistently throughout the growing season and tailor them according to specific cultivars or environmental conditions unique to your orchard. Observation, experimentation, and an attentive approach will ultimately lead you toward achieving bigger and better strawberries. 

How to Increase Strawberry Fruit Size

Optimizing Soil Nutrients for Larger Strawberry Fruits 

To achieve larger Strawberry fruits in your orchard, one of the key aspects to focus on is optimizing soil nutrients. Providing your plants with the right balance of essential elements will promote healthy growth and maximize fruit size.  Nitrogen is an important nutrient for promoting vegetative growth, but too much can result in excessive foliage at the expense of fruit development.

Phosphorus encourages root development and flower formation, while potassium improves overall plant health and helps enhance fruit quality. In addition to these macronutrients, micronutrients like iron, manganese, zinc, and boron are also crucial for optimal Strawberry growth. These trace elements play vital roles in various physiological processes within the plant. Consider using organic fertilizers or compost to improve soil fertility naturally. 

Maximizing Sunlight Exposure for Bigger and Better Strawberry Fruits 

When it comes to growing bigger and better Strawberry fruits, maximizing sunlight exposure is a crucial factor. It’s important to choose the right location for your Strawberry patch. Look for an area that receives full sun throughout the day. This means at least 6-8 hours of direct sunlight. Avoid planting them in shady spots or areas with too much shade from surrounding trees or buildings. 

Next, consider the layout and spacing of your Strawberry plants. Ensure that they are not overcrowded, which can lead to shading and competition for light. Give each plant enough space so that their leaves have room to spread out and capture maximum sunlight. Regular pruning is also key to maximizing sunlight exposure for your strawberries.  

The Role of Pruning in Increasing Strawberry Fruit Size 

Pruning plays a crucial role in increasing the size of Strawberry fruits. One important aspect of pruning is removing runners’ plants that emerge from the main Strawberry plant. While these runners are essential for propagating new plants, allowing too many to grow can divert resources away from fruit development. By cutting back excess runners, you ensure that the plant’s energy is focused on producing bigger fruits. Another pruning technique is thinning out overcrowded foliage.

In case you missed it: Top 15 Strawberry Varieties to Grow in Your Garden: Best List of Strawberry Varieties for High Profits

Strawberry Harvest

Strawberry plants need ample airflow and sunlight to thrive, so it’s important to remove dense clusters of leaves that may block light from reaching the lower parts of the plant. This not only improves overall growth but also encourages larger fruit development. Additionally, pruning dead or diseased leaves helps prevent diseases and ensures that nutrients are directed toward healthy parts of the plant. Regularly inspecting your Strawberry plants and promptly removing any damaged or infected foliage will contribute to better fruit size and quality. 

Irrigation Techniques for Larger Strawberry Fruits 

Adequate water supply is essential for nutrient absorption, cell expansion, and overall plant growth. To ensure your Strawberry plants receive the right amount of water, consider implementing these irrigation techniques. It’s important to provide consistent moisture throughout the growing season. Strawberries require regular watering, especially during hot and dry periods.  

Drip irrigation systems are highly effective for strawberries as they deliver water directly to the roots while minimizing evaporation and reducing weed growth. Installing drip lines or using soaker hoses ensures efficient water distribution without wetting the foliage excessively. Mulching around Strawberry plants helps retain soil moisture by preventing evaporation. Organic materials make excellent mulch options as they also suppress weeds and regulate soil temperature. 

Fertilizer Application for Bigger Strawberry Fruits 

Proper fertilizer application is essential for promoting the growth of bigger and better Strawberry fruits in your orchard. By providing the right nutrients at the right time, you can ensure that your plants have all they need to produce large, juicy berries. When it comes to fertilizing strawberries, timing is key. Start by applying a balanced fertilizer before planting to provide a good foundation for growth. Once the plants are established, apply nitrogen-rich fertilizer during the growing season. 

It’s important to remember that too much fertilizer can be detrimental to fruit size and quality. Avoid over-fertilization by carefully following recommended application rates and monitoring soil nutrient levels regularly. In addition to nitrogen, strawberries also require phosphorus and potassium for optimal growth. Incorporate these nutrients into your fertilization plan by using a complete fertilizer or supplementing with specific products designed for strawberries. 

Strawberry Fruit Thinning: When, How, and Why to Thin Fruits for Optimal Growth 

When it comes to growing strawberries, one important aspect that often gets overlooked is fruit thinning. Ideally, this process should begin once the fruits reach about 1/2 inch in diameter. At this stage, you can easily identify which fruits are smaller and less developed compared to others. Thinning can be done by simply pinching off or snipping away the excess fruits from each cluster.

It’s essential to leave enough space between each fruit for proper air circulation and sunlight penetration. This will ensure that each remaining fruit receives an adequate amount of nutrients and energy for its growth. Thinning out your Strawberry fruits allows the plant to focus its resources on fewer but larger berries. This means more nutrients are available per fruit, resulting in bigger and juicier strawberries. 

Monitoring and Controlling Pests and Diseases for Larger Strawberry Fruits 

To achieve larger Strawberry fruits in your orchard, it is important to monitor and control pests and diseases effectively. These visitors can damage your plants, stunting their growth and reducing fruit size. Regular monitoring is key to ensuring optimal conditions for your strawberries. Start by inspecting your plants regularly for any signs of pests or diseases. Look out for common culprits such as aphids, spider mites, powdery mildew, and fungal infections.  

In case you missed it: Hydroponic Strawberry Gardening Techniques, Tips

Strawberry

There are various methods you can employ to control pests and diseases in a natural and eco-friendly manner. One approach is using biological controls like ladybugs or beneficial nematodes that feed on harmful insects. You can also try companion planting with herbs such as basil or marigolds that repel pests naturally. Another important aspect of pest control is maintaining good garden hygiene. Remove any dead leaves or plant debris promptly, as they can harbor pests and disease-causing pathogens. 

Harvesting Strawberry Fruits at the Right Time: The Importance of Timing for Maximizing Fruit Size and Quality 

Harvesting Strawberry fruits at the right time is crucial for maximizing their size and quality. Timing plays a significant role in ensuring that you get the most out of your Strawberry plants, both in terms of yield and flavor. The first indicator that strawberries are ready to be harvested is their color. Ripe strawberries will have a vibrant red hue all over, with no trace of green or white remaining. They should also feel firm but not too hard when gently squeezed. 

To determine if your strawberries are truly ripe, it’s important to taste-test them. The fruit should be sweet and juicy, with a burst of flavor. If the berries lack sweetness or are sour, they may need more time on the plant to fully ripen. Another key factor to consider when harvesting strawberries is weather conditions. Ideally, pick your berries early in the morning when temperatures are cooler.  

Temperature Management for Bigger Strawberry Fruits 

Temperature plays a key role in the growth and development of Strawberry fruits. To ensure bigger fruit size, it is important to manage temperature effectively in your orchard. During the flowering stage, maintaining cooler temperatures can benefit fruit set and increase the chances of bigger fruits. Cooler temperatures encourage proper pollination by extending the pollen viability period.

This allows for more efficient fertilization and ultimately leads to larger strawberries. On the other hand, warmer temperatures during berry development promote faster ripening but may result in smaller fruit size. It is essential to strike a balance between temperature and ripening time to maximize fruit size. To manage temperature effectively, consider using shade cloth or row covers during hot periods to protect plants from excessive heat.

Additionally, strategic positioning of your Strawberry plants can help take advantage of natural shade provided by nearby trees or structures. Proper ventilation within your orchard is also crucial for temperature management. Good airflow helps regulate heat buildup and prevents stagnant air pockets, which can lead to higher temperatures that negatively impact fruit growth. 

Strawberry Tree Maintenance and Training for Increased Fruit Size 

Proper maintenance and training techniques can play a significant role in ensuring larger fruit size in your Strawberry trees. First, it is important to prune your Strawberry tree regularly. Pruning removes dead or diseased branches, allowing more sunlight and air circulation, which can ultimately contribute to bigger fruit size. Additionally, thinning out the excess branches will direct energy towards fewer fruits, resulting in larger ones. Another key aspect of maintaining healthy Strawberry trees is regular watering.

In case you missed it: Best Fertilizers for Strawberries: Homemade, Organic, Compost, Liquid, NPK Ratio, and Schedule

Ripe Strawberries

Adequate irrigation ensures that the plants receive the necessary nutrients they need for optimal growth. It is essential to water deeply rather than frequently so that the roots have access to moisture deeper in the soil. Fertilizer application also plays a crucial role in maximizing fruit size. Using a balanced fertilizer high in potassium can promote healthier root development and enhance overall plant vigor. Regularly checking leaves for signs of infestation or diseases such as powdery mildew is vital for early intervention. 

Conclusion 

By implementing these fruit size management techniques in your Strawberry orchard, you can significantly increase the size and quality of your Strawberry fruits. Optimizing soil nutrients, maximizing sunlight exposure, pruning effectively, applying irrigation techniques and fertilizers strategically, thinning fruits when necessary, monitoring pests and diseases diligently, harvesting at the right time, managing temperature appropriately, and maintaining proper tree training can all contribute to bigger and better Strawberry fruits. 

How to Get Bigger Dragon Fruits: Increase with Dragon Fruit Size Management

0

Dragon fruit, with its unique appearance, has captured the attention of many fruit enthusiasts worldwide. However, achieving larger-sized Dragon fruits requires a deeper understanding of their growth process and careful consideration of various factors that influence their size. Increasing the size of Dragon fruits in your orchard requires careful fruit size management techniques.

How to Get Bigger Dragon Fruits

By understanding the growth process and factors affecting fruit size, you can optimize conditions for larger Dragon fruits. By implementing these techniques and avoiding pitfalls in fruit size management, you can enhance the quality and yield of your Dragon fruits.  

How to Get Bigger Dragon Fruits

Optimizing Soil Nutrients for Larger Dragon Fruits 

To grow bigger and juicier Dragon fruits, it’s essential to optimize the soil nutrients in your orchard. The right balance of nutrients will provide the necessary support for the fruit’s growth and development. You can ensure that your Dragon fruit plants get adequate amounts of nitrogen, phosphorus, potassium, and other essential elements. 

One way to enhance soil fertility is by incorporating organic matter into the planting area. This will not only improve nutrient availability but also enhance soil structure and water-holding capacity. In addition to organic matter, consider using slow-release fertilizers specifically formulated for Dragon fruits.  

Maximizing Sunlight Exposure for Bigger and Better Dragon Fruits 

When it comes to growing Dragon fruits, maximizing sunlight exposure is crucial for achieving bigger and better fruits. These tropical plants grow well in warm climates with plenty of sunshine, so it’s important to ensure they receive adequate light throughout the day. To maximize sunlight exposure, start by selecting a location in your orchard that receives full sun. Ideally, this means a spot that gets at least 6-8 hours of direct sunlight each day.

Avoid planting Dragon fruit trees in shaded areas or near tall buildings or trees that could block the sun’s rays. Another way to optimize sunlight exposure is by properly spacing out your Dragon fruit plants. Give them enough room to spread out their sprawling vines and leaves, ensuring that neighboring plants do not cast shadows on one another. This will allow each plant to absorb as much sunlight as possible.  

The Role of Pruning in Increasing Dragon Fruit Size 

Pruning plays a crucial role in increasing the size of Dragon fruits in your orchard. By strategically removing certain parts of the plants, you can encourage better fruit development and maximize their overall size. Pruning helps to redirect the plant’s energy towards fruit production. By removing excess branches and foliage, you reduce competition for nutrients and water within the plant.  

In case you missed it: How to Grow Dragon Fruit/Pitaya from Cuttings to Harvest: Check How this Guide Helps Beginners

Dragon Fruit Harvest

Trimming away dense foliage also ensures that sunlight reaches all parts of the plant evenly, promoting photosynthesis and enhancing fruit size. When it comes to pruning Dragon fruits, it’s important to focus on removing weak or damaged branches as well as any suckers that divert energy away from main stems. Regularly thinning out excessive growth will prevent overcrowding and allow the remaining branches to thrive. 

Irrigation Techniques for Larger Dragon Fruits 

Irrigation plays a vital role in the development and growth of Dragon fruit plants. Adequate water supply is essential for larger fruit production. It’s important to ensure that your Dragon fruit plants receive regular and consistent watering. A drip irrigation system can be highly effective in providing controlled moisture levels directly to the roots. Additionally, timing is crucial when irrigating Dragon fruit plants. It’s best to water them early in the morning or late in the evening when temperatures are cooler. This allows the plant to absorb water more efficiently without excessive evaporation. 

Fertilizer Application for Bigger Dragon Fruits 

One crucial aspect of growing bigger Dragon fruits is proper fertilization. By supplying the right nutrients to your plants, you can enhance their growth and increase fruit size. It’s important to understand the nutrient requirements of Dragon fruits. These tropical cacti thrive in well-drained soil that is rich in organic matter. They need a balanced fertilizer with a higher phosphorus content, as this promotes flowering and fruit development. 

When applying fertilizer, you should follow the instructions on the packaging carefully. It’s best to use slow-release granular fertilizers or organic options like compost or manure. Apply the fertilizer evenly around each plant, ensuring it doesn’t come into direct contact with the stems or roots. Regularly monitor your plants’ nutrient levels by conducting soil tests. This will help you determine if any deficiencies need to be addressed through additional fertilization. 

Dragon Fruit Thinning: When, How, and Why to Thin Fruits for Optimal Growth 

Fruit thinning involves removing excess fruits from the plant to promote better growth and development of the remaining ones. This process allows the plant to allocate its energy more effectively, resulting in larger and tastier Dragon fruits. Ideally, you should begin this process when the fruits are still small and green. It’s important not to wait until they become too big or mature because that could hinder their growth potential. 

Now, let’s talk about how actually to perform fruit thinning. First, carefully inspect each fruit on your plant and select those that appear damaged or misshapen. These are prime candidates for removal. Next, gently twist or cut off these undesirable fruits using clean pruning shears or scissors. Thinning out your Dragon fruits serves several purposes beyond just improving their size. By reducing overcrowding on the plant, you also enhance air circulation around the remaining fruits while minimizing disease risks. 

Monitoring and Controlling Pests and Diseases for Larger Dragon Fruits 

Monitoring and controlling pests and diseases is essential for ensuring the productivity of your Dragon fruit plants. These pesky creatures cause stunted growth, reduced fruit quality, and even complete crop loss if left unchecked. Regular monitoring is key to identifying any signs of pests or diseases early on. Inspect your plants regularly for any unusual leaf discoloration, spots, holes in the fruits, or wilting stems. It’s also important to keep an eye out for common insect pests such as mealybugs, scale insects, aphids, and spider mites. 

In case you missed it: How to Prepare the Soil for Dragon Fruit Plants/Trees: Best Soil Mix, pH, Compost, and Recipe

Bug Cut Dragon Fruit

Once you’ve identified a pest or disease issue in your Dragon fruit plantation, it’s essential to take swift action. There are various methods you can employ to control these unwanted visitors effectively. Integrated Pest Management techniques involve using a combination of cultural practices like maintaining proper sanitation in the orchard area by removing fallen leaves and debris that may harbor pests. 

Harvesting Dragon Fruits at the Right Time: The Importance of Timing for Maximizing Fruit Size and Quality 

Timing is everything when it comes to harvesting Dragon fruits. One key indicator is color. Dragon fruits come in various hues, ranging from bright pink to deep red or even yellow. As they ripen, their skin becomes vibrant and starts to develop a slight give when gently pressed. Another sign to watch for is texture.

Ripe Dragon fruits have a firm yet slightly soft feel, like a ripe avocado. If they’re too hard or mushy, then they’re not ready yet. When harvesting your Dragon fruits, use clean pruning shears or scissors to carefully cut them off the plant without damaging either the fruit or nearby branches. 

Temperature Management for Bigger Dragon Fruits 

Dragon fruit plants thrive in warm climates, ideally between 18-30°C. During the flowering stage, maintaining optimal temperatures is vital for the fruit set. High temperatures above 32°C can hinder pollination and lead to smaller fruits. Similarly, excessively low temperatures below 10°C can cause flower drop or poor fruit development. 

To manage temperature effectively, consider planting Dragon fruits in areas with good air circulation and protection from strong winds that could exacerbate temperature fluctuations. In colder regions, using greenhouses or hoop houses can help create a more controlled microclimate for the plants. Monitoring weather forecasts and taking appropriate measures, such as providing shade during scorching heatwaves or protecting plants from frost during cold snaps, will ensure optimal growing conditions throughout the season. 

Dragon Tree Maintenance and Training for Increased Fruit Size 

1. Pruning: Regular pruning is crucial for maintaining a well-shaped tree structure and promoting better fruit development. Remove any dead or damaged branches, as well as excessive suckers that compete for nutrients. This allows the energy to be directed towards fruit production. 

2. Support System: Installing a sturdy support system, such as trellises or stakes, will help keep the plant upright and prevent damage to the developing fruits. 

3. Training Techniques: Employing proper training techniques like tying branches horizontally along supports can encourage more even distribution of nutrients throughout the plant, resulting in larger and healthier fruits. 

4. Pest Control: Regularly monitor your Dragon tree for pests like aphids or mealybugs, which can hinder fruit growth. Use organic methods or pesticides specifically designed for these insects to maintain a healthy environment for optimal fruit development. 

5. Disease Management: Fungal diseases like anthracnose can affect both the foliage and fruit of Dragon trees if not properly managed. Ensure good air circulation around plants by spacing them appropriately and treating them with fungicides when necessary. 

In case you missed it: How to Attract Dragonflies to Your Garden: Ideas, Tips, and Techniques

Dragon Fruit

Conclusion 

Implement these tips into your Dragon fruit farming practices, and get ready to indulge in big, juicy Dragon fruits straight from your orchard. The satisfaction of growing such delicious treasures will be truly rewarding – both for yourself and anyone lucky enough to taste them. 

How to Get Bigger Mango Fruits: Increase Mango Size with Fruit Size Management

0

Successful Mango farming requires careful attention to fruit size management throughout different stages of cultivation – from planting to harvesting. By implementing effective practices like pruning, thinning, and fertilization strategies tailored to specific cultivars or varieties – growers can achieve larger-sized Mangoes that not only meet consumer preferences but also maximize profits. 

How to Get Bigger Mango Fruits

How to Get Bigger Mango Fruits

Optimizing Soil Nutrients for Larger Mango Fruits 

When it comes to growing Mangoes, one of the key factors that can greatly impact fruit size is the optimization of soil nutrients. Providing your Mango trees with the right balance of essential nutrients is crucial for ensuring healthy growth and maximizing fruit production. Mango trees have specific nutrient requirements throughout their growth stages.

During flowering and fruiting periods, they need enough phosphorus and potassium to support flower formation, fruit set, and enlargement. Nitrogen should be provided in moderation, as higher nitrogen can increase vegetative growth at the expense of fruiting. Organic matter improves soil fertility and moisture retention.  

Maximizing Sunlight Exposure for Bigger and Better Mango Fruits 

Sunlight is the key factor in determining the size and quality of Mango fruits. Ensure that your Mango trees are planted in an open area with minimal shading from nearby structures or other tall trees. This will allow maximum sunlight to reach the leaves and, ultimately, the fruits. Regular pruning of the Mango tree canopy can help optimize sunlight penetration.

Thinning out the canopy allows better air circulation as well, reducing humidity levels that can lead to fungal diseases. Additionally, consider using reflective materials such as white plastic mulch or aluminum foil around the base of each tree. These reflectors help redirect sunlight towards lower branches and increase overall light intensity within the canopy.  

The Role of Pruning in Increasing Mango Fruit Size 

Pruning plays a crucial role in maximizing the size and quality of Mango fruits. When it comes to pruning Mango trees, timing is key. It’s best to prune when the tree is not actively growing. This allows for better healing and minimizes stress on the tree. One important aspect of pruning is removing dead or diseased branches. 

Another technique used in Mango pruning is thinning out excessive branches. This helps improve air circulation within the canopy, reducing disease incidence and allowing sunlight to penetrate deeper into the tree. By strategically pruning overcrowded areas, you also promote proper light distribution among fruit-bearing branches. Improved exposure to sunlight results in enhanced photosynthesis, which directly contributes to bigger fruit development. 

In case you missed it: How to Grow Mangosteen Fruit from Seed to Harvest: Check How this Guide Helps Beginners

mango growing on the tree

Irrigation Techniques for Larger Mango Fruits 

Irrigation plays a crucial role in the growth and development of Mango trees, ultimately impacting the size and quality of their fruits. Adequate water supply is essential for optimal fruit production, but it’s important to strike a balance. Too little water can lead to stunted fruit growth, while excessive watering can result in poor flavor and texture. One effective technique for irrigation is drip irrigation. Drip irrigation not only conserves water by reducing evaporation and runoff but also ensures that each tree receives a consistent supply of moisture. 

Monitoring soil moisture levels is crucial in determining when and how much to irrigate. Using a moisture meter or conducting regular visual inspections can provide valuable insights into whether your trees are receiving adequate hydration. It’s important to note that during certain stages of Mango fruit development, like flowering or fruit set, additional watering may be required due to increased nutrient demand.  

Fertilizer Application for Bigger Mango Fruits 

When it comes to growing bigger and better Mango fruits, fertilizer application plays a crucial role. By providing your Mango trees with the right nutrients, you can enhance their growth and development, resulting in larger and juicier fruits. One important aspect of fertilizer application is choosing the right type of fertilizer. Mango trees require a balanced blend of nitrogen, phosphorus, and potassium (NPK) for optimal fruit production. 

Timing is also key when applying fertilizers. It’s recommended to divide the total amount of fertilizer into multiple applications throughout the year rather than applying it all at once.  Applying excess fertilizer can be detrimental as well. In addition to traditional granular fertilizers, consider using organic options such as compost or manure.  

Mango Fruit Thinning: When, How, and Why to Thin Fruits for Optimal Growth 

When it comes to growing Mangoes, one important technique that can significantly impact fruit size is fruit thinning. Ideally, thinning should be done when the fruits are still small and immature. It’s best to wait until they have reached about 1 inch in diameter before making any decisions on which ones to remove. Thinning can be done using various methods depending on personal preference or specific circumstances.

Some growers choose to simply pluck off excess fruits by hand, while others may use pruning shears or scissors for a cleaner cut. Whichever method you choose, remember not to damage the surrounding branches or leave stubs behind. By reducing the number of fruits competing for nutrients and resources on each branch, you’re allowing those remaining fruits to receive a greater share of these essential elements. This results in larger-sized Mangoes with better quality overall. 

Monitoring and Controlling Pests and Diseases for Larger Mango Fruits 

Pests and diseases can damage your Mango orchard, affecting not only the overall health of your trees but also the size and quality of your fruits. It is crucial to monitor and control these issues to ensure you get larger Mango fruits. Look out for common culprits such as aphids, fruit flies, or fungal infections like powdery mildew. Implement proactive measures to control the pests.

In case you missed it: Growing Mangoes from Seed to Harvest: A Detailed Planting/Production Guide for Beginners

Ripe mangoes

This can include using neem oil sprays or introducing beneficial insects like ladybugs that feed on harmful pests. Maintain good orchard hygiene by removing fallen leaves and debris regularly. Cleaning up around the base of the tree reduces hiding places for pests and minimizes disease transmission. Practicing proper irrigation techniques can also minimize pest problems by avoiding excess moisture that attracts certain insects and promotes fungal growth. 

Harvesting Mango Fruits at the Right Time: The Importance of Timing for Maximizing Fruit Size and Quality 

Harvesting Mango fruits at the right time is crucial for maximizing their size and quality. Timing plays a key role in ensuring that you get the juiciest, most flavorful Mangoes from your orchard. One indicator of ripeness is color – when the green skin starts turning yellow or orange, it’s usually a sign that the fruit is ready to be harvested.  

Another way to determine if a Mango is ripe is by gently squeezing it. A ripe Mango will yield slightly to pressure but should not feel overly soft or mushy. It should also have a sweet fragrance emanating from its stem end. If you wait too long, the Mango may become overripe and lose some of its sweetness and firmness. On the other hand, harvesting too early can result in underripe fruits with less developed flavors. 

Temperature Management for Bigger Mango Fruits 

Temperature management plays a crucial role in achieving bigger Mango fruits in your orchard. Mango trees thrive in warm, tropical climates, but extreme temperatures can negatively impact fruit development. To ensure optimal fruit size, it is important to manage temperature fluctuations throughout the growing season. During flowering and fruit set, maintaining a moderate temperature range of around 21-29°C is ideal.

High temperatures above 35°C can lead to poor pollination and reduced fruit set. In contrast, temperatures below 13°C can cause flower drop and hinder fruit development. To regulate temperature, consider using shading techniques such as installing shade nets or providing temporary coverings during peak heat periods. This helps protect the Mango tree from excessive sun exposure and prevents heat stress on the developing fruits.  

Mango Tree Maintenance and Training for Increased Fruit Size 

  1. Regular pruning: Remove any dead or diseased branches, as well as those that may be crossing or rubbing against each other. 
  2. Thinning out excess fruits: If your tree has too many young Mangoes, it’s important to thin them out to allow the remaining fruits sufficient nutrients to grow larger. This can be done when they reach about one inch in diameter by gently plucking away a portion of the small fruits. 
  3. Proper spacing: Ensure that your Mango trees have enough space between them for adequate sunlight penetration and air circulation. This will promote better overall growth and development of the fruit. 
  4. Mulching: Apply organic mulch around the Mango tree to conserve moisture, suppress weed growth, and provide essential nutrients over time. 
  5. Pest control measures: Regularly monitor your trees for signs of pests such as aphids or scale insects, which can hinder fruit development. 

In case you missed it: How to Prepare the Soil for Mango Trees: Tips for Best Soil Mix, pH, and Compost

Mango farming

Conclusion 

Increasing the size of your Mango fruits requires a combination of proper soil nutrient management, maximizing sunlight exposure, strategic pruning techniques, effective irrigation methods, appropriate fertilizer application, fruit thinning when necessary, monitoring and controlling pests and diseases, harvesting at the right time, temperature management, and tree maintenance.

By implementing these practices in your orchard or garden, you can optimize fruit size and quality. By following these guidelines and adapting them to suit your specific location and Mango variety characteristics, you will increase your chances of obtaining bigger and better Mango fruits.  

How to Increase Pomegranate Fruit Size: Fruit Size Management for Getting Bigger Pomegranate Fruits

0

By understanding the factors that affect fruit size, implementing proper pruning and training methods, optimizing fertilization and irrigation practices, protecting against pests and diseases, and adopting appropriate harvesting and storage techniques, you can successfully achieve bigger Pomegranate fruits.

How to Increase Pomegranate Fruit Size

Remember that fruit size management requires a combination of knowledge, skill, and dedication. It is important to regularly monitor your trees’ health and adjust your practices accordingly. By consistently following these guidelines, you will be able to enjoy abundant yields of large Pomegranate fruits year after year. 

How to Increase Pomegranate Fruit Size

Optimizing Soil Nutrients for Larger Pomegranate Fruits 

To achieve larger Pomegranate fruits in your orchard, it is crucial to optimize the soil nutrients. The right balance of essential nutrients will provide the necessary fuel for the development and growth of these juicy red gems. Nitrogen plays a vital role in promoting vegetative growth, so make sure there is an adequate supply throughout the growing season. Phosphorus aids in root development and fruit formation, while potassium enhances fruit quality and overall plant health.

In addition to these macronutrients, micronutrients such as iron, zinc, manganese, and copper are also essential for optimal Pomegranate growth. Regular monitoring of nutrient levels and adjustments based on plant requirements are key for maintaining an ideal nutrient balance. Remember that excessive fertilizer application can lead to imbalances or even damage to plants. Organic matter incorporation improves soil structure and fertility over time by increasing water retention capacity and microbial activity.  

Maximizing Sunlight Exposure for Bigger and Better Pomegranate Fruits 

When it comes to growing Pomegranate fruits that are big and bursting with flavor, maximizing sunlight exposure is key. Pomegranate trees thrive in areas with plenty of sunshine, so ensuring they receive ample sunlight throughout the day is essential for optimal fruit growth. One way to maximize sunlight exposure for your Pomegranate trees is by strategically pruning surrounding vegetation.

By trimming back any overhanging branches or nearby plants that may be blocking the sun’s rays, you can create a clear path for sunlight to reach your Pomegranate tree’s canopy.  Another technique to enhance sunlight exposure is by using reflective mulch around your Pomegranate tree. Reflective mulch helps bounce additional light onto the lower branches and fruiting zone, increasing overall photosynthesis and promoting fruit growth. 

The Role of Pruning in Increasing Pomegranate Fruit Size 

Pruning is a crucial factor to consider in increasing pomegranate fruit size. By selectively removing branches and shoots, pruning helps to improve sunlight penetration within the tree canopy, leading to bigger and better fruits. When it comes to pruning Pomegranate trees, timing is key. The best time for pruning is during the dormant season when the tree is not actively growing.  

In case you missed it: Different Methods of Pollinating Pomegranate Trees: A Guide for How to Pollinate Pomegranate Trees

Plantation of pomegranate trees in the harvest season

Remove any dead or damaged branches. These can hinder growth and contribute to disease spread. Next, thin out crowded areas by cutting back excessive growth. This promotes optimal light exposure and prevents competition among branches. It’s important to strike a balance between maintaining a strong framework of main branches while also encouraging new growth for increased fruit production. Prune off weak or crossing branches that may be limiting nutrient distribution or blocking sunlight. 

Irrigation Techniques for Larger Pomegranate Fruits 

Irrigation plays a crucial role in the growth and development of Pomegranate fruits. By providing the right amount of water at the right time, you can ensure that your Pomegranate trees produce larger and juicier fruits. One important irrigation technique is drip irrigation. This method allows for precise watering by delivering water directly to the roots of each tree. It conserves water and ensures that moisture reaches the plants’ root zone, promoting optimal fruit size. 

Timing is key when it comes to irrigating Pomegranate trees. During the growing season, it’s important to provide regular deep watering to support healthy fruit development. Monitoring soil moisture levels is essential for effective irrigation management. Using a soil moisture meter or conducting a simple finger test can help determine when it’s time to water again. 

It’s also crucial to consider factors such as climate and weather conditions when planning your irrigation schedule. Adjustments may be needed during periods of high temperatures or prolonged dry spells. In addition to proper timing and techniques, maintaining consistent moisture levels throughout the growing season is vital for optimizing fruit size. Avoid extreme fluctuations in soil moisture by regularly checking on your trees’ hydration needs. 

Fertilizer Application for Bigger Pomegranate Fruits 

Proper fertilizer application is crucial when it comes to growing bigger and better Pomegranate fruits in your orchard. Nitrogen, phosphorus, and potassium are crucial macronutrients that play a key role in fruit development. Nitrogen promotes vigorous growth, while phosphorus aids in root development and overall plant health.

Potassium enhances fruit quality and helps improve resistance against diseases. When applying fertilizers, it’s important to follow the recommended dosage instructions provided by experts or based on the results of your soil test. Over-fertilization causes excessive vegetative growth at the expense of fruit production. 

Pomegranate Fruit Thinning: When, How, and Why to Thin Fruits for Optimal Growth 

Thinning Pomegranate fruits may seem counterintuitive at first. Well, it turns out that thinning is a crucial practice if you want larger and more luscious Pomegranate fruits. Typically, it’s best to begin the process when the fruits are about marble-sized or a few weeks after bloom. This allows you to assess which fruits are developing well and which ones might be too small or damaged. 

Now, let’s talk about how to thin your Pomegranate fruit. The key is to select which fruits to remove carefully. Look for those that are misshapen, wrinkled, or showing signs of disease or pest damage. Gently twist them off the branch using your fingers or use sterilized pruning shears for thicker stems. 

In case you missed it: 14 Different Types of Pomegranate Varieties: Distinct Types and Their Characteristics

pomegranate farming

Thinning helps ensure that each remaining fruit receives enough nutrients and energy from the tree. With fewer fruits competing for resources, there will be more nutrients available per fruit – leading to better growth and size. Removing too many fruits can stress the tree and result in poor overall yield. Aim for spacing each remaining fruit around 6-8 inches apart on the branch. 

Monitoring and Controlling Pests and Diseases for Larger Pomegranate Fruits 

Pomegranate trees, like any other plant, can fall victim to pests and diseases that hinder their growth and fruit size. It is essential to monitor and control these issues to ensure that your Pomegranate fruits reach their full potential. Regular inspection of the trees is crucial in identifying early signs of pest infestation or disease development.

Look out for common pests such as aphids, mites, and scales, as well as diseases like fungal infections or bacterial blight. Once identified, appropriate measures must be taken to control these problems. Integrated Pest Management techniques include employing natural predators or introducing beneficial insects into the orchard.

Additionally, practicing good sanitation by removing fallen leaves and debris helps eliminate breeding grounds for pests and prevents disease spread. Proper pruning techniques also aid in maintaining tree health by improving air circulation. Regularly monitoring soil moisture levels can help prevent root rot caused by overwatering or poor drainage. Adequate irrigation practices should be followed based on your specific climate conditions.  

Harvesting Pomegranate Fruits at the Right Time: The Importance of Timing for Maximizing Fruit Size and Quality 

Timing is everything when it comes to harvesting Pomegranate fruits. Harvesting at the right time can significantly impact the size and quality of your yield. Keep an eye on the color of the fruit. A ripe Pomegranate will have a deep red or reddish-brown hue, depending on the variety. The skin should also feel firm but slightly yielding when gently squeezed. 

Another important factor to consider is taste. Pomegranates develop their full sweetness and flavor as they ripen. Taste test a few fruits by sampling their seeds – if they are bursting with sweet-tart juice, then it’s likely that they are ready for harvest. As Pomegranates mature, they tend to increase in size and weight. If you notice that most of the fruits have reached their maximum size on your tree, it may be time to start picking. 

Temperature Management for Bigger Pomegranate Fruits 

1. Optimal Temperature Range: Pomegranate trees thrive in areas with a Mediterranean climate, where temperatures range from 21°C to 32°C during the growing season. This temperature range encourages fruit growth and enhances fruit quality. 

2. Avoid Extreme Temperatures: High temperatures above 38°C can cause stress on Pomegranate trees, leading to reduced fruit size and quality. Similarly, frost or extreme cold temperatures below freezing can damage flowers and young fruits. 

3. Protecting from Frost: During colder months, it’s essential to protect Pomegranate trees from frost by covering them or using frost protection methods like heaters or row covers. This helps maintain an optimal temperature environment for fruit development. 

4. Microclimate Considerations: Creating a favorable microclimate around the Pomegranate tree can help regulate temperature fluctuations. Planting near walls or structures that absorb heat during the day and release it at night can provide added warmth during cooler periods. 

5. Monitoring Temperature Changes: Regularly monitoring weather patterns and adjusting irrigation schedules accordingly is vital for maintaining consistent soil moisture levels, which aid in temperature regulation around the roots. 

Pomegranate Tree Maintenance and Training for Increased Fruit Size 

Proper maintenance and training of Pomegranate trees are crucial steps towards achieving larger fruit size. Regular pruning maintains the shape of the tree and promotes better fruit development. Prune during late winter to remove dead or weak branches, allowing more energy to be directed towards fruit production. Additionally, thinning out crowded areas within the canopy improves air circulation and sunlight penetration, which contributes to larger fruit sizes. 

In case you missed it: How to Grow Pomegranate from Seed to Harvest: Check How this Guide Helps Beginners

pomegranate Farm

It’s important to provide adequate support for heavy fruit-bearing branches by using stakes or trellises. Furthermore, maintaining a proper irrigation schedule is vital for optimal growth. Pomegranates require regular watering during dry spells but also need well-drained soil to prevent waterlogging, which can hinder root development. Monitor soil moisture levels carefully and adjust irrigation accordingly. 

To encourage increased nutrient uptake by Pomegranate trees, applying fertilizers at appropriate times is necessary. Keep an eye on pests such as aphids or fungal diseases like powdery mildew that can affect fruit size negatively. Regular monitoring allows for early detection so you can take appropriate measures, such as applying organic pest control methods or disease-resistant varieties if needed. 

Conclusion 

Increasing Pomegranate fruit size requires careful management and attention to various factors. By understanding the key elements that influence fruit size, such as variety selection, pruning techniques, irrigation practices, nutrient management, and pest control measures, you can optimize your orchard’s potential for growing bigger Pomegranate fruits. By implementing these tips and incorporating proper management practices into your Pomegranate orchard routine, you can enhance the overall quality of your harvests with bigger and more desirable Pomegranate fruits. 

How to Get More Pumpkins Per Plant: 11 Pumpkin Growth Hacks for a High Yield

0

Growing Pumpkins can be a rewarding experience when you implement these growth hacks into your gardening routine. With careful planning, you’ll soon have an abundance of Pumpkins ready for carving or enjoying delicious recipes. 

How to Get More Pumpkins Per Plant

How to Get More Pumpkins Per Plant

Start with Quality Seeds or Seedlings 

When it comes to growing Pumpkins, starting with quality seeds or seedlings is essential for a successful harvest. First and foremost, look for seeds or seedlings from reputable sources. This ensures that you’re getting varieties specifically bred for optimal growth and yield. Additionally, reputable sources often prioritize quality control measures, resulting in healthier plants overall. 

Next, consider the age of the seeds or transplants. Freshness is key when it comes to Pumpkin success. Older seeds may have lower germination rates, while older transplants might struggle to establish themselves in the garden. Some varieties are naturally more resistant to common Pumpkin diseases, such as powdery mildew or vine borers. Choosing disease-resistant varieties can save you time and effort down the line by reducing your risk of plant loss. 

Provide Adequate Sunlight 

One of the most important factors in growing healthy and productive Pumpkin plants is providing them with adequate sunlight. Pumpkins thrive in full sun, which means they need at least six to eight hours of direct sunlight each day. When choosing a location for your Pumpkin patch, make sure it receives ample sunlight throughout the day. Avoid areas that are shaded by tall trees or buildings, as this can decrease the growth and development of your Pumpkins. 

If you have limited space in your garden or if there are shading issues, consider using reflective materials like aluminum foil or white plastic mulch to redirect and maximize the amount of sunlight reaching your plants. In addition to providing enough sun exposure, it’s also crucial to ensure proper air circulation around your Pumpkin plants.  

Choose the Right Location and Soil 

Choosing the right place and soil is key for growing healthy and productive Pumpkin plants. When selecting a location, make sure it receives 6-8 hours of direct sunlight daily. Pumpkins thrive in warm weather, so choose a place that receives enough sun throughout the day. In terms of soil, Pumpkins prefer well-drained soil with a pH between 6.0 and 7.5. Avoid planting Pumpkins in low-lying areas where water tends to pool or where there is poor air circulation. These conditions can lead to fungal diseases and rotting issues. 

Plant at the Right Time with Proper Spacing 

When planting Pumpkins, timing is everything. To get the most out of your Pumpkin plants and maximize your yield, it’s crucial to plant them at the right time and provide them with proper spacing. Pumpkins thrive in warm weather, so before planting wait until all danger of frost has passed. This is typically around late spring or early summer. By waiting for the optimal temperature range of 21-29°C, you give your Pumpkins a better chance of germinating successfully. 

In case you missed it: How to Deal with Pumpkin Pests: Getting Rid of them with Natural, Organic, and Homemade Recipes

Pumpkin Patch

Once you’ve determined the right time to plant, it’s important to consider proper spacing. Pumpkin plants require ample room for their sprawling vines and large leaves. Aim for a spacing of about 4-6 feet between each hill or mound where you’re planting your seeds or seedlings. 

Mulch and Water Pumpkin Plants Regularly 

Mulching and providing regular water to Pumpkin plants are crucial factors for achieving a high yield. Mulching helps retain moisture, suppress weed growth, maintain soil temperature, and prevent soil erosion. It acts as a protective layer around the plant’s roots, keeping them cool during hot summer days.

When it comes to choosing the right mulch for Pumpkins, organic options like straw or compost work best. Watering is another essential aspect of Pumpkin plant care. Consistent watering ensures that the plants receive adequate moisture throughout their growing season. As a rule of thumb, Pumpkins need about 1-2 inches of water per week. 

Prune or Trim and Support for Optimal Growth 

Pruning or trimming and providing support to your Pumpkin plants can significantly enhance their growth and yield. Regular pruning allows its energy to focus on producing more Pumpkins rather than sprawling vines. It also improves air circulation around the plants, reducing the risk of diseases. When pruning, remove any damaged or dead leaves and vines. This will prevent them from sapping nutrients that could otherwise be used for Pumpkin production. Additionally, trim back excessive foliage to enable sunlight penetration into every part of the plant. 

Supporting your Pumpkin plants is equally important. As they grow, their heavy fruits can put a strain on the vines and may cause them to break or detach from the main stem. Using trellises or cages provides a sturdy structure for supporting these fruits while ensuring proper airflow. To support your Pumpkin plants effectively, place a mesh netting beneath each fruit as soon as it starts forming. This will distribute weight evenly across multiple points along the vine and minimize stress on individual sections. 

Apply Best Fertilizers to Produce More Pumpkins 

Fertilizing your Pumpkin plants is crucial for achieving a bountiful harvest. By providing the right nutrients, you can help your Pumpkins grow larger and healthier. Consider using organic fertilizers like compost or well-rotted manure. Additionally, look for fertilizers specifically formulated for vegetables or fruit-bearing plants. These products usually contain a balanced blend of macronutrients, which are vital for plant growth. When applying fertilizer, you should follow the instructions on the package carefully. Over-fertilization causes excessive foliage growth at the expense of fruit production. 

Monitor and Control for Pests and Diseases 

Pumpkins, like any plant, are susceptible to pests and diseases. To ensure a high yield, it’s essential to monitor and control these issues effectively. One common pest that affects Pumpkins is the squash bug. These critters can cause significant damage if left unchecked. If you spot them early on, manually remove them or use organic insecticides to keep their population in check. 

Another pesky problem is powdery mildew, a fungal disease that can hinder Pumpkin growth. Keep an eye out for white powdery patches on the leaves and stems. To prevent its spread, space your plants adequately for proper air circulation and avoid overhead watering. Root rot can also affect Pumpkin plants. This condition occurs due to waterlogged soil, causing the roots to decay. Ensure good drainage in your garden beds by adding compost or peat moss before planting. 

In case you missed it: Growing Pumpkins from Seed to Harvest: A Detailed Guide for Beginners

Pumpkin

Aphids suck sap from plant tissues and transmit viruses in the process. They reproduce rapidly, so it’s important to catch them early on when their population is still manageable. Use insecticidal soap as a natural remedy to control aphids. Cucumber beetles are yet another nuisance when it comes to Pumpkin cultivation. Covering your plants with row covers during vulnerable stages can help protect them from these beetles’ destructive feeding habits. 

Carryout Hand Pollination in Case of Poor Pollination 

Pollination plays a key role in the growth and development of Pumpkins. However, sometimes, nature needs a helping hand to ensure successful pollination. If you notice poor pollination or lack of fruit set in your Pumpkin plants, it’s time to consider hand pollination. Hand pollination involves transferring pollen from the male flower to the female flower manually. To do this, simply identify a male flower with a long stem and no swelling at the base (this is where the fruit would grow). Gently remove one of its petals to expose the stamen covered in yellow pollen. 

Next, locate a female flower with a small swelling at its base (the future Pumpkin). Take care not to damage any part of either flower during this process. Using a cotton swab, gently transfer some pollen from the male flower onto the stigma inside the female flower. Repeat this process for other flowers as needed, ensuring each female bloom receives sufficient pollen for fertilization. It’s important to conduct hand pollination early in the morning when both male and female flowers are fully open. 

Increase Flowering in Pumpkins for More Yield 

One of the key factors in getting a high yield of Pumpkins is ensuring that your plants produce plenty of flowers. The more flowers you have, the greater the chance of pollination and fruit development. Make sure your plants receive enough sunlight. Pumpkins thrive in full sun, so choose a place that receives at least 6-8 hours of direct sunlight each day. This will encourage healthy growth and abundant flower production. 

Next, provide adequate water to keep your Pumpkin plants hydrated. Water them regularly, but avoid overwatering as this can cause root rot and other problems. A consistent moisture level is essential for promoting flowering. Additionally, consider using organic fertilizers rich in phosphorus and potassium to stimulate flower production. These nutrients play a crucial role in encouraging plant growth and blooming. 

Make Sure to Harvest at the Right Time 

Timing is crucial when harvesting Pumpkins. You want to make sure that you pick them at their peak ripeness for the best flavor and longevity. Pay attention to the color of the Pumpkin. As they mature, they will start changing from green to a deeper orange or whatever color variety you are growing. This is a good indicator that they are ready for harvest. Check the skin of the Pumpkin. It should be hard rather than soft or easily punctured. A firm skin ensures that your Pumpkins have reached their full potential.

In case you missed it: Best Fertilizer for Pumpkin: Homemade, Organic, Liquid, Compost Manure, NPK, and Schedule

Pumpkins

Another important factor is checking if the stem has dried out and turned brown. If this is the case, then it means your Pumpkin has detached itself from its vine and is ready for picking. When harvesting, use sharp tools like pruning shears or a knife to carefully cut off each Pumpkin from its vine without damaging it. Leave about 3-4 inches of stem attached, as this helps with storage and prevents rotting. 

Conclusion 

Growing Pumpkins can be an enjoyable experience, especially when you see the fruits of your labor in the form of large, vibrant Pumpkins. By implementing these Pumpkin growth hacks, you can maximize your yield and produce an abundant harvest. 

How to Get More Potatoes Per Plant: 11 Potato Growth Hacks for a High Yield

0

Growing Potatoes can be a rewarding experience, especially when you see your plants thriving and producing a bountiful harvest. By implementing these Potato growth hacks, you can maximize the yield per plant and enjoy an abundance of delicious spuds.

How to Get More Potatoes Per Plant

By choosing the suitable variety, preparing the soil properly, providing adequate water and nutrients, utilizing companion planting techniques, protecting your plants from pests and diseases, and implementing storage tricks for long-lasting Potatoes, you’ll be well on your way to enjoying a bountiful harvest of Potatoes. Gardening is an ever-evolving process, so don’t be afraid to try new things and learn from both successes and failures. With patience and perseverance, you’ll soon become a master at growing Potatoes. 

How to Get More Potatoes Per Plant

Start with Quality Seeds or Seedlings 

When it comes to growing Potatoes, starting with quality seeds or seedlings is crucial for a successful harvest. Choose certified disease-free seed Potatoes from reputable suppliers. These Potatoes have been tested and proven to be free of common diseases like late blight or bacterial wilt.

By using healthy seed Potatoes, you reduce the risk of your entire crop being affected by these diseases. Consider selecting varieties that are known for their high yield potential. Look for varieties that are specifically bred for productivity and resistance to common pests and diseases. This way, you increase your chances of getting more Potatoes per plant. 

Provide Adequate Sunlight 

To ensure your Potato plants receive enough sunlight, choose a place that gets at least six hours of direct sun each day. Avoid planting them in areas shaded by trees or buildings, as this will limit their access to sunlight. When planting Potatoes, be mindful of spacing to prevent overcrowding and competition for sunlight among the plants.

In case you missed it: Growing Potatoes in Containers/Pots: DIY Guide for Beginners

Freshly harvested organic potatoes in the garden

Give each plant enough room to spread out its foliage and capture maximum sunshine. It’s worth noting that while Potatoes require ample sunlight for optimal growth, they also benefit from some shade during particularly hot periods. Providing partial shade during scorching afternoons can help prevent wilting and stress on your Potato plants. 

Choose the Right Location and Soil 

Choosing the best location and soil is crucial for maximizing Potato yield. Potatoes thrive in well-drained, loose soil that is rich in organic matter. Before planting, it’s important to assess the condition of your soil and make any necessary amendments. Select a spot that gets full sunlight for at least six hours a day.

This ensures optimal growth and development of Potato plants. Avoid shady spots or areas with poor air circulation, as these can lead to disease issues. Next, test the pH level of your soil. Potatoes prefer slightly acidic conditions with a pH range between 5.0 and 6.0. If your garden soil is too alkaline, you can lower the pH by adding organic materials such as compost or peat moss.

In addition to pH levels, consider the texture of your soil. Sandy soils tend to drain quickly but may require more frequent watering, while clay soils hold onto moisture longer but can become compacted easily. Loam soils are ideal for Potatoes as they provide good drainage while retaining enough moisture. Another factor to consider is fertility – Potatoes require a nutrient-rich environment to produce high yields.  

Plant at the Right Time with Proper Spacing 

Timing is everything when it comes to planting Potatoes. To get the most out of your Potato plants, it’s essential to plant them at the right time and give them adequate spacing. First and foremost, determine the ideal planting time for your region. Potatoes thrive in cool weather, so aim to plant them a few weeks before the last frost date in your area. This will allow ample time for growth before the summer heat sets in. 

When it comes to spacing, giving each Potato plant enough room is crucial. Aim for about 12-15 inches between each seed piece or seedling. Proper spacing also helps prevent disease spread by allowing better airflow around plants and reducing moisture build-up. It’s important not to overcrowd your Potato bed – remember that healthy plants lead to healthy harvests. 

Mulch and Water Potato Plants Regularly 

Mulch and water are two essential elements for promoting healthy Potato growth and maximizing your yield. When it comes to mulching, using organic materials such as straw or compost can provide multiple benefits. Mulch helps regulate soil temperature, keeping it cooler during hot summer months. This creates an optimal environment for the Potatoes to grow.  Moreover, mulch acts as a natural weed suppressant by preventing sunlight from reaching weed seeds.

In case you missed it: Best and Worst Companion Plants for Potatoes: A Detailed Guide

harvesting potatoes

By reducing competition from weeds, your Potato plants have better access to nutrients and water in the soil. In addition to mulching, proper watering is crucial for ensuring successful Potato growth. Potatoes require consistent moisture throughout their growing season. However, overwatering can lead to rotting tubers or disease development. To strike the right balance, aim for even soil moisture by watering deeply but infrequently. Ensure that the top few inches of soil remain moist but not soggy. 

Prune or Trim and Support for Optimal Growth 

Pruning or trimming Potato plants may not be something that immediately comes to mind when thinking about maximizing your Potato yield. When Potato plants are left unattended, they tend to become bushy and sprawling, which can lead to overcrowding and reduced airflow within the plant canopy. 

To avoid this, regularly prune or trim your Potato plants by removing any excess foliage or branches. This will help reduce the risk of fungal infections and allow more sunlight to reach the lower parts of the plant. Supporting your Potato plants is equally important for their overall health and productivity. By providing proper support, such as stakes or trellises, you ensure that the stems remain upright throughout their growth cycle. 

Additionally, supporting your Potato plants helps prevent tubers from being exposed to sunlight. When Potatoes are exposed to light during their development stage, they turn green and produce solanine – a toxic compound that renders them unfit for consumption. By pruning or trimming your Potato plants regularly and providing adequate support as they grow taller, you promote healthier foliage growth while protecting developing tubers from damage caused by bending stems or exposure to sunlight. 

Apply Best Fertilizers to Produce More Potatoes 

Potatoes are heavy feeders, so it’s important to provide them with the nutrients they need to thrive. Start by choosing organic or slow-release fertilizers that will gradually release nutrients over time. This helps prevent nutrient burn and ensures a steady supply of elements for your plants. Look for fertilizer with equal amounts of nitrogen, phosphorus, and potassium (NPK). These macronutrients play crucial roles in promoting healthy root development, strong foliage growth, and robust tuber formation.

In case you missed it: Homemade Fertilizers for Root Vegetables: Potatoes, Carrots, Beetroot, Onions, Radishes, Turnip, Ginger, and Garlic

Freshly harvested potatoes from garden

As your Potato plants start growing, consider using additional side-dressings of fertilizer throughout the growing season. This can replenish any nutrients that may have been depleted from watering or leaching out of the soil. Avoid over-fertilizing, as this causes excessive vegetative growth at the expense of tuber production. Remember that every garden is unique, so it’s important to monitor your plants closely for signs of nutrient deficiencies or excesses. Adjusting fertilization practices accordingly can help you achieve optimal Potato yields while minimizing environmental impacts. 

Monitor and Control for Pests and Diseases 

Ensuring the health of your Potato plants is crucial for a high yield. Pests and diseases can damage your crops, so it’s important to monitor them closely and take proactive measures to control their spread. Regularly inspect your Potato plants for any signs of pests or diseases. Look out for common culprits like aphids, Colorado Potato beetles, and fungal infections such as late blight.  

If you spot any signs of disease and pests, take immediate action. There are various organic methods you can employ to control pests, like introducing beneficial insects like ladybugs or using neem oil sprays. For more serious infestations or diseases, consult with a local gardening expert who can recommend appropriate treatments. In addition to monitoring and controlling existing pests and diseases, it’s essential to prevent future outbreaks by implementing good cultural practices.  

Carryout Hand Pollination in case of poor pollination 

In some cases, Potato plants may experience poor pollination, resulting in a lower yield.  Hand pollination is a simple technique that can help increase the number of fruits produced by ensuring proper fertilization. To carry out hand pollination, start by identifying the male and female flowers on your Potato plants. Gently remove the pollen-laden anthers from the male flower using a clean brush or cotton swab. Then, transfer this pollen onto the stigma of the female flower, making sure to brush it over each stigma lightly for optimal coverage. 

In case you missed it: Guide to Growing Potatoes in Texas: At Home, In Backyard, Containers, In Winter and Summer
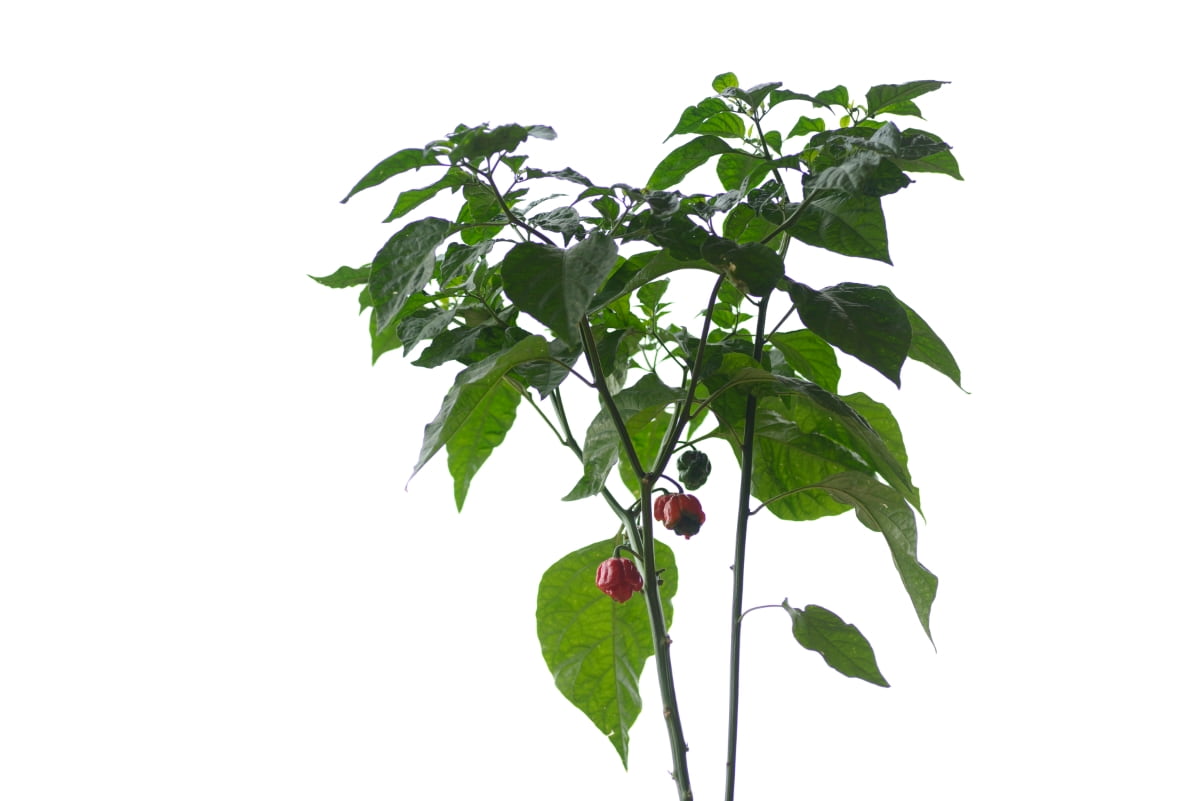
Potato Harvest Using Garden Showel

Repeat this process for all suitable flowers on each plant, taking care not to damage any delicate structures. It’s important to carry out hand pollination during calm weather conditions when no wind or rain could disrupt the process. By manually transferring pollen between flowers, you can improve cross-pollination rates and enhance the fruit set in Potatoes. This method ensures that more seeds are formed within each tuber, leading to higher yields at harvest time. 

Increase Flowering in Potatoes for More Yield 

One of the key factors to achieving a high Potato yield is ensuring optimal flowering. The more flowers your Potato plants produce, the more potential there is for an abundant harvest. Choose the right varieties that are known for their prolific flower production. Look for Potato varieties such as Yukon Gold or Red Pontiac that have a reputation for abundant blooms. To encourage flowering, make sure your Potatoes receive adequate sunlight. Plant them in a location where they will get at least six hours of direct sunlight per day.

This will stimulate healthy flower growth and improve overall plant vigor. Proper nutrition is essential in promoting flower formation. Ensure your soil has sufficient nutrients by incorporating organic matter before planting. Regular watering is essential to keep Potato plants hydrated and facilitate proper flower development. Aim to provide consistent moisture without overwatering, as excessive moisture can lead to fungal diseases. Pruning or trimming the foliage can help redirect energy towards flower production rather than vegetative growth.  

Make Sure to Harvest at the Right Time 

Harvesting Potatoes at the right time is crucial for maximizing your yield and enjoying the best flavor and texture. First, keep an eye on the foliage of your Potato plants. Once they start to turn yellow and wither, it’s usually a sign that the Potatoes are ready for harvesting. This typically occurs about two to three weeks after the plants have finished flowering. Another indicator is the size of the Potatoes themselves.

While baby Potatoes can be harvested earlier, if you’re looking for larger spuds, wait until they reach their full size before digging them up. Gently brush away some soil around a plant and inspect its tubers – if they’ve reached their desired size, it’s time to start harvesting. 

When harvesting, handle your Potato plants carefully to avoid damaging both the tubers and their delicate skins. Use a garden fork or shovel to unearth them from beneath the soil surface gently. Be sure not to leave any behind, as they could rot in damp conditions. Once harvested, allow your freshly dug Potatoes to dry out in a cool, well-ventilated area before storing them properly.  

In case you missed it: How to Grow Potatoes in 20 Steps: Secrets, Tips, and Ideas

Harvesting organic potatoes

Conclusion 

Growing Potatoes can be a rewarding and fruitful experience. By implementing these Potato growth hacks, you can maximize the yield of your Potato plants and enjoy a bountiful harvest. Remember to choose the right variety for your climate, prepare the soil properly, provide adequate sunlight and water, fertilize regularly, and protect your plants from pests and diseases. With proper care and attention to detail, you’ll soon have an abundant supply of delicious Potatoes that will not only enhance your meals but also contribute to a healthy diet. 

How to Grow Black Gram in Summer: Farming Practices for Beginners

0

This leguminous crop, scientifically known as Vigna mungo, thrives in warm climates, presenting an optimal opportunity for cultivation during the summer months. With its versatility and nutritional value, black gram holds significant agricultural importance. In this blog, we delve into the intricacies of cultivating black gram during the summer, offering insights and guidelines for a successful harvest.

How to Grow Black Gram in Summer

How to Grow Black Gram in Summer

Introduction to Summer Black Gram Cultivation

Black gram (Vigna mungo L.), also known as urad dal, is one of the most important pulse crops in India. It is rich in protein, carbohydrates, fat, and phosphorus and has many health benefits. It is consumed as dal and is also used to make various dishes like papad, idli, dosa, and vada. Black gram is also a valuable green manure crop that improves soil fertility by fixing atmospheric nitrogen.

Black gram can be grown in both the kharif and summer seasons, but the summer crop has some advantages over the kharif crop. The summer crop is less affected by pests and diseases and has higher yield potential and better-quality seeds.

Climate and Soil Requirements for Summer Black Gram Cultivation

Black gram grows best in hot and humid conditions with an ideal temperature range between 25°C to 35°C. It can tolerate high temp up to 40°C during flowering and pod formation stages. However, it is sensitive to frost and low temperatures below 10°C. It requires 60 to 75 cm of annual rainfall, but heavy rain can damage the flowers and pods.

‘It can be grown at a sea level of about 1800 meters.’It can be grown at a sea level of about 1800 meters. Black gram can be grown on a variety of soils, but loam or clay loam soils are best suited for its cultivation. The soil should have a neutral pH (6.5 to 7.5) and good drainage. Black gram can also grow on saline or alkaline soils with proper management.

In case you missed it: Growing Chickpeas At Home – Bengal Gram/Chana

Haricots Split Murad

Varieties of Black Gram Suitable for Summer

BDU-1: This is a high-yielding variety developed by Tamil Nadu Agricultural University. It matures in 75 to 80 days and has a seed yield potential of 800 to 900 kg/ha. It is resistant to yellow mosaic virus and tolerant to drought.

TAU-1: This is another high-yielding variety developed by Tamil Nadu Agricultural University. It matures in 70 to 75 days and has a seed yield potential of 900 to 1000 kg/ha. It is resistant for yellow mosaic virus and tolerant to drought.

TPU-4: This is a high-yielding variety developed by Tamil Nadu Agricultural University. It matures in 65 to 70 days and has a seed yield potential of 1000 to 1100 kg/ha. It is resistant to yellow mosaic virus and tolerant to drought.

Pant U-35 is a high-yielding variety that the G.B. Pant University of Agriculture and Technology developed. It matures in 75 to 80 days and has a seed yield potential of 900 to 1000 kg/ha. It is resistant to yellow mosaic virus and tolerant to drought.

Azad-1: This is a high-yielding variety developed by Indian Agricultural Research Institute. It matures in 70 to 75 days and has a seed yield potential of 900 to 1000 kg/ha. It is resistant to yellow mosaic virus and tolerant to drought.

Pusa-1: This is a high-yielding variety developed by Indian Agricultural Research Institute. It matures in 65 to 70 days and has a seed yield potential of 1000 to 1100 kg/ha. It is resistant to yellow mosaic virus and tolerant to drought.

Land Preparation and Sowing Techniques

The land selected for summer black gram cultivation should not have been sown with a black gram in the previous year to avoid volunteer plants that cause admixture and disease infection. The land should be plowed thoroughly and leveled to make a fine tilth. The field should be free from weeds and stubbles. The optimum time of sowing for summer black gram is April, the second fortnight after the harvest of the rabi crop.

The seeds used for sowing should be from an authorized source and should be genetically pure, vigorous, and healthy. The seeds treated with fungicides, biofertilizers before sowing to protect them from soil-borne diseases and to enhance their germination and growth. The recommended seed rate for summer black gram is 15 to 20 kg/ha.

The seeds can be sown by broadcasting or by drilling in rows. The broadcasting method is easy and quick, but it results in uneven plant distribution and poor weed control. The drilling method is preferred as it ensures uniform plant distribution and better weed control. The seeds sown at a depth of 3 to 4 cm and covered with soil. The recommended row spacing for summer black gram is 30 to 45 cm, and the plant spacing is 10 to 15 cm.

Irrigation Management

Summer black gram requires adequate moisture for germination, vegetative growth, flowering, and pod formation. The frequency and amount of irrigation depend on the soil type, weather conditions, and crop stage. Generally, summer black gram requires 4 to 5 irrigations during its growth period. The first irrigation should be immediately after sowing to ensure good germination.

In case you missed it: How to Get More Carrots Per Plant: 11 Carrot Growth Hacks for a High Yield

Black Gram Farming

The second irrigation should be given at the time of flowering, the third at the time of pod formation, the fourth at the time of pod filling, and the fifth at the time of maturity. Excess irrigation should be avoided as it can cause waterlogging, leaching of nutrients, and disease outbreaks.

Pest and Disease Management

Yellow mosaic virus: This is a viral disease that is transmitted by whiteflies. It causes yellowing, curling, and distortion of leaves, stunting of plants, and reduction in seed yield. The disease can be controlled by producing resistant varieties, removing infected plants, spraying insecticides to control whiteflies, and avoiding crop rotation with susceptible crops.

Powdery mildew: This is a disease that causes white powdery mass on leaves, stems, and pods, reducing photosynthesis and seed quality. The disease is controlled by using resistant varieties, avoiding dense planting, removing infected plant debris, spraying fungicides, and applying sulfur dust.

Root rot or wilt: This is a soil-borne fungal disease that causes yellowing, wilting, and death of plants. The disease can be controlled by treating seeds with fungicides, avoiding continuous cropping of black gram, improving soil drainage, and applying organic manures.

Aphids: These are sucking insects that feed on sap from leaves, stems, and pods, causing curling, distortion, and yellowing of leaves, stunting of plants, and transmission of viral diseases. Spraying insecticides, using resistant varieties, removing weeds, and using neem oil or soap solutions can all help control the pest.

Pod borer: This is a caterpillar that feeds on pods and seeds, causing damage to seed quality and yield. The pest can be controlled by insecticides, using pheromone traps or light traps, hand picking and destroying infested pods, and applying neem oil or soap solution.

Fertilization Practices

Summer black gram requires moderate amounts of nutrients for its growth and development. The recommended dose of fertilizers for summer black gram is 20 kg/ha of nitrogen (N), 40 kg/ha of phosphorus (P), and 20 kg/ha of potassium (K). Half of the nitrogen and a full dose of phosphorus and potassium should be applied as a basal dose at sowing. The remaining half of the nitrogen was applied as top dressing at the time of flowering.

In case you missed it: Raised Beds in Winter: What to Grow and How to Deal with Frost

Black Gram

Organic manures like farmyard manure or compost can also be applied at the rate of 10 tonnes/ha before sowing to improve soil fertility. Black gram can also fix atmospheric nitrogen in association with rhizobium bacteria in its root nodules. Therefore, inoculating the seeds with rhizobium culture can enhance nitrogen fixation and reduce the need for chemical fertilizers.

Weed Control Strategies

Summer black gram, a brief-cycle pulse crop prevalent in India, emerges as a nutritional powerhouse abundant in protein, minerals, vitamins, and dietary fiber. Its cultivation, however, confronts a significant hurdle—weed infestation, capable of slashing yields by 49-80%. Weeds pose a multifaceted threat, competing with the crop for vital resources, fostering pests and diseases, and escalating cultivation costs. Effective weed management becomes pivotal to elevating productivity and profitability.

Diverse weed control methods, encompassing cultural, mechanical, biological, and chemical approaches, exist. Cultural tactics involve strategic practices like crop rotation and intercropping. Mechanical methods include manual weeding and plowing. Biological control deploys insects or microorganisms to curb weed growth. Chemical weed control, the most prevalent, is convenient yet plagued by environmental and health concerns, herbicide resistance, and residual impacts. A judicious blend of methods ensures sustainable weed management.

Noteworthy herbicides for summer black gram encompass Pendimethalin (pre-emergence), Imazethapyr + Imazamox, Quizalofop-ethyl, and Fenoxaprop-p-ethyl (post-emergence). Adherence to application guidelines, optimal water volume, and integration with cultural or mechanical practices are imperative for efficacy and safety. Rotation and mixing of herbicides thwart resistance development.

Harvesting and Post-harvest Management

Summer black gram matures 60-70 days after sowing and should be harvested when 80-90% of the pods turn black and dry. Delayed harvesting can cause damage and deterioration in quality. The crop can be harvested manually and mechanically using a reaper or combine harvester. After harvesting, the seeds should be threshed to separate them from the pods. The seeds should be cleaned to remove impurities and dried to reduce moisture content to 10-12% for safe storage. The dried seeds should be graded based on size, shape, and color. 

In case you missed it: How to Get More Peppers Per Plant: 11 Pepper Growth Hacks for a High Yield

Black Gram in a spoon

The graded seeds should be stored in clean, dry, and well-ventilated containers, labeled with the crop’s name, variety, date of harvest, and weight. The containers should be kept away from moisture, heat, rodents, and insects. The seeds should be checked periodically for signs of deterioration or damage and treated with appropriate fungicides or insecticides if needed. The seeds should be used for consumption or sowing within one year of storage.

Economic Viability and Market Potential

Summer black gram is a profitable crop with low cultivation costs, high yield potential, and high market demand. It can be grown as an intercrop with other crops to increase land income and productivity. The average cost of cultivation is 10,000–25,000/ha, with a yield of 800-1,500 kg/ha. The market price is 80–120/kg, resulting in a gross income of 48,000–75,000/ha and a net income of 38,000–56,000/ha. The crop’s market potential is high due to its multiple uses, including food, fodder, green manure, and medicinal purposes.

It is rich in iron, calcium, magnesium, and phosphorus, antioxidants, aiding digestion, blood circulation, immunity, and skin health. The demand for summer black gram is increasing in domestic and international markets, with major consumers being India, Pakistan, Bangladesh, Sri Lanka, Nepal, and Myanmar. Major exporters are Myanmar, Australia, and Tanzania, while major importers are India, Pakistan, and Bangladesh. The export potential is high due to its quality and competitiveness, with the Indian summer black gram being preferred due to its distinct flavor, aroma, and color.

In case you missed it: 8 Easy Seeds to Start for Beginners: For Flowers, Fruits, Herbs, and Vegetables

Black Gram Bowl

Conclusion

Summer black gram is a successful pulse crop in India, offering short duration, high yield, low cost, high demand, and multiple uses. However, it faces challenges like weed infestation, post-harvest losses, and market fluctuations. By adopting improved varieties, effective weed management practices, proper harvesting and post-harvest techniques, and efficient marketing strategies, farmers can enhance productivity and profitability, contributing to food security and economic development.

How to Get More Carrots Per Plant: 11 Carrot Growth Hacks for a High Yield

0

Growing Carrots can be a rewarding and satisfying experience, especially when you implement these Carrot growth hacks. By selecting the right variety, preparing the soil properly, utilizing proper planting techniques, maintaining moisture and fertilization, controlling pests and diseases, thinning and weeding diligently, harvesting with care, storing for longer freshness, and finding creative uses for extra Carrots, you can significantly increase your Carrot yield.

How to Get More Carrots Per Plant

Remember that patience is key when growing Carrots. It takes time for them to develop to their full potential. But with dedication and following these growth hacks, you will soon be enjoying an abundant harvest of deliciously sweet and crunchy Carrots. 

How to Get More Carrots Per Plant

Start with Quality Seeds or Seedlings 

Starting your Carrot garden with quality seeds or seedlings is essential for a high yield. When it comes to selecting the right seeds, choose varieties that are known for their productivity and disease resistance. Look for reputable seed companies that have a good track record of providing high-quality seeds.

If you prefer using seedlings, make sure they are healthy and vigorous before planting them in your garden. Check for any symptoms of disease and avoid purchasing weak or stunted plants. Remember, strong and healthy seedlings will have a better chance of thriving in your garden and producing more Carrots. 

Provide Adequate Sunlight 

Sunlight is essential for the growth of Carrot plants. Carrots are sun-loving vegetables that thrive in full sunlight. When selecting a spot to plant your Carrots, make sure they get 6-8 hours of direct sunlight daily. Carrots need sunlight for photosynthesis, which is crucial for their energy production and overall health. The more sunlight they get, the better their chances of producing a high yield. 

In case you missed it: How to Grow Carrot from Seed to Harvest: Check How this Guide Helps Beginners

Harvesting Carrots

Consider using reflective surfaces or mirrors to redirect and maximize the available light onto your Carrot plants. This can help compensate for any shade caused by nearby structures or trees. Additionally, be mindful of planting Carrots too close together or under taller plants that may obstruct their access to sunlight. Proper spacing ensures each plant gets enough light exposure throughout the day. 

Choose the Right Location and Soil 

When growing healthy and productive Carrot plants, choosing the right location and soil is crucial. Carrots thrive in loose, well-draining soil that is rich in organic matter. Before planting, you should prepare your soil by removing any rocks or debris and adding compost for added nutrients. Next, consider the location where you will be planting your Carrots. They prefer a place with full sun exposure for at least 6-8 hours a day.

This ensures that they receive ample sunlight to photosynthesize and produce energy for growth. In addition to sunlight, Carrots also require consistent moisture levels. Avoid areas prone to waterlogging as this can cause rotting of roots. Proper spacing is another factor when choosing the right location for your Carrot plants.

Overcrowding causes stunted growth and smaller yields. Make sure to follow the recommended spacing provided on seed packets or labels. Keep in mind that different varieties of Carrots may have specific requirements regarding pH levels and nutrient preferences in the soil. It’s always beneficial to conduct a soil test before planting so you can adjust accordingly with amendments if necessary. 

Plant at the Right Time with Proper Spacing 

The timing of planting your Carrot seeds or seedlings is crucial to ensure a high yield. Carrots are cool-season crops, so it’s best to plant them in early spring or late summer for optimal growth. Avoid planting during extreme heat as it can hinder germination and stunt their growth. Proper spacing is equally important for maximizing Carrot production. Carrots need enough space to develop fully without crowding each other. Aim for a spacing of about 2-4 inches apart between individual plants, allowing them ample room to grow their roots. 

In case you missed it: Homemade Fertilizers for Root Vegetables: Potatoes, Carrots, Beetroot, Onions, Radishes, Turnip, Ginger, and Garlic

Harvesting Carrots in The Garden

To ensure even spacing, you can use tools like garden stakes or string lines as guidelines when sowing the seeds. This will help you prevent overcrowding, which can lead to smaller Carrots. When transplanting seedlings, be gentle and handle them carefully, ensuring they have enough space in the new location. Planting at the right time and providing proper spacing allows each Carrot plant to receive adequate sunlight, nutrients, and water without competition from neighboring plants. 

Mulch and Water Carrot Plants Regularly 

Mulching and providing regular water to Carrot plants are essential for ensuring optimal growth and a high yield. Mulching helps maintain moisture levels in the soil, preventing weed growth and maintaining a stable soil temperature. When it comes to mulch, organic materials like straw or shredded leaves work best for Carrots. Apply mulch around each plant, taking care not to cover the foliage. This will help conserve moisture by reducing evaporation from the soil surface. 

Regular watering is crucial for Carrots as they have shallow roots that can dry quickly. Water deeply but infrequently encourages deep root development. Aim for about an inch of water per week, either through rainfall or irrigation. To determine if your Carrots need watering, check the soil moisture level near the plants. Avoid overhead watering as this causes diseases such as leaf blight or rotting of Carrot tops. Instead, use a drip irrigation system or direct water at the base of each plant. 

Prune or Trim and Support for Optimal Growth 

Pruning or trimming and providing support for your Carrot plants can greatly contribute to their optimal growth and higher yield. By removing any dead or diseased foliage, plants focus its energy on producing healthy Carrots. Additionally, pruning improves air circulation around the plant, reducing the risk of fungal diseases. When it comes to supporting your Carrot plants, using stakes or trellises can be beneficial. By providing support structures, you ensure that the plants remain upright and avoid any damage that could hinder their growth. 

Regularly monitor your Carrot plants for signs of overgrowth or overcrowding. If necessary, thin out the weaker seedlings to provide more space for those with better potential for robust growth. This allows each plant to receive ample sunlight and nutrients from the soil. Remember that pruning should be done judiciously – only remove what is necessary without causing harm to the plant’s overall health. Similarly, choose sturdy supports that will adequately hold up your growing Carrot plants without impeding their access to sunlight. 

Apply Best Fertilizers to Produce More Carrots 

To produce an abundant yield of Carrots, it is crucial to provide them with the right nutrients. Applying the best fertilizers can significantly enhance Carrot growth and increase their overall productivity. When choosing a fertilizer for Carrots, opt for one that is rich in nitrogen, phosphorus, and potassium (NPK). These essential nutrients help promote healthy root development and vigorous plant growth.

Look for fertilizers specifically formulated for vegetable gardens or those labeled as balanced or all-purpose. Before planting your Carrots, prepare the soil by incorporating organic matter. This will not only enrich the soil but also improve its ability to retain moisture and nutrients. Once your Carrots are sown, apply a slow-release granular fertilizer around each plant according to package instructions.  

In case you missed it: 18 Common Carrot Plant Problems: How to Fix Them, Solutions, and Treatment

Carrots

Regularly feeding your Carrot plants throughout their growing season is important for optimal results. Consider using liquid fertilizers like fish emulsion or seaweed extract every two weeks during active growth periods. This provides a quick nutrient boost while also promoting strong foliage and root development. In addition to synthetic fertilizers, you can also use natural alternatives like bone meal or blood meal. These organic options release nutrients slowly over time, ensuring a steady supply of nourishment without risking a nutrient burn. 

Monitor and Control for Pests and Diseases 

Pests and diseases can damage your Carrot plants, so it’s crucial to monitor and control them effectively. Keep a close eye on your plants for any symptoms of pests such as aphids, caterpillars, or snails. If you spot any pests, take immediate action by removing them manually or using organic pest control methods. Regularly check the leaves for any symptoms of disease like fungal infections or rot.

If you notice any suspicious spots or discoloration, treat the affected areas with appropriate fungicides or natural remedies like neem oil. To prevent pests and diseases, practice garden hygiene by removing debris regularly. This will help eliminate hiding places for insects and reduce the risk of plant infections.

Encourage natural predators to visit your garden, as they feed on harmful bugs that can damage your Carrot plants. You can attract these beneficial creatures by creating a welcoming habitat with some birdhouses or planting flowers that attract pollinators. Remember to rotate your crops each year to disrupt pest cycles and reduce the chances of recurring problems. This practice also helps maintain soil health by preventing nutrient depletion in specific areas. 

Carryout Hand Pollination in case of poor pollination 

In some cases, Carrot plants may experience poor pollination, resulting in a lower yield. This can be due to factors like a lack of bees or other insects for pollination, unfavorable weather conditions, or even planting varieties that are not compatible with local pollinators.  To carry out hand pollination, you will need a small brush or cotton swab.

In case you missed it: Carrot Planting Frequently Asked Questions (FAQs)

Bunch of Freshly Picked Carrots

Gently brush the inside of each flower on the Carrot plant to transfer pollen from one flower to another. This mimics the natural process done by bees and ensures proper fertilization. It’s important to do this early in the morning when flowers are open and before any wind disturbance occurs. Be consistent with your efforts, and make sure to cover all flowers on each plant. 

Increase Flowering in Carrots for More Yield 

When it comes to growing carrots, increasing flowering is a crucial component for achieving a higher carrot yield. The more flowers your Carrot plants produce, the greater the chances of developing a bountiful harvest. Opt for Carrot varieties known for their abundant and prolific blooms. Carrot plants require consistent moisture to promote healthy growth and encourage blooming. Phosphorus is essential for promoting flower formation, so use fertilizers with a high phosphorus content.

Regularly remove faded or spent flowers to stimulate the production of new blooms on your Carrot plants. Bees and other pollinators play a crucial role in flower fertilization, so attract them by planting companion flowers nearby or using bee-friendly practices in your garden. While nitrogen is beneficial during early stages, excess nitrogen can result in excessive leaf growth, so be mindful of balanced fertilizer application. 

Make Sure to Harvest at the Right Time 

Harvesting at the right time is crucial for maximizing Carrot yield and flavor. Look for visual cues. Mature Carrots will have a vibrant color and smooth skin. They should be firm to touch but not too hard or woody. Avoid harvesting any Carrots with cracks, splits, or signs of disease. Consider the size of your Carrots. Most varieties are ready to harvest when they reach about 1 inch in diameter, although this can vary depending on the specific variety you’re growing. If in doubt, gently dig up one Carrot and check its size before deciding whether it’s ready for harvest. 

In case you missed it: Planting Carrots in Pots – A Complete Guide

A Pile of Freshly Picked Carrots

Another important factor is timing based on days from planting or sowing seeds. Carrots usually take around 60-80 days from planting to reach maturity, so keep track of when you planted them and plan accordingly. Additionally, pay attention to the weather conditions leading up to harvest time. Dry weather can result in stunted growth, while wet conditions may lead to rotting or splitting of roots. 

Conclusion 

Growing Carrots can be a rewarding experience, especially when you follow these Carrot growth hacks for a high yield. Not only do you get to enjoy the delicious taste of homegrown vegetables, but you can also maximize your carrot yield with these helpful growth hacks.

By understanding the growth and development of Carrots, choosing the right variety, preparing the soil properly, using efficient planting techniques, watering and fertilizing effectively, practicing companion planting, and managing weeds diligently, you can ensure a high yield from your Carrot plants. Remember to stay consistent with care and maintenance throughout the growing season.  

Raised Beds in Winter: What to Grow and How to Deal with Frost

0

As winter approaches, raised beds can provide a fantastic opportunity for gardeners to continue growing their favorite plants and vegetables. These elevated structures offer several benefits, including improved drainage, better soil quality, and protection against frost. By choosing the right plants and taking necessary precautions, you can enjoy a bountiful winter harvest. With careful planning and ongoing maintenance throughout the season, you’ll be rewarded with fresh produce straight from your garden all year round. 

Raised Beds in Winter

Raised Beds in Winter
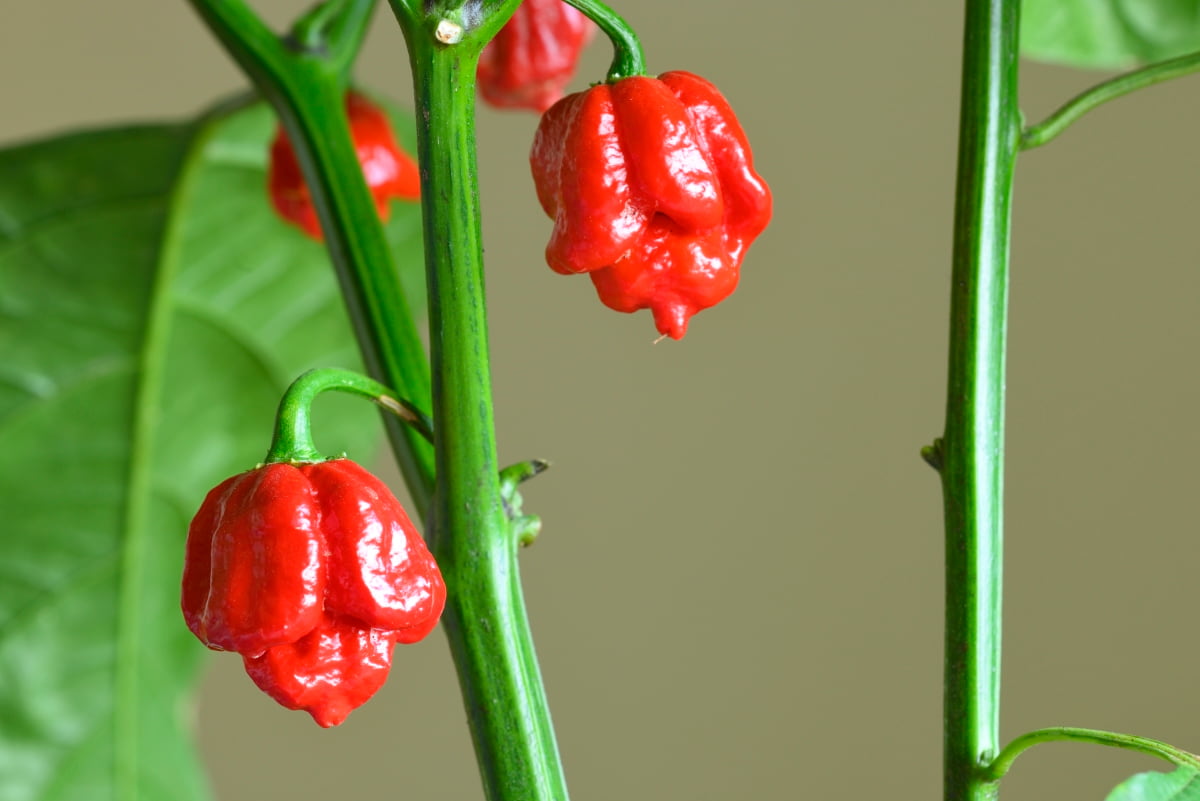
Frost-Tolerant Vegetables for Raised Beds in Winter 
When growing vegetables in raised beds during the winter months, it’s essential to choose crops that can withstand frosty temperatures. Fortunately, there are several frost-tolerant vegetables that you can cultivate in your raised beds, ensuring a bountiful harvest even when the weather gets chilly. One popular choice for winter gardening is Kale. This leafy green thrives in cooler temperatures and becomes sweeter after a frost.
Other cold-hardy greens like Spinach and Swiss Chard are also excellent options for your raised beds. Root vegetables like Carrots, Beets, and Turnips are well-suited for winter growth as they can tolerate colder conditions. These hardy veggies will continue to grow slowly underground throughout the winter months until you’re ready to harvest them.

Vegetables like Cabbage, Brussels sprouts, and Broccoli thrive in cool weather and can handle light frost without issue. They make a delicious addition to any winter garden. It’s worth noting that while these crops are more resilient to cold temperatures than others, they still benefit from some protection against extreme freezing conditions.  

Protecting Raised Beds from Frost 

When winter arrives, it’s important to take steps to protect your raised beds from frost. The freezing temperatures can be detrimental to your plants, but with a little preparation and care, you can keep them thriving throughout the season. One of the most effective ways to protect your raised beds from frost is by covering them with a protective layer. There are various options available, such as row covers or cloches, which act as a barrier between your plants and the cold air.

These covers help trap heat and create a microclimate for your crops. Another method is using mulch. Applying organic mulch around your plants helps insulate the soil and prevents temperature fluctuations. This not only protects against frost but also provides other benefits like suppressing weeds and retaining moisture. To further safeguard your raised beds, consider using cold frames or hoop houses.

These structures provide extra protection by creating an enclosed space that traps warmth inside. They are easy to construct and can extend the growing season for certain crops. Additionally, consider placing straw or hay bales around the perimeter of your raised beds. These natural barriers help shield against icy winds that could damage tender foliage. 

Choosing the Right Location for Raised Beds in Winter 

Selecting the proper location for your raised beds in winter is crucial to ensure the success of your winter gardening endeavors. One key factor to consider is sunlight exposure. Aim for a spot that receives maximum sunlight during the day, as this will help keep your plants warm and encourage growth. Another important aspect is wind protection. Winter winds can be harsh and damaging to delicate crops, so try to position your raised beds in a location shielded from strong gusts.
In case you missed it: 14 Creative Ways to Build a Raised Garden Bed on a Budget

Vegetables and Herbs Grow in Wooden Dirt Squares

This could be against a wall or fence or even using windbreaks such as trellises covered with plastic sheeting. Additionally, proximity to water sources should not be overlooked. It’s easier to maintain proper hydration levels for your plants if you have easy access to water nearby. Consider placing your raised beds within reach of a hose or irrigation system. Think about convenience and accessibility when choosing the location of your winter raised beds. You’ll want them placed somewhere easily accessible so that you can tend to them without hassle during colder months. 

Soil Preparation for Winter Raised Beds 
Soil preparation is a crucial step when it comes to setting up your raised beds for winter gardening. First, remove any remaining plant debris from your raised beds. This will prevent the buildup of pests and diseases that can survive overwintering in the soil. You can compost this debris or dispose of it properly. Next, enrich your soil with organic matter. Spread organic matter evenly over the surface of your raised bed and gently work it into the few inches of soil using a garden fork or trowel.

After adding organic matter, consider incorporating a slow-release fertilizer specifically formulated for vegetables. This will provide nutrients to support healthy plant growth during winter when nutrient uptake is slower. To further enhance moisture retention and prevent waterlogging during heavy rains or snowmelt, add some coarse sand to improve drainage in heavy clay soils. Consider covering your prepared raised bed with mulch, to protect against temperature fluctuations and reduce weed growth. 

Watering Raised Beds in Winter 

Watering raised beds in winter is crucial for the survival and growth of your plants. While it may not seem necessary with the colder temperatures, plants still need water to thrive. You’ll want to adjust your watering schedule based on the weather conditions. During periods of  snowfall, you may not need water at all, as nature will take care of it for you.

On drier days, though, it’s important to provide supplemental moisture. Be mindful of overwatering. While plants still require hydration, they don’t need as much as they do during warmer seasons. Overwatering causes root rot and other issues that could harm your crops. To determine if your raised beds need watering, simply check the soil moisture level. If it feels dry at this depth, then it’s time to water.

In case you missed it: How to Improve Drainage in a Raised Garden Bed

Taking Care of Raised Bed Plants

When irrigating your raised beds in winter, aim for slow and deep saturation rather than surface-level sprinkling. This helps ensure that water reaches down into the roots where it’s needed most. Consider using a drip irrigation system instead of overhead sprinklers during winter months since these methods deliver water to the base of each plant while minimizing evaporation. 

Pest and Disease Control in Winter Raised Beds 

  1. Cleanliness: Start by removing any plant debris or dead foliage from your raised beds.  
  2. Mulching: Applying organic mulch around your plants can help prevent weeds and create a barrier against pests. Additionally, mulch acts as an insulator for the soil, protecting plant roots from extreme temperature fluctuations. 
  3. Row covers: Consider using row covers made of frost-resistant fabric to provide an extra layer of protection for your crops. These covers allow sunlight and water through while keeping pests at bay. 
  4. Companion planting: Certain plants naturally repel pests or attract beneficial insects. For example, Marigolds deter nematodes while attracting pollinators like bees. 
  5. Regular inspection: Check your plants regularly for signs of pest damage or disease signs, such as wilting leaves or unusual spots. By catching problems early on, you can take appropriate action before they worsen. 

Harvesting Winter Crops in Raised Beds 

Harvesting during the winter months can be a bit different than harvesting in other seasons. When it comes to harvesting winter crops in raised beds, timing is key. Different vegetables have different maturity dates, so make sure to keep an eye on each plant and harvest them at their optimal time. Leafy greens like Kale and Spinach are usually ready for harvest when they reach a certain size or after a specific number of days from planting. 

In case you missed it: Best Raised Garden Beds for All Plants: for All Seasons, Small Spaces, and Outdoor Use

Vegetable Garden

To ensure the best flavor and quality of your harvested crops, try picking them during sunny days when the soil is not frozen. Additionally, using garden tools such as shears or pruners can help minimize damage to neighboring plants while harvesting. Once harvested, it’s important to handle your winter crops with care. Avoid washing them until you’re ready to consume or store them, as excess moisture can lead to rotting or mold growth. Instead, gently brush off any dirt from the vegetables before storing them properly. 

Maintaining Raised Beds in Winter 

  1. Clearing Away Debris: As the winter months roll in, it’s important to tidy up your raised beds. Remove any fallen leaves, dead plants, or debris during the fall season. 
  2. Mulching: Applying a layer of mulch to your raised beds can provide insulation and protect the soil from extreme temperature fluctuations. Use organic materials such as straw, hay, or shredded leaves to create a cozy blanket for your plants. 
  3. Checking for Moisture Levels: Even though it’s colder outside, don’t forget about watering. While plants typically need less water during winter due to slower growth rates, it’s still crucial to monitor moisture levels in the soil. Stick your finger into the soil – if it feels dry at least an inch below the surface, give it some water. 
  4. Protecting Plants from Frost: Frost can be detrimental to delicate winter crops like Lettuce and Spinach. Consider using frost blankets or cloches to shield vulnerable plants from freezing temperatures overnight. 
  5. Pruning and Trimming: Take advantage of this downtime by pruning back any overgrown branches or stems on perennial herbs or fruit trees surrounding your raised beds. This will promote healthy growth come springtime. 
  6. Weed Control: Keep an eye out for any unwelcome intruders popping up in your raised beds during winter months, and promptly remove them before they have a chance to compete with your crops. 

Extending the Growing Season in Raised Beds 

Consider planting cold-tolerant crops that can withstand frost and low temperatures. Vegetables like Kale, Spinach, Carrots, and Radishes are great options for winter gardening in raised beds. These hardy plants can handle chilly conditions and continue to grow even as other plants start to wither. 

Another way to extend your growing season is by utilizing protective coverings such as row covers or hoop tunnels. These structures help create a microclimate around your plants, trapping heat and providing insulation against freezing temperatures. By covering your raised beds during cold nights or using them throughout the entire winter season, you can keep your plants thriving despite the harsh weather. 

In case you missed it: How to Use Raised Bed Covers to Protect Plants: Types of Garden Bed Coverings

Tomatoes Growing in Vegetable Bed

Additionally, incorporating mulch into your raised bed soil helps regulate temperature fluctuations and retains moisture. Mulching also acts as an extra layer of protection against frost damage by insulating plant roots from extreme cold. Furthermore, maximizing sunlight exposure is crucial for extending your growing season in raised beds during winter.

Choosing the Right Crops for Your Climate 

First and foremost, take into account the length of your growing season. Some crops require a longer period to mature and produce fruit or vegetables, so make sure you choose varieties that can reach maturity before the first frost hits. Another important consideration is the amount of sunlight your garden receives during the winter months. Certain crops, like leafy greens and root vegetables, can tolerate partial shade, while others, such as Tomatoes and Peppers, require full sun. 

It’s also worth considering the average rainfall in your region during winter. Some crops are more drought-tolerant than others and may be better suited for areas with limited precipitation. Don’t forget about soil type. Different crops have different nutrient requirements and prefer certain soil conditions.  

Winter Gardening Tips and Tricks 

When it comes to winter gardening, there are a few tips and tricks that can help you make the most of your raised beds. First and foremost, choose cold-hardy crops that can withstand the chilly temperatures. Some great options include Kale, Spinach, Carrots, Radishes, and Beets. To protect plants from frost, use row covers or cloches. Additionally, mulching around your plants can retain soil moisture and regulate temperature. 

Watering is also crucial in winter gardening. While you may not need to water as frequently as in other seasons, it’s important to check the moisture level regularly. Water deeply when needed, but avoid overwatering as this can lead to root rot. Keep an eye out for pests and diseases even in winter months. Harvesting crops at their peak is key in winter gardening. Be sure to monitor their growth closely so they don’t become overripe or damaged by freezing temperatures.  

Benefits of Raised Beds in Winter 

  1. Improved Drainage: Raised beds offer better drainage compared to traditional garden beds, which is especially beneficial during winter when excess moisture can lead to root rot and other issues. 
  2. Increased Soil Temperature: The elevated design of raised beds helps to trap heat from the sun, resulting in warmer soil temperatures. This is crucial during winter as it allows for earlier planting and extended growing seasons. 
  3. Better Pest Control: By using raised beds, you can create a physical barrier between your crops and pests. This helps reduce the risk of pest damage and makes it easier to implement pest control measures if needed. 
  4. Easy Access and Maintenance: With raised beds, you don’t have to bend over or kneel on wet ground when tending to your winter crops. The elevated height makes it more comfortable for gardening tasks such as watering, weeding, and harvesting. 
  5. Weed Suppression: Raised beds make it easier to control weeds by providing a defined space for planting and reducing weed competition with your desired crops. This saves time and effort spent on manual weed removal during winter months. 
  6. Space Optimization: If you have limited garden space, raised beds allow you to maximize your growing area by utilizing vertical space effectively through trellises or supports for vines like Peas or Beans. 
  7. Enhanced Soil Quality: By filling raised beds with high-quality soil mixtures rich in organic matter, you provide an ideal environment for plant growth even during colder months.  

In case you missed it: 9 Common Raised Bed Gardening Mistakes: Every Gardener Must Avoid Them

Planting Plants

Conclusion 

Raised beds are a fantastic option for growing plants during the winter months. By choosing the right plants for winter growing, protecting them from frost and cold temperatures, and implementing some creative techniques to extend the growing season, you can continue to harvest delicious vegetables throughout the colder months. And don’t forget to store your winter crops properly so that you can savor their flavors well into spring. 

Varieties of Chard: the Best Chard Types to Grow in the Garden

0

Growing Chards in your garden can be a rewarding experience, both for their nutritional benefits and their vibrant beauty. With so many varieties, you can find the perfect Chard that suits your taste and gardening preferences. Its large green leaves with colorful stems make it a standout in any garden. When it comes to caring for your Chard plants, remember to provide them with enough sunlight and water regularly. With proper care and maintenance, your Chard plants will thrive throughout the growing season. 

Varieties of Chard: the Best Chard Types to Grow in the Garden

Varieties of Chard

Argentata Chard 

Argentata Chard is a delightful variety of Chard that stands out with its striking silver-green leaves. This unique color brings a touch of elegance to your garden or plate. The distinctive feature of Argentata Chard is its large, crinkly leaves that have beautiful silver veins running through them. These veins not only add visual appeal but also give the leaves a slightly crunchy texture when cooked. 

When it comes to taste, Argentata Chard offers a mild and earthy flavor. One great thing about growing Argentata Chard is its ability to grow well in different climates and soil conditions. It’s known for being quite resilient and disease-resistant, making it the best choice for both beginner and experienced gardeners. 

Rainbow Chard 

Rainbow Chard is a vibrant and stunning variety of Chard that will add a pop of color to your garden. With its beautiful stems in shades of red, yellow, orange, purple, and white, it’s like having a rainbow in your backyard. In terms of taste, Rainbow Chard has a mild and slightly earthy flavor that pairs well with both savory and sweet dishes. One great thing about growing Rainbow Chard is its versatility. Additionally, it can be harvested at different stages – you can cut the young leaves for salads or wait until they mature for cooking purposes. 

In case you missed it: Best Fertilizers for Swiss Chard Plants in Pots: Organic, Slow-Release, Liquid, and Natural

Fresh raw swiss rainbow chard leaves

Rhubarb Chard 

Rhubarb Chard is a unique and vibrant variety that adds a splash of color to any garden. Its vibrant red stems stand out against the dark green leaves, creating a beautiful contrast that is simply stunning. This variety gets its name from its resemblance to rhubarb, with its long and thick stalks.

Not only does Rhubarb Chard add visual interest to your garden, but it also offers incredible flavor and versatility in the kitchen. One of the great things about growing Rhubarb Chard is that it is relatively easy to care for. Regular watering will ensure healthy growth, but be careful not to overwater, as this causes root rot. 

Peppermint Chard 

Peppermint Chard is a unique and eye-catching variety of Chard that will add a touch of whimsy to your garden. Its vibrant green leaves are streaked with bold red veins, resembling the colors of peppermint candy. This beautiful contrast makes it not only visually appealing but also a great addition to any culinary creation. Not only does Peppermint Chard look amazing in the garden, but it also tastes delicious.  

One of the best things about growing Peppermint Chard is its versatility. It grows best in cool and warm climates, making it suitable for gardens across different regions. It is also relatively easy to grow from seeds or transplants. In terms of care, Peppermint Chard requires regular watering and well-drained soil rich in organic matter.  

Fordhook Giant Chard 

Fordhook Giant Chard is known for its growth and ability to withstand heat and cold, making it a great choice for gardeners in various climates. One of the standout features of Fordhook Giant Chard is its size. The leaves can grow 24 inches long, providing an abundance of nutritious greens for your meals. Not only does it offer an impressive yield, but it also has excellent disease resistance. 

In case you missed it: How to Grow and Care for Swiss Chard in Containers: Planting to Harvesting Process

fresh chard leaves

Whether you’re a seasoned gardener or a beginner, Fordhook Giant Chard is easy to grow. It grows well in well-drained soil with enough sunlight. Regular watering will keep this Chard happy and healthy throughout the growing season. In addition to being easy to grow, Fordhook Giant Chard adds beauty to any garden with its vibrant green foliage. Its bold presence makes it an eye-catching addition when planted alongside other vegetables or flowers. 

Bright Lights Chard 

Bright Lights Chard is a stunning variety that will add color to any garden. With its vibrant stems in shades of yellow, orange, pink, and red, it’s not only beautiful but also incredibly nutritious. One great thing about Bright Lights Chard is its versatility. It can tolerate both cool and warm weather conditions, making it suitable for growing throughout the year. Whether you have a small backyard plot or containers on your balcony, this Chard will thrive wherever you plant it. 

Green Chard 

Green Chard is a classic variety that is known for its vibrant, deep green leaves. It’s one of the most common types of Chard, and it’s easy to see why it’s so popular. One great thing about Green Chard is that it can be grown year-round in different climates. It grows best in cooler temperatures and can even withstand light frosts, making it a versatile addition to any garden.

In case you missed it: How to Grow Swiss Chard from Seed to Harvest: Check How this Guide Helps Beginners

Chard leaves

This variety of Chard is not only delicious but also packed with nutrients. When cooking with Green Chard, you can use both the leaves and stems. The stems have a slightly sweeter taste than the leaves but still retain their crunchy texture when cooked. 

Silverado Chard 

Silverado Chard is a stunning variety of Chard that will surely add vibrancy to your garden. With its deep green leaves and contrasting white stems, it is not only visually appealing but also packed with nutritional benefits. This Chard is known for its robust flavor and tender texture. The leaves are slightly crinkled, giving them an interesting texture that adds depth to your culinary creations. 

In terms of cultivation, Silverado Chard is relatively easy to grow. It thrives in cool weather conditions and can tolerate some shade, making it best for different climates. Whether you have a small garden or a spacious backyard, this variety can adapt well to different growing environments. Aside from being delicious, Silverado Chard also offers numerous health benefits. 

Bordeaux Chard 

Bordeaux Chard is a stunning variety of Chard that adds a touch of elegance to any garden. Its deep purplish-red stems and veins contrast beautifully with its dark green leaves, creating a visually striking display. Not only is Bordeaux Chard aesthetically pleasing, but it also packs a punch in terms of flavor. Bordeaux Chard is also known for being incredibly nutritious. When it comes to growing Bordeaux Chard in your garden, you’ll be pleased to know that it’s relatively easy to cultivate.  Regular watering will ensure healthy growth and prevent the leaves from becoming bitter. 

Canary Chard 

Canary Chard is a vibrant and striking variety of Chard that adds a burst of color to any garden. With its bright yellow stems and dark green leaves, it’s truly a sight to behold. This unique Chard not only looks beautiful, but it also has a mild and delicate flavor that pairs well with many dishes. One of the great things about Canary Chard is its versatility in the kitchen.

You can use both the stems and leaves in your culinary creations. The stems have a slightly sweet taste, like Celery, while the leaves are tender with a hint of earthiness. In addition to being tasty and nutritious, growing Canary Chard is relatively simple. It thrives in cool weather conditions and can be planted from spring through fall. Just make sure it gets enough sunlight and regular watering for optimal growth. 

Golden Chard 

Golden Chard is a stunning variety that adds a bright color to any garden. Its vibrant yellow stems and deep green leaves make it both visually appealing and deliciously nutritious. One of the great things about Golden Chard is its versatility in the kitchen. Not only is Golden Chard beautiful and tasty but it’s also packed with nutrients. In addition to being easy to grow in the garden, Golden Chard is also relatively low maintenance compared to other vegetables.  

In case you missed it: Common Mistakes to Avoid When Mixing Your Potting Soil

picking chard on allotment

Perpetual Spinach 

Perpetual Spinach is a versatile and delicious leafy vegetable that deserves a place in every garden. It certainly holds its own when it comes to flavor and nutrition. One of the great things about perpetual spinach is its ability to keep producing leaves throughout the season. Unlike traditional spinach varieties that tend to bolt quickly in warm weather, perpetual spinach keeps on going, providing a continuous harvest from spring through fall. 

In terms of taste, perpetual spinach has a mild and slightly earthy flavor that pairs well with many dishes. When planting perpetual spinach in your garden or containers, make sure to give them enough space to grow. They need full sun but can bear partial shade. Regular watering is important for optimal growth and to prevent bolting. 

Romanesco Chard 

Romanesco Chard is a unique and eye-catching variety of Chard that will add a touch of elegance to any garden. Its vibrant green leaves are complemented by stunning pink or red stems, creating a beautiful visual display. One of the standout features of Romanesco Chard is its tender and succulent leaves. These can be harvested young for salads or left to grow larger for cooking purposes.

The taste is mild and earthy, making it a versatile choice for many dishes. Not only does Romanesco Chard offer great flavor and culinary potential, but it is also packed with nutritional benefits. In terms of growing Romanesco Chard in your garden, it’s relatively easy to cultivate. Make sure to provide regular watering to keep the soil moist but not waterlogged. 

Vulcan Chard 

Vulcan Chard is a unique and striking variety of Chard that will add a fiery touch to your garden. With its deep red stems and glossy, dark green leaves, Vulcan Chard stands out amongst other Chard varieties. Not only does Vulcan Chard have eye-catching aesthetics, but it also offers great flavor and nutrition. The leaves are tender and delicious with a slightly earthy taste, making them perfect for salads or sauteing.  

In case you missed it: 12 Best Water Management Strategies for Flower Gardens

colorful leaves of swiss chard

One of the great things about growing Vulcan Chard is that it is relatively easy to care for. It thrives in cool weather conditions and requires regular watering to keep the soil moist. Additionally, this variety is known for being resistant to some common pests and diseases that can plague other plants in your garden. 

Frequently Asked Questions (FAQ) on Chard Varieties

How Do I Choose Which Type of Chard to Grow? 

When selecting a type of Chard for your garden, consider factors such as taste preference and visual appeal. Rainbow Chard is popular for its stunning multi-colored stems and mild flavor. If you prefer a sweeter taste, Ruby Red Chard might be your best choice. Fordhook Giant is excellent for larger leaves that can withstand heat better than other varieties. For those looking to create an eye-catching display in their garden beds or containers, Bright Lights Chards with their bright yellow, orange, and pink stems are perfect. 

Can I Grow Different Types of Chards Together? 

Yes! Growing different types of Chards together not only adds visual interest but also allows you to enjoy various flavors at once. The contrasting colors create an attractive patchwork effect when planted closely together. 

Do The Different Types Require Specific Growing Conditions? 

While all varieties thrive in full sun or partial shade conditions with well-drained soil rich in organic matter, each type has slight preferences when it comes to temperature tolerance and water requirements. It’s always recommended to read the seed packet instructions for specific guidance on each variety’s needs. 

Conclusion 

Chards are wonderful vegetables to grow in your garden. Its vibrant colors and versatile nature make it a great addition to any meal. Not only will you enjoy fresh produce right from your backyard, but you will also reap numerous health benefits. Whether you’re looking for vibrant colors, classic flavors, or versatile options, there is a type of Chard out there that will suit your taste buds and gardening preferences.