Home Gardening

Outdoor Gardening

Organic Gardening

Modern Gardening

Urban Gardening

Gardening Business

Home Blog Page 3

Homemade Fertilizers for Squash: DIY Organic Fertilizers Recipe  

0

Squash plants are known for their vigorous growth and abundant harvests. To ensure that your Squash plants thrive and produce the best yields, it is important to understand the importance of fertilizers in their cultivation. Homemade Squash Fertilizers can be a great option for nourishing your Squash plants and promoting healthy growth. By using readily available natural ingredients, you not only save money but also contribute to a more sustainable gardening practice. 
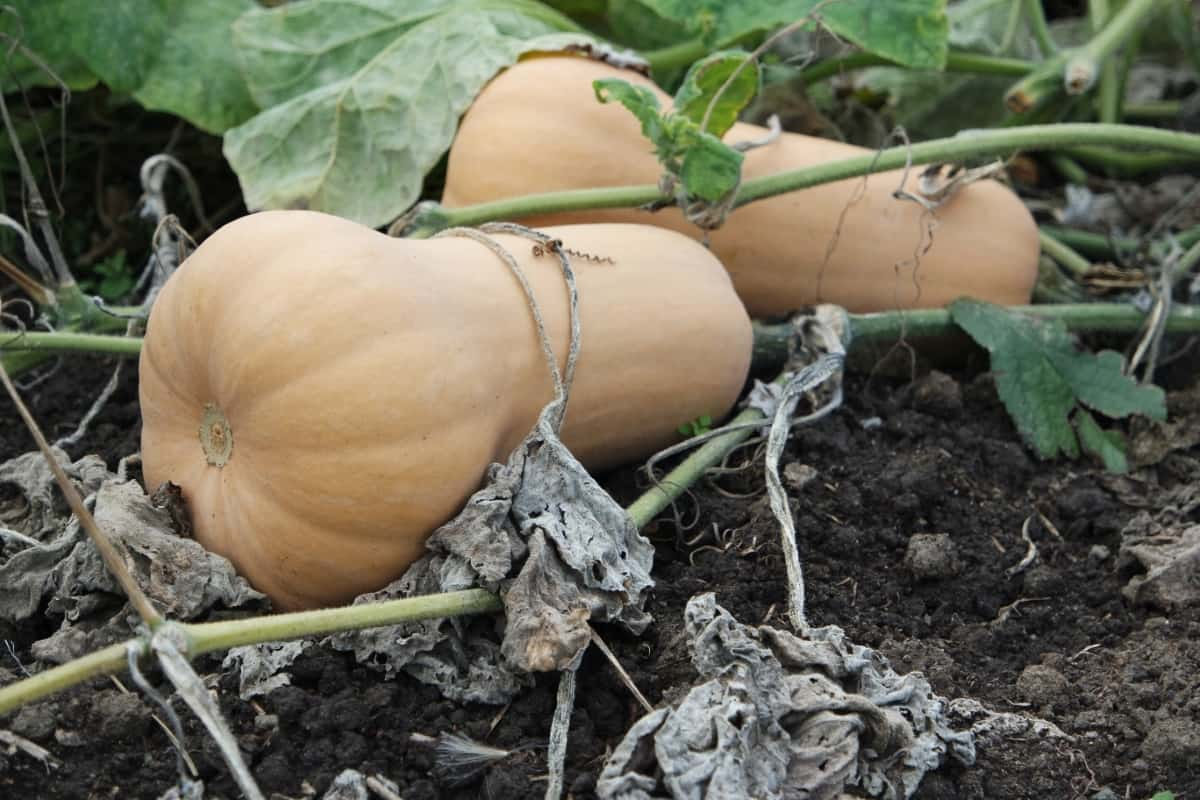
Homemade Fertilizers for Squash

Homemade Fertilizers for Squash

Key Nutrients for Healthy Squash Growth 

Nitrogen is one of the most important elements for Squash plant nutrition. It helps in leaf and stem development, as well as overall plant vigor. Calcium is another vital nutrient that shouldn’t be overlooked when it comes to Squash plants. Adequate levels of calcium contribute to strong cell walls, preventing diseases like blossom end rot that can plague your precious fruits. Potassium is yet another essential nutrient for healthy Squash growth. This element helps regulate water movement within the plant and enhances fruit quality and yield. 

Advantages of Organic Fertilizers for Squash 

DIY Organic Fertilizer for Squash nourishes the soil while feeding your crops, supports beneficial microbial life, and reduces risks associated with chemical runoff. Even though organic fertilization may require more effort, it pays off handsomely when it comes to long-term sustainability. 

Starting with Compost 

How to Make Compost at Home 

To get started with composting, collect kitchen scraps and even yard waste. Next, create a compost pile in your backyard by layering the organic materials.  Layer the browns (dry leaves or straw) followed by greens (kitchen scraps). Turn the pile regularly using a pitchfork or shovel to aerate it and accelerate decomposition. Within a few months to a year, you’ll have rich dark brown compost ready for use in your garden. 

Applying Compost to Squash Beds 

When it comes to Squash Compost Application, spread a layer of about two inches on top of the soil surface. Gently rake it into the top few inches of soil without disturbing any plant roots. 

Coffee Grounds for Nitrogen 

Preparing Coffee Grounds for Squash Fertilizer 

When it comes to Coffee Grounds Squash Fertilizer, prepare coffee grounds for use as Squash fertilizer, and collect used coffee grounds. Allow the grounds to dry out completely before applying them to your Squash beds. Once dried, scatter the coffee grounds around the base of your Squash plants, being mindful not to pile them too close to the stems. 

Nitrogen’s Role in Squash Development 

Nitrogen is essential for Squash development as it helps in leafy green growth and overall plant vigor. It plays a vital role in promoting photosynthesis, which is essential for energy production and nutrient absorption in plants. By using coffee grounds as a natural nitrogen-rich fertilizer, you can provide your Squash plants with an extra boost of nutrients without relying on synthetic chemical fertilizers. 

Eggshell Calcium Enrichment 

Creating Eggshell Fertilizer for Squash 

When it comes to the health and productivity of your Squash plants, calcium plays a crucial role. Creating eggshell fertilizer for Squash is not only easy but also a sustainable way to utilize kitchen waste. Start by collecting clean eggshells from your kitchen scraps. Rinse them and let them dry completely. Once the shells are dry, crush them or grind them into a fine powder using a blender.  

The Importance of Calcium for Squash Plants 

Remember that maintaining adequate calcium levels in your soil is crucial throughout the entire growing season. Regular applications of eggshell fertilizer can help prevent conditions like blossom end rot—a common problem in Squashes caused by calcium deficiency. 

In case you missed it: Squash Plant Diseases, Pests and Control Methods

Squash

Banana Peels for Potassium 

How to Use Banana Peels as Squash Fertilizer 

To utilize banana peels as fertilizer, start by collecting them from your kitchen scraps. It’s important to note that organic bananas are preferred since conventionally grown ones may have pesticide residues. Once you have gathered enough peels, cut them into small pieces to speed up decomposition. Next, bury the banana peel pieces directly into the soil around your Squash plants or blend them into a liquid fertilizer by soaking them in water for several days. This will allow the nutrients from the peels to leach out and create a potassium-rich solution. 

Potassium’s Impact on Squash Health and Yield 

Potassium is vital for overall plant growth and development. It helps strengthen cell walls, improve disease resistance, regulate water balance within cells, enhance root development, and promote fruiting and flowering in Squash plants. 

Wood Ash for Potassium and pH Adjustment 

Using Wood Ash in the Squash Garden 

Wood ash is a valuable resource when it comes to providing potassium and adjusting soil pH in your Squash Garden. Potassium is an essential nutrient for Squash plants as it promotes healthy root development, improves disease resistance, and enhances fruit production. Using wood ash as a natural fertilizer can help ensure that your Squash plants have an adequate supply of this important mineral. 

To use Wood Ash for Squash Gardens, start by collecting the ashes from hardwood fires or fireplaces. Avoid using ashes from coal or treated wood, as they may contain harmful chemicals. Spread the ashes evenly over the soil in your Squash beds and gently work them into the top layer of soil. 

Balancing Soil pH for Optimal Squash Growth 

Squash plants prefer slightly acidic to neutral soils with a pH between 6.0 and 7.0. Wood ash has alkaline properties that can help raise the pH level if your soil is too acidic. However, it’s important not to overdo it with wood ash application since excessive amounts can lead to overly alkaline conditions, which are not suitable for the optimal growth of Squash plants.  

Fish Emulsion for a Nutrient Boost 

Making Homemade Fish Emulsion Fertilizer 

To start the Fish Emulsion Recipe for Squash, gather the necessary ingredients: fresh fish scraps (such as heads, bones, and organs), water, and a large container with a lid. Begin by chopping the fish into smaller pieces to increase the surface area. Place the chopped fish in the container and cover it with water.

For every pound of fish scraps, add two gallons of water. Seal the container tightly with the lid. Allow this mixture to ferment for about two weeks in a cool location away from direct sunlight. During this time, beneficial bacteria will break down the fish scraps, transforming them into an odoriferous liquid fertilizer packed with essential nutrients. 

Benefits of Fish Emulsion for Squash 

Fish emulsion also contains calcium and phosphorus, which are essential for overall plant health. These minerals contribute to strong root systems and enhance flower production in Squash plants. Another advantage of using fish emulsion as a fertilizer is its ability to improve soil fertility over time. 

Seaweed for Micronutrients 

Preparing Seaweed Fertilizer for Squash 

To prepare Seaweed Fertilizer for Squash Plants, start by collecting fresh seaweed from beaches or purchase dried seaweed online or at gardening stores. Rinse off any saltwater and debris before using it in your garden. For a liquid extract, chop up the seaweed into small pieces and soak them in water for several days. Stir occasionally to help release its nutrients into the water. Strain out the solids and use the liquid as a foliar spray or root drench. 

Micronutrients’ Roles in Squash Plant Health 

Micronutrients are vital for Squash plants’ development as they play crucial roles in enzyme activation, photosynthesis, hormone production, and disease resistance. These trace elements include iron, manganese, zinc, copper, boron, molybdenum, nickel, and chlorine. While needed in small amounts compared to macronutrients like nitrogen and phosphorus, they are equally important for achieving optimal plant health. 

In case you missed it: Growing Butternut Squash – A Full Guide
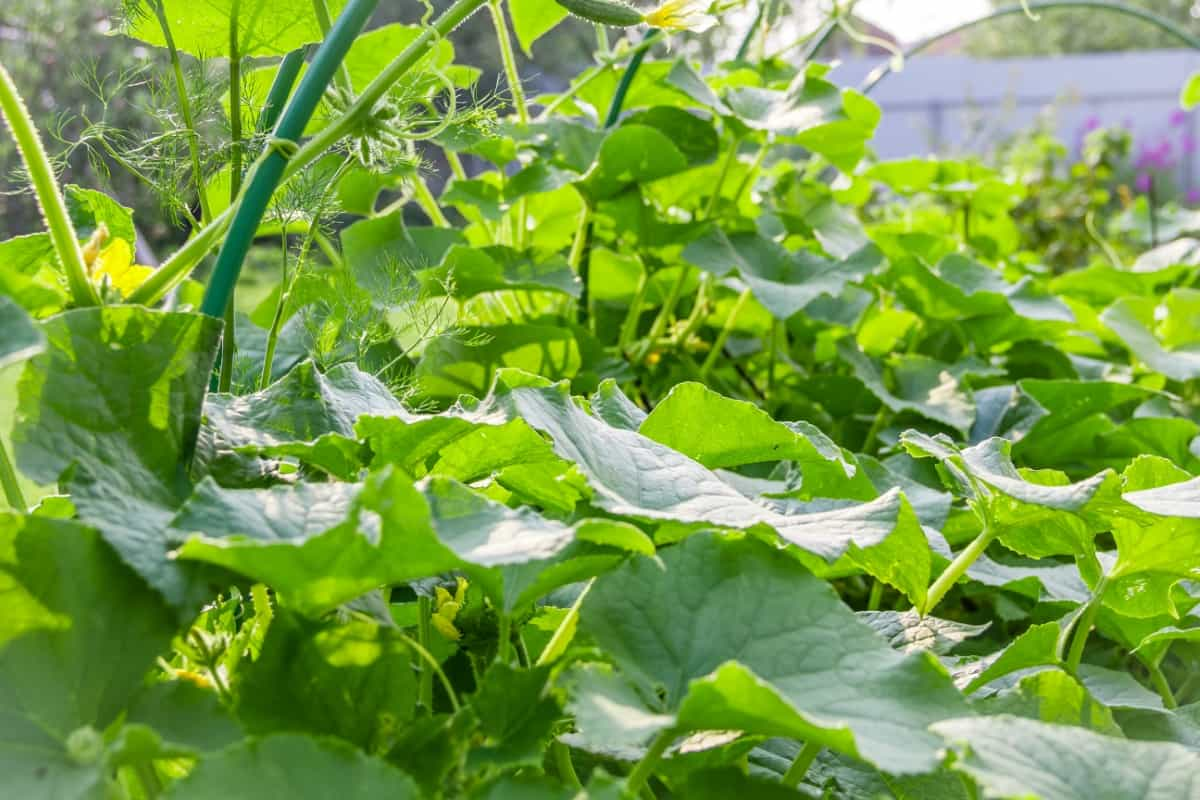
Pumpkin Growing on The Field

Epsom Salt for Magnesium and Sulfur 

Using Epsom Salt in Squash Cultivation 

When it comes to Epsom Salt for Squash Growth, ensure that your plants receive nutrients that are essential for their growth. One nutrient that plays an key role in promoting vigorous Squash plants is magnesium. And one way to provide this vital mineral is by using Epsom salt.  Epsom salt can be easily dissolved in water and applied to the soil or sprayed onto the leaves of your Squash plants. It not only provides magnesium but also supplies sulfur, another important element for plant development. 

Enhancing Squash Plant Vigor with Magnesium and Sulfur 

Magnesium is involved in physiological processes within the plant, such as photosynthesis and enzyme activation. Sulfur, on the other hand, aids in protein synthesis and enhances root development. By incorporating Epsom salt into your fertilization routine, you are giving your Squash plants a boost of the sulfur they need for optimal growth. 

Green Manure for Soil Fertility 

Selecting and Growing Green Manure Crops for Squash 

Green manure crops are a fantastic way to improve the fertility of your soil and provide essential nutrients for your Squash plants. When choosing Green Manure for Squash Beds, consider their nitrogen-fixing abilities. Legumes like Clover, Peas, or Beans are excellent choices as they have a symbiotic relationship with bacteria that convert atmospheric nitrogen into plant-available form.

This helps boost nitrogen levels in the soil naturally. Another option is incorporating grasses such as Rye or Oats into your garden. These cover crops help prevent erosion, suppress weeds, and add organic matter when turned under. 

Incorporating Green Manure into the Squash Garden 

To incorporate green manure into your Squash garden, start by planting these nutrient-rich cover crops in sections where you plan to grow Squash later in the season. Allow them to grow until they reach maturity before cutting them down and turning them under. By doing this several weeks before planting your Squashes, you give enough time for organic matter from the cover crop to break down and release its nutrients into the soil. 

In case you missed it: Growing Spaghetti Squash; Planting; Care; Harvesting
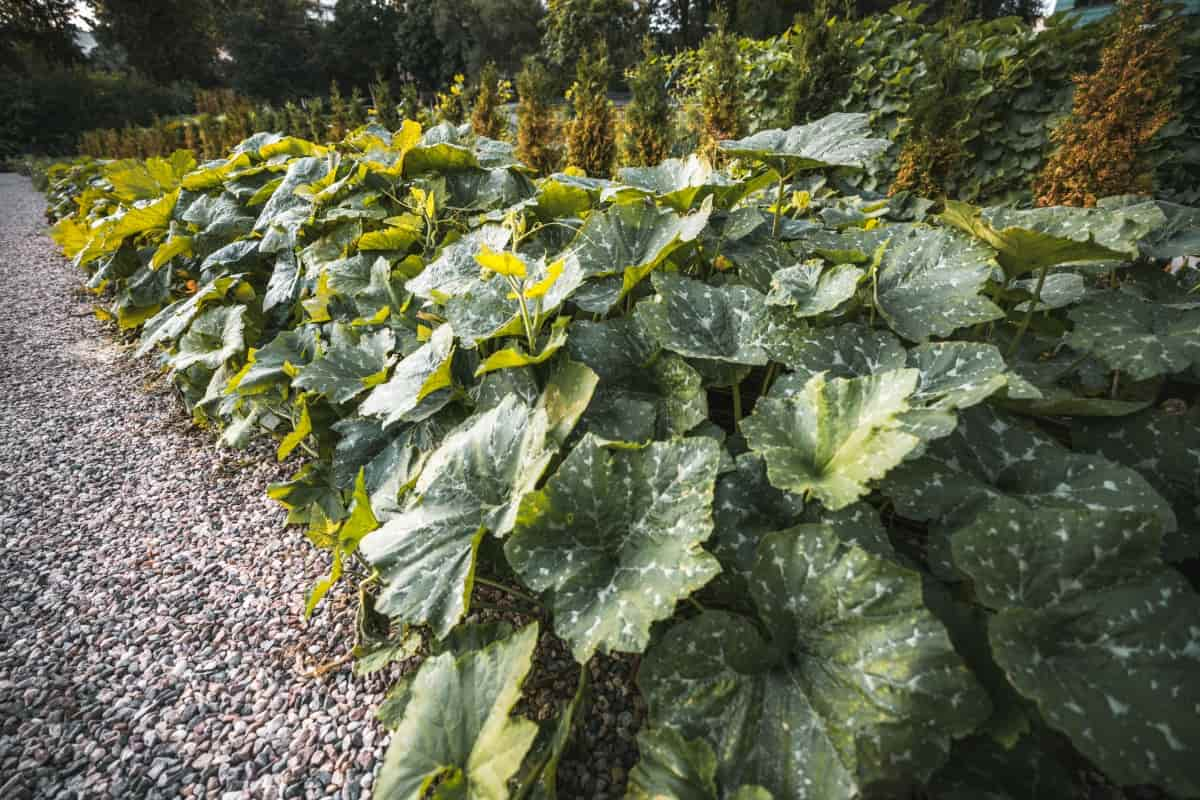
Bushes of Squashes and Pumpkins

Conclusion 

Incorporating homemade fertilizers and Organic Squash Growing Tips into your Squash garden is not only a sustainable and cost-effective approach but also a way to promote Squash Soil Health and the productivity of your plants. Remember to experiment with proportions and application methods based on your specific growing conditions until you find what works best for your garden. With a little patience and dedication toward creating homemade fertilizers suited for Squash cultivation, you’ll be rewarded with bountiful harvests year after year. 

Homemade Fertilizers for Asparagus: DIY Organic Fertilizers

0

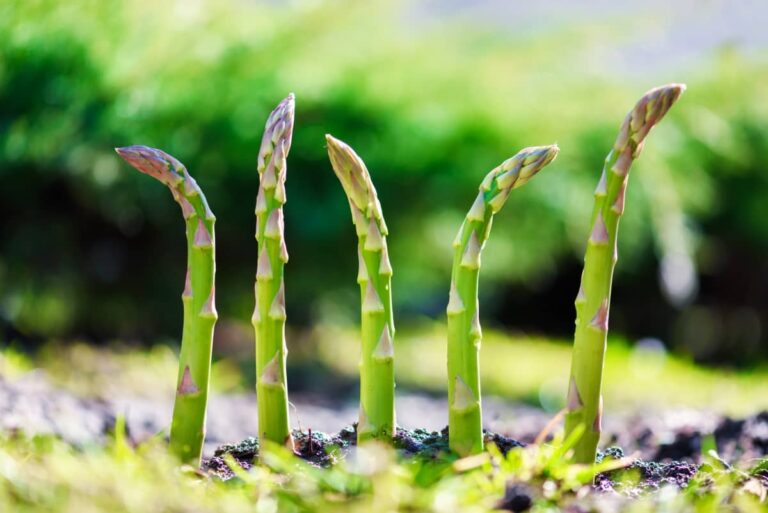
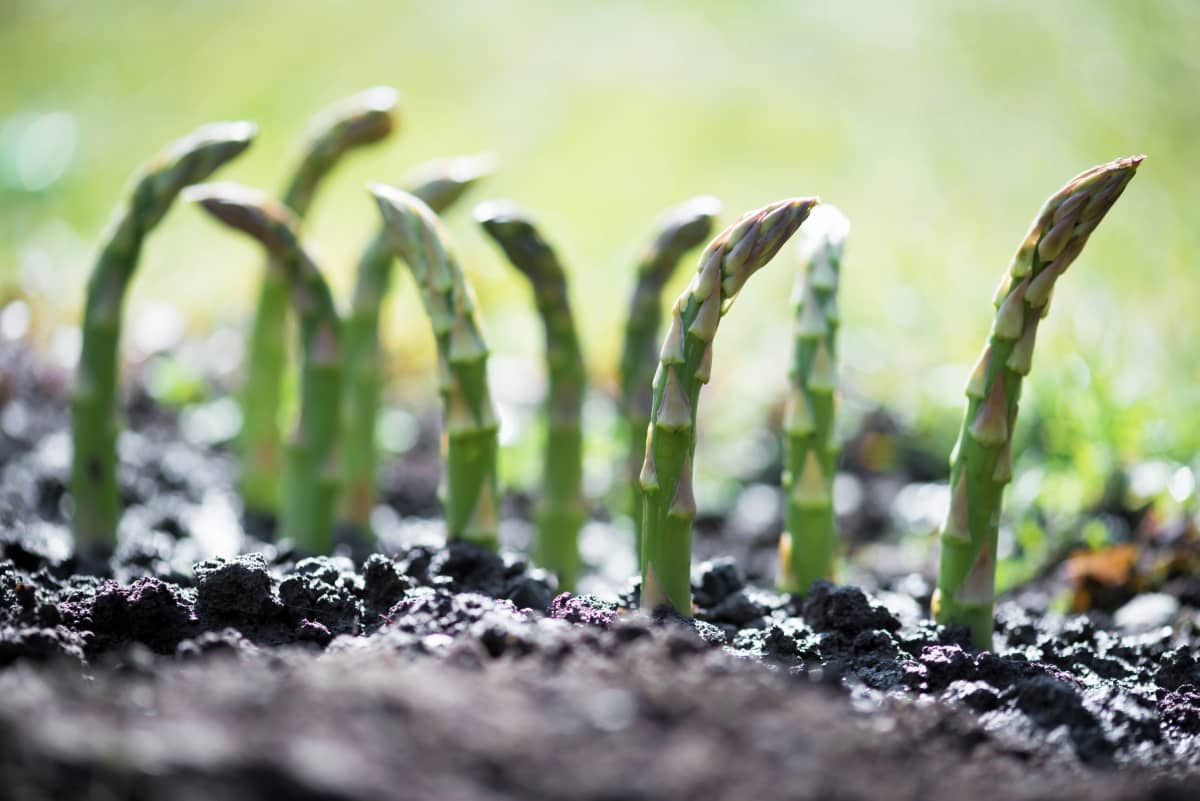
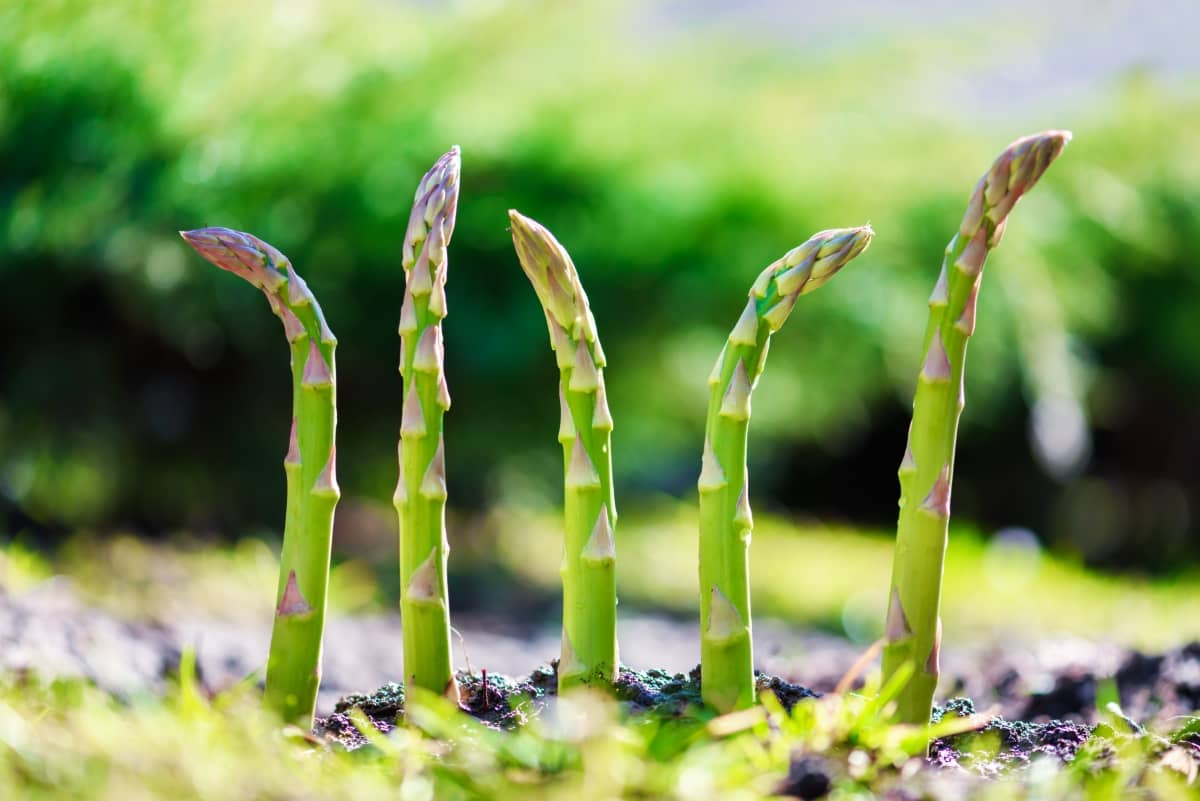
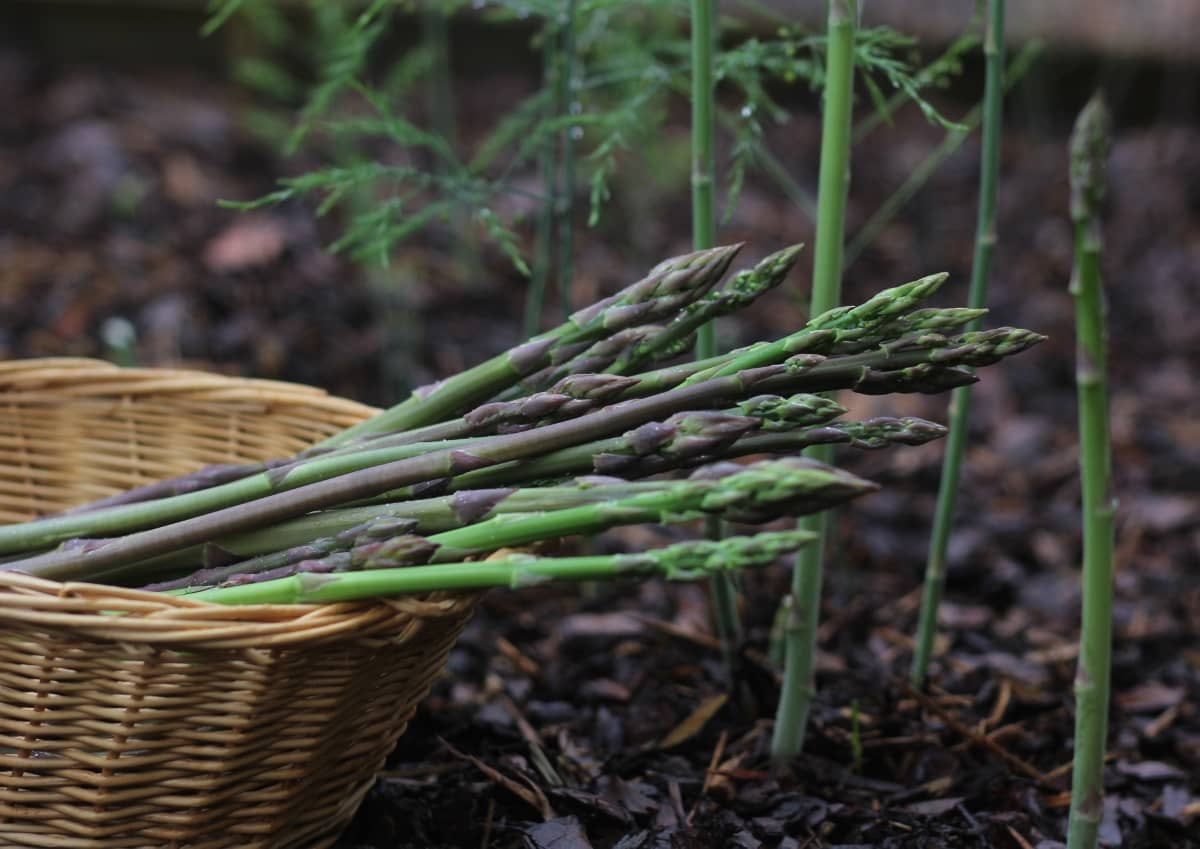
Asparagus is a nutritious vegetable that requires proper care to thrive. One essential aspect of Asparagus cultivation is fertilization. Fertilizing your Asparagus plants frequently can make a significant difference in their growth. Fertilizers provide essential nutrients, ensuring optimal development for your Asparagus plants. These nutrients include nitrogen, phosphorus, and potassium, which are crucial for vigorous growth, strong root systems, and increased yield. 

Homemade Fertilizers for Asparagus

Homemade Fertilizers for Asparagus

Introduction to Asparagus Nutrition 

Understanding Asparagus Nutrient Requirements 

Understanding the nutrient requirements of Asparagus is crucial for successful cultivation. Organic Asparagus Feeding can provide numerous benefits. Asparagus plants require several essential nutrients for optimal growth. These include nitrogen, phosphorus, potassium, calcium, magnesium, and trace minerals such as iron and zinc. 

The Benefits of Organic Fertilization 

Organic fertilization offers several advantages over synthetic alternatives. Organic fertilizers are derived from compost or animal products. This means they release nutrients slowly over time instead of providing a sudden burst that may cause harm to the plants or leach into surrounding water sources. 

Composting Basics for Asparagus 

How to Create Compost at Home 

Composting is the best way to create nutrient-rich soil for your Asparagus plants. Creating Asparagus Compost Mix at home is surprisingly simple. To start composting, gather organic materials like fruit and vegetable scraps, coffee grounds, grass clippings, and leaves. Aim for a good mix of green (nitrogen-rich) and brown (carbon-rich) materials to ensure proper decomposition.

Next, find a location for your compost pile or bin. It should be in a well-drained area that receives partial sunlight. Layer the organic materials in alternating green and brown layers, making sure to add some soil or finished compost occasionally to introduce beneficial microorganisms. 

Keep the pile moist by watering it regularly but not soaking it. Turn the pile every few weeks with a garden fork to aerate it and speed up decomposition. Within several months to a year, depending on various factors like temperature and moisture levels, you’ll have rich dark compost ready for use. 

Using Compost as Asparagus Fertilizer 

When using compost as fertilizer for your Asparagus beds, spread a layer of about one inch thick around each plant’s base in early spring before new growth appears. This will provide slow-release nutrients throughout the growing season while improving soil structure and moisture retention. 

Coffee Grounds as Fertilizer 

The Nitrogen Benefit of Coffee Grounds 

Nitrogen plays a crucial role in promoting leafy green growth and enhancing overall plant health. To use Coffee Grounds in Asparagus Garden, start by collecting the used grounds from your morning brew. Another method is to create a compost tea using coffee grounds. Simply place them in a bucket with water and let them steep for about 24 hours. This will extract valuable nutrients from the grounds, creating a nutrient-rich liquid fertilizer that can be poured directly onto your Asparagus plants. 

Application Methods for Asparagus Beds 

It’s worth noting that while coffee grounds provide an excellent source of nitrogen, they are slightly acidic. Spread coffee grounds evenly around the base of each Asparagus plant or directly onto the soil surface. Remember not to bury them too deep, as this may prevent water penetration and air circulation. 

Eggshell Calcium Boost 

Preparing Eggshells as Fertilizer 

Eggshell Calcium for Asparagus, which is crucial for the healthy development of Asparagus. Calcium plays helps in cell division and structure, ensuring strong stems and leaves. To prepare eggshell fertilizer at home, simply collect eggshells and let them dry completely. Once they are dry, crush them into small pieces using a blender. You can then sprinkle these crushed shells around the base of your Asparagus plants or mix them directly into the soil during planting. 

The Role of Calcium in Asparagus Growth 

By adding this homemade eggshell fertilizer to your garden bed, you’ll provide essential calcium nutrients to promote robust growth and improve overall plant health. Plus, it’s an environmentally friendly way to repurpose something that would otherwise go to waste. Boosting the calcium levels in your soil with eggshell fertilizer will ensure that your Asparagus plants have all they need for optimal growth. 

In case you missed it: How to Grow and Care for Yardlong Beans/Asparagus Beans From Seed

Young Green Asparagus Sprout

Banana Peel Potassium Kick 

Creating Banana Peel Fertilizer 

Potassium plays a key role in the overall well-being of Asparagus. It promotes strong root development, improves disease resistance, and enhances nutrient uptake. Creating Banana Peel Fertilizer for Asparagus is simple and cost-effective. Start by collecting ripe banana peels – make sure they are free from any pesticides or chemicals. Chop them into small pieces and blend them until they become a smooth paste. You can then mix this paste with water at a ratio of 1:5 (one part peel paste to five parts water). 

Potassium’s Importance to Asparagus Health 

Once you’ve prepared your banana peel fertilizer, it’s time to apply it to your Asparagus beds. Pour the mixture around each plant, making sure not to saturate the soil too much. By harnessing the power of banana peel fertilizer, you’re not only providing essential nutrients for your Asparagus but also reducing waste in an eco-friendly way. 

Wood Ash for Soil Health 

Benefits of Wood Ash for Asparagus 

When it comes to Wood Ash use Asparagus Beds, which are essential for healthy plant growth. Potassium plays a crucial role in many aspects of Asparagus health, including root development and disease resistance. By adding wood ash to the soil, you can provide your Asparagus with this important nutrient and help them thrive. 

How to Apply Wood Ash Correctly 

First, make sure the ashes are completely cooled before handling them. Then, sprinkle a thin layer of wood ash around the base of each Asparagus plant. Be careful not to use too much, as excessive amounts can raise the pH level of your soil too high and inhibit nutrient uptake. It’s also important to note that while wood ash provides beneficial nutrients like potassium, it does not contain nitrogen or phosphorus. Therefore, it should be used in conjunction with other organic fertilizers or compost to ensure balanced nutrition for your Asparagus plants. 

Fish Emulsion Fertilizers 

Making Homemade Fish Emulsion 

Fish Emulsion for Asparagus Plants is a fantastic way to give your Asparagus plants the nutrients they need to thrive. To make Homemade Asparagus fertilizers like homemade fish emulsion fertilizer, start by collecting fish scraps or heads from your local seafood market. These can be used as the main ingredient in your fertilizer mixture. Simply blend the fish scraps with water until you have a smooth consistency. 

Application Tips for Asparagus Plants 

Dilute the fish emulsion with water according to the package instructions or based on the needs of your specific plants. Then, using a watering can or sprayer, evenly distribute the mixture around the base of each plant. In addition to applying fish emulsion directly to Asparagus plants, you can also use it as part of compost tea or combine it with other organic fertilizers for a nutrient-rich soil amendment.  

Seaweed Fertilizer for Trace Minerals 

How to Harvest and Prepare Seaweed 

Seaweed fertilizer is a fantastic Natural Fertilizer for Asparagus providing trace minerals to your Asparagus plants. Harvesting seaweed can be an enjoyable activity that connects you with nature’s abundance. When collecting seaweed, make sure to choose healthy specimens from clean waters. Avoid areas near industrial sites or pollution sources. Look for varieties such as kelp or rockweed, which are rich in beneficial elements like potassium, nitrogen, and magnesium. 

To prepare Seaweed Extract for Asparagus Growth, rinse off any saltwater by soaking the collected seaweed in fresh water overnight. This process helps remove excess salts that may harm your plants. Afterward, chop the seaweed into smaller pieces to aid decomposition and nutrient release. 

Boosting Asparagus with Trace Minerals 

Once prepared, add the chopped seaweed directly to your compost pile, or when it comes to Asparagus Mulching Techniques, use it as mulch around your Asparagus beds. As it breaks down over time, the seaweed will gradually release its valuable trace minerals into the soil.  

Epsom Salt for Magnesium and Sulfur 

The Benefits of Epsom Salt to Asparagus 

Magnesium and sulfur are two essential nutrients that play a key role in the growth and development of plants. Asparagus, being a heavy feeder, requires an adequate supply of these nutrients to thrive. Adding Epsom salt to Asparagus beds can provide a much-needed boost of magnesium and sulfur. Magnesium helps with chlorophyll production, which is crucial for photosynthesis and overall plant health. Sulfur aids in protein synthesis and enzyme activity, promoting vigorous growth. 

Guidelines for Epsom Salt Application 

To apply Epsom salt to your Asparagus plants, simply dissolve one tablespoon of Epsom salt in water. Apply this solution to the soil around the base of the plants once every four weeks during the growing season. Remember not to overdo it with the Epsom salt application. Too much magnesium can lead to nutrient imbalances or toxicity in your Asparagus plants. 

In case you missed it: 20 Common Asparagus Plant Problems: How to Fix Them, Solutions, and Treatment 

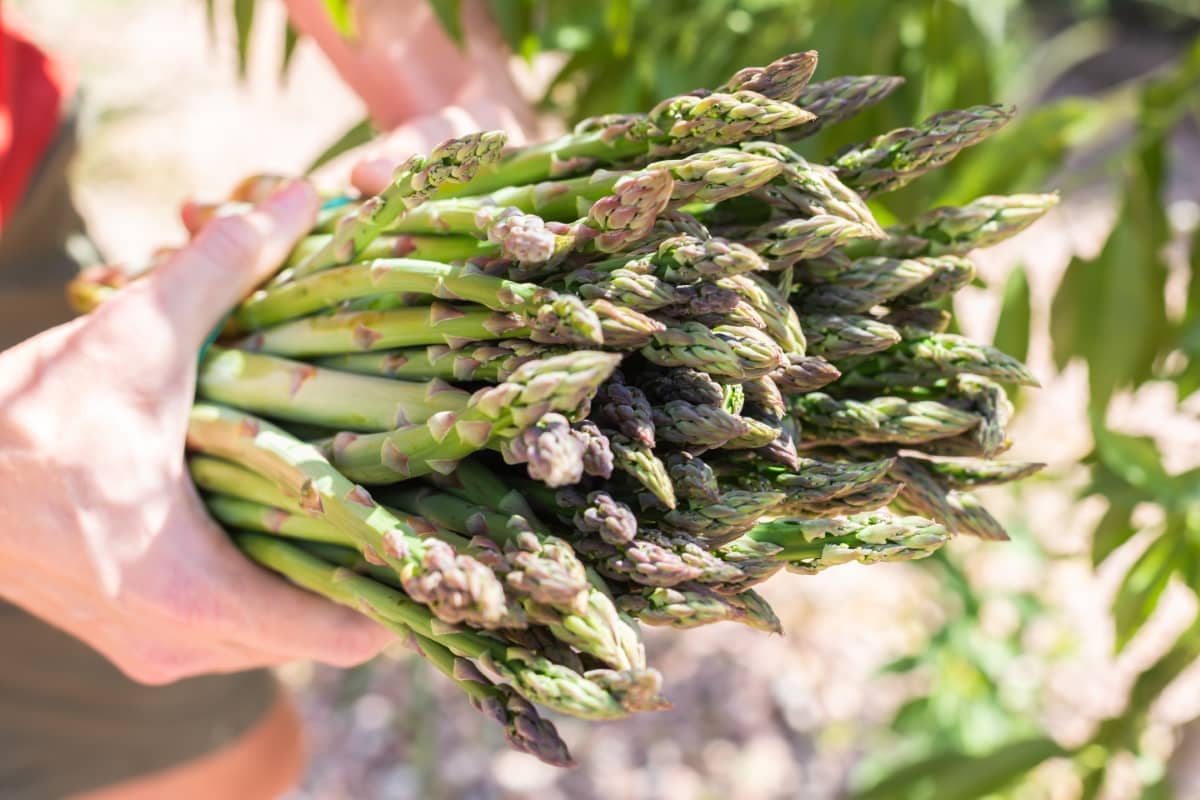
Freshly Picked Asparagus

Companion Planting and Fertilization 

Benefits of Companion Planting for Asparagus 

One of the key benefits of companion planting for Asparagus is pest control. Certain plants, such as Marigolds and Tomatoes, emit natural compounds that repel pests like nematodes and aphids. Legumes like Beans and Peas are known nitrogen fixers, meaning they can convert atmospheric nitrogen into a form that other plants can use. 

Natural Fertilizer Contributions from Companion Plants 

Furthermore, some companion plants act as dynamic accumulators, which means they have deep roots capable of extracting minerals from deeper soil layers. These minerals are then stored in the plant’s leaves or stems and released when the plant decomposes or is cut back. This process helps improve overall soil fertility and nutrient availability for neighboring crops like Asparagus. 

In case you missed it: Growing Organic Asparagus in Containers

Asparagus

Conclusion 

Homemade organic fertilizers offer several advantages over synthetic ones. They provide a natural and balanced source of nutrients for your plants without the risk of harmful chemicals or environmental pollution. Additionally, these DIY Asparagus Plant Food options allow you to customize the ingredients based on your needs and resources. 

Embracing an organic approach not only benefits your garden but also promotes sustainability by reducing reliance on chemical interventions. By utilizing homemade organic fertilizers for Asparagus beds, you contribute to healthier soil ecosystems while reaping delicious rewards from your harvests. 

Homemade Fertilizers for Zucchini: DIY Organic Fertilizers Recipe  

0

Zucchini is not only a versatile vegetable but also a nutritious addition to any diet. To ensure these plants thrive and produce the best yield possible, it is essential to understand the importance of fertilizers. By using homemade and organic fertilizers, you can provide your Zucchini plants with the essential nutrients they need to thrive.  

Homemade Fertilizers for Zucchini

Homemade Fertilizers for Zucchini

Understanding Zucchini’s Nutrient Needs 

Understanding the nutrient needs of Zucchini is crucial for successful cultivation and abundant harvests. Trace Nutrients required for Healthy Zucchini Growth include nitrogen, phosphorus, potassium, calcium, magnesium, iron, and zinc. These essential nutrients play a key role in various plant processes, such as photosynthesis, root development, fruit production, and overall plant growth. 

Benefits of Using Organic Fertilizers 

Unlike synthetic fertilizers that can damage soil health due to their high salt content or chemical additives, organic options provide slow-release nutrients while improving soil structure. Using Homemade Zucchini Fertilizer not only ensures that you are providing your plants with the necessary nutrients they need but also reduces reliance on store-bought products. 

Composting for Zucchini Fertilizer 

Creating Rich Compost at Home 

Creating rich compost at home is a great way to provide your Zucchini plants with the nutrients they need for healthy growth. To start composting for Zucchini fertilizer, collect fruit and vegetable scraps, coffee grounds, eggshells, and yard waste like grass clippings or leaves. 

Layer these materials in a bin or designated area in your garden. Green materials include kitchen scraps and fresh grass clippings, while brown materials include dried leaves or straw. Keep the compost moist, but avoid overwatering, which can lead to bad odors. Turn the compost occasionally using a pitchfork or shovel to aerate it and promote decomposition. 

Applying Compost to Zucchini Plants 

Once your compost has broken down into dark, crumbly soil-like material, known as humus, you can apply it around the base of your Zucchini plants. Gently work Zucchini Compost Mix into the top 2 inches of soil without disturbing the roots too much. 

Coffee Grounds as Nitrogen Boost 

Preparing Coffee Grounds for Garden Use 

When it comes to using Coffee Grounds as Zucchini Fertilizer, first prepare coffee grounds for garden use. Collect used coffee grounds from your morning ritual. Spread them out on a tray and let them dry completely before using them in the garden. 

The Role of Nitrogen in Zucchini Growth 

Nitrogen is the essential nutrient that plants require for healthy development, including leafy green growth and overall vigor. Excess nitrogen can cause excessive foliage growth at the expense of fruit production in Zucchinis. Aim for a balanced approach by combining other organic fertilizers rich in phosphorus and potassium along with your nitrogen boost from coffee grounds. 

In case you missed it: From Zucchini to Butternut: Discover the Top 13 Squash Varieties for Your Home Garden

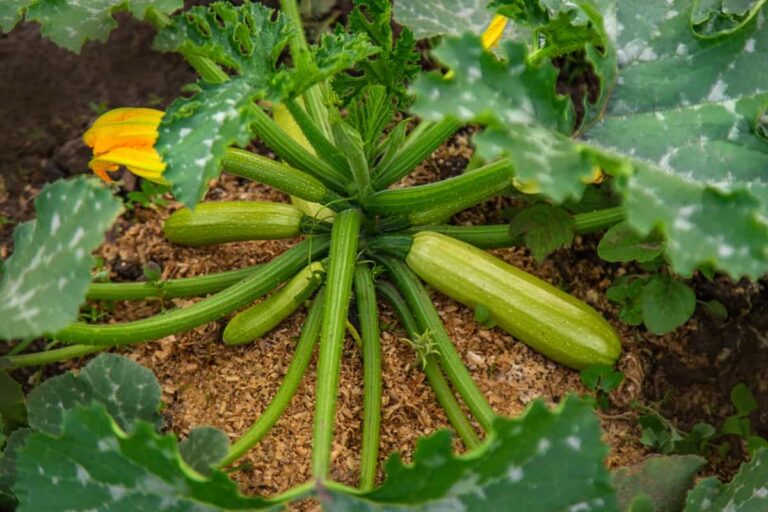
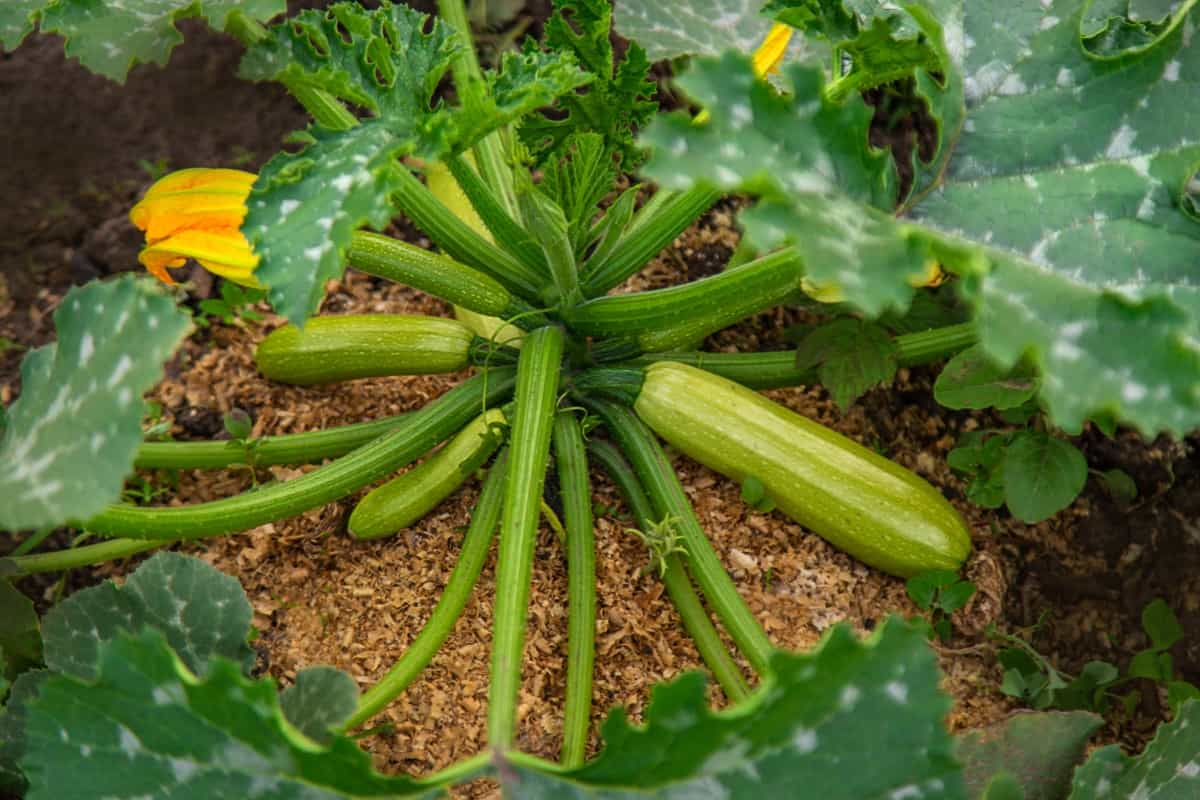
Zucchini Growing in The Garden

Eggshell Calcium Supplement 

How to Make Eggshell Fertilizer 

To make your eggshell fertilizer, start by collecting clean eggshells. Rinse them thoroughly and let them dry. Once they are completely dry, crush the shells into small pieces. You can use a mortar and pestle or simply put them in a plastic bag and gently crush them with a rolling pin. 

Calcium’s Importance for Zucchini Health 

When it comes to Eggshell Calcium for Zucchini Plants, Calcium plays a key role in cell development and overall plant growth. It strengthens the cell walls of Zucchinis, making them more resistant to diseases such as blossom end rot. By incorporating DIY Organic Zucchini Fertilizer Recipes into your Zucchini garden, you’ll provide your plants with an ample supply of calcium while avoiding the use of synthetic fertilizers that may harm both your plants and the environment. 

Banana Peel Potassium Source 

Crafting Banana Peel Fertilizer 

To create banana peel fertilizer, simply collect a few peels and chop them into small pieces. Then, place the chopped peels in a container filled with water and let it sit for about three days. This allows the nutrients to leach out from the peels and into the water, creating a potassium-rich liquid fertilizer. 

Potassium and Zucchini Development 

When it comes to Banana Peel Potassium for Zucchini, potassium plays a crucial role in promoting overall plant health and development. It helps regulate water uptake, improves disease resistance, enhances root growth, and aids in fruit production. By providing your Zucchini plants with this homemade potassium boost from banana peel fertilizer, you’re giving them an extra dose of nutrition they need to thrive. 

Wood Ash for Soil Alkalinity 

Safely Using Wood Ash in the Zucchini Garden 

Adding wood ash to your Zucchini garden can be a game-changer when it comes to soil alkalinity. First things first, make sure that the source of your wood ash is from untreated wood. When it comes to Wood Ash Use in Zucchini Beds, remember that moderation is key. Sprinkle evenly over the surface and gently work it into the topsoil with a rake or gardening fork. Avoid piling up excessive amounts, as this can lead to over-alkalization and harm your Zucchini plants. 

The Effects of Alkalinity on Zucchini 

The benefits of using wood ash are not just limited to adjusting soil pH levels; they also provide essential nutrients like potassium and calcium. Potassium plays a key role in promoting healthy fruit development in Zucchinis, while calcium helps prevent blossom end rot – an all-too-familiar problem for many gardeners. 

Fish Emulsion Homemade Recipe 

Creating Fish Emulsion Fertilizer 

When it comes to Fish Emulsion Fertilizer for Zucchini, you may be surprised to learn that fish can play a vital role. By creating your fish emulsion fertilizer at home, you can provide your Zucchinis with the nutrients they need to thrive. To make fish emulsion fertilizer, start by obtaining some fresh fish scraps or heads from a local seafood market. These leftovers are often discarded and can be obtained for free or at a low cost.

Next, combine the fish scraps with water in a large container and let them sit for several weeks. This allows the mixture to ferment and break down into a nutrient-rich liquid. Once the fermentation process is complete, strain out any solids from the liquid using cheesecloth or a fine mesh sieve. The resulting liquid is now ready to be used as fertilizer for your Zucchini plants. 

Benefits of Fish Emulsion for Zucchini 

One of the major benefits of using fish emulsion is its high concentration of nitrogen, an essential nutrient for plant growth. Nitrogen helps promote lush foliage and healthy green leaves on your Zucchini plants. In addition to nitrogen, fish emulsion also contains other important elements, such as phosphorus and potassium, which aid in root development and overall plant health. These nutrients help ensure strong stems and abundant yields in your Zucchinis. 

In case you missed it: How to Grow Zucchini from Seed to Harvest: Check How this Guide Helps Beginners

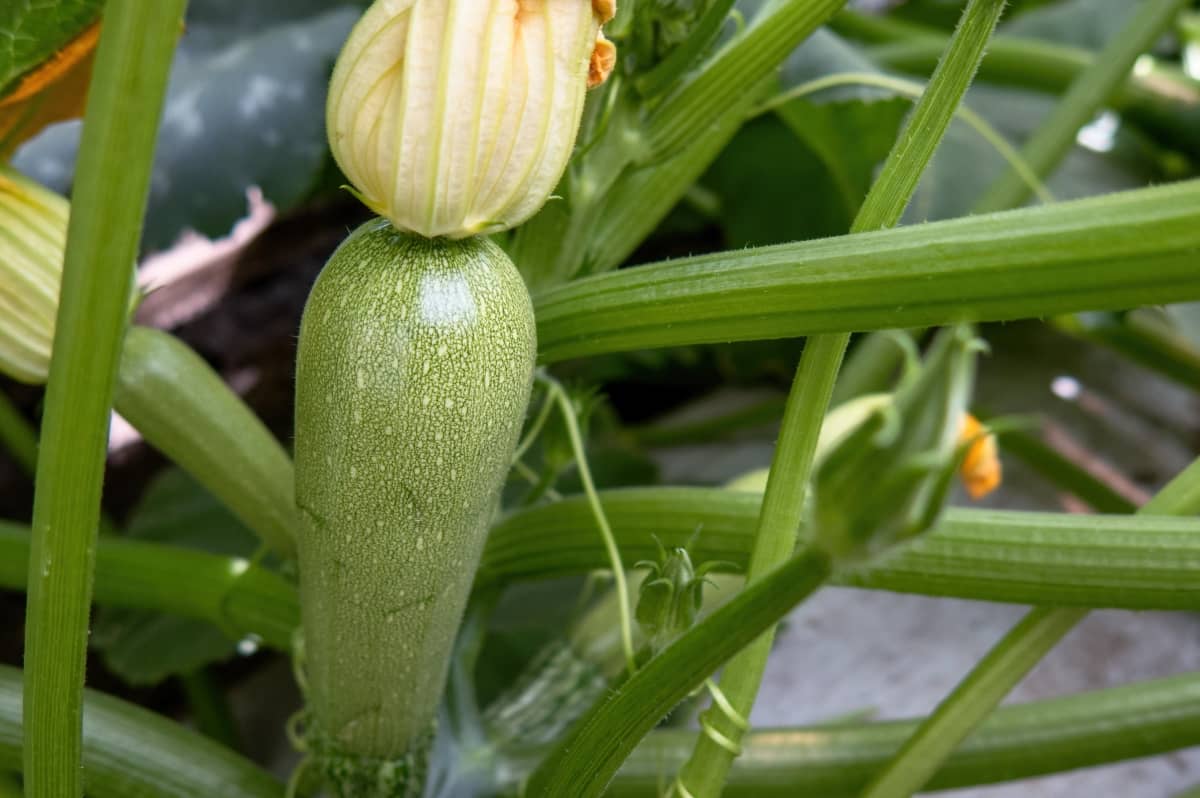
Zucchini

Seaweed Fertilizer for Trace Nutrients 

How to Prepare Seaweed Fertilizer 

When it comes to Seaweed Fertilizer Benefits for Zucchini, Seaweed fertilizer is a natural and organic way to provide your Zucchini plants with the trace nutrients they need for healthy growth. To prepare seaweed fertilizer, start by collecting fresh seaweed from beaches or purchasing dried seaweed from gardening stores.

Rinse the seaweed thoroughly and chop it into small pieces before soaking it in water for several days, stirring occasionally. After the soaking period, strain the liquid into a container and dilute it with water at a ratio of 1:3 (one part seaweed extract to three parts water). This diluted mixture can be used as a foliar spray or poured onto the soil around your Zucchini plants. 

Trace Elements and Their Role in Zucchini Growth 

The trace elements found in seaweed, such as iron, zinc, manganese, and copper, play crucial roles in various plant functions. Iron aids in chlorophyll production and photosynthesis, while zinc promotes enzyme activity. Manganese helps activate enzymes involved in nutrient uptake and metabolism, while copper assists with reproductive development. 

Epsom Salt for Sulfur and Magnesium 

Using Epsom Salt in Zucchini Cultivation 

When it comes to Epsom Salt Usage for Zucchini Growth, Magnesium is an essential nutrient that plays a vital role in photosynthesis, helping convert sunlight into energy for plant growth. Without enough magnesium, Zucchini plants can become weak and stunted. Sulfur is crucial for protein synthesis and enzyme activity within the plant. It helps with seed production and overall plant development. A deficiency in sulfur can lead to yellowing leaves and reduced fruit yield. 

The Importance of Magnesium and Sulfur 

By adding Epsom salt to your Zucchini Garden beds or containers, you’re providing a readily available source of both magnesium and sulfur. The roots of your plants easily absorb this natural mineral supplement. To use Epsom salt as a fertilizer for Zucchinis, simply dissolve one tablespoon of it in 1 gallon of water and apply it around the base of each plant once every two weeks during the growing season. The diluted solution ensures proper distribution without overwhelming your plants. 

Using Green Manure for Zucchini 

Choosing and Growing Green Manure Crops 

When it comes to Green Manure Techniques for Zucchini Soil, it is an excellent way to enrich the soil in your Zucchini beds naturally. It involves growing specific crops that are then incorporated back into the soil as nutrient-rich mulch. Not only does it provide a sustainable source of organic matter, but it also helps suppress weeds and improve soil structure. 

When selecting green manure crops for your Zucchini Garden, consider plants that are fast-growing and have deep root systems. Some popular choices include Clover, Alfalfa, Buckwheat, and Ryegrass.  

Incorporating Green Manure into Zucchini Beds 

To incorporate green manure into your Zucchini beds, simply sow the chosen crop seeds densely over the area you want to improve. Allow them to grow until they reach their peak biomass or when they begin flowering. At this point, cut them down close to ground level using shears or a lawnmower. 

Next, work the plant material into the top 2 inches of soil using a garden fork or tiller. This will speed up decomposition while ensuring nutrients are released gradually over time. By utilizing green manure in your Zucchini Garden beds regularly, you’ll notice improved fertility year after year.  

In case you missed it: Growing Organic Zucchini In Containers At Home

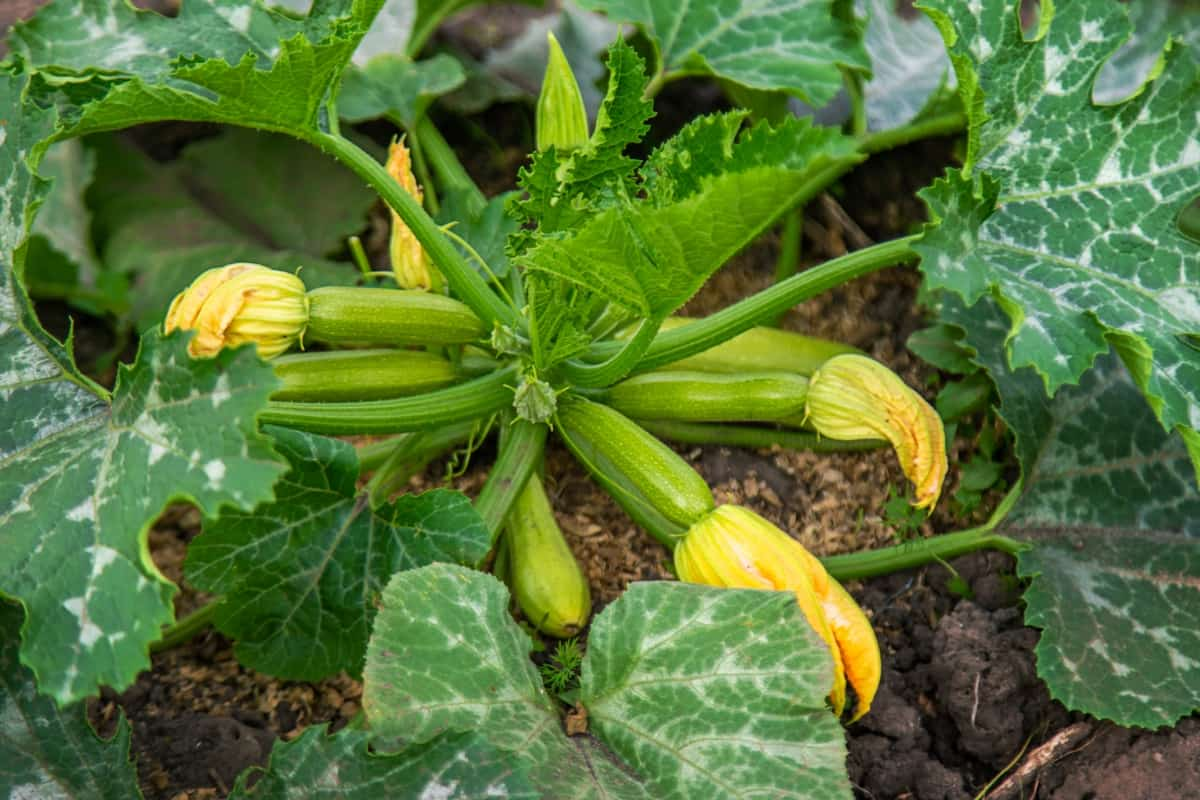
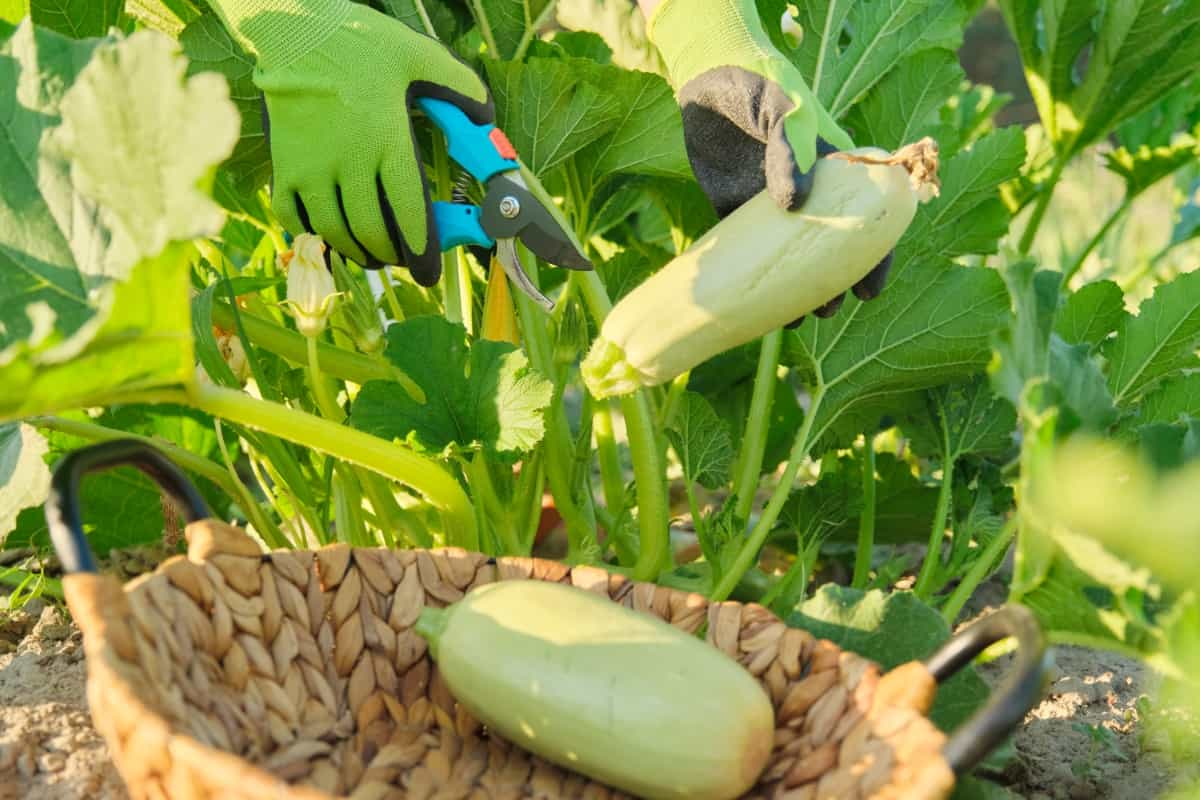
Zucchini Harvest

Conclusion 

Providing homemade fertilizers for Zucchini plants is a great way to ensure they receive the necessary nutrients for optimal growth and productivity. By understanding their nutrient needs and using organic alternatives, Organic Zucchini Cultivation Tips, you can promote healthy soil, enhance plant development, and ultimately enjoy a bountiful harvest. 

Homemade Fertilizers for Rosemary: A Guide to DIY Organic Fertilizers

0

Rosemary adds flavor and fragrance to many dishes. Whether you have a small garden or a few pots on your balcony, growing Rosemary can be a rewarding experience. Homemade plant food for Rosemary is a fantastic option for nourishing your Rosemary plants. They provide numerous benefits, such as promoting healthy growth, enhancing nutrient absorption, and boosting overall plant health.

Homemade Fertilizers for Rosemary

By using common ingredients found in your kitchen or garden, you can easily create these natural fertilizers to ensure the well-being of your beloved Rosemary. Remember to experiment with different recipes and follow Organic Rosemary care tips.  

Homemade Fertilizers for Rosemary

Organic Materials-Based Fertilizers 

Compost Tea 

Compost tea is a nutrient-rich liquid fertilizer made from steeping compost in water. It’s packed with beneficial microorganisms that help improve soil structure and nutrient availability. To make compost tea, you’ll need mature compost and a brewing container or bag. Simply place the compost in the container, add water, let it steep for 24-48 hours, and then strain it before applying it to your Rosemary plants. 

Manure Tea 

Manure tea is another excellent organic option. It involves soaking aged manure (such as a cow or horse manure) in water to create a nutrient-dense liquid fertilizer. The process is like making compost tea: mix the manure with water in a container or bag and allow it to steep for several days before straining and using it on your Rosemary. 

Seaweed Extract 

Seaweed extract contains trace minerals, growth hormones, amino acids, vitamins, and enzymes that can benefit plant growth. Applying seaweed extract to your Rosemary can be done by diluting it with water according to the package instructions or making a liquid tea by steeping dried seaweed in water for several days. You can use this mixture as a foliar spray, or you can apply it directly to the soil around your plants. 

DIY Nutrient-Rich Compost 

Ingredients 

Creating your nutrient-rich compost is not only a sustainable practice but also a cost-effective way to nourish your Rosemary plants. To make your homemade compost, you’ll need a combination of green and brown materials. Green materials like kitchen scraps like fruit and vegetable peels, coffee grounds, and grass clippings. Brown materials can be dried leaves, straw or hay, wood chips, or sawdust. 

Composting Process 

Once you’ve gathered the necessary ingredients, it’s time to start the composting process. Layer the green and brown materials in equal proportions in a designated compost bin or pile. This will help create an ideal balance of nitrogen and carbon that promotes decomposition. It’s important to turn the pile regularly to aerate it and speed up decomposition. 

Compost Application 

After several weeks or months of decomposition (depending on factors such as temperature and moisture), your compost will transform into dark, crumbly soil-like matter that’s rich in nutrients. Spread compost around the base of your Rosemary plants without burying them. 

Vermicompost Fertilizer 

Vermicomposting Basics 

When it comes to Homemade Rosemary fertilizer solutions, vermicompost is a powerhouse for your plants, including Rosemary. Vermicomposting process includes using worms to break down organic materials into nutrient-rich compost. 

Making Vermicompost Tea 

To make vermicompost tea, start by collecting mature compost from your worm bin. Take about one cup of this compost and mix it with five gallons of water in a bucket or container. Steep the mixture for 24-48 hours, stirring occasionally. Once you have your vermicompost tea ready, strain out any solid particles and dilute it with water until it looks like weak tea. This liquid gold can be applied directly to the soil around your Rosemary plant or used as a foliar spray. 

Applying Vermicompost to Rosemary 

Applying vermicompost to Rosemary provides a wide range of benefits. It enhances soil structure, improves moisture retention capabilities, and increases nutrient availability for the plant’s roots. It’s important to note that you don’t need to apply vermicompost too frequently. Once every few months should be sufficient, especially if you have well-established plants.

In case you missed it: Expert Tips to Grow Fuller and Bushier Rosemary

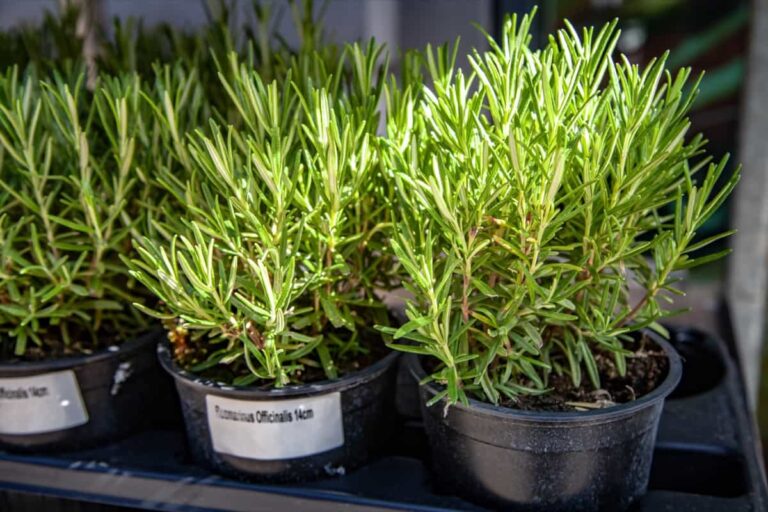
rosemary plants

Coffee Grounds Fertilizer 

Coffee Grounds Composition 

When it comes to Homemade Rosemary fertilizer, coffee grounds are a popular choice among gardeners. Not only can they provide a nutrient-rich boost to your plants, but they also help reduce waste by repurposing used coffee grounds. First and foremost, they are rich in nitrogen, which is essential nutrient for plant growth. Additionally, coffee grounds contain other important minerals like potassium and phosphorus that contribute to overall plant health. 

Preparation of Coffee Grounds Fertilizer 

To prepare your own coffee grounds fertilizer, collect used coffee grounds from your daily brew. Mix the coffee grounds with water at a ratio of 1 part coffee grounds to 4 parts water. Steep the mixture overnight or for at least 24 hours before straining out any solid particles. 

Applying Coffee Grounds to Rosemary 

Now that you have your homemade fertilizer ready, it’s time to apply it to your Rosemary plants. Begin by watering the soil around the base of the plant thoroughly. Then, pour the diluted coffee ground solution onto the soil surface while avoiding direct contact with leaves or stems. Aim to apply this Homemade organic fertilizer for Rosemary once every few weeks during active growing seasons for best results. 

Epsom Salt Fertilizer 

Benefits of Epsom Salt for Rosemary 

If you’re looking to give your Rosemary plants a nutrient boost, consider using Epsom salt as a natural fertilizer. One of the main advantages of using Epsom salt on Rosemary is its ability to promote healthy growth. Magnesium plays a crucial role in chlorophyll production, which is essential for photosynthesis. By supplying your plants with an adequate amount of magnesium through Epsom salt, you can ensure that they have enough energy to grow and thrive. 

Mixing Epsom Salt Solution 

To create an Epsom salt solution for your Rosemary plants, simply dissolve one tablespoon of Epsom salt in one gallon of water. Stir well until the crystals are completely dissolved. You can apply mixture directly to the soil around your Rosemary plants. 

Application Frequency and Method 

When it comes to frequency and method of application, it’s best to use the Epsom salt solution once every month. Make sure to water your plants thoroughly after applying the solution to help distribute the nutrients evenly throughout the root zone. Remember that while Epsom salts can benefit your Rosemary plants when used correctly, excessive use or misuse can harm them. 

Banana Peel Fertilizer 

Nutrients in Banana Peels 

When it comes to Organic Rosemary fertilizers, banana peels can be an excellent resource right at your fingertips. These seemingly humble fruit remnants are packed with nutrients that can benefit your Rosemary plants in more than one. Let’s talk about the valuable nutrients present in banana peels. It contains potassium, they also contain small amounts of phosphorus and calcium. Additionally, banana peels provide a healthy dose of magnesium and sulfur – two essential elements for plant growth. 

Banana Peel Fertilizer Preparation 

To prepare banana peel fertilizer, simply collect a few ripe peels and chop them into small pieces. Then, place these pieces in a jar or container filled with water. Let the mixture sit for a week or so until it turns brownish – this indicates that the nutrients have been extracted from the peels. 

Applying Banana Peel Solution to Rosemary 

Once ready, strain the liquid and dilute it by adding water (usually at a ratio of 1:5). This ensures that you won’t overwhelm your Rosemary plants with too much-concentrated solution. Gently pour the diluted solution around the base of each plant once every two weeks during its active growing season. Make sure not to drench the foliage, as this may lead to rotting or fungal issues. 

Eggshell Fertilizer 

Calcium Benefits for Rosemary 

Eggshells, though often discarded as waste, can actually be incredibly beneficial for your Rosemary plants. One of the key advantages they offer is their high calcium content. Calcium plays a crucial role in plant development and overall health. 

In case you missed it: How to Grow Rosemary from Seed to Harvest: Check How this Guide Helps Beginners

Leaves Of Green Rosemary
Eggshell Fertilizer Preparation 

To prepare eggshell fertilizer, start by collecting clean and dry eggshells. Crush them or grind them into a fine powder. This will make it easier for the nutrients to be absorbed by your Rosemary plant’s roots. 

Incorporating Eggshells into Soil 

Incorporating Eco-friendly Rosemary fertilizers like eggshells into your soil is simple yet effective. You can either sprinkle crushed shells around the base of your Rosemary plants or mix them directly into the soil during planting or transplanting. Over time, as the shells break down, they release calcium slowly, providing a steady supply of this essential nutrient to your Rosemary. By incorporating DIY Rosemary nutrient boosters like eggshell fertilizer into your gardening routine, you are not only utilizing kitchen waste but also ensuring that your Rosemary plants receive adequate calcium for optimal growth and productivity. 

Fish Emulsion Fertilizer 

Nutrient Content in Fish Emulsion 

Fish emulsion fertilizer is a nutrient-rich organic option for feeding your Rosemary plants. It contains essential nutrients that can promote healthy growth and vibrant foliage. The nutrient content in fish emulsions includes nitrogen, phosphorus, and potassium (NPK), as well as trace minerals like calcium, magnesium, and iron. These nutrients are easily absorbed by the roots of the plant, providing immediate nourishment. 

Homemade Fish Emulsion Recipe 

Making homemade fish emulsion is simple. Start by blending fresh fish scraps with water in a blender or food processor until they form a slurry-like consistency. Strain the mixture, then dilute it with water according to the instructions. 

Dilution and Application Techniques 

Mix one part fish emulsion with four parts water before applying evenly around the base of the plant. For best results, apply fish emulsion fertilizer every two weeks during the growing season. This regular feeding will help support strong root development and overall plant health. Remember that while fish emulsion is an effective Natural Rosemary fertilizer recipe, it does have a distinct odor that may not be pleasant to some gardeners. 

Molasses Fertilizer 

Role of Molasses in Soil Health 

Molasses, a thick and sweet byproduct of sugar production, maybe the secret ingredient your Rosemary plants need to thrive. Its role in soil health goes beyond its delicious taste. Molasses are rich in essential nutrients like potassium, iron, and calcium that can benefit your plant’s growth. 

Making Molasses Fertilizer Solution 

To make a molasses fertilizer solution, simply mix one tablespoon of unsulphured molasses with one gallon of water. Stir thoroughly until the molasses dissolves completely. This homemade concoction will provide your Rosemary with an organic boost without harmful chemicals. 

Using Molasses Fertilizer for Rosemary 

Using molasses fertilizer for Rosemary is easy. Apply the solution to the base of the plant or use it as a foliar spray during the growing season. The natural sugars in molasses help stimulate microbial activity in the soil and improve nutrient uptake for healthier and more vibrant Rosemary plants. 

Grass Clipping Fertilizer 

Grass Clipping Composition 

Grass clippings, a common yard waste material, can actually be repurposed into a beneficial Best homemade Rosemary feed for your Rosemary plants. The composition of grass clippings includes nitrogen, phosphorus, and potassium that are crucial for plant growth and development. 

Grass Clipping Tea Preparation 

To make grass clipping fertilizer, first, ensure that the grass you have collected has not been treated with any chemicals or pesticides. Next, create a compost tea by soaking the grass clippings in water for several days. This allows the nutrients to leach out into the water and create a nutrient-rich solution. 

Application of Grass Clipping Fertilizer to Rosemary 

Once the compost tea is ready, strain out the grass clippings and dilute the liquid with water at about a 1:10 ratio. This ensures that it doesn’t become too concentrated and potentially harm your Rosemary plants. When applying the grass clipping fertilizer to your Rosemary plants, use it as a foliar spray or pour it onto the soil around them. Be sure to apply it sparingly to avoid over-fertilizing your plants. 

In case you missed it: 15 Gardening Mistakes to Avoid This Fall: For Vegetables, Flowers, Fruits, and Herbs

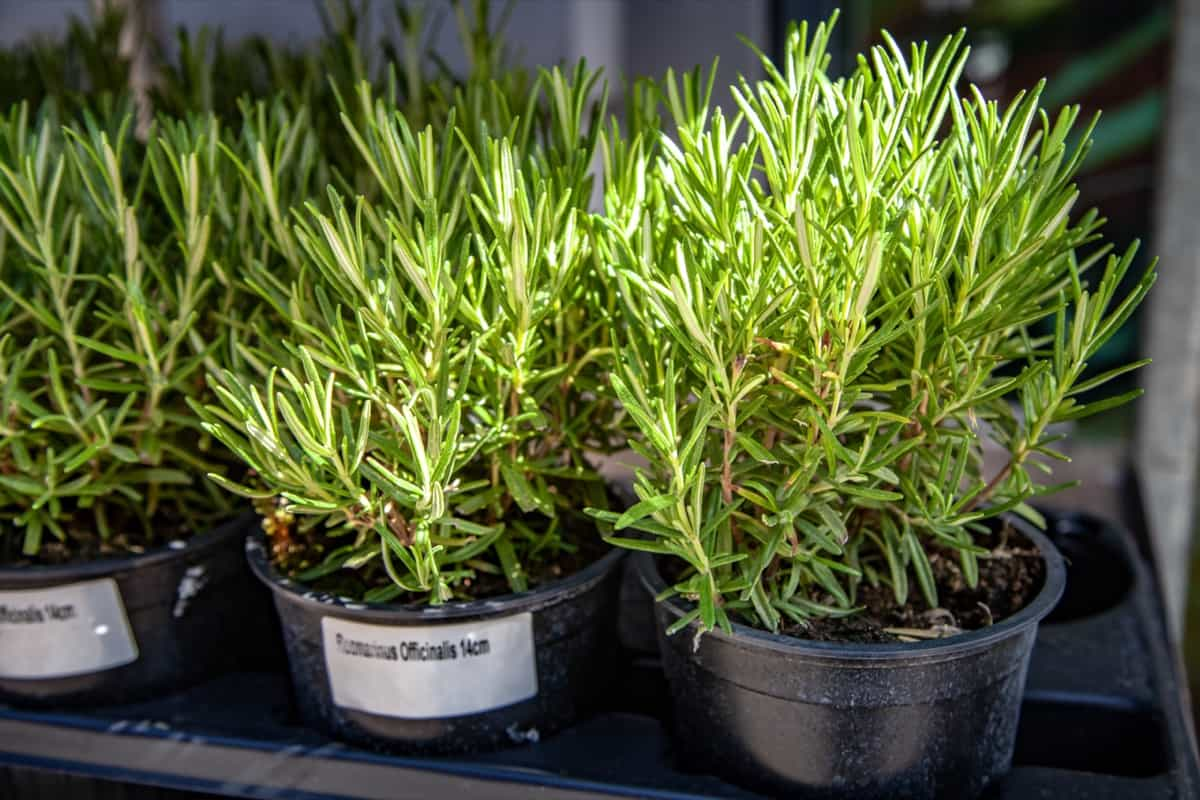
Rosemary herb bush in a garden

Conclusion 

Incorporating Homemade fertilizers for herbs can not only save you money but also promote a healthier and vibrant plant. Remember always to consider the needs of your Rosemary plant when choosing which homemade fertilizer to use. Whether you opt for nutrient-rich compost tea or opt for the rejuvenating effects of seaweed extract, these DIY Rosemary plant foods offer Sustainable Rosemary fertilization and eco-friendly ways to nourish your plants. 

Homemade Fertilizers for Peas: DIY Organic Fertilizers for Pea Plants

0

DIY organic fertilizers for pea plants can be made from a variety of natural materials readily available in most homes or gardens. These fertilizers not only deliver essential nutrients like nitrogen, phosphorus, and potassium but also improve soil health and structure, encouraging a thriving pea crop. Some of the popular organic fertilizer recipes are:

  • Compost Tea: Compost tea is made from steeping compost in water. To make it, simply fill a bucket with water and add well-aged compost. Let the mixture sit for a few days while stirring occasionally. Once the water turns dark brown and has a rich, earthy smell, strain out the solids and dilute the liquid before applying it to your Peas. 
  • Manure Tea: Another option is manure tea, which is created by soaking aged animal manure in water. This process allows beneficial microbes present in the manure to multiply and release nutrients into the solution. Dilute this concentrated mixture before using it on your Pea plants. 
  • Seaweed Extract: Seaweed extract is an excellent choice for providing essential minerals to your Peas. Soak the dried seaweed in water until it rehydrates completely, and then strain out any solid pieces. You can spray the resulting liquid onto your Pea plants or use root drenches. 
Homemade Fertilizers for Peas

Homemade Fertilizers for Peas

DIY Nutrient-Rich Compost 

Ingredients 

Creating your nutrient-rich compost is not only cost-effective but also a sustainable way to nourish your Pea plants. You can produce an organic fertilizer by recycling kitchen scraps and yard waste, that will promote healthy growth and abundant yields. To start with, gather a mix of brown materials, like dried leaves or straw, and green materials, like grass clippings or vegetable peels. These ingredients provide the necessary carbon-to-nitrogen ratio for successful composting. 

Composting Process 

Layer your brown and green materials in a bin or pile, ensuring proper air circulation by occasionally turning it over. Add some water to keep the mixture moist but not soggy. Over time, beneficial microorganisms will break down the organic matter into rich humus-like compost. 

Compost Application 

Once your compost has reached a crumbly texture with an earthy smell, it’s ready for application. Spread compost around the base of each Pea plant while avoiding direct contact with stems to prevent rotting.

Vermicompost Fertilizer 

Vermicomposting Basics 

Vermicompost fertilizer is a fantastic organic Pea fertilizer option for nourishing your Peas. The vermicomposting process involves using worms to break down organic waste materials, like kitchen scraps and garden debris, into nutrient-rich compost. It’s an excellent way to recycle household waste while creating a valuable soil amendment.  

Making Vermicompost Tea 

To make vermicompost tea, you’ll need some finished vermicompost (the dark, crumbly material that the worms leave behind) and water. Simply mix a small amount of vermicompost with water in a container and let it steep for 24-48 hours. The resulting liquid can be diluted further before application. 

Applying Vermicompost to Peas 

When applying vermicompost tea to your Pea plants, pour it directly onto the soil around the base of the plant or use it as a foliar spray on the leaves. This will help deliver essential nutrients like nitrogen, phosphorus, potassium, and beneficial microbes straight to their roots. 

In case you missed it: How to Make Coco Peat at Home: A Step-by-step Preparation Guide

Growing peas outdoors

Coffee Grounds Fertilizer 

Coffee Grounds Composition 

Coffee grounds can boost energy in the morning. They can also be a great source of nutrients for our plants, including Peas. Coffee grounds contain high organic matter and contain essential nutrients like nitrogen, phosphorus, and potassium. They also have trace amounts of calcium, magnesium, and sulfur. Plus, they add beneficial microorganisms to the soil. 

Preparation of Coffee Grounds Fertilizer 

To prepare coffee ground fertilizer for your Peas, collect used coffee grounds. Spread them on a tray to dry completely. Once dry, you can simply sprinkle the coffee grounds around the base of your Pea plants or mix them into the soil. 

Applying Coffee Grounds to Peas 

When applying coffee grounds to Peas (or any other plant), it’s important not to overdo it. Aim for about half an inch of coffee ground layer around each plant, or mix one-part dried coffee grounds with three parts potting soil when transplanting seedlings. 

Epsom Salt Fertilizer 

Benefits of Epsom Salt for Peas 

Epsom salt can work wonders for your Pea plants. This natural and affordable fertilizer offers several benefits that can promote healthy growth and abundant harvests. One of the key advantages of using Epsom salt is its ability to boost nutrient absorption in Peas. The magnesium in Epsom salt plays a crucial role in photosynthesis, aiding the production of chlorophyll. By ensuring an ample supply of magnesium, you’ll help your Pea plants efficiently convert sunlight into energy. 

Mixing Epsom Salt Solution 

To make an Epsom salt solution, dissolve a tablespoon of Epsom salt in one gallon of water. Stir well until the crystals are fully dissolved. It’s important not to exceed this concentration, as excess magnesium can have adverse effects on plant health. 

Application Frequency and Method 

When applying Epsom salt to Peas, moderation is key. Start by spraying the foliage with the diluted solution once every two weeks during active growing periods. However, be cautious not to spray directly on blossoms or young pods, as this may cause damage. Alternatively, you can apply Epsom salt directly into the soil around your Pea plants at planting time or during early stages when they require extra nutrients for vigorous root development. 

Banana Peel Fertilizer 

Nutrients in Banana Peels 

Banana Peel Fertilizer is an excellent way to provide essential nutrients to your Peas while reducing waste. Banana peels contain a high quantity of potassium, phosphorus, and calcium, which are important for plant growth and development. 

In case you missed it: How to Grow Peas from Seed to Harvest: Check How this Guide Helps Beginners

peas growing in the farm
Banana Peel Fertilizer Preparation 

To prepare banana peel fertilizer, start by cutting up the peels into small pieces. Then, place them in a jar filled with water and let it sit for about a week. This process allows the nutrients from the peels to seep into the water, creating a nutrient-rich solution. Once the mixture has fermented for a week, strain out any remaining solids and dilute the liquid with water at a 1:2 ratio (one part fertilizer to two parts water). This ensures that you don’t overfeed your plants. 

Applying Banana Peel Solution to Peas 

When applying banana peel solution to your Peas, pour it directly at the base of each plant or use a spray bottle to mist their leaves. The nutrients will be absorbed through their roots or foliage. By using the Best homemade Pea feed banana peel fertilizer on your Peas and Organic Pea care tips, you not only provide them with essential nutrients but also reduce kitchen waste in an eco-friendly manner. 

Eggshell Fertilizer 

Calcium Benefits for Peas 

Eggshells are packed with calcium carbonate, which helps strengthen cell walls and promotes overall plant health. Plus, they’re readily available and cost-effective, and it is one of the best Homemade organic fertilizers for Peas.  

Eggshell Fertilizer Preparation 

To prepare Eco-friendly Pea fertilizer options like eggshell fertilizer, start by collecting clean eggshells from your kitchen. Rinse them to remove any residue and let them dry completely. Once dried, grind the eggshells into a fine powder using a blender. This powder can be directly sprinkled onto the soil around your Pea plants or mixed into compost for an added boost of nutrients. 

Incorporating Eggshells into Soil 

Incorporating eggshells into the soil not only provides calcium but also improves drainage and texture. When it comes to DIY Pea soil amendments, Crushed eggshells act as natural mulch, preventing weeds from sprouting while retaining moisture in the soil. By utilizing this DIY Pea plant food, you’ll be giving your Peas the extra dose of calcium they need to grow strong and healthy. 

Fish Emulsion Fertilizer 

Nutrient Content in Fish Emulsion 

Fish emulsion fertilizer is a fantastic organic option for providing essential nutrients to your Pea plants. This Natural Pea fertilizer solution is rich in nitrogen, phosphorus, and potassium – three key elements that are crucial for healthy plant growth. The nutrient content in fish emulsion helps promote strong root development and vigorous foliage. 

Homemade Fish Emulsion Recipe 

To make homemade fish emulsion fertilizer, you’ll need fish scraps or whole fish, water, and a large container. Cut the fish into small pieces and place them in the container. Add water until the fish is fully submerged. Let it sit for several weeks to allow fermentation to occur. 

Dilution and Application Techniques 

Once fermented, strain the liquid from the solid remains of the fish using a fine mesh sieve or cheesecloth. Dilute the concentrated liquid with water at a ratio of 1:4 (one part fish emulsion to four parts water). This dilution ensures that your plants receive enough nutrients without risking burning their roots. 

When applying fish emulsion fertilizer to your Peas, use a watering can to distribute it around the base of each plant evenly. Avoid getting any on leaves as this may cause damage or burn them under direct sunlight. 

Regular application every two weeks during active growing periods will help keep your Pea plants well-nourished throughout their lifecycle. Remember to follow label instructions if using store-bought versions of this Homemade organic Pea fertilizer. 

Molasses Fertilizer 

Role of Molasses in Soil Health 

When it comes to soil health, molasses plays a vital role in improving its overall condition. It acts as a natural source of energy for beneficial microorganisms in the soil, promoting their growth and activity. These microorganisms help break down organic matter and release essential nutrients that are crucial for plant growth. 

In case you missed it: Best Fertilizer for Black Pepper Plants: Nutrient Management in Black Pepper/Piper Nigrum Farms  

freshly picked green pea pods
Making Molasses Fertilizer Solution 

To make a molasses fertilizer solution, simply mix one tablespoon of unsulfured molasses with one gallon of water. Stir the mixture thoroughly until the molasses are completely dissolved. You can use it as a foliar spray or applied directly to the soil around your Peas. 

Using Molasses Fertilizer for Peas 

Using molasses fertilizer for Peas has several benefits. It helps improve nutrient uptake by enhancing microbial activity in the soil. As a result, your Pea plants will have access to more nutrients like nitrogen and phosphorus, which are necessary for healthy growth and abundant yields. Additionally, molasses can also boost plant immunity by stimulating the production of beneficial bacteria and fungi that protect against harmful pathogens and pests.  

Grass Clipping Fertilizer 

Grass Clipping Composition 

Grass Clipping Fertilizer is a fantastic way to utilize the grass clippings from your lawn and turn them into a nutrient-rich fertilizer for your Peas. Not only does it provide essential nutrients, but it also helps reduce waste by repurposing grass clippings that would otherwise end up in the trash. 

The composition of grass clippings includes nitrogen, phosphorus, and potassium, which are all vital elements for healthy plant growth. By using these clippings as fertilizer, you can directly supply your Peas with the nutrients they need to thrive. 

Grass Clipping Tea Preparation 

To prepare Homemade Pea fertilizer mixtures like grass clipping tea, simply gather fresh grass clippings from your lawn and place them in a bucket or bin. Add water to cover the clippings and let them steep for several days.  

Application of Grass Clipping Fertilizer to Peas 

When applying grass clipping fertilizer to your Pea plants, dilute the tea with water at a 1:10 ratio (one part tea to ten parts water). Use this mixture to water your Pea plants every one to two weeks during their growing season. By utilizing Homemade plant food for legumes like Grass Clipping fertilizers, you not only save money but also contribute towards Sustainable Pea fertilization methods. 

Conclusion 

Homemade Pea fertilizer recipes can be an effective and sustainable way to nourish your Pea plants and promote healthy growth. From compost tea to banana peel fertilizer, there are various options to choose from when it comes to DIY organic fertilizers for Peas.  

Using Homemade fertilizers for legumes not only benefits your Pea plants but also contributes towards a greener environment by reducing dependence on chemical-based products. Plus, it’s a cost-effective solution that allows you to make use of kitchen scraps and other natural resources. 

Ultimate Guide to Using Epsom Salt for Potted Plants: Tips, Dosage, and Benefits

0

Epsom salt, also called magnesium sulfate, is a versatile mineral compound that has gained popularity among plant enthusiasts for its numerous benefits. This salt contains magnesium and sulfur – two essential nutrients for plants’ growth and development. 

Using Epsom Salt for Potted Plants

Using Epsom Salt for Potted Plants

Benefits of Epsom Salt for Potted Plants 

When it comes to the Benefits of Epsom salt for indoor gardening, Epsom salt promotes nutrient absorption. It helps optimize soil pH levels and improves the uptake of important minerals like nitrogen, phosphorus, and potassium (NPK). This means your potted plants will receive a well-rounded nutritional boost. Epsom salt can also aid in seed germination and root development. When used as a soak or added to potting mixtures at planting time, it provides young seedlings with an extra dose of nutrients that encourage robust growth from the start. 

Assessing Your Plants’ Needs 

Signs Your Potted Plants May Benefit from Epsom Salt 

One of the key benefits of using Epsom salt on indoor plants is its ability to enhance nutrient absorption. Potted plants can sometimes show signs of nutrient deficiencies, which can hinder their growth and overall health. Signs that your potted plants may benefit from Epsom salt include yellowing leaves, stunted growth, or poor flowering. These symptoms often indicate a lack of essential nutrients like magnesium and sulfur. By incorporating Epsom salt into your plant care routine, you can help address these deficiencies. 

Understanding Plant Nutrient Requirements 

Understanding the nutrient requirements of your potted plants is crucial for their well-being. Magnesium helps in chlorophyll production, which is necessary for photosynthesis. Sulfur aids in the synthesis of important proteins and enzymes within the plant’s cells. 

By providing your potted plants with an adequate supply of magnesium and sulfur using Epsom salt, you can ensure they have what they need to thrive. It’s important to note that while some fertilizers contain these nutrients, they are not always readily available for absorption by the roots. Incorporating Epsom salt into your plant care routine helps promote healthy foliage development and vibrant blooms. 

Preparing Epsom Salt Solution for Potted Plants 

Dilution Ratios for Epsom Salt Solutions 

Preparing Epsom Salt Solution for Potted Plants can be a simple and effective way to provide your plants with the necessary nutrients. How to apply Epsom salt to indoor potted plants? The general rule of thumb is to use one tablespoon of Epsom salt per gallon of water. This ratio provides a balanced amount of magnesium and sulfur without overwhelming your plants. However, it’s always a good idea to check the specific needs of your plant species, as some may require Epsom salt. 

In case you missed it: Heat-Tolerant Outdoor Plants for Home Yards, Terrace, Balcony, and Containers

Epsom Salt for Indoor Plants
Mixing and Storage Tips 

When Mixing Epsom salt for houseplants, make sure to dissolve the Epsom salt completely in warm water before applying it to your potted plants. This ensures that all nutrients are evenly distributed throughout the solution. Stir well until there are no visible crystals left. As for storage tips, it’s best to mix up fresh batches of Epsom salt solution each time you plan on using it. Storing pre-mixed solutions can lead to bacterial growth or nutrient breakdown over time. So, save yourself from potential problems by making small amounts as needed. 

Application Methods 

Foliar Spray Application 

When it comes to Epsom salt foliar spray for potted plants, it involves spraying a diluted Epsom salt solution directly onto the leaves of your plants. Epsom salt watering solution for container plants allows for quick absorption of magnesium and sulfur through the foliage, providing immediate benefits to the plant. It is particularly effective in correcting nutrient deficiencies or helping plants recover from stress. 

Direct Soil Application 

Direct soil application involves adding Epsom salt directly to the soil around your potted plants. This allows for the gradual release of nutrients into the root zone over time, promoting overall plant health and growth. It is especially beneficial for improving soil quality and enhancing nutrient uptake by roots. For direct soil application, sprinkle about one teaspoon of Epsom salt around each plant’s base and gently work it into the top layer of soil. 

Scheduling Epsom Salt Applications 

Frequency of Application for Potted Plants 

When it comes to the Epsom salt application schedule for container plants, timing is key. You want to make sure you’re giving them the right amount at the right time. Consider the type of plant you have. For instance, flowering plants and vegetables often benefit from regular doses of magnesium and sulfur provided by Epsom salt. Take into account the season. Different seasons bring different needs for your plants. During the growing season, you may increase the frequency of your Epsom salt applications. 

Seasonal Considerations 

During dormant periods or winter months when growth slows down significantly, reducing or even suspending Epsom salt applications might be necessary. Always monitor your plants’ health and nutrient requirements closely. Keep an eye out for any signs of deficiency or excess that may indicate a need for adjustment in your scheduling. By understanding these considerations and adjusting accordingly throughout the year, you can ensure that your potted plants receive optimal benefits from their Epsom salt treatments without overdoing it. 

Epsom Salt for Specific Plant Types 

Succulents and Cacti 

Succulents and cacti are trendy, low-maintenance plants that can add beauty to any space. When it comes to succulents and cacti, one common issue is root rot. Epsom salt can help prevent this by promoting better drainage in the soil. To use Epsom salt for succulents and cacti, simply dissolve half a teaspoon in one gallon of water and use it as a regular watering solution. 

Flowering Plants and Vegetables 

Flowering plants like Roses, Geraniums, and Petunias also thrive with the help of Epsom salt. The magnesium sulfate found in Epsom salt promotes vibrant blooms by aiding in chlorophyll production. For Epsom salt for flowering container plants, you can apply an Epsom salt solution directly to the soil or as a foliar spray every two weeks during the growing season. 

In case you missed it: Calandiva Plant Care: Pruning, Propagation, and Indoor Care

Transplanting a succulent into a plastic pot

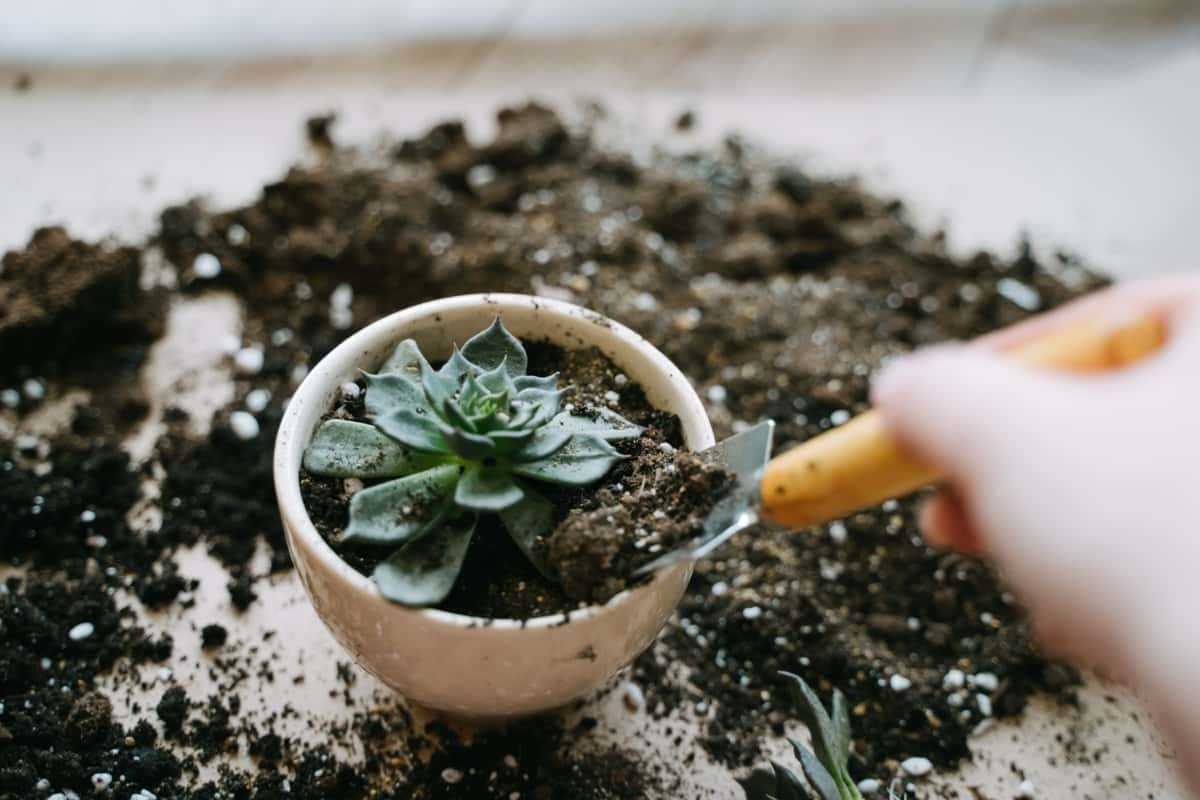
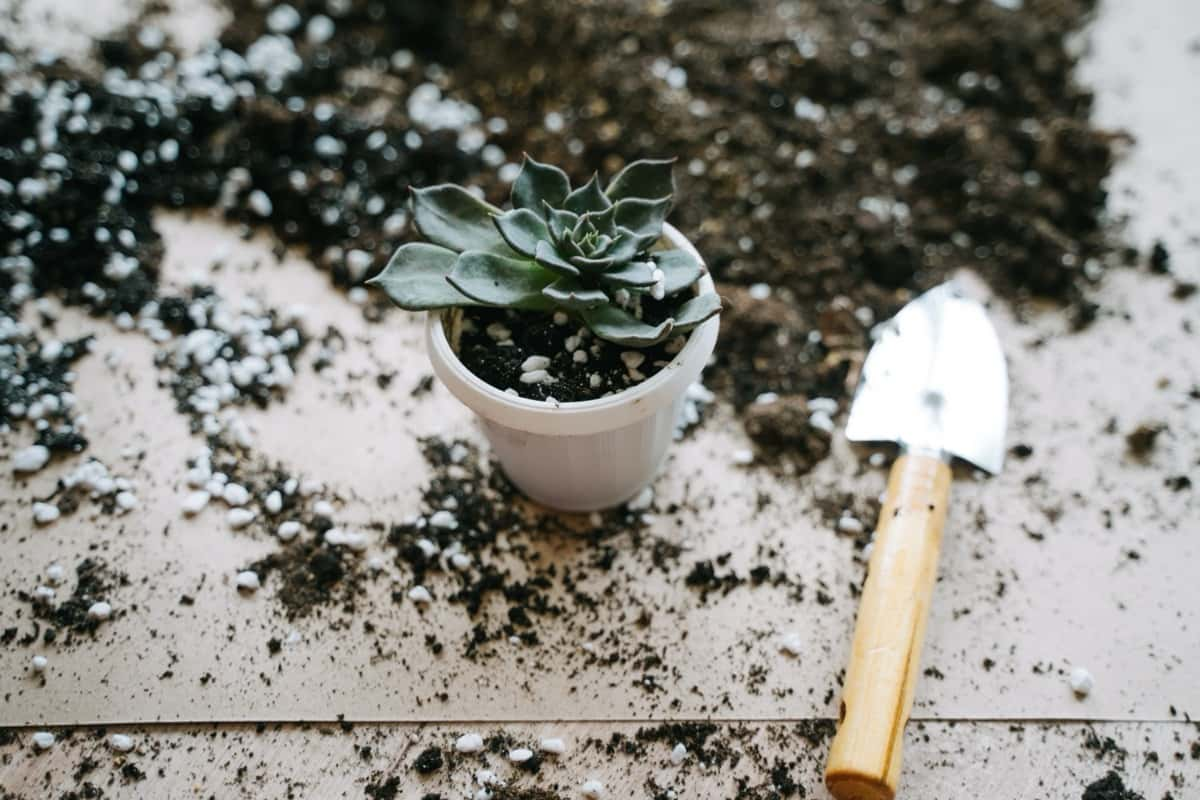
Vegetables are another plant type that greatly benefits from Epsom salt. Tomatoes, peppers, and leafy greens like spinach all require adequate levels of magnesium for healthy growth. By adding diluted Epsom salt to their watering routine or applying it directly to the soil around their roots, you’ll provide them with this essential nutrient. 

Troubleshooting Common Issues 

Avoiding Overuse of Epsom Salt 

When using Epsom salt for potted plants, more is not always better. While this natural mineral can provide numerous benefits, overusing it can harm your plants. It’s important to understand the appropriate Epsom salt dosage for houseplants and the frequency of application to avoid any negative effects. 

Identifying Symptoms of Magnesium or Sulfur Deficiency 

One of the main reasons gardeners turn to Epsom salt is its ability to correct nutrient deficiencies in plants. Magnesium and sulfur are essential nutrients that play a crucial role in plant health. If your potted plants are lacking these nutrients, they may exhibit certain symptoms that indicate a deficiency. 

Magnesium deficiency in potted plants often manifests as yellowing leaves with green veins, while sulfur deficiency may cause stunted growth and pale foliage. By observing these signs, you can identify whether your plants could benefit from an Epsom salt treatment. To prevent the overuse of Epsom salt, it’s important to accurately diagnose nutrient deficiencies before applying any treatments. 

Integrating Epsom Salt into Regular Plant Care 

Complementing Fertilization Routines 

Integrating Epsom Salt into regular plant care is a great way to complement your fertilization routines and enhance soil amendment practices. You can use Epsom Salt as a supplement alongside traditional fertilizers. Its high magnesium content helps improve chlorophyll production, leading to vibrant and lush foliage. During the growing season, simply dissolve a tablespoon of Epsom Salt in water and apply it to the soil around your plants every four weeks. 

Soil Amendment Practices 

In addition to its role in fertilization, Epsom Salt can also serve as an effective soil amendment. It helps loosen compacted soils, allowing better root penetration and nutrient absorption. When it comes to Epsom salt soil amendment for potted plants, before planting new potted plants or transplanting existing ones, mix some Epsom Salt into the potting mix or sprinkle it on top of the soil. 

Epsom Salt and Pest Management 

Using Epsom Salt as a Pest Deterrent 

Using Epsom salt as a pest deterrent is an effective and natural method that many gardeners swear by. The high magnesium content in Epsom salt acts as a repellent for various insects, including aphids, mites, and even slugs. By sprinkling or spraying a diluted solution of Epsom salt on your potted plants, you create an environment that pests find unfavorable. 

Safe Practices for Potted Plants 

However, it’s important to follow safe practices when using Epsom salt for pest management in potted plants. Always dilute the Epsom salt solution according to the recommended ratios. Applying undiluted or excessive amounts of Epsom salt can cause harm to your plants rather than benefit them. 

Make sure to apply the solution evenly on both sides of the leaves and around the base of the plant where pests are most likely to attack. This will create a protective barrier against unwanted critters without harming beneficial insects like bees or ladybugs. Remember that while using Epsom salt may deter some pests, it might not eliminate all infestations. In severe cases, additional methods like organic insecticides or physical removal may be necessary. 

In case you missed it: How to Make Grass Clippings Compost Fertilizer: Homemade Recipe, DIY for Container, Indoor, and Backyard Garden Plants

Preparing a indoor plant

Conclusion 

Epsom salt can be a popular addition to your potted plant care routine. Its benefits range from promoting healthy growth and vibrant blooms to preventing nutrient deficiencies and pest infestations. By understanding the signs of magnesium or sulfur deficiency in your plants and knowing how to prepare and apply Epsom salt solutions properly, you can ensure that your potted plants get the right amount of these essential nutrients. 

Expert Guide on How to Transplant Cucumber Seedlings for Maximum Harvest

0

Transplanting Cucumber seedlings is a key step in ensuring a successful harvest. But before diving into the process, it’s essential to understand the basics. Transplanting means moving young Cucumber plants from their initial container or seed tray to a larger pot or directly into the garden soil. This allows them to continue growing and thriving in their new environment. 

Timing plays a vital role in transplanting Cucumbers. You want to wait until all chances of frost have passed and the soil temperature has warmed up sufficiently for optimal growth. Too early, and your delicate seedlings could suffer from cold damage; too late, and they may struggle with establishing strong roots. 

The Best Time for Transplanting to Ensure Growth Success 

Ideally, you should wait until all frost danger has passed before transplanting your Cucumber seedlings outdoors. When it comes to the best time to transplant cucumbers, these are warm-weather crops that thrive in temperatures between 21°C – 35°C. In most regions, this means transplanting Cucumbers in late spring or early summer.  

How to Transplant Cucumber Seedlings

How to Transplant Cucumber Seedlings

Selecting Healthy Cucumber Seedlings 

Criteria for Choosing the Best Seedlings for Transplant 

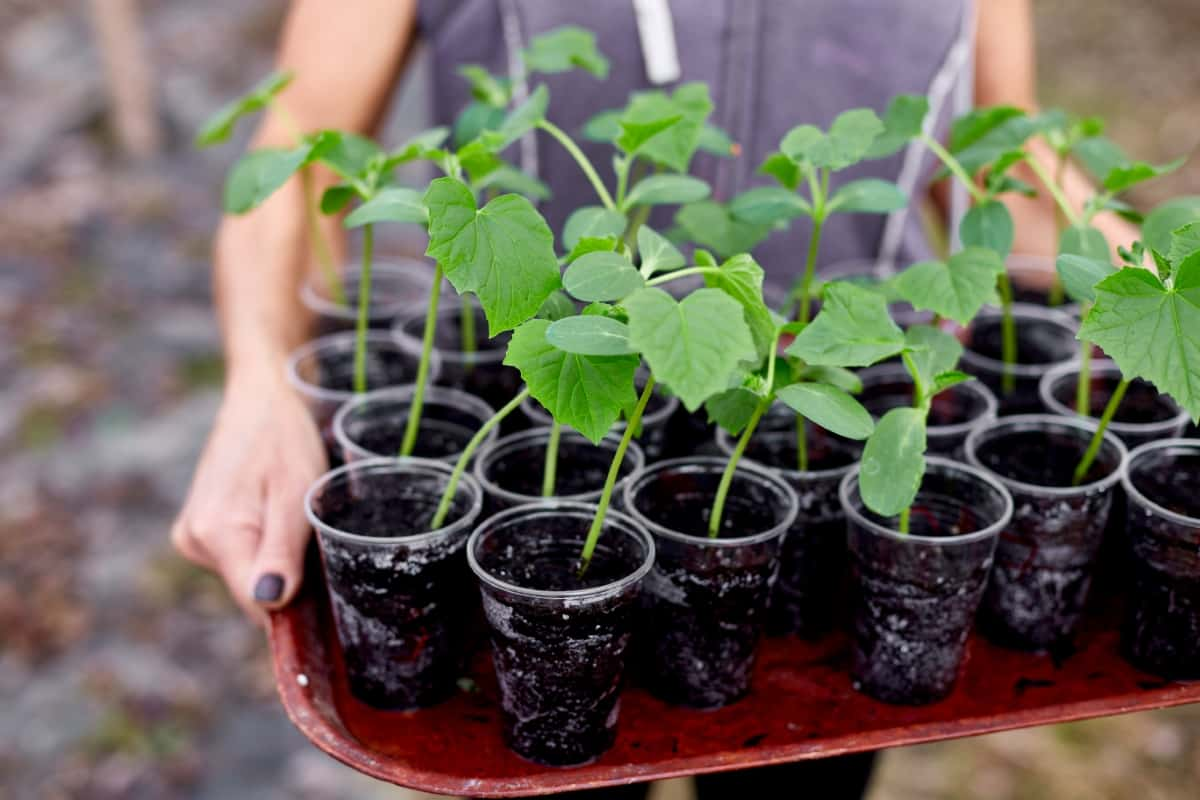
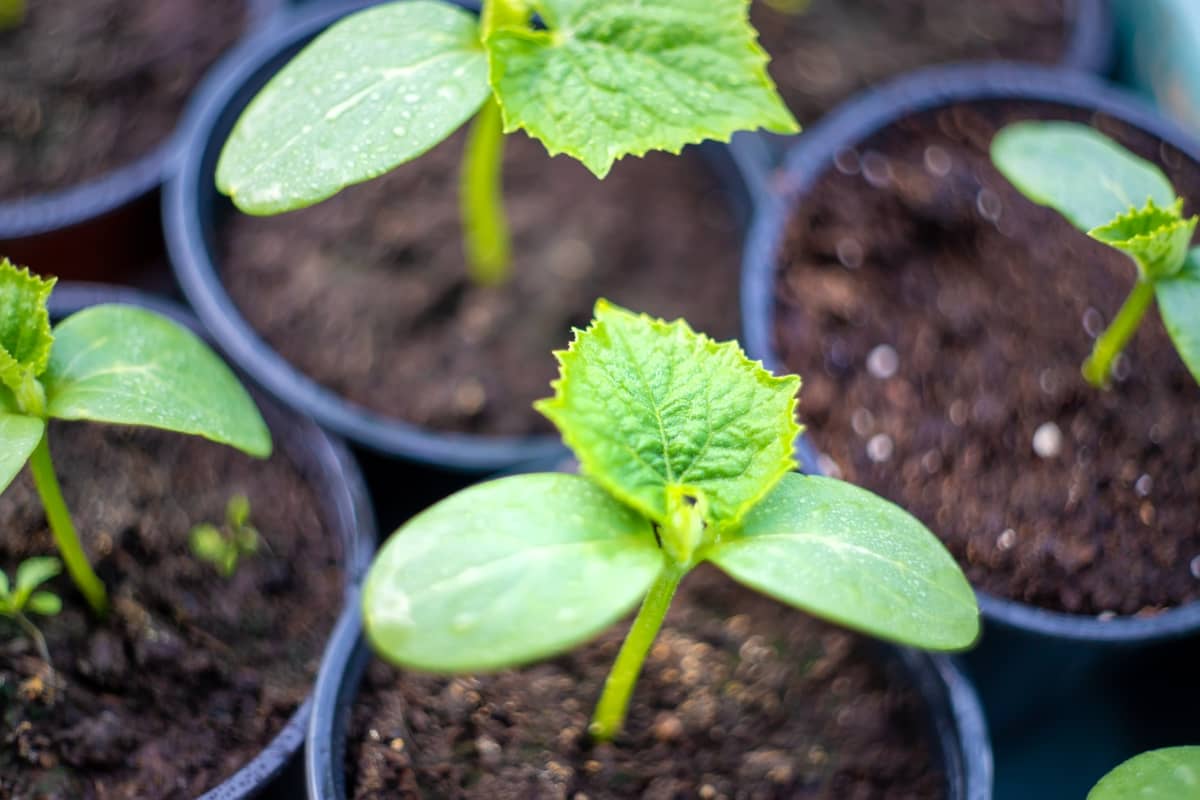
Look for seedlings that have developed strong root systems. Healthy roots are essential for successful transplantation and future growth. Avoid seedlings with weak or damaged roots, as they may struggle to establish themselves in their new environment. Consider the overall appearance of the seedling. Look for plants that are sturdy and well-developed with vibrant green leaves. Avoid any signs of yellowing or wilting, as these can indicate underlying issues or poor health.  

Preparing Seedlings for the Transition Outdoors 

First, give your seedlings a few days to acclimate to outdoor conditions before transplanting them. Start by placing them outside in a sheltered area for a few hours each day, gradually increasing their time outside over several days. This process will help them adjust to changes in temperature and wind. Next, make sure your seedlings are well-hydrated before transplanting.  

Preparing the Garden Bed 

Soil Preparation Techniques for Optimal Growth 

With the right cucumber transplanting strategies, you can create an environment that supports their development and ensures a bountiful harvest. When it comes to Preparing soil for cucumber transplant, choose a well-draining soil for your Cucumbers. They prefer moist but not waterlogged conditions. Before transplanting your seedlings, prepare the planting area by loosening the soil with a garden tiller. This will allow roots to penetrate easily and access necessary nutrients. 

Amending Soil with Compost and Fertilizers 

One key aspect of successful Cucumber transplanting care is preparing the soil to provide optimal nutrition for the seedlings. Amending the soil with compost and fertilizers is crucial to ensure healthy growth and abundant harvests. When it comes to Soil amendments for cucumber seedlings, Compost is a fantastic natural amendment that enriches the soil with organic matter. It improves soil structure, enhances moisture retention, and provides a steady release of nutrients.

Incorporating compost into your garden beds before transplanting will create a nutrient-rich environment for your Cucumber plants to thrive in. In addition to compost, using fertilizers can further boost plant growth by supplying necessary macronutrients like nitrogen, phosphorus, and potassium. However, it’s important not to overdo it – excessive fertilizer application can harm plants rather than benefit them. 

Transplanting Techniques for Cucumber Seedlings 

Step-By-Step Guide to Transplanting 

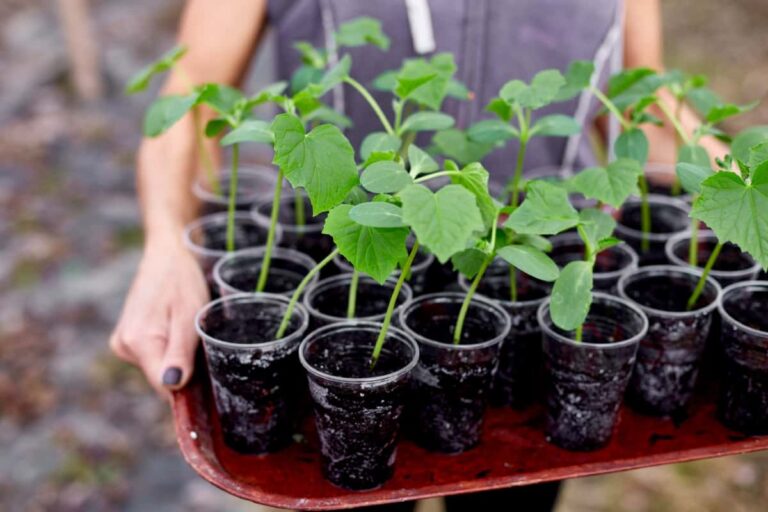
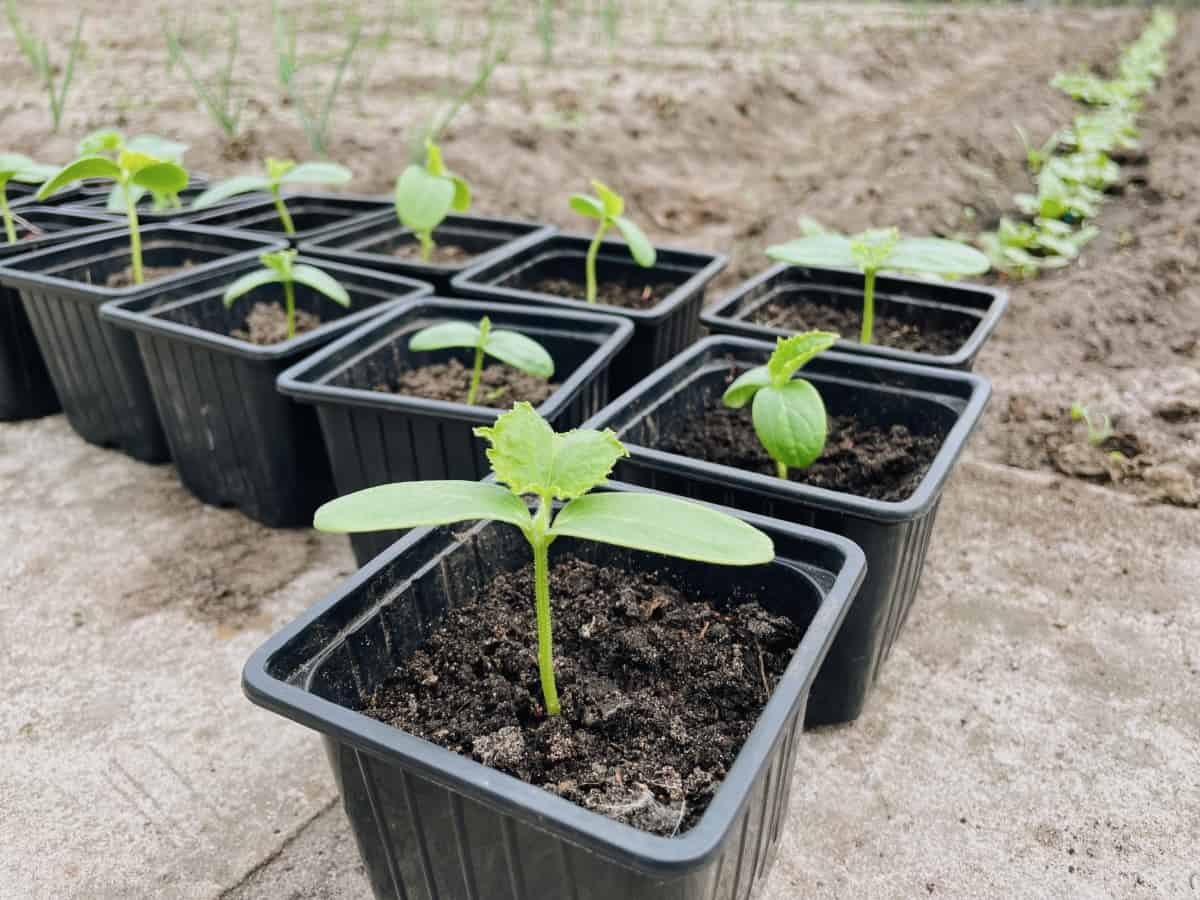
Transplanting Cucumber seedlings can be a crucial step in ensuring their successful growth and maximum harvest. How to transplant cucumber plants? First, choose a suitable location for transplanting your seedlings. Cucumbers grows well in full sun and well-drained soil. Remove any weeds or debris and loosening it with a garden fork. Next, gently remove the seedlings from their containers. If the roots are tightly bound, carefully untangle them before planting.

Dig holes that are larger than the root ball of each seedling in the prepared soil. Place each seedling into its hole, making sure it is at the same depth as it was in its original container, and Spacing cucumber seedlings correctly. After planting all the seedlings, water them thoroughly to settle the soil around their roots. It’s important to keep them well-watered during this transplantation period to prevent stress and promote healthy growth. 

How to Minimize Transplant Shock in Cucumber Seedlings 

One essential step to minimize transplant shock is to handle the seedlings with care. When it comes to Avoiding transplant shock in cucumbers, gently loosen the soil around each plant and carefully lift them by holding onto their leaves or roots. Avoid touching the stems as they are delicate and prone to damage. Before transplanting, it’s crucial to prepare the planting holes adequately. Dig holes larger than the root ball of each seedling. This will give them enough space for growth while providing good contact with the surrounding soil. 

In case you missed it: Guide to Growing Cucumbers in California: In Containers, Backyard, Summer, and Winter

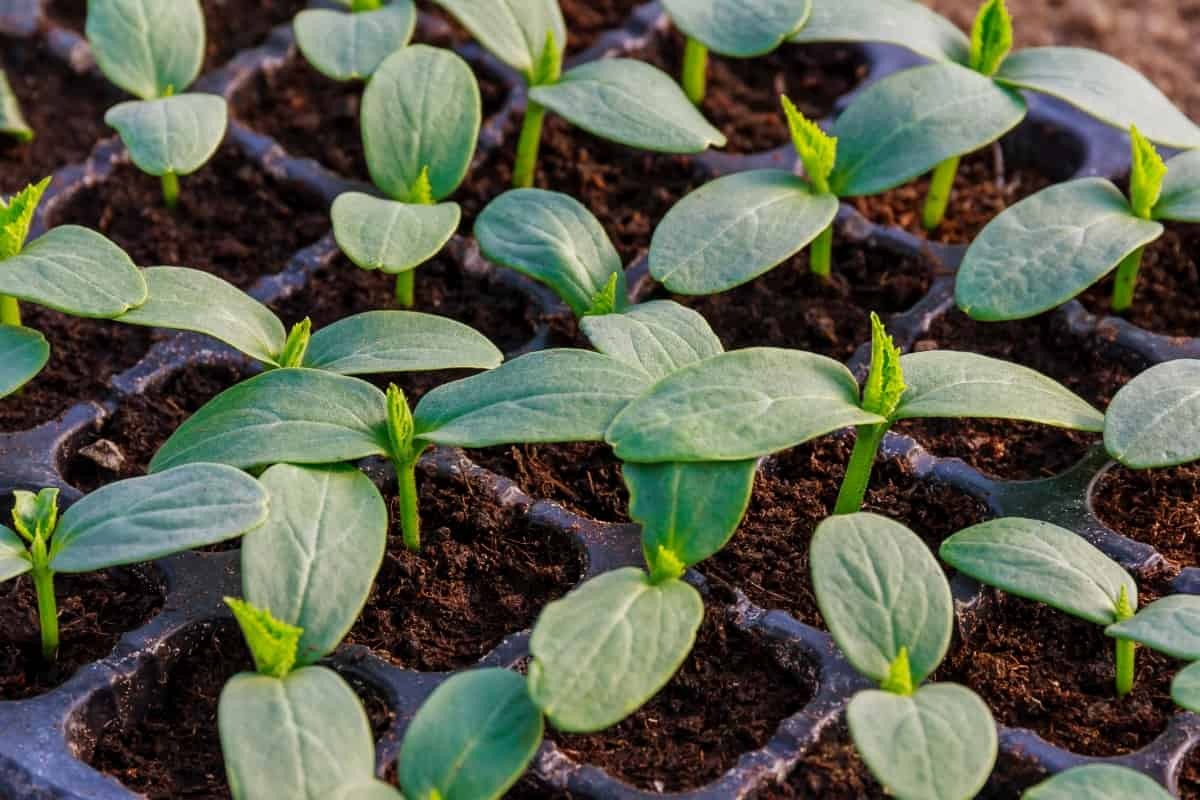
Sprouting Seeds of Cucumbers

Watering After Transplanting 

Proper Watering Techniques for New Transplants 

To ensure your newly transplanted Cucumber seedlings receive adequate moisture, it’s important to water them deeply but infrequently. This means giving them a thorough soak rather than light sprinkles every day. Watering cucumbers after transplanting encourages the development of strong roots that can better withstand drought conditions. One effective technique is to water the plants at their base rather than overhead. You can use a watering can or drip irrigation system for precision watering. 

Establishing a Watering Schedule to Support Growth 

When it comes to watering Cucumbers, consistency is key. These plants thrive in moist soil, so it’s important to keep the soil moist throughout their growing season. One effective method is deep watering. This involves providing a thorough soak once or twice a week rather than light daily watering. Deep watering encourages deeper root growth as the roots are encouraged to reach down into the soil for moisture. 

Mulching to Support Transplanted Seedlings 

Benefits of Mulching for Cucumber Plants 

One effective technique to enhance the growth and productivity of Cucumber plants is mulching. Mulch offers a variety of benefits that can optimize the overall health of your Cucumber plants. Mulching helps conserve moisture by reducing evaporation from the soil surface. By creating a barrier between the soil and air, mulch prevents water loss, ensuring that your Cucumber plants stay hydrated for longer periods. This is particularly beneficial during hot summer months when water scarcity becomes an issue. 

Choosing the Right Mulch for Cucumbers 

When it comes to choosing the right mulch for your Cucumber plants, there are a few factors to consider. First and foremost, you want a mulch that will retain moisture in the soil and keep weeds at bay. Organic options such as straw or shredded leaves work well for this purpose. Straw is a popular choice because it allows air and water to penetrate easily while also providing insulation for the roots.

It helps maintain an even temperature around the plant, preventing fluctuations that can stress out Cucumbers. Shredded leaves are another great option as they break down slowly, releasing valuable nutrients into the soil. They also create a barrier against evaporation and weed growth. 

Support Structures for Growing Cucumbers 

Installing Trellises and Supports for Climbing Varieties 

Installing trellises and supports for climbing varieties of Cucumbers is a crucial step in optimizing their growth and productivity. Choose the right type of trellis or support system that suits your garden space and Cucumber variety. There are various options available, such as bamboo stakes, wire mesh cages, A-frame structures, or even homemade trellises using strings or netting. Make sure they are sturdy enough to withstand the weight of the vines when fully grown. 

Training Cucumber Vines for Maximum Production 

One of the key factors in maximizing Cucumber production is proper vine training. By guiding the vines to grow in a controlled manner, you can ensure maximum exposure to sunlight and improve air circulation around the plants. This not only promotes better fruit development but also helps prevent disease. To train Cucumber vines, start by gently tying them to trellises or supports as they begin to grow.

As the vines continue to lengthen, regularly guide them along the support system, ensuring they stay on track and don’t become tangled or overcrowded. It’s important to note that different Cucumber varieties have varying growth habits. Some are bushy and compact, while others are climbers. For climbing varieties, such as English Cucumbers, or vining types like pickling Cucumbers, it’s crucial to provide sturdy trellising structures for support. 

In case you missed it: Stages of Cucumber Plant Growth

Seedlings of Cucumber

Monitoring and Caring for Transplanted Seedlings 

Identifying Signs of Stress and Addressing Issues 

Gardeners must be able to identify signs of stress to address them promptly. One common sign of stress in Cucumber seedlings is wilting leaves. If you observe that the leaves are drooping or turning yellow, it could indicate a lack of water or nutrients. Another indicator of stress is stunted growth. If your Cucumber plants are not growing as vigorously as they should be, there may be underlying issues with soil fertility or inadequate sunlight exposure.

Pests and diseases can also cause significant stress for Cucumber plants. Keep an eye out for any unusual spots on the leaves, discoloration, or evidence of pests such as aphids or spider mites. To address these issues effectively, it’s important to take immediate action. Adjust watering schedules if necessary and ensure that your Cucumbers receive adequate sunlight throughout the day. Implement pest control measures like organic insecticides or natural predators like ladybugs. 

Routine Checks for Pests and Diseases 

Inspect your Cucumber plants on a regular basis. Look for pest infestations like holes in the leaves, chewed edges, or discolored spots. If you spot any suspicious activity or signs of disease, act immediately to prevent further damage. There are various organic methods you can use to control pests and diseases, such as handpicking insects off the plants or spraying a solution made from neem oil. 

Fertilizing Cucumber Plants After Transplant 

Fertilizer Types and Application Schedules for Cucumbers 

Organic fertilizers are excellent choices as they provide essential nutrients while improving soil structure. These organic options release nutrients slowly over time, ensuring a steady supply for your Cucumbers throughout the growing season. If you prefer synthetic fertilizers, look for a balanced formula with nitrogen, phosphorus, and potassium. This balanced approach promotes overall plant health and encourages vigorous growth.

Remember to follow the manufacturer’s instructions carefully when applying synthetic fertilizers to avoid overfeeding your Cucumbers. As for application schedules, it’s best to divide the fertilizer into multiple applications throughout the growing season. Start by applying a slow-release organic fertilizer at planting time to provide a steady source of nutrients in the early stages.  

Organic vs. Synthetic Fertilizers for Cucumber Plants 

Organic fertilizers are made from compost, manure, or bone meal. They provide slow-release nutrients that gradually feed the plants over time. This can result in healthier soil structure and improved long-term plant growth. Additionally, organic fertilizers are often more environmentally friendly and sustainable.

Synthetic fertilizers are chemically manufactured to provide specific nutrients to plants. They offer quick results and can be easily tailored to meet specific nutrient deficiencies in the soil. Synthetic fertilizers also tend to be less expensive than their organic counterparts. 

In case you missed it: Best Fertilizers for Cucumber: Homemade, Organic, Liquid, NPK, and Schedule

Cucumber Seedlings

Conclusion 

Follow the Cucumber seedling transplant tips for successful transplantation, taking care not to damage the delicate roots of the seedlings. Once transplanted, provide proper care and maintenance by watering regularly, providing support as needed, and protecting against pests or diseases. With patience, diligence, and some tender loving care, successful cucumber transplanting strategies you’ll soon be rewarded with an abundance of fresh Cucumbers that are perfect for salads, pickling, or enjoying straight from the vine. 

Effective Fertilizer Management of Arecanut: A Comprehensive Guide

0

Areca nut, also called betel nut, is a fascinating fruit that holds great cultural and economic significance in many tropical regions. Derived from the Areca palm (Areca catechu), this nut can be found abundantly in areas such as the Pacific, South Asia, and Eastern Africa. Proper fertilizer management is crucial for the healthy growth and development of the Arecanut crop.

Importance and Economic Significance

This palm tree fruit has been cultivated for centuries and plays a vital role in various cultural traditions. From an economic perspective, Arecanut farming provides livelihood opportunities for many farmers. In countries like India and Indonesia, Arecanut production contributes significantly to agricultural GDP. Apart from its economic value, Arecanut holds immense cultural importance. It is widely used in religious ceremonies, social gatherings, and traditional events across different communities.

Fertilizer Management of Arecanut

Fertilizer Management of Arecanut

Understanding Arecanut Nutrient Requirements

Macronutrients and Micronutrients

Arecanut requires a balanced supply of both macronutrients and micronutrients. Macronutrients like nitrogen (N), phosphorus (P), and potassium (K) are required in larger quantities compared to micronutrients. Nitrogen is essential for promoting leafy growth and enhancing photosynthesis. Phosphorus is necessary for root development, flower formation, and fruit set. Potassium helps regulate water uptake, improving disease resistance and enhancing overall plant vigor.

In addition to macronutrients, Arecanuts also require various micronutrients like zinc (Zn), manganese (Mn), iron (Fe), copper (Cu), boron (B), molybdenum (Mo), etc., although in smaller quantities. These trace elements play critical roles in enzymatic activities, hormone synthesis, cell division, and nutrient transportation within the plant.

Nutrient Uptake Patterns in Different Growth Stages

During the early growth stage, when the plant is establishing its root system, it primarily takes up phosphorus (P) and potassium (K). As the plant enters the vegetative stage, nitrogen (N) becomes more important. This nutrient is responsible for promoting leaf and shoot growth. The demand for N increases as the canopy expands, so regular applications of N fertilizers should be made to meet this requirement.

During flowering and fruiting stages, micronutrients such as zinc (Zn), manganese (Mn), iron (Fe), and copper (Cu) become critical. These micronutrients play a key role in flower bud formation, pollination, fruit set, and proper nut development.

Soil Analysis and Fertility Assessment

Importance of Soil Testing

Soil testing is an important tool that provides essential information about the composition and health of your soil, helping you make informed decisions regarding fertilization. By conducting regular soil analysis, you can determine the pH level, organic matter content, nutrient availability, and other factors that influence plant growth. By analyzing your soil’s fertility profile, you can adjust your fertilizer program accordingly to ensure optimal growth and productivity.

Interpreting Soil Test Results

Soil testing involves analyzing samples from different areas of your land to determine their nutrient content. The key aspect of interpreting soil test results is understanding the recommended nutrient levels for Arecanut crops. These guidelines change based on factors such as soil type, climate, and plant growth stage. By comparing your soil’s nutrient levels with these recommendations, you can determine if any adjustments need to be made.

Selecting the Right Fertilizers

Types of Fertilizers (Organic and Inorganic)

Organic fertilizers are natural sources such as compost, manure, or plant residues. They improve its overall structure. Organic fertilizers also promote beneficial microbial activity in the soil, which enhances nutrient availability for the plants. On the other hand, inorganic fertilizers are chemically synthesized compounds that contain specific ratios of essential nutrients. Inorganic fertilizers also have a longer shelf life compared to organic options.

NPK Ratio and Application Rates

A balanced NPK ratio for Arecanuts, like 14-7-17 or 16-8-24, is often recommended. To calculate the correct nutrient application rate for your Arecanut plantation, consider conducting soil tests regularly. These tests provide valuable insights into the existing soil nutrient levels and help determine how much fertilizer you need to apply.

In case you missed it: Best Fertilizer for Coconut Trees: Application Guidelines for Coconut Palm

Ripe Arecanut

Fertilizer Application Techniques

Pre-Planting Fertilization

Pre-planting fertilization plays a crucial role in establishing healthy and vigorous Arecanut plants. Before applying fertilizers during the pre-planting of Arecanuts, it is important to consider soil analysis results. Typically, organic amendments such as compost or well-decomposed farmyard manure are recommended for pre-planting fertilization. These help improve soil fertility while slowly releasing nutrients over time.

Split Application during Growth Phases

By splitting the fertilizer application, you ensure that the Arecanut plant receives a steady supply of nutrients throughout its development, maximizing its potential for healthy growth and high yields. During the early vegetative phase, for example, nitrogen (N) is crucial for promoting leaf production and canopy development. As the crop progresses into flowering and fruiting stages, phosphorus (P) becomes more important as it aids in flower formation and fruit setting. Potassium (K), on the other hand, plays a vital role in improving the quality and size of fruits.

Fertilizer Scheduling

Seasonal Application Timing

During the pre-planning phase, it is crucial to prepare the soil by including organic matter and applying basal fertilizers. It is also important to consider seasonal variations in rainfall patterns when scheduling fertilizer applications. During dry seasons or prolonged droughts, additional irrigation may be required to supplement nutrient availability in the soil.

Foliar Feeding and Nutrient Mobility

Nutrient mobility refers to how easily a particular nutrient can move within the plant. Certain micronutrients like zinc and iron have limited mobility within the plant. Foliar feeding allows us to supplement these immobile nutrients directly onto the leaves, ensuring that they reach their target areas effectively.

Nutrient Management Practices

Nutrient Deficiency Symptoms and Correcting Nutrient Imbalances

One common nutrient imbalance in Arecanut cultivation is nitrogen deficiency. This can affect stunted growth and yellowing of leaves. To correct this imbalance, applying a nitrogen-rich fertilizer like urea can help provide the necessary nutrients for proper growth. Another common issue is phosphorus deficiency, which can result in poor root development and reduced fruit yield. Adding phosphorus-based fertilizers like triple superphosphate or rock phosphate can address this problem effectively.

Potassium deficiency is also a concern in Arecanut farming, leading to lower resistance against diseases and pests. Applying potassium-rich fertilizers such as muriate of potash or potassium nitrate can help restore the balance. In addition to these macronutrients, micronutrient deficiencies should also be addressed promptly. These include iron, zinc, manganese, copper, and boron deficiencies that can cause leaf discoloration and reduced productivity. Using appropriate foliar sprays or incorporating micronutrient-enriched fertilizers into the soil can rectify these imbalances effectively.

Organic Fertilizer and Compost Integration

Benefits of Organic Amendments

Organic fertilizers improve soil structure by enhancing its ability to hold water and nutrients. This leads to better root development and overall plant growth. Additionally, the increased microbial soil activity resulting from organic amendments helps break down organic matter into simpler forms that the Arecanut plants can readily absorb.

Composting Techniques for Arecanut Plantations

Composting is a valuable technique in the management of Arecanut plantations. One popular composting method is windrow composting, where organic materials like farmyard manure and green leafy matter are piled up into long rows or windrows. This process promotes the breakdown of organic matter by microorganisms, resulting in nutrient-rich compost.

In case you missed it: The Importance of Soil and Fertilizer in Balcony Vegetable Gardening

Areca Palm Seeds

Another effective technique is vermicomposting, which involves using earthworms to decompose organic waste materials. The worms consume organic matter and excrete nutrient-rich castings that can be used as an excellent fertilizer for Arecanut plantations.

Fertilizer Storage and Handling

Proper Storage Methods
  • Store in a cool, dry place: Fertilizers should be kept away from moisture and extreme temperatures. Exposure to heat or humidity can cause clumping or degradation of the product.
  • Secure containers: Ensure that fertilizer bags or containers are sealed tightly to prevent leakage or spills. This will help maintain the quality and efficacy of the fertilizer.
  • Separate from other chemicals: It’s important to store fertilizers separately from pesticides, herbicides, and other chemicals. Mixing different types of chemicals can lead to dangerous reactions or contamination.
Safety Precautions
  • Use protective gear: Always wear personal protective equipment (PPE) such as gloves, goggles, and masks when handling fertilizers. This will help prevent direct contact with chemicals and ensure your safety.
  • Follow instructions: Follow the instructions carefully provided by the manufacturer on how to handle, store, and apply fertilizers safely. Different types of fertilizers may have specific guidelines that you need to adhere to for safe usage.
  • Follow manufacturer guidelines: Different types of fertilizers may have specific storage requirements outlined by the manufacturer. It is important to follow these guidelines for optimal storage conditions.

In case you missed it: Best Fertilizer for Plumeria: Organic, Natural, Homemade, NPK Ratio, When and How to Apply

Dried Supari Chips

Conclusion

Understanding how to manage fertilizers for your Arecanut plantation properly is crucial for achieving optimal growth and yield. Proper fertilizer management ensures that the Arecanut trees receive essential nutrients for healthy development. This leads to improved nutrient uptake, resulting in higher yields and better-quality nuts.

The Ultimate Guide to Growing Kagzi Lemons in Home Gardens

0

Selecting the appropriate site for Kagzi Lemons is a crucial factor in successful gardening. When selecting the perfect location, keep in mind that Kagzi lemons prefer well-draining soil. They don’t like wet feet, so avoid areas prone to standing water or heavy clay soil. Sandy loam with good drainage will provide an ideal growing environment. Additionally, consider the microclimate of your garden.  

Growing Kagzi Lemons

Growing Kagzi Lemons

Selecting Healthy Kagzi Lemon Saplings 

The quality and health of the sapling will determine how well it adapts to its new environment and how vigorously it grows. Start by looking for a reputable nursery or supplier that specializes in citrus trees.  Look for saplings with vibrant green leaves and a strong, straight trunk. Avoid any plants with yellowing or wilting leaves, as this may be a sign of disease or poor health. Avoid plants with mushy or dark-colored roots, as these could indicate root rot or other issues. 

Soil Preparation for Kagzi Lemon Trees 

Ideal Soil Conditions for Maximum Growth 

To create the perfect environment for your Kagzi lemon tree, start by testing the pH level of your soil. Ideally, it should be slightly acidic, with a range between 5.5 and 6.5. You can adjust the pH by adding amendments such as sulfur or dolomite lime. In addition to pH levels, proper drainage is essential for these lemon trees. They do not tolerate waterlogged conditions. 

Amending Your Garden Soil for Lemon Trees 

If your soil is heavy or clay-like, it may hinder water drainage and cause root rot. When it comes to Soil preparation for lemon trees, start by testing the pH level using a simple kit. If the pH level is too high (alkaline), you can lower it by mixing organic matter with the soil. These amendments will help acidify the soil gradually over time. 

Planting Techniques for Kagzi Lemons 

Best Time to Plant Kagzi Lemon Trees 

Ideally, the best time to plant Kagzi lemon trees is during the spring season. Springtime provides optimal conditions for new growth and helps ensure that your lemon trees have a healthy start. Before planting Kagzi lemon saplings, it’s important to prepare your soil properly. Make sure the soil is well-drained and contains high organic matter. This will provide a good foundation for your lemon trees to thrive.  

In case you missed it: Best Fertilizer for Lemon Trees: Homemade, Liquid, Organic, Natural, Compost Manure and NPK

Fresh lemons on a tree
Step-by-Step Guide to Planting Kagzi Lemons 

Start by selecting a sunny place in your garden with well-draining soil. Dig a hole that is wide enough as the root ball of your Kagzi lemon sapling. Gently remove the sapling from its nursery container and place it in the center of the hole. Make sure to position it at the same depth it was previously planted, ensuring that the crown is level with or slightly above ground level. 

Carefully backfill the hole with soil, tamping it down gently to eliminate air pockets. Once done, spread a layer of organic mulch around the base of your lemon tree to help retain moisture and suppress weeds. After planting, give your Kagzi lemon tree a thorough watering to settle its roots into its new home. This initial watering is crucial for promoting healthy growth and establishment. 

Watering Requirements for Kagzi Lemon Trees 

How Often to Water Your Kagzi Lemons 

When it comes to Watering Kagzi lemon trees, finding the right balance is crucial. These citrus trees thrive in well-drained soil so over-watering can cause root rot and other problems. On the other hand, underwater can cause stress and hinder growth. As a general guideline, young lemon trees require more frequent watering compared to mature ones. During hot summer months or drought periods, you may need to water your Kagzi lemons every 7-10 days. However, it’s essential not to rely solely on a fixed schedule.  

Tips for Efficient Water Use in Lemon Gardening 

Aim for deep irrigation sessions that penetrate the root zone. This encourages deeper roots and makes them more resilient to drought conditions. Applying organic mulch around your lemon trees helps retain moisture in the soil by reducing evaporation. It also regulates temperature fluctuations and suppresses weed growth. 

Nutrition and Fertilization for Healthy Growth 

Essential Nutrients for Kagzi Lemon Trees 

Kagzi lemon trees, like any other plant, require certain essential nutrients to thrive and produce healthy fruits. One of the most important nutrients for kagzi lemon trees is nitrogen. Nitrogen plays a key role in promoting leafy growth and overall plant health. To ensure an adequate supply of nitrogen, you can use organic fertilizers.  

Phosphorus is another key nutrient required by kagzi lemon trees. It aids in root development and enhances flower formation, ultimately leading to better fruit production. Combining bone meal to the soil can help fulfill the phosphorus needs of your citrus tree. Potassium is essential for strong cell walls, disease resistance, and regulating water movement within the plant. Potash-rich fertilizers like wood ash or potassium sulfate are commonly used to supply this nutrient. 

Organic Fertilization Methods for Home Gardens 

When it comes to Nutrients for Kagzi lemons, using organic fertilizers is an excellent way to provide them with the nutrients they need for healthy growth. One popular organic fertilizer option is compost. Compost is made by decomposing organic matter, such as kitchen scraps, yard waste, and leaves.

It adds key nutrients to the soil and improves its structure, promoting better water retention.  Another effective organic fertilizer is manure. Whether it’s cow manure or chicken manure, these nutrient-rich substances are packed with beneficial elements like nitrogen, phosphorus, and potassium that promote vigorous plant growth. 

In case you missed it: How to Grow Lemon from Seed to Harvest: A Complete Guide for Beginners

Green lemons hanging from the lemon tree

Pest and Disease Management in Kagzi Lemons 

Identifying Common Pests and Diseases  

Pests such as aphids, scale insects, and citrus leaf miners are common culprits that can infest Kagzi lemon trees. These tiny creatures feed on the leaves, sap, or fruits of the tree, causing damage and weakening its overall health. When it comes to Pest Management in lemon trees, keep an eye out for distorted or discolored leaves, sticky residue on the foliage, or small tunnels on the surface of the leaves as signs of infestation. 

In addition to pests, bacterial and fungal diseases can also pose a threat to your Kagzi lemon trees. Citrus canker, powdery mildew, root rot, and citrus greening are some common diseases that can impact their growth. Look for symptoms like yellowing leaves with dark spots or lesions, powdery white patches on leaves or fruit surfaces, wilting branches, or stunted growth as indicators of potential diseases. 

Organic Solutions for Pest and Disease Control 

When it comes to growing Kagzi lemons in your home garden, dealing with pests and Diseases in Kagzi lemons is crucial. One effective method is using beneficial insects to control pests such as aphids and mites. These natural predators feed on harmful insects, keeping their populations in check.

Additionally, introducing nematodes into the soil can help control soil-borne pests like root-knot nematodes. Another organic solution is making use of homemade sprays made from ingredients like neem oil or garlic. Neem oil acts as an insecticide while also preventing fungal infections, while garlic spray repels many common pests. 

Pruning and Maintenance for Optimal Health 

When and How to Prune Kagzi Lemon Trees 

Timing is essential when pruning Kagzi lemon trees. The best time to prune is during late winter or early spring before new growth begins. This allows the tree to recover from any cuts before entering its active growing season. Remove any dead, diseased, or damaged branches. These can hinder the overall health of the tree and potentially spread disease if left unattended. Use clean pruning shears or loppers for a precise cut without damaging the surrounding tissue. 

Regular Maintenance Tips for Vigorous Growth 

Regularly trim back any dead or diseased branches from your lemon tree. Feed your lemon tree with a balanced organic fertilizer every few months during the growing season. This will provide it with essential nutrients for optimal growth. Apply organic mulch around your lemon tree to help retain moisture and regulate soil temperature. Keep an eye out for common pests such as aphids, scale insects, and citrus leaf miners. 

Pollination Tips for Higher Fruit Yield 

Enhancing Pollination in Kagzi Lemon Trees 

Pollination is a crucial process for the successful growth and development of Kagzi lemon trees. One effective way to enhance lemon tree pollination is by planting flowers that they love. Bees and butterflies are especially important for lemon tree pollination, so consider adding bee-friendly plants like Lavender, Sunflowers, or Marigolds to your garden. These colorful blooms will not only beautify your space but also provide a food source for these helpful insects. 

Attracting Pollinators to Your Home Garden 

One of the key factors in successful lemon tree cultivation is ensuring proper pollination. Planting a variety of flowering plants throughout your garden will provide an enticing buffet for pollinators. Examples include lavender, marigolds, and sunflowers. 

Harvesting Your Kagzi Lemons 

Knowing When Your Lemons Are Ready to Pick 

One of the most exciting moments for any lemon gardener is when it’s time to  Harvesting Kagzi lemons. Take a look at the color of the skin. As Kagzi lemons mature, they transform from a bright green hue to a rich yellow color. However, don’t expect all lemons on the tree to ripen at once; they may vary in their stages of maturity. 

Next, give your lemon a gentle squeeze. Ripe lemons will have a slight give when pressed but still feel firm overall. Avoid picking overly soft or squishy fruits, as these may be overripe and less flavorful. Another indicator is the size and weight of the lemon. Mature kagzi lemons tend to be larger and heavier compared to younger ones. They should feel substantial in your hand with a good amount of juice inside. 

In case you missed it: How to Grow and Care for Organic Lemon Balm: Planting Instructions

Growing Kagzi Lemons4
Harvesting Techniques for Home Gardeners 

When it comes to harvesting your Kagzi lemons from your home garden, timing is everything. To harvest your lemons, simply grasp them firmly in one hand and twist gently until they detach from the tree. Once you’ve harvested your lemons, handle them with care. Place them in a basket lined with soft padding or wrap each lemon individually in tissue paper before storing them. 

Post-Harvest Care and Usage of Kagzi Lemons 

Storing Your Kagzi Lemon Harvest 

Once you’ve successfully harvested your precious Kagzi lemons from your home garden, it’s important to store homegrown lemons properly to ensure their freshness and flavor. Make sure to gently wipe off any dirt or debris from the lemons before storing them. Avoid washing the lemons unless necessary, as excess moisture can lead to spoilage. 

Creative Ways to Use Kagzi Lemons in Your Kitchen 
  • Lemon Infused Water: Add a slice of Kagzi lemon to your water for a burst of citrusy goodness. It’s not only refreshing but also adds essential vitamins and minerals to your daily hydration routine. 
  • Tangy Salad Dressings: Whip up a tangy salad dressing by combining freshly squeezed Kagzi lemon juice with olive oil, honey, Dijon mustard, and herbs. 
  • Flavorful Marinades: Create delicious marinades by mixing Kagzi lemon juice with garlic, herbs, and spices. 
  • Citrus Desserts: From luscious lemon bars to tangy sorbets, there’s no shortage of delightful desserts you can create using Kagzi lemons. Their bright flavor adds a refreshing touch that will leave everyone wanting more. 

Conclusion 

Growing Kagzi Lemon in your home garden can be a rewarding and enjoyable experience. By following these Kagzi lemon gardening tips, Sustainable Kagzi lemon gardening, you can ensure that your Kagzi Lemon trees thrive and produce abundant fruit. From selecting the correct location to providing proper care and protection against pests and diseases, each aspect is crucial for successful cultivation. 

How to Grow Nectarine from Seed: A Comprehensive Guide for Beginners

0

When it comes to growing Nectarines from seeds, it’s important to understand the basics before getting started. First and foremost, it’s essential to choose a ripe and healthy Nectarine fruit.  Next, prepare a well-drained potting mix using equal parts of peat moss, perlite, and vermiculite.

Fill a small container with this mixture and plant your Nectarine seed about an inch deep. Germination may take several weeks, so be patient. Once your seedling emerges from the soil with its first set of true leaves, you can transplant it into a larger container or directly into your garden. 

Benefits of Growing from Seed 

Growing Nectarines from seed can be a rewarding and fulfilling experience for beginners. Growing from seed allows you to have control over the entire process right from the very beginning. You get to select high-quality seeds and ensure that they are free of any diseases or pests. This gives you peace of mind, knowing that your tree will start healthy and strong. Additionally, growing Nectarines from seeds is cost-effective.  

How to Grow Nectarine from Seed

How to Grow Nectarine from Seed

Selecting the Right Nectarine Seeds 

Choosing High-Quality Seeds 

When it comes to the choosing right Nectarine Seed, Opt for fresh and viable seeds. Look for plump, firm, and undamaged seeds, as these have higher chances of sprouting successfully. Next, consider the source of your seeds. It’s advisable to purchase them from reputable nurseries or seed suppliers who specialize in fruit tree varieties. Furthermore, prioritize certified organic or heirloom varieties if possible. 

Understanding Seed Varieties 

When it comes to growing Nectarines from seed, understanding the different seed varieties available is essential. There are several factors to consider when choosing a seed variety. First and foremost, you’ll want to choose a variety that is suited to your climate. Another important factor to consider is whether you want a standard or dwarf variety. Additionally, there are early-ripening and late-ripening varieties available. Early-ripening varieties produce fruit earlier in the season, while late-ripening varieties extend the harvest period into late summer or even fall.  

Preparing Seeds for Planting 

Stratification Process 

To begin Stratifying Nectarine Seeds, gather your Nectarine seeds and place them in a sphagnum moss. Seal them and store them in the refrigerator for about 8-12 weeks. This extended period of chilling helps break down any dormancy mechanisms within the seed. 

During this time, be sure to check on your seeds regularly to ensure they remain moist but not overly wet. Excessive moisture can cause mold or rotting, which will hinder germination. After the recommended stratification period has elapsed, from the refrigerator remove the seeds and prepare them for planting.  

Seed Cleaning and Storage 

After extracting the seeds from ripe Nectarine fruits, it’s important to remove any attached flesh or debris. Gently rinse the seeds under running water to ensure they are clean. Once cleaned, lay the seeds out on a paper towel or tray to air dry completely. Allow them to dry in a well-ventilated area for about 24-48 hours. After drying, transfer the seeds into an airtight container.  

Soil and Container Preparation 

Choosing the Right Soil Mix 

When it comes to Soil Preparation for Nectarine Seeds, Choosing the right soil mix is crucial. For starters, it’s important to use a well-draining soil mix. Nectarine trees don’t like wet feet, so ensuring good drainage is essential. You can achieve this by mixing perlite or sand into your soil mixture. Nectarine trees prefer slightly acidic soil with a pH range between 6 and 7.5. Mixing organic matter in your soil mix can also improve its fertility and moisture-retaining capabilities. 

Selecting Containers for Seedlings 

When it comes to growing Nectarine seedlings, choosing the right containers is crucial for their development. Opt for containers that have good drainage holes. Plastic pots or clay pots with drainage holes are both suitable options. Next, consider the size of the container. It’s best to choose a container that provides enough space for the roots to grow. As a rule, select a pot that is at least 12 inches deep and wide. Additionally, look for containers made from durable materials that can withstand outdoor conditions.  

How to Grow Nectarine from Seed How to Increase Apple Fruit Size: Management for Getting Bigger Apple Fruits in Your Orchard  

Sweet Organic Nectarines on Tree

Sowing the Seeds 

Proper Depth and Spacing 

When it comes to Nectarine Tree Planting Tips, planting seeds at the right depth ensures that they receive enough moisture while still being able to push through the soil. It’s recommended to plant Nectarine seeds at a depth of about 1 inch in well-draining soil. Spacing between seedlings is equally important as it allows each tree to access sufficient nutrients without competing with neighboring plants. For optimum growth, leave a gap of around 15-20 feet between each sapling. 

Ideal Conditions for Germination 

Nectarine seeds thrive in warm environments, so aim for a consistent temperature between 21-29°C. Moisture is another critical factor. Regularly misting the soil surface with water can help maintain adequate moisture levels. Providing good air circulation around your seedlings is also important. This helps prevent fungal diseases and encourages strong growth.  

Caring for Nectarine Seedlings 

Watering and Feeding 

When it comes to Caring for Nectarine Seedlings, proper hydration ensures that the seeds receive enough moisture to germinate. To water your Nectarine seeds, use a gentle spray or mist so as not to disturb the delicate roots. Ensure that the soil moist but not waterlogged. Feeding your Nectarine seedlings with nutrients is equally important for their growth and development. Organic fertilizers rich in nitrogen, phosphorus, and potassium are ideal choices for providing essential nutrients.  

Managing Sunlight and Temperature 

In terms of temperature, Nectarines prefer a moderate climate. It performs best in regions where the average annual temperature ranges between 10°C to 29°C. It’s important to note that extreme heat or cold can stress or even damage young Nectarine plants. To manage sunlight exposure, consider planting your seedlings in an area that gets sufficient sunlight throughout the day. If you’re growing indoors, use grow lights to supplement natural light and ensure proper intensity. 

Transplanting Nectarine Seedlings Outdoors 

Timing and Location Considerations 

When it comes to timing, it’s essential to sow the seeds during the right season. Nectarine seeds should be planted in late winter or early spring when the soil temperature starts to warm up. As for location, choose a spot that receives full sunlight throughout the day. Nectarine trees thrive in sunny locations as they require six hours of direct sunlight daily. Ensure that there is enough space for the tree to grow without any obstructions. 

Acclimatizing Seedlings to Outdoor Conditions 

Start by gradually exposing the seedlings to outdoor conditions. Begin with short periods outside, gradually increasing both the duration and intensity of sunlight exposure over several days or weeks. Choose calm days without extreme weather conditions for this process. Avoid placing seedlings directly under intense sunlight, as they may get sunburned. During this acclimation period, closely monitor soil moisture levels. Seedlings may dry out more quickly when exposed to outdoor conditions due to increased wind and sunlight exposure.  

Pruning and Training Young Nectarine Trees 

Basic Pruning Techniques 

Pruning Young Nectarine Trees is an essential practice when it comes to growing Nectarine trees from seed. By removing certain parts of the plant, you can shape its growth, promote better fruit production, and prevent diseases. It’s important to prune your Nectarine tree during dormancy in late winter or early spring. This allows the wounds to heal quickly before new growth begins. Start by removing any dead branches with clean pruners. Next, thin out crowded areas by cutting backcrossing branches or those that grow towards the center of the tree. 

Training for Optimal Growth 

By providing the right support and guidance, you can help your young Nectarine tree develop a strong structure and produce abundant, high-quality fruits. One important aspect of training is pruning. Regularly pruning your Nectarine tree helps maintain its shape, promote airflow through the branches, and remove any damaged or diseased wood.  

In case you missed it: Orange Gardening For Beginners, How To Start, FAQs

Fresh Nectarines

Pest and Disease Management in Nectarine Trees 

Identifying Common Threats 

When growing Nectarines from seed, it’s important to be aware of the common threats that can hinder their growth. One common threat to Nectarine trees is pests. Aphids, mites, and fruit flies are just a few examples of pests that can damage the leaves and fruits of your plants. Regularly checking trees for signs of infestation, such as discolored or wilting leaves, sticky residue, or small holes in the fruit, will help you catch these pesky critters before they cause significant damage. 

Another threat to watch out for is diseases. Nectarine trees are susceptible to fungal infections like peach leaf curl and brown rot. These diseases can lead to defoliation and fruit decay if left untreated. Keep an eye out for symptoms such as distorted leaves or moldy spots on the fruits. 

Organic Control Methods 

When it comes to pests and diseases in Nectarine trees, many people are turning to organic control methods. One effective method of pest management is the use of beneficial insects. Ladybugs, lacewings, and parasitic wasps can be introduced into the orchard to prey on common pests like aphids and caterpillars. Another organic approach is companion planting. By interplanting certain flowering plants or herbs among your Nectarine trees, you can create a diverse ecosystem that attracts beneficial insects while repelling pests.  

Harvesting and Propagation of Nectarine 

Knowing When to Harvest 

Harvesting Nectarines is an exciting moment for any gardener. First and foremost, pay attention to the color of the fruit. Nectarines should have vibrant hues of yellow, orange, or red when they are ripe. Additionally, gently press the skin with your thumb – if it yields slightly and feels soft but not mushy, that’s a good sign it’s ready. 

Another indicator of ripeness is aroma. Ripe Nectarines emit a sweet fragrance that can be detected even before reaching them. Take a whiff near the stem end – if there’s a pleasant scent, it means they’re likely ripe. Size also matters when determining whether your Nectarine is ready for harvest. The fruit should have reached its full size and feel plump in your hand. 

Propagating from Mature Trees 

One of the most rewarding ways to grow Nectarines is by propagating them from mature trees. To propagate from a Nectarine tree, you can use several techniques, such as grafting or air layering. Grafting requires some knowledge, but it can be a fun and satisfying process once you get the hang of it. It’s important to choose healthy branches for grafting and make clean cuts using sharp tools. The scion should be carefully aligned with the rootstock, ensuring good contact between their cambium layers for successful fusion. 

On the other hand, air layering is a simpler technique that doesn’t require much expertise. It involves making an incision on a lower branch of the mature tree and wrapping it with moist sphagnum moss covered in plastic wrap. This creates a favorable environment for roots to form while still receiving nutrients from the parent plant. 

In case you missed it: Growing Lemon Trees Hydroponically – For Beginners

Juicy and Sweet Nectarines

Conclusion 

Growing Nectarines from seed can be a rewarding and fulfilling experience for beginners. By understanding the basics of seed selection, stratification, and germination, as well as providing the right conditions for growth, you can successfully grow your Nectarine tree. Growing Nectarines may require some effort initially, but with time and dedication, you’ll enjoy bountiful harvests of this delicious fruit year after year. 

Watermelon Fertilizer Schedule: Fertilization Based on Growth Stages 

0

Watermelon cultivation is an art that requires careful attention to detail, and one crucial aspect of this process is fertilization. Fertilization plays a key role in ensuring the healthy growth and development of Watermelon plants. By providing essential nutrients, Proper Watermelon Growth Fertilizer Plan, fertilizers help optimize plant health, increase fruit quality, and maximize yield.  

Watermelon Fertilizer Schedule

Overview of Nutrient Requirements for Watermelons 

Watermelon plants require a balanced supply of essential macronutrients, nitrogen, phosphorus, and potassium. Nitrogen promotes lush foliage growth, while phosphorus aids in root development and overall plant health. Potassium contributes to fruit quality and helps regulate water uptake. In addition to these primary macronutrients, Watermelons also benefit from secondary nutrients. 

Watermelon Fertilizer Schedule

Soil Preparation and Testing 

Assessing Soil Nutrient Levels 

To ensure healthy growth, it is crucial to assess the nutrient levels in the soil before planting Watermelons. Soil testing is a valuable tool for assessing nutrient levels. By analyzing samples from different areas of the field, farmers can determine if any specific nutrients are deficient or imbalanced.  

Amending Soil Prior to Planting 

When it comes to Watermelon Soil Fertility, Amending the soil is the best step in ensuring optimal nutrient availability and overall plant health. The first thing you need to do is assess the quality of your soil. Conduct a soil test to determine its nutrient content. Based on the soil test, you can then decide what amendments are needed. Common amendments include compost, aged manure, peat moss, and sand. These organic materials improve soil structure, fertility, drainage, and moisture retention. 

Starter Fertilizer Application 

Choosing the Right Starter Fertilizer 

Choosing the right starter fertilizer is crucial for successful Watermelon cultivation. This initial application sets the stage for healthy plant growth and development. When selecting a starter fertilizer, it’s important to consider the nutrient content and formulation. Ideally, a starter fertilizer should have a higher concentration of phosphorus (P) compared to nitrogen (N) and potassium (K). Phosphorus helps in root development, and young Watermelon plants need to establish themselves in the soil. 

Application Techniques and Timing 

When it comes to Watermelon Fertilization Techniques, timing plays a key role in ensuring healthy growth and abundant fruit production. To begin with, it’s important to note that Watermelon plants have different nutrient needs at various stages of growth. During the early stages, when seedlings are just starting to establish themselves, a starter fertilizer rich in phosphorus can provide a boost for root development.

This should be applied at planting time by placing small amounts directly into the planting hole or mixing it into the soil around each plant. As the plants continue to grow, regular applications of nitrogen become essential for optimal development. Nitrogen is responsible for promoting leafy growth and overall plant vigor. It’s recommended to divide nitrogen applications into multiple doses rather than applying them all at once. 

In case you missed it: How to Increase Watermelon Fruit Size: Management for Getting Bigger Watermelons

Watermelon plant growing in organic vegetable garde

In addition to nitrogen, Watermelon plants also require adequate levels of phosphorus and potassium for healthy fruit development. Phosphorus aids in flower formation, while potassium contributes to overall plant strength and disease resistance. Applying these nutrients during flowering and fruiting stages is crucial for maximizing yield potential. 

Nitrogen Management 

Importance of Nitrogen for Watermelon Growth 

In the early stages of growth, nitrogen is important for promoting vigorous vegetative growth. Adequate nitrogen levels help Watermelon plants establish a strong root system and develop healthy leaves that can efficiently photosynthesize and provide energy for fruit production. 

Nitrogen Application Schedule 

Early in the growing season, when your Watermelon plants are still establishing themselves, a small amount of nitrogen can be beneficial. This helps promote vigorous root growth and sets the stage for future development. As the plants enter their vegetative phase and start producing leaves, you can increase the nitrogen application rate slightly. 

During flowering and fruit set stages, however, it’s best to reduce the amount of nitrogen applied. Too much nitrogen during this time can cause extra vine growth at the expense of fruit development. Instead, focus on phosphorus and potassium applications to support flowering and fruiting. 

Phosphorus and Potassium Requirements 

Role of Phosphorus and Potassium in Watermelon Health 

Phosphorus is responsible for promoting strong root development, which is vital for nutrient uptake and plant stability. It transfers energy within the plant, aiding in photosynthesis and fruit development. Potassium, on the other hand, helps regulate water balance within the plant cells and enhances disease resistance. It strengthens cell walls, making plants more resilient to environmental stressors such as drought or pests. Potassium also improves fruit quality by enhancing sugar content and flavor. 

Recommendations for Phosphorus and Potassium Application 

For phosphorus, it is generally recommended to apply it before planting or during transplanting. This nutrient promotes root development and overall plant growth. Incorporating phosphorus-rich fertilizer into the soil prior to planting will ensure that your Watermelon plants have access to this vital nutrient from the very beginning.

Potassium, on the other hand, is responsible for improving fruit quality and disease resistance. It also helps regulate water uptake by plants. Splitting applications into multiple doses can be beneficial as well, especially during periods of rapid fruit development. 

Micronutrients and Trace Elements 

Identifying Micronutrient Needs 

Micronutrients may be small in quantity, but they play a crucial role in the growth and development of Watermelons. These essential elements include iron, manganese, zinc, copper, boron, molybdenum, and chlorine. Identifying micronutrient deficiencies is not always straightforward, as symptoms may change depending on the specific nutrient involved. However, there are some common signs to look out for. For example, yellowing between leaf veins may indicate an iron deficiency, while white or yellow spots on leaves could point to a zinc deficiency. 

Application Methods for Micronutrients 

When it comes to Fertilizer Application for Watermelons, one effective method of applying micronutrients is through foliar sprays. By spraying a fine mist directly onto the leaves, these nutrients can be absorbed quickly and efficiently by the plant’s foliage. This method is especially useful when there are signs of nutrient deficiency or when soil conditions may hinder nutrient uptake.

Another way to provide micronutrients to Watermelon plants is through fertigation – combining fertilization with irrigation. By injecting liquid fertilizer containing the necessary micronutrients into the irrigation system, growers can ensure that these vital elements reach the roots directly. 

Fertilization During Flowering and Fruit Set 

Adjusting Fertilizer Types and Amounts 

During the early stages of growth, Watermelons benefit from a higher nitrogen content in their fertilizer. This helps promote healthy leaf development and overall plant vigor. As the plants start flowering and fruiting, NPK Ratios for Watermelons are less nitrogen and more phosphorus (P) and potassium (K). These nutrients play crucial roles in flower formation, fruit development, and overall plant health. You can switch to a fertilizer with a lower nitrogen value but higher phosphorus and potassium values during this time. 

In case you missed it: The Ultimate Guide to the Top 16 Best Watermelon Varieties

watermelon berry in the home garden
Timing of Applications to Maximize Fruit Quality 

When it comes to Fertilization Timing for Watermelons, During the early growth stage, it is important to focus on nitrogen application. Nitrogen promotes vegetative growth and helps establish a strong foundation for the plant. However, excessive nitrogen during this stage can result in lush foliage but fewer fruits.  

As the plants transition into the flowering stage, phosphorus and potassium become more essential. Phosphorus aids in flower development and root growth, while potassium increases overall plant health and disease resistance. To determine when these nutrients should be applied, closely monitor your crop’s development. As a general guideline, consider applying phosphorus and potassium before flowering begins or as indicated by soil test results. 

Irrigation and Fertilizer Interactions 

Watering Techniques for Optimal Fertilizer Uptake 

Watering your Watermelon plants is not just about quenching their thirst. To achieve optimal fertilizer uptake, it’s important to water your Watermelons deeply and evenly. Shallow watering can lead to nutrients being washed away before they reach the root zone, while uneven watering can result in uneven nutrient distribution within the soil. 

Managing Fertilization in Different Irrigation Systems 

Watermelon plants have specific nutrient needs that must be met at different stages of growth. In traditional irrigation systems such as overhead sprinklers or furrow irrigation, it’s important to consider the potential for nutrient leaching. These systems can cause nutrients to be washed away from the root zone, making them less available to the plant.

To mitigate this issue, applying fertilizers in smaller doses more frequently can help ensure a steady supply of nutrients throughout the growing season. Alternatively, if you’re using drip irrigation or a subsurface drip system, there is less risk of nutrient leaching. This allows for longer intervals between fertilizer applications but requires careful monitoring of soil moisture levels and regular testing for nutrient deficiencies. 

Organic Fertilization Options 

Types of Organic Fertilizers Suitable for Watermelons 

One popular organic fertilizer for Watermelons is compost. Compost is made from food scraps, yard waste, and manure. It not only provides essential nutrients like nitrogen, phosphorus, and potassium but also improves soil structure and promotes beneficial microbial activity. Another organic fertilizer option is fish emulsion. Fish emulsion is particularly effective during the early stages of Watermelon growth when plants need a boost of nutrients to establish strong roots. 

Integrating Organic and Inorganic Fertilization Methods 

Integrating organic and inorganic fertilization methods can be a game-changer for your Watermelon crops. Organic fertilizers provide slow-release nutrients that nourish plants over time. They are derived from natural sources like compost, manure, or bone meal. These materials improve soil structure and enhance microbial activity. On the other hand, inorganic fertilizers contain concentrated forms of nutrients that are easily available to plants. They are typically manufactured using chemical processes and can deliver quick results when applied correctly. 

Monitoring and Adjusting Fertilization 

Techniques for Monitoring Plant Health and Soil Nutrients 

One effective method is visual observation. Look out for yellowing leaves, stunted growth, or wilting, as these may indicate nutrient imbalances or other issues. Another technique is conducting soil tests. These tests provide valuable information about the nutrient content of your soil, helping you determine if any amendments are needed.  

Adjusting Fertilization Based on Growth Stages 

One crucial aspect of Watermelon cultivation is adjusting fertilization based on the different growth stages of the plants. As Watermelons progress from seedlings to mature fruit-bearing plants, their nutrient requirements change. During the early stages of growth, like germination and seedling development, it is important to provide fertilizer with a higher ratio of phosphorus and potassium. These nutrients promote strong root development, healthy foliage growth, and overall plant vigor. 

As the Watermelon vines start to vine out and produce flowers, nitrogen becomes more critical. Nitrogen supports vigorous vegetative growth which in turn allows for more efficient energy production during flowering and fruit set. Once fruits have formed on the vines, it’s time to shift focus toward providing adequate potassium for proper fruit development. Potassium helps regulate water movement within cells, which contributes to firmness and sweetness in the final product. 

In case you missed it: Best and Worst Companion Plants for Watermelon

Watermelon gardening

Conclusion 

Fertilization plays a vital role in the successful cultivation of Watermelons. By understanding the nutrient requirements of Watermelon plants and assessing soil nutrient levels, farmers can make informed decisions about amending the soil and choosing the right fertilizers. By following a well-planned Watermelon fertilizer schedule based on growth stages, Watermelon growers can optimize their crop yields and produce high-quality fruits that satisfy market demands. 

Ultimate Guide to Growing Aronia Berries: Tips, Tricks, and Best Practices

0

Aronia berries are small fruits that pack a powerful punch when it comes to health benefits. Whether you’re looking for a new superfood ingredient or simply want to enhance your garden’s diversity, growing Aronia berries can be a rewarding experience.  

Growing Aronia Berries

Growing Aronia Berries

Health Benefits and Nutritional Value 

When it comes to health benefits, Aronia berries are a true powerhouse. These small but mighty fruits are packed with vitamins, minerals, and antioxidants. One of the key nutritional highlights of Aronia berries is their high content of anthocyanins. Anthocyanins have anti-inflammatory properties and may help protect against heart disease and diabetes. 

Starting Your Aronia Berry Garden 

Selecting the Right Variety 

Selecting the right variety of Aronia berries is a crucial step in Aronia Berry Growing. Some popular varieties include Viking, Nero, and McKenzie. Viking is known for its high yields and large fruit size, making it an excellent choice for commercial growers. Nero boasts exceptional disease resistance and produces sweet-tasting berries that are perfect for fresh consumption or juicing. Home gardeners favor McKenzie due to its compact size and abundant crop. 

Understanding Your Climate Zone 

When it comes to Cultivating Aronia Berries, one of the most crucial factors is understanding your climate zone. Aronia plants thrive in specific temperature ranges and weather conditions, so knowing which zone you are in will help you determine if they can grow successfully in your area. 

Each region has its unique climate characteristics that influence plant growth and development. By identifying your climate zone, you can make informed decisions about selecting the right variety of Aronia berries and providing them with optimal growing conditions. 

Propagation Methods for Aronia Berries 

Growing from Seeds 

Growing Aronia berries from seeds is a rewarding and cost-effective way to start your berry garden. When it comes to Aronia Berry Propagation, you’ll need fresh Aronia berry seeds. These can be obtained from ripe berries that have been thoroughly cleaned and dried. It’s important to note that Aronia berries have hard outer shells, so scarification (scratching or nicking) of the seed coat may be necessary for better germination rates. 

Start by filling small seed trays or pots with a well-draining potting mix. Plant the Aronia berries seeds about 1/4 inch deep into the soil. Water gently to ensure good moisture penetration without causing waterlogging. Germination typically takes around 3-4 weeks, but it can vary depending on other factors. Once sprouts emerge, provide them with bright light for optimal growth.  

Propagating from Cuttings 

One of the most effective ways to grow Aronia berries is by propagating them from cuttings. To get started with propagating from cuttings, choose healthy and disease-free stems from mature Aronia plants. Make sure the stem is about 6-8 inches long and has several leaf nodes present. Using sharp pruning shears, make a clean cut just below a node. Next, remove any leaves on the cutting to prevent excess moisture loss through transpiration. Dip the cutting in rooting hormone powder or gel for better root development.

Prepare a pot filled with well-draining soil mix, such as peat moss and perlite. Create holes in the soil using your finger or pencil and insert each cutting about an inch deep into these holes.  After planting, water frequently settles the soil around the cuttings and provides the necessary moisture for root establishment. Place the pot in a warm location with indirect sunlight. Check for roots after 4-6 weeks by gently tugging on one of the cuttings. If there is resistance, it means roots have formed successfully. 

Soil Preparation and Site Selection 

Ideal Soil Conditions 

Having the right soil conditions is crucial for the successful growth of Aronia berries. These hardy plants prefer well-draining soil that contains high organic matter. They thrive in a pH between 5.5 to 7. To ensure optimal soil conditions, it’s important to prepare the planting area properly. Start by removing any weeds or grass and loosen the soil with a garden fork. Adding compost or well-rotted manure can greatly enhance the fertility of the soil. Mix it thoroughly into the top few inches to provide a nutritious base for your Aronia plants. 

Sunlight and Location Requirements 

When it comes to growing Aronia berries, providing the right amount of sunlight is crucial for their growth and productivity. These hardy plants thrive in full sun conditions, which means they need 6 to 8 hours of direct sunlight per day. So, make sure you choose a location that receives ample sunshine throughout the day. In terms of location, Aronia berries can adapt well to various climates but prefer slightly acidic soil. They can tolerate both cold winters and hot summers, making them a great option for many regions. 

In case you missed it: The Ultimate Guide to the Top 16 Best Watermelon Varieties

Branches of Black Chokeberry

Planting Aronia Berries 

Best Time to Plant 

When it comes to planting Aronia berries, timing is key. The best time to plant these hardy shrubs is in the early spring or fall when temperatures are mild. Planting during these seasons allows the roots to establish themselves before extreme weather sets in. 

Planting Steps and Spacing Guidelines 

When it comes to planting Aronia berries, there are a few key steps you need to follow for success. First, prepare the soil by removing any weeds and loosening it with a garden fork. Next, dig a hole that is wide enough to fit the root ball of your Aronia plant. Gently place the plant into the hole, making sure that it sits at the same depth as it was in its container. Spacing is important when planting Aronia berries. Each plant should be spaced about 4-8 feet apart from one another to allow for proper air circulation and growth. This spacing also ensures that each plant has access to adequate sunlight and nutrients from the soil. 

Irrigation and Water Management 

Watering Frequency and Techniques 

Watering is a crucial aspect of growing Aronia berries successfully. In general, Aronia berries require regular watering to maintain consistent moisture in the soil. During the first year after planting, it’s important to keep the soil consistently moist but not waterlogged. This helps establish strong root systems for future growth. 

During hot summer months, you may need to increase watering frequency to prevent wilting or stress on the plants. When it comes to watering techniques, it’s best to use a slow and deep irrigation method rather than simply spraying water onto the surface. This allows water to penetrate deeply into the root zone and encourages stronger root development. 

Signs of Over or Under-Watering 

One telltale sign of over-watering is when the soil remains constantly wet or soggy. This can ultimately cause the plant to wither away. On the other hand, underwatering will result in dry and parched soil, causing leaves to wilt and turn brown. 

Fertilizing and Soil Care 

Recommended Fertilizers 

When it comes to Aronia Berry Fertilization, choosing the right fertilizers can make a world of difference in their growth and productivity. One popular choice among Aronia berry growers is organic fertilizer. These natural options are derived from plant or animal sources and offer a slow release of nutrients that nourish the plants over time.  

Soil pH and Nutrient Management 

These hardy plants prefer a pH level between 5.5 and 7.0. Once you know the pH level, you can take steps to adjust it if necessary. Before planting, consider incorporating well-rotted manure or compost into the soil to provide a good foundation of organic matter and nutrients. During active growth periods, fertilize with balanced organic fertilizers specifically formulated for fruit-bearing plants. 

Pruning and Managing Growth 

Pruning Techniques and Timing 

By removing dead branches, you can improve airflow and prevent diseases. Additionally, pruning helps shape your plants for aesthetic appeal and makes harvesting easier. When it comes to Aronia Berry Pruning Tips, the best time to prune Aronia bushes is during late winter or early spring while they are still dormant. However, light pruning can also be done in summer after fruiting if necessary. 

Training and Shaping Aronia Plants 

Training and shaping Aronia plants is an essential part of cultivating healthy and productive bushes. By implementing proper techniques, you can ensure that your plants grow in a well-structured manner, allowing maximum sunlight penetration and air circulation. One common method for training Aronia plants is by utilizing trellises or stakes. This helps to support the branches as they develop and prevents them from drooping or breaking under the weight of the berries. As the plant grows, gently tie the branches to the trellis or stake using soft string or twine. 

In case you missed it: Top 10 Best Vegetables to Grow in Raised Beds: Ultimate Guide for Planting to Harvest

Aronia Tree

Pest and Disease Management 

Common Pests and Diseases 

One common pest that can affect Aronia berries is the aphid. To control aphids, try using insecticidal soap or introducing natural predators like ladybugs. Another nuisance you may encounter is the spider mite. Regularly misting plants with water can help deter them. When it comes to Aronia Plant Diseases, fungal diseases can also plague Aronia bushes. Proper air circulation through strategic pruning helps prevent these issues, but if they do appear, treat affected areas with a fungicide labeled for use on berries. 

Organic and Chemical Control Measures 

One approach is the use of organic control measures, which focus on natural solutions that are safe for both the environment and your health. This method involves utilizing beneficial insects to prey on harmful pests like aphids or mites. Another organic option is using botanical extracts derived from plants themselves. Neem oil is the best choice as it acts as an insecticide and fungicide while being non-toxic to humans and animals. It works by disrupting the life cycle of insects, preventing them from reproducing. 

Harvesting and Storing Aronia Berries 

Indicators of Berry Ripeness 

When it comes to harvesting Aronia berries, knowing the right time is crucial. Pay attention to the color of the berries. As they ripen, Aronia berries transition from green or red to a deep dark purple or black hue. The darker the berry, the riper it is likely to be. However, be cautious not to wait too long, as overripe berries may become mushy and lose their flavor.  

Harvesting Techniques and Storage Tips 

When it comes to harvesting Aronia berries, timing is crucial. These small fruits are ready for picking when they have reached their deep, dark color. It’s important to wait until they are fully ripe before plucking them from the plant. Gently tug on a few berries to see if they easily detach from the stem – this is a good indicator that they’re ready for harvest. 

To avoid damaging the delicate berries, use your hands or small garden shears to remove them from the plant carefully. Place them in a shallow container to prevent bruising. Avoid stacking too many layers of berries on top of each other, as this could cause damage. 

In case you missed it: Best Berry Plants for Home Gardens: Berry Varieties for Home Gardeners

Harvesting Natural Chokeberry

Conclusion 

Growing Aronia berries can be a rewarding and fruitful endeavor. These small but mighty fruits offer numerous health benefits, making them the best addition to any garden or orchard. By selecting the right variety for your climate zone and providing optimal soil conditions, sunlight, and water requirements, Aronia Berry Care you can cultivate thriving Aronia plants. 

Effective Strategies for Managing Mango Flowers to Boost Yields

1

Understanding the stages of Mango flower development is essential for any Mango grower or enthusiast. During the dormant period, Mango trees rest and prepare themselves for the upcoming flowering season. Once they enter the initiation stage, flower buds begin to form, setting the foundation for future blooms. The differentiation of flower parts follows, where petals, stamens, and pistils take shape.

Managing Mango Flowers to Boost Yields

The subsequent stage of pollination and fertilization is vital as it determines whether flowers will develop into fruits or not. This process involves transferring pollen from male to female flowers through natural means like wind or insects or human intervention like hand-pollination. Fruit development occurs after successful fertilization. 

Managing Mango Flowers to Boost Yields

Factors Influencing Mango Flowering 

One key factor is the age of the Mango tree. Young trees may take longer to start flowering, while mature trees tend to have more consistent and abundant flower production. Another important factor is the environmental conditions in which the Mango tree grows. Mangoes thrive in warm climates with temperatures ranging between 24-27°C during the day and 16-21°C at night.

The availability of sunlight also impacts flower formation. Mango trees require full sun exposure for at least six hours a day to stimulate growth and initiate flowering. Proper Mango Bloom nutrition is crucial for healthy flower formation as well. Deficiencies in essential nutrients like nitrogen, phosphorus, potassium, magnesium, and iron can negatively affect Mango flowering.  

Optimal Nutrient Management for Better Mango Flowers 

Essential Nutrients for Flowering 

One crucial nutrient for flowering is potassium. Potassium promotes flower initiation and helps regulate important metabolic processes during bloom. In addition to potassium, nitrogen is another essential nutrient for flowering. Nitrogen is responsible for promoting vegetative growth, which indirectly affects flower development.  

Phosphorus also plays a critical role in promoting flower bud initiation and development. It helps in energy transfer within the plant, facilitating optimal floral growth. Phosphorus deficiency can result in poor flower formation and reduced fruit set. Micronutrients such as zinc, iron, manganese, copper, boron, and molybdenum are equally important for proper flowering in Mango trees.  

Soil Testing and Fertilization Strategies 

By analyzing a soil sample, you can determine if any deficiencies or imbalances exist that may affect flower development. Mango trees require a balanced supply of macronutrients and also micronutrients like zinc and iron, for optimal flowering. Fertilizer application should be done at specific stages of Mango tree flowering to maximize its effectiveness. It is important to follow recommended dosage rates and application methods. 

Irrigation Practices for Flowering 

Watering Techniques During the Flowering Stage 

Proper Watering practices for Mango Flowers can significantly impact the yield and quality of your Mango crop. Mango trees prefer well-drained soil, so excessive moisture can cause root rot and other diseases. Additionally, pay attention to timing when watering your Mango trees during flowering. It’s best to irrigate early in the morning or late in the evening when temperatures are cooler and evaporation rates are lower. This allows for better absorption by both roots and flowers. 

Monitoring Soil Moisture Levels 

Proper irrigation practices play a key role in ensuring healthy Mango flower development and ultimately boosting yields. To effectively monitor soil moisture levels, it is essential to use reliable tools such as soil moisture sensors or tensiometers. These devices help determine when and how much water your Mango trees require. Regularly checking these readings allows you to make informed decisions about irrigation scheduling. 

Pest and Disease Control in Flowers 

Common Pests and Diseases Affecting Mango Flowers 

One common Mango Flower Pest is the Mango Leafhopper. This tiny insect causing flower buds to wither and die. Another pesky intruder is the Mango Fruit Fly, which lays eggs in developing fruit. The larvae then feed on the flesh of the fruit, leading to premature drop or poor-quality harvest. 

In addition to pests, Mango Blossom Diseases such as Anthracnose and Powdery Mildew can also pose a threat to Mango flowers. Anthracnose causes black lesions on flower panicles, while Powdery Mildew results in a white powdery coating on leaves and inflorescences. 

Integrated Pest Management Strategies 

One effective Integrated Pest Management strategy for managing pests in Mango flowers is crop rotation. By alternating different crops in the same field, it disrupts the life cycle of pest populations and reduces their buildup. Another important aspect of Integrated Pest Management is maintaining good plant health through proper nutrition and irrigation. Healthy plants are resistant to pest attacks and can recover faster from any damage caused by pests or diseases.  

In case you missed it: How to Get Bigger Mango Fruits: Increase Mango Size with Fruit Size Management

Green Mangoes

Pruning Techniques for Better Flowering 

Timing and Methods of Pruning 

When it comes to timing, Pruning for Mango Flowering should ideally be done during the dormant season, which is typically after harvest when the tree has shed its leaves. This allows for better visibility and access to branches, making it easier to assess each one’s health and potential for flower production. 

Different methods of pruning can be employed depending on the specific needs of your Mango trees. One common technique is called “thinning cuts,” where selective removal of certain branches or shoots is performed to improve air circulation within the canopy. This helps reduce disease incidence as well as encourages more uniform flowering. 

Pruning’s Impact on Flower Production 

Timing is everything when it comes to pruning for flower production. It is generally recommended to prune Mango trees after harvest but before the flowering stage begins. This allows enough time for new shoots to form and develop into strong flowering branches. The impact of pruning on flower production is directly related to its ability to stimulate new growth.  

Use of Growth Regulators 

Types of Growth Regulators Suitable for Mangoes 

One commonly used Growth regulator for Mango Blooms is gibberellic acid (GA). This hormone promotes cell elongation and stimulates the development of lateral buds, which can lead to more flowering. It is typically applied during the pre-flowering stage to enhance flower initiation. 

Another effective growth regulator is cytokinin. Cytokinins promote cell division and differentiation, resulting in increased flower production. They also help regulate nutrient transport within the plant and improve fruit quality. Ethephon is another growth regulator that is often used in Mango cultivation. It acts as a source of ethylene gas, which helps induce flowering in some varieties of Mangoes that have difficulty initiating flowers naturally. 

Application Techniques and Timing 

Gibberellic acid promotes flowering by stimulating cell division in shoot tips, while naphthalene acetic acid helps in increasing fruit set by preventing premature fruit drop. Applying these growth regulators can be done through foliar sprays or trunk injections. Foliar sprays involve spraying a diluted solution directly onto the leaves and flowers using a handheld sprayer or backpack sprayer. The timing of application varies depending on factors like climate, variety of Mango trees, and desired yield goals. 

Environmental Control 

Managing Microclimate for Optimal Flowering 

One effective technique is to plant windbreaks or hedges around your orchard strategically. These barriers help reduce strong winds that can damage delicate flower buds during their development stage.

Another way to manage microclimate is through proper irrigation practices. Regularly monitoring soil moisture content and adjusting irrigation accordingly will ensure optimal hydration without excess saturation. Providing partial shade during intense heat periods protects tender flowers from scorching temperatures, preventing stress-induced bud drop. 

Techniques to Protect Flowers from Extreme Weather 

One effective technique is the use of protective covers or shelters. These structures can shield the flowers from heavy rain, strong winds, or excessive sunlight. They create a microclimate that provides optimal conditions for flower development and prevents damage caused by extreme weather events. 

Another strategy is mulching around the base of Mango trees. This helps regulate soil temperature and moisture levels, protecting roots and promoting healthy flower growth. Mulch also acts as an insulator during cold spells or frosty nights, preventing damage to developing buds. 

Pollination Enhancement Strategies 

Encouraging Natural Pollinators 

One effective strategy for encouraging natural pollinators is to create an inviting habitat for them. Providing nectar-rich flowers throughout the growing season will attract bees, butterflies, and other pollinating insects. Another way to support natural pollinators is by avoiding the use of harmful pesticides. These chemicals can have detrimental effects on insect populations, including pollinators.  

Artificial Pollination Methods 

When it comes to Mango Flower Pollination, artificial pollination can play a crucial role. One common method is hand pollination, where pollen from male flowers is manually transferred to the stigma of female flowers using a small brush or cotton swab. This method requires careful observation of flower development and timing to ensure compatibility between the male and female stages. It also allows growers to control the cross-pollination process if desired. 

In case you missed it: Growing Mangoes from Seed to Harvest: A Detailed Planting/Production Guide for Beginners

Mango Fruit

Another technique involves using vibrating devices or blowing air onto flower clusters to dislodge pollen grains and facilitate their movement between flowers. This method mimics the action of wind in nature, helping overcome limitations when natural wind conditions are not optimal. 

Harvest Management and Post-Harvest Care 

Proper Timing and Techniques for Harvest 

Harvesting Mangoes at the right time is crucial to ensure optimal flavor, sweetness, and overall quality. Pay attention to the fruit’s size and color. Mature Mangoes typically have a good size and display vibrant hues of yellow or orange-red, depending on their variety. Give them a gentle squeeze – ripe Mangoes should yield slightly to pressure but still feel firm. When harvesting Mangoes, it’s best to use clippers or shears instead of pulling or twisting them off by hand. This helps avoid damage to both the fruit and tree branches. 

Post-Harvest Handling to Maintain Flower Quality 

Temperature control plays a key role in preserving flower freshness. Flowers should be stored at cool temperatures between 10-15°C to slow down the aging process and maintain their color and fragrance. Humidity levels should also be carefully managed during post-harvest handling. High humidity can cause fungal growth, while low humidity can cause dehydration of the flowers. Maintaining an optimal humidity level of around 85% helps preserve flower quality. 

In case you missed it: Fertilizer Management in Mango: Homemade, Organic, Compost, Liquid, and Schedule

Unripe Mangoes

Conclusion 

Effectively managing Mango flowers is crucial for boosting yields and ensuring a successful harvest. By understanding the flowering biology of Mango trees, optimizing nutrient management, implementing proper irrigation practices, controlling pests and diseases, utilizing pruning techniques, using growth regulators strategically, regulating the environment to create an optimal microclimate for flowering, enhancing pollination methods and practicing proper harvest management and post-harvest care, farmers can maximize their Mango flower production. 

Italian Plum Trees: A Comprehensive Guide for Varieties, Planting and Care

0

Italian Plums are small to medium-sized Plums that have a distinctive oblong shape and deep purple skin. They are prized for their sweet, juicy flesh and rich flavor. In culinary circles, Italian Plums are highly regarded for their versatility. Gardeners appreciate Italian Plum trees not only for their delicious fruit but also for their ornamental value. The trees produce beautiful white blossoms in spring, adding beauty to any landscape.  

Significance in Culinary and Gardening 

Italian Plum trees hold great significance in both culinary and gardening pursuits. In the kitchen, these Plums are highly prized for their sweet and juicy flesh. Their vibrant flavor adds a delightful twist to jams, jellies, pies, and even savory dishes like roasted meats. In addition to their culinary value, Italian Plum trees also offer numerous benefits in the garden. These trees not only provide shade but also add aesthetic appeal with their delicate blossoms in springtime and colorful fruit throughout summer.  

Italian Plum Trees

Italian Plum Trees

Varieties of Italian Plum Trees 

Popular Italian Plum Cultivars 

One of the most widely grown Italian Plum varieties is the ‘Stanley.’ This cultivar produces large, oval-shaped Plums with dark purple skin and sweet yellow flesh. Another variety is the ‘Santa Rosa’ Plum. This cultivar features medium-sized fruit with red skin and amber-colored flesh. If you’re looking for a smaller-sized Plum, consider planting the ‘Methley’ variety. These Plums have bright red skin and deep red flesh that is exceptionally sweet and juicy. 

Characteristics of Different Varieties 

One popular variety is the ‘Stanley’ Plum. Known for its purple skin and sweet flesh, this cultivar is perfect for eating fresh or using in jams and preserves. Another well-loved variety is the ‘Italian Prune.’ This Plum features a distinct dark purple skin with a greenish-blue bloom. Its juicy flesh has a sweet-tart flavor, making it ideal for both cooking and eating fresh. The Italian Prune tree is also known for its high productivity, making it a favorite among home gardeners. 

Choosing the Right Variety 

Factors to Consider 

First and foremost, consider the climate in which you live. Italian Plum trees thrive in temperate climates with mild winters and warm summers. They require a certain number of chilling hours during winter to ensure proper fruit development. The soil composition is another crucial factor to consider. Italian Plums prefer well-draining soil that is rich in organic matter. Next, evaluate the available space in your garden.  

Climate and Soil Preferences 

Italian Plum trees thrive in a variety of climates, but they do have specific preferences when it comes to temperature and growing conditions. They naturally prefer a mild climate with warm summers and cool winters. However, they can also adapt well to colder regions if the winter temperatures don’t drop too low. 

When it comes to Soil Requirements for Italian Plums, these are fairly adaptable. They can grow well in a wide variety of soil types, including loam, clay, and sandy soils. The most important factor is that the soil is well-drained to prevent waterlogged roots, which can lead to root rot. In terms of pH levels, Italian Plum trees prefer a pH between 6.0 and 7.0.  

Planting Italian Plum Trees 

Best Time to Plant 

The best time to plant Italian Plum trees is in late winter or early spring. Before planting, make sure that all risk of frost has passed in your area. Plums are sensitive to cold temperatures, so it’s important not to expose young saplings to freezing conditions. 

Step-By-Step Planting Process 

Planting Italian Plum trees can be an exciting and rewarding experience. First, choose a suitable location for planting. Italian Plum trees prefer full sun, so find a spot in your garden that gets 6-8 hours of direct sunlight each day.  

Next, prepare the soil and dig a hole that is sufficient to accommodate the tree’s roots without crowding them. The depth should be just deep enough so that the tree sits at ground level when planted. Gently spread out the roots and position the tree in the center of the hole. Backfill around the roots with soil, ensuring that there are no air pockets left behind. Tamp down gently on the soil to secure it around the roots. 

Soil Preparation and Fertilization 

Soil Requirements for Italian Plums 

Italian Plums thrive in well-draining soil. Italian Plums prefer slightly acidic to neutral pH levels in the range of 6.0-7.0. Testing your soil’s pH level will help you determine if any adjustments need to be made using appropriate amendments such as sulfur or lime. In addition, Italian Plum trees require fertile soil that is rich in organic matter. Prior to planting, mix compost or well-rotted manure into the top layer of the soil to provide essential nutrients for optimal growth. 

Fertilizing for Optimal Growth 

When fertilizing Italian Plum trees, choose a balanced fertilizer specifically formulated for fruit trees. This will typically have equal ratios of nitrogen (N), phosphorus (P), and potassium (K). Nitrogen promotes leafy growth, phosphorus supports root development and flowering, while potassium enhances overall plant health. To determine how much fertilizer to apply, consider the age and size of your Italian Plum tree.  

In case you missed it: How to Grow Plum Tree/Fruits from Seed to Harvest: Check How this Guide Helps Beginners

Plum Tree Branch with Ripe Fruits

Watering and Irrigation Techniques 

Watering Schedule for Young Trees 

Young Plum trees should be watered deeply but infrequently. This means providing a thorough soaking twice a week rather than frequent light sprinklings. Deep watering encourages the deep roots, which in turn helps the tree withstand drought conditions. 

Irrigation Methods for Mature Trees 

One effective way to water mature Plum trees is through drip irrigation. This method involves placing hoses or tubing near the base of each tree, allowing water to slowly drip directly onto the roots. Drip irrigation conserves water by minimizing evaporation and runoff. 

Another option for Irrigation for Italian Plum Trees is using sprinklers, which can provide a more widespread coverage of water. However, it’s important to avoid wetting the foliage excessively as this can promote disease development. When determining how much water your mature Plum trees need, consider factors such as weather conditions and soil moisture levels.  

Pruning and Training 

Pruning Techniques for Healthy Growth 

Pruning Techniques for Plum Trees play a crucial role in maintaining the productivity of Italian Plum trees. By removing dead branches, you can prevent the spread of infections and ensure that resources are directed towards new growth.  

It’s important to prune during the tree’s dormant season, in late winter or early spring. Start by removing any crossed or rubbing branches, as these can create wounds that invite pests and diseases. Additionally, thin out crowded areas to improve air circulation and light penetration within the canopy. 

Training for Shape and Productivity 

When it comes to Italian Plum trees, training them for shape and productivity is essential to ensure healthy growth and abundant fruit production. Proper training techniques not only help maintain a desired tree form but also encourage maximum yield. 

To start, pruning plays a crucial role in shaping the tree. It’s important to remove any dead or diseased branches, as well as those that cross or rub against each other. This will promote good airflow and reduce the risk of fungal infections. During the early years of the tree’s life, it’s recommended to prune lightly to establish a strong framework of scaffold branches. 

Pest and Disease Management 

Common Pests and Diseases 

One common pest that affects Italian Plum trees is the Plum curculio. These tiny beetles lay their eggs in developing fruits, causing them to become deformed and drop prematurely. To Control pests in Italian Plum Trees, regularly inspect your trees for symptoms of damage and consider using organic insecticides or traps. 

Diseases that commonly affect Italian Plum trees include brown rot and bacterial spot. Brown rot causes fruit rotting and can spread quickly throughout the tree if not treated promptly with fungicides. Bacterial spot causes dark spots on leaves which eventually lead to defoliation; copper-based sprays are effective against this disease. 

Organic and Chemical Control Strategies 

Organic control methods focus on using natural substances or techniques to manage pests and diseases. This can include introducing beneficial insects that prey on harmful ones, such as ladybugs, for aphid control. 

Another organic strategy is practicing good cultural care for Italian Plum trees. This involves maintaining healthy soil through proper fertilization, ensuring adequate water drainage, and keeping the area around the tree free of debris that may harbor pests or disease-causing organisms. 

Chemical control methods include the use of synthetic pesticides or fungicides to combat pest infestations or fungal infections. These products are typically more potent than their organic counterparts but should be used with caution to minimize negative impacts on the beneficial insects. 

Harvesting and Storing Italian Plums 

Signs of Ripeness 

One of the first signs of ripeness is a change in color. As the fruit matures, it will transition from green to shades of red, purple, or even yellow. Keep an eye on the Plum’s skin as it starts to develop a vibrant hue. Touch is another important sense when gauging ripeness. Ripe Italian Plums should have a slight give when gently squeezed. Avoid firm fruits as they may not be fully matured yet, while overly soft Plums may be overripe and mushy. 

The fragrance also plays a role in identifying ripe plum. When perfectly ripe, Italian Plums emit a sweet aroma that fills the air around them. Take a moment to sniff each Plum before picking to ensure they have reached their peak fragrance. 

Storage and Preservation Tips 

When it comes to enjoying the deliciousness of Italian Plums throughout the year, proper storage and preservation techniques are key. It’s important to pick Plums at their peak of ripeness for optimal flavor and texture. Look for fruits that are soft to the touch but still firm. Avoid any blemishes or signs of decay. 

In case you missed it: Plum Gardening For Beginners, How to Start

Branch of Plum Tree

Once harvested, handle them gently to prevent bruising. You can store Plums at room temperature for a few days until they reach their desired level of ripeness. If you prefer them to be fully ripe, store them in a paper bag at room temperature for a day or two. 

Propagation and Breeding 

Propagating Italian Plum Trees 

Propagating Italian Plum trees is an exciting endeavor for passionate gardeners and fruit tree enthusiasts. Grafting is the most common technique used to propagate Italian Plum trees. It involves joining a scion (a cutting from the desired variety) with a rootstock (the base onto which the scion will be grafted). This process allows the resulting tree to inherit desirable characteristics from both parents. 

Rooting cuttings is another viable option for propagating Italian Plum trees. Select healthy, disease-free branches from your existing tree and remove all leaves except for two or three at the tip. Dip the cutting into rooting hormone powder, then plant it in a container with moistened soilless mix or perlite. 

Breeding for Variety Improvement 

One approach breeders take is selecting parent trees with desirable traits and crossing them to create offspring with a combination of those qualities. This can involve multiple generations of breeding and rigorous testing before a new variety is released to the market. 

Breeders also consider factors such as adaptability to different climates and soils when developing new varieties. They strive for trees that can thrive in various regions without compromising their productivity or overall health. By creating robust cultivars suited for specific conditions, breeders ensure that Plum lovers across different areas can enjoy the fruits of their labor. 

In case you missed it: Best Fertilizer for Plum Trees: Homemade, Organic, Compost, Natural, Liquid, When and How to Apply

Plums in The Orchard

Conclusion 

Italian Plum trees are a wonderful addition to any garden. With their delicious fruit, beautiful blossoms, and relatively easy-care requirements, they offer both culinary delight and aesthetic appeal. Whether you’re an experienced gardener or a beginner, Italian Plum trees can be a great choice. 

How to Prune a Weeping Mulberry Tree: A Comprehensive Guide for Beginners

0

Pruning is an essential practice for maintaining the health and aesthetics of a Weeping Mulberry tree. By selectively removing branches and shaping the canopy, pruning helps promote optimal growth, improve air circulation, and prevent disease.  

How to Prune a Weeping Mulberry Tree

How to Prune a Weeping Mulberry Tree

Best Time of Year for Pruning

The Best Time to Prune Weeping Mulberry is late winter or early spring; this gives your Weeping Mulberry tree ample time to recover and develop new growth before summer arrives. This dormant period allows for optimal healing and minimizes stress on the tree.  

Tools and Equipment for Pruning 

Selecting the Right Tools 

You’ll need a pair of sharp bypass pruners for cutting small branches up to 1 inch in diameter. These pruners have curved blades that slide past each other and provide clean cuts without crushing the branch. For larger branches, a set of loppers will come in handy. Look for loppers with long handles and thick blades that can handle branches up to 2 inches in diameter. In some cases, you may encounter thicker limbs that require a pruning saw. A quality pruning saw with a curved blade will help you make precise cuts through larger branches. 

Tool Maintenance and Safety 

Proper tool maintenance is essential when it comes to pruning Weeping Mulberry trees. Not only does it ensure the longevity of your tools, but it also promotes safe and effective pruning practices. Before you begin, take a few moments to inspect your tools for any damage. This includes checking the blades of pruners and saws for sharpness, as dull blades can make clean cuts difficult. In addition to regular inspections, it’s important to keep your tools clean after each use. Remove any debris or sap that may have accumulated on the blades, as this can increase friction and hinder cutting efficiency.  

Initial Assessment and Planning 

Analyzing Tree Structure

When it comes to the Weeping Mulberry Pruning Guide, understanding its structure is crucial. Analyzing the tree’s branches and overall form will help you determine which areas require pruning. Start by identifying any crossing or rubbing branches that may cause damage over time. Look for any branches that are growing inwards towards the center of the canopy, as these can create congestion and inhibit proper air circulation. 

Identifying Key Areas for Pruning 

First, take a step back and analyze the overall structure of your tree. Search for any limbs that are intersecting or chafing against one another since this can lead to harm over time. Additionally, keep an eye out for limbs that are growing toward structures or power lines – those should be removed. Next, inspect the tree for dead or diseased branches.  

Removing Dead or Diseased Branches 

Identifying Damaged Limbs 

The first thing you’ll want to look for are any branches that appear broken or cracked. These can be caused by high winds, heavy snowfall, or even disease. If left untreated, these damaged limbs can weaken the entire tree and increase the chances of further damage during storms. Another sign of damage is the bark that appears stripped or peeling off. This could indicate an infestation of pests or diseases, which should be dealt with promptly to prevent further spread throughout the tree. 

Safe Removal Techniques 

Before making any cuts, assess the branch’s size, weight, and angle of attachment to determine the safest way to remove it. For branches that are too large to cut in one go, make an undercut first about 12-18 inches from where you want the final cut. Then, make a top cut slightly further out from the undercut. When removing smaller branches or twigs, use sharp pruning shears to make clean cuts close to nodes or lateral buds. To minimize damage and promote healing, prune along natural lines such as leaf scars or bud rings rather than cutting straight across limbs. 

Thinning the Canopy 

Benefits of Thinning 

One major advantage of thinning is improved air circulation within the tree, which prevents fungal diseases and promotes healthy growth. By removing excess branches and foliage, sunlight can penetrate deeper into the canopy, allowing for better photosynthesis and nutrient absorption. 

Another benefit of thinning is reducing weight on limbs, especially during strong winds or heavy rainstorms. This decreases the risk of branch breakage and potential harm to people or property below. Thinning also helps maintain a balanced shape for the tree by preventing overcrowding and ensuring that each branch has enough space to grow properly. 

How to Thin Effectively 

Trimming Weeping Mulberry is an essential part of pruning, as it helps to maintain its overall health and appearance. To thin effectively, start by identifying branches that are overcrowded or crossing over each other. These branches can create areas of congestion in the canopy, hindering sunlight and airflow. Carefully remove these branches using sharp pruning shears or loppers, making clean cuts just outside the branch collar. When thinning, aim to create a balanced look by removing roughly one-third of the branches.  

In case you missed it: How and When to Prune Your Orchids

Growing Mulberries

Shaping the Tree 

Principles of Tree Shaping

It’s important to note that shaping should be done gradually over time. Avoid drastic pruning, as this may lead to stress and damage to the tree. Instead, focus on small adjustments each year to maintain and enhance its natural beauty. When Shaping a Weeping Mulberry Tree, consider the overall structure and balance. Look for any branches that are crossing or rubbing against each other and remove them carefully. This will prevent future issues such as bark damage or potential disease spread. 

Achieving the Desired Weeping Form

First and foremost, it’s important to understand the principles of tree shaping. The weeping form is all about creating graceful, cascading branches that droop down towards the ground. To achieve this, you’ll need to carefully select which branches to prune and how much to remove. 

Start by identifying any upward-growing or crossing branches that disrupt the overall flow of the tree’s canopy. These should be pruned back to their point of origin or removed entirely if necessary. Pay close attention not only to horizontal growth but also vertical growth – anything that doesn’t contribute to the desired weeping shape should be removed. 

Pruning Young Trees 

Special Considerations for Saplings 

One important consideration is timing. Saplings are still establishing their root systems and need time to adjust before undergoing any major pruning. It’s best to wait until the tree has been in the ground for at least two years before attempting any significant pruning. Another key consideration is the size of the branches being pruned. Since saplings have smaller limbs compared to mature trees, it’s important not to remove too much foliage or branch material at once.  

Encouraging Healthy Growth

When it comes to Pruning Young Mulberry Trees, one key aspect of encouraging Weeping Mulberry Tree Health is regular pruning. Additionally, pruning promotes air circulation throughout the canopy, reducing the risk of fungal infections. Proper watering and fertilization also play a crucial role in supporting healthy growth. Mulberry trees prefer moist soil but do not tolerate waterlogging well. It’s important to provide consistent moisture without overwatering.  

Caring for the Tree Post-Pruning 

Wound Treatment and Healing 

Proper wound treatment and healing can help prevent pests, diseases, and decay from affecting your Weeping Mulberry tree. It’s crucial to remember that not all wounds require treatment. Small cuts or nicks will generally heal on their own without intervention. However, larger wounds or areas where large branches were removed may benefit from some extra care. To promote healing, you can apply a wound dressing or sealant specifically designed for trees.  

Adjusting Watering and Fertilization 

After pruning, it’s important to adjust your watering routine to support the tree’s recovery process. When watering, aim for slow, deep soakings rather than frequent shallow waterings. This allows the water to penetrate deep into the root zone, encouraging strong root development. In terms of fertilization, a balanced fertilizer specifically formulated for trees is recommended. Apply the fertilizer according to instructions, typically in early spring or late fall when nutrient uptake is highest. 

Addressing Common Pruning Challenges 

Overgrown Trees and Rejuvenation Pruning

When it comes to pruning an overgrown Weeping Mulberry tree, rejuvenation pruning can be a game-changer. This technique involves removing large sections of the tree’s canopy to stimulate new growth and restore its health and shape. Before diving into rejuvenation pruning, it is important to assess the tree’s current state.

Look for signs of stress, such as dead or diseased branches, crowded foliage, or imbalanced growth patterns. These indicators will help guide your pruning decisions. To start the process of rejuvenation pruning, focus on removing any dead branches first. These branches not only hinder healthy growth but can also serve as entry points for pests and diseases. 

Dealing with Pest and Disease Issues During Pruning 

It’s crucial to identify the specific pests or diseases affecting your tree. Common culprits include aphids, scale insects, spider mites, and fungal diseases like powdery mildew or leaf spot. By accurately diagnosing the issue, you can choose the appropriate treatment method. 

For pest infestations like aphids or scale insects, consider using natural remedies like neem oil or insecticidal soap. In cases of fungal diseases, proper sanitation practices play a vital role in prevention. Remove any infected branches during pruning and dispose of them properly to avoid spreading spores around your garden. 

Seasonal Pruning Care 

Spring and Summer Maintenance Tips

Spring and summer are crucial seasons for maintaining the health and beauty of your Weeping Mulberry tree. During this time, you’ll want to focus on a few key Weeping Mulberry Maintenance tasks that will keep your tree thriving. First and foremost, regular watering is essential during these warmer months. Make sure to water deeply and thoroughly, ensuring that the roots receive adequate moisture. 

Preparing for Winter Post-Pruning 

One of the key things to do after pruning is to clean up any debris or fallen branches around the tree. It also reduces potential hazards such as slipping on wet leaves or tripping over branches. Another important task is to provide proper insulation for your tree.

Mulching around the base with organic materials like wood chips or straw can help regulate soil temperature, retain moisture, and protect roots from freezing temperatures. In addition to mulching, wrapping the trunk of your Weeping Mulberry tree with burlap can provide extra protection against harsh winter winds and frost damage. Be sure to secure it tightly but not too tight, as this could cause damage itself. 

In case you missed it: How and When to Prune Hydroponic Plants: Benefits, Techniques, and Methods

Mulberries

Conclusion 

Pruning a Weeping Mulberry tree may seem like a daunting task for beginners, but with the right knowledge and tips, it can be easily accomplished. By understanding the importance of pruning, Mulberry Tree Care Pruning, and selecting the appropriate tools, you can ensure that your tree remains healthy and beautiful year after year. 

Note: The images presented in this post are intended solely for representation purposes. The images are meant to serve as visual aids and should not be relied upon as accurate representations of their real-life counterparts.

How to Grow Boysenberries in a Pot: A Comprehensive Guide for Beginners

0

One of the greatest benefits of Boysenberry Container Gardening is its flexibility. You can grow boysenberries in pots regardless of the size or type of outdoor space you have available. Growing boysenberries in containers allows you to maximize your growing area by utilizing vertical space.  

How to Grow Boysenberries in a Pot

How to Grow Boysenberries in a Pot

Overview of Boysenberry Plants

Boysenberry plants are vigorous growers that can reach heights of 5 to 6 feet. They have long trailing canes with thorny stems that require support as they grow. These plants also produce large clusters of berries that ripen from green to deep purple or maroon when fully matured. When choosing boysenberry cultivars for container growth, consider varieties specifically bred for compact growth and suitability for pots.  

Choosing the Right Variety for Pots 

Selecting Boysenberry Cultivars

When it comes to growing boysenberries in pots, selecting the Best Boysenberry Varieties for Pots is crucial for success. Think about the climate and growing conditions in your area. Some boysenberry cultivars are more suited to specific climates, so choose one that will thrive in your region. Next, think about the size of your pot and how much space you have available.  

Considerations for Container Growth

First and foremost, selecting the ideal container is crucial for the success of your plants. For boysenberries, choose a pot that is 18 inches deep and wide enough to accommodate their sprawling nature. Proper drainage and airflow are also essential factors to consider when growing boysenberries in containers. Use well-draining soil mix with good moisture retention properties while avoiding heavy clay-based soils that tend to retain excess water.  

Selecting the Ideal Container 

Size and Material of Pots

Boysenberry plants have vigorous growth habits, so you’ll want to provide them with enough space to spread their roots. A general rule of thumb is to use a pot with a diameter of 18 inches. As for material, clay or terracotta pots are the best choices due to their ability to absorb excess moisture and allow airflow through the walls. If you prefer lightweight options, consider using plastic or fabric containers.  

Drainage and Airflow Requirements

Drainage and airflow are crucial factors to consider when growing boysenberries in pots. To ensure proper drainage, choose a pot with drainage holes at the bottom. This allows water to flow out freely and prevents it from pooling around the roots. To promote good airflow around your boysenberry plants, avoid overcrowding them in one pot. Leave enough space between each plant so that air can circulate freely. 

Preparing the Soil and Pot 

Soil Composition for Boysenberries

The right soil composition is crucial for the successful growth of boysenberry plants in containers. To create the perfect soil mix, start with a base of high-quality potting mix or garden soil. Avoid using heavy clay soils as they can restrict drainage and lead to waterlogged roots.

Mix in organic matter such as compost or aged manure to improve fertility and moisture retention. Boysenberries prefer slightly acidic soil with a pH range between 6.0 and 6.5. You can adjust the pH level by adding amendments like sulfur or lime if necessary, but it’s best to test your soil before making any adjustments. 

Setting Up Your Container

Setting up your container is a crucial step in successfully growing boysenberries. It ensures that your plants have the right conditions to thrive and produce delicious berries. Selecting the ideal container for your boysenberries is essential. Consider choosing a pot that is large enough to accommodate the plant’s root system and allows room for growth. Speaking of drainage, it is vital to ensure proper airflow and water drainage in the container.  

In case you missed it: How to Get More Potatoes Per Plant: 11 Potato Growth Hacks for a High Yield

Boysenberries

Planting Boysenberry Plants 

Timing and Method of Planting

When it comes to the Potting Boysenberries Guide, timing is crucial for successful planting. The best time to plant boysenberry plants in containers is during the early spring or late fall when temperatures are mild. Before planting, make sure you have a well-draining potting mix ready. Fill your chosen container with this nutrient-rich soil, leaving about an inch of space from the top for watering purposes.

Next, carefully remove your boysenberry plant from its nursery container and gently loosen any tangled roots. Place the root ball into your prepared pot, making sure that it sits at the same level as it did in its original container. Once you’ve positioned your plant, backfill with additional potting mix until it reaches just below the rim of the container. Press down lightly around the base of the plant to secure it in place. 

Initial Care Post-Planting

First and foremost, water is essential for newly planted boysenberries. Water deeply and thoroughly when needed, allowing excess water to drain out of the pot. In addition to adequate watering, feeding your boysenberries is crucial during this stage. Apply a slow-release fertilizer or organic compost around the base of each plant, following package instructions for application rates. Regular inspection of your plants is also important post-planting.  

Watering and Feeding Boysenberries 

Watering Schedule for Container Plants

In general, containers dry out faster than garden beds, so regular monitoring is essential. As a general rule of thumb, it’s better to water deeply but less frequently rather than shallowly and often.  

Fertilization Needs and Schedule

Fertilizing Potted Boysenberry Plants is an essential aspect of Boysenberry Plant Care in Containers. These plants need a steady supply of nutrients to thrive and produce abundant fruit. To meet their fertilization needs, it’s important to establish a proper schedule and choose the right type of fertilizer. Boysenberry plants benefit from regular feeding throughout the growing season. Start by applying a balanced, slow-release fertilizer when planting your boysenberries in containers. This will provide them with initial nutrition to establish strong roots. 

Pruning and Training 

Pruning for Health and Productivity

When it comes to Pruning Container-Grown Boysenberries, there are a few key considerations to keep in mind. Remove any dead or damaged canes regularly throughout the growing season. These canes not only detract from the overall appearance but may also harbor disease or pests. In addition to removing dead wood, thinning out overcrowded canes is essential for maximizing fruit production. Aim for about 3-4 strong canes per container, cutting back weaker growth at ground level. 

Training Boysenberries in Containers

As the boysenberry plants grow, gently guide their vines along the trellis, using plant ties or soft twine to secure them if necessary. It’s important to train the vines horizontally along the trellis, as this encourages more fruit production. 

Pest and Disease Management 

Common Pests and Diseases

One common pest that may plague your boysenberry plants is the aphid. To combat aphids, regularly inspect your plants for signs of infestation and use natural remedies such as insecticidal soap or neem oil. Another pesky critter that may bother your boysenberries is the spider mite. Regularly spraying water on your plants can help deter spider mites. In terms of diseases, gray mold (botrytis) can be a concern for boysenberries grown in containers.

In case you missed it: 9 Best Berries to Grow in Containers: Well Explained in Simple Steps

Boysenberries growing under the sunlight

This fungal disease thrives in moist conditions and causes brown spots on berries and fuzzy gray growth on plant parts. To prevent botrytis, avoid overwatering and ensure good air circulation around your pots. Root rot is another potential issue for container-grown boysenberries if there’s excessive moisture or poor drainage in their potting mix. Avoid waterlogged soil by providing adequate drainage holes in your containers. 

Prevention and Treatment Strategies

One effective prevention strategy is regular inspection of your plants. By closely monitoring for signs of pests or diseases, you can catch potential problems early on. Remove any affected leaves or berries promptly to prevent further spread. Another preventive measure is practicing good hygiene in your garden area. Clean up fallen leaves, weeds, and debris regularly, as they can harbor pests and diseases. 

Winter Care and Overwintering 

Protecting Plants in Colder Months

Overwintering Boysenberries in Containers can be done by adding mulch around the plant. Mulch acts as a barrier against extreme temperatures, helping to regulate soil temperature and prevent frost from penetrating deep into the roots. Another important aspect to consider is providing shelter for your boysenberry plants.  

Winter Pruning and Maintenance

Start by removing any dead or damaged canes, as well as those that are crossing or overcrowding each other. This opens the plant to better airflow and sunlight penetration, reducing the risk of disease. Next, trim back the remaining canes to about 12-18 inches above ground level. To protect your plants during frosty nights, consider covering them with breathable fabric or mulch. This insulation will shield them from extreme cold while allowing air circulation. 

Harvesting and Propagation 

Signs of Ripeness and Harvesting Techniques

Boysenberries should have a deep, dark purple color when fully ripe. Avoid harvesting them when they’re still red or green, as they won’t be as flavorful. Gently touch the berries to check their firmness. Ripe boysenberries should be plump and slightly soft, giving a little under gentle pressure. The best way to determine ripeness is by tasting a few berries. If they’re sweet with a hint of tartness, it’s time to harvest. 

To Harvest Boysenberries from Pots, simply grasp the berry between your thumb and forefinger and give it a gentle twist. Ripe berries will detach easily from the stem. It’s important not to pull on the fruit forcefully, as this can damage both the berry and the plant itself. To avoid any bruising or crushing during transport, place harvested boysenberries into shallow containers rather than stacking them on top of each other. 

Propagating Boysenberries from Container Plants

To propagate Boysenberries, you have a few options. One method is by taking stem cuttings from the mother plant. Simply select a healthy, vigorous stem and cut it. Remove any leaves on the lower half of the cutting and dip them in rooting hormone before planting them in a small pot filled with moist soil mix. Another way to propagate boysenberries is through layering. This involves bending one of the long stems down towards the soil surface and covering part of it with soil or compost.

After some time, roots will form along this buried portion, allowing you to separate it from the mother plant and transplant it into its container. You can also propagate boysenberries by division. As these plants grow, they naturally produce multiple crowns or clumps connected by underground runners. To divide them, carefully dig up the entire plant and separate these clumps into individual sections using clean pruning shears. 

In case you missed it: Discover the Top 13 Blueberry Varieties for Your Home Garden

Fresh Picked Boysenberries

Conclusion 

Growing boysenberries in a pot is not only practical but also rewarding. It allows you to experience the joy of gardening regardless of space constraints while reaping all the benefits that come with cultivating these tasty berries at home. 

Step-by-Step Guide to Building a Tower Garden in Switzerland 

0

Building a tower garden in Switzerland is the best way to enjoy the benefits of fresh, homegrown produce while maximizing limited space. With its compact design and vertical structure, a tower garden allows you to grow a variety of fruits, vegetables, and herbs. Throughout this step-by-step tower garden guide, explore the process of building your tower garden in Switzerland.

Building a Tower Garden in Switzerland

From choosing the correct location and gathering materials to assembling the structure and planting seeds or seedlings, each step contributes to creating a thriving garden that will give you delicious harvests. 

Building a Tower Garden in Switzerland

Research and Choose the Right Tower Garden System 

Researching and choosing the right Tower Garden system is an essential step in Sustainable Gardening Switzerland. With so many options available on the market, it’s important to find one that suits your specific needs and preferences. Start by considering the size of the Tower Garden you want. Think about how much produce you want to grow and how much room you have available. 

Next, consider the features of different systems. Some may come with built-in lighting, while others rely on natural sunlight. Think about what works best for your location and lifestyle. Look for a system that is user-friendly and comes with clear instructions or online support resources. You want a Tower Garden that will be easy to set up and maintain over time. Additionally, think about durability and quality when choosing a system. You want something that will last long term without constant repairs or replacements. 

Select a Suitable Location 

  • Sunlight: Find an area that receives at least six to eight hours of direct sunlight each day. Place your Tower Garden in a sunny place, away from any shaded structures or trees that may obstruct the sunlight. 
  • Accessibility: Make sure the location is easily accessible for watering, pruning, and harvesting. You don’t want to struggle with reaching your plants or transporting supplies to and from the garden. 
  • Stability: Ensure the chosen location provides a stable foundation for your Tower Garden system. It should be level and capable of supporting the weight of fully grown plants without tipping over. 
  • Protection from elements: Consider protecting your Tower Garden from strong winds, heavy rains, or extreme temperatures by placing it near a wall or fence. 
  • Water source availability: Check if there is a nearby water source for convenient access during watering sessions. 

Prepare the Location 

Choosing a suitable location for your Tower Garden is crucial for Urban Gardening in Swiss Cities. The first step is to find an area that gets 6 to 8 hours of direct sunlight daily. This could be on a balcony, patio, or even in your backyard. Once you have identified the perfect spot, it’s time to prepare the area. Start by clearing any debris that may obstruct the growth of your plants. Trim overhanging branches or bushes if necessary. 

Assemble the Tower Garden 

Assembling the Tower Garden is an exciting step in the process of building a DIY Tower Garden in Swiss Urban Areas. With a little bit of patience, you’ll have your Tower Garden up and running in no time. First, start by unpacking all the components of your Tower Garden system. Lay them out on a clean surface so you can easily see everything that’s included. 

Next, follow the manufacturer’s instructions to connect each piece. This typically involves sliding the support poles into the base plate and securing them with screws or clamps. Make sure everything is tightly fastened for stability. Once you’ve assembled the main structure, it’s time to attach the planting ports. These are small pots or cups that hold your plants in place as they grow vertically. Insert them into pre-drilled holes along each tower section. 

Fill the Tower Garden with Medium 

Once you have assembled your Tower Garden and selected a suitable location, it’s time to fill it with growing medium. This is an essential step in creating the optimal environment for your plants to thrive. The first thing you’ll need to do is choose the right type of growing medium for your Tower Garden. There are several options available, including rock wool, coconut coir, perlite, and vermiculite. Each has its benefits and considerations, so do some research to determine which one will work best for your specific needs. 

In case you missed it: Nutrient Management for Tower Gardens: How to Mix Your Nutrients for Tower Farms

Hydroponic Greenhouse with Vertical Pipes and Plants

Next, prepare the medium by moistening it with water. This will help create a stable growing environment for your plants and ensure they have access to adequate moisture throughout their growth cycle. Once the grow medium is ready, carefully fill each planting port on the Tower Garden with it. Take care not to overfill or compact the medium too much, as this can restrict root growth and hinder plant development. 

Plant Your Seeds or Seedlings

Planting your seeds or seedlings is an exciting step in building your Tower Garden. First, prepare your grow medium by moistening it with water. This will create the best environment for the roots to take hold and thrive. Gently place the seeds or seedlings into the holes provided on each level of your Tower Garden. Be mindful of spacing to allow proper airflow and prevent overcrowding. 

When planting seeds, follow the instructions regarding depth and spacing requirements. For seedlings, gently remove them and loosen any tightly bound roots before placing them in their designated spots. Once planted, lightly cover the seeds or firm up the soil around the seedlings to provide stability. Give them good watering using either a hand-held spray bottle or adjust your Tower Garden’s watering system accordingly. 

Set up the Watering System

One essential aspect of building a successful home Vertical Gardening in Switzerland is ensuring that your plants receive an adequate water supply. This is where setting up the watering system comes into play. To get started, you’ll need to connect the reservoir to your Tower Garden using a pump and tubing.

Make sure that the tubing reaches each tower so that water can flow throughout the entire system. Next, it’s time to adjust the flow rate of your irrigation system. Depending on factors such as climate and plant type, you may need to increase or decrease the amount of water provided to your garden. 

Monitor and Maintain Your Tower Garden 

Keeping a close eye on your Tower Garden is crucial for its Swiss Tower Garden Construction. Regular monitoring will ensure that your plants are thriving and that any potential issues are addressed promptly. One key aspect of monitoring your Tower Garden is checking the water levels regularly.

The reservoir should always have enough water to provide adequate hydration for your plants. Keep an eye out for any signs of insufficient or excessive watering, such as wilting or yellowing leaves. In addition to water levels, it’s important to monitor the pH balance of the nutrient solution in your Tower Garden. Another essential task in maintaining your Tower Garden is pruning and trimming your plants as they grow.

Regularly removing dead leaves, flowers, or any diseased parts will promote healthy growth and prevent pests or diseases from spreading. Pest control is also an important part of monitoring your Tower Garden. If you notice any unwanted visitors, consider using organic pest control methods like neem oil spray or introducing beneficial insects into the garden. 

In case you missed it: How to Grow Leeks on Tower Gardens: Step-By-Step Guide for Beginners

Hydroponic Towers

Harvest Your Produce 

Once your Tower Garden has been flourishing for a few weeks, it’s time to reap the rewards of your hard work and enjoy the bountiful harvest. Snip some fragrant Basil or Mint to add flavor and freshness to any dish. And if you’ve planted Strawberries, prepare yourself for bursts of juicy sweetness with every mouthful. The joy of harvesting extends beyond just picking fruits and vegetables; it’s also about sharing this abundance with loved ones.  

Clean and Store Your Tower Garden 

Cleaning your Tower Garden will help prevent any build-up of dirt, algae, or pests that can hinder the growth of future plants. Start by removing all the plants and emptying any remaining water in the reservoir. Use a dish soap and warm water solution to scrub away any dirt or residue on the tower sections. Take care not to use harsh chemicals as they may damage the materials. 

Next, rinse each section thoroughly with clean water to remove any soap residue. Allow them to air dry before reassembling the tower. Store your Tower Garden in a cool and dry place away from direct sunlight when not in use. The best option is indoors, where temperature fluctuations are minimal. Make sure all components are stored together so that nothing gets misplaced. 

In case you missed it: How to Grow Cauliflower in Aeroponic Towers

Spiral Vertical Garden with Green Plants in a Greenhouse

Conclusion 

Building a Tower Garden in Switzerland offers numerous benefits such as convenience, sustainability, and freshness of produce all year round, regardless of space limitations. By following this guide from research to harvest and maintenance tips along the way – anyone can successfully build their very own tower garden. 

How to Grow Pittosporum from Cuttings: Steps for Successful Cutting Propagation

0

Growing Pittosporum from cuttings can be a rewarding and cost-effective way to propagate this beautiful plant. By following Pittosporum propagation techniques, you can increase your success rate and enjoy the benefits of having more Pittosporum plants in your garden. How to root Pittosporum cuttings?

How to Grow Pittosporum from Cuttings

Gathering the necessary materials and understanding cutting propagation are essential first steps. Taking the time to prepare your cuttings carefully, providing them with proper Pittosporum cutting care, and troubleshooting any issues that may arise will give you the best results. 

How to Grow Pittosporum from Cuttings

Selecting the Right Tools and Materials 

When it comes to propagating Pittosporum from cuttings, selecting the correct tools and materials is crucial for success. First and foremost, you’ll need a sharp pair of pruning shears to make clean cuts without damaging the plant. It’s also important to have a clean work surface and sterile equipment to prevent the spread of diseases. Next, you’ll need a rooting medium such as perlite or vermiculite that provides good drainage while retaining moisture.

This will create an ideal environment for root development. Additionally, having small pots or containers with drainage holes is essential for planting the cuttings. To further enhance rooting success, consider using hormone rooting powder. This powdered substance contains growth hormones that stimulate root formation in cuttings. Simply dip the base of each cutting in the hormone powder before planting. 

Choosing the Right Time for Taking Cuttings 

Timing is crucial when it comes to taking cuttings from your Pittosporum plant. The ideal time for this propagation method is during spring or early summer. This is when the stems are at their healthiest, making them more likely to root successfully. One way to determine if it’s the right time to take cuttings is by observing the growth pattern of your Pittosporum. Look for new shoots that have begun to harden off slightly but are still flexible enough to bend without breaking. These young stems are perfect candidates for cutting propagation. 

Preparing the Cutting 

One crucial step in Successful Pittosporum cutting propagation is preparing the cutting itself. This involves selecting a healthy, disease-free branch that is suitable for propagation. Look for a branch that is about 4-6 inches long and has several sets of leaves. To prepare the cutting, start by making a clean diagonal cut just below a node – this is where new roots will emerge. Remove leaves from the lower portion of the cutting to encourage root development.  

Next, dip the bottom end of the cutting into hormone-rooting powder. This powder contains growth hormones that stimulate root formation and increase success rates. After applying the rooting powder, you can plant your cutting in a well-draining potting mix or propagating medium. Make a hole with your fingertip or pencil and gently insert the cutting into it, ensuring that at least one set of nodes remains above ground. 

Using Hormone Rooting Powder 

Using hormone rooting powder is a common practice when propagating plants from cuttings, and it can greatly increase the success rate of root formation. This powder contains synthetic hormones that stimulate the growth of roots in plant cuttings. To use hormone rooting powder, start by dipping the base of your Pittosporum and cutting it into water to moisten it.

In case you missed it: List of Houseplants That Grow from Leaf Cuttings

Pittosporum

Then, dip the moistened end into the rooting powder, ensuring that it is evenly coated. Gently tap off any excess powder before planting. The hormone in the rooting powder works by encouraging cell division at the base of the cutting, which leads to root development. It also helps protect against fungal and bacterial infections that could hinder root growth. 

Planting the Cuttings 

The best soil for Pittosporum cuttings is a well-draining potting mix, such as one composed of equal parts perlite, peat moss, and vermiculite. Make sure the soil is moist but not waterlogged before planting the cuttings. Make holes in the soil by using a pencil. The holes should be deep enough to accommodate about half of each cutting’s length.

Gently place each cutting into a hole and lightly press down on the surrounding soil to secure it in place. Once all your cuttings are planted, mist them with water to increase humidity levels around the leaves. This will help prevent excessive moisture loss through transpiration while they establish roots. 

Providing the Ideal Growing Conditions 

Creating the perfect environment for your Pittosporum cuttings is crucial to their successful growth. These delicate plants need specific conditions to thrive and develop strong roots. Make sure you place your cuttings in a bright location that receives indirect sunlight. Next, maintain a consistent temperature between 18-24°C.

Fluctuations in temperature can stress the cuttings and hinder their growth. You may need to use a heating mat or provide additional warmth during cooler months. Humidity is also important for Pittosporum cuttings. To increase humidity levels around your plants, you can mist them regularly with water or use a humidity tray filled with water beneath the pots. 

Watering and Humidity Requirements 

Watering and humidity requirements play a key role in the successful propagation of Pittosporum cuttings. Once you’ve planted your cuttings, it’s important to provide them with the right amount of water to keep them hydrated without drowning them. When it comes to watering, it’s always better to err on the side of caution and not overwater the cuttings. Too much moisture causes rotting or fungal diseases. Instead, aim for moist but well-drained soil.  

Humidity is another key factor in helping your Pittosporum cuttings establish roots. Maintaining a humid environment around the plants will prevent excessive transpiration and promote healthy growth. You can increase humidity by covering the cuttings with plastic bags or using a misting system. 

In case you missed it: Best Fertilizer for Coconut Trees: Application Guidelines for Coconut Palm

Green Leaves of A Pittosporum

Fertilizing the Pittosporum Cuttings 

Fertilizing the Pittosporum cuttings is an important step in ensuring their healthy growth and development. These young plants require a balanced supply of nutrients to establish strong roots and promote overall vigor. When it comes to fertilization, it’s best to use a slow-release fertilizer. This will help prevent any potential burn or damage to the delicate root system of the cuttings. 

Before applying fertilizer, make sure the potting mix is moist but not waterlogged. This will ensure optimal absorption of nutrients by the roots. Use a well-balanced fertilizer with nitrogen (N), phosphorus (P), and potassium (K) for balanced growth. Over-fertilization can be detrimental to these young plants and may cause excessive leafy growth without proper root development. 

Monitoring and Care During Rooting Process 

During the rooting process, it is crucial to monitor and care for your Pittosporum cuttings to ensure their successful growth. This stage requires attention and diligence, as you want to create an optimal environment for root development. Keep a close eye on the moisture level of the soil. It should be consistently damp but not overly saturated. Regularly check the soil using your finger or a moisture meter to maintain proper hydration. 

Additionally, maintaining humidity levels is essential during this phase. Covering the cuttings with a plastic bag or placing them in a greenhouse can help create a humid microclimate around them. This will prevent excessive moisture loss through evaporation and promote healthy root formation. Furthermore, protect your cuttings from extreme temperatures and direct sunlight. Keep them in a location that receives bright indirect light but avoids harsh afternoon sun exposure, which could scorch delicate new growth. 

Transplanting the Rooted Cuttings 

Once your Pittosporum cuttings have successfully rooted, it’s time to give them a new home. Transplanting is a key step in the growth process as it allows the young plants to establish themselves in their permanent location. Before transplanting, make sure you have prepared a suitable planting area. Choose a place that gets partial shade and has well-drained soil.  

Gently remove each rooted cutting from its container. Dig a hole place each cutting into its respective hole and backfill with soil, ensuring that the plant is at the same depth it was previously planted. Gently firm down the soil around each cutting to eliminate any air pockets. Water thoroughly after transplanting to help settle the soil and provide moisture for establishing roots. Continue to water regularly during dry periods until your Pittosporum cuttings are fully established. 

In case you missed it: How to Grow Leeks on Tower Gardens: Step-By-Step Guide for Beginners

Pittosporum Tobira

Conclusion 

Growing Pittosporum from cuttings can be a rewarding and cost-effective way to propagate these beautiful ornamental plants. By following Pittosporum propagation tips, you can increase your chances of success rate and enjoy the satisfaction of watching your cuttings grow into healthy, thriving plants. 

The Rise of Tower Gardening in Austria: Elevating Urban Green Spaces with Vertical Farming

0

Tower gardening has emerged as a game-changer for urban green spaces in Austria, providing numerous benefits to both the environment and city dwellers. One of the key advantages is that it allows people to grow their fresh produce right in the heart of urban areas. With this Small Space Gardening in Austria, tower gardens offer a compact and efficient solution. 

Tower Gardening in Austria

Tower Gardening in Austria

Getting Started with Tower Gardens in Austria’s Cities 

Getting started with tower gardens in Austria’s cities is easier than you might think. First, choose a suitable spot for your tower garden – whether it’s on your balcony, patio, or even indoors near a sunny window. Next, gather the necessary supplies – a tower garden kit, nutrient-rich soil or growing medium, and seeds or seedlings of your choice. 

Once you have everything ready, it’s time to set up your first tower garden. Assemble the vertical gardening system according to the manufacturer’s instructions and fill each planting pocket with soil or growing medium. Plant your seeds in each pocket and water them thoroughly. 

Easy Steps to Set Up Your First Tower Garden in Austria 

Setting up a tower garden in Austria is easier than you might think. First, choose a suitable location for your tower garden. It could be on your balcony or even indoors near a sunny window. Just make sure there’s enough sunlight for your plants to grow. Next, assemble your tower garden using the provided components.

The setup process is straightforward and doesn’t require any special tools or equipment. Just follow the instructions, and you’ll have it ready in no time. Once assembled, fill the reservoir at the base of the tower with water and add nutrients according to package instructions. This will provide essential nourishment for your plants as they grow. 

Start by placing seedlings or young plants into each planting port on the tower. Make sure to space them out evenly and give them room to grow. After planting, regularly check and adjust water levels in the reservoir as needed. Tower gardens are designed to be self-watering, so you won’t need to worry about watering every day. Monitor your plants’ growth and check for any pests or diseases that may affect them. If necessary, treat affected areas promptly using organic pest control methods. 

Tower Gardening for Beginners in Austrian Urban Areas 

Tower gardening is a fantastic way for beginners in Austrian urban areas to start their green oasis. When it comes to the Beginner Tower Gardening Guide, choose a suitable location for your tower garden. It can be on your balcony, rooftop, or even indoors near a sunny window. Next, assemble your tower garden using the provided instructions and ensure it is stable and secure. 

In case you missed it: Nutrient Management for Tower Gardens: How to Mix Your Nutrients for Tower Farms

Hydroponics method of growing plants using mineral nutrient solutions in water, without soil.

When it comes to choosing what to plant in your tower garden, opt for herbs like Basil, Mint, or Parsley, as they are easy to grow and require minimal care. You can also include leafy greens such as Lettuce or Spinach for added variety. Watering is an essential aspect of tower gardening. Consider investing in a timer system or self-watering pots that will make watering more manageable. 

Use organic fertilizers specifically designed for hydroponic systems to provide key nutrients needed for healthy plant growth. Stay observant of any pests or diseases that may affect your plants. Regularly inspect them and take necessary steps such as removing infected leaves or using natural pest control methods if needed. 

Basic Tools and Tips for Starting a Tower Garden in Austria 

You’ll need a sturdy tower garden kit that includes vertical planters, nutrient solutions, and seedlings or seeds of your choice. Next, make sure you have good quality potting soil specifically formulated for container gardening. Additionally, invest in organic fertilizers and pest control methods to ensure healthy growth without harmful chemicals. When it comes to Vertical Garden Setup Austria, find a suitable location with ample sunlight exposure throughout the day.

Balconies or rooftop gardens can be ideal spots for these compact vertical gardens. Proper watering is key for the success of your tower garden. Consider installing an automated irrigation system to maintain consistent moisture levels without overwatering. Regular maintenance is essential for productive growth. Trim off any dead branches regularly and monitor plant health closely. It’s also advisable to rotate crops every season to prevent soil depletion and promote biodiversity. 

Simple Guide to Creating Tower Gardens in Austrian Cities 

Tower gardening has become increasingly popular in Austrian cities, providing urban dwellers with the opportunity to create their green oasis within limited spaces. Creating a tower garden in Austria is a simple process that anyone can do. To start your tower garden in an Austrian city, you’ll need a few basic tools and materials. First, choose a suitable location for your tower garden – it could be on your balcony, patio, or even indoors near a sunny window.

Next, gather the necessary supplies, such as a vertical growing system or tower planter, a potting mix or a soilless medium like perlite or coconut coir, seeds or seedlings of your chosen plants, and nutrient-rich fertilizer specifically formulated for hydroponic systems. Once you have all the materials ready, assembly is straightforward. Follow the manufacturer’s instructions to set up your tower garden structure securely. Fill each planting pocket with potting mix or soilless medium and plant one seedling per pocket.  

In case you missed it: Vertical Tower Farming in Portugal: Sustainable Agriculture in Portugal Urban Areas  

Vertical Planters with Green Leafy Plants in a Greenhouse

Build and Care for Your Tower Garden in Austria 

First things first, make sure you have a sturdy base for your tower garden. This could be a raised bed or even just a solid platform. It needs to be able to support the weight of the towers as well as hold the water reservoirs securely. Next, choose the right plants for your tower garden. Consider the climate in Austria and select plants that will thrive in that environment.

Herbs like Basil, Parsley, and Thyme are great options for tower gardens because they don’t require much space. When it comes to watering your tower garden, remember that consistency is key. The towers rely on a constant supply of water and nutrients from the reservoirs at their base. Make sure to check the water levels regularly and top them up if needed. In addition to regular watering, don’t forget about fertilizing your plants.

Tower gardens often use hydroponic systems which deliver nutrients to the roots of each plant. Follow instructions on fertilizers carefully and adjust accordingly based on plant growth. Check for any pests or diseases that may affect your tower garden. Check your plants for signs of trouble, like yellowing leaves or insect infestations. Treat any issues promptly using organic methods whenever possible. 

How to Grow a Tower Garden on Your Austrian Balcony 

When it comes to urban Vertical Gardens in Austria, creating a tower garden on your balcony is the best solution to bring some greenery into your life. With Austrian Balcony Gardening, you can transform your balcony into a thriving oasis of fresh herbs, vegetables, and flowers. First things first, choose the right location for your tower garden. Ensure that it receives at least 4-6 hours of sunlight each day. If your balcony doesn’t get enough sun exposure, consider using grow lights.

Next, select the right tower garden system that suits your needs and available space. There are various options available in Austria that are specifically designed for small balconies or patios. Once you’ve set up your tower garden system, it’s time to start planting. Choose plants that are best for container gardening, such as Lettuce, Cherry tomatoes, Peppers, or herbs like Basil and Parsley. Make sure to provide adequate water for your tower garden. The vertical design allows water to flow from top to bottom through each layer of plants.  

Austrian City Gardening: Easy Tower Garden Techniques 

Tower gardening offers a simple yet effective solution for those seeking to bring nature into their cities. With its vertical design, it maximizes growing space while minimizing the need for large plots of land. Whether you have a small balcony or limited backyard space, tower gardens can fit seamlessly into your urban lifestyle. Begin by selecting the right tower garden system that suits your needs and available space.

Many options are lightweight and portable, making them ideal for apartment balconies or rooftop terraces. Once you have your tower garden system, it’s time to set up your mini oasis. Choose an area that receives adequate sunlight throughout the day – around 6-8 hours is optimal for most plants. Then, simply assemble your tower garden according to the manufacturer’s instructions. 

After assembling your tower garden, it’s time to choose what types of plants you want to grow. Herbs like Basil and Mint are the best choices due to their compact size. Leafy greens such as Lettuce or Kale also thrive in tower gardens, providing a continuous supply of fresh salad ingredients. 

In case you missed it: How to Build a Vertical Garden With PVC Pipes: Cheap, DIY Making Ideas, Tips, and Techniques

Strawberries indoor garden

Conclusion 

Tower gardening has become a popular trend in Austria’s cities, elevating Urban Green Spaces Austria and providing residents with the opportunity to grow their food in limited spaces. With its numerous benefits, such as increasing access to fresh produce, reducing environmental impact, and promoting Sustainable Urban Agriculture in Austria, it’s no wonder that tower gardens are on the rise. 

The Rise of Tower Gardening in Africa: Elevating Urban Green Spaces with Vertical Farming

0

Tower gardening and vertical farming have emerged as innovative solutions to address the challenges of limited space, food security, and environmental sustainability in urban areas across Africa. With its ability to maximize productivity using minimal land, tower gardening has the potential to revolutionize urban green spaces and transform them into thriving hubs of sustainable agriculture. 

Tower Gardening in Africa

Tower Gardening in Africa

Understanding the Concept of Vertical Farming 

Vertical farming gained immense popularity in recent years. Vertical farming is cultivating plants in vertically stacked layers using hydroponic or aeroponic systems. This innovative approach allows for maximum use of space, making it ideal for urban areas where land availability is limited. In vertical farms, crops are grown indoors under controlled environments with artificial lighting and climate control systems.

This eliminates the need for traditional soil-based agriculture and opens endless possibilities for growing a wide range of crops year-round. By knowing the Step-by-Step Vertical Farming Guide utilizing vertical space efficiently, farmers can significantly increase their productivity compared to traditional farming methods. Moreover, because these farms operate indoors, they are not subject to weather conditions or seasonal constraints. 

Advantages of Vertical Farming in Africa 

Vertical farming has emerged as a promising solution for addressing food security and sustainability challenges in Africa. With its numerous advantages, this innovative agricultural practice is gaining popularity across the continent. One of the advantages of vertical farming in Africa is its ability to maximize limited space. As urban areas continue to expand rapidly, arable land becomes scarce. Vertical farms offer a viable alternative by utilizing vertical space rather than relying solely on horizontal cultivation methods.

By stacking crops vertically, farmers can grow more produce using less land, making it an ideal option for densely populated cities. Another advantage is the year-round production that vertical farming offers. Traditional agriculture often faces limitations due to seasonal changes and weather conditions. In contrast, vertical farms provide controlled environments where temperature, lighting, and humidity can be adjusted according to crop requirements. This allows for consistent production throughout the year, regardless of external factors. 

One of the main reasons why Vertical Crop Cultivation Africa is gaining popularity in Africa is due to the rapid urbanization taking place across the continent. Vertical farming also reduces water usage compared to conventional agriculture methods. Through hydroponics or aeroponics systems used in tower gardens, plants are grown without soil and require significantly less water than traditional soil-based cultivation. 

Tower Farming: A Suitable Model for African Countries 

Tower farming, also known as vertical farming, is a revolutionary agricultural practice that has gained traction in various parts of the world. Africa faces unique challenges when it comes to agriculture. Limited arable land, unpredictable weather patterns, and rapid urbanization are just some of the factors that have hindered traditional farming practices. Tower farming offers a solution by utilizing vertical space rather than horizontal land. 

One of the key advantages of tower farming in Africa is its ability to maximize productivity in limited spaces. By using vertical structures such as towers or multi-level platforms, farmers can grow crops vertically rather than horizontally. This allows them to produce higher yields per square meter compared to traditional methods. Furthermore, tower farms can be established in urban areas, bringing agriculture closer to consumers and reducing transportation costs. This proximity not only ensures fresh produce but also creates employment opportunities within communities. 

Site Selection and Design Considerations for Tower Farms in Africa 

When it comes to setting up tower farms Agriculture in Africa, site selection plays a crucial role. The success of vertical farming depends on various factors, including access to sunlight, water availability, and proximity to urban areas. Selecting the right location ensures optimal conditions for plant growth and maximizes the efficiency of the farm. 

One key consideration is sunlight exposure. Tower farms require ample sunlight for photosynthesis to occur, so selecting a site with unobstructed access to sunlight is essential. Water availability is another critical factor. Vertical farming relies heavily on efficient irrigation systems that deliver water directly to plants’ roots. Therefore, choosing a site near a reliable source of water or implementing proper water storage solutions is vital. 

In case you missed it: Growing Vegetables In South Africa, Sowing Calendar

Vertical Garden

Additionally, proximity to urban areas should be considered when selecting a site for tower farms in Africa. Urban centers provide ready markets for fresh produce and reduce transportation costs. Being close to consumers also promotes sustainable agriculture practices by minimizing food miles and carbon emissions. Design considerations are equally important when setting up tower farms in Africa. Maximizing space utilization through vertical stacking systems allows more crops to be grown within limited land areas effectively. 

Legal and Regulatory Framework for Vertical Farming in Africa 

In Africa, where agriculture is a significant contributor to many economies, it’s essential to establish clear guidelines for vertical farming practices. One of the primary considerations in developing these frameworks is ensuring that they align with existing agricultural laws while also addressing the unique aspects of vertical farming.

This involves defining key terms related to this innovative farming method and establishing guidelines for land use, water rights, waste management, and crop safety. Additionally, regulations must address issues such as licensing requirements for operating tower farms and certifications for produce grown using this technique.

It’s important to ensure that consumers have confidence in the safety and quality of vertically farmed products. Collaboration between government agencies, research institutions, and industry stakeholders is critical in formulating effective legal frameworks. Engaging experts from various fields can help policymakers understand the potential benefits of vertical farming while also considering any environmental or health concerns associated with its implementation. 

Moreover, governments should explore incentives such as tax breaks or subsidies to encourage investments in vertical farming infrastructure. These measures can attract both local entrepreneurs seeking expansion opportunities and foreign investors interested in supporting sustainable agriculture initiatives on the continent. 

Urban Agriculture and Food Security in Africa 

Africa is a continent that faces numerous challenges when it comes to food security. The rise of urban agriculture, particularly through Tower Farming Techniques Africa, has brought about new opportunities for ensuring food security in African cities. Advantages of Urban Agriculture in Africa is its ability to provide fresh produce directly to local communities. By growing crops within city limits, transportation costs are reduced significantly, and vegetables can be harvested at their peak freshness.

This not only improves access to nutritious foods but also reduces reliance on imported goods. Moreover, African Urban Agriculture Tips empowers individuals and communities by providing them with the means to grow their food. In many African cities where poverty rates are high, this can make a significant impact on household budgets and overall well-being. Additionally, community gardens foster a sense of belonging and collaboration among residents. 

In case you missed it: How To Start Backyard Vegetable Garden In Africa

Greenhouse Vegetables

Financing and Investment Opportunities in Tower Farming in Africa 

Financing and investment opportunities in tower farming in Africa are gaining significant attention from both local and international investors. To attract investment capital, entrepreneurs looking to venture into tower farming need to develop comprehensive business plans that outline their projected financials, growth strategies, and market analysis. Demonstrating a clear return on investment potential will be crucial in securing funding from banks or private investors. 

Furthermore, partnerships with government agencies or non-profit organizations can provide access to grants or subsidies that support agricultural initiatives focused on food security and sustainability. These collaborations not only offer financial assistance but also enhance credibility within the industry. 

Investors should also consider exploring innovative financing models such as crowdfunding or impact investing platforms specifically targeting sustainable agriculture projects. These alternative sources of funding have gained popularity globally as they align with socially responsible investing principles. 

Challenges and Opportunities in Tower Farming in Africa 

Tower farming has gained significant traction across Africa as a sustainable solution for urban agriculture. However, like any innovative practice, it comes with its own set of challenges and opportunities. One major challenge is the initial investment required to set up an African Tower Farm. The high costs associated with purchasing vertical farming systems and equipment can be a barrier for many small-scale farmers. Additionally, access to quality seeds, fertilizers, and other inputs may also pose a challenge in some regions. 

Another challenge is the limited technical expertise and knowledge about tower farming techniques among farmers. Training programs and workshops aimed at educating farmers on best practices are crucial to ensure the successful implementation of vertical farming methods. Implementing irrigation systems that minimize water usage is essential for sustainable tower farming. 

The Future of Vertical Farming in Africa 

The future of vertical farming in Africa holds great promise and potential. Vertical farming offers a solution that utilizes limited space efficiently, making it suitable for densely populated cities. With advancements in technology and innovation, vertical farming systems are becoming more affordable and accessible. This opens opportunities for small-scale farmers and urban dwellers to participate in food production while reducing their reliance on traditional agricultural practices. 

In addition, vertical farming can help address some of the challenges faced by African countries, such as climate change and water scarcity. Controlled environment agriculture allows farmers to optimize growing conditions, ensuring consistent crop yields regardless of external factors. Furthermore, vertical farms have the potential to enhance food security by providing fresh produce year-round. By eliminating the need for long-distance transportation from rural areas to cities, these farms reduce carbon emissions associated with conventional agriculture. 

In case you missed it: Guide to Growing African Violets from Seeds: Problems, Plant Care 

Strawberries in Greenhouse

Conclusion 

Vertical farming is on the rise in Africa, with tower gardening at the forefront of this innovative agricultural practice. Through vertical farming, African countries are elevating urban green spaces and addressing food security challenges. This Sustainable Farming Africa offers numerous advantages, including efficient land use, reduced water consumption, year-round production, and decreased reliance on pesticides. 

Best Fertilizer for Coconut Trees: Application Guidelines for Coconut Palm

0

Fertilizing Coconut trees is a crucial aspect of their care and maintenance. By knowing Coconut tree nutrient requirements, you can ensure that they thrive and produce an abundant yield of Coconuts. However, it’s essential to choose the best fertilizer for Coconut trees and apply it correctly. With proper knowledge and careful application techniques, Beginner’s guide to Coconut tree fertilization, you’ll be able to provide your Coconut trees with optimal nutrition for vibrant growth and bountiful harvests year after year. 

Best Fertilizer for Coconut

Best Fertilizer for Coconut

Organic Fertilizers for Coconut Trees 

Organic fertilizers are a great choice for Coconut trees as they provide nutrients naturally and sustainably. One popular organic Coconut tree fertilizer is compost, which is made by decomposing organic matter like leaves, kitchen scraps, and manure. It improves soil structure, allowing Coconut trees to absorb water and minerals more effectively.

To create nutrient-rich soil for Coconut trees, start by testing the pH level. Coconuts prefer slightly acidic to neutral soil with a pH range between 5.0 and 7.0. Another effective organic fertilizer is seaweed extract. Packed with beneficial minerals, vitamins, and hormones, it stimulates root development and enhances overall tree health. Plus, it helps improve resistance against pests and diseases.

For those looking to boost nitrogen levels in the soil, legume-cover crops such as Peanuts or Soybeans can be grown around Coconut trees. These plants can fix atmospheric nitrogen into usable forms that benefit the surrounding soil. Bone meal is the source of phosphorus for Coconut trees. Derived from animal bones, it releases this vital nutrient slowly over time while also promoting strong root development. 

Nitrogen-Rich Fertilizers for Coconut Trees 

Nitrogen is the best nutrient for the growth and development of Coconut trees. When it comes to nitrogen-rich fertilizers for Coconut trees, there are several options to choose from. One popular choice is urea, which contains a high concentration of nitrogen. Urea is easily soluble in water, making it readily available for absorption by the roots. Another option is ammonium sulfate, which not only provides nitrogen but also sulfur, another important nutrient for Coconut trees. 

Another effective nitrogen-rich fertilizer option is fish emulsion. Made from decomposed fish waste, this organic fertilizer releases nutrients slowly over time while also enriching the soil with beneficial microorganisms. Using a balanced blend of these different types of nitrogen-rich fertilizers can help ensure that your Coconut trees receive adequate nutrition throughout their growth cycle. Remember to follow the Fertilizer application for Coconut provided by the manufacturer when applying these fertilizers to your Coconut trees.  

Phosphorus-Rich Fertilizers for Coconut Trees 

Phosphorus is an essential nutrient for Coconut trees. It aids in root development, flowering, and fruiting. When choosing a phosphorus-rich fertilizer for Coconut trees, there are several options to consider. One popular choice is bone meal, which is made from animal bones. Bone meal contains phosphorus and calcium, another important nutrient for Coconut trees. Another option is rock phosphate, a natural mineral that slowly releases phosphorus over time. 

If you prefer organic options, you can opt for bat guano or fish emulsion fertilizers. Both of these sources are rich in phosphorus and provide additional benefits such as added micronutrients. When applying phosphorus-rich fertilizers to your Coconut trees, it’s important to follow the dosage instructions.  

Potassium-Rich Fertilizers for Coconut Trees 

Potassium plays a key role in various physiological processes, including photosynthesis, enzyme activation, and water regulation. There are several potassium-rich fertilizers available in the market that can help meet the potassium requirements of your Coconut trees. One such example is Muriate of Potash, which contains a high concentration of potassium chloride. This fertilizer is readily soluble in water and can be easily applied through irrigation. 

In case you missed it: How to Grow Coconut from Seed to Harvest: Check How this Guide Helps Beginners

Bunch of Coconut on Coconut Tree

Another option is Sulphate of Potash, which contains potassium sulfate. This fertilizer not only provides potassium but also supplies sulfur, which is essential for protein synthesis in plants. Potassium nitrate is another popular choice among Coconut tree growers as it contains both nitrogen and potassium. This balanced formula ensures optimal growth while promoting fruit production. When applying potassium-rich fertilizers to your Coconut trees, it’s important to follow proper guidelines for dosage and timing. 

Slow-Release Fertilizers for Coconut Trees 

Slow-release fertilizers are a great option for Coconut trees because they provide a steady and continuous supply of nutrients over an extended period. Unlike traditional fertilizers that release their nutrients all at once, slow-release fertilizers gradually break down and release their nutrients as the Coconut tree needs them. 

One benefit of using slow-release fertilizers is that they reduce the risk of nutrient leaching. Since these fertilizers release nutrients slowly, there is less chance of excess nutrients being washed away by rain or irrigation water. This means more efficient nutrient uptake by the Coconut tree and less waste. 

Another advantage is that slow-release fertilizers require fewer applications compared to traditional fast-acting ones. With slow-release fertilizers, you can apply them less frequently, saving both time and money in the long run. Coconut trees also benefit from slow-release fertilizer’s ability to improve soil health. When using slow-release fertilizer for your Coconut trees, it’s important to follow the manufacturer’s instructions regarding application rates and timing.  

Liquid Fertilizers for Coconut Trees 

Liquid fertilizers are a convenient and effective option for nourishing Coconut trees. They come in various forms, including soluble powders, concentrates, and ready-to-use solutions. Liquid fertilizers are easily absorbed by the tree’s roots, allowing for quicker nutrient uptake. One advantage of liquid fertilizers is their ability to provide a balanced mix of nutrients. Many liquid fertilizers contain nitrogen, phosphorus, and potassium (NPK), which are essential for healthy Coconut tree growth.

These NPK ratios can be adjusted based on the specific needs of your trees. In addition to NPK nutrients, liquid fertilizers also often include micronutrients such as iron, zinc, manganese, and copper. When applying liquid fertilizer to Coconut trees, it is important to follow the instructions carefully. Dilute the fertilizer according to the recommended ratio or use it at full strength if it is already a ready-to-use solution. Apply evenly around the base of each tree while avoiding direct contact with leaves or trunk. 

Biofertilizers for Coconut Trees 

Biofertilizers can be a great addition to your Coconut tree fertilizer regimen. These are natural and eco-friendly alternatives that provide essential nutrients to the soil and help enhance the growth of Coconut trees. One type of biofertilizer commonly used for Coconut trees is mycorrhizal fungi. These beneficial fungi help in nutrient absorption and improve root development.

They also protect against soil pathogens, making them an excellent choice for maintaining healthy Coconut trees. Another biofertilizer option is rhizobium bacteria. These bacteria fix atmospheric nitrogen into a usable form for plants. Adding rhizobium-based biofertilizers to your Coconut tree’s soil can increase nitrogen availability, promoting lush green foliage and better fruit production. 

In case you missed it: 14 Common Coconut Tree Problems: How to Fix Them, Solutions, and Treatment

Coconut Tree

Homemade Fertilizers for Coconut Trees 

Homemade fertilizers can be a great option for Coconut tree owners who want to take a more natural approach to nourishing their trees. Plus, making your fertilizer allows you to have control over the ingredients and quality of what you’re applying. One popular homemade fertilizer for Coconut trees is compost tea. This liquid is made by steeping compost in water for several days, creating a powerful brew that can provide essential nutrients to your trees.

Simply strain out the solids and apply the liquid directly to the soil around your Coconut trees. Another option is banana peel fertilizer. To make this homemade fertilizer, simply chop banana peels into small pieces and bury them around the base of your trees. Over time, they will decompose and release their nutrients into the soil.

Epsom salt solution is also commonly used as a homemade fertilizer for Coconut trees. Dissolve Epsom salts in water according to package instructions. The magnesium content in Epsom salts helps improve overall plant health. Coffee grounds are another excellent homemade fertilizer option. They contain nitrogen, phosphorus, potassium, and other trace minerals that can benefit Coconut tree growth and maintenance. Simply sprinkle coffee grounds around your trees or mix them into the soil. 

Coconut Tree Fertilizer Application Guidelines 

  1. Timing: It’s best to apply fertilizer during the rainy season or just before it begins. This allows for better absorption by the tree’s roots and reduces the risk of nutrient runoff. 
  2. Quantity: The amount of fertilizer needed depends on various factors such as tree size, age, and soil fertility. As a general rule, young Coconut trees require less fertilizer compared to mature ones. 
  3. Spread evenly: Distribute the fertilizer around the base of the tree in a circular pattern, making sure it reaches beyond the drip line. Avoid piling up large amounts near the trunk, as this can cause root burn. 
  4. Watering after application: After applying fertilizer, water the area thoroughly to help dissolve and distribute nutrients into the soil. 
  5. Frequency: For established Coconut trees, fertilize once or twice a year with a slow-release organic fertilizer or follow specific product instructions. 

In case you missed it: Coconut Coir Benefits for Gardening, Making, Uses

Coconuts

Conclusion 

Choosing the best fertilizer for your Coconut trees is crucial in ensuring their healthy growth and abundant yield. Whether you opt for organic fertilizers, nitrogen-rich options, phosphorus-rich blends, potassium-enhanced formulas, or micronutrient supplements – each type has its benefits and application guidelines. By providing proper nutrition through well-chosen fertilization practices, Coconut tree care tips, you will promote vigorous growth, increased resistance against pests and diseases, and ultimately enjoy a bountiful harvest from your beloved Coconut trees. 

Nutrient Management for Tower Gardens: How to Mix Your Nutrients for Tower Farms

0

Proper nutrient management is crucial for the success of your Tower Garden. By understanding the needs of your plants and following best practices for mixing nutrients, you can ensure that they receive the essential elements they require to thrive. 

Nutrient Management for Tower Gardens

Nutrient Management for Tower Gardens

Choosing the Right Nutrients for Your Tower Garden Farm 

Choosing the right nutrients for your Tower Garden farm is a crucial step in ensuring healthy plant growth and maximum yield. When it comes to choosing the best nutrients for your Tower Garden, there are a few key factors to consider. Different plants have varying nutrient requirements, so it’s important to choose a formula that meets their specific needs. Whether you’re growing leafy greens, herbs, or fruit-bearing crops like Tomatoes or Peppers, there are specialized nutrient blends designed to support their growth. 

Importance of Nutrient Ratios and Concentrations 

When it comes to nutrient management for your Tower Garden farm, understanding the importance of nutrient ratios and concentrations is crucial. Each plant has specific nutrient requirements, and providing the right balance is essential for optimal growth and productivity. The Tower Garden nutrient recipe is the secret sauce for growing healthy and thriving plants in your vertical farm. One popular organic nutrient solution tower garden is compost tea. 

Nutrient ratios refer to the proportion of different elements in a fertilizer solution. These elements include macronutrients like nitrogen, phosphorus, and potassium, as well as micronutrients such as iron and manganese. The correct Nutrient ratios for Tower Garden ensure that plants get all the necessary nutrients in appropriate amounts. 

Concentration, on the other hand, refers to the strength or dilution of the nutrient solution. It is important to measure and maintain proper concentration levels because too little or too much can have detrimental effects on plant health. Regular testing of your reservoir will help you determine if adjustments are needed. 

Preparing the Nutrient Reservoir 

When it comes to nutrient management for your Tower Garden farm, one crucial step is preparing the nutrient reservoir. This is where you mix your chosen nutrients with water to create a solution that will provide essential elements for plant growth. To start, make sure you have a clean and sanitized reservoir. Any residue or contaminants can affect the health of your plants. Once clean, fill the reservoir with fresh water, leaving enough room for the nutrient solution. 

Mixing the Nutrients with Water 

Tower Garden nutrient mixing with water is a key step in ensuring your plants receive the proper nourishment they need to thrive. To start, fill your reservoir with clean, filtered water. Once filled, it’s time to add the nutrients. Follow the manufacturer’s instructions carefully and measure out the recommended amount of each nutrient. To mix your DIY Tower Garden nutrient solution, start by dissolving the base minerals in water according to package instructions.

It’s crucial to measure accurately, as too much or too little can harm your plants. Once dissolved, adjust the pH level using pH-up or pH-down solutions until it reaches an optimal range for your specific crop. When mixing, always add one nutrient at a time while stirring continuously. This will help ensure an even distribution of all essential elements throughout your solution.

In case you missed it: Vertical Farming with Tower Farms in Italy

Vertical Garden with Green Plants

Be gentle when stirring to prevent excessive foaming or splashing that could lead to inaccurate measurements. After adding all necessary nutrients, allow them to dissolve fully before testing and adjusting their levels if needed. Regular monitoring is key here – check pH levels regularly using a reliable meter or test kit and make any necessary adjustments by adding pH up or down solutions. 

Monitoring and Adjusting Nutrient Levels 

Providing the perfect nutrient mix for vertical farming requires careful attention and ongoing monitoring. It ensures that plants receive the right amount of nutrients to support their growth and development. Regular monitoring allows you to assess the nutrient levels in the reservoir, identify any deficiencies or excesses, and make necessary adjustments. To monitor nutrient levels, you can use an electrical conductivity meter or a pH meter. These tools help measure the concentration of nutrients in the solution and determine if it falls within optimal ranges.

Maintaining proper nutrient ratios is vital, as imbalances can cause plant death. Adjusting nutrient levels involves adding more concentrated nutrients or diluting them with water, depending on your readings. Start by making small changes and retest until desired levels are reached. Tower Garden’s nutrient schedule can vary depending on the stage of growth and specific plant requirements. 

Maintaining Proper pH Levels 

One crucial aspect of nutrient management in Tower Gardens is maintaining proper pH levels. The pH level tells the acidity or alkalinity of your nutrient solution. It directly affects the availability and absorption of nutrients by your plants. To ensure optimal plant growth, you regularly monitor and adjust the pH level regularly. A range between 5.8 and 6.2 is ideal for most plants grown in hydroponic systems like Tower Gardens. 

When the pH level deviates from this range, it can cause nutrient deficiencies or toxicities as certain nutrients become less available or more concentrated. This imbalance can stunt plant growth and reduce overall productivity. To maintain proper pH levels, you may need to use a pH meter or test kit to measure the acidity/alkalinity accurately.  

Proper Aeration and Agitation of Nutrient Solution 

Proper aeration and agitation of the nutrient solution in your Tower Garden farm are vital for ensuring optimal plant growth. When the nutrients are mixed with water, they need to be well-oxygenated to provide sufficient oxygen to the roots. To achieve proper aeration, you can use an air pump or air stone in your nutrient reservoir.

These devices create bubbles that continuously agitate the solution, keeping it well-oxygenated. The movement of the solution also helps distribute nutrients evenly throughout the system. Adequate aeration and agitation also help prevent algae growth in your Tower Garden. Algae thrive in stagnant water, but providing constant movement disrupts their growth cycle. 

Regular Maintenance and Replacement of Nutrient Solution 

Regular maintenance and replacement of nutrient solutions are crucial for the health and productivity of your tower garden. As plants absorb nutrients from the solution, their levels can become depleted over time. To ensure optimal growth, it’s important to monitor and replace the nutrient solution regularly. One key aspect of regular maintenance is checking the nutrient levels in your reservoir.  

When it comes to replacing the nutrient solution, it’s recommended to do so every 1-2 weeks. This ensures that your plants always have access to fresh and balanced nutrients. Before adding a new solution, make sure to clean the reservoir thoroughly to prevent any buildup or contamination. 

In case you missed it: How to Grow Cauliflower in Aeroponic Towers

Greenhouse Vegetables

In addition to replacing the entire solution, you may also need to top up with water between changes. Evaporation and plant uptake can lead to a decrease in volume, so monitoring water levels is important. Remember that maintaining proper pH levels is essential for nutrient availability and absorption by plants. Regularly test and adjust pH as necessary using appropriate solutions or additives. 

Diagnosing Nutrient-Related Issues 

When it comes to nutrient management in Tower Garden farm, it’s important to be proactive in identifying any issues that may arise. By closely monitoring your plants and being aware of their nutrient needs, you can catch potential problems early on. One common issue is nutrient deficiency, which manifests as yellowing or discoloration of leaves. A lack of specific nutrients such as nitrogen, phosphorus, or potassium can cause this.

By observing the symptoms and comparing them to deficiency charts or guides, you can pinpoint the problem nutrient and make the necessary adjustments. On the other hand, over-fertilization can also occur if nutrient concentrations are too high. This often leads to leaf burn or necrosis. Adjusting the concentration levels accordingly will help alleviate this issue. 

Additionally, pH imbalances can impact nutrient availability for plants. If pH levels are too high or too low, certain nutrients may become locked up in the soil or hydroponic solution, making them inaccessible to plant roots. Another factor to consider is water quality. Poor water quality with high mineral content or heavy metals can negatively affect plant health and nutrient uptake. Conducting regular water tests will help identify any potential issues related to water quality. 

Optimizing Plant Growth with Proper Nutrient Management 

Proper nutrient management is crucial for optimizing plant growth in Tower Gardens. One key aspect of proper nutrient management is understanding the needs of different plant varieties. Each type of plant requires a different combination of nutrients to thrive. Researching and selecting the appropriate nutrient blend for your crop will set a solid foundation for success. 

Another important factor to consider is the timing and concentration of nutrients applied. Regular monitoring and adjustment are vital for maintaining optimal nutrient levels in Tower Gardens. Regularly check pH levels and adjust as necessary to keep them within the recommended range for your crops. Additionally, monitor electrical conductivity levels to ensure that nutrient concentrations are maintained at suitable levels. 

In case you missed it: How to Grow Leeks on Tower Gardens: Step-By-Step Guide for Beginners

Plants Growing in Hydroponic Towers

Conclusion 

Nutrient management is a crucial aspect of maintaining a successful Tower Garden farm. By choosing the right nutrients and maintaining proper ratios and concentrations, you can provide your plants with the essential nutrients they require to grow. By implementing these practices for nutrient management in your Tower Garden farm, you can optimize plant growth while minimizing waste. The result will be healthier crops with higher yields—making your tower farming venture even more rewarding. 

Vertical Tower Farming in Portugal: Sustainable Agriculture in Portugal Urban Areas  

0

Vertical farming is a cutting-edge agricultural practice that has gained significant attention in recent years. It involves growing crops in vertically hydroponic or aeroponic systems without the need for soil. This innovative method maximizes space utilization and allows year-round cultivation of various crops, regardless of weather conditions. With their compact design and efficient use of resources, Tower Farms offers numerous benefits for farmers in Portugal. 

Vertical Tower Farming in Portugal

Vertical Tower Farming in Portugal  

Innovative Approaches to Aeroponic Tower Farming in Portugal’s Urban Areas 

Portugal has been embracing innovative approaches to aeroponic tower farming in its urban areas, revolutionizing the way food is grown and consumed. In Porto, Lisbon, and other urban centers across Portugal, unused spaces such as rooftops and abandoned buildings are being transformed into productive farms. These aeroponic tower farms utilize advanced technology to cultivate crops in a soil-free environment. 

By utilizing vertical space effectively, these tower farms maximize crop yields while minimizing water usage. The plants are nurtured with a precise blend of water and nutrient-rich mist delivered directly to their roots. This method eliminates the need for excessive amounts of water commonly used in traditional farming methods. 

Sustainable Agriculture: How Portugal is Embracing Vertical Aeroponic Farming 

Portugal is leading the way in sustainable agriculture with its embrace of vertical aeroponic farming. This innovative approach to farming allows crops to grow vertically in tower structures, using a fraction of the land and water resources compared to traditional agriculture methods.

A key factor contributing to the success of tower farms in Portugal is their ability to maximize crop yield. By utilizing Portugal vertical farming aeroponics, Portugal can optimize crop yields while reducing environmental impact. Aeroponic towers provide plants with nutrients and water through misting, eliminating the need for soil and minimizing water usage.

This Sustainable vertical farming Portuguese model ensures that every drop of water is utilized successfully, making it an ideal solution for countries facing drought or limited arable land. Vertical aeroponic farming also offers numerous benefits in urban areas where space is limited. By growing crops vertically, cities can produce fresh and healthy food locally, reducing reliance on imports and lowering carbon emissions associated with transportation. 

Optimizing Crop Yields in Portugal’s Aeroponic Tower Farms 

With limited space and a growing population, maximizing productivity is crucial for sustainable agriculture. In aeroponic tower farms, crops are grown vertically using nutrient-rich mist instead of soil. This innovative approach allows farmers to take advantage of every square inch available and produce more food compared to traditional farming methods. 

Several factors come into play to optimize Crop yield enhancement in aeroponic Portugal. First and foremost is the precise control over environmental conditions such as temperature, humidity, and light intensity. These parameters can be fine-tuned to create the ideal growing environment for each crop type. 

In case you missed it: Vertical Farming with Tower Farms in Italy

Spiral Vertical Garden with Green Plants

Another important aspect is the careful selection of plant varieties that are well-suited for vertical farming. By choosing cultivars that have been specifically bred or adapted for this method, farmers can ensure higher yields and better overall quality. Additionally, an efficient irrigation system plays a vital role in maximizing crop production. In aeroponic towers, water usage is significantly reduced compared to conventional agriculture, thanks to the closed-loop system where excess water gets recirculated back into the reservoir. 

The Future of Farming: Portugal’s Journey into Vertical Aeroponics 

One of the key advantages of vertical aeroponic farming is its ability to optimize crop yields. By utilizing tall towers that stack plants vertically, farmers can make the most out of limited urban spaces. This means that even in densely populated areas like Lisbon or Porto, fresh produce can be grown locally and sustainably. But it’s not just about maximizing space; technology also plays a crucial role in Portuguese vertical farms. Aeroponics, which involves misting plant roots with nutrient-rich water instead of soil, allows for precise control over growing conditions.

This level of precision ensures optimal growth and minimizes resource wastage, such as water and fertilizers. Moreover, Portuguese agriculture vertical aeroponics has significant environmental benefits. By reducing reliance on traditional agricultural practices that often contribute to deforestation and land degradation, these farms help preserve natural habitats while producing high-quality food all year round. 

Challenges and Solutions in Establishing Aeroponic Towers for Vertical Farming in Portugal 
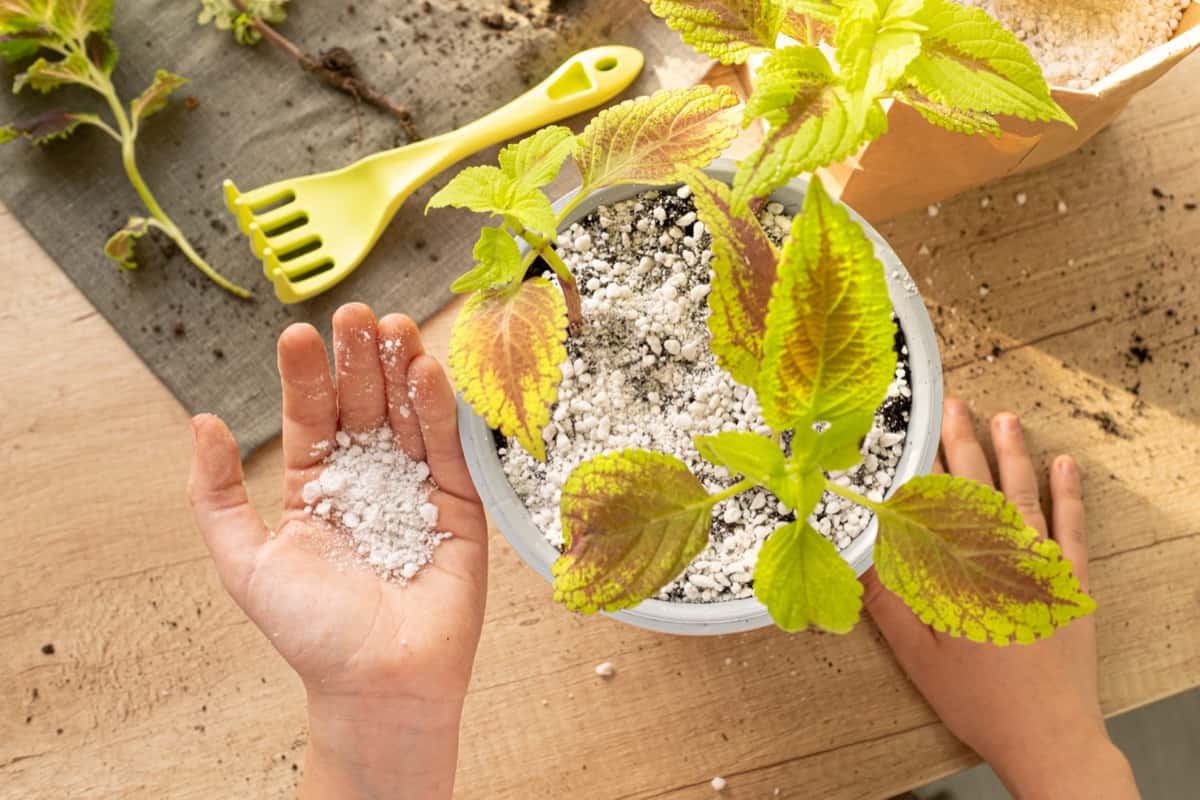
A major challenge in Portuguese aeroponic towers is the initial investment needed to establish a vertical farm. The cost of purchasing and installing the tower systems can be high, especially for small-scale farmers or entrepreneurs looking to enter the industry. However, there are funding options available through government grants and agricultural programs that can help offset these costs. Another challenge lies in obtaining suitable land for setting up vertical farms.

In urban areas where space is limited, finding adequate land can be a struggle. However, some creative solutions have been implemented, such as repurposing abandoned buildings or using rooftop spaces for cultivation. Water scarcity is another concern when it comes to aeroponic farming in Portugal. With water being a precious resource, finding sustainable ways to conserve and optimize water usage is crucial. Implementing advanced irrigation systems and recycling techniques can help mitigate this issue. 
Integrating Technology in Portuguese Vertical Farms: The Role of Aeroponics 

Aeroponics, growing plants without soil by spraying nutrient-rich mist directly onto their roots, plays a crucial role in these high-tech vertical farms. In Portuguese vertical farms, sensors and automation systems monitor various environmental factors. This data is then analyzed to provide precise adjustments that promote ideal growing conditions for each specific crop. With technology in Portugal’s vertical aeroponics at their fingertips, farmers can fine-tune every aspect of cultivation to achieve maximum efficiency. 

Moreover, integrating technology in vertical farms allows for real-time monitoring and control over water consumption. Water scarcity is an important issue globally but particularly relevant for Portugal with its arid climate. Aeroponic systems precisely deliver nutrients and water directly to plant roots while reducing wastage significantly compared to traditional soil-based agriculture methods. 

In case you missed it: Vertical Gardening Frequently Asked Questions (FAQs)

Vertical Garden with Green Plants

The Environmental Impact of Vertical Farming with Aeroponic Towers in Portugal 

Vertical farming using aeroponic towers offers a sustainable solution to traditional agriculture practices, and it also has several positive Environmental impacts on aeroponic farming in Portugal. Water usage is significantly reduced compared to conventional farming methods. With aeroponics, plants are misted with nutrient-rich water instead of being submerged in soil. This allows for precise control over the amount of water used, minimizing waste. 

Additionally, vertical farming decreases the need for pesticides and herbicides. In traditional agriculture, chemicals are often sprayed on crops to ward off pests and weeds. However, in a controlled environment like an aeroponic tower farm, these harmful substances can be eliminated or drastically reduced. This not only benefits human health but also prevents chemical runoff into nearby rivers and streams. 

Furthermore, vertical farming helps combat deforestation by reducing the demand for land expansion. As Urban aeroponic farming in Portugal, agricultural land becomes scarce. By utilizing vertical space rather than horizontal land area for cultivation purposes, we can preserve valuable forests and natural habitats. 

Moreover, transportation emissions are minimized through localized food production. With traditional agriculture systems that rely on long-distance shipping of produce from rural farms to urban centers, carbon emissions increase due to transportation activities. However, by establishing vertical farms within cities themselves or in proximity to urban areas, as in Portugal’s case, this problem is mitigated as there is no need for extensive transportation networks. 

Educational Initiatives and Workshops on Vertical Farming with Aeroponics in Portugal 

In recent years, there has been a surge in educational initiatives focused on Aeroponic farming education in Portugal. These initiatives aim to educate farmers, students, and even urban dwellers about the benefits of this revolutionary farming technique. Workshops are being conducted across the country where experts share their knowledge and experiences with participants. These workshops cover various aspects of vertical aeroponic farming, including crop selection, planting techniques, nutrient management, pest control strategies, and more. 

The goal is to equip individuals with the skills needed to establish their tower farms or work within existing ones. Participants learn practical techniques that they can apply in real-life scenarios. From understanding optimal lighting conditions for different crops to mastering irrigation systems tailored for aeroponic towers – attendees gain hands-on experience during these workshops. 

In case you missed it: How to Build a Vertical Garden With PVC Pipes: Cheap, DIY Making Ideas, Tips, and Techniques

Greenhouse Vegetables

Conclusion 

Vertical farming with aeroponic towers is revolutionizing the agriculture industry in Portugal. As urban areas continue to expand, innovative approaches like vertical farming are essential for sustainable food production. The use of aeroponics technology allows farmers to optimize crop yields and minimize environmental impact. 

Vertical Farming with Tower Farms in Italy

0

Vertical farming with Tower Farms is revolutionizing agriculture in Italy, offering a sustainable and efficient way to produce food. By utilizing vertical space, these innovative systems can maximize crop yields while minimizing resource usage. Vertical farming methods in Italy offer numerous benefits for Italian agriculture – increased crop yields, reduced resource consumption, and improved food quality – all within a compact footprint.  

Vertical Farming with Tower Farms in Italy

Vertical Farming with Tower Farms in Italy

Exploring New Vertical Farming Methods with Tower Farms in Italy 

Vertical farming has emerged as an advanced solution to address the challenges of traditional agriculture. In Italy, this trend is gaining popularity with the introduction of Tower Farms – a revolutionary method that allows crops to be grown vertically in urban areas. Instead of sprawling fields, these systems stack plants on top of each other in towers, maximizing limited land resources. Italy’s embrace of Tower Farms is driven by its commitment to sustainable practices and its desire to reduce reliance on imports.

With its diverse climate and fertile soil, Italy has long been known for its agricultural prowess. However, changing weather patterns and increasing urbanization have posed significant challenges to traditional farming methods. By exploring new vertical farming techniques like Tower Farms, Italy is adapting to these changes while simultaneously improving food security and reducing environmental impact. These farms can be set up anywhere – from abandoned warehouses in bustling cities to rooftops overlooking picturesque landscapes. 

How Tower Farms are Transforming Urban Farming in Italy 

Tower farms utilize hydroponic technology to cultivate crops in vertically stacked layers within enclosed environments. By maximizing space and resources, tower farms can produce a high yield of fresh fruits, vegetables, and herbs all year round. One of the key advantages of tower farms is their ability to be set up virtually anywhere – from rooftop gardens to abandoned warehouses. Moreover, tower farms provide optimal growing conditions by controlling factors like temperature, humidity, light intensity, and nutrient delivery.

This precision ensures that plants receive exactly what they need for healthy growth without relying on pesticides or herbicides. In addition to addressing environmental concerns, these vertical farming systems also contribute significantly towards improving food security in densely populated cities like Rome and Milan. With limited arable land available within city limits, tower farms offer a sustainable solution by producing fresh produce locally throughout the year. 

Italy’s Shift to Sustainable Farming with Tower Farm Technology 

Italy, known for its rich agricultural heritage and exquisite cuisine, is now embracing a new era of sustainable farming through the implementation of tower farm technology. This innovative approach to urban agriculture has revolutionized the way crops are grown in densely populated areas. Tower farms offer a vertical solution to limited space by utilizing stacked levels of growing trays. These vertical structures maximize land use efficiency and allow farmers to cultivate crops all year round, regardless of external environmental factors.

In case you missed it: Growing Carolina Reaper Chili Peppers on a Tower Garden Vertically

Plants growing in hydroponic garden

By adopting tower farm technology, Italy is not only addressing the challenges posed by urbanization but also reducing its reliance on traditional farming methods that often require vast amounts of water and pesticides. The shift towards sustainable farming practices aligns perfectly with Italy’s commitment to preserving its natural resources and promoting eco-friendly initiatives. Furthermore, tower farm technology enables farmers to have greater control over their crop production.

By closely monitoring variables such as temperature, lighting, and nutrient levels within each tower unit, they can optimize plant growth while minimizing waste. This shift towards Sustainable tower farming technology in Italy has already yielded promising results in terms of both economic viability and environmental impact. Tower farms have been shown to produce higher yields compared to traditional agriculture while significantly reducing water consumption. This translates into increased profitability for farmers and reduced strain on local water sources. 

The Success Story of Tower Farms in Italian Urban Agriculture 

The success story of Tower Farms in Italian urban agriculture is a testament to the power of innovation and sustainability. These Successful urban tower farms in Italy have revolutionized the way food is grown in urban areas, providing fresh produce year-round, regardless of climate or location. One of the key factors contributing to their success is their efficient use of space. In densely populated cities like Milan and Rome, where land for traditional farming is scarce, Tower Farms offers a viable solution.

By stacking plants vertically in hydroponic towers, these farms can grow large quantities of crops in a fraction of the space required by conventional farms. Another factor that has contributed to their success is the ability to control every aspect of the growing process. With advanced technology and precise monitoring systems, conditions such as temperature, humidity, and nutrient levels optimize plant growth.

This level of control not only ensures consistent quality but also minimizes water usage and eliminates the need for harmful pesticides or herbicides. Furthermore, Tower Farms provides a sustainable alternative to traditional farming methods that often rely heavily on fossil fuels for transportation and require vast amounts of water resources. By locating these vertical farms within or near urban centers, they significantly reduce food miles while promoting local production and reducing carbon emissions. 

Improving Food Security in Italy with Vertical Tower Farms 

One such solution gaining traction is food security in Italy’s tower farms. This revolutionary method of agriculture allows crops to be grown year-round, regardless of weather conditions. Vertical tower farms utilize vertical space efficiently by stacking plants on multiple layers on top of each other, maximizing land use. By growing crops indoors using controlled environments, tower farms eliminate the reliance on traditional soil-based farming methods that are vulnerable to pests, diseases, and climate change.

In case you missed it: How to Build a Vertical Garden With PVC Pipes: Cheap, DIY Making Ideas, Tips, and Techniques

Spiral Vertical Garden with Green Plants in a Greenhouse

Instead, hydroponic systems provide nutrients directly to plant roots through water solutions. Tower farms also employ advanced technology, such as LED lighting systems that simulate natural sunlight for optimal growth. This means that farmers have greater control over crop quality and yield throughout the year. 

Case Studies: The Impact of Tower Farms in Italian Vertical Farming 

One of the most exciting aspects of Italian vertical farming case studies is the opportunity to study and analyze its impact on traditional agriculture. Several case studies have revealed fascinating insights into how this innovative farming method is revolutionizing food production.  In a recent study conducted by an agricultural research institute, it was found that Tower Farms significantly increased crop yields compared to conventional farming methods.

The controlled environment inside the towers allows for optimal conditions for plant growth and healthier crops. Another case study focused on water usage in Tower Farms. It was discovered that these vertical farms use less water than traditional agriculture methods. This reduction in water consumption not only helps conserve this precious resource but also reduces the strain on local water supplies.

Furthermore, a case study examined the economic viability of implementing Tower Farms on a larger scale. It concluded that despite initial investment costs, these farms can generate substantial profits due to their high yield potential and year-round production capabilities. 

Adapting Traditional Italian Crops to New Vertical Farming Techniques 

Italy is renowned for its rich agricultural heritage, with traditional crops vertically farming Italy like tomatoes, basil, and grapes and playing a pivotal role in the country’s cuisine. However, as urbanization continues to sweep across Italy’s landscape, the need for innovative farming methods has become increasingly apparent. Enter vertical farming and tower farms – an exciting new approach that allows farmers to grow crops vertically in stacked layers.

This revolutionary technique presents a unique opportunity to adapt traditional Italian crops to meet the demands of modern agriculture. With vertical farming, farmers can optimize space utilization by growing crops upwards instead of outwards. By utilizing hydroponic systems that provide essential nutrients directly to plant roots without soil, these farms offer a controlled environment where temperature and lighting conditions can be tailored precisely. 

This precision allows farmers to create ideal growing conditions for specific crop varieties regardless of seasonal limitations. For instance, using vertical farming techniques enables growers to cultivate vine-ripened tomatoes year-round rather than relying on external factors. Moreover, vertical farming offers advantages beyond increased yield and extended growing seasons. 

Technological Advancements in Italy’s Tower Farming Industry 

Italy has been at the forefront of technological advancements in vertical farming, particularly with the use of tower farms. These innovative systems have revolutionized the way crops are grown and cultivated, maximizing space and resources while minimizing environmental impact. One significant technological advancement in Italy is the integration of smart sensors and automation technology into tower farms.

These sensors monitor crucial factors such as temperature, humidity, and nutrient levels in real time, ensuring optimal growing conditions for plants. Automation systems control irrigation cycles and adjust lighting schedules based on plant needs, reducing human intervention while maintaining crop quality. 

Another breakthrough is the implementation of precision farming techniques within tower farms. Through data analysis and advanced algorithms, farmers can precisely tailor irrigation amounts and nutrient solutions to each plant’s requirements. This not only maximizes yields but also minimizes water usage and fertilizer waste—a vital step towards sustainable agriculture. 

In case you missed it: How to Start Indoor Vertical Garden with Stunning Spider Plants

Vertical Planters with Green Leafy Plants in a Greenhouse

Evaluating the Environmental and Economic Benefits of Tower Farms in Italy 

Tower farms have gained significant attention in the field of urban agriculture, not only for their ability to grow crops vertically but also for the environmental and economic benefits they bring. One of the key Environmental benefits of Italian tower farms is their efficient use of space. By stacking plants on top of each other, tower farms maximize land utilization, making them ideal for urban areas with limited available land. 

In terms of environmental impact, tower farms offer several advantages. They significantly reduce water usage compared to traditional farming methods. The closed-loop hydroponic system used in tower farms recirculates water and nutrients efficiently, minimizing waste and conserving resources. Additionally, since tower farms are typically located within or near cities, transportation distances are reduced drastically, which reduces carbon emissions associated with food transport. 

Educational Programs and Workshops on Vertical Farming and Tower Farms in Italy 

The growing popularity of Vertical farming education opportunities in Italy has led to the development of educational programs and workshops that aim to educate individuals about this innovative form of agriculture. These programs provide valuable knowledge and practical skills to aspiring farmers, entrepreneurs, and even students interested in sustainable farming practices. 

Through these educational initiatives, participants can learn about various aspects of vertical farming, including crop selection, cultivation techniques, hydroponics systems, pest management strategies, and more. Workshops often include hands-on activities where attendees can get their hands dirty while learning how to grow crops vertically. 

One notable program is the “Vertical Farming Academy,” which offers comprehensive courses on all aspects of vertical farming. Participants gain a deep understanding of the technology behind tower farms as well as practical insights into running successful vertical farms. The academy also provides networking opportunities with industry experts and fellow enthusiasts.

Conclusion 

Tower Farms is transforming urban farming in Italy on multiple fronts – from improving food security to promoting sustainability. As this technology continues to evolve, there is no doubt that it will play a vital role in shaping the future of agriculture, not just in Italy but across the globe.

Top 10 Steps to Growing Kentia Palm: How to Plant and Care Guide

0

Growing a Kentia Palm can be a rewarding experience that adds beauty and elegance to any indoor or outdoor space. With patience, dedication, and a little bit of knowledge, Kentia Palm Care Guide, you can watch your Kentia Palm thrive and flourish over time. Bring home this tropical beauty and enjoy all the benefits that come with having a stunning Kentia Palm plant in your life. 

Leafy green potted Kentia palm

Top 10 Steps to Growing Kentia Palm

Right Soil for Your Kentia Palm: Step-by-Step Guide 

When it comes to Kentia Palm Growth Requirements, choosing the right soil is crucial for its overall health and growth. This elegant plant thrives in well-draining soil that retains some moisture but doesn’t become waterlogged. Make sure to choose the best soil for Kentia Palm that is specifically designed for palm plants. These mixes are typically formulated with ingredients like peat moss, perlite, and vermiculite, which provide excellent drainage. 

Optimal Lighting Conditions for Thriving Kentia Palms 
  1. Bright Indirect Light: Kentia palms prefer indirect light, which means they must be placed near a window where they can get indirect sunlight throughout the day.  
  2. Rotate Regularly: Rotate your Kentia palm every few months so all sides receive an equal amount of light. 
  3. Artificial Lighting: If you want to grow Kentia Palms Indoors, you can supplement with artificial grow lights specifically designed for indoor plants. Place these lights about 12 inches above the plant and keep them on for 10-12 hours each day. 

Watering Your Kentia Palm: How Much and How Often? 

Watering your Kentia Palm is crucial to its overall health and vitality. When it comes to the Kentia Palm Watering Schedule, make sure to saturate the soil thoroughly until water drains out from the bottom of the pot to ensure all roots get enough moisture. In terms of frequency, it’s best to water your Kentia Palm when the top few inches of soil feel dry.  

Best Fertilizer for Kentia Palm’s Growth 

One essential aspect of caring for your Kentia palm is providing it with the right nutrients. Choosing the best fertilizer will help ensure its optimal growth and overall health. When selecting a fertilizer, look for one specifically formulated for palm trees. Avoid using general-purpose fertilizers as they may not provide all the necessary nutrients in the right proportions. 

To promote healthy growth, opt for a slow-release fertilizer designed to release nutrients gradually. This helps prevent nutrient burn or excessive feeding, which can harm your Kentia palm. Apply the fertilizer every three months during spring and summer when growth is most active. Be sure to water your palm thoroughly before applying the fertilizer to prevent root burn. 

In case you missed it: Creating a Tropical Oasis: 14 Palm Tree Varieties for Your Landscape

Kentia or howea forsteriana

The Ideal Temperature and Humidity for Kentia Palm Care 

When it comes to Kentia Palm’s Ideal Temperature, a range between 15°C and 29°C is ideal for these majestic plants. They can tolerate slightly cooler temperatures but may suffer if exposed to frost or extreme heat. In terms of humidity, Kentia palms prefer higher levels of moisture in the air.

Aim for a humidity level of around 50-70% to keep your palm happy and healthy. It’s important not only to provide an optimal temperature and humidity range but also to ensure consistent conditions for your Kentia palm. Avoid placing it near drafts or vents that can create fluctuations in temperature or dry out the leaves.  
Repotting Your Kentia Palm: Best Practices and Timing 

Repotting your Kentia palm is an essential step in its care and maintenance.  Timing is crucial when repotting Techniques for Kentia Palm. Generally, it’s recommended to repot every two or three years, preferably during spring or early summer when the plant is actively growing. This timing ensures that your palm has enough time to acclimate and establish itself before winter sets in. 

When choosing a new pot for your Kentia palm, opt for one that is slightly larger than its current container. This will give the roots room to spread without overwhelming them with excessive space. Make sure the pot contains drainage holes at the bottom so excess water can escape, preventing root rot. Before transferring your palm into its new home, prepare a well-draining soil mix consisting of peat moss, perlite, and sand.
To begin repotting, gently remove your Kentia palm from its current container by loosening any tightly packed soil around its roots. Carefully untangle any circling or bound-up roots using your fingers or a small tool if necessary. Place some fresh soil mixture at the bottom of the new pot before positioning your Kentia palm in it at a similar depth as before. Fill in around the sides with additional soil until firmly anchored but not compacted too tightly. 

Pruning and Maintenance Tips for a Healthy Kentia Palm 

Pruning and maintaining your Kentia palm is essential for keeping it healthy and looking its best. When it comes to Kentia Palm Pruning Advice, make sure to use clean and sharp pruning scissors. This will prevent any damage or tearing of the fronds. Start by removing any brown or dry leaves at the base of the plant, as these can attract pests and diseases. Next, focus on removing any yellowing or damaged fronds higher up on the plant.

Cut them off at their base, being careful not to cut into healthy green foliage. Remember that over-pruning can be detrimental to your palm’s health, so only trim what is necessary. In addition to regular pruning, maintenance tasks like dusting and cleaning the leaves are important for optimal growth. Wipe down each leaf gently using a damp cloth to remove dust buildup that can hinder photosynthesis. 

Another crucial aspect of caring for your Kentia palm is inspecting it regularly for signs of pests or diseases. Common issues include spider mites, mealybugs, and scale insects. If you notice any infestation or disease symptoms such as discoloration or wilting leaves, take prompt action by treating them with appropriate insecticides or fungicides specifically formulated for palms. 

Common Pests and Diseases in Kentia Palms and How to Treat Them 

Kentia palms are generally hardy plants, but they can still fall victim to a few common pests and diseases. It’s important to keep an eye out for these issues so you can address them promptly and ensure the health of your beloved palm. One common pest that affects Kentia palms is spider mites. These tiny insects thrive in dry conditions and can cause discoloration and webbing on the leaves.

When it comes to Kentia Palm Pest Control, regularly mist the leaves with water or use insecticidal soap. Another pesky critter that may infest your Kentia palm is mealybugs. These small white bugs feed on plant sap, causing stunted growth. To eliminate mealybugs, wipe them off with rubbing alcohol or apply neem oil to affected areas. 

In case you missed it: How to Get More Potatoes Per Plant: 11 Potato Growth Hacks for a High Yield

Fresh green fronds of a potted Kentia palm plant

Mildew also affects kentia palms, especially if they’re kept in humid environments without proper ventilation. Remove infected leaves immediately and improve air circulation around the palm by trimming nearby foliage or using a fan. Root rot is another issue that can plague Kentia palms if they’re overwatered or planted in poorly draining soil. Allow the soil to dry between waterings and ensure good drainage by using a well-draining potting mix. 

Propagating Kentia Palms 

Propagating Kentia Palms is an exciting way to expand your plant collection and share the beauty of these stunning palms with others. One popular method of propagating Kentia Palms is through seed propagation. To start, collect ripe seeds from mature palm trees. Soak the seeds in warm water for a day or two to soften their hard outer shell. Then, plant them in well-draining soil mixed with sand or perlite to improve drainage. 

Another method of propagation involves division. Carefully separate the offshoots or suckers that grow at the base of mature palms using a sharp knife or pruning shears. Make sure each division has its roots before planting it in a suitable potting mix. It’s important to note that patience is key when propagating Kentia Palms – they are not known for their fast growth rate. Keep your newly propagated plants in bright but indirect light, provide regular watering (without overwatering), and maintain moderate humidity levels. 

How to Grow Kentia Palm in Pots 

Kentia palms are not only beautiful additions to any indoor space, but they can also thrive in pots. Growing a Kentia palm in a pot allows you to have the flexibility of moving it around and finding the perfect spot for it in your home. Choose a pot that contains good drainage holes. This will prevent water from sitting stagnant and causing root rot. Additionally, make sure the pot is big enough for the palm to grow comfortably. 

Next, select a well-draining potting mix that is formulated specifically for tropical plants. Avoid heavy soils as they can retain too much moisture and lead to overwatering issues. When planting your Kentia palm in a pot, ensure that the root ball is placed at an appropriate depth – about two inches below the rim of the container. 

In terms of watering, allow the top few inches or so of soil to dry out before watering again. Overwatering can be detrimental to Kentia palms, so be mindful not to keep their roots constantly wet. Kentia palms thrive best when placed near bright but indirect light sources such as north or east-facing windows. However, avoid placing them directly under intense sunlight as this may scorch their leaves. 

To maintain healthy growth, consider fertilizing potted Kentia palm every 2-3 months during its active growing season (spring and summer). Regularly inspect your potted Kentia palm for signs of pests such as spider mites or mealybugs. If detected early on, these pests can usually be treated by wiping down affected areas with mild soap or using organic pest control methods like neem oil spray. 

In case you missed it: How to Propagate Calathea Plant: Ways to Grow from Water, Soil, Division, and Cuttings

Palm Howea Kentia pot

Conclusion 

Growing a Kentia palm can be a rewarding and fulfilling experience. With the right Kentia Palm Seasonal Care and attention, these beautiful plants can thrive and bring a touch of tropical elegance to any space. Remember to choose the appropriate soil, provide optimal lighting conditions, water your plant correctly, and fertilize it regularly. 

Tips That Will Make You Utilize Your Garden More Often

0

Having a garden is a wonderful addition to any home. It offers a serene space to relax, unwind, and connect with nature. However, many people fail to make the most out of their gardens, often neglecting them due to various reasons. In this article, we will provide you with some valuable tips that will help you utilize your garden more often and create a beautiful outdoor space to enjoy.

Tips That Will Make You Utilize Your Garden More Often

Create Cozy Outdoor Living Spaces

To make your garden more inviting, consider creating cozy outdoor living spaces. Invest in comfortable furniture, such as lounge chairs, hammocks, or a dining set, where you can relax and enjoy meals with family and friends. By incorporating these elements, you’ll be more motivated to spend time outdoors, whether it’s for reading, entertaining, or simply soaking up the sunshine. Gazebos are the perfect place to create a cozy sitting space, or creating a cozy porch for example. 

Enhance Privacy And Security

Privacy and security are essential factors that can significantly impact your garden utilization. No one wants to relax in a space that feels exposed or insecure. Consider installing fences, hedges, or trellises to provide privacy from neighbors and passersby. Additionally, proper outdoor lighting and security measures, such as motion sensor lights or cameras, can make you feel safer and more comfortable in your garden, especially during evenings and nights.

Add Functional Features

To truly make the most of your garden, add functional features that cater to your interests and hobbies. For example, if you enjoy cooking, create an outdoor kitchen area with a barbecue grill or a pizza oven. If you love gardening, allocate a specific area for planting flowers, herbs, or vegetables. By tailoring your garden to suit your passions, you’ll find more reasons to spend time in it.

In case you missed it: How to Grow Leeks on Tower Gardens: Step-By-Step Guide for Beginners

Couple Repotting FLowers in Backyard

Embrace Outdoor Entertainment

Transform your garden into an entertainment hub by incorporating elements that promote fun and relaxation. Consider installing a fire pit for cozy evenings or a hot tub for therapeutic soaking. These additions will encourage you to utilize your garden year-round, even during colder months. Furthermore, if you have children, create a dedicated play area with swings, a trampoline, or a sandbox to keep them engaged and entertained.
Utilize Garden Structures

Garden structures, such as log cabins and gazebos, can greatly enhance your garden’s functionality and aesthetics. A log cabin from Tuin offers a versatile solution, providing extra space for hobbies, storage, or even as a guest room or home office for example. Gazebos create a focal point in your garden, offering shade and protection from the elements. By incorporating these structures, you can make your garden more versatile and appealing.

Engage in Outdoor Activities

One of the best ways to utilize your garden is by engaging in outdoor activities. Whether it’s practicing yoga, playing sports, or gardening, these activities not only make your garden more productive but also provide physical and mental health benefits. Dedicate specific areas for various activities, such as a designated sports area or a meditation corner, to encourage regular participation.

In case you missed it: Best Low-Maintenance Fruit Varieties for Busy Gardeners

Managing Outdoor Home Garden

Incorporate Lighting and Decor

Illuminate your garden with well-placed lighting to create a warm and inviting ambiance. String lights, lanterns, and solar-powered fixtures can add a magical touch to your outdoor space. Additionally, incorporate garden decor such as colorful planters, statues, or wind chimes to add personality and character. Adding these subtle details can enhance the warmth and pleasure of your garden.

How to Grow Cauliflower in Aeroponic Towers

0

Growing Cauliflower in vertical aeroponic towers offers a host of benefits, making it the best choice for home gardeners and commercial growers alike. The unique combination of vertical gardening and aeroponics allows for efficient use of space, water, and nutrients while maximizing plant growth and minimizing disease risks.

Grow Cauliflower in Aeroponic Towers

By following the beginner vertical farming Cauliflower guide on how to set up a vertical aeroponic tower specifically designed for Cauliflower cultivation, you can create the best environment for your plants to thrive. Remember to regularly monitor the pH levels, nutrient solution, and overall health of your Cauliflower plants to ensure optimal growth. 

Grow Cauliflower in Aeroponic Towers

Step-By-Step Guide to Growing Cauliflower in Vertical Aeroponic Towers 

Growing Cauliflower in vertical aeroponic towers is a unique and innovative way to cultivate this nutritious vegetable. With the right techniques and tools, you can enjoy a bountiful harvest of fresh Cauliflower year-round. To start, choose healthy Cauliflower seedlings or seeds from a reputable source. Ensure they are disease-free and have strong root systems. Prepare your vertical tower system by setting up the necessary infrastructure, such as sturdy frames, nutrient reservoirs, and vertical growing trays. 

Next, create an optimal environment for your Cauliflower plants. Provide them with ample light using LED grow lights positioned at appropriate heights. When it comes to nutrient management, aeroponics allows for precise control over the nutrients delivered to each plant’s roots. Use a balanced hydroponic nutrient solution specifically formulated for leafy greens like Cauliflower. Implement preventive measures like introducing beneficial insects or using organic pest control methods when necessary.

Water usage is an essential consideration in vertical aeroponic farming systems. Make sure your system has efficient water circulation mechanisms to minimize wastage while providing adequate hydration to the plant’s root systems. As your Cauliflowers near maturity, closely monitor their progress by observing changes in the color and size of their heads (curds). Harvest Cauliflower heads when they reach full size but before they begin to loosen or separate into florets. 

Maximizing Yield: Advanced Techniques for Cauliflower Cultivation in Aeroponic Systems 

When it comes to growing Cauliflower in aeroponic systems, several advanced Cauliflower aeroponic techniques can help you maximize your yield. One technique that has proven successful is optimizing the nutrient solution for Cauliflower plants. By providing the right balance of nutrients such as nitrogen, phosphorus, and potassium, you can promote vigorous growth and development. Regular monitoring of the nutrient levels and adjusting them accordingly will help maintain optimal conditions for your plants. 

Another important factor to consider is temperature control. Cauliflower thrives in cool temperatures ranging from 15°C to 21°C. Proper spacing is also crucial when cultivating Cauliflower in vertical aeroponic towers. Giving each plant enough room ensures they have access to ample light and air circulation, which promotes better overall health. Additionally, pruning any overcrowded or damaged leaves helps redirect energy towards producing larger heads. 

Beginner’s Insights: Getting Started with Cauliflower on Vertical Farming Towers 

Getting started with growing Cauliflower aeroponic vertical towers can be a rewarding venture for beginners. The innovative approach of aeroponic systems offers a unique way to cultivate this versatile vegetable, maximizing space and yield. It’s important to choose the right variety of Cauliflower that is suitable for vertical farming. Look for compact varieties that have been bred specifically for indoor cultivation. These varieties will thrive in the controlled environment provided by the vertical farming towers. 

In case you missed it: How to Grow Cauliflower from Seed to Harvest: A Complete Guide for Beginners

Cauliflower Growing in The Field

Before planting, ensure that your tower system is properly set up and functioning optimally. This includes checking the nutrient delivery system, ensuring proper lighting and ventilation, and monitoring temperature and humidity levels. When it comes to planting Cauliflower seeds or seedlings in the tower system, follow the instructions provided by the seed supplier or nursery.  

Regular monitoring of nutrient levels is crucial in ensuring the healthy growth of Cauliflower plants in aeroponic towers. Maintain a balanced nutrient solution specific to Cauliflower’s needs throughout its growth cycle. Pest control is another important aspect to consider when growing Cauliflower on vertical farming towers. Implement integrated pest management strategies like regular scouting, physical barriers, beneficial insects, and organic pesticides if necessary. 

Nutrient Management for Healthy Cauliflower Growth in Aeroponic Vertical Farms 

Aeroponic Cauliflower nutrient management plays a critical role in ensuring healthy Cauliflower growth in aeroponic vertical farms. With the absence of soil, it is essential to provide the plants with all the necessary nutrients they need to thrive. In an aeroponic system, the nutrient solution is delivered to the plant roots through a fine mist or fog. It also allows for better nutrient uptake efficiency compared to traditional soil-based cultivation. 

To achieve healthy Cauliflower growth, it is important to maintain a balanced nutrient solution tailored specifically for this crop. The solution should include essential elements and trace minerals like iron and zinc. Regular monitoring of nutrient levels is crucial to prevent deficiencies or toxicities that can hinder plant growth. 

It’s worth noting that different stages of Cauliflower growth require varying nutrient ratios. During vegetative growth, higher nitrogen levels promote leafy foliage development. As the plants transition into flowering and head formation stages, adjusting the nutrient composition by increasing phosphorus and potassium stimulates proper flower initiation and overall head quality. 

Innovative Pest Control Strategies for Cauliflower in Vertical Aeroponic Towers 

Pests can be a real nuisance when growing Cauliflower in vertical aeroponic towers. These tiny intruders have the potential to wreak havoc on your precious crop if left unchecked. One effective method of pest control in vertical Cauliflower farming is companion planting. For example, Marigolds emit a scent that repels many common garden pests. Planting them near your Cauliflowers can help deter these unwanted visitors. 

Another innovative approach is the use of beneficial insects. Introducing predatory insects like ladybugs or lacewings into your vertical farming system can help control pest populations naturally. These helpful bugs feed on common Cauliflower pests like aphids and caterpillars, reducing their numbers without the need for harmful pesticides. Regular monitoring of your vertical aeroponic towers is also crucial for the early detection of any pest problems. Inspect leaves regularly for signs of damage or infestation and take immediate action if necessary. 

Environmental Benefits of Growing Cauliflower on Aeroponic Vertical Towers 

Vertical aeroponic towers offer numerous environmental benefits in aeroponic Cauliflower. These systems require significantly less space compared to traditional farming methods. By utilizing vertical space efficiently, farmers can grow more Cauliflower in a smaller footprint, allowing for increased food production without encroaching on natural habitats or valuable farmland. Another key advantage is the reduction in water usage. Aeroponics uses a misting system that delivers water and nutrients directly to the plant’s roots, minimizing wastage and evaporation.

This targeted approach ensures that each Cauliflower plant receives optimal hydration while conserving this precious resource. Additionally, vertical aeroponic towers eliminate the need for soil. This eliminates concerns related to soil erosion, contamination from pesticides or herbicides, and depletion of nutrient-rich topsoil. The absence of soil also reduces the risk of disease transmission between plants since pathogens are often present in the soil. 

Optimizing Water Usage for Cauliflower Growth in Vertical Aeroponic Farming 

Water efficiency in Cauliflower aeroponics is crucial for successful Cauliflower growth in vertical aeroponic farming. With this innovative cultivation method, it becomes even more important to ensure that the plants receive adequate hydration without wasting water. One approach to optimizing water usage is through careful monitoring and control of irrigation systems.

In case you missed it: 19 Common Cauliflower Plant Problems: How to Fix Them, Solutions, and Treatment

Freshly Picked Cauliflowers

By using sensors and timers, farmers can precisely regulate the amount and frequency of watering based on the specific needs of Cauliflower plants. This helps prevent overwatering or underwatering, both of which can negatively impact crop health. 

Troubleshooting Common Issues in Aeroponic Cauliflower Vertical Farming 

Cauliflower cultivation in vertical aeroponic towers offers a multitude of benefits, but like any farming method, it is not without its challenges. By troubleshooting vertical Cauliflower farming, you will get a bountiful yield. One potential issue is nutrient deficiency. Since aeroponic systems deliver nutrients directly to the roots, it’s important to ensure a well-balanced nutrient solution.

Monitor your plants closely for signs of yellowing leaves or stunted growth, which may indicate a lack of essential minerals. Adjust your nutrient solution accordingly based on Cauliflower’s specific needs. Another challenge can be maintaining proper pH levels. Cauliflower prefers slightly acidic conditions with a pH range between 6 and 7. Regularly test the pH of your water or nutrient solution and make adjustments if necessary, using pH adjusters such as vinegar or citric acid.

Temperature fluctuations can also impact Cauliflower growth. Extreme temperatures can cause stress and affect overall plant health. Ensure that your vertical farm has adequate ventilation and consider implementing temperature control measures such as fans or misting systems to maintain optimal growing conditions. Inadequate lighting is another common issue in indoor vertical farming setups. Cauliflower requires sufficient light for photosynthesis and healthy development. 

Harvesting and Post-Harvest Care for Cauliflower Grown in Vertical Aeroponic Systems 

Harvesting aeroponic tower Cauliflower is a rewarding experience, but it requires some careful techniques to ensure the best quality produce. To begin, visually inspect each head of Cauliflower to determine if it is ready for harvest. Look for heads that are firm, dense, and have a vibrant white color. Avoid harvesting heads with any discoloration or soft spots, as they may not be at their peak freshness. Cut the head of the Cauliflower using a sharp knife just below the base where it meets the leaves.

Be cautious not to damage neighboring plants during this process. After harvesting, gently clean each head by removing any outer leaves and debris. Rinse them under cool water to remove any remaining dirt or pests. Once cleaned, allow the heads to air dry before storing them. Proper post-harvest care is essential for maintaining the taste and texture of your freshly harvested Cauliflower. Store the heads in a cool environment with high humidity levels – around 0-2°C with 90-95% humidity is ideal. 

In case you missed it: Growing Hydroponic Cauliflower, Planting, and Care

Cauliflower

Conclusion 

Growing Cauliflower in vertical aeroponic towers offers numerous advantages for farmers and the environment alike. With a step-by-step guide to cultivation, advanced techniques for maximizing yield, and valuable insights for beginners, anyone can embark on this exciting journey of vertical farming. 

How to Grow Leeks on Tower Gardens: Step-By-Step Guide for Beginners

0

Tower gardening is a unique and innovative way to grow plants vertically, maximizing space and yield. It involves using a vertical structure, such as a tower garden system, to stack multiple growing levels on top of each other. This allows for efficient use of limited space, making it ideal for urban gardens or small backyard setups.

How to Grow Leeks on Tower Gardens

By maximizing space through vertical gardening techniques like growing Leeks in tower gardens, you can enjoy fresh produce right at your fingertips throughout the year – regardless of whether you have ample outdoor space or not. With beginner’s guide tower garden Leeks, you’ll be enjoying homegrown Leeks in no time. 

How to Grow Leeks on Tower Gardens

A Beginner’s Guide to Cultivating Leeks in Tower Gardens: Step-By-Step Instruction 

Make sure your tower garden is set up in an area that receives at least six hours of sunlight per day. To get started, plant Leek seeds or seedlings about six inches apart in your tower garden. Make sure to leave enough space for them to grow vertically as they mature. Water your Leeks regularly, but be careful not to overwater them. As your Leeks begin to grow, it’s important to provide support by gently tying them together using twine or soft plant ties.

This helps prevent them from bending or falling over as they reach their full height. To encourage healthy growth and maximize yield, consider adding a balanced organic fertilizer every few weeks during the growing season. This will ensure that your Leeks receive all the necessary nutrients for optimal development.

Keep an eye out for any pests or diseases that may affect your Leeks. Common culprits include aphids, slugs, and leaf miners. Utilize organic pest control methods like introducing beneficial insects or using natural sprays if needed. Once your Leek stalks have reached around one inch in diameter (usually after about three months), you can start harvesting by gently pulling them out of the ground one at a time.  

Advanced Techniques for Enhancing Leek Growth in Tower Gardening Systems 

When it comes to growing Leeks in a vertical tower gardening system, there are a few advanced tower garden Leeks growing techniques you can employ to maximize your yield and ensure robust growth. One such technique is companion planting. For example, pairing Leeks with Carrots or Onions helps deter pests and maximizes space utilization. Another technique to enhance Leek’s growth is through proper pruning.

As the Leeks grow taller, it’s essential to trim off any side shoots or flower buds that may develop. This encourages the plant’s energy to focus on bulb development rather than producing seeds. Additionally, using organic fertilizers enriched with phosphorus and potassium can significantly boost Leek growth. To prevent common issues like bolting or splitting, consider providing consistent moisture levels by utilizing drip irrigation systems or self-watering mechanisms within your tower garden setup.  

The Benefits of Growing Leeks on a Tower Garden: Health, Efficiency, and Sustainability 

Growing Leeks on a Tower Garden offers numerous benefits that go beyond just having fresh, homegrown produce. One of the key benefits of tower garden Leeks is that it maximizes space utilization. Tower Gardens are designed to be compact yet efficient, allowing you to grow more plants in a smaller area compared to traditional gardening methods. 

In addition to saving space, Tower Gardens also enhances plant growth by providing optimal conditions for Leek cultivation. The vertical design allows for better airflow and light penetration, which helps prevent diseases and promote healthy plant development. Plus, the automated watering system ensures consistent hydration without any guesswork or manual labor involved. 

Troubleshooting Common Challenges When Growing Leeks in Vertical Tower Gardens 

Leek cultivation in a vertical tower garden can present its fair share of challenges, but with the right knowledge and techniques, you can overcome them and enjoy a bountiful harvest. One common issue that growers face is overcrowding. Leeks need space to grow, so it’s important not to plant too many seedlings close together. Give each Leek enough room to develop properly and receive adequate airflow. 

In case you missed it: How to Start Leeks Gardening for Beginners

Chopped Green Leek Onion

Another challenge is nutrient deficiency. Leeks are heavy feeders, especially when grown vertically. Ensure your tower garden has a balanced nutrient mix, and regularly check for signs of deficiencies such as yellowing leaves or stunted growth. Adjust your nutrient solution accordingly to ensure optimal health and productivity.

Pests can also be problematic when growing Leeks in tower gardens. Aphids, onion flies, and thrips are some common pests that may attack your plants. Implement organic pest control methods like introducing beneficial insects or using neem oil spray to keep these pests at bay. Inadequate watering can lead to uneven growth or even rotting roots in Leeks. Monitor soil moisture levels closely and water consistently without overwatering the plants. 

Innovative Watering and Nutrient Strategies for Healthy Leeks in Tower Gardens 

Watering and providing nutrients to your Leeks in a Tower Garden is crucial for ensuring their healthy growth. Consider implementing a drip irrigation system in your Tower Garden. This method delivers water to the plant’s root zone, minimizing waste and maximizing efficiency. By using a timer, you can ensure consistent watering without any guesswork. In addition to regular watering, it’s important to provide your Leeks with the right balance of nutrients.

One innovative approach is foliar feeding – spraying liquid fertilizer directly onto the leaves. This allows for quick absorption by the plant, boosting its overall health and vitality.
Another strategy worth exploring is hydroponics – growing plants in nutrient-rich water instead of soil. Tower Gardens are well-suited for this technique since they already utilize a vertical design that maximizes space utilization.

Hydroponics not only conserves water but also provides precise control over nutrient levels, resulting in healthier and more productive levels. Furthermore, consider incorporating compost tea into your watering routine. Compost tea is created by steeping organic matter (such as compost or worm castings) in water until beneficial microbes multiply.

When applied to your tower garden, it enriches the soil with nutrients while promoting microbial activity and improving overall soil health. Applying organic mulch around your Leek plants helps maintain moisture levels in the soil while suppressing weeds. It also acts as insulation during temperature fluctuations and adds valuable organic matter back into the growing environment. 

How to Start Growing Leeks on a Tower Garden: Essential Equipment and Setup 

  1. Tower Garden: The heart of your vertical garden, this self-contained system allows you to grow plants without soil. 
  2. Seedlings or Seeds: Choose healthy Leek seedlings or seeds from a reputable source. Start by germinating them in a seed tray before transferring them to your Tower Garden.
  3. Nutrient Solution: Leeks require proper nutrition to thrive, so invest in a high-quality hydroponic nutrient solution specifically formulated for leafy greens.
  4. pH Testing Kit: Regularly monitor the pH level of your nutrient solution using a testing kit, as Leeks prefer slightly acidic conditions between 6-7 pH.

Setting up Leek Tower Garden is easy. Assemble the tower according to the manufacturer’s instructions and ensure all parts are secure. Fill the reservoir with water and add the recommended amount of nutrient solution based on the size of your garden.

Insert net pots into designated holes on each planting port and place young Leek seedlings gently into each pot filled with growing medium. Adjust the height of each planting port as needed throughout growth stages to accommodate increasing root length. Turn on the pump system and set timer intervals based on plant needs (usually 15 minutes every hour). 

From Seed to Harvest: A Comprehensive Timeline for Growing Leeks on Tower Gardens 

When it comes to Leek’s growth timeline in tower gardens, starting with the right seeds is crucial when growing Leeks on your tower garden. Look for varieties that are known to thrive in vertical gardening systems, such as “King Richard” or “Tadorna.” Sowing the seeds indoors about 8-10 weeks before the last frost date. 

Once the seedlings have grown to a height of around 6 inches and developed several leaves, it’s time to transplant them into your tower garden. Make sure each plant is properly spaced and has enough room to grow vertically. As the Leeks continue to grow, regularly check their moisture levels and adjust watering accordingly. Leeks prefer consistently moist soil but can’t tolerate waterlogged conditions.  

Around 2-3 months after transplantation, you’ll start noticing significant growth in your Leeks. At this stage, provide additional support by tying them gently to vertical supports within your tower garden using soft twine or plant clips. Throughout their growth cycle, monitor your Leeks closely for any signs of pests or diseases.

In case you missed it: Growing Leeks from Seed, Roots in Containers

Fresh Leeks

Regularly inspect both leaves and stems for common issues like aphids or fungal infections. Implement organic pest control methods if necessary. When harvested at maturity (around 90-120 days after transplantation), Leeks should be firm yet tender with white bases and green tops. Loosen the soil around each plant before gently pulling them from the ground – being mindful not to damage neighboring plants’ roots. 

Organic Pest Control and Disease Management for Leeks in Tower Gardening 

Pest control and disease management are crucial aspects of successful Leek cultivation in tower gardens. By opting for Organic pest control for tower garden Leeks, you can ensure the health of your plants while minimizing harm to beneficial insects and the environment.
To start, prevention is key. Regularly inspect your tower garden for signs of pests or diseases. Remove any infected or damaged leaves promptly to prevent further spread.

Implementing good hygiene practices, such as cleaning tools and equipment regularly, will also help minimize potential pest problems. One effective method is companion planting. Interplanting Leeks with herbs like Basil or Chives can deter pests naturally due to their strong scents. Additionally, attracting beneficial insects by planting flowers nearby can help keep harmful pests at bay.

If pests do become an issue despite preventive measures, consider using natural remedies such as neem oil or insecticidal soaps that are safe for both humans and the environment. These products target specific pests without harming beneficial insects. Disease management requires careful attention as well. Ensure proper airflow around your tower garden by spacing out plants appropriately and avoiding overcrowding. This helps reduce humidity levels that can contribute to fungal infections. 

Harvesting and Storing Homegrown Leeks from Your Tower Garden: Best Practices and Tips 

Harvesting and storing homegrown Leeks from your Tower Garden is an exciting and rewarding experience. It’s important to know when your Leeks are ready for harvest. Typically, they reach maturity around 90-120 days after planting. Look for thick stems and a height of about 12 inches as indicators that they’re ripe for picking. Gently loosen the soil around the Leek before carefully pulling it out by grasping it near the bottom. 

Once harvested, it’s crucial to handle your Leeks with care. Avoid washing them immediately, as moisture can promote spoilage during storage. Instead, gently brush off any excess dirt or debris using a soft brush or cloth. Trim off any damaged or discolored parts, leaving about an inch of greenery intact.

Now comes the crucial step: proper storage. Leeks prefer cool temperatures between 0-4°C with high humidity levels around 95%. If possible, store them in a refrigerator crisper drawer wrapped loosely in plastic wrap or placed inside perforated plastic bags to maintain moisture levels while allowing airflow. 

In case you missed it: Growing Hydroponic Spring Onions – A Full Guide

Fresh Green Onions

Conclusion 

Growing Leeks vertically on Tower Gardens offers a multitude of benefits, from maximizing space and yield to promoting efficiency and sustainability. By following the step-by-step instructions, you can embark on your journey of cultivating flavorful Leeks at home.

As you gain experience with tower gardening systems, advanced techniques such as enhancing Leek growth and implementing innovative watering strategies will take your harvest to new heights. Troubleshooting tower garden Leeks, allowing for a seamless growing experience. By embracing vertical Leek gardening techniques, you open endless possibilities for creating an abundant supply of fresh Leeks right at home.