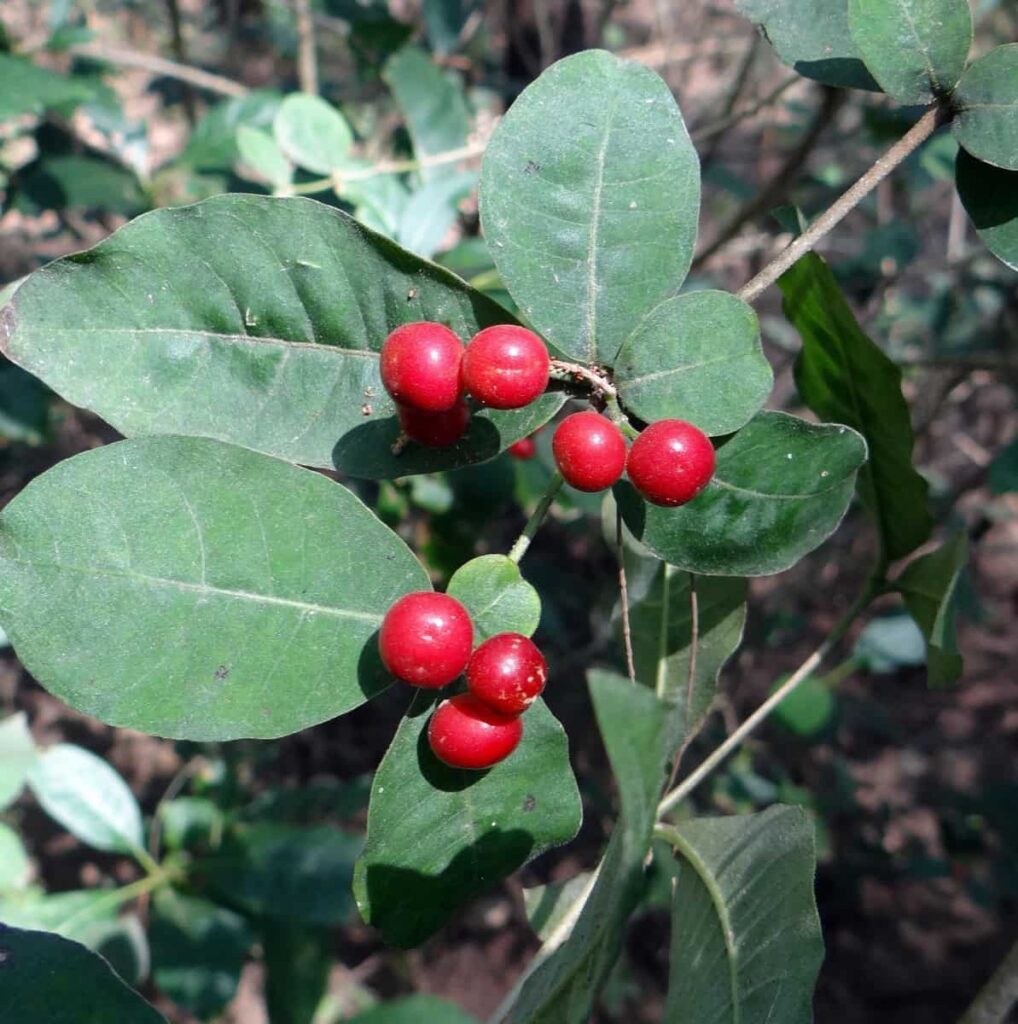
Sarpagandha roots emit a specific aroma but are bitter in taste. Its roots are used to develop various medicines. Medicines from Sarpagandha treat wounds, fever, urinary retention, insomnia, high blood pressure, epilepsy, and insanity. It is a shrub with an average height of 0.3 to 1.6 meters. The leaves are 8 to 15 centimeters long. The flowers are white or rose in color, the fruit is black, and the roots are 0.5 to 3.6 centimeters in diameter. Let’s check out How to grow Sarpagandha for beginners.
Sarpagandha is an important medicinal plant. It is a perennial crop. The Sarpagandha root is one of the main parts used in modern medicine. The root is prominent, tuberous, usually branched, 0.5 to 3.6 centimeters in diameter, and goes 40 to 60 centimeters deep in the soil. Root bark, which forms 40-60% of the entire root, is rich in alkaloids known for their efficacy in reducing high blood pressure and as a sedative or tranquilizing agent. Fresh roots emit a specific pungent aroma and are very bitter in taste. Roots have high alkaloid concentrations.
How to grow Sarpagandha for beginners
Varieties of Sarpagandha
RS1– This variety has 50-60% seed viability and produces ten quintals of dry roots per acre.
Sowing Time of Sarpagandha
If propagated by seeds, cultivation is done in April-June. If the propagation is done through stem cuttings, it is cultivated in June, and if cultivated by root cutting, it is cultivated in March-June. If propagated by root stump, cultivation is done in May-July.
Climate suitable for growing Sarpagandha
It grows in various climatic conditions but thrives well under warm, humid tropical climates in open or partial shade. This species is suitable for a temperature of 10-38°C and annual rainfall of 2500 millimeters. Good yields are achieved in areas that are less affected by frost and have less severe winters. In its natural habitat, the plant thrives in the shade of forest trees or at the edge of forests where three sides are protected from very intense light.
In case you missed it: When to Apply Organic Pesticides in Your Garden: Best Time, Safety Tips, and Precautions for Beginners
Water requirement for growing Sarpagandha
Irrigation should be given at regular intervals. The crop can be irrigated fifteen days during hot, dry weather and once a month during winter. Irrigation is not required when it rains. Don’t let the soil lack moisture. The production also decreases due to a lack of moisture. Herbicide control is very important for healthy plants and higher yields. Sarpagandha, if grown in areas that receive 1500 millimeters or more rainfall, is well distributed in the growing season; it can be grown in tropical conditions as a rain-fed crop.
Soil requirement for growing Sarpagandha
Due to its hardy nature, it is grown in various soil varieties ranging from red lateritic loamy soil to sandy alluvial loamy soil. This results best when grown under soil rich in humus and nitrogenous substances containing organic matter and a good drainage system. It can tolerate moderate clayey soil and loamy clay soil.
It grows best when the soil pH is from 4.6 to 6.5. The plant requires slight acidity to neutral soil for good growth with medium to deep, well-drained fertile soil. Soils rich in organic materials and silt loams are suitable for commercial cultivation. The land is plowed deep in May. After pre-monsoon showers, the farmyard manure is added, followed by a second plowing and two cross harrowing to break the clods.
In case you missed it: India Herb Planting Calendar: Month-wise Growing Chart, Schedule Guide, and Season Dates

Propagation of Sarpagandha
From seed
To protect the crop from fungal diseases such as damping off diseases, you should soak the seeds in water for 24 hours. Then treat the seedlings by dipping them in a fungicide solution Thiram 2 to 3 grams per kg seed. Use seeds for planting after chemical treatment. You should collect the ripe seeds from the beginning of June to the end of October to maintain efficacy for six months. You should sow seeds in raised beds at a depth of 1centimeters in the nursery in lines 10 centimeters apart with a 5 centimeters distance from seed to seed.
The seeds germinate within three weeks. Seeds are exposed to alternate temperatures at 25°C (16h) and 35°C (8h) with sufficient soil moisture for 55–65% better germination. About 5 to 7 kg of seeds are required for sowing in one hectare of land. Fresh seeds are preferred for sowing as their viability lasts only six months.
It has been observed that it is difficult to germinate seeds stored for more than a year. The seeds are treated with Thiram after soaking them in water for 24 hours and sown 1 to 2 centimeters deep from the end of April to May. Then covered with a mixture of farmyard manure and soil and irrigated daily. Germination rates vary from 10-50%.
In case you missed it: How to Grow Peach From Seed to Harvest: Check How this Guide Helps Beginners

From cutting
Root cutting
Stems and root cuttings can also propagate it. Root cuttings are 30 to 50 millimeters long and no more than 125 millimeters in diameter, planted in June-July. Large tap roots and lateral secondary rootlets are employed to prepare 2.5 to 3.0 centimeters cuttings. Planting is done in 5 centimeters deep holes at the advent of monsoon and is covered with a 2.5 to 5.0 centimeters upper layer of soil. The cutting sprouts within three weeks if good humidity is maintained during this period. The success rate is 50-80%, and about 100 kg of root cuttings are required to plant a hectare area.
Stem cutting
150 to 200 millimeters long stem cuttings with 3 to 4 nodes are planted in June and remain moist until they sprout. The success rate achieved in stem cutting is about 65%.
Root stumps
In the case of root stumps, about 50 millimeters of roots with a portion of the stem above the collar are planted in irrigated fields in May-June. Although about 90-95% success is achieved in this method, only one plant can be grown from a single stump.
Transplanting Sarpagandha
The seedlings are grown in the nursery for 40 to 50 days. They have 4 to 6 leaves 100 to 120 millimeters long. The seedlings are carefully dug, and the root of the tap root is cut. It takes a long period (after 18 months), as Sarpagandha has a slow-growing crop, especially in the early stages. Use 30 × 30 centimeters spacing depending on the plant’s growth habit. About 80,000 to 1,00,000 seedlings are needed per hectare as a single crop.
Sarpagandha plants care
Weed control
You should do weeding followed by hoeing to keep the field weed free. In the first year, two weedings are done; in the next, i.e., the second year, one weed is followed by one hoeing done in the growing period of the plant. Flowers should be plucked to enhance root growth if flowering begins in the early period. Sarpagandha’s field should be kept relatively weed-free in the early stages of growth.
Fertilizer requirement for growing Sarpagandha
25 to 30 tons of organic manure per hectare is recommended. A basal dose of 20 kg nitrogen, 30 kg phosphorus, and 30 kg potash is applied per hectare, and two top dressings of 20 kg annually can be applied during the growing season.
In case you missed it: 14 Best Compost Bins for Home in India: For Indoor, Outdoor, and Kitchen Garden
Pest and diseases of Sarpagandha and their control
Cockhafer grubs
The symptom is a seedling attack and then dries out. Phorate granules mixed well with soil are used when preparing the land for pest control.
Leaf spot
The symptoms are brown spots on the upper and lower surface of the leaves. The leave first turns yellow, then dries up, and then falls. To control the disease, mixing 400 grams of Dithane in 150 liters of water per acre is given monthly until November.
Root-knot nematode
Symptoms are stunted growth, and leaf size decreased. Using carbofuran of 10kg per acre or Phorate granules of 5kg per acre will help overcome them.
Alternaria tenuis
Symptoms are dark brown leaf spots. To control diseases, spray with blitox 30 grams in 10 liters of water.
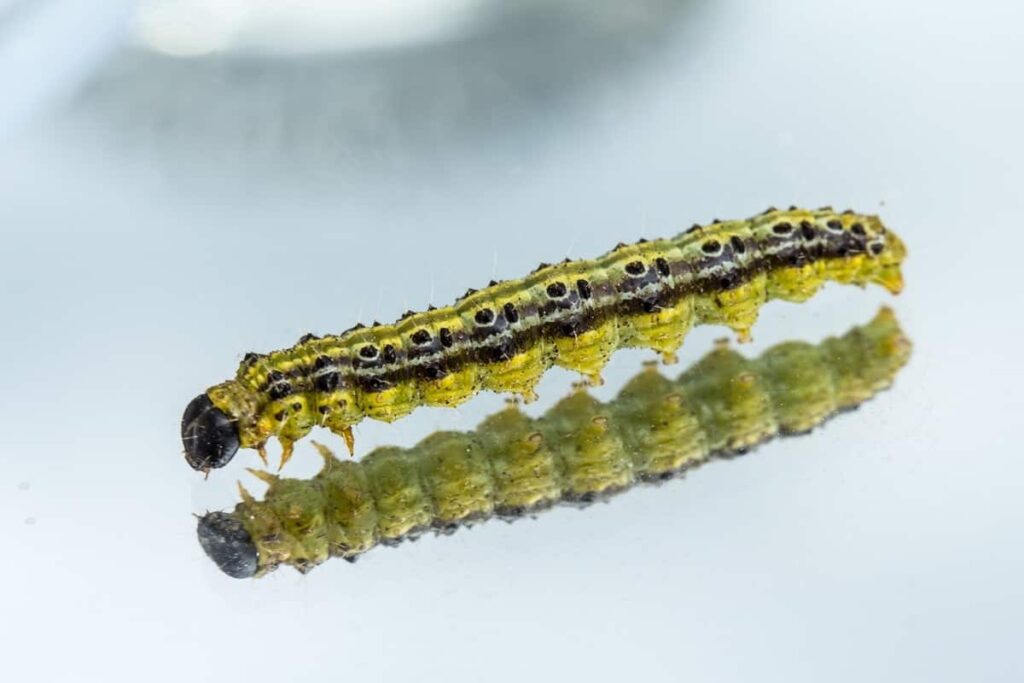
Pyralid caterpillar
The symptoms are rolling of leaves and defoliation of leaves. It feeds leaves resulting in damage to the leaves. Spraying of 0.2% rogor is used to control pests.
In case you missed it: When to Apply Organic Pesticides in Your Garden: Best Time, Safety Tips, and Precautions for Beginners
Sarpagandha harvesting
Marketable roots are usually collected, preferably 2-3 years after planting. When transplantation is carried out during June-July, the harvest period coincides with the shedding of leaves during early autumn. At this stage, the root contains the maximum concentration of total alkaloids. The roots can be up to 40 centimeters deep in the soil during harvesting. Thin roots are also collected during root harvesting. Care should be taken to maintain the root.
Yield of Sarpagandha
Although Sarpagandha can be propagated in different ways, the maximum production of the root is achieved when propagation is done by seeds that vary from 0.1 to 0.4 kg per plant. The average yield of Sarpagandha dry root is about 2000 to 2500 kg per hectare under average management when harvested at 30 months.
Conclusion
Sarpagandha, also known as the Indian Snakeroot, is an important medicinal plant found in the foothills of the Himalayas. Sarpagandha is an essential raw medicine used in making contemporary and Ayurvedic medicines. Its roots have a distinct aroma but are bitter in taste, and the roots are used to make a variety of medicines. The demand for Sarpagandha has also increased due to the demand for Ayurvedic and herbal medicines.
- How to Grow Tomatoes Organically at Home: A Comprehensive Guide
- Organic Gardening on a Budget: Low-Cost Methods and Materials
- Gongura Seed Germination and Planting Methods
- Cabbage Seed Germination and Selection
- Broccoli Seed Germination and Selection
- Asparagus Seed Germination and Variety Selection
- Seasonal Flower Gardening: Best Practices for Spring, Summer, Fall, and Winter
- How to Grow Hibiscus from Flower
- Plantation Ideas for Home Decoration: A Beginners Guide
- Flower Garden Designs and Layouts for Beginners
- Planting and Spacing Techniques in Papaya: A Beginner’s Guide
- Growing Gold: Essential Techniques for Planting Pineapples
- How to Make Kalanchoe Plant Bushy: Home Remedies and Solutions
- 11 Reasons Why Your Gardenia is Not Blooming: Home Remedies and Solutions
- Eco Elegance: The Guide to Designing a Drought-Tolerant Landscape
- Gardening on a Slope: Strategies for Hillside Landscaping
- Nourish and Flourish: Top Organic Mulches for Thriving House Plants
- Everything You Want to Know about Indian Mogra Flower: Discover Uses and Growing
- Green Thumb Success: Expert Tips for Cultivating Greenhouse Pumpkins All Year Round
- Maximize Growth & Flavor: The Ultimate Guide to Companion Planting in Herb Gardens
- How to Control Rhododendron Problems Naturally: Home Remedies and Organic Ways to Fix Them
- Natural Magic: The Remarkable Benefits of Cinnamon for Plants
- Best Steps to Revive Dying Tulip with Natural and Organic Treatment
- 10 Reasons Why Your Angel Trumpet is Not Blooming: Remedies and Treatment
- How to Fix Periwinkle Leaf and Flower-Related Problems: Natural Remedies and Solutions
- How to Fix Zinnias Leaf and Flower Problems: Discover Natural and Home Remedies
- Organic Steps to Induce Lemon Tree Flowers: A Comprehensive Guide
- Bloom Booster: Crafting the Perfect Homemade Bougainvillea Fertilizer
- Optimizing Growth: A Guide to Applying NPK Fertilizer for Potted Plants
- 10 Best Homemade Fertilizers for Rubber Plant: DIY Recipes and Application Method
- How to Boost Female Pumpkin Flowers: Effective Steps for More Flowers and High Yields
- Transform Your Indoor Garden: Top Benefits of Pink Salt for Houseplants
- 10 Best Homemade Fertilizers for Peacock Plants (Calathea): Easy DIY Guide
- Unlock Blooms: 9 Reasons Why Your Potted Chrysanthemum is Not Blooming
- 8 Reasons Why Your Potted Hibiscus is Not Blooming: Fix it with Simple Solutions
- Unlock Blooms: 9 Key Reasons Your Potted Frangipani Won’t Flower
