Orchids are beautiful and delicate plants that require proper care to thrive. One of the most common issues that Orchid owners face is root rot. Root rot is a common problem affecting many plants, but it’s particularly devastating for Orchids due to their unique growth habits. However, fixing Orchid root rot is relatively easy with the right tools and knowledge. With the right knowledge and techniques, you can easily fix root rot in your precious Orchid plants and keep them flourishing for years.

How to Fix Root Rot in Orchid Plants
Signs of Orchid Root Rot
Orchids are beautiful and exotic plants requiring specific care to thrive, including proper watering and drainage. But sometimes, even with the best intentions, Orchid owners may encounter a problem known as root rot. This condition occurs when an Orchid’s roots infect with fungus or bacteria due to overwatering or poor drainage. One of the first signs of root rot in an Orchid is discoloration or blackening of the roots. Healthy roots are firm and white or greenish.
Another indication is a foul odor emanating from the potting mix—this smell comes from decaying organic matter caused by excess moisture. Orchids suffering from root rot also tend to have yellowing leaves that drop prematurely since damaged roots can’t properly absorb the water and nutrients needed for healthy growth. Over time, an affected plant will look wilted and sickly rather than vibrant and robust. If you suspect your Orchid might have root rot, it’s crucial to act quickly before it spreads further throughout the plant.
Causes of Root Rot
Root rot affects the plant’s roots and can lead to their death if left untreated. There are several causes of root rot in Orchids, including overwatering, poor drainage, and inadequate air circulation. Overwatering is one of the main causes of root rot. When an Orchid receives too much water, it can cause its roots to become waterlogged, leading to the growth of harmful fungi that attack the roots. Poor drainage also contributes to this problem since standing water prevents oxygen from reaching the roots.
In case you missed it: How to Propagate Orchids Easily at Home: A Step-By-Step Guide

Inadequate air circulation can also cause root rot in Orchids, creating a damp environment where fungi thrive. This issue often occurs in enclosed spaces such as greenhouses or closed terrariums. Another factor contributing to root rot is using contaminated or reusing old potting mix without sterilizing it first. These practices introduce harmful pathogens into your plants’ environment and compromise their health.
How to Fix Orchid Root Rot?
Before Pruning Water Thoroughly
Before pruning an Orchid plant affected by root rot, it is crucial to water the plant thoroughly. This helps ensure the roots are hydrated and plump before cutting them. Cutting dry or dehydrated roots can lead to further damage and shock for the plant. Therefore, watering beforehand is essential in maintaining a healthy recovery process for your Orchid. One way of doing this is by submerging your pot in room temperature water for around 20-30 minutes until bubbles stop appearing from the potting mix’s surface.
Another method is showering your Orchid under running lukewarm water until all parts of the root system have been sufficiently hydrated. Adding more moisture into a situation with too much may seem counterintuitive. Still, adequate hydration will help prevent dehydration during pruning, which can cause stress on a recovering Orchid with damaged roots.
Remove the Orchid From its Pot
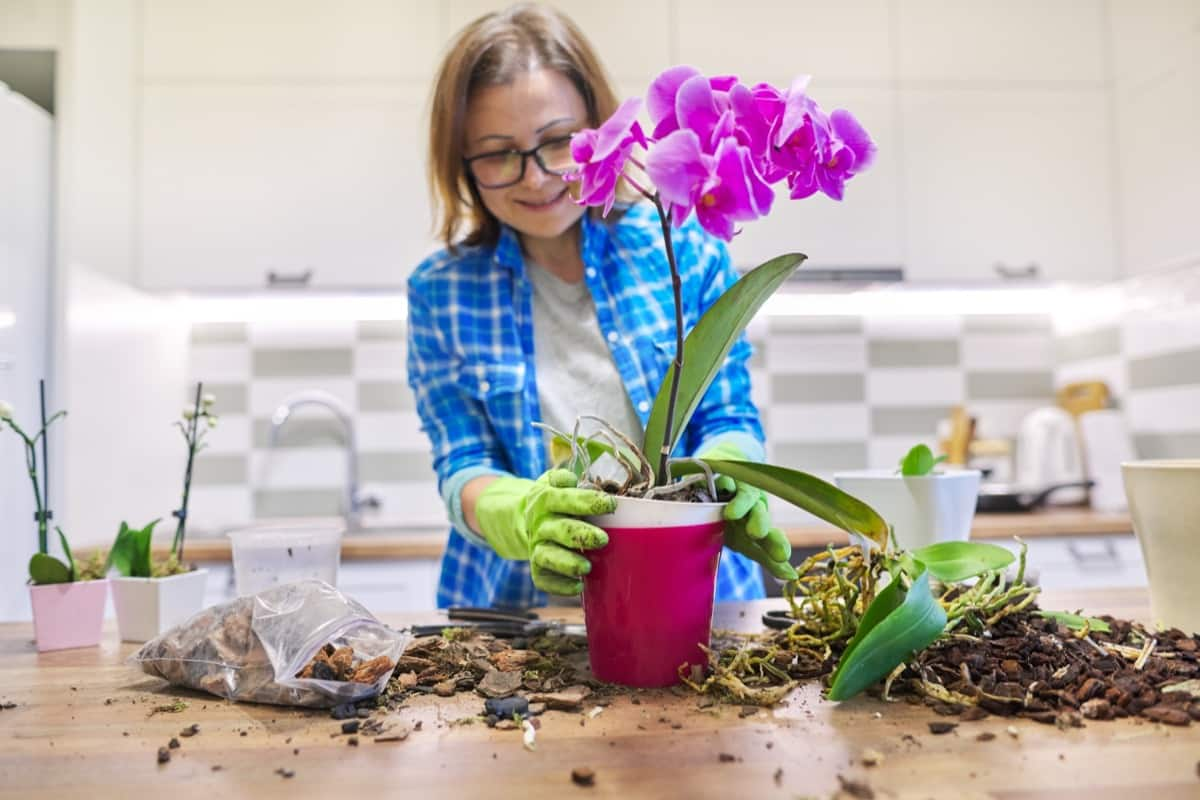
To fix Orchid root rot, removing the plant from its pot is crucial. Before doing so, water your plant thoroughly. This will make it easier to loosen the roots and reduce the risk of further damage. Carefully turn the pot on its side and gently tap around the edges to loosen any soil that may be stuck inside. If necessary, use a clean knife or scissors to cut away any stubborn roots that are causing resistance.
Remove Excess Planting Material
When fixing Orchid root rot, removing excess planting material is a crucial step. This can include old potting mix, dead roots, and debris that may have accumulated over time. Removing this material will help prevent the spread of disease and allow for better airflow and drainage around the plant’s roots. To start, gently remove your Orchid from its pot and brush away any loose soil or debris. You want to be careful not to damage any healthy roots while doing this. These should be pruned off if you notice any mushy or discolored roots.
Prune Damaged Roots
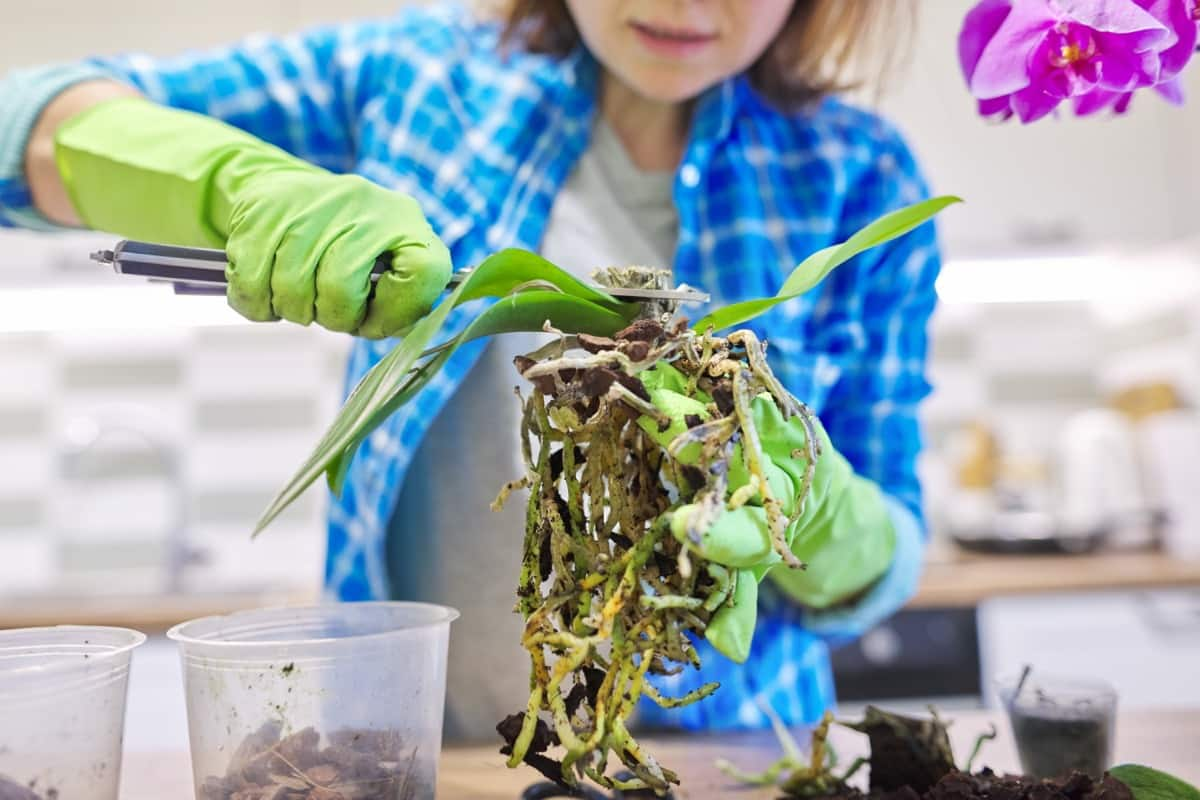
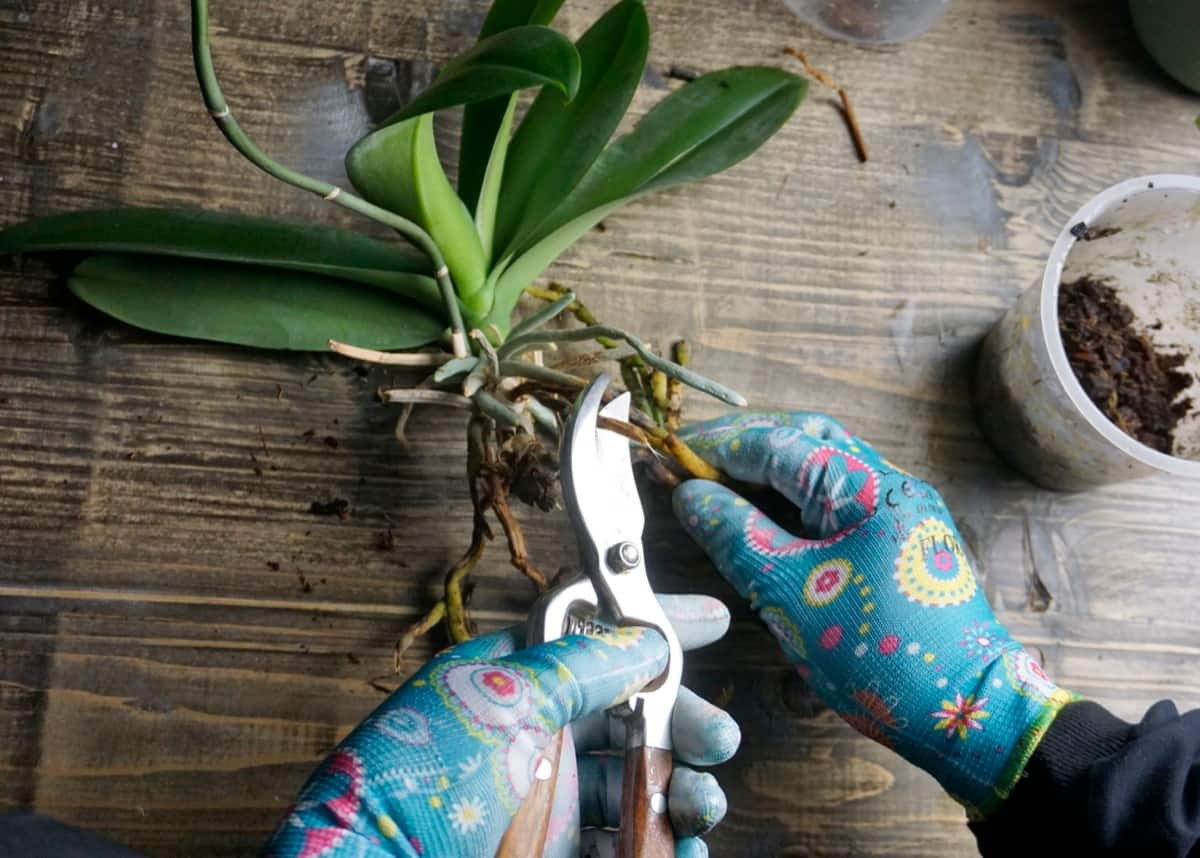
When pruning the damaged roots of an Orchid plant, it is important to have sharp and sterile tools on hand. This will make the process easier and prevent any further damage or infection to the plant. Start by identifying which roots are damaged or dead. They may be discolored, withered, or mushy to the touch. Carefully cut away any damaged roots at their base using a clean pair of scissors or shears.
In case you missed it: How and When to Prune Your Orchids

Be sure not to cut into healthy roots, which could cause more harm than good. If you notice very few healthy roots remaining after pruning, don’t worry. This is normal during root rot recovery; new healthy roots will eventually grow. After pruning, giving your Orchid some time to recover before repotting is important. Consider placing it in a shaded area with proper ventilation until its wounds heal.
Spray the Roots with Fungicide
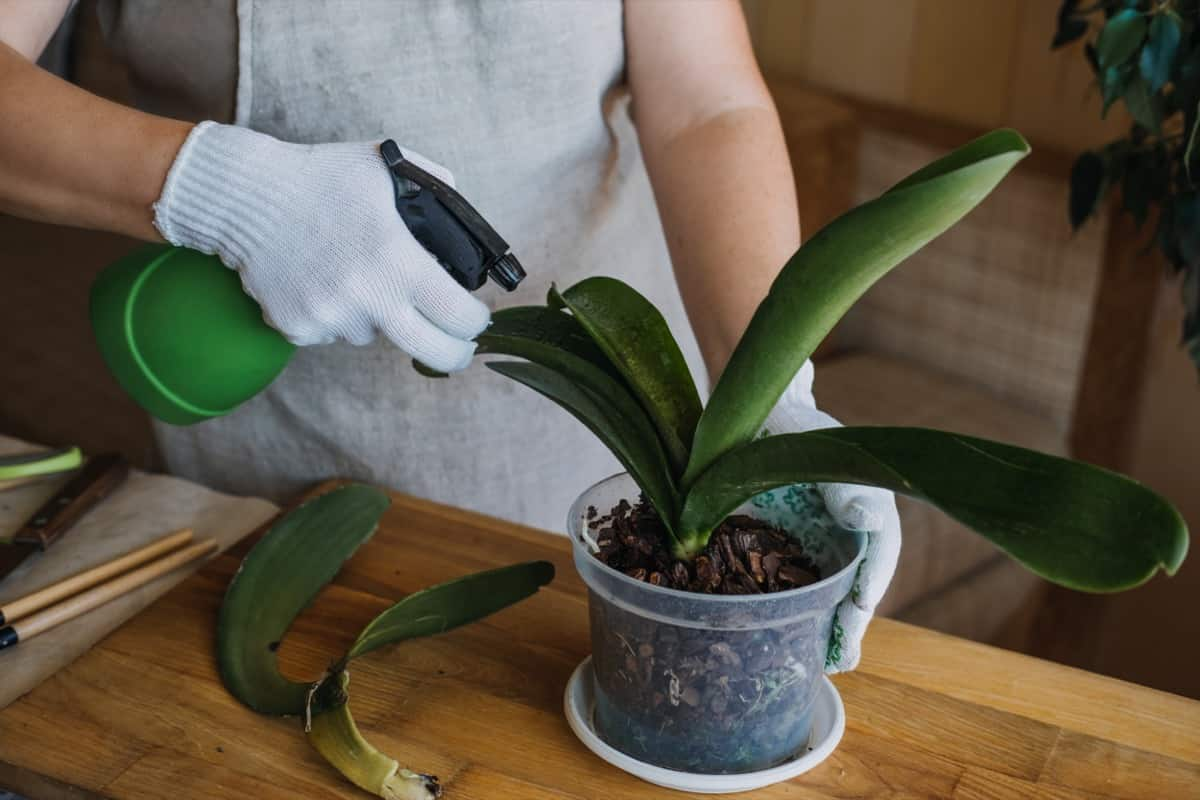
Once you have removed the excess planting material and pruned any damaged roots, it’s time to give your Orchid a good dose of fungicide. This is essential in combating root rot and preventing it from spreading further. Fungicides work by killing off any harmful fungi that may be present in the soil or on the roots of your Orchid. Many different types of fungicides are available, so make sure you choose one specifically designed for use on Orchids.To apply the fungicide, spray it directly onto the roots of your Orchid.
Make sure to cover all areas thoroughly, including both healthy and damaged roots. After applying the fungicide, allow your Orchid to dry out completely before repotting it with fresh material. This will help ensure that any remaining traces of fungus are eliminated. Always follow the manufacturer’s instructions when using chemical treatments on your plants. You can save your beloved Orchids from root rot and keep them thriving for years with proper care and attention.
Repot with Fresh Material
Repotting an Orchid with fresh material is crucial in fixing root rot. Once you have pruned the damaged roots and sprayed the remaining ones with fungicide, it’s time to refill your pot with a brand-new planting medium. Choose a pot larger than the current one – this will allow for growth and prevent overcrowding. A clear plastic pot can also help you monitor root development.
Next, add a layer of fresh bark or sphagnum moss to the bottom of your chosen container. This will provide proper drainage while retaining moisture for healthy root growth. Gently place your Orchid back into its new home and fill any gaps around the edges with more fresh planting material. Be sure not to pack it too tightly, as this can limit airflow and cause further damage to already weakened roots.
In case you missed it: Easy to Grow Orchid Plants for Beginners: Soil, Propagation, Planting, and Care

Allow the Orchid to Recover
After successfully repotting your Orchid and pruning away the damaged roots, it’s important to give the plant time to recover. Don’t water your Orchid for a few days after repotting. This will allow any wounds on the roots to dry out and prevent further damage or infection from moisture. After that period has passed, begin watering your Orchid sparingly until you see new growth emerging.
Placing your newly potted Orchid in an area with bright but indirect sunlight is also a good idea. You want to avoid exposing it to direct sunlight immediately, which can cause stress and further damage. During this recovery period, watch your plant for signs of distress, such as wilted leaves or stunted growth. If you notice anything concerning, adjust its environment by moving it closer or farther from light sources or increasing/decreasing humidity levels accordingly.
Orchid Care After Repotting
Orchids are beautiful and delicate plants that require proper care to thrive. It’s important to understand that Orchids prefer a well-draining potting mix, as their roots can easily become waterlogged. When repotting an Orchid, using the right type of soil is essential. Orchid-specific mixes are available at garden centers, which provide good drainage while retaining moisture. Another factor contributing to root rot after repotting is the type of pot used.
Clay pots can benefit Orchids since they allow air circulation around the roots. It’s best to avoid plastic pots with no drainage holes and glass containers altogether because they can trap excess moisture leading to root rot. During the initial stages of post-repotting, placing your Orchid in direct sunlight or too close to other plants may cause stress on its fragile roots and deteriorate them, further worsening the condition of your plant. Therefore, always be mindful of where you place your newly potted Orchid plant.
In case you missed it: Orchid Gardening For Beginners – How To Start, FAQs

How to Prevent Root Rot in Orchids?
Orchids are beautiful flowers that require care and attention to keep them healthy. One of the most common problems Orchid growers’ faces is root rot, which can be fatal if not addressed promptly. Fortunately, you can take some simple steps to prevent this problem from occurring in the first place. It’s essential to choose the right potting mix for your Orchids. Orchids need a well-draining growing medium that allows air to circulate freely around their roots. Avoid using soil-based mixes as they tend to hold onto moisture and promote fungal growth.
Ensure that your Orchids aren’t overwatered or underwatered. Overwatering causes root rot as excess water leads to anaerobic conditions in the substrate where fungi thrive. To avoid this problem, let the top inch of the potting mix dry slightly before watering again. Make sure that your Orchids receive adequate light and ventilation.
Poor lighting and stagnant air can contribute to high humidity levels around your plants’ roots, leading them susceptible to fungal infections. Keep an eye on any signs of stress in your plants, like yellow leaves or stunted growth, indicating potential issues with rooting systems early on before it becomes more severe, avoiding any future plant loss due to root rots. These simple tips for preventing root rot in Orchids will help you maintain healthy blooms year-round.
In case you missed it: How to Identify and Treat Black Spots on Rose Leaves: Preventative and Damage Control Methods

Conclusion
Root rot is a common problem affecting Orchid plants’ health and growth. It can be caused by various factors such as overwatering, poor drainage, or using contaminated soil. However, it’s possible to fix root rot in an Orchid plant with proper care and attention to detail. Remember to always inspect the roots of your Orchids regularly for signs of root rot and take immediate action if you notice any symptoms. With these tips on fixing root rot in Orchid plants, you can ensure that your precious blooms stay beautiful and healthy all year round.
- How to Grow Hibiscus from Flower
- Plantation Ideas for Home Decoration: A Beginners Guide
- Flower Garden Designs and Layouts for Beginners
- Planting and Spacing Techniques in Papaya: A Beginner’s Guide
- Growing Gold: Essential Techniques for Planting Pineapples
- How to Make Kalanchoe Plant Bushy: Home Remedies and Solutions
- 11 Reasons Why Your Gardenia is Not Blooming: Home Remedies and Solutions
- Eco Elegance: The Guide to Designing a Drought-Tolerant Landscape
- Gardening on a Slope: Strategies for Hillside Landscaping
- Nourish and Flourish: Top Organic Mulches for Thriving House Plants
- Everything You Want to Know about Indian Mogra Flower: Discover Uses and Growing
- Green Thumb Success: Expert Tips for Cultivating Greenhouse Pumpkins All Year Round
- Maximize Growth & Flavor: The Ultimate Guide to Companion Planting in Herb Gardens
- How to Control Rhododendron Problems Naturally: Home Remedies and Organic Ways to Fix Them
- Natural Magic: The Remarkable Benefits of Cinnamon for Plants
- Best Steps to Revive Dying Tulip with Natural and Organic Treatment
- 10 Reasons Why Your Angel Trumpet is Not Blooming: Remedies and Treatment
- How to Fix Periwinkle Leaf and Flower-Related Problems: Natural Remedies and Solutions
- How to Fix Zinnias Leaf and Flower Problems: Discover Natural and Home Remedies
- Organic Steps to Induce Lemon Tree Flowers: A Comprehensive Guide
- Bloom Booster: Crafting the Perfect Homemade Bougainvillea Fertilizer
- Optimizing Growth: A Guide to Applying NPK Fertilizer for Potted Plants
- 10 Best Homemade Fertilizers for Rubber Plant: DIY Recipes and Application Method
- How to Boost Female Pumpkin Flowers: Effective Steps for More Flowers and High Yields
- Transform Your Indoor Garden: Top Benefits of Pink Salt for Houseplants
- 10 Best Homemade Fertilizers for Peacock Plants (Calathea): Easy DIY Guide
- Unlock Blooms: 9 Reasons Why Your Potted Chrysanthemum is Not Blooming
- 8 Reasons Why Your Potted Hibiscus is Not Blooming: Fix it with Simple Solutions
- Unlock Blooms: 9 Key Reasons Your Potted Frangipani Won’t Flower
- 10 Reasons Why Is My Ice Plant Not Blooming: Remedies and Treatment
- 10 Reasons Why My Potted Hydrangea Not Blooming: Treatment and Remedies
- 10 Reasons Why is My Wisteria Not Blooming: Remedies and Treatment
- 10 Reasons Why is My Goldfish Plant Not Blooming: Remedies and Treatment
- Maximize Your Space: Ultimate Guide to Balcony Gardening with Grow Bags
- 10 Reasons Why Your Iris is Not Blooming: Remedies and Treatment
- 10 Reasons Why Your Anthurium Plant is Not Blooming: Treatment and Remedies