You can start a backyard garden in many ways; not all are quick, efficient, or cost-effective. Beginner food gardeners who want to get up and running in their backyards as soon as possible need to discover a technique that fits their budget. They require the least amount of expertise and yield results immediately. Food gardening is becoming more popular. People are interested in the quality of the food they eat. Still, if you don’t start your garden off on the proper foot, it will be a useless attempt that will be beset by weeds, require more effort, and provide unsatisfactory results.
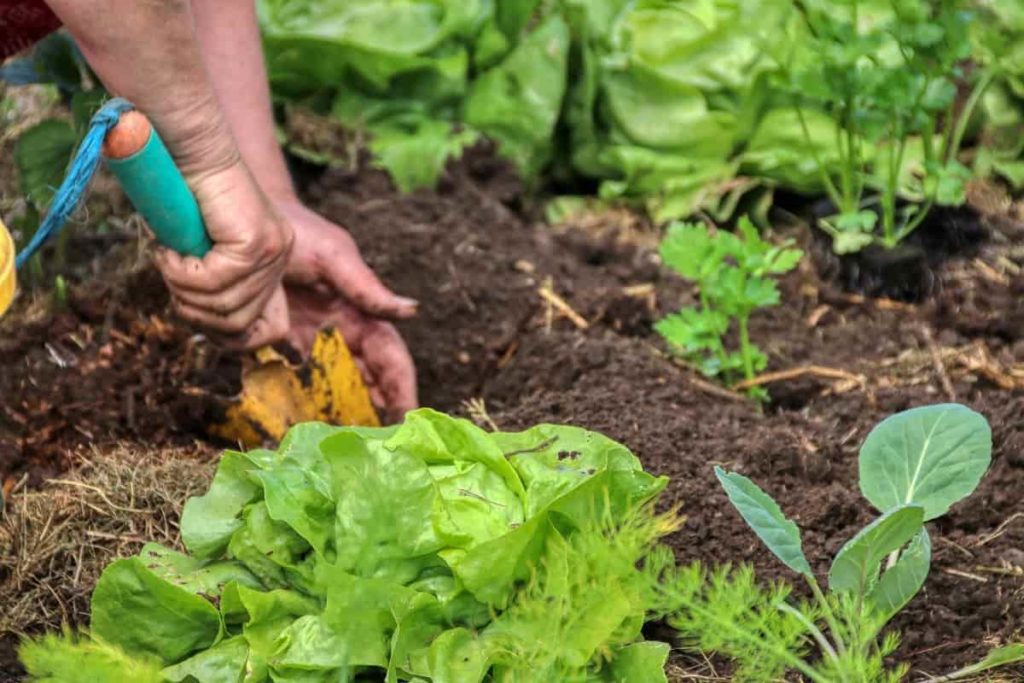
The following paragraphs will provide detailed instructions on growing a garden in your backyard. This approach does not demand a significant financial commitment or construction abilities; nevertheless, it involves some physical labor in addition to a tiny budget. Below we will learn about Tampa backyard gardening, the climate and USDA hardiness zones of Tampa when to start planting in Tampa, the best vegetables, fruits, flowers, and herbs to grow in the backyards of Tampa, and a step-by-step guide to growing plants in the backyards of Tampa.
About the climate and USDA hardiness zones of Tampa
Knowing which plants thrive best in Florida’s many climate zones is important for a gardener. Using the following map of Florida planting zones, you can determine which one applies to your house and which does not. According to the USDA, the city of Tampa can be found in both the Hardiness Zone 9b and the Hardiness Zone 10a.
Due to its position between Tampa Bay and the Gulf of Mexico, the Tampa Bay area is a humid subtropical climate, although it also has certain tropical characteristics. Salt-tolerant plants are significant considerations for gardeners who live near the bay. According to the USDA, Tampa, Florida, is situated in hardiness zones 9b and 10a. As a result of its subtropical climate, Tampa has warm winters and humid summers punctuated by frequent thunderstorms.
Tampa Bay is an inland bay situated in western Florida. Clearwater and St. Petersburg are part of the metropolitan region. Located to the south of Sarasota and Bradenton are the cities of Venice and St. Petersburg. For the coldest month (January), it is 16.7 °C (62 °F), while the hottest month is 28.9 °C (84 °F), the average monthly temperature. These are the typical daytime temperatures.
December through February is a pleasant and sunny time of year. It rains very seldom, but when it does, it may be quite a lot of rain, depending on the year. The temperature rises to or above 25 degrees Celsius (77 degrees Fahrenheit). Temperatures begin to plummet as soon as the sun sets, and fog can gather in the outermost reaches of the city. Additionally, brief cold snaps with zero or below zero degrees Celsius have been known to occur.
Temperature records go back to December 1983, when the mercury fell to an all-time low of -7 °C (19.5 °F). In Tampa, snowfall is almost unheard of. June to September are the hottest months when the air is thick and oppressive. The heat is unbearable due to the high levels of humidity. More than 40 degrees Fahrenheit (104 degrees Celsius) is possible when humidity and temperature are combined.
35/36°C is the average high temperature during the year’s warmest days. It has been measured at 37 °C (98.5 °F) on many occasions. Even when the sun is shining, the sky might be cloudy, leading to thunderstorms. While it doesn’t rain all the time throughout the summer, thunderstorms do break often. Hail and strong winds are also possible. Hurricanes and other tropical storms have the potential to make landfall in the Tampa area between the end of summer and the beginning of fall.
Tropical cyclone activity typically peaks in August through October, while the season officially stretches from June through November. The city has been struck many times over the previous few decades; nevertheless, these strikes have not resulted in significant damage. Because it faces west rather than east, Tampa is out of the direct path of most storms, yet it is still a danger because of its location along the coast.
Tampa backyard gardening: Step-by-step guide to starting a backyard garden in Tampa
Choose the ideal location in your backyard
How to choose the best spot for a backyard garden? It’s just as vital to choose the right spot for your garden as to pick the right plants to grow there. Plants need direct sunshine, healthy soil, and sufficient drainage to thrive. They will also be less likely to catch a disease if the location is properly ventilated. It is important to arrange the garden such that it is easy to grow, maintain, and harvest. Insects and animals can invade a garden, so keep it safe.
There aren’t many of us who are blessed with the perfect location for a garden. With dahlias in bloom, you can discover that the ideal spot for your sweet corn is along the back fence. Chard or beets can be grown along the sidewalk entryway, which receives the most sunlight. Gardeners who think beyond the box can identify locations that suit their plants’ requirements. To begin, choose a location that gets a lot of sunshine.
At the very least, search for a spot that isn’t shrouded in trees. All plants need at least six hours in direct sunlight each day. Early spring warmth, loamy soil that allows roots to breathe, long-term water retention, and the ability to produce a healthy crop of weeds are all characteristics of excellent gardening soil. Drainage and early warming go hand in hand. Early-season veggies have difficulty growing in soggy soil late in the spring.
Using raised beds or adding drainage is good if your soil is heavy and moist even after the rain has ceased. Raised beds will not only drain better but also begin to warm up sooner than their lower counterparts. Natural growth in your garden can provide insight into the soil’s overall fertility. The soil will be better for producing veggies if healthier weeds or grasses are growing on the spot.
It’s a good idea to situate your garden away from huge trees and bushes. Your plants will be depleted of nutrients and water by the roots of neighboring woody plants. It’s best not to put the garden in an area with little or no airflow. Natural breezes assist in preventing diseases from spreading to the foliage.
In case you missed it: Phoenix Backyard Gardening: How to Start with Vegetables, Fruits, Flowers, and Herbs at Home in Arizona
Tomato blight, squash mildew, and green bean mold thrive in the warm, stagnant air that encourages them. Your garden should be situated in a location that is simple to maintain. The act of watering becomes a hassle if you have to carry a 50-foot hose around with you. Gardening passion can rapidly fade if watering is time-consuming.
Prepare the soil in your backyard
How to prepare the soil in your backyard? You may want to enrich your garden’s soil if it needs it. Adding organic matter to sandy soils enhances their ability to retain nutrients and water. When organic materials are worked into clay soil, drainage and aeration are improved, and the soil can dry out and warm up in the spring more rapidly.
Wood byproducts like sawdust, peat moss, cured manure, bark mulch, grass or wheat straw, and compost are good organic amendments for garden soils. An example of an inorganic amendment is sand or pumice, all types of perlite and vermiculite. The humus that results from the reduction of the decomposed matter is an excellent soil additive. For example, if the manure has been adequately composted to eliminate weed seeds, it is a great soil addition.
Unfortunately, many manures have common uncomposted bedding components like sawdust, wood chips, and straw. Because of their low nitrogen level and high carbon content, these organic materials will stunt plant development unless you supplement them with additional nitrogen. Carbon-rich additions encourage soil microorganisms to use free nitrate nitrogen to create their tissues. As a result, plants will have less nitrogen accessible until the carbon-rich organic matter in the soil decomposes.
It would take years for organic matter with a high carbon content to be broken down by the nitrogen naturally present in cow or horse dung. Your garden should be fertilized with ammonium nitrate, or 10 pounds of ammonium sulfate for every inch of organic matter put over a 1,000-square-foot area. Peat moss is the optimum amendment for raised beds or tiny gardens because of its high humus content.
The downside is that it might be prohibitively costly for big gardens to implement. Humus is not present in or produced by inorganic additions like perlite, sand, or vermiculite. Inorganics act as wedges between soil particles to increase soil aeration and porosity. As a result, finer silt or clay soils get compacted when sand is present. To boost the amending characteristics of the sand, combine it with an organic amendment like peat moss or sawdust in a mixing container.
Work any amendments into the soil as deeply as possible to avoid soil clotting. Soil microorganisms start turning organic matter into humus when organic additions are tilled into gardens in the autumn. The amendments will be properly incorporated into the soil when the soil is tilled again in the spring. Tiling the garden serves a variety of important purposes. Garden soil is mixed with organic matter and fertilizer, which loosens the soil and prevents weeds from competing with crops for water and nutrients.
Tilling too often, on the other hand, might have a negative impact. Tilling too much can degrade soil’s structural properties, resulting in soil that’s more suited to manufacturing bricks than growing vegetables. Garden soil should only be tilled if it serves a practical function, such as breaking up crusted dirt for water penetration or loosening a tiny quantity of soil for seed germination, and only if it is necessary.
When the ground is wet, avoid tilling it. If you do this, the earth will become compacted and cloddy. To determine the soil’s moisture level, grab a handful of the material and compress it. Too much moisture means that the soil can’t be tilled. A sign that it’s excessively dry is a powdered or clumped appearance. It’s OK if it crumbles freely.
Plant your backyard garden
After preparing your brand-new garden, it is time to start planting. There are two methods to plant your plants: the first is to sow the seeds directly into the garden, and the second is to plant the transplants. Several vegetables can be grown from their roots, bulbs, or tubers rather than their seeds.
When ready to plant, carefully move the mulch out of the way. Next, make a hole in the newspaper and plant the seeds or transplants. Mulch should be reapplied once seeds or transplant roots have been covered with soil. Give the plant or the seeds plenty of water. It is essential to get the time of your planting just right since different types of plants have different temperature requirements for optimal growth. Some plants thrive best in chilly weather, while others do best in warm weather.
Because of the shorter growing season in colder areas, you can consider either beginning seeds inside or buying seedlings that have already begun. This will help you get a head start on the growth process. When started from scratch in a protected environment, growing plants from seeds can be time-consuming and space-intensive, even though seeds are significantly more cost-effective than beginning plants from cuttings. When dealing with seeds, it is also simple to overplant, which will need you to thin out your plants at some point in the process.
However, this is a fantastic approach to learning about development patterns and establishing a consistent care regimen for your plant. Most perennials should be purchased from a nursery or friends who have grown them. You can also try looking for local garden swap meetings, or you could search online for gardeners who are selling their plant offspring for a price that is far cheaper than that of a professional garden shop.
Water your backyard garden
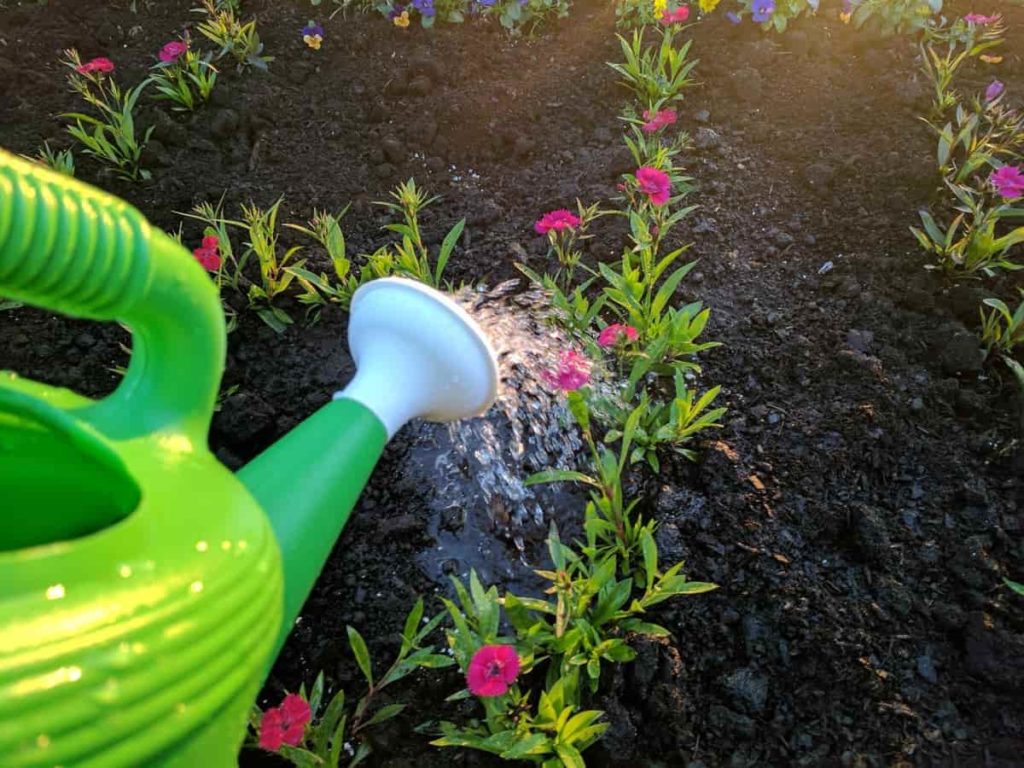
Wondering how to water your backyard garden? You can water your plants using one of three methods: (1) manual watering, (2) drip watering, or (3) portable sprinklers. The size of your garden, the amount of money you have available, and how you spend your time will all play a role in determining which strategy is best for you. Since hand-watering is quick, there is no waste. Make sure you water all the way in if you’re doing it by hand.
Keep in mind that this will take some time. Keep an eye on how much water is being delivered, and ensure that all your plants get it. An upfront investment of labor and money is required, but drip watering systems are more convenient and save water once established. Drip watering systems can be customized to match the specific wagering requirements of particular plants, and they can be adjusted as conditions change throughout the growing season.
Using this watering approach, you should aim for infrequent, thorough waterings. Depending on the complexity, drip systems are typically operated for one or two hours once or twice a week. With drip systems, avoid the inclination to overwater; the top may seem dry, but the rooting zone is still moist. If you’re unsure, examine the ground. Drip watering wets sandy soils differently than clay soils. Sand soaks up water like a sponge, forming a narrow strip of moist soil along the ground’s vertical axis.
Water spreads more widely and horizontally in clay soil than in other soil types. Consequently, the distance between drip emitters in clay soil is less than in sandy soil. Because they water walkways and other barren parts of the landscape, sprinklers wastewater. Additionally, they lose water because of evaporation and wind-driven drift. The best time to use sprinklers is when the weather is calm, and there is no breeze.
Sprinklers can also stimulate leaf disease growth since they moisten the leaves. The water streams will not be obstructed if you use oscillating sprinklers, so raise them over the highest bushes. Place sprinklers so that their patterns overlap to water your plants evenly. Runoff is a sign that you should flood more slowly.
Whatever method you use, the end aim is to provide water to the plant roots at a rate equivalent to the rate at which water is lost from the soil due to transpiration and plant growth. When deciding how much and how frequently to water your garden, consider the soil, the plants, and the previous weather. Clay soils, on the other hand, are far more water-resistant. Plants that are larger than seedlings need more water than those that are smaller than seedlings. Soil dries out in hot, windy weather.
During the growth season, watch how much water your plant needs. Your garden can include a variety of plants, each of which may have somewhat different requirements: Every day or two, mist the seeds and seedlings with a moderate spray to keep them wet but not rinsed away. To promote deep root development, young plants need more frequent, shallow watering. After watering 6 inches deep, let the top inch or two of soil dry before rewatering. Water well-hydrated garden plants in hot temperatures every 5 to 7 days.
Fertilize your backyard garden
A thriving garden depends on providing your plants with the correct nutrients. Plants need the presence of 16 different elements. N, phosphorus, and potassium are three of the most important nutrients in commercial fertilizer blends. A soil pH of 6.0–7.0 is ideal for growing vegetables. At this pH, nutrients are most readily absorbed by plants.
Wood ashes, manure, grass clippings, and blood meal are examples of “organic” fertilizers. Chemical fertilizers, on the other hand, include synthetic fertilizers. Both types of gardens may produce fruitful crops, but there are significant distinctions in how they’re done. For organic fertilizers, soil bacteria and fungus must break them down first before plants can use the nutrients that can take them up. It doesn’t matter what fertilizer you use; the plant absorbs the same substance.
Check the soil before applying fertilizer to your plants. Before applying the appropriate product, you can use the soil test results to determine which nutrients are deficient. Packaged fertilizer blends comprising N, P, and K are available from chemical and organic sources. Consider each nutrient’s amount before purchasing; this information may be found on the package label. The three macronutrients—nitrogen, phosphorus, and potassium—are always mentioned in this sequence. That is why fertilizer labeled as 5-10-5 comprises 5% nitrogen and contains both 10 percent and 5 percent phosphorus.
Soil N, phosphorus, and potassium all react differently. Consider these variations while making fertilizer application decisions. The movement of phosphate and potassium in the soil is extremely slow. To guarantee that your plants get enough of these nutrients, you should incorporate them into the soil. “Banding” is a frequent technique. Create a trench 3 inches deep and 2 inches wide to plant seeds or plants. Spray in some fertilizer. The plants’ roots will readily absorb the fertilizer’s nutrients as they develop.
Soil organisms must release the nitrogen contained in organic fertilizers. Mix these nutrients into the soil’s top 2–3 inches to allow the organisms to begin their job. Chemical fertilizers have readily accessible nitrogen that is easily dissolved in water. Make sure to water your plants to dissolve the chemical nitrogen fertilizer and transport it into the root zone if it doesn’t rain within two days of applying it.
The fertilizer you use, when and how much to use, which nutrients are weak in your garden, and which ones are missing entirely might vary from garden to garden. Even within the same garden, things might change from year to year. Finding your plants’ nutritional requirements can help you get a better crop.
When to start planting your backyard garden in Tampa?
Many gardeners put off beginning their growing season until the autumn, and they continue to tend to their backyard gardens up until late spring. This is because the summer has its own unique set of obstacles. If you want to get the most out of your backyard garden, September is an excellent month for planting seeds and seedlings. The ideal location for your garden is shaded. If this does not happen, some of the plants will probably die.
To ensure that your plants can withstand the impacts of the heat and humidity, you need to have a suitable watering system in place. When the temperature is higher than 90 degrees Fahrenheit, it is difficult for many plants to remain alive. If you can, take a reading of your soil’s temperature. It is optimal for growth to plant when the soil temperature is below 85 degrees Fahrenheit.
Some of the most knowledgeable backyard gardeners in Florida pay attention to the state of the soil and wait until it reaches the right temperature before planting. This often means holding off on planting their gardens until around the middle of October. Soil content is as least as significant as temperature. Turn over the soil in your backyard garden about 2 to 3 weeks before you want to start planting, and then incorporate compost or another sort of organic fertilizer into the ground.
Cabbage, tomatoes, and pepper seeds should all be started inside for them to mature in time for harvest in the autumn. Beets, peas, watermelon, radishes, kale, Green beans, turnips, broccoli, carrots, herbs, collards, cauliflower, and lettuce are examples of vegetables being started outside. Other vegetables that can be started outside include radishes. After the temperature drops a little, garden pests aren’t nearly as big of a problem as they are during the warm summer.
You can maintain your attention on your vegetable gardens beginning with the autumn planting season. In your spring garden, frost-sensitive plants should not be planted until March. Always ensure that the kind of plants you pick out is suggested for use in Florida, regardless of the season. Some of the most popular crops to grow in the spring are sweet corn, tomatoes, watermelons, and cucumbers.
Top vegetables to grow in the backyards of Tampa
Various vegetables can be grown in the backyards of Tampa, such as tomatoes, beets, cabbage, radishes, broccoli, potatoes, kohlrabi, carrots, cauliflower, lettuce, spinach, arugula, Swiss chard, and other vegetables.
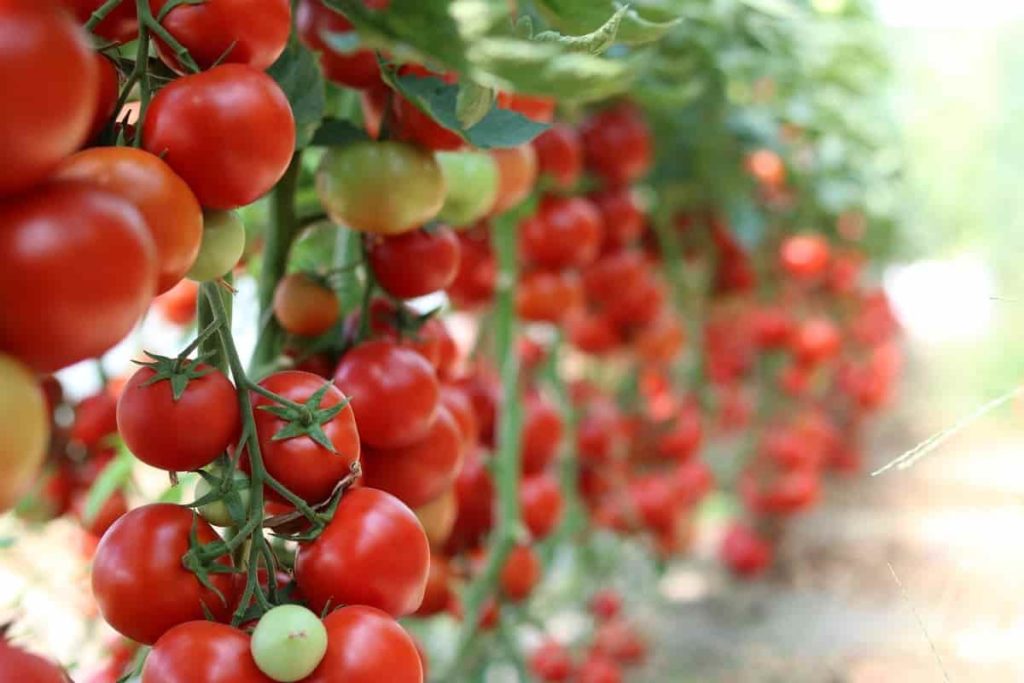
Tomatoes: The multipurpose vegetable is one of the most in-demand options for home gardeners who wish to grow these edible plants in their backyard gardens. All summer long, the plant thrives in full sun and little water. You just have to clip the leaves off to allow the roots to penetrate the soil.
In case you missed it: Soil Preparation for Tomato Plants: Best Soil Mix, pH, Compost, and the Recipe
Radishes: When grown at home, they’re even better for your health and taste better than if you buy them from the store. Around the middle of October is the ideal time to sow it. Every other day, water the three-inch-wide and half-inch-deep seeds you’ve placed in the earth. Within 30 days, they should be able to begin plucking.
Cabbage: When planting, do it in the early autumn, so the buds have enough time to develop before winter arrives (February-March). In Florida, the vegetable can grow to enormous sizes and is a delicacy to eat. For it to grow to its full potential, it must be fertilized regularly.
Broccoli: The ideal time to plant them was in October when the weather cooled down. For best results, space them approximately 18 inches apart, fertilize them once a month, and provide minimal watering. The head will develop to the size of a volleyball in a month, so select them while they’re still green. As a result of cutting off the head, you’ll have food for months.
Carrots: Rub the small seeds between your fingers before dispersing them into the soil with a fine mist. Once the stalks have sprouted, thin them out, so the roots have enough room to develop. After that, water and cover the soil again. The time required for complete root development is dependent on the seed variety, which will be specified so that you can harvest them appropriately.
Top fruits to grow in the backyards of Tampa.
Many fruits such as lychee, mango, mulberry, peaches, papayas, tamarind, persimmons, loquat, oranges, lemons, nectarines, and other fruits can be grown in the backyards of Tampa.
Lychee: The lychee is a tall, evergreen tree that produces tiny, juicy fruits. For them to thrive, there must be no frost and temperatures in the summer of at least four °C (25°F) with high summer temperatures, rainfall, and humidity. The optimum conditions for growth include somewhat acidic soils, good drainage, and rich organic matter and mulch. Early and late-ripening cultivars can be used in hotter or colder areas. They are also planted for their fruit, but they are also used as a decorative trees.
Papaya: This little tree, which can reach a height of five to ten meters and has spirally arranged leaves on the top of its trunk, is often known as the papaya. There are obvious scars on the lower trunk from where the leaves and berries grew. Sweet-smelling, moth-pollinated blooms bloom at night. Fruits range in size from 10 to 30 centimeters (3.9 to 11.8 inches) across and are around 15–45 centimeters (5.9–17.7 inches) long. At this point, the skin has turned from a pale yellow to an amber-orange color.
Mangoes: Mango trees can reach heights of 35–40 m and a diameter of 10 m. Some examples have been fruiting for over 300 years. The taproot can extend down to a depth of 6 meters (20 feet) in particularly deep soils, and it is accompanied by an abundance of feeder roots that spread out in all directions. In addition, the tree sends down many anchor roots that can reach a depth of several feet.
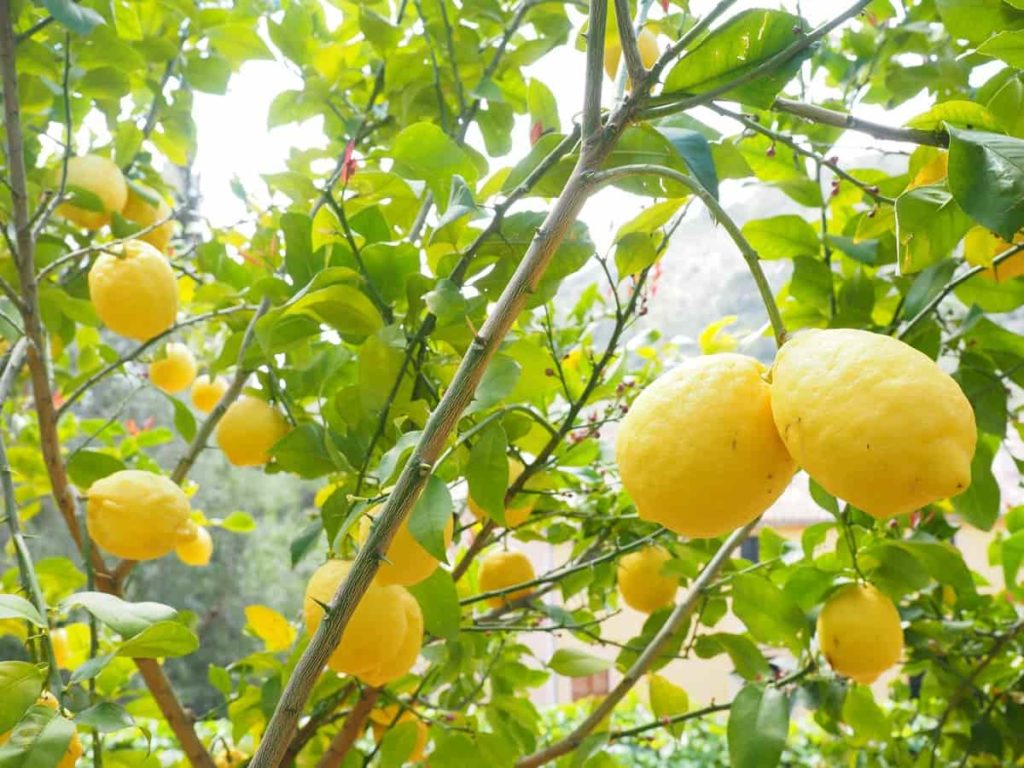
Citrus: Florida is often associated with citrus trees. Cold temperature damages citrus since it is a subtropical fruit. People in Tampa must safeguard their plants during the colder months.
In case you missed it: 24 Common Lemon Tree Problems: How to Fix Them, Solutions, and Treatment
Persimmons: Persimmon trees take a long time to mature, but their tasty fruits are worth waiting for. It is possible to consume this fruit; however, doing so will cause your mouth to pucker up. If you want the fruit to have a pleasant flavor, it is better to wait until after the first frost or until the skin is wrinkled and the flesh is mushy. Winemakers occasionally employ it in the process.
Top flowers to grow in the backyards of Tampa.
Many flowers like coreopsis, gerberas, salvias, golden dewdrops, evolvulus, purslane, petunias, zinnias, blanket flowers, pentas, lantanas, verbena, and other flowers can be grown in the backyards of Tampa.
Pentas: Pentas need full sun or shade and soil draining properly to thrive. After it has been established, it can withstand a modest amount of drought. In sandy soils, the most excellent blooms can be encouraged by fertilizing regularly throughout the spring and the summer. Alternately, you might use a fertilizer with a gradual release rate a few times a year. Both landscapes and container gardens are ideal environments for its growth. Pentas is a kind of perennial plant that does well in the climate of Tampa.
Evolvulus: Evolvulus requires well-drained soil with either full sun or partial shade to thrive. It helps to foster the finest bloom display possible if you fertilize it. In North Florida, where the winters are often colder than usual, it acts more like an annual than in Central and South Florida, where it always behaves like a perennial.
Coreopsis: Cultivate coreopsis on soil with good drainage and full sun or partial shade. Once established, most species can withstand some degree of dryness and do a decent job of caring for themselves. They are also successful when grown in pots and garden beds and borders as they are in backyards.
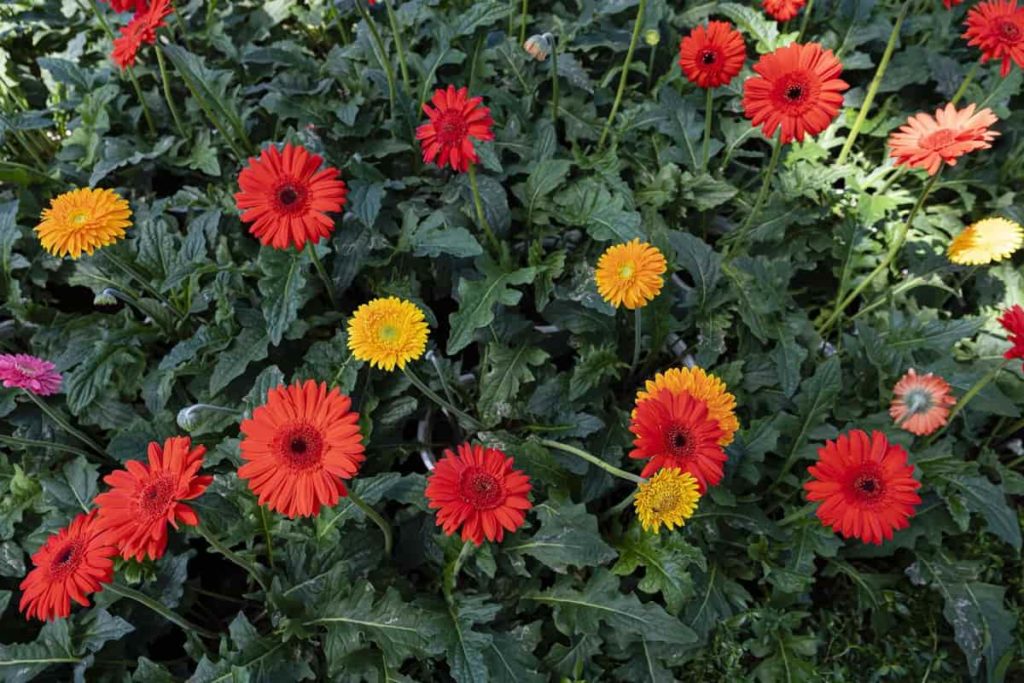
Gerberas: Garvinea gerberas need full sun to partial shade and soil that is wet but has good drainage to thrive. It is important to provide them with water during periods of drought to ensure their happiness and fertilize them regularly throughout the spring and summer months to ensure an abundance of blooms.
In case you missed it: Growing Gerbera Daisy in Pots – a Full Guide
Blue salvias: Blue salvia is an essential component of pollinator gardens because butterflies, bees, and hummingbirds all gravitate toward it. Depending on the kind, plants can reach a height of between 18 and 36 inches and a width of between 12 and 18 inches. The blossoms keep up rather well as cut flowers, and the plant is moderately resistant to animals and rabbits because of the fragrant leaves. A sunny location with soil drains properly is ideal for growing blue salvia. It can flourish in hot and dry environments when many other plants cannot. After it has been established, it is consistently resistant to drought.
Top herbs to grow in the backyards of Tampa
Lemon Balm, Mint, Basil, Parsley, Rosemary, Cilantro, Dill, Tarragon, Thyme, and Oregano are some of the many herbs that can be grown in the backyards of Tampa.
Cilantro: If allowed to be exposed to warm weather, cilantro will swiftly blossom. However, this is not negative since after cilantro flowers produce seeds, you can harvest coriander from the plant. The leaves of the cilantro plant can be used as a seasoning, and as the plant matures into seeds, the seeds can be harvested and used as a seasoning. Cilantro is like a two-for-one deal. There should be around 8 inches of room for cilantro to grow. Even though it can survive in direct sunlight, cilantro grows best when it receives some afternoon shade.
Dill: Dill is quite successful in Tampa. Not only does it bring more taste to the kitchen, but it also brings in more black swallowtail butterflies. This makes it a perfect addition to the herb garden. There are a variety of applications for dill. The most simple method is to harvest fresh leaves and use them as a seasoning, but you can alternatively let the plants dry up and utilize the blossoms instead. Dill should be started from seeds and then thinned out so that each plant has approximately one foot of room to develop.
Lemon balm: Lemon balm, belonging to the mint family, thrives in Tampa. It has a strong lemony scent and is quite enticing. What on earth were you thinking? It is claimed to provide many different advantages for one’s health, and it has beautiful small white blooms. These plants will reach a height of around one foot, and they need approximately one foot of space to thrive.
Mint: Growing mint in Florida is a breeze since the plant thrives in the state’s typically warm and damp conditions. Numerous individuals have voiced dissatisfaction with their mint’s unruly growth, describing it as having characteristics similar to a weed. It can produce blooms in various colors, including white, blue, and purple. It can grow in the full sun, although it does better with some shade.
The spread of mint will continue fast, and it will eventually dominate. Because of this, you should not be hesitant to pinch off a significant amount of new growth. These are the most delicious portions of the plant, and eating them will help you keep the whole situation under control. The plant known as mint is not only simple to grow and use in the kitchen but also brings many pollinators to the area where it is grown.
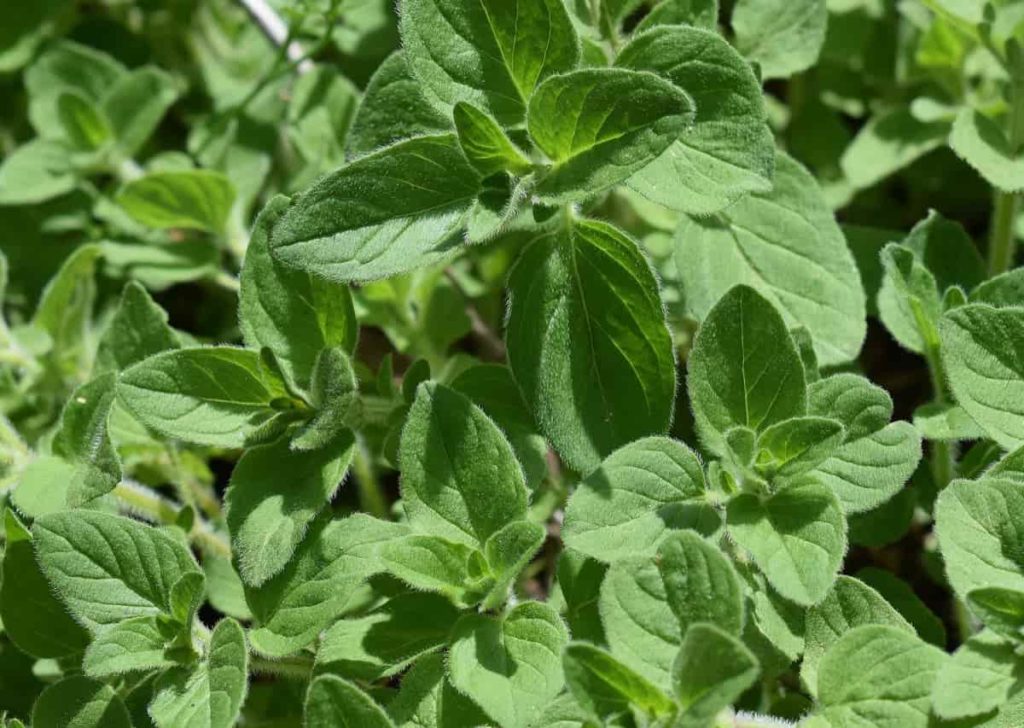
Oregano: Oregano plants are known to endure through several different seasons. Oregano plants can live for three to four years if given proper care and attention. Oregano plants need around 1 foot of room around them for them to be able to spread out and develop healthily. They typically reach heights of between one and two feet and are excellent partners for various crops in your garden. The optimal time to collect the leaves is when the flower buds are just beginning to develop.
In case you missed it: Growing Organic Oregano In Containers, Pots
Growing Indian Vegetables, Flowers, Fruits, and Herbs in Tempa, Florida backyards
You can easily grow Indian vegetables such as Bottle Gourd (Sorakaya), Ridge Gourd (Beerakaya), Snake Gourd (Potlakaya), Cluster Beans (Goru Chikkudu), Broad beans (Chikkudukaya), Gongura, Bitter Gourd (Kakarakaya), Ivy Gourd (Dondakaya), Yellow Cucumber (Dosakaya), Malabar Spinach (Bachalikura), Ginger (Allam), Garlic (Vellulli), Bayleaf, Turmeric (Pasupu), Taro root/Arbi Root (Chamadumpa), Parwal, Methi Leaves (Menthikura), Curry Leaves (Karivepaku), Kothimeera, Ponnaganti Kura, Thotakura/Amaranthus, and Palakura/Spinach.
You can grow flowers such as Jasmin flowers (Malle Poolu), Marigolds (Banthipoolu), Crossandra (Kanakambaram), Chrysanthemums (Chamanthi Poolu), Gerbera, Bougainvillea, Dahlia, and Hibiscus (Mandaram).
You can also grow fruits such as Guava (Jama), Custard Apple (Sitaphal), Mango (Aam/Mamidi), Jamun (Alla Neredu), Sapota/Sapodilla, Indian Ber (Regi Pallu), and Indian Gooseberry (Amla/Usirikaya).
Conclusion
Take a moment to savor the fruits of your labor. Remember to weed the area regularly and check that the plants receive the correct water quantity. You won’t have to wait much longer before you can start reaping the rewards of your hard work! We wish you luck no matter how you start your new backyard garden.
- Broccoli Seed Germination and Selection
- Asparagus Seed Germination and Variety Selection
- Seasonal Flower Gardening: Best Practices for Spring, Summer, Fall, and Winter
- How to Grow Hibiscus from Flower
- Plantation Ideas for Home Decoration: A Beginners Guide
- Flower Garden Designs and Layouts for Beginners
- Planting and Spacing Techniques in Papaya: A Beginner’s Guide
- Growing Gold: Essential Techniques for Planting Pineapples
- How to Make Kalanchoe Plant Bushy: Home Remedies and Solutions
- 11 Reasons Why Your Gardenia is Not Blooming: Home Remedies and Solutions
- Eco Elegance: The Guide to Designing a Drought-Tolerant Landscape
- Gardening on a Slope: Strategies for Hillside Landscaping
- Nourish and Flourish: Top Organic Mulches for Thriving House Plants
- Everything You Want to Know about Indian Mogra Flower: Discover Uses and Growing
- Green Thumb Success: Expert Tips for Cultivating Greenhouse Pumpkins All Year Round
- Maximize Growth & Flavor: The Ultimate Guide to Companion Planting in Herb Gardens
- How to Control Rhododendron Problems Naturally: Home Remedies and Organic Ways to Fix Them
- Natural Magic: The Remarkable Benefits of Cinnamon for Plants
- Best Steps to Revive Dying Tulip with Natural and Organic Treatment
- 10 Reasons Why Your Angel Trumpet is Not Blooming: Remedies and Treatment
- How to Fix Periwinkle Leaf and Flower-Related Problems: Natural Remedies and Solutions
- How to Fix Zinnias Leaf and Flower Problems: Discover Natural and Home Remedies
- Organic Steps to Induce Lemon Tree Flowers: A Comprehensive Guide
- Bloom Booster: Crafting the Perfect Homemade Bougainvillea Fertilizer
- Optimizing Growth: A Guide to Applying NPK Fertilizer for Potted Plants
- 10 Best Homemade Fertilizers for Rubber Plant: DIY Recipes and Application Method
- How to Boost Female Pumpkin Flowers: Effective Steps for More Flowers and High Yields
- Transform Your Indoor Garden: Top Benefits of Pink Salt for Houseplants
- 10 Best Homemade Fertilizers for Peacock Plants (Calathea): Easy DIY Guide
- Unlock Blooms: 9 Reasons Why Your Potted Chrysanthemum is Not Blooming
- 8 Reasons Why Your Potted Hibiscus is Not Blooming: Fix it with Simple Solutions
- Unlock Blooms: 9 Key Reasons Your Potted Frangipani Won’t Flower
- 10 Reasons Why Is My Ice Plant Not Blooming: Remedies and Treatment
- 10 Reasons Why My Potted Hydrangea Not Blooming: Treatment and Remedies
- 10 Reasons Why is My Wisteria Not Blooming: Remedies and Treatment
- 10 Reasons Why is My Goldfish Plant Not Blooming: Remedies and Treatment