Home Gardening

Outdoor Gardening

Organic Gardening

Modern Gardening

Urban Gardening

Gardening Business

Home Blog Page 73

Rose Classification, Rose Species; Rose Varieties

Rose Classification and Species

Today, we discuss Rose classification and Rose plant species. Classification of Roses:Rose plant is one of the most favorite plants in the world. There are totally 100 different species of roses in the world. The rose is a kind of flowering shrub. The rose name comes from the Latin word Rosa. The flowers of the rose develop in many different colors, from the well-known red rose or yellow roses and sometimes white or purple color roses. Roses belong to the family called Rosaceae.

The flower of the rose plant could be of different sizes. It could be as small as 1/2 inch across to a diameter of almost 7 inches. And, roses can be used for a good scent. The scent of the rose comes from tiny perfume glands on the rose petals, which can be seen through a powerful microscope. Sometimes rose petals are dried and packed so using them for decoration. Rose plants can be seen very much in gardens.

The rose is a woody perennial that was initially from China but is now growing across the world. Rose is characterized by a wide range of colors and sizes. Roses are multi-petal flowers obtainable in an array of colors. Some varieties are recognized for their prickles along the stems of the plant, which are used to deter predators. Many species are now cultivated, although there are still varieties that develop in the wild.

Roses want to be fed regularly and the amount of feeding will depend on the kind of soil they are planted in. When to start pruning roses? Pruning is also important and it should be done after between mid-February and mid-March during a sustained frost-free period. Garden roses are predominantly hybrid roses that are developed as ornamental plants in private or public gardens. They are one of the most popular and widely cultivated groups of flowering plants, particularly in temperate climates.

Features of Rose plant

Roses are one of the main popular garden shrubs in the world with both indoor and outdoor appeal. They possess a number of common features that cause growers and gardeners to choose roses for their gardens. This includes the wide range of colors they are obtainable in; the generally large size of the flower, larger than most flowers in temperate regions; the selection of size and shape; the wide selection of species and cultivars that freely hybridize.

Color of flowers
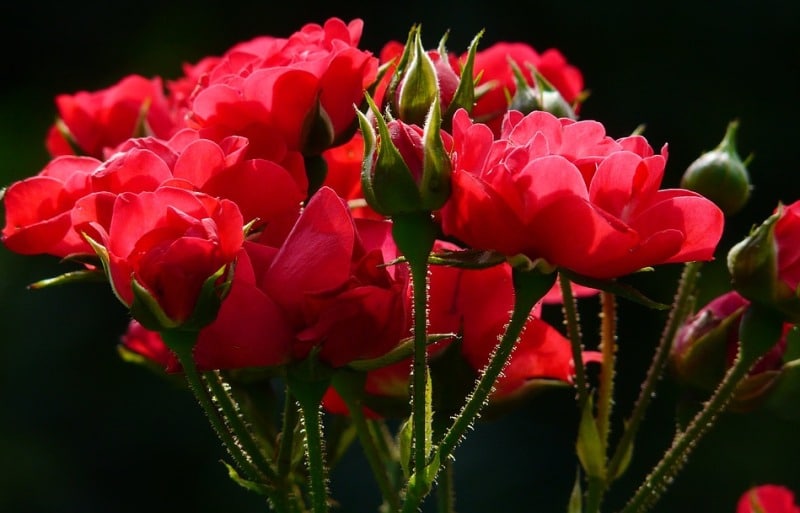
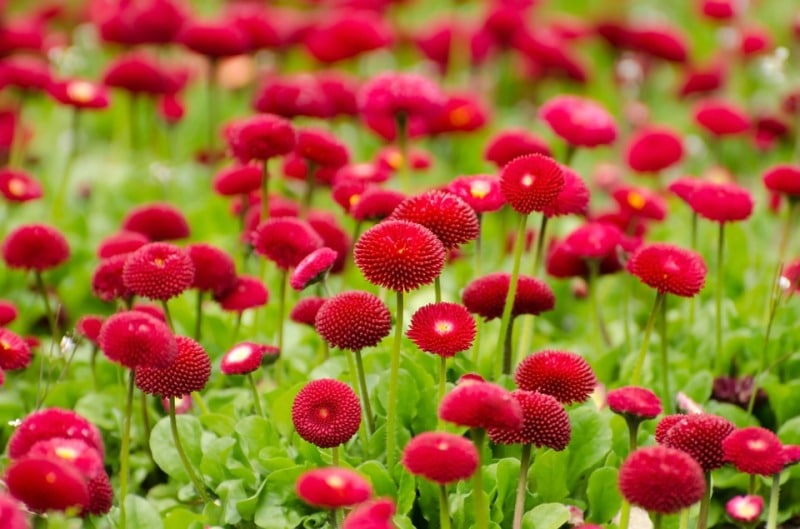
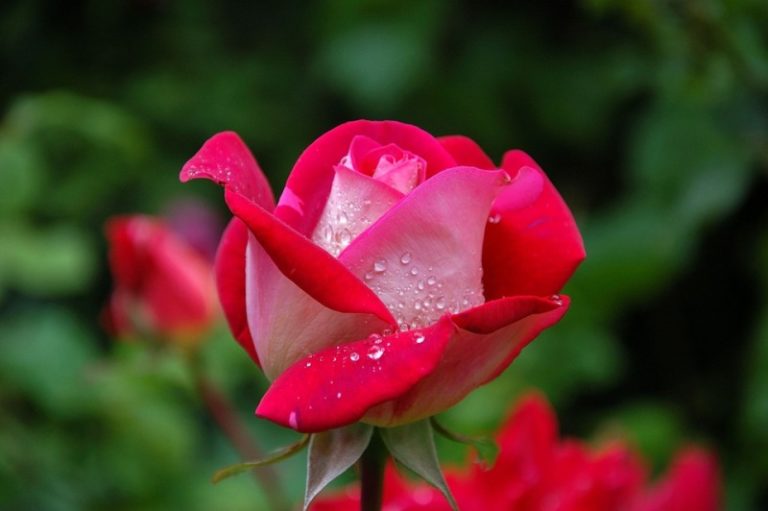
Red Roses.
Red Roses.

Read: How to Grow Artichokes in Pots.

Rose flowers have historically been cultivated in a diverse number of color varieties in intensity and huge; they are available in countless combinations of colors which result in multicolored flowers. Breeders have been able to widen this range through all the options obtainable with the range of pigments in the species. This gives us the yellow, orange, pink, red, white color and many combinations of these colors. However, they lack the blue pigment that would provide a true purple color or blue color and until the 21st century, all true blue flowers were created using some form of the dye. Now, however, genetic change is introducing the blue pigment. Colors are bred during plant breeding programs which have existed for a long time. These are often bred for new and intriguing color combinations which can fetch premium prices in the market. How many varieties of roses are there? There are totally around 150 species of rose. The cultivars can be divided into species roses, Old garden roses and Modern roses and these into several well-recognized subgroups. For those unfamiliar with roses, the wide variety of roses obtainable can be a bit overwhelming. Now let us look into Rose classification and species.
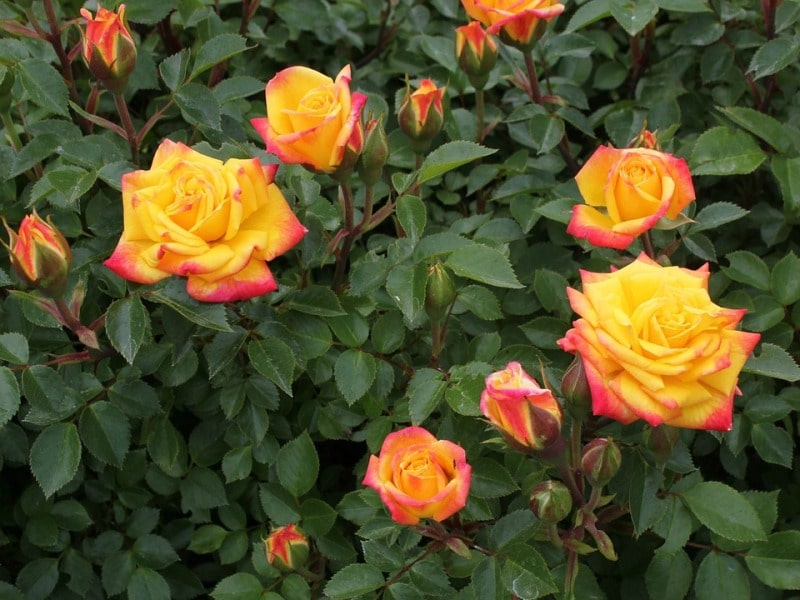
Rainbow Roses.
Rainbow Roses.

Classification of Roses

Roses are mainly divided into three categories:

  1. Species Roses
  2. Old Garden Roses
  3. Modern Roses

Species Roses

Species Roses are often known as Wild Species Roses. These roses often have relatively very simple, 5-petaled flowers followed by very colorful hips that last well into the winter, providing food for birds and winter color.

The mainly popular Rose species for sale today is Rosa rugosa owing to its superior hardiness, disease resistance, and extremely easy maintenance. Species roses are widely hybridized. Wild Species Roses contain many different varieties. Wild Species Roses generally bloom once in the summer.

Old Garden of Rose classification

Old Garden Roses have a delicate beauty and wonderful perfume, not often create in modern hybrid tea roses. Old Garden Roses are a diverse collection from those with a wonderful fragrance and great winter hardiness in the tender and lovely tea roses, which are best, fitting for warm climates.

Read: Summer Gardening Tips, Ideas.

Old Garden Roses comprise multifaceted groups that in general are easy to grow, disease-resistant and winter-hardy. Old Garden Roses produce in several shrub and vine sizes. Although colors do vary, this class of Roses is usually white or pastel in color. These “antique Roses” are normally preferred for lawns and home gardens.

Damask roses

These Damask roses are best known for their intense heavy fragrance. Plants normally range in size from 3 to 6 feet. Some varieties are repeat blooming.

Alba

Alba roses are also Known as “white roses,” these plants are upright often climbing, have dense blue-green foliage and are disease resistant.

Bourbon

Initial repeat-flowering roses developed from the hybrid chinas. They obtain their name from the locations of the first members of the class, the Ile de Bourbon in the Indian Ocean. Bourbon plant size can range from 2 to 15 feet tall. They repeat blooming.

Centifolia

These Dutch hybridized roses derive their class name from the fact the flowers often include more than 100 petals. Centifolia plants are 4 to 8 feet tall and winter hardy. They are referred to as “cabbage roses” and are featured in Dutch flower paintings of the 17th century. Once blooming.

Moss

Moss roses are essentially Centifolia roses and Damasks that have developed a distinctive fragrant moss-like growth on the sepals. The “moss” rose (small hairs with scented glands on the bud) has a rich scent when rubbed or on a warm day. The double flowers come in almost all colors and are extremely fragrant. Early Moss roses are once bloomers, the more modern hybrids have an excellent repeat. Hardiness varies.

Noisette 

The primary roses to be bred in America, their bloodlines include the China roses. Noisettes are historically very important for their contribution to the colors orange and yellow with modern roses. Tall, bushy plants that are best treated as climbers by maintaining; they bear fragrant clusters of blooms in a wide range of colors. Most are continual or repeat bloomers. Somewhat tender to Zone 7 (10 degrees F).

Polyantha

These Polyantha compact roses are the forerunners of the modern Floribunda. Polyanthas is normally 2 to 3 feet high with foliage that is small, narrow and disease resistant. Winter hardy and ideal for small gardens or pots.

Tea Roses

Tea roses originated in China and are the ancestors of modern Hybrid Teas. They are the effect of a cross between a China rose and Rosa gigantea and were imported on the Tea Clipper ships to Europe, where they were an instant success. The flowers are large, fragrant, and several have a delicacy of form and color that is not found in today’s roses. The plants are disease resistant, however tender to Zone 8 (15 degrees F). Tea roses often have only five petals.

Portland

This small collection of roses was derived from crosses involving hybrid gallica, damask, centifolia and hybrid china. They are small in stature usually feet tall, repeat blooming and have very short peduncles. Class named in honor of the Duchess of Portland.

Read: Asparagus Container Gardening.

Modern Roses of Rose classification

Modern roses are nearly always repeat-blooming and come in just about each color imaginable (except blue, a color that still eludes rose growers). This group of Roses is very popular. Modern Rose is the effect of crossbreeding the hybrid tea with the polyanthus (a variety of primrose). The colors of these Modern Roses are varied, rich and vibrant.

Large-flowered Climbers

Have clusters of flowers on stiff, arching canes that normally reach from 8 to 15 feet high. Climbers want to go up and will not do well on a three-foot fence. Many climbers can be developed as large, sprawling shrubs without support.

Ramblers

Ramblers tend to have a distinct growth habit. Rambler roses are vigorous climbers to 20 feet or more, with pliable canes and smaller flowers than climbers. Ramblers may be once-blooming, repeat, or continuous. Without support, ramblers will travel along the ground and cover anything that gets in their system (buildings, cars, or other plants).

Climbing rose

Climbing roses are mainly two categories they are natural climbers and climbing forms of hybrid teas (or other bush roses). Both categories send out long canes that need to maintain from walls, fences, trellis, etc. Some bloom frequently, others have one annual display. Plant at least six inches apart and away from other plants. Lady Banks, Blaze, Dortmund, and Cl. Cecile Brunner is very popular. Extra colors are added each year.

Hybrid Teas

Hybrid teas are the florist roses. Flowers are produced generally one bloom to a stem, not in clusters. Most are three to six feet tall; they tend to lack foliage at the base of the plant due to susceptibility to foliar diseases. The plants are more open rather than bushy, with long, straight, upright canes; the least cold hardy division of modern roses.

Floribundas

Floribundas roses are a cross between Hybrid Teas and Polyantha roses. Flowers are formed in large clusters like Polyanthas, but with bigger flowers. Plants are generally compact, 3 to 4 feet high, and can be upright or spreading. Floribundas commonly have good disease resistance and are bushy, making them good choices for containers.

Grandiflora rose

Grandiflora roses can be treated like a Hybrid Tea but are generally taller and more upright. Large flowers are formed on long stems, either singly or in clusters.  Hardy and vigorous, these bushes can reach seven feet.

Landscape or Shrub Rose

There have been many new releases of landscape shrub roses recently that have been specially selected for use as flowering shrubs in landscapes. These ever bloomers have more disease and insect resistance and need less pruning than traditional garden varieties. Also, there are fewer thorns, the flowers fall off on their own (less deadheading), and they are developed on their own rootstock. These are available in three growth forms they are; upright plants, mounding shrubs, and groundcovers.

Miniatures of Rose classification
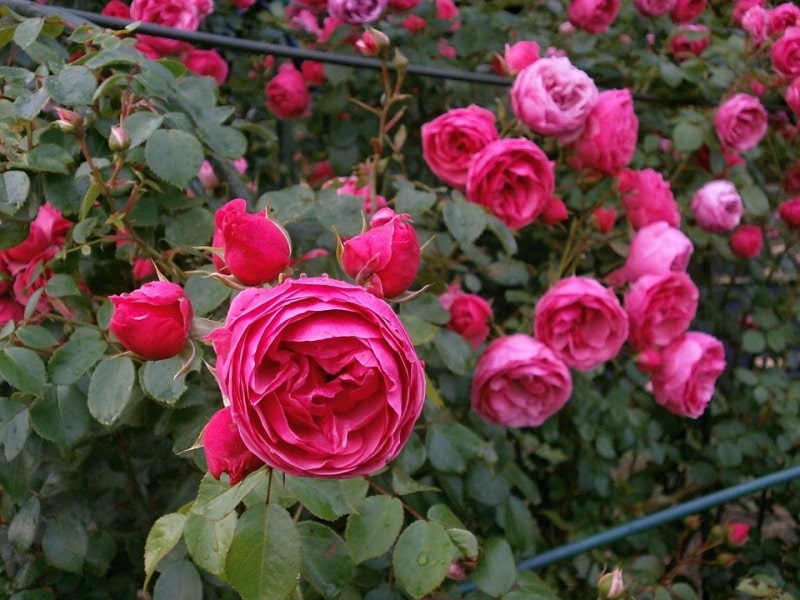
Miniature Roses.
Miniature Roses.

Descendants of Rosa chinensis minima, these plants range in height from three inches to 2 feet or more (some climbing). The stems, leaves, and flowers are all petite. Miniature roses come in a wide range of colors and are a repeat or continuous bloomers. ‘MiniFlora’ or ‘Patio’ roses are somewhat bigger in growth and in flower.

That’s all folks about Rose Classification and Species.
Read: How to Extract Lavender Essential Oil.

Asparagus Container Gardening Tips, Techniques

Asparagus Container Gardening Tips and Techniques

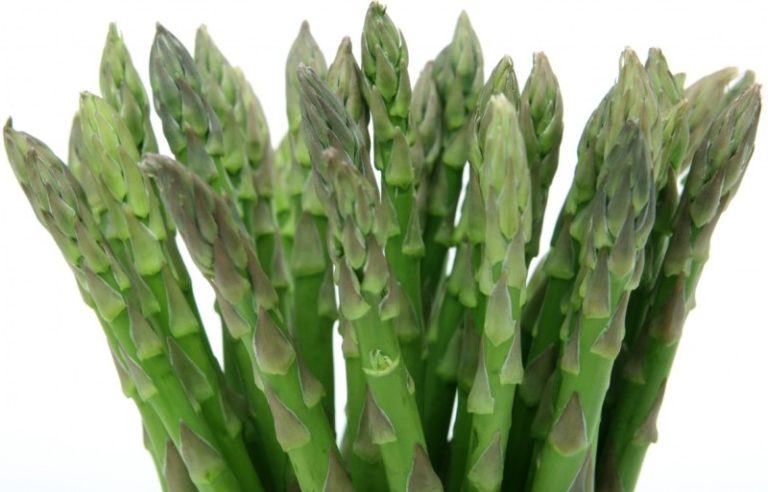
Today, we learn the topic of Asparagus container gardening techniques and methods. Asparagus is a perennial plant which is hardy. This plant has the capability to produce green spears which are luscious for up to a span of twenty years. Spears will be harvested after three years of growth when the establishment of the asparagus plant takes place completely. In the starting two years, spears which are open at the top and look like a fern which is appealing to the eye but not edible will be produced. Asparagus will grow very well in full sun and when the soil is light. This article will help you to know how to grow asparagus in the container.

Steps for asparagus container gardening:

Steps for Asparagus Gardening.
Preparation of container for planting asparagus
  • Start the preparation of your container for the plantation of asparagus when the trees start leafing out. Makes the holes for drainage beneath the plastic container. This container has to be large with a depth of 20-inches and the diameter of 20-inches. The pot has to be turned upside down and a screwdriver has to be placed beneath the pot. Use a hammer to strike the screwdriver for making a hole. The holes have to spaced at a distance of 3-inches from each other in all the directions. Two holes have to be punched on the two sides of the pot starting from 3-inches at the bottom. The pots which are made of plastic are a great choice as they will not involve in the absorption of moisture which the pots made of clay do, and the drainage holes are bit easier to make when using plastic containers. Asparagus is more prone to diseases when exposed to a large amount of moisture.
  • After that, you will need to add gravel for about two inches to the pot’s bottom. The gravel and the drainage holes which are made to the side of the pot, when combined, will help in keeping the asparagus away from wet feet and the fungus which is contracting.
  • The pot has to be filled partially with the garden mix soil. A hole has to be made at the center of the soil by making use of a trowel at a depth of about 9 inches and for thrice the width of the crown of the asparagus. This will leave enough space for the root system of the asparagus to spread throughout the pot.
  • Now you can place an aged compost in the middle of the hole. You can take the compost with a large spoonful. The center of the root ball has to be set at the top of the compost and the roots have to be spread around it. The crown has to be covered with the soil for about two inches. Watering asparagus plants is very important. The asparagus has to be watered in a thorough manner by making use of a watering can. You can see an indentation at the middle of the pot toll the shoots will reach the top level of the soil.
  • The soil has to be kept moist in an even manner as the crown of the asparagus keeps growing. When the shoots start appearing on the crown, you can slowly cover them with the soil, by leaving for about ½ inch of the uncovered shoots. You can continue to cover the shoots every week or so till they will reach to the top of the level of soil in terms of length. The crowns which are larger will have more numbers of shoots which seem to be appearing as they are emerging from the soil. You can start expecting about 8 to 12 shoots to appear from each individual crown based on the variety.
  • The plant of asparagus has to be fertilized one time in a month by side dressing the plant by making use of compost. Fertilizing with the help of compost will help in the production of vegetables which are organic. As an alternative, you can also start fertilizing asparagus with the help of a fertilizer which is balanced such as 10-10-10 at the time of spring after the plantation takes place.
  • You will need to remove any red berries which you see on the asparagus plants which are female. These will fall into the container making space for the weeds which are not considered to be fertile for more plants. The Male asparagus plants will not produce berries. Female plants will produce spears which are thin like a pencil and the male ones will produce the spears which are twice as thick as the ones produced by the female asparagus plants. The process of plantation and growth is similar for both male and female types of asparagus plants.
  • The asparagus plants have to be cut down to the level of soil by making use of a sharp knife at the end of the fall. This will let the plants to overwinter and will decrease the chances of disease of rust from the formation in the foliage.

Read: How to Grow Artichokes in Pots.

Tips to grow asparagus in containers:

  • You will need to select the crowns which are of two years old rather than the ones which are one-year-old for the plantation so that the harvest can be done quickly. Nurseries will consist of different types of crowns of asparagus which are of at least two years old.
  • Asparagus has to be grown in the areas which have warm climates by doing its plantation at the early stages of spring and protecting it from the sun which occurs at the middle of the day and also hot.
  • Asparagus plants which are the female ones will produce spears which are thinner than the ones which are produced by the male plants though they are tender in an equal way after cooking.
  • Next comes the harvest of asparagus plants. The asparagus plants have to be harvested after three years of the plantation of the crown. You will need to remove the spears present at the level of the ground by making use of a sharp knife. The spears have to be harvested only for one time in three years. The spears have to be harvested from the time of early stages of spring when the spears are at a length of 8 inches for about 10 weeks.

That’s all folks about Asparagus Container Gardening Tips and Techniques. Happy gardening!.

Read: How to Grow Roma Tomatoes in Pots.

Growing Artichokes in Pots, Containers

Growing Artichokes in Pots, Containers

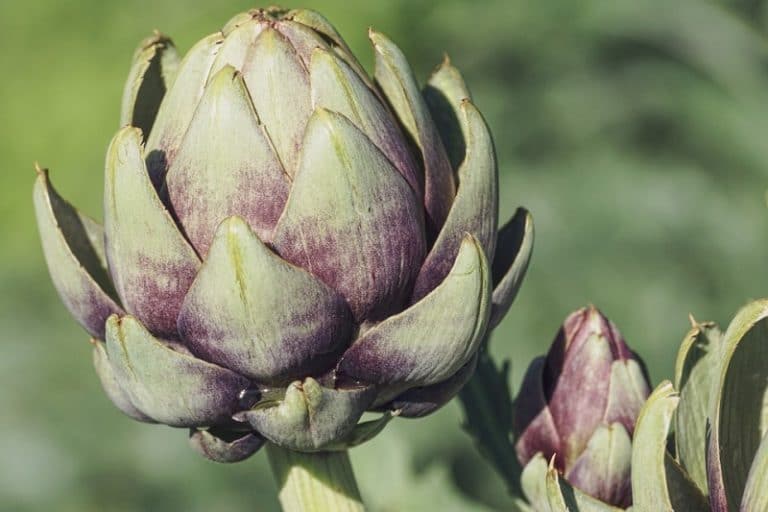
Today, we get into details of growing Artichokes in pots/containers. How to grow artichokes in pots?. If you are enthusiastic to grow artichokes but are very much confused about the growing process which you have to follow, this article is for you. This article works as a tutorial which will give you a complete insight into growing artichokes in pots. A positive element about the plantation of artichokes is that they can be grown in an easy way in different environmental conditions.

There are several varieties of artichokes which you can choose. For example, you have an option to grow Big Heart, Omaha, Imperial start and Green Globe. A good thing is that the plantation of artichokes is worth your efforts.

The artichokes are very rich in the content of Vitamin C and you can get a fiber which can be added to your diet from artichokes. In the leaves of Artichokes, you can find Cynarin which is helpful in increasing the health of the liver. The main objective of this article is the introduction of the gardening basics to the beginners who are confused about the process. You can go through the process in detail.

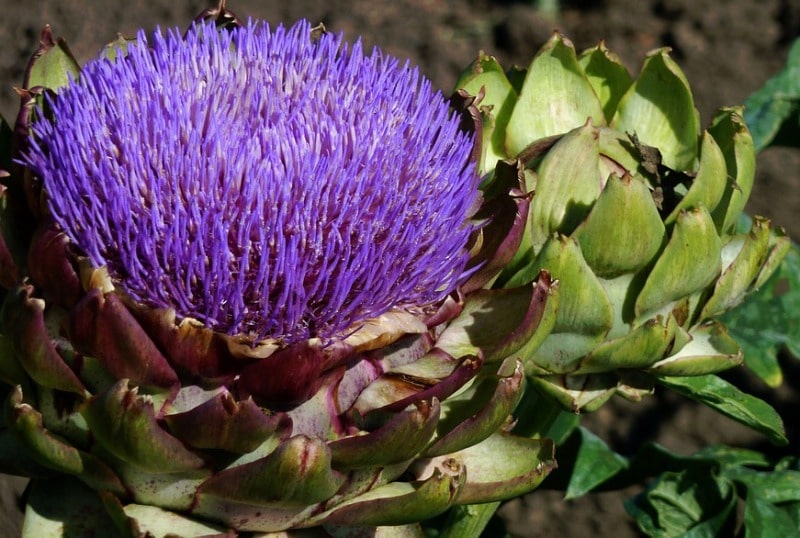
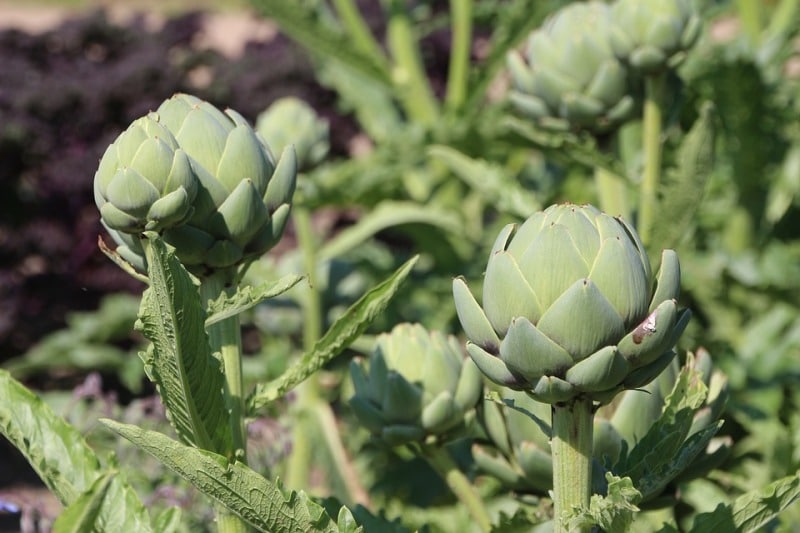
Artichoke Blossom.
Artichoke Blossom.

Read: Tips for Growing Hydroponic Strawberries.

Preparation of pots for growing artichokes:

  • When you have pots, there is no need to plant the artichokes in the ground. The suitable size is a pot of 24-inches as this will give the plant enough space for growing. You can start growing the artichokes which are at a length of 5 feet and a width of 6 feet in the pots. Each and every plant will be able to grow at least 30 artichokes all across the year.
  • For growing artichokes, you will need to choose for organic soil as the artichokes will need fertile and rich soil which is organic. Additionally, you will require to select the soil which has natural nutrients. It is also important that you will need to choose the soil which is draining. That means it should have a rich texture so that whenever you are watering the soil, it will go through in a simple way with much ease.
  • Anyways, this soil should not cling on to the roots as this may even cause death to the roots. When you are able to get hold of the soil, ensure that it has some kind of ingredient which can restore the moisture in the ground. Always choose the soil which has the extract of yucca in it as it is the thing which has the ability if drawing moisture.
  • You can purchase an artichoke plant which is of 2 months of age. You can make use of the plant which is been grown from the seed or the one which is cultivated as the division. The artichoke plant needs to have roots which are tender and which covers the area of the roots.
  • You will need to get a hold of tomato vegetable food and it should have a perfect mixture of nitrogen. Moreover, this tomato vegetable food should have the perfect content of potassium as well which is required for your artichoke plants for growing.

Steps for growing Artichokes in pots:

Steps for Growing Artichokes.

Read: How to Grow Ginger Indoors.

  • First, you will need to take a big pot of 24-inches and completely fill it potting soil which is organic.
  • The plant has to be kept in the pot which is having the soil. The baby plant has to be kept at the same height in the pot as it was in the previous pot. The roots of the plant should be submerged into the soil completely and only the plant leaves have to keep above the level of the soil.
  • After this, you will need to start watering the artichoke plant. On a daily basis, you will need to touch the soil with your finger to check if it will require any moisture or not. If you feel that the soil is dry, then you should start watering the plants. Always keep in mind that the artichoke plant which is in the pot will dry out more rapidly when compared to the plant which is grown in the ground. You will be required to be very careful about this particular aspect mainly if the climatic conditions are hot.
  • Your daily routine should be in such a way that you will need to water the artichokes one time in a week. Anyways, the artichokes should not be standing in water. Additionally, if you see that the water is less, then even in such cases, there is a chance that the buds will have bad taste.
  • When your plant reaches the age of one month, then you will need to add vegetable food. The main reason is that the artichokes will need a heavy feed. Now when you are done with planting in the spring, you can wait for the first harvest after six months in the early fall.
  • If you are residing in a climate which is cool and you are planting the artichokes at the time of spring, then you will need to give a time of complete summer for the plant for growing. You can wait for the harvest of artichokes at the time of fall.
  • Now, the artichoke plant will be big and you will need to start thinking about the lines of cutting 6 inches. You will have to add some amount of mulch. Moreover, you have to start covering the plant mainly if you are growing the artichoke in an area which has snow. You will have to keep the pot in the garage if you are planting the artichokes in the winter season. It will get its share of warmness and will have the ability to grow with ease.
  • Once the season of spring arrives, you will have to bring the plant to sunlight and ensure that you are drying it out. The artichoke plant has to be placed under the sun. Always remember to water the plant along with fertilizing it.

Read: How to Grow Alfalfa Sprouts at Home.

Harvesting the artichoke plant:

You will need to check the artichoke plant regular basis daily. Whenever you start seeing the flower buds appearing, then it would be the best time for the harvest. The buds have to be picked up prior to the opening of petals. If you have waited for so long, then there is a chance that the buds become fibrous and also stringy. If you have taken a decision to make use of the artichoke seeds, then ensure that the seeds are at the top of the amended soil. The plants have to be placed at least at a distance of 4 feet from each other. After about thirty days, it is always suggested to make use of liquid fertilizer.

Make sure that there are no weeds in the beds of artichoke. As said above, you will require mulch in the initial stages. Anyways, when you see the buds appearing, you will need to ensure that you are removing the mulch. Here, you will have to use the compost which forms a thick layer of 4-inches surrounding the plant.

There are few instructions which you have to follow for the purpose of harvesting. The buds need to be harvested whenever they are tight and also firm. When you are done with the harvest of all the buds present on the stem, then the stem has to be cut to the ground.

That’s all about growing artichokes in pots or containers. Keep gardening!.

Read: NFT FARMING in India.

Growing Alfalfa Sprouts in Trays, Jars Guide

Growing Alfalfa sprouts in trays

Today, we learn the topic of growing Alfalfa sprouts in trays and jars. Alfalfa sprouts can also be grown by making use of a clay tray. In this article, let us discuss how to grow alfalfa sprouts from seeds by using a clay tray.

  • You will need to measure the seeds which you desire to use. You can measure 1 tablespoon of alfalfa seeds which will give 1 ½ cups of alfalfa. The seeds which are not used have to be stored in a plastic container or in their actual bag.
  • The alfalfa seeds should be rinsed and sorted. The alfalfa seeds have to be placed in a strainer with fine-mesh or in a cheesecloth piece and should be rinsed in a thorough manner. The alfalfa seeds have to be sorted and the seeds which are discolored and damaged have to be removed.
  • Now it is time to soak the seeds. For this, the seeds have to be placed in a glass jar. Then they should be covered with cold water up to 2 inches. Now the entire jar has to be covered with a cheesecloth piece and make sure that you are securing it by making use of a rubber band. The seeds should be placed in a dark room and have to be soaked for a minimum of 12 hours.
  • Water has to be poured across the cheesecloth so that it will help in trapping the seeds inside the jar and keep them from spilling out of the sink.
  • Start spreading the seeds over the clay tray base. It would always be better if you choose a terra cotta pot which is red in color and this is also considered to be perfect for the growing of alfalfa sprouts. The seeds have to be spooned inside the clay tray and should be spread in a uniform manner.
  • The clay tray has to be set up in a water pan. For this, select a pan which is bigger than the size of the clay tray. The pan has to be filled completely with water. This is done so that the water increases about half way up to the tray sides. Make sure that you are not adding much water that it would spill into the clay tray.
  • The clay tray and water pan have to be kept in a dark room so that it would let the seeds to sprout.
  • This specific method will work as the clay tray will start absorbing the water which is present in the pan. This water which is absorbed by the clay tray will be sufficient enough to moisten the alfalfa seeds and will help them for their growth. If you are using this method for growing alfalfa sprouts, then rinsing is not at all required.
  • The pan has to be refilled with water for every three to four days. You will need to monitor it on a daily basis and fill it whenever the water in it will undergo evaporation. The clay tray will continuously absorb water from the pan which will keep the soil moist and at the same time help them to sprout.
  • The clay tray has to be moved into the sun when the length of the sprouts reach 2 inches. Make sure that you are keeping the tray in a sunny window for about 15-20 minutes. Now the sprouts will be ready for consumption when they turn into a bright green color.
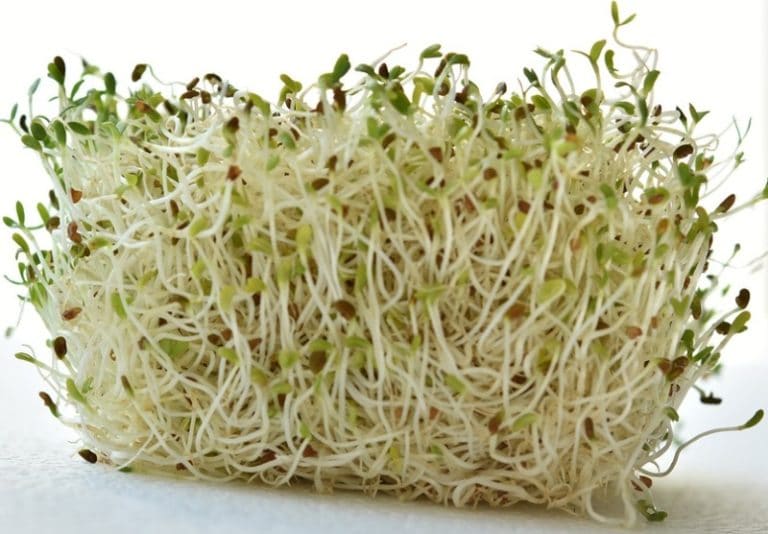
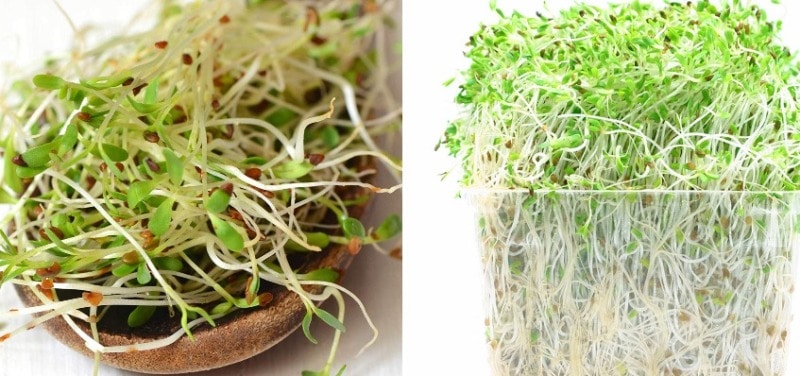
Alfalfa Sprouts in Containers.

Read: How to Grow Ginger Indoors.

Consumption and storage of Alfalfa:

  • The hulls of the alfalfa can be consumed but most of the people will prefer to remove the hulls for a few aesthetic reasons. For the removal of hulls, you will need to keep the sprouts in a water bowl and irritate the mass of the sprout by making use of your hands. The hulls will get separated in an easy manner from the sprouts and rise to the water surface. The water with the hulls has to be removed so that the sprouts can be saved.
  • Alfalfa sprouts are the best choice to add in any salad type. The taste of the alfalfa sprouts will be the best when consumed fresh from the time when they are last rinsed. You can separate the sprouts by chopping and add them to any of your favorite salads.
  • Alfalfa has to be completely dry after the last rinse has been completed. If you store it, when it is wet, then it will get rotten for sure. The dry alfalfa has to be placed inside of a storage bag made of plastic and should be refrigerated.

Growing Alfalfa in jars

The following guide explains growing Alfalfa sprouts in Jars.

Alfalfa sprouts are very popular when coming to the United States of America. It is frequently found in the salad bars, at the top of sandwiches and in the produce aisle. If you like the alfalfa sprouts which are bought from a store, then you will definitely love the crunch and flavor of the alfalfa which is sprouted at home and is fresh.

Alfalfa sprouts are nothing but the shoots of the plant Alfalfa. These come from the Alfalfa plant when it is harvested before growing fully. As these are very small, alfalfa sprouts will consist of a concentrated amount of few vitamins like calcium, Vitamin C and Vitamin K.

Alfalfa sprouts are the ones which will grow very rapidly, that is they undergo sprouting in just two to five days. The growth of the Alfalfa sprouts can be done in a small tray or a glass jar. And for growing them, you will require only 1 tablespoon of alfalfa seeds and you will get 1 ½ cups of the alfalfa sprouts. The sprouts are very nutritious and they are high in the content of antioxidants and they would be great if added to sandwiches and salads. In this article, we will discuss how to grow alfalfa sprouts in a jar.

Read: How to Prepare a Garden Seedbed.

  • The first step in growing alfalfa sprouts is to buy the alfalfa seeds. You will be able to find the alfalfa seeds at health food stores, online suppliers of seeds or at the feed stores. You can also find the alfalfa seeds which are organic. These seeds will be available in packages which would be as small as 10 to 16 oz and sacks will be as large as 1 pound. If you have a plan to eat lots of alfalfa on a daily basis, it would be cheaper if you purchase the alfalfa seeds in bulk at a time.
  • Always take a measurement of 1 tablespoon of alfalfa seeds. One tablespoon of alfalfa seeds will give rise to 1 ½ cups of the alfalfa which would be sufficient to fill a jar and will give you one meal or two meals. The additional amount of seeds can be stored in the actual bad or in a plastic container which is sealable.
  • The alfalfa seeds which you wish to grow have to be taken and placed in a sieve with fine-mesh or they can also be placed on a piece of cheesecloth. These have to be rinsed thoroughly. If you see any seeds being discolored or broke, then pick them out.
  • All the seeds have to be washed at once and this will cause few seeds to sprout prior to you being prepared of using them. So make sure that you are washing the seeds which you are planning to sprout immediately.
  • The alfalfa seeds have to be kept in a quart jar which has a clean glass. The jars which have a flat size will work best as you they can be laid on their sides to let the better circulation of air.
  • The alfalfa seeds have to be covered with 2 inches of water. Remember that the water should be cold. Always ensure that the seeds are covered completely.
  • The mouth of the jar has to be covered by making use of a clean pantyhose or a cheesecloth. By doing this, it will keep the alfalfa seeds present in the jar whenever you drain the contents in it. The covering has to be protected by making use of a rubber band.
  • The seeds of the alfalfa have to be soaked for a minimum of 12 hours. The jar has to be kept in a place which is warm and dry when you are soaking the alfalfa seeds. The alfalfa seeds will not require direct sunlight for the purpose of sprouting.
  • Now the water has to be drained. The cheesecloth has to be left in its place and the jar has to be turned upside down over a sink. By doing this, the water present in the jar will drain out whereas the seeds will remain in the jar itself.
  • The alfalfa seeds have to be rinsed and drained again. Now, ensure that all the water in the jar drains out completely so that there would not be any chance of rotting of the alfalfa seeds.
  • The jar should be placed by laying it on its side in a spot which is dark. The best choices are a pantry or closet which will provide a comfortable and warm temperature. Ensure that the alfalfa seeds are being spread out all across the jar base.
  • The jar has to be removed for every 10 to 12 hours for rinsing the seeds of alfalfa. The seeds have to be rinsed by making use of lukewarm water. The seeds have to be drained in a thorough manner each and every time. This has to be done for every four days or till the alfalfa seeds start to sprout to a length of 2 inches.
  • Now the alfalfa sprouts should be moved into sunlight. The sprouts should be spread in a thin layer. This can be done on a dish or a platter and these should be kept in a sunny window for about 15-20 minutes. By doing so, it will activate the enzymes which are important to make the alfalfa sprouts more healthy. You will need to be patient until they will turn into a green color. Once the alfalfa sprouts have become green in color, then they are ready to eat. These have to be stored in the refrigerator which will slow their growth for up to seven days.

That’s all folks about growing Alfalfa sprouts in Trays and Jars.

Read: Kaju Cultivation Tips.

Indoor Ginger Gardening Techniques, Tips

Indoor Ginger Gardening Techniques

Today, let us talk about Indoor Ginger Gardening Tips. Ginger is a herb which is pungent and has a capability to add a great flavor to many varieties of recipes. It also has several benefits towards health like increasing the metabolism, decreasing inflammation so that it helps to have fresh food on hand whenever you require it. It is always easy to grow ginger in the indoor locations and lead to the creation of a plant which sustains on its own and can be harvested in an indefinite way. The main part of it is, to begin with, a root which is healthy, using the perfect soil and pot for planting.

Ginger is called in different ways in different Indian languages. It is termed as Inji in Tamil, Inchi in Malayalam, Allam/Sonti in Telugu, Shunti/Alla/Ardraka in Kannada, Adrak in Hindi, Ada in Bengali, Aadu/Sonth in Gujarati, Alley in Konkani, Aale in Marathi, Ada in Oriya, Adrak in Punjabi, Adrak in Urdu, Soonthi in Tulu.

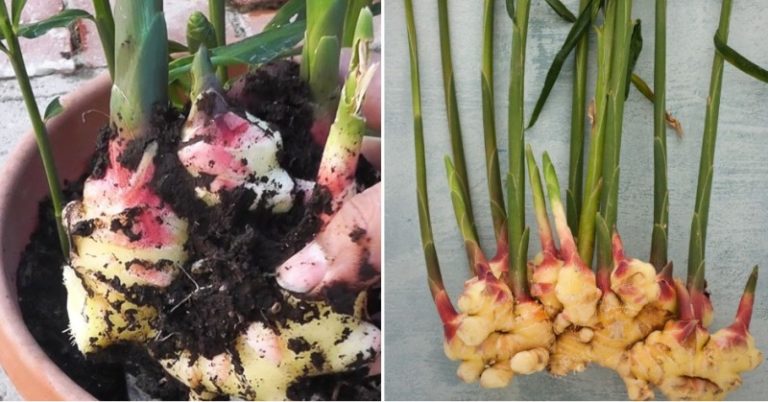
Ginger Root.
Ginger Root.

Plantation in the indoor Ginger gardening:

  • For the indoor plantation of ginger, you will need to select a pot which is wide and shallow. This is because the roots of the ginger plant will grow in a horizontal direction instead of growing in vertical.
  • A pot which is having a width of 12 inches and a depth of 12 inches is considered to be an ideal option for growing ginger.
  • The pot has to be deeper if you are keeping gravel at the bottom for a good drainage system. Ensure that the pot has a good number of drainage holes so that the roots will not be waterlogged.
  • You will need to have a saucer which is fairly deep for placing below the pot to catch hold of the water which drains from the holes.
  • After that, fill the pot will soil which is well-drained. Once the selection of your pot is done, you have to add potting soil medium to the pot. It is very much essential to select the soil which drains well so that the roots of ginger will be healthy.
  • Find the potting soil which consists of sand, gives air space which will help the water to get drained easily. Vermiculite and perlite will help in the creation of air space for a better drainage system so that you can make use of the soil mixes which contain those two ingredients also.
  • A soil-free mix which can be used for all purposes is also a good choice for the ginger plants as it will contain a high content of organic material like peat and also contains perlite, sand, vermiculite or a mixture of all the three which helps the soil in an effective draining.
  • In order to grow ginger in containers and that too in indoor locations, you will require a living ginger root. You can buy a ginger root from a local garden supply store or a seed company or you can also get it from a nursery. If you have a neighbour who is having a ginger plant, you can also approach them for getting a root cutting.
  • Ensure that the root of ginger which you select is firm and also plump. The skin of the root must be tight and should have many eye buds on it. Eye buds are almost the same as the eyes which you would find on a potato.
  • When you have finally got the ginger root, now fill a tiny bowl with water. This water should be warm. Now the root has to be placed in the warm water and let it soak for at least 8 hours or for the whole night. When you soak the root, it will help in the stimulation of germs which is specifically important if you are using a root which is brought from the store.
  • After filling the pot, you will need to stick the root of the ginger in the soil. Ensure that the eye buds of the root are pointing in the upward direction when you are setting it in the pot.
  • If you are going for the plantation of more than one root in your pot, you will have to place them at a minimum distance of 6 inches so that they will have a good space for growing.
  • When the root is placed in the pot, you will need to put the soil over it for about 2 inches. The complete root has to be covered with the soil.
  • You will need to make sure that the root has enough water for the purpose of growth. You will need to fill a watering can with water and then add sufficient water to the soil to wet it in a thorough manner. You can water the soil well, but make sure that you are not oversaturating it. Ensure that the entire water is absorbed completely so that there will not be any puddles on the soil surface.

Read: How to Grow Hydroponic Strawberries.

Care and maintenance of indoor Ginger gardening:

  • In order to grow a ginger plant which is healthy, you will need to put the pot in an area which is warm in your home or any other indoor location you choose. Anyways, you will need to select a location which will not get a large amount of direct sunlight as the exposure to the sun will turn the ginger to green in color.
  • The temperature which is ideal for the growth of ginger is 15°C to 30°C. Always ensure that the maintenance of temperature is done in an even manner for the complete night.
  • It is essential not to overwater the ginger as it starts growing, but the soil has to be maintained moist. You can fill a spray bottle with water and can mist the soil on a daily basis in a light manner. You can also refer to water the soil lightly by making use of a watering can two times in a week rather than misting it on a daily basis.
  • In order to make sure that the roots are warm and for the protection of the roots from the exposure of sun, you will need to combine some amount of rich compost into the pot on a regular basis. You will need to sprinkle 3 inches of the compost on the soil top one time in a month.
  • The compost can be bought from your local garden store.
  • Find the compost which is considered to be multipurpose compost. These are considered to be the best alternatives for the plants which are kept in pots.
  • When your ginger plant is unable to get a good amount of water and sunlight, it will give signs that it is not healthy. Always be alert about the texture and color of the leaves of the plant. If you do so, you can correct any mistakes as soon as possible when they occur.
  • If the leaves of the ginger plants turn yellow, it is generally a sign that you are overwatering the plant or the soil is not properly draining. Cut the watering and check the drainage holes of the plant to make sure that they are not blocking the water.
  • If the leaves start to look scorched or dry, it is generally an indication that the plant is getting too much sunlight in a direct manner. Now you will have to move the plant to a place where it will not receive sunlight and also make sure that you are removing all the leaves which are affected.
  • If the leaves start developing brown tips, it is generally an indication that you are applying a lot of fertilizer or compost. The compost has to be applied only once for a month.

Read: How to Grow Organic Celery in Containers.

Ginger harvesting:

  • Ginger will grow slow when compared to all the other herbs. After two to three weeks of the plantation, you will begin seeing the shoots coming up on the soil, but it will not be prepared for harvesting until 3 months after the shoots have emerged.
  • You can generally confirm that the ginger is ready for the harvest when you see the stems above the soil have reached a length of approximately 3 inches or 5 inches.
  • When the time has come for the harvest, make use of your fingers to push some amount of soil aside to the corner edge of the pot. Get hold of ginger rhizome. This is usually the part of the root which will be present underground and grows continuously. After holding the ginger rhizome, cut off a ginger piece by making use of a small knife.
  • After cutting some ginger, the rhizomes have to be replaced with soil. Ensure that they are completely covered with soil so that they will continue growing.
  • The soil has to be misted continuously with water on a daily basis and add the compost to the pot on a monthly basis so that the plant keeps growing.

That’s all folks about Indoor Ginger Gardening Tips. Keep Gardening!.

Read: How to Grow Button Mushroom.

Hydroponic Strawberry Gardening Techniques, Tips

Hydroponic Strawberry Gardening Techniques

Today, the topic is about hydroponic strawberry gardening tips and techniques. How to grow hydroponic strawberries? With time, everything is touch by hands of modernization and the quality and productivity of every aspect of life have been changed. So is our primitive ways of gardening. We used to saw fields, water them regularly, manuring and weeding at proper intervals of time. Now we don’t even need soil the rudimentary thing that is soil. We moved onto a much conservative solution, saving us from the hustle of maintaining soil pH and all the other extra work that tagged along the process.

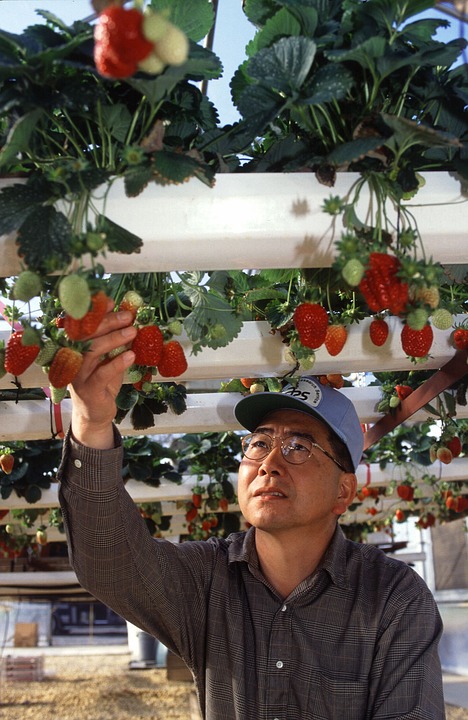
Hydroponic Strawberry Gardening.

So, today we will be discussing the process of growing strawberries hydroponically. Strawberries belong to the Rose family (Rosaceae, genus Fragaria) that includes many of the other fragrant and flavorful species of pears, plums, cherries, and apples. At first, the succulent berries were termed strew-berries because of the runners and berries grew across the ground. However, the name strawberry gradually evolved with time. Strawberries thrive in hydroponic grow systems and can produce large amounts of fresh fruit all through the year.

A hydroponic system is not that much tricky and can be easily achieved by keeping in mind some basic needs like proper watering and maintaining the nutrient levels of the water so as to produce plump, juicy, unblemished strawberries. The best thing about this style of gardening is that production is not affected by the season as a hydroponic system can be established outdoors or indoors and that too with the help of artificial light.

Types of Strawberries and varieties recommended for hydroponics:

Strawberries can be categorized in the following classes depending upon the growing seasons and requirement for the light.

Read: How to Grow Hydroponic Strawberries.

June-bearing strawberry:

June bearers are the most popular one because of the time period they take to grow that is of two to three weeks, on average. Most of the June bearing strawberry varieties ripe and are harvested around the month of June, and the, therefore, got its name. Strawberry varieties can be further defined under the category of the early season, midseason, and late season. When we select different varieties that can be produced during different parts of the season, we can prolong the harvest for a longer period of time. June bearing strawberries are (Fragariax ananassa) the Garden Strawberry variety. These are preferred to be grown using the matted row system.

Everbearing strawberry varieties:

As the name would you give some idea but they are not everbearing. They usually have a rate of two harvests per year production: one in the spring and another in the late summer or maybe fall. Basically grown in the hills the everbearing strawberries are often planted in locations where space is limited. If we are talking about the ideal conditions, it is may be possible for

Some everbearing varieties to produce even three harvests. Most of the everbearing strawberry types are also hybrids of Fragariax ananassa, but some may be of the species Fragaria vesca. So in layman term, we can say that everbearing varieties grow out fewer runners than the hybrids of June bearing varieties, the concept is to produce maximum yields by converting the energy into produce.

Some everbearing varieties are:

Ozark Beauty, Ft. Laramie

Day-neutral strawberry varieties:

Day-neutral varieties will give better yield in the first year of the plantation. 35 and 85 degrees is the ideal temperature to set flowers into fruits, and they keep on producing fruit in October during milder years. The only drawback to a day-neutral variety of strawberry plants is that they strawberries are smaller in size than the June bearing and the everbearing strawberry varieties. Fruit usually ranges from small to medium in size, and can rarely exceed one inch. Plants from these varieties are often planted following the hill system or are grown in the locations where space is limited as such.

Some day-neutral varieties are:

Mara de bois, Tribute, Albion, Quinault, Seascape

When can we do the plantation?

Strawberry Plantation.

Now that we have discussed the varieties of strawberries and their gardening aspects we can move onto the method, as such how are we supposed to produce and maintain the hydroponic plantation.  One of the major advantages is in hydroponics; there are no strict growing season requirements. Your growing season will be chiefly affected by the availability of runners, either in stores or in your outdoor gardens. Starting with strawberry growing season there is no such rule that when we can grow the plants in hydroponics, it is easy to get appropriate nutrient mixes for specific plants from your local store. Like any other plant strawberries also require both essential nutrients: Nitrogen, Potassium, and Phosphorus (NPK) are essential for basic plant survival. Nitrogen promotes cell growth, phosphorus is helpful for the roots, flowers, and buds, and potassium is required for the process of photosynthesis and trace elements: Iron, manganese, zinc, copper, molybdenum, cobalt, and chlorine, among others. In case of lack of these elements will result in poor plant growth.

Most hydroponics nutrient mixes contain these trace elements in the water as there is no need to have the support of soil in hydroponics. If you are using a nutrient mix intended for the proper.

Read: Greenhouse Types and Building Greenhouse.

In hydroponics, we don’t have to worry about anything like a nutrient deficiency. Hydroponic strawberry can grow throughout the season if runners from home ground plants are given the required cold stimulation. One week after propagating strawberry hydroponically we can have good produce throughout the year this can be achieved by placing the strawberries in the refrigerator for a time period 6 to 12 weeks.

Temperature requirement

Now talking about the ideal temperature requirement these plants require a temperature that can vary from cool to warm we can say that the ideal temperature should be somewhere between 60 to 80 degrees Fahrenheit or 15 to 27 degrees Celsius. According to experienced hydroponic growers, the night temperature results in increased fruit and the temperature should be between 10 to 12 degrees. Strawberry can be stored for a longer period of time as the plant preferred hibernation period of 2 to 5 months in winters.

Pollination

Strawberries are self-fertile and pollinate themselves without any external aid but pollination is a key concern. Strawberry plants are monoecious that is both the male and female parts on the same plant but require help from pollinating agents such as wind, bees, or someone to help transfer the pollen. To help with pollination indoor it simply requires brushing the open flowers with hand or to each other for the transfer of the pollen from the stamens onto the pistils.

Light duration

Strawberries are most preferably either short day or day neutral. This means that they can manage their growth with shorter light durations. Anywhere between 8-12 hours of proper light is usually more than enough for proper growth and good yield. It doesn’t require varying the light schedule in different stages either.

Strawberry nutrient solution:

In hydroponics, it is easy to get appropriate strawberry nutrient solution easily for growing plants from your local store and various online sites selling horticultural implements, hydroponic kits, and solutions. Like any other plant strawberries also require both essential nutrients: Nitrogen, Potassium, and Phosphorus (NPK) are essential for basic plant survival. Nitrogen promotes cell growth, phosphorus is helpful for the roots, flowers, and buds, and potassium is required for the process of photosynthesis and trace elements: Iron, manganese, zinc, copper, molybdenum, cobalt, and chlorine, among others. In case of lack of these elements will result in poor plant growth.

The most hydroponic strawberry formula contains these trace elements in the water as there is no need to have the support of soil in hydroponics. If you are using a nutrient mix intended for the proper hydroponics, we don’t have to worry about anything like a nutrient deficiency. One question may arise are strawberries organic? And yes it can be possible with hydroponics strawberry gardening as you can manage the nutrients and growing environment yourselves and when you are keeping it free from chemicals it becomes organic.

Disease management of hydroponic strawberry gardening

Though soil-borne diseases are virtually eliminated by opting hydroponics gardening. But in hydroponics rotting of the roots can sometimes be a bigger problem. There are some chemicals in the market that can help plants to combat Pythium root rot. It can work to strengthen plants roots against root rot. So, we would suggest managing that in case. Important caution to avoid disease is to not allow water to be stagnated in your hydroponic system as standing water causes low oxygen conditions which promote fungal growth. And best practice is to start gardening with healthy planting materials.

pH Levels for hydroponic strawberry gardening

The optimal pH level for the nutrient solution when growing strawberries is generally in the range of 5.8 – 6.2. The accumulation of mineral salts can adversely affect strawberry growth. The pH level of the nutrient solution can always be manipulated by either adding potassium hydroxide (so as to increase pH), or phosphoric acid (so as to decrease pH).In hydroponics, the nutrient mixes containing minerals sometimes can affect the water electrical conductivity levels.

Read: How to Grow Organic Chilli in the Container.

Plantation material for hydroponic strawberry gardening

Like other crops, Strawberry seeds can also be used for raising strawberry plants. But if you are opting for hydroponics system for cultivating strawberry plants then the seed is not the right choice. Strawberry plants grown from seeds take time to mature maybe over 2 to 3 years. And when you are planning to enjoy fresh and juicy fruits this year then this option is out of the question again.  Runners are the best material for propagating strawberries, especially in soil-less culture. Some stems instead of growing vertically grow horizontally. These stems have the capability to sprout roots and thus gives a rose to a new plant. Such stems are harvested from the mature strawberry plants and are allowed to grow. Runners can easily be obtained from local nurseries or gardening stores.

Hydroponic strawberry gardening guide

Hydroponic Strawberries.

As far as hydroponics is concerned strawberries are incredibly versatile. The reason behind this is mainly due to their small root systems.

Runners can be grown by a wide variety of techniques; they can range from simple to quite complex methods and that to mobile to more complex and stationary growing systems. They include:

  • Deep Water Culture
  • Aeroponics
  • Ebb & Flow
  • Wick system
  • Nutrient Film Technique

We can choose the plantation system of strawberries by using hydroponics commercially i.e growing hydroponic strawberries for profit or as hobby growers any one of these different techniques. Deep water culture (DWC) strawberries gardening system is most useful if you have space to grow a large number of plants that too in a single-tiered system. Others are much more suitable for compact multi-tiered growth systems. As a result, commercial and hobby growers prefer any one of these different techniques.

First, determine which hydroponic gardening method will be suitable for the location you are and a number of plants you want to plant. If you are opting for smaller, multi-tiered deep water culture, drip irrigation garden or Nutrient Film Technique (NFT) is preferred as the method of choice for both the purpose of hobby and commercial growers. Plants can be cultivated at high density in PVC pipes hence giving you an opportunity to DIY hydroponic strawberry gardening setup. The only point to be considered is that strawberries will hang down, so space should be maintained between each plant for this to happen freely.

Flood and drain or EBB and flow works well if you are looking for production for a large number of plants, however, the only drawback is once established it cannot be made mobile on preference. One of the famous hydroponic systems for growing strawberry is, hydroponics strawberries Kratky its complete setup along with installation guidelines are easily available in a number of online sites.

The process starts with careful removal of the runners or the new strawberry plant from its potted container. After that, we remove as much of the soil as we can by gently shaking or massaging the roots gently.

Then submerge the entire root system in a container of cold water for approximately for 10 minutes then we rinse roots under cold running water to remove all the remaining soil and dirt. This process is called chilling treatment. Chilling is important for a strawberry to start its growth cycle, if chilling treatment is not done properly then plants may not showcase their full vigour.

One has to be very careful because any root breakage will seriously increase the stress in plants and can lead to impaired growth.

Then prepare the growing medium by soaking it in pH balanced water for 30 minutes.the grwoing medium used must be well drained and aerated. Avoid using coco peat, rather use a combination of perlite – vermiculite or coco coir mixed with perlite or vermiculite.  Now fill the container with the growing medium, up to two-thirds level. For growing container, you can use either individual pots or a single large tub. Ensure that growing containers can rest securely upon the reservoir.

Then fill the reservoir with a mix of water and nutrients solution. The reservoir can be of any material as long as it can hold water. You can use small or large container depending upon the number of plants to be raised. A reservoir of about 5 gallons is quite large to harvest a good amount of strawberries.

Now securely place the grow container over the reservoir. Again you will have to place the strawberry plant inside these containers and have to spread the roots evenly into the prepared growing medium.

Now cover the roots with more growing medium and but never cover the crown of the plant as the crown requires light and fresh air because this is where new leaves and flowers will grow. If we submerge the crown, it will rot and cause the entire plant to die.

Check the reservoir daily for water levels. Refill the container when the level gets low is critical for the survival of the plants.  Keep a close watch on the pH levels and EC levels when refilling the container with a fresh nutrient water mix.

Now all there is to keep in mind that you have to flush the growing medium using fresh water once per week and that we remove accumulated mineral salts. Four weeks is generally the maximum time between flushing.

Place the strawberries under sunlight if we are growing plants as outdoor hydroponics. In case of indoor gardening, use grow lights and ensure that the plants get adequate light.

Another thing that we have to keep in mind is that harvest fruits only when they are completely ripped and turn red in color because as most of you may not be aware of the fact but unlike other fruits, strawberries do not ripen once plucked. Now you can clip additional runners from adult plants if wanted we can grow more strawberries all through the year.

That’s all folks about hydroponic strawberry gardening techniques, tips and methods.

Read: Kaju Cultivation Tips, Techniques.

Types of Greenhouse in India, Greenhouse Material

Types of Greenhouse in India

Today, we discuss the topic of Types of Greenhouse in India and the materials used for the construction of the greenhouse. Greenhouse types and materials: What is a greenhouse? A greenhouse, more normally called a glasshouse in Europe, is an outdoor structure that is used to house plants. Often a simple frame covered by glass or by plastic, greenhouses works by insulating the environment, to a point, in order to extend the growing season.

A greenhouse is a framed enclosure or structure, covered with transparent material, that provides an opportunity for the control of all environmental factors that are capable of affecting crop yield and wide enough to facilitate the performance of cultural practices to aid crop growth and development.

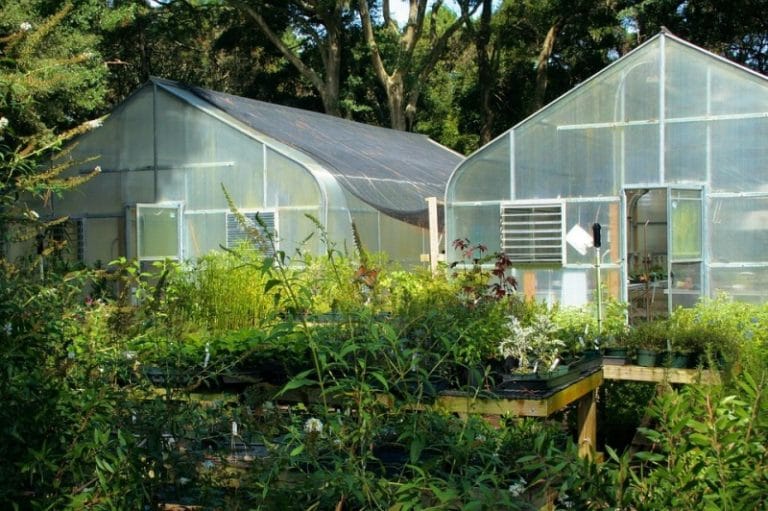
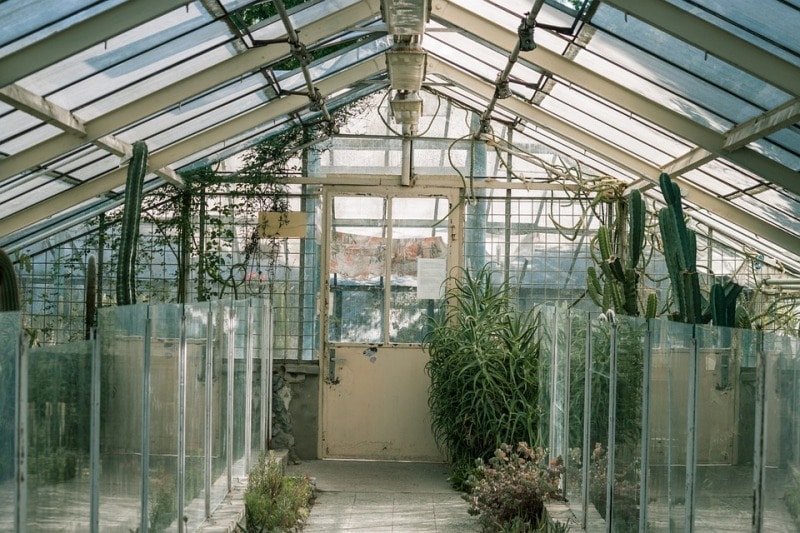
Glass Greenhouse.
Glass Greenhouse.

Greenhouses can make an adequate growing temperature in summer and winter alike. They often are used for growing plants and trees that need strictly regulated climatic conditions. While these structures differ in terms of size and purpose, commercial greenhouses can be significantly larger and boast high-tech equipment designed to boost lighting, cooling, heating, and different types of screening installations. What is the purpose of having a greenhouse? The purpose of having a greenhouse is to shield crops from excess cold or heat and unwanted pests. A greenhouse makes it possible to grow definite types of crops year round, and fruits, vegetables, and flowers are what a greenhouse most normally grows.

All greenhouse buffer plants from freezing temperatures and contain clear walls and ceilings, allowing plants ideal growing conditions with maximum sunlight. Some greenhouses have built-in heating systems to protect plants during the winter, while others rely on the buildings themselves to maintain temperatures inside the greenhouse above freezing. In areas with hot summers, greenhouses might also work as shade houses, with drapes or screening to block the sunlight during peak hours for plants that can’t tolerate hours of direct sun. Now let us get into details of types of greenhouse in India.

Read: Growing Lettuce in Hydroponics.

The orientation of the greenhouse

The greenhouse for farming must be oriented in an east-west direction to maintain better sunlight level as compared to a north-south oriented one. This aids photosynthesis and excellent growth of crops, thus, allowing greenhouse farmers to have a good yield.

Maximum yield explains the greenhouse

Greenhouses are very beneficial to large-scale agricultural crops because the plants are sheltered from drastic weather changes like high winds, torrential rains, blizzards and dust storms, soil erosion, flash floods, and more. Crops grown in greenhouses are also protected from rodents and insects.

Types of greenhouses

What are the different types of greenhouses? The different types of greenhouses are explained below;

  1. Wooden framed structures

In general, for the greenhouses with a span less than 6 m, wooden framed structures are used. Side posts and columns are constructed of wood without the use of a truss is commonly used as it is inexpensive and possesses the required strength. Timber locally obtainable, with good strength, durability and machinability can be used for the construction.

  1. Pipe framed structures

Pipes are used for the construction of these greenhouses when the clear span is around 12m. In common, the side posts, columns, cross ties, and purlins are constructed using pipes. In this type, of greenhouses, the trusses are not used.

  1. Polyhouse

The polyhouse is a generally used type of greenhouse across the globe. It is prepared of the frame (usually metal) of the desired size and covered with polyethylene film. Unlike glasshouse; polyethylene will be used as the glazing material. The polyhouse type greenhouse is not recommended at all in hilly regions because of poor temperature retention, low crop yield, and high installation cost.

  1. Even-span greenhouse

An even-span greenhouse is a self-supporting commercial greenhouse and is the most general type of greenhouse. It is named an even-span as the distance from the ridge to the eave is equal on both sides.

  1. Ridge-and-furrow greenhouse

Two or more even-span greenhouses connected at the eaves is known as a ridge-and-furrow greenhouse. It contains supports but no inner walls dividing the greenhouses. This allows for the making of horticultural crops requiring the same growing environments.

  1. Contiguous greenhouse

Like the ridge-and-furrow type greenhouse, a contiguous greenhouse has two or more even-span greenhouses connected at the eaves. The difference is that a contiguous greenhouse contains inner walls separating the greenhouse which allows for the production of horticultural crops need different growing environments.

  1. Lean-to greenhouse

A lean-to greenhouse is seldom used commercially and create attached to the south wall of a self-supporting structure. Lean-to greenhouses are normally used to start bulbs or seeds.

  1. Truss framed structures

If the greenhouse span is greater than or equal to 15 meters, truss frames are used. Flat steel, tubular steel or angular iron is welded joints to form a truss encompassing rafters, chords, and struts. Struts are supporting members under compression and chords are maintaining members under tension. Angle iron purlins running during the length of the greenhouse are bolted to each truss. Columns are used in very wide truss frame houses of 21.3 m or more. Most of the glass houses are of truss frame type, as these frames are best suitable for pre-fabrication.

  1. Glass greenhouses

Only glass type greenhouses with glass as the covering material existed prior to 1950.  Glass as covering material has the benefit of greater interior light intensity.  These greenhouses have a higher air infiltration rate, which leads to lower interior humidity and improved disease prevention.

  1. Plastic film greenhouses

Flexible plastic films, including polyethylene, polyester, and polyvinyl chloride are used as covering material in this kind of greenhouses.  Plastics as covering material for greenhouses have become popular, as they are cheap and the cost of heating is less when compared to glass type greenhouses. The major disadvantage of plastic films is its short life.  For example, the best quality ultraviolet (UV) stabilized film can last for 4 years only.  Quonset design, as well as gutter-connected design, is appropriate for using this covering material.

  1. Rigid panel greenhouses

Fiberglass-reinforced plastic and polycarbonate rigid panels are employed as the covering material in the Quonset variety frames or ridge and furrow type frame. Very high-grade panels have a long life even up to 20 years. The major disadvantage is that these panels tend to collect dust as well as to harbor algae, which results in a darkening of the panels and subsequent reduction in the light transmission. There is an important danger of fire hazard.

  1. Net house

The net house is a simple kind of greenhouse; here, a net is used as the glazing material, thereby, reducing the adverse effects of the sun and heavy rain.

Materials used in a designing of greenhouse:

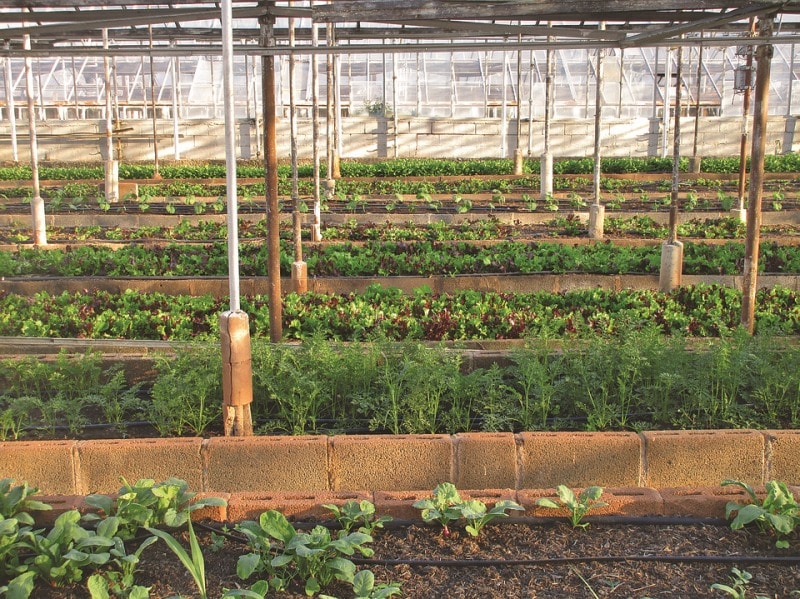
Greenhouse Gardening.

Read: How to Grow Sweet Corn at Home.

The different materials used in building a greenhouse are;

Technically, a greenhouse is a frame-like structure generally made of metals of suitable size. The varying material is the glazing material or film, used in covering the greenhouse. The cost, climatic and environmental conditions generally determine the types of gazing material or film used in the greenhouse. Mostly, there are four (4) materials used in covering the greenhouse.

Glass

The glass is universally the major preferred covering material for greenhouses because of its light transmissivity and better temperature retention. Though, the high cost of installation, fervent damage, and poor maintenance are the liming factors in the use of glass as a film in greenhouses.

Fiberglass

Fiberglass Reinforced Plastic (FRP) is another good choice for your greenhouse. FRP scatters sunlight, providing good diffusion and light transmission throughout the greenhouse, and can last up to 10 years. However, UV rays break down the fiberglass over time, creating the cover brittle. To maintain the strength of fiberglass panels, you need to apply a new UV coating every few years.

Polyethylene

Remember, glass is the main preferred but polyethylene is the widely used greenhouse film or covering material across the globe. Only a UV-stabilized polyethylene sheet is suggested because Non-UV polyethylene will break down after 3 to 5months due to photochemical reactions.

Polyethylene film is tough, flexible and inexpensive. It can withstand as low as -50°C but melts at a temperature between 80-90°C; temperature above 60°C will make it lose much of its strength and can stretch significantly.

Polycarbonate greenhouse panels

Polycarbonate is a strong and light-weight material. Panels prepared for outdoor use have UV treatments that help prevent yellowing and deterioration from sunlight and are guaranteed for about 10 years.

Read: How to Grow Louki on the Terrace.

Maintenance of climatic factors in the greenhouse

There are certain climatic factors need to know and maintain before construction of a greenhouse. They are:

Sunlight

Sunlight is necessary for crop growth and development. It is the main source of energy used by plants and it is essential for photosynthesis. A greenhouse must be constructed such that it receives sunlight for maximum hours.

In hilly regions, the greenhouse must face the southeast direction and it should not be located under shade. In the tropics, temperature retention must be reduced by choosing a less-sunny site.

Temperature

The rate of reactions is always favored by high temperature; however, the temperature through the night hours can drop to below 0°C and heat obtained during the day are not conserved. To keep an adequate temperature in a greenhouse, use the below practices.

  • Keep a container filled with water inside the greenhouse
  • Place black-colored stones in the greenhouse
Relative Humidity

This is the amount of water there in the atmosphere. The minimum necessity of relative humidity to enhance the normal physiological function of the plants is 50 percent. In the greenhouse, adequate water application and restricted air circulation, help keep the relative humidity of the greenhouse.

Soil

The soil is the main popular medium of plant growth. The greatest choice of soil in the greenhouse is the sandy loam soil enriched with decomposed farmyard manure, compost or biofertilizer to aid its productivity.

The soil in the greenhouse needs to be treated during soil sterilization or soil solarization to prevent pathogen and pests within the soil.

Carbon-dioxide

Plants need carbon-dioxide for the procedure of photosynthesis to make organic matter. In the cold, arid regions, carbon-dioxide concentration is below normal and within the greenhouse; it will drop further as an effect of consumption of the plants. The supplementary function of carbon-dioxide will boost plant productivity in the greenhouse.

In a hilly environment, suitable air circulation is a better means of controlling the undesirable lowering of carbon-dioxide. A strongly closed greenhouse helps to conserve carbon-dioxide in the night.

That’s all folks types of greenhouse in India.

Read: Cinnamon Leaf Oil Extraction Process.

Hydroponic Lettuce Gardening Tips, Techniques

Hydroponic Lettuces Gardening Techniques

Today, we discuss the topic of hydroponic lettuce gardening tips, techniques, and ideas. The meaning of gardening has been changed a lot with the emerging science of hydroponics. Hydroponics has made gardening easy as it does not call for huge backyard areas or digging the soil for preparing your field to raise plants. For hydroponic even your balcony, porch or even a corner of your living room is enough. So no more dedicated garden area, no more soil plowing, all you need is a container to harvest best of vegetables and fresh herbs.

Lettuce is nowadays becoming the most desired ingredient in salads, burgers, and sandwiches. Because of its crispy and nutrient enriched leaves, it is most desired leafy vegetable, especially in metro cities. So when we have the technique to reap and harvest best of produce so why not have our own lettuce garden!! Home-grown lettuce is far superior in both taste and nutrient as we can easily regulate and look after its production. Hence Hydroponic lettuce systems are best to the store-bought alternative!.

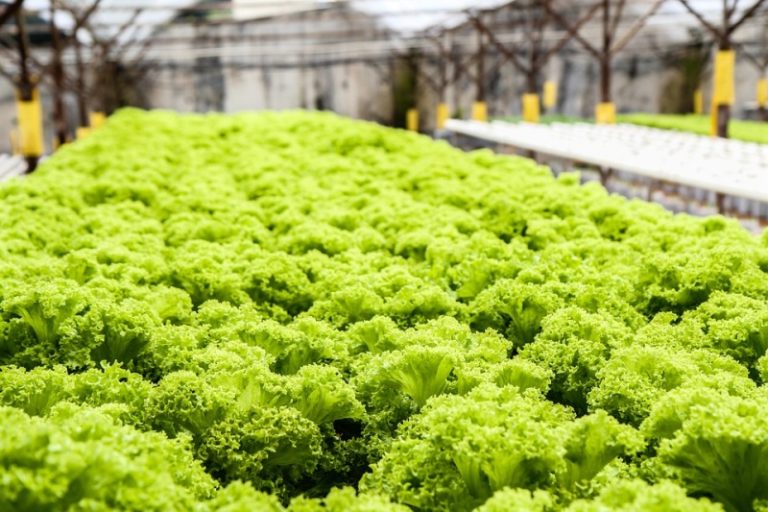
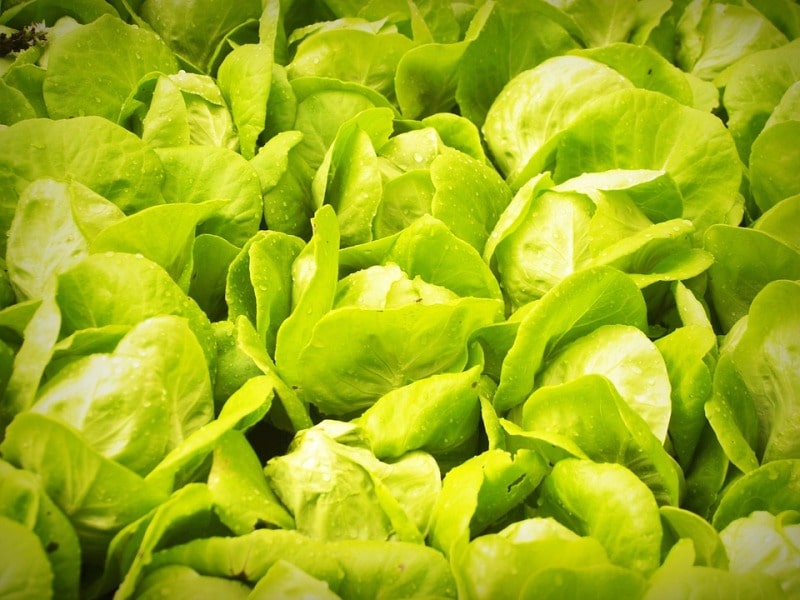
Growing Lettuce in Hydroponics.

Lettuce is becoming one of the favorites for new hydroponic growers and is one of the most widespread plants grown amongst hydroponic growers. Hydroponic lettuce is surprisingly easy to cultivate and boost great confidence in beginner hydroponic enthusiast the reason for this being is that it can be raised in temperate and tropical climates. It is productive for gardeners because both the stems and leaves can be eaten. Hydroponic lettuce grows fast and does not require much space and low maintenance crop under the hydroponic system. In today’s writing, we will discuss Starting lettuce for hydroponics.

Raising hydroponic lettuce is one of the easiest and best ways to start out hydroponic gardening. If it’s done rightly, within a short period of time, you will observe that it is enjoyable, easy and quite productive. Hydroponic setups can be simple or as complex as you wish for, and a basic hydroponic system is usually well to grow lettuce in water and is within reach of anybody with some basic DIY skill.

Read: Growing Beets in Container.

Lettuce varieties

Lettuces are often categorized by their leaf type or head formation. The primary categories of lettuce types may be grouped as follows:

Leaf lettuce

There are three kinds of leaf lettuce commonly grown: red, green, and oak. They don’t have a “head” on them because the leaves arise from a single stalk. For this reason, leaf lettuce is usually more perishable than the head varieties. Red leaf lettuce has a burgundy tint and mild flavor, alike to that of green leaf, while the oak leaf is spicier

Romaine Lettuce

With its long, slightly bitter leaves and sturdy, sweeter centers, romaine provides a robust and crunchy. Most often used in famous caesar salads. This variety of lettuce is usually robust about 8 to 12″ tall and upright growing with thick ribs and tightly folded, spoon-shaped leaves. Often darker green on the outside, the interior leaves are light green or white colored. Romaine varieties of lettuce are usually grown for their baby leaves for salad mixes.

Iceberg Lettuce

It is the most popular type of lettuce. Iceberg is crisp and vigorous, but it’s not as flavorful and nutritious as other lettuces. It contains more water content than the other lettuce. It is known as crisphead lettuce. Iceberg Lettuce Hydroponic is quite famous because of its vigour growth and low maintenance.

Boston lettuce

There are two different kinds of butterhead lettuce: Boston and Bibb. The Boston variety has small, round, and loosely shaped heads with soft, supple leaves that bruise easily. It’s larger and fluffier than Bibb lettuce. This kind is undoubtedly the main greenhouse kind.  As a delicate variety, on the outside butterhead is soft, loose, and ruffled green and on the inside, it’s creamy to light green colored. It is almost exclusively grown to full-head size for harvesting.

Bibb lettuce

Bibb lettuce, on the other hand, is sweet and extra small, bears a head size of a fist. It’s also quite expensive at least twice the price of iceberg lettuce.

Yugoslavian Red Lettuce

This bibb lettuce variety not only looks wonderful but tastes great too. It features red to purple-spots throughout its leaves. It is ready to be harvested in only 55 days and has a mild buttery flavor.

Rex Lettuce

This lettuce variety isn’t recommended for outdoor gardening; however, is perfect for growing lettuce indoors. The lettuce is recommended for hydroponic growing. Their thick leaves have a high resistance to mildew and are also tolerant to tip burn.

Burpee Bibb lettuce

This lettuce variety is considered “The sweetest bibb lettuce “It takes a much longer time to mature than other varieties.

Butter Crunch Lettuce

This variety is a must grow; there is a good reason why it is one of the most desirable for setting up the Buttercrunch lettuce hydroponics system because its leaves are good to store, is crisp and it is recognized for its rich flavor.

Read: Water Culture Hydroponic System.

Hydroponic system for lettuce gardening

There are various kinds of hydroponic systems that you can grow plants in, which include aeroponic systems, NFT systems, drip systems, ebb-flow systems, and many more.

Water culture systems, where roots of plants grow down and absorb nutrients while plants float directly on top of the water, are recommended for growing lettuce at home because of the simplicity of the system. For large production or when you have decided to grow lettuce only, nutrient film method is the best suited hydroponic system for lettuce gardening.

This is a hydroponic system to raise plants hydroponically, which involves a thin film of liquid nutrients, which flow over a plant’s roots in a recirculating arrangement. It often consists of the plants being placed in troughs and put on a table or rack at an angle so that the water will stream down the trough, then out into a common drain line that will be drained back to the tank. When the system is perfectly installed, you’ll have continuous movement of the hydroponic lettuce nutrients solution with no stagnation in the trough. In case of standing water, the system would not permit the right exchange of oxygen through the roots; it will lead to the plant poor growth due to stress.

Advantages of nutrient film technique NFT

Overall, growers commonly prefer an NFT system over others because of its flexibility, low maintenance needs and also a low-cost investment. But there are plenty of other benefits of growing lettuce in the nutrient film technique:

  • Very expandable and modular.
  • Simple to observe the health and quality of the root.
  • Prevents the need to using lots of growing media.
  • Recirculating, which makes it a sustainable system.
  • The constant flow of nutrient solution prevents salt accumulation in the root area.
  • Low consumption of nutrient and water.
  • Disinfecting the setup and plant roots is simple.

Choose a growing medium for Hydroponic Lettuce Gardening

You have lots of growing media options to select from, which includes sand, pine shavings, coco peat, river rock, rock wool, vermiculite, perlite and many more. These types of options have their own advantages and disadvantages; however, though choosing any one of them will let you grow lettuce without an issue. The most commonly used growth medium option in lettuce hydroponics is Rockwool and is both porous and sterile means won’t react and affect the growth of lettuce. While using Rockwool as a growing medium, be careful to keep it from getting too saturated or soggy.  As it can result in root rot, stem rot, and root suffocation because of less oxygen supply. Another widely used option is to grow rock, which holds the moisture well and has a neutral pH. You can use it again if cleaned thoroughly, which can be a great help for growing hydroponic lettuce at home; however, it may become tiresome when growing on a bigger scale.

There are various kinds of hydroponic systems that you can grow plants in, which include aeroponic systems, NFT systems, drip systems, ebb-flow systems, and many more.

Water culture systems, where roots of plants grow down and absorb nutrients while plants float directly on top of the water, are recommended for growing lettuce at home because of the simplicity of the system. For large production or when you have decided to grow lettuce only, nutrient film method is the best suited hydroponic system for lettuce gardening.

This is a hydroponic system to raise plants hydroponically, which involves a thin film of liquid nutrients, which flow over a plant’s roots in a recirculating arrangement. It often consists of the plants being placed in troughs and put on a table or rack at an angle so that the water will stream down the trough, then out into a common drain line that will be drained back to the tank. When the system is perfectly installed, you’ll have continuous movement of the hydroponic lettuce nutrients solution with no stagnation in the trough. In case of standing water, the system would not permit the right exchange of oxygen through the roots; it will lead to the plant poor growth due to stress.

Advantages of nutrient film technique NFT in Hydroponic Lettuce Gardening

Advantages of NFT.
Advantages of NFT.

Read: How to Grow Sweet Corn at Home.

Overall, growers commonly prefer an NFT system over others because of its flexibility, low maintenance needs and also a low-cost investment. But there are plenty of other benefits of growing lettuce in the nutrient film technique:

Very expandable and modular

Simple to observe the health and quality of the root

Prevents the need to using lots of growing media

Recirculating, which makes it a sustainable system

A constant flow of nutrient solution prevents salt accumulation in the root area

Low consumption of nutrient and water

Disinfecting the setup and plant roots is simple

Choose a growing medium for Hydroponic Lettuce Gardening

You have lots of growing media options to select from, which includes sand, pine shavings, coco peat, river rock, Rockwool, vermiculite, perlite and many more. These types of options have their own advantages and disadvantages; however, though choosing any one of them will let you grow lettuce without an issue. The most commonly used growth medium option in lettuce hydroponics is Rockwool and is both porous and sterile means won’t react and affect the growth of lettuce. While

using Rockwool as a growing medium, be careful to keep it from getting too saturated or soggy.  As it can result in root rot, stem rot, and root suffocation because of less oxygen supply. Another widely used option is to grow rock, which holds the moisture well and has a neutral pH. You can use it again if cleaned thoroughly, which can be a great help for growing hydroponic lettuce at home; however, it may become tiresome when growing on a bigger scale.

Hydroponics Lettuce Seeds

As lettuce seeds become older they get start losing viability, and the rate of germination also decreases incredibly. Make sure you use seeds, which are viable for the current growing season. You can buy seeds of your preferred lettuce variety from any store as well as from online sites.

Starter cubes used for germination should be well moistened. Place the seeds into the cubes holes. You will require about five seeds per cube, expecting that few may not germinate and the ones that are weak can be removed out afterward.

They need to be put on a grow tray and watered every day with simple water without any nutrient solution till they germinate and sprouting starts. After the seeds have sprouted, you can use half strength of the nutrient solution.

Read: Organic Celery Gardening.

Transplanting in Hydroponic Lettuce Gardening:

As soon as the seedlings are germinating, thin out the additional seedlings leaving in each cube only that lettuce seedling which appears the fittest. A few of the thinned out lettuce plants might be ideal for transplanting elsewhere. When roots start to appear, and seedlings reach a height of 2 to 3″ that’s about fourteen to twenty-one days, bearing three to four true leaves, your seedlings are all set to leave the nest and go into the system.

Keep in mind that if you chose to make use of transplants from soil be absolutely certain any soil sticking to the roots is washed off thoroughly prior to placing the plants in a hydroponic lettuce system. Lettuce plantings are advised to be staggered sown roughly about three-week intervals so as to assure a constant harvest. Take care not to set seedling cubes or trays with plants on non-sterile surfaces like the ground because the seedlings may get infected with fungal spores. Be cautious when transplanting takes care not to damage the fragile roots of plants during transplanting because such damage will make the plant susceptible to disease infection. It is often advisable to transplant the plant during the late afternoon to prevent them from becoming stressed in the heat of the day.

Lettuce needs quite a cool temperature for the germination. The temperature during the pre-germination phase has to be approximately 40 °F. Once the hydroponic lettuce seeds start showing the smallest indications of sprouting, you should maintain the temperatures of about 65°F.

Hydroponic lettuce gardening light requirements

Lettuce under hydroponic system grows up vigorously with simple fluorescent lighting. It is found growing far better with the more expensive lighting purposely created for hydroponics, like HID and some of the advanced LED grow lights for indoor plants.

However, regarding cost-effectiveness, from the viewpoint of the small-scale home hydroponic grower, fluorescent lighting works the best. Offer at least fourteen hours of light every day to your growing lettuce.

Hydroponic lettuce gardening nutrient requirements

Since there’s no soil for growing lettuce indoors hydroponics to take the necessary nutrients and minerals that they need; you don’t have to be really precise with your hydroponic lettuce nutrients, since this is what has the most impact over how adequately the lettuce will grow.

If you are new to hydroponic lettuce, then it will be sensible to buy pre-made nutrient solutions that are very user-friendly. All you need is the right quantity of water to a measure of the solution which is recommended in the pack itself and you are set. Well, it is also possible to make your own nutrient solutions if you desire to put up the extra efforts.

When yellowing of leaves is detected in your growing lettuce then it’s a sign of lack of magnesium in the nutrient solution. To provide your lettuce plants the best opportunity to thrive, experienced hydroponic growers time to time add a handful of calcium nitrate and Epsom salt to the pre-made nutrient solutions, at a concentration of about a teaspoon to a gallon into the main container. This will guarantee a sufficient supply of magnesium. Another important factor affecting growth is the pH level. the pH level of the nutrient solution describes how basic or acidic it is and will determine whether or not the growing plant can perfectly absorb the nutrients available to it. You should ensure that the pH remains between 5.5 and 6.5 for hydroponic lettuce cultivation. On a regular basis examine the pH with a pH paper strip test and ensure it is a little acidic to nearly neutral to get the top hydroponic lettuce production.

Managing diseases and pests in Hydroponic Lettuce Gardening

Prevent water-borne molds by not allowing water to accumulate in the system or by properly sterilizing equipment majorly the setup.

If you’re having problems with water-borne molds and other diseases, sanitize your equipment by using 2 percent bleach solution.

Sterilize all tanks, reservoirs, pots, and any other equipment that has or supplies water mainly that will come into contact with the lettuce.

You should replace any hydroponic lettuce production media from time to time.

Reduce direct sunlight to prevent the growth of algae if you are placing your hydroponic setup outside. Algae often flourish in the damp environments of a hydroponic garden. But algae need direct sunlight to grow so if you are using grow light the problem is minimized. In case your lettuce is subjected to direct sunlight during the daytime, place a shade over the growing plants.

Keep away insect pests using sticky traps and screens. Ensure any nearby window is protected with a fine-mesh insect screen.

Make sure there’s proper circulation of air in the system to prevent mildew and bacteria.

Hydroponic gardens need to be properly aerated to help the plants get the air they require and prevent the growth of bacteria and molds.

Leave a window or door near to the plants, or consider installing a vent with an exhaust fan if you’re cultivating the lettuce in an enclosed area.

Why hydroponic lettuce gardening is rewarding?

Hydroponic lettuce also grows more rapidly compared to other lettuce in soil. This is mainly because the roots don’t need to spread out looking for nutrients in the soil. This is an additional benefit, meaning you’ll make money in a short time comparatively.

You won’t be passing on any sort of soil-borne diseases to your lettuce which is a real concern for most gardeners.

You can grow the lettuce anywhere in bedroom, greenhouse, balcony, rooftop, garage, window ledge or anywhere no more dependency on the soil.

If you start planting initial seeds by one week for four weeks, you will have long-term lettuce yields. Mostly the Lettuce takes 4 weeks to grow.

You will not need to kill any soil loving pests so you will not have to pay for any costly pesticides. For that reason, your lettuce will grow organic and healthy.

Hydroponic lettuce is expected to grow an average of 40 percent more than other plants grown traditionally in soil. This is simply because you have manipulated and maintained the growing conditions in accordance with the suitability of lettuce variety being grown in the hydroponic system. This way Lettuce plants will also have access to all the nutrients they necessitate through the nutrient present in the hydroponic setup.

Maintenance time is reduced to a great extent. You do not have to water hydroponic lettuce since all the nutrients are already there and the operation of weeding doesn’t exist with the hydroponic plant growing. All you will need to do is harvest your lettuce as soon as it is ready.

There will be no competition for air, water and space in the hydroponic system due to the absence of weed and nutrient availability and light conditions can be adjusted according to the requirement and growth pattern.

That’s all folks about Hydroponic Lettuce Gardening Techniques, keep gardening!.

Read: Vanilla Cultivation Guide.

Sweet Corn Gardening Tips, Ideas, Techniques

Sweet Corn Gardening in Backyard

Today, we learn the topic of sweet corn gardening in your home backyard.Growing corn in your backyard: Corn is a crop which most of us think as a something which is grown in large-scale as we always see it growing in hundreds or dozens of rows in fields. But, if you want to harvest the corn ears just minutes before you grill it or boil it and want your guests and family to enjoy it, you can refer to grow corn in your backyard. Of course, you will also get a very good harvest from a very little space like just 12-15 square feet. When you have decided to grow corn in your backyard, you will enjoy the benefits of a beautiful scenery as you will be able to see the stalks which are climbing to an average height of 8 feet based on the corn type you are growing, environmental conditions in your locality and the care and maintenance of your crop. This article will help you to know how to grow corn in your backyard or helps you in the process of growing corn in small gardens.

Corn Plantation in Backyard.

Read: How to Grow Beetroots in Containers.

Types of corn:

There are basically four types of corns:

  • Dent corn
  • Flint corn
  • Popcorn
  • Sweet corn

Steps to grow corn in your backyard: 

Planning the space for your corn:
  • The first thing you will need to do for growing corn in the backyard successfully is planning the space you are going to dedicate. Though you may be very passionate to grow the corn in long rows across a fence or in between the other crops of your garden, you will end up knowing that this design will not work out for your harvest.
  • Most of the home gardeners grow plants for food. But corn is different from all of those crops. It will not get pollinated by insects, bees or butterflies. You can see a tassel which is located at the top of the stalk. Because of this tassel, it is important that the plantation of corn is done in blocks or rows with at least 2-3 rows of stalks. As you are interested to plant the stalks with a distance of 1 foot, you have to go for the creation of block in a space which is at least 3×5 feet or 4×5 feet. In fact, you can also plan for a large space in order to get a bigger crop when the time of harvest arrives, but this is the least size you can dedicate for your corn to grow.
  • It is always perfect to select a location which is in the complete sun or receives sunlight for most hours of the day. Corn will need a lot more water than many of the plants which produce food and are found commonly in the backyard gardens. Hence, you will have to always remember that if you are designing a garden, make sure that you are grouping the plants which are similar needs for water.
  • Corn can also be grown directly on the ground in large containers or raised bed gardens which can be placed to form rows.
Preparation of soil for sweet corn gardening:

Corn will require more nutrients than other common garden plants. It also likes the soil which is well-drained, acidic and with a pH at 6 to 6.8. You can till the soil at the top up to 8 to 10 inches. This will help in loosening the earth and in the improvement of drainage by the amendment of soil. You have to do this anyways for the addition of nutrients. Combining a little amount of compost from your local garden center is a very good way for the addition of nutrients to the soil when you are preparing it for plantation.

Plantation of corn seeds:

The seeds of corn have to be placed at a distance of one foot, but most of the gardeners will prefer to plant them closer to each other and then start thinning the seedlings once they are grown to a height of few inches. Each and every seed have to be placed at 1.5-inch depth under the ground and have to be covered with soil. This is how to plant corn by hand. As soon as you plant the corn, you will need to water it sufficiently so that the soil gets moist.

Watering the corn:

Corn is never a plant which is tolerant to drought and will require regular watering. Germination of seeds will take a time of 2 weeks and at this time, you will have to water the place on a regular basis so that the soil will be moist. As soon as you have seedlings which are a few inches in height, you can water it deep for one time or two times in a week when the climate is specifically hot or dry.

Read: Growing Peppers in Containers.

Fertilization of your crop:

You will need to fertilize your crop of corn for at least once in two months in its cycle of growth. You will have to select a fertilizer which has a rich content of nitrogen if you want to get the best results.

Hand Pollination of corn:

If you have planted your corn in rows which are at least at a depth of three feet, you will have a crop which is successful without any hand pollination. But if you want your corn to produce to its maximum, it is always a good idea to assist the process of pollination. For doing this, you will need to remove a tassel from one of your stalks and then dust skills in a light manner with the help of the tassel for the distribution of pollen. You will have to do this every day in the morning for almost a week to make sure that the pollination is proper.

Harvesting the corn:
Corn Harvest.
Corn Harvest.

Once you see the silks are almost dry and brown, it is the right time to check the ears to see if they are ready for the harvest. The simplest way to check for the harvest time of your corn is to open the husk slowly just to poke the kernel with your nails. The liquid which comes out should be a bit milky. If it is like water, then it is not the time of harvest. In such cases, the corn will taste more like starch and is also edible.

Storage of your corn:

If it is possible, always prefer to harvest your corn just before you plan to consume it. If you feel that it is not possible to do so, you can always opt for storage. Corn can be stored in refrigerators until you want to use it for a meal. If the harvest of your corn is abundant and you have too much of corn that you cannot eat at one, you can opt for blanching it and freeze it for the use in future. As an alternative, you can also grind the dry part of your corn for cornmeal.

sweet corn gardening Indoors:

Actually, corn has to be grown in the outdoor locations keeping them under the full sun at the time of summer, but if you do not have enough space or if you want to try something in a different way, you can try to grow corn in the indoor location. This house plant is generally unusual, buy it may give you one or two meals.

Steps for sweet corn gardening indoors:

  • The first thing you will need to do is to select a sunny place which is available in your indoor location. Always try to get a large window which is facing towards the direction west or south, a sunroom. The window can also be under the skylight.
  • Now it is time to offer a supplement for the light. Corn will normally take a lot of light. It can as much as possible light if you keep giving. So it is always better to take into consideration the supplementation of light mainly if you have taken this getting corn indoors experiment seriously. You might get a need to supplement the light if you are not having sufficient light which is available naturally. You can go for fluorescent bulbs if necessary as a supplement for natural light.
  • Select a container which is large for growing your corn. You can try a washtub or something which is of the same size. Like any other houseplant, make sure that you are protecting the underneath surface. You can make use of a plant saucer which is large in between the floor and container.
  • The soil has to be filled in the container. You can make use of a potting mix which is rich in the content of nutrients and organic matter. As an alternative, you can also consider adding fertilizers as per the instructions are given in the package.
  • Start growing from the seed. The seeds have to be planted in the soil at a depth of 1 inch and at a distance of 4-5 inches from each other.
  • Watering has to be done as per requirement. You will need to be patient until the soil top gets dried and also it is better not to water too much that you are seeing the roots standing in the water. Always make sure that you are checking for moisture before watering the plants. Always check on a weekly basis and keep in mind that the containers which are kept in the indoor locations will need less water than the ones which are located in the outdoor locations.
  • You can start thinning five plants for one large container. You will need to select the ones which are growing stronger and remove the others.
  • You can help them in the process of pollination. The perfect pollinator for the growth of corn is the wind which will never be available in the indoor locations. Rather than that, you can try shaking the plants in a gentle manner as you will see tassels appearing slowly. The tassels will help in the production of pollen and the silk will start receiving it. Each and every strand of silk will correspond to one kernel.
  • You can start harvesting your corn whenever you have planned to consume it. Corn will be ready for harvest when you see the juice which is coming from the kernel is milky. Other symptoms are brown silk but you will see a green husk. When you are confident that an ear is ready for harvest, you can remove it off the stalk by twisting it and make sure that you are cooking it as soon as possible.

That’s all folks about sweet corn gardening techniques, ideas, and tips.

Read: Weekend Farming.

Container Beetroot Gardening Tips, Techniques

Container Beetroot Gardening Guide

Today, let us learn the topic of container beetroot gardening ideas and tips. Growing beets in Containers: Beetroots are the vegetables which are most commonly called as beets. These are one of the well-known root vegetables and is also used in many recipes across the world. The beets have essential plant compounds, vitamins, and minerals in them. Some of the beet varieties also have the properties of medicine. They are also very good in taste and can also be added to your diet.

Beetroot Plant.
Beetroot Plant.

Read: How to Grow Bottle Gourd on the Terrace.

Beets are the vegetables which grow quickly without any requirement of special care. It is very easy to grow beets in a container. These vegetables are apt for the container gardening who are just at the beginning stage. These will grow very fast and if you are experienced in growing carrots or radishes which are other forms of root vegetables, then growing of beets is not that different for you.

Select the right container:

You can use any type of container which you feel the best. Make sure that it has a good number of drainage holes. It is possible to grow beets in small containers but make sure that the depth of the containers is at least 8 inches. The containers with the depth of at least 12 inches will be ideal ones as they will help in the development of roots. You can select containers of any width you desire. The wider the pot, the more numbers of plants you can grow in that together. Large containers which are rectangular in shape or window boxes with suggested depth are the best choices.

The right time for plantation:

The best practice is to start the plantation of beets at the time of spring. You can start sowing the seeds for every four weeks till the time the temperature starts to rise above 30°C. You can again start the plantation late in the summer and early in the autumn when the temperature will begin coming under the range of 30°C.

As the beets are the vegetables which prefer to grow in cool climatic conditions, the people who reside in the areas which have the climates as tropical and subtropical should start growing the beets late in the winter and early in the spring.

Plantation of beets in containers:

Do remember that the beets will not like transplantation, so there is no requirement of seed trays. You will need to choose the containers and start sowing the seeds at a depth of a ¼ inch. Once the process of germination takes place in the seeds and they will reach to a required height, you can choose the seedlings which are healthy and thin the other seedlings in order to maintain the spacing of 3 inches. In order to quicken the process of germination, you also have an option of soaking the seeds for the entire night in the water which is not chlorinated before the plantation. Anyways, if the fungicides are applied to the seeds, you can avoid the before step.

The seedlings will start anytime in between 7 to 15 days based on the conditions of growing. Till then, you will need to keep the containers in a place which is warm and receives partial sun and make sure that you are maintaining the moisture in the soil. Once the seeds are germinated, you can keep the child plants in the required position and when the seedling starts to grow to at least 3 inches in length, start thinning them.

If you are well aware of how to grow beets in containers, you can try any variety of beets. A few varieties of beets are Early wonder, Detroit dark red, sweetheart, and Sangria.

Growing requirements for beets:

Location for container beetroot gardening:

Beets can be grown in the complete sun to partial sun, but for the best growth, you can select a place which receives full sun for at least 6 hours in a day. Also, ensure that the place you chose to keep the containers has a very good circulation of air in it.

Soil for container beetroot gardening:

Soil which is penetrable, loamy and helps in growing large roots is the best one for growing beets in a container. Always, ensure that the soil you are using is rich in content of nutrients. Adding a large amount of compost to your soil is also a good idea. Also, make sure that you are not adding stones or pebbles to the soil or to the beneath layer when you are growing beets.

Read: How to Install Drip in Home Garden.

If you are not making use of the soil which is purchased in stores for growing the beets, you can go with the preparation of your own potting medium by the addition of soil, compost or manure which is rotten and perlite in the ratio of 1:1:1. If you are interested to make a mix which does not involve soil, you can add coco peat or peat moss, compost or manure which is rotten, perlite or sand at the ratio of 1:1:1. You can also go with the addition of fertilizer which is time-based and also low in the content of nitrogen at the time when you are mixing it in the soil.

Watering your beets:

If you do not want your beetroots to be hard and sinewy, make sure that you are watering them on a regular basis in an even manner. In order to maintain the soil in a slight moist way all across the day, make sure that you are not allowing the soil to get dried fully between the process of growing and also make sure that you are not watering the plants too much.

Spacing between the seedlings:

Make sure that you are maintaining a distance of 3 inches in between each and every plant from all the four sides in order to grow the beets in pots in a successful manner. You can also grow each beetroot plant at a distance of 2 inches, but doing this will affect the root growth. For example, the container which is of rectangular shape and has a width of 12 inches will be able to support 5 plants.

Temperature:

Always remember that the best temperature required for the growth of beets in containers is 10°C to 30°C. The beets can also grow in temperatures which are as low as 5°C and as high as 35°C with great difficulty.

Care and maintenance of beets:
Beetroot Plant Care.

It is a great idea to use slow release fertilizer as an addition to the potting soil medium. As the beets are root vegetables and if you like to have a very good development of root, you can choose a fertilizer which has less content of nitrogen but is high in the content of potassium and phosphorus. For instance, you can go with an N-P-K ratio of 5:10:10.

Once it is been one month since the growing of beets and they are good going, you can start using a fertilizer which is water-soluble. By using the same formula of 5:10:10. And if you find that the soil is becoming deficient of nitrogen, then you can start using the complete fertilizer with the content of N-P-K as 20:20:20.

If you are interested in growing the beets in an organic way, you can dress the plants by making use of compost or manure and start feeding the plants with compost tea in alternate weeks. As the beets generally suffer due to deficiency of boron, you can start adding seaweed fertilizer which is considered to be a very good source of Boron to the compost tea for the best growth.

Pests and diseases in beets:

When growing beets in containers, you will not have much problem with pests and diseases. You can avoid the problem with pests by avoiding too much watering and overhead watering. The most common problems are scab and root rot. The pests like leaf miners and aphids will affect the growth of foliage.

Harvesting of beets:

Beets will need an average time of 8 weeks to get ready for harvesting after the process of germination. You also have an option to harvest the beet green for making use of them in salads. The leaves which are tender will have a delicious taste. You can harvest the beet greens when the leaves are just tiny by removing the outer leaves and leaving behind the inner foliage which is small to grow so that you can harvest them later.

That’s all folks about ideas and tips for container beetroot gardening. Keep gardening!.

Read: How to Make Fish Meal Organic Fertilizer.

Home Garden Drip Installation Techniques, Ideas

Home Garden Drip Installation

Today, let us talk about home garden drip installation techniques, tips, and ideas.Setting up a drip system in your garden is an esy task. The drip irrigation system is a comfortable way of watering your garden. It will supply the water to the plant roots directly by decreasing the evaporation and loss of water because of the flow of wind. You will need to connect the drip to a timer and you will your garden watering itself in an automatic way with very less upkeep. In this article, we will discuss how to install a drip system in your garden or home garden drip installation techniques.

Planning a drip system for your garden:

Well, if you have good control of your garden, you can easily work on home garden drip installation. Read further for finding information on how home garden drip installation works.

  • The first thing you will need to do for installing a drip system in your garden is to divide the garden as per its water requirements. Before you buy all the supplies, you will be required to know what you need exactly. You will need to sketch a map of your garden or the spot you want to start drip irrigation. Then, start dividing the mao into several spots depending on the following factors
    • The water requirements of every plant. You will need to divide them as medium, heavy and light.
    • Shade levels of sun. If all the plants in your garden have the same watering requirements, you will need to use exposure to the sun in order to divide the garden. Plants exposed to full sun will require more water than the plants which are exposed to partial shade.
    • You will need to consider any variation of soil in your garden.

Read: How to Grow Bottle Gourd on the Terrace.

  • A drip tube which is typical will reach up to the length of 250 feet or 450 feet if the water will enter the line at its center. If you require more than one drip tube, you can start installing a lateral lie with more drip tubes extending from it at several spots. For gardens which are a lathe, you can make use of a mainline which is pressurized rather than the lateral line and also take into consideration looping it in a complete circle which will allow you to make the length twice to 1000 feet. Sketch the layout which is proposed on the map.
    1. Ideally, each and every drip tube should work in an area with similar water requirements.
    2. You can also choose distribution tubing as an alternative to drip tubing. This will reach a maximum length of 35 feet. You can make use of hanging plants or potted plants for the prevention of clogging.
    3. Normally, the mainline will run along the length of the garden or around the complete perimeter for the properties which are large.
  • After that, start dividing the garden into watering zones. The drip emitters and tube diameter will help in the determination of the maximum system gallons per hour. For meeting the water requirements of your garden, you should divide the system into different zones. By the installation of the zone control valve in each and every zone of your garden, you can send the water flow to one or two zones at the same time. It is always better to install the valves near the zone center so that it will push the water out at uniform pressure in all the directions.
    1. If the drip irrigation system you are installing is a permanent one, it would be worth the cost if you go with an electric valve which will get hooked up to an irrigation controller. The valves which are manual are too long for operation and are frequently by mistake left operating for longer than intended.
    2. The drip irrigation system equipment you are purchasing should always include the tube length which is recommended and also GPH. You can also make a calculation of this on your own by making use of calculations of hydraulic flow.
  • You will need to make a decision on the delivery method of water in your garden. There are different ways for water delivery from the drip tubing to the garden plants. You will need to take up a determination of what to use in which spot of your garden. Drip emitter is the common option in most of the drip irrigation systems. This is a line with a small diameter and is attached to the actual tubing. Punch holes which use a drip irrigation hole will punch anywhere along the length so the water will start flowing towards the garden plants. Below are the drip emitter types.
    1. Micro-sprinkler heads: These will be between sprinklers and drip irrigation. These are the sprinklers which have low pressure and are not that efficient. But these are harder that they will not clog. This feature would be useful for the areas which have hard water. They will do well in the areas which are shaded and for the plants which love mist.
    2. Pre-installed emitter lines: This type of drip tubing will place the emitters in a uniform way. These will be suitable for orchards, crops, and rows of vegetables. It will also work for shrub beds and other sites which are planted in a dense manner and even under turf if the installation is done in a perfect way.
    3. Porous pipe: This is one of the cheapest alternatives for drip tubing along its complete length with no other requirement for the maintenance of water pressure rate of control. This is generally not recommended as it will clog very easily and will also have a shorter length. You should never combine with other emitter types.

Read: How to Grow Organic Chillies at Home.

  • After that, you will be required to narrow the drip emitter type. If you have decided to choose drip emitters, there are several types to select from. The turbulent-flow emitters which are of the basic model are a good alternative, but you will need to take into consideration the below options in a few situations:
    1. Before that, you will need to make a note that irrespective of the emitter time you select, it should be flushing on its own so that it will be clear when the zone is shut down.
    2. Make use of the drip emitters which compensate pressure for changes in elevation over 6 feet. The pressure-compensating label is not regulated so you will need to check for the information of the product and get a confirmation on how it works with the rate of flow you wish before purchasing.
    3. The drip emitters which are adjustable will waste the water and are prone to flooding if not checked in a frequent manner. It is generally better if you go for the installation of different emitters which are standard and color-coded with varied strengths.
    4. The turbulent-flow emitters are a cheap option for all the other purposes. Emitters like a vortex, the diaphragm will work fine. These variations are not that important than the differences which are mentioned in the above points.
  • Plan the rate of flow and spacing: Now it is the correct time to check the number of emitters you require. Each and every emitter has a specific rate of flow generally expressed in GPH. Below are some basic guidelines based on the type of soil.
    1. Sandy soil: This soil will get divided into grains when you rub between your fingers. Space 2 GPH emitters with a distance of 12 inches in between them.
    2. Loamy soil: The soil quality will not be too much loose or too much dense. You will need to place 1 GPH emitters with a distance of 18 inches in between them.
    3. Clay soil: This is dense and will be very slowly absorbing water. You will need to place 0.5 GPH emitters with a distance of 21 inches between them.
    4. If you are making use of micro-sprinklers, you will need to place them 3 inches distance from each other as described in the above points.
    5. For other plants with high requirements of water, you will go with the installation of two emitters which are spaced in a uniform manner around the root zone. Do not combine emitters with different rate of flows on the same drip line.

Equipment purchase for your drip system:

Apart from emitters and pipes, you will require a plastic fitting for every connection along with an end cap or flush valve for every drip tube. In addition to this, you will require an air vent on the lateral line. This will get opened when the zone shuts down to help the emitters to flush. Before that, make sure that you are reading the instructions which are mentioned in the next section for extra equipment required to connect the system to the source of water.

    1. You can make a comparison of all the threads and sizes before buying. You will require adapters to make a connection between the pipes of several sizes or to get hose thread attached to pipe thread.
    2. If you are making use of a lateral line, use tubing which has black polyethylene.
    3. If you are making use of mainline, select piping which is made from copper, galvanized steel, PVC which is sturdy or polyethylene which is heavy. Then bury the PVC for protecting it from sunlight.
    4. The type and size of your pipe will help in the determination of the rate of flow which is maximum. The 200 PVC pipe of 1 inch will be large enough and also supports a water flow of 12 gallons per minute. If your supply of water has a rate of flow which is higher than that, then improve the pipe sizes and zone valves as per that.

Water supply connection for your home garden drip installation:

  • Installation of the mainline with a backflow preventer: Each and every irrigation mainline should be its own closed system with backflow assemblies which prevent any contamination back into the supply of drinking water. Your backflow assembly has to stop all the backflow from both the back-siphonage and back pressure and comply with all the local code and laws.
  • Hooking up a controller: If you wish to start watering your garden automatically, you can install an irrigation controller to a location which is comfortable. You will need to wire this to each and every zone valve making use of direct burial irrigation wire and also wire splices which are of waterproof. You can put any wires above the ground in conduit.
  • Drip tubing will be clogged very easily because of minerals, rust and other types of particles present in water. You can make use of a mesh which is having a size of 150 or higher and is rated twice the water pressure which is expected.
  • Connecting a pressure regulator if required. It can also be called a valve which reduces pressure. This will reduce and regulate water pressure in your irrigation lines. Installation of this into your system will have a water [pressure above 40 PSI.
  • The lateral line has to be fitted if required, If more than one drip line will run from this lateral line, you can go for installing your PVC lateral line. Each and every drip line in the garden area will run from this specific pipe.
  • Make sure that you are not forgetting about the protection of your lateral line from the sunlight by making use of aluminum tape.

Attachment of the drip watering system:

  • You will need to first assemble the drip lines. You can make use of a tubing cutter in order to cut the drip tubing to the lengths you want. You will need to push each and every drip tube into a connector and also go with attaching the connector to your lateral line or regulator of pressure. Now lay out the drip lines on the garden surface.
  • Make sure that you are not burying your drip lines, or they can end up being chewed by gnawing mammals. You will need to start covering them with mulch if you want to hide them after the installation is completed.
  • You can also add control valves prior to each drip line if you wish to adjust or shut each of them.
  • Now the drip lines have to stake in their place. The drip lines have to be secured by making use of garden stakes which are ordinary ones.
  • Now, it is time for the attachment of emitters. If you are making use of drip emitters or micro sprinklers, you can go with attaching these along the drip lines. Make use of a punch tool which is small enough for piercing it into the drip tube. Then after this, start inserting the emitter into this hole tightly.
  • Make sure that you are not making use of a nail or any other object which is improvised which may have chances of creating a ragged or leaky hole.
  • The end of each drip tube has to be capped. Attachment of a flush valve to each and every drop tube has to be done for the prevention of water being leaked out at the end. You can also just blend the tube and shut it down. These are the tools which will make it easy for inspection and also clean the tubing which is clogged.
  • Now, it is time for testing the system. You will need to set the timer on manual mode and switch on the supply of water. The adjustment has to be done to the control valves until the release of slow and steady water from the emitters. Once the release is done, the timer has to be set as per the requirements of your garden. The complete system has to be checked for any leaking and repair if required.
  • For the connections which are made from metal to metal, you can wither fo by wrapping the threads with the help of a Teflon tape, not more than thrice, or you can also go with the application of a little amount of paste made from pipe thread which is also called as pipe dope. Make sure that you are not using too much of pipe dope as there are chances that it may worsen the leaks mainly with the metals which are soft like copper or brass.
  • The connections which are plastically threaded will seal in a better way than the metal ones and these are not designed to work with the help of Teflon tape. Make sure that you are tightening them as much as possible by making use of your hand and then make use of a hand tool for the purpose of tightening now more than one complete turn.

That’s all folks about home garden drip installation instructions.

Read: How To Prepare Fish Meal Organic Fertilizer.

Bottle Gourd Terrace Gardening (Louki) Ideas, Tips

Bottle Gourd Terrace Gardening

Today, we discuss the gardening topic of “Bottle Gourd Terrace Gardening” or How to grow Louki on the terrace.

How to grow Bottle gourd in the terrace?

What is Bottle gourd? The Bottle gourd is a very popular and very healthy annual vegetable. This vegetable is a long vine, whose flower is white and the leaves come in bigger.

The Bottle gourd is also called a calabash, or white-flowered gourd. It has always been regarded as one of the healthiest veggies. This is a very versatile vegetable is full of water (about 92%) and minerals and keeps your body hydrated. Bottle gourd has lots of health benefits, is easy to grow and tolerant to high temperatures, making it a great vegetable for the Indian summers. The Bottle gourd scientific name is Lagenaria Siceraria.

There are several shapes or types of Bottle gourd, namely,

  • Round (called calabash) bottle gourd
  • High round bottle gourd
  • Cylindrical bottle gourd
  • Bottle shape bottle gourd
  • Long bottle gourd
Long Bottle Gourds.
Long Bottle Gourds.

Read: Container Organic Celery Gardening.

The Bottle gourd is simple to grow plants at home. You can grow it in pots or containers on the terrace starting from Bottle gourd seeds or seedlings.

Nutritional value:

Bottle gourd has high water content and is a rich source of vitamin C and vitamin K and calcium. Bottle gourd helps in maintaining a healthy heart and it brings down bad cholesterol levels. Bottle gourd juice is recognized to be beneficial for the diabetic patient since it stabilizes blood sugar levels.

Prepare the soil for Bottle gourd terrace gardening:

Get some soil and natural manure, and combine it well with the peats. If you want to maintain it organically, add cow dung or goat dung manure to the mix. Stay this mix aside for a few days. Meanwhile, when peeling veggies, etc.; do not throw away the skin.

Water requirement:

Verify the soil once or twice daily for moisture loss. If it feels dry condition, it’s time to water. A healthy Bottle gourd plant needs water in a consistent manner so that the soil does not dry up. Proper watering during the growing period encourages plant flower and fruit. If not watered well, the plant will have weak produce.

Containers used for planting Bottle gourd in terrace:

What type of containers can I use? Containers of all different sizes, shapes, whether of plastic, ceramic, metal or mud can be used. Your coke bottles, take away plastic boxes, old sacks, coconut shells, old broken buckets, UV treated grow bags, cement pots, your dented kitchen pots, just about everything can be recycled and used as containers.

Containers are the key to setting up plants. Whatever containers you use, they want to have a small opening at the bottom to release any extra water that pours for the plants. However, this small hole must be blocked with a small piece of flat stone to prevent the soil from draining away as well.

Tips for Bottle gourd terrace gardening:

Salt water must not be left on the plants. Specifically, in pot plant growers are using one and a half feet repeatedly in wood & cement plants for planting to be comfortable. Pots of red soil, sand, manure & mix well and to be applied. Plants were irrigated in the morning & evening. After the plants are grown with natural fertilizers in the growing of vegetables, the taste is good with the quality.

Temperature requirement to grow Bottle gourd:

Bottle gourd like plenty of sunlight and do not develop well in shady areas. The Bottle gourd plant grows well under warm temperatures (25 to 35ºC). Under frost free, low-temperature conditions, it will grow well provided the plants have attained sufficient vegetative growth before the onset of cool weather. The optimum germination temperature is between 20 and 25ºC. Temperatures below 15ºC and above 35ºC decrease the germination rate.

Read: Container Organic Chilli/Pepper Gardening.

Propagation of Bottle gourd:

Depending on weather conditions, the seed can be sown directly or it can be raised in the nursery and then transplanted. In the case of transplanting, seeds can be sown in poly pots filled with a mixture of soil and compost manure and transplanted at 4 to 5 leaf stage. With some variation, seedlings are transplanted with an inter-row spacing of 1.5 to 2 m, and intra-row spacing of 1 m to 2 m. During the rainy seasons, the Bottle gourd is generally planted on mounds and during the dry season in depressions. The seed must be soaked in water overnight so that they absorb water which softens the seed coat.

Seed germination:

Bottle Gourd Seeds.
Bottle Gourd Seeds.

The sprouts should emerge within 10 to 14 days. If you want quicker seed germination, soak the seeds overnight in water, prior to sowing. 

Best time to grow Bottle gourd:

When to plant Bottle gourd? Bottle gourd is a winter growing vegetable and usually in the months from November to January in India. Raise the seedlings in a four-inch pot indoors (growing vegetables from seeds) or in a hot frost-free place (Temperature at least 20°C) in the ground by sowing two seeds, half inch deep. Keep the pot or container moist.

Keep your gardening tools ready:

You will require very simple tools for gardening like gloves, sprayers, composters, rakes, shovels, plant pruners and growth stimulators that you have handy to avoid delay in treatment. Based on the space and your need you can find a proper terrace gardening kit online for yourself.

Selection of space to grow Bottle gourd:

The home terrace is an ideal place to grow your organic veggies as it gets ample amounts of sunlight all throughout the day. However, if plants do not require that much sunlight, you can always arrange for a green shade net or greenhouse on your terrace or take a few indoors near windowsills. Though, if you are living in an apartment, you can use your own balcony, windowsill or confirm the housing society does not have any problem with you growing Bottle gourd on the terrace as it is going to take up some amount of common space.

How to find the right containers for terrace gardening? It is not necessary to opt only for costly earthen pots or decorative clay vessels to nurture plants. You can easily choose from one of unused household items like an empty paint bucket, water bottle, milk crates, and bathtubs and so on. You can even find that helmet you do not use anymore, clean it and fill it with soil and necessary nutrients to grow your vegetables. However, refrain from using rice or cement bags as they can start to disintegrate after some time. Whichever container you choose, make sure it is well cleaned and had holes for drainage before planting your seeds in it.

Planting:

How to plant Bottle gourd? Fill your pot or container with the given growing medium and level the surface. Wet the soil with water to give the right environment for seeds to germinate. Plant seeds about 1 to 2 inches deep in the group of 3 seeds, then cover them with growing medium. Maintain the soil moist by spraying water twice daily.

Transplanting and plant growth:

Once the plants have reached at least 1/2 foot in height, it’s time to transplant them to a pot or container in a terrace. Before transplanting, maintain one healthy plant and remove others. At the bottom of the soil, cut the weakest seedlings out. Be careful not to disturb the roots of the healthy Bottle gourd plant. This procedure is called the plant thinning and it’s a great way to ensure healthy growth.

After thinning, shift the whole biodegradable pot out in an open space or in a container 18 to 24 inches deep. Bottle gourd vegetable grows well in sandy loam soil. By adding organic manure you can create the soil rich. This will give high-quality vegetables. The plant can grow over 1 to 6 feet as a vine, so it needs solid support to climb. You can give support by installing vertical trellis.

Read: Garden Drip System Ideas and Tips.

Bottle gourd planting care:

  • Mind it when the frost is over. Transfer these plants to the prepared soil by manure in the late spring season.
  • This plant requires a lot of water, particularly during the growing season, but hate the wet feet.
  • When the main vine becomes 6 to 8 feet long, it’s growing tip is cut off, it strengthens the plant and helps support other branches. This helps in more stimulus of fruits and flowers. But this Bottle gourd plant grows well in sandy loam soil. By adding organic manure you can compose the soil rich. To cultivate Bottle gourd, as well-prepared soil by mixing the organic manure. This will give high-quality vegetables. For this soil pH Level, 6.5 to 7.5 are ideal.
  • Bottle gourd plant needs water in a uniform manner; its soil does not dry up. The abundant water in the growing period encourages plant flower and fruit. Due to the state of drought, the tree will create weak and less.
  • Keep in mind that wherever this plant is available, there must be a better system of drainage.
  • Use it to spray seaweed solution or liquid fertilizer every three weeks.
  • Its plants are vines and can be up to long 15 feet. To climb it, you can use lattice.

Harvesting:

When to harvest Bottle gourd? It is important to harvest Bottle gourd at the correct time. When the Bottle gourd begins to change color or becoming yellowish color, it is time to harvest it. You must be able to pierce your nail in it easily. Harvest the Bottle gourd with at least one inch of stem attached. If the fruit becomes hard and cannot pierce your nails in it, it is over-ripe and not excellent for cooking but good for decoration purpose. Overripe Bottle gourds are very good for making seeds, which can be used to grow gourds next year. How long does bottle gourd take to grow? Your Bottle gourd plant should start flowering within 25-30 days of planting. Bottle gourd produces white flowers, about four inches in diameter. Bottle gourds should appear within 40 to 50 days of planting.

Insects and diseases of Bottle gourd:

In Bottle gourd planting powdery mildew can be a problem in humid hot weather. If mildew develops, remove the affected plant leaves. In order to avoid powdery mildew and rotting, make sure the plant gets good air circulation and proper water drainage.

In Bottle gourd, powdery mildew can be prevalent under humid conditions during summer and can quickly spread to all seedlings in a nursery net house. Control is achieved by spraying with copper oxychloride to the plant.

Gourds protect plant seeds from most pests. Gourds on the ground must be protected from damp by placing a pad of dry grass underneath. The damp will discolor the gourd with black blotches.

Storage of Bottle gourd seeds:

Store Bottle gourd seeds in a dated brown paper bag in a cool, dry, insect free area. Otherwise, leave the seeds inside the uncut calabash or Bottle gourd in a cool, dry area where they will remain safe from pests until the planting season.

That’s all folks about bottle gourd terrace gardening.

Read: Weekend Farming Information.

Container Organic Chilli Gardening (Peppers)

Container organic chilli gardening

Today, we are discussing the topic of container organic chilli gardening or container organic pepper gardening. Any home gardener when raising its own vegetable definitely prepares a list of plants to be grown at least once and on this list chilli plants are usually on top position. Chillies are an inseparable part of any cuisine whether you are making curry or any sauce or you want to add flavor in your food with delicious chilli pickles, whether you are topping your pizza, chillies are omnipresent.

Growing Peppers in Containers.

In addition to satisfying our taste buds chilli has nutritional importance as well let’s look at some benefits this humble spice offers:

  1. We should start with the ultimate benefit – i.e. green chillies come with zero calories. In fact, they can speed up one’s metabolism as well.
  2. Green chillies are full of antioxidants that defend the body against free radicals.
  3. Interestingly enough capsaicin, found in green chillies although hot to taste and this pigment causes the spice and pungent taste and has been shown to lower body temperature by stimulating the cooling center of the hypothalamus region present in the brain. This explains why, even in very hot places like India, green chillies are consumed. Isn’t it wonderful!!!
  4. Remember when last time you accidentally chewed a piece of green chilli and your nose and mouth started watering or anything when you smell anything spicy automatically you start salivating. This is because the capsaicin in green chillies has a stimulating effect on the mucous membranes of the nose and sinuses. Capsaicin stimulates blood flow through the membranes and causes mucus secretion to become thinner. This action makes it beneficial in combating the common cold or sinus infections. So this craving of soups and spicy noodles during cold is stimulated due to chillies only.
  5. Enriched with Vitamin C and beta-carotene, green chillies are beneficial for healthy eyes, skin and immune system. Make sure to store the green chillies at a dark and cool area because chillies lose their Vitamin C content when they are exposed to heat, light, and air.
  6. Green chillies are a natural source of iron and a boon for iron-deficient people.
  7. Green chillies are rich in Vitamin K.

So after reading these several benefits, you must be thinking how to grow chilli at home and let me tell your chilli plants are one of the favorable crops to be grown at home as it doesn’t have stringent requirements and care. Another good thing about growing chilli in the garden is you need plenty of lands to raise them chilli prefer to be in containers or you can say they yield more when grown in containers. So today we will discuss How to grow chillies in pots? We will also suggest ideas to raise organic chilli plants.

Chilli plant information

Chilli plant belongs to the family Solanaceae same family as tomato and brinjal, chilli is botanically known as Capsicum annuum all over the world.

Talking of plant habit, it is a small, annual shrub with an erect, branched shoot with green-brown stems with simple oval leaves. It thrives through a tap root system. The plants produce small flowers with five petals, usually white in color and are pendent. In other words, unlike in other plants, the flowers of chilli droop down and hang like pendants. The chilli fruits also similarly hang downwards. Chilli seeds are contained within the fruit. The economic plant of chilli plant is its fruit.

There are many varieties of chilli plants, some of which are the hottest peppers known such as naga chilli, ghost chilli, Guajillo, jalapeno, peri peri, etc.  Though chilli plant is grown all over the world but found mostly in Britain, Australia, South Africa, India, and other Asian countries.

Life-Cycle: Annual and perennial.

Height: 20 to 39 inches.

Width/Spread: 1-3 feet.

Flowering season: early summer.

Flower: Chilli flowers occur singly or in small groups of two to three flowers varying in colors and size.

Pollination similar to tomatoes means the chilli flowers are self-fertile, and you don’t need to provide additional agencies to pollinate them.

Read: How to Grow Organic Celery in Containers.

Growing chilli plants in pots or container

Growing Peppers in Pots.

Being a low maintenance crop you can easily enjoy homegrown organic chillies at home. Also used as an ornamental crop because of its canopy and beautiful fruit color, green, purple and red you can grow chilli plant indoor or beautify your veranda, backyard or in terrace with chilli plants on your own.

Major grown species of chilli

Capsicum annum

  1. frutescens

C.chinense

C.pendulum

C.pubescens

Organic chilli gardening in containers

Since we are focusing on the growing of chilli plants in containers that too organically, so let’s define organic gardening of chilli first in simple words organic gardening is a crop production method in accordance to the rules defined by nature. It focuses on the use of natural resources and minimizes the use of any chemical resources. It is a gardening system that seeks to avoid the use of chemical fertilizers and pesticides. In organic gardening, the entire system i.e. plants, soil, water and micro-organisms present in soil are to be protected and use of biofertilizers and green manure is encouraged.

The answer to question How to grow chilli plants faster lies in practice of organic gardening of chilli plant since we are maximizing the use of nutrient-rich sources such as green manure, vermicompost, and biofertilizers and growing chilli plant in protected environment like containers and pots increases its production due to less disease and insect, pest infestation as pots are easy to maintain and are always in our radar.

Choosing a perfect pot or container

Choosing a Perfect Pot.

For growing chilli plants in the container, always choose containers or pots that have sufficient drainage holes to drain out the excess water with the right conditions, chillies can grow brilliantly in containers. A 5-gallon container or 12 inches deep and wide similarly is sufficient for a single plant for most of the chilli varieties.  You can pick any container plastic or aluminum anything that can hold the plant or doesn’t interfere with the plant growth. As chillies grow bigger, they like to be transferred into slightly larger pots. For example, move a seedling from a three-inch pot into a half litre, then one litre, then three liter – rather than from a three-inch pot to a three-litre one

Position of container or pots

Growing chillies in containers need a place that receives full sun around 6-8 hours of direct exposure to sunlight. They are heat-loving plants like other plants of the family e.g. Tomatoes and eggplant. If you are short of space, you can also grow chilli plants indoors on a sunny windowsill. Also, choose a spot that has superior air circulation to avoid diseases.

Soil requirements

Chilli gardening in containers makes its cultivation relaxed and rewarding. The soil used in pots should be well drained rich in organic matter, chilli plants thrive in soil having a pH of 6.5-7.5, and it cannot tolerate acidic or alkaline soils. Always make sure the share of soil used in your container must be free from inoculums of pest and insect and should not be taken from the field with an incidence of any disease. The portion of soil used should be free from stones or pebbles or any plant debris. Chilli plants require moisture for growth for the gardening purpose the crop needs well-drained sandy loam with rich organic content.

Read: How to Prepare Garden Seedbed.

Soil treatment for container organic chilli gardening

If you wish to harvest organic chilllies then you need put some extra efforts by treating the soil with biofertilizers such as Azotobacter or Azospirillum are mixed with compost or farmyard manure and can be left overnight. You can also add vermicompost in the soil these biofertilizers add bulk of essential nutrients in the soil. It’s also a good idea to mix 5-10 gm of neem cake at the time of soil preparation this will provide protection to the young plants from soil-borne diseases and pests.

Climatic requirements

Chilli is a tropical and sub-tropical plant which requires a combination of warm, humid yet dry weather. Chilli plant growing stages require different temperature conditions during the vegetative growth stage it needs warm and humid weather. However, dry weather is suitable for fruit maturity. Temperature range of 20⁰-25⁰C is perfect for chilli growth. At 37⁰C or higher temperature, the fruit development is affected. Similarly, in case of heavy rain, the plant defoliates and starts rotting. However, in case of low moisture conditions during the fruiting period, the bud does not develop appropriately. Hence, as a result, the flower and fruit may drop off. We can conclude, high temperature and relatively low humidity level would lead to deflowering and fruits if developed would be very small. These points are to be kept in mind when you are growing chilli plants in the container in outdoor conditions especially.

The season for container organic chilli gardening

Chillies can be produced both as Kharif and Rabi crop. Sowing months are May to June for Kharif crop, September to October for Rabi crops. If they are planted as summer crops then January-February months are preferred.

How to water chillies in pots

How you water chillies or watering frequency will make a big difference to your growing success story. Drainage is important the chilli roots must have an adequate amount of oxygen that’s why we recommend pots with sufficient drainage holes. Chillies seem to grow best with dry and wet cycles so it’s good not to water them every day if possible. Keep the soils slightly moist constantly and never allow the plants to dry out completely.  Also, avoid overhead watering as this may lead to wet foliage, which invites fungal infections. At the times, when flowers start to appear and fruits begin to form reduce the watering a little. But be careful, drying out of soil completely results in flower drop. Chillies are crops that cannot withstand a lot of water. Heavy rainfall and stagnated water would result in rotting of the plants. A frequent watering would result in the shedding of flowers during chilli flowering time and a burst of vegetative growth. The amount of water to be irrigated, the number of irrigations and its frequency highly depends on the climatic conditions and the soil type. If the leaves start dropping during day time it is an indication of water requirement. Similarly, if the flowers seem weak or exhibit not enough vigour, watering the plants would help.

Read: How to Identify Organic Food in India.

Seed treatment in container organic chilli gardening

It is always advantageous to adopt indigenous practices for seed treatment, especially when going for organic production. The seeds may be treated with Trichoderma and Pseudomonas sp. @ 10 g per kg of seeds to avoid the incidence of seedling rot in the nursery. Biological seed treatment with antagonistic Pseudomonas fluorescens improves the seed quality parameters and drastically reduces the bacterial wilt incidence.

Planting material for container organic chilli gardening

Chilli plants are propagated by its seeds which are also grown in nurseries. Depending upon the preference of the grower chilli plant can be cultured either by sowing the seed directly and raise your seedlings yourself or you can opt for purchasing the raised seedlings from nurseries anytime.

For growing chillies from dried seeds, you can either use containers as raised seed beds or directly on the field. Chilli seeds can be planted into small pots and compressed down to the soil by using compost. The seeds should be planted at uniform and good space between them so that their roots are not harmed and hampered.

 Raising organic chilli nurseries

Grow chilli from seeds step by step seeds of high yielding varieties with tolerance to pests and diseases may be used. They should be carefully chosen from certified organic farms or from own seed plot which is raised organically. Seeds should not be treated with any chemical fungicides or pesticides as it is the essence of organic crop production. Chilli plants are typically started in seedling trays or small pots. Seeds should be sow about 5mm deep in small pots or growing tray. They are very susceptible when small and they don’t grow all that fast. The germination usually takes 1-3 weeks, depends on the warmth and humidity.

You can plant several chilli seeds per pot. Once your seedlings have a few leaves, you can discard the weaker ones and only keep the healthy promising plants. Usually we only want one chilli plant per pot when we transfer them out for easy maintenance. Sow the seeds almost ¼ inch deep in a seed starting mix or you can use growing material like perlite or coco peat. Place seed tray in a spot that is warm, temperature above 15 C is significant for germination. Keep misting the seed tray frequently and keep the soil evenly moist. To make germination of seeds easier, cover the seeds with a plastic wrap and keep it in a warm location to keep the moisture conditions intact. As soon as the majority of the seeds in a pot have emerged and have started bearing two well-formed leaves, and surely before they become leggy, they should be transferred into the larger pots where they will grow further. During transplantation, the seedlings require little care; hold the seedlings by the leaves, and not the stems.

Transplanting chilli seedlings to containers

The most crucial part of transplanting chilli seedlings or chilli potting is to avoid too much disturbance to the plant.  Ensure your new pot is filled with the compost and perlite or sterilized and treated soil.

Make a hole in the center using your finger or dibber before you transplant the seedling this will provide proper aeration to the growing seedling and will also drain the extra water in the pot.

You can plant one seedling per each pot or if the pot is large in size you can also plant multiple seedlings but make sure you maintain a distance of at least 5 cm between the seedlings so that they don’t affect each other’s growth.

Cautiously, using a small implement, lift the seedling out of the growing tray by holding a leaf, not the stem, then drop the seedling into the hole present in the desired pot.  Make sure that the hole is deep enough to allow the stem to be covered by soil and just the leaves to be visible.  This will facilitate to reduce the risk of the plant becoming leggy or damping off.

Gently fill soil around the plant by simply patting, but do not compact the soil, just give the pot a gentle tap to settle the soil.  Gently water the new seedling by sprayer, don’t make seedlings swim in the water.

After transplanting the container should be placed in a favorable place where the optimum temperature is maintained supporting proper growth of the plant.

Read: Community Gardening Tips.

Container organic chilli gardening care

The growing medium should not be over watered until the seed germinates. You can also raise very hot chillies, like Bhut Jolokia, by from soaking in water for 24 hours before sowing it benefits the germination.

Disease Management in Chilli Plantation

Chillies suffer from a variety of diseases like anthracnose, fruit rot, dieback, bacterial wilt, mosaic diseases, powdery mildew, leaf spot, etc. The best way to check the development and spread is to use resistant strains for sowing and conduct the regular manual inspection. The affected plants must be removed immediately as soon as the disease is detected. In addition, spraying Trichoderma and Pseudomonas species would help to prevent the disease spread.

Pest Management

Thrips, pod borers, grubs, nematodes, aphids, mites, etc. are the major pests of chilli gardening. It must be ensured that at the time of farmyard manure application only well-rotted manure issued. Neem cake helps to keep root grubs away. Some gardeners keep grasses in heaps at designated spots on the field. Grubs gather in these heaps and the heap is burnt in the morning. This way, the life cycle is disturbed and likely grubs are destroyed. Neem Seed Kernel Extract is applied for controlling thrips and mites. Similarly, installing pheromone traps help control fruit borers.

Pinching

Pinching in early growth makes the plant bushier and promotes more branching it is a type of pruning. When the plant is around six inches tall, clip the growing tip, which helps it to be more bush type. If you see the flowers appearing early, remove them as well. Do this also at the time of transplanting. During the growth, look out for diseases or infected foliage or branch and remove it too.

Support/Training of Chillies

Chillies have weak twigs. If they are loaded with fruit they can break off. The chilli plants are prone to branches drooping on the ground and breaking off. Growing chillies in containers may require support especially if you’re keeping your plant in a windy spot. Simply stab a stick near the main stem and tie the plant to it.

Deadheading

If your plant is flowering too early deadhead the flowers, it is important. This will direct the plant’s energy into growing and becoming healthy.

Harvesting chillies from containers

Time to harvest may vary and depends on the variety that you’re growing and climate conditions and nutritional status of the plant.

Most of the varieties take 2-3 months to harvest. You can identify this when they are ready from their size. The longer you leave chillies on the plant, the hotter if flavor they become, but at the same time leaving them on the plant after it’s ready for harvest will decline in further fruiting. Dark green fruit is suitable to be plucked for preparing chilli pickle. If you wish to dry them for chilli powder or flakes, you can even leave them on the bush until they shrivel up and dry on their own. For dry chilli and for making chilli powder, picking should be done when the fruit is dark red.  Ripe fruits should be harvested at frequent intervals. Retaining fruits on the plant for a long period on the plants causes wrinkles and color fading. About 5-6 pickings can be made for dry mature chilli and 8-10 pickings for green chilli. For harvesting or plucking the chilli fruit rule is pull it in an upward direction, exactly opposite to the direction in which it bends or hung down.

That’s all folks about container organic chilli gardening.

Read: Ideas for Balcony Vegetable Gardening.

Organic Celery Gardening in Containers

Organic Celery Gardening in Containers

Today, we discuss the topic of container organic celery gardening at your home. What is Organic Celery? Celery is a common household staple valued for its crunchy texture and distinctive somewhat sweet flavor. Organic Celery contains an abundance of vitamins and other nutrients, but is mainly rich in vitamin K. Organic Celery is 100% natural and it is organic.

Growing organic celery at home can be a challenge, but knowing that your product wasn’t sprayed with chemical pesticides. The fresh flavor is far superior to anything you can purchase at the grocery store. Give it plenty of water content and warm conditions and you’ll have a bumper crop come fall.

Celery has a reputation as one of the mainly daunting vegetables to grow. However, once you understand what type of conditions celery likes, it’s an enjoyable crop to grow in the backyard garden. Now, let us get into details of container organic celery gardening

Preparing the garden soil for Organic Celery Gardening:

Soil Preparation for Celery.

Soil requirement for growing Celery is discussed below;

Celery is a heavy feeder, so work in some compost or organic fertilizer before planting the Celery transplants. Celery likes high-nitrogen soil, so a chicken manure fertilizer would work well.

Choose a gardening place that gets plenty of direct sunlight; make sure the celery gets afternoon shade or light shade all day. Celery prefers a fairly cool and moist soil, so plant it somewhere simple to water and mulch the soil as needed when temperatures rise.

Sunlight requirement for plant growth:

Patience is a key point when it comes to starting Celery from seed. Make sure Celery seeds aren’t covered by soil but set on the top of it. The Celery seeds require full sun to germinate. Germination could take from 14 to 21 days. Celery requires 5 to 7 hours of sun each day. Any less and it won’t be capable to take in the energy it needs.

Celery seed germination in Organic Celery Gardening:

Celery needs a long growing season, between 130 and 140 days for several varieties. The Celery seeds need to be started indoors, 10 to 12 weeks before your final frost date.

For excellent germination results, use organic seed and soak it overnight before planting. Begin in shallow trays of seed-starting mix and press the seeds into the surface of the soil, rather than covering them. How to save Celery seed? Celery is a biennial plant so it won’t place seed until the second year in the garden. To save celery seed, overwinter some stalks and let them grow out the next summer until they start flowering. Once the flowers die you will see the seeds begin to form. When the celery flowers are brown and dry and start to fall off the plant shake them into a bag to collect the seed. You can keep Celery seed in a sealed container in a cool place for up to 5 years. Utilize the seed to plant more Celery, or as a spice.

Read: How to Build a Greenhouse at Your Home.

Maintain the seeds moist as they germinate this can be aided by putting a loose plastic bag over the tray. Once have celery seedlings, transplant them into small peat pots or trays with several inches of potting mix, keeping about two inches of space between plants. Continue to develop indoors under grow lights until it is time to transplant the seedlings to their final destination in the garden. Keep the soil moist but never waterlogged celery likes to have its feet wet at all times and the seedling period is no exception.

Blanching Styles:

  1. Mound soil approximately 4 inches up against the developing plant to hide it from the sun.
  2. To maintain dirt out of your Celery, blanch by tying the tops of the Celery leaves with twine. This remains the stalks close together, hiding the center from the sun, but not close enough to cause mold.

Transplanting Celery seedlings

Be careful not to transplant Celery too early, as a drop in temperature can kill off the plants. Wait for a consistent temperature of 55°F before planting out, and confirm to harden off your transplants for a few days before you plant them. Space plants 8 inches apart.

Care for Celery in a Container:

  • Celery is a water hog, so be sure to maintain the growing celery in a container moist at all times.
  • Use an organic fertilizer (fish emulsion or seaweed extract) every 2 weeks.
  • Once the Celery seedlings have established, there is little to do but wait for those crunchy, zero calorie stalks to mature.

Growing Celery in a container:

Container Celery.
Container Celery.

How to grow Celery in a container? Celery can be a challenging vegetable to grow in the ground or in a container. Choose a container which is at least eight inches deep and large enough to space the celery plants 10 inches apart.  Don’t use an unglazed clay pot since it will dry out too quickly.  Plastic containers are a great option in this instance, as they maintain moist conditions. Confirm there are drainage holes in the bottom.  Fill the container with half soilless planting mix, half compost and a small quantity of hard organic fertilizer.  Mix well and water quantity with a weak solution of fish and seaweed emulsion, Let settle for an hour. If necessary, top off with a more moistened soil mix to leave two inches of headroom for mulch. You can plant Celery in a container in the early spring or in the late summer if the area has mild winters. Place the container outdoors, in a spot that receives full sun requirement.

Follow these below things whenever you grow Celery in containers;

  • Fill the eight-inch container about halfway with the container soil mix. Add a trowelful of compost to the container soil, and combine together.
  • Locate the Celery seedling in the center of the container, on top of the soil mix. Add more container soil around the seedling’s root ball, to about one inch below the top of the container. Don’t cover the outer stalks of the Celery with the soil, and don’t bury the roots too deeply.
  • Pour about one tablespoon of compost tea into the watering can. Load the can with water. Water the celery to help it obtain established in the container.
  • Water the container regularly. Don’t let the soil dry out. Celery needs a good quantity of water or else its quality will suffer. Underwater celery plants have stringy, pithy stalks. You can add a one-inch layer of mulch on top of the container soil to help retain moisture.
  • Mulch deeply around Celery plants with organic compost. This helps maintain the soil cool, prevents moisture loss and creates a stable, long-lasting soil for your garden.
  • Put in a handful of compost to the container soil once a month, up until the third month. Add a spoonful of compost tea to the watering can every week to maintain the plant well fed.
  • Wrap a piece of cardboard around the Celery stalks and tie it in place with twine a week or 2 before harvest, if you want to blanch the celery. Blanching Celery gives it a milder flavor, but reduces the nutrient content of the stalks.
  • Cut the entire Celery head on the harvest or cut the stalks separately. Cut the head from right below the soil line when the plant is bigger than about 3 inches. If you desire individual stalks, then cut stems from the outside of the plant.

Organic Fertilizers for Celery

The main role of Organic fertilizers for growing Celery;

  1. The nutrient supply is more balanced, which helps to maintain plants healthy.
  2. They improve soil biological activity, which improves nutrient mobilization from organic and chemical sources and decomposition of toxic substances.
  3. They enhance the colonization of mycorrhizae, which improves Phosphorous supply.
  4. They increase root growth due to better soil structure.
  5. They increase the organic matter content of the soil, then improving the exchange capacity of nutrients, rising soil water retention, promoting soil aggregates and buffering the soil against acidity, soil alkalinity, salinity, pesticides, and toxic heavy metals.
  6. They release nutrients slowly and contribute to the residual pool of organic Nitrogen (N) and Phosphorous (P) in the soil, reducing N leaching loss and P fixation; they can supply micronutrients.
  7. They supply food and encourage the growth of useful microorganisms and earthworms.
  8. They help to suppress certain plant pests and diseases, soil borne diseases and parasites.

Read: How to Make Liquid Organic Fertilizers at Home.

Insect and disease problems in Celery

If the foliage on Celery curls puckers and turns yellow, check for aphids. Yellow leaves may be a sign of Fusarium wilt. Infected plants show one-sided growth and the vascular strands become reddish brown color from the roots to the leaves. Check for garden slugs if notice large ragged holes in the leaves or stems.

Organic Insecticide and Organic Pesticides

For controlling pest and diseases in the organic way we will use organic insecticides and organic pesticides.

Some gardeners use a homemade insecticide, like salt spray, mineral oil, or garlic spray. These natural insecticides fight off pests without harming you or the plant. Just remember to reapply these natural garden pesticides frequently, particularly in rainy climates.

Encourage helpful insects to take up residence in the garden. Release lady beetles, spined soldier beetles, lacewings, praying mantis, or Trichogramma wasps to help control pest insects. Grow plants that will give nectar and pollen for beneficial insects; several beneficial insects are attracted to the herbs dill, caraway, fennel, spearmint, and lemon balm.

Bacteria, fungi, or virus infectious microorganisms can be used to injure or kill garden insect pests. The most normally used microbial insecticides are Bacillus thuringiensis (Bt) a species of bacteria that produces a toxin poisonous to several common insect pests. Make sure with a local nursery or garden center for microbial insecticides.

Most insect pests can be controlled with moderately nontoxic sprays. A forceful spray of water from the garden hose is one of the easiest methods to dislodge pests. Mineral oil, vegetable oils and proprietary oils, such as those prepared with cottonseed oil, will suffocate soft-bodied pests. Natural vegetable based soaps or detergents are added to sprays in little amounts to make them stick to plants. Several insects dislike and are harmed by soap also.

How to harvest and store your Celery

You can cut celery stalks individually from the outside of the plant as it grows or harvests the whole head at once. If you cut the stalks about 1 to 2 inches above the soil level and keep the stump watered. Water the celery copiously and consistently after that, feed it liquid seaweed, fish meal, or worm casts fertilizer every 2 to 4 weeks. Stay an eye on the mulch, and be sure to replenish it whenever it appears necessary.

Keep Celery in a perforated plastic bag in the fridge and use as soon as possible for best flavor and vitamin content. You can freeze or dry celery pieces for use in soups and stews later, as well. Harvest Celery once it’s reached a little more than a foot in height.

Storage of Celery

How to store Celery? Store Celery in cold and moist, 32°-40°F as cold as possible without freezing and 95 percent relative humidity. Cold and moist storage of Celery is a challenge. Usage of the refrigerator is cold but the air is dry. Wrap Celery in a moist cloth or paper towel and put it in a perforated plastic bag in the vegetable crisper section. Celery with the leaves attached will stay in the refrigerator for a few days, without the leaves up to two weeks.

That’s all folks about Organic Celery Gardening.

Read: Guinea Grass Farming.

Garden Drip System Advantages, and Disadvantages

Garden Drip System Advantages and Disadvantages

Today, we discuss the topic of garden drip system. Drip irrigation system in gardens will allow the water to release slowly at the base of the plant by using a system which involves, pipes, tubes, emitters, and valves. Most of the drip systems are simple to set up and once they are set up, the drip irrigation system will create growing conditions which are healthy and also a high amount of yields by saving time and money at the same time for the gardeners.

Importance of Drip System in gardens:

It would be always better for people to consider a drip system if they are interested in water-wise gardening. The areas which have an odd shape or which are narrow can be irrigated, more easily when used a drip system. Drip irrigation will stretch the water supplies and it is an exemption from the restrictions of water which are kept at the time of drought. The equipment of the drip system will be available readily and even you can install it easily. The common mistakes which people do at the time of setup are that they will not install a filter or anything which can reduce pressure, usage of the too lengthy mainline and also adding so many numbers of drip emitters. Drip systems can be changed very easily over a period of time when the plants will start growing and they need some sort of change. You can also make use of goof plugs in order to plug the holes in mainline which are no more required.

Importance of Garden Drip.

Read: How to Build a Greenhouse at Home.

The technology of drip system will use a network of pipes made of plastic for carrying a huge flow of water under less pressure to plants. The application of water is done more slowly than in the system which uses sprinklers.

A drip system will provide at least 90% of efficiency compared to the sprinkler systems which are just 60% efficient. A drip system is very much efficient that most of the utilities of water will leave the lands which are irrigated with a drip system from the restrictions which are imposed at the time of drought. Always remember that any kind of irrigation system is good based on the schedule of watering. If the watering systems are scheduled to excess watering, any watering system including a drip system will waste water.

Application of less volume of water to the roots of the plant will maintain a required balance of water and air in the soil. The plants will grow better as the air, water and the moisture in soil would be balanced. The application of water is done often at fewer rates of flow with an aim to apply only the requirement of water plants. The system which includes sprinklers will lead to a greater fluctuation between wet and dry in the soil and there is a chance of not producing the best results of growth.

Drip irrigation systems are mostly available and designed in a better way of using home gardens than before. This is used traditionally for the growth of commercial vegetables, windbreaks, orchards, nursery plants, greenhouse, these are very nicely adapted for use at homes. You can use them in landscapes, flower gardens and also vegetable gardens in order to get small fruits. They are very much suitable for the watering of plants which are grown in containers as well. Drip system, when it is used in the combination of controller, they can be easily managed. Drip irrigation will be more suitable for the berm plantings. The slopes are not at all efficient for irrigation as the gravity will pull the water towards downhill which in turn causes waste of water and runoff. The water rate which is slow will be applied through the drip system and this method will help the water to soak it rather than run-off.

Read: How to Care Plants in Winter.

If you are taking the drip system into consideration for your garden, you will be very happy after seeing the benefits of these systems. Below are the drip system benefits:

  • As the water will penetrate into the soil slowly and deeply by putting the moisture wherever needed i.e., at the roots, plants will grow rapidly. When the plants are watered in a uniform way, it will reduce the stress which is caused due to the lack of water.
  • A perfect drip system will use ¼th to the ½ amount of water used by the overhead sprinklers which are traditional. There is an estimation that 70% of the water will remain in the soil and the rest of the amount will be evaporated or lost due to the wind. A drip irrigation system which is good will redirect 90% of water towards soil which will, in turn, lead to less loss of water due to evaporation.
  • As the drip systems are very effective, there is less chance for soil erosion to take place as there will be little runoff which ends up in the rivers and streams of the area.
  • When differentiated with overhead sprinklers, drip system will retain the foliage which will further decrease the chances of powdery mildew and other types of diseases which will be caused when the conditions are damp.
  • A good drip system is very effective as it reduces the water bill which you will receive on a monthly basis.
  • By making use of the drip system in the garden, there will be no requirement to drag hoses and sprinklers continuously from one place to another. Moreover, many of the kits used in irrigation will provide us with information about installing a timer. This will provide a level of automation making the irrigation in your garden much easier.
  • Drip system of high quality is very simple to assemble and also to use. The systems of high-quality drip systems will be attached o the hose spigot directly.
  • Drip systems will keep the water in the area surrounding the plant directly. Hence, weed seeds will starve for water which will, in turn, reduce the germination in them.
  • When a drip system is configured in a proper way, it will work on any type of soil including the landscapes which are not levelled properly.
  • If you have any doubt regarding the drip system appearance, you can hide the tubes simply by making use of an organic mulch layer.

Disadvantages of drip systems:

  • If the emitters are placed in a poor way, that is very far from each other or very less in terms of number, the restriction in the development of root will take place as the limited area will be wetted. The seeping of water at the ground level is difficult to see and it will make it tough to know if the system is properly working. A device which is used as an indicator will raise and lowers a flag in order to show when the flowing of water takes place. This will help to overcome the issue.
  • Inspections have to be done on a regular basis in terms of maintenance. These are required for the maintenance of the effectiveness of the system. There is very less chance of clogs with water which is filtered and regulation of pressure which is used in combination with emitters which have the capability of self-cleaning.
  • Drip tubing seems to be harmful mainly for kids and dogs. You can solve this by covering with mulch and fasten it with pins of wire anchor for every 3 feet. Drip lines can also be cut easily at the time of undertaking the maintenance activities of other landscapes.

That’s all folks about garden drip system and it’s advantages, disadvantages.

Read: Plant Growth Promoters, Regulators.

Homemade Greenhouse Gardening Ideas

Homemade Greenhouse

Today, we discuss the topic of homemade greenhouse gardening. Greenhouse for Home gardens: I believe gardeners are greedy by heart as once they start growing vegetables or flowers or fruits on their own the more they sow more they want to reap. A gardener always wants to see its garden lush green, plants flourishing filling scent in the air, branches loaded with fresh colorful fruits and vegetables. But what about extreme winters and summers that make your garden almost barren and your plants almost dead. As I said gardener is greedy by heart in order to have year around vegetation the concept of science and greed of gardeners have come up with ideas of a greenhouse. While greenhouses were once only used by commercial farmers, they are now a common sight in backyards and home gardens around the world.

Now everybody must be wondering how to build a greenhouse at home? A greenhouse allows you to extend the growing season so that you can enjoy harvesting fresh produce throughout the entire year. They also help out you to become even more self-sustainable, as food prices rise each year are no rare thing.

So today in this article we will be discussing homemade greenhouse ideas, various factors affecting the choice of greenhouse and points to be taken care of when constructing a small greenhouse for vegetables.

Here are the guidelines for homemade greenhouse gardening techniques, tips, and ideas.

Greenhouse Gardening Ideas.

What is Greenhouse?

 We always keep looking for effective technology which can advance the productivity, profitability, sustainability of our gardening systems continuously. One such skill is the greenhouse technology. Well said, raising plants is both an art and a science. Your plants not only depend on your art of raising them while they also fight with the adverse environment like in some of the temperate regions where the climatic conditions are extremely unpleasant and no crops can be grown, man has developed methods of growing them providing protection from the excessive cold, which is called as Greenhouse Technology.

Greenhouse Technology is the practice of providing favorable environment condition to the plants. It is somewhat accustomed to guard the plants against the adverse weather conditions such as wind, cold, precipitation, excessive radiation, extreme temperature conditions, insect, pest, and diseases attack.

Typically Greenhouses are framed or inflated structures covered with transparent or translucent material large enough to grow crops under partial or full controlled environmental conditions to get optimum growth and productivity.

Read: Gardening Ideas for Spring.

Greenhouse advantages

The greenhouse is now being utilized as one of the successful technique for indoor gardening and is favored by experienced growers and newcomers too.

  • The yield may be 10-12 times higher than that of outdoor cultivation depending upon the type of greenhouse, type of crop, environmental control facilities.
  • Reliability of crop increases under greenhouse cultivation as it provides a controlled environment to the growing crop.
  • Ideally suited for growing vegetables and flowers at home.
  • You can grow exotic plants
  • Provides year-round production of floricultural crops.
  • Off-season production of vegetable and fruits.
  • In comparison to garden plantation plants are disease-free and insect, pest attack.
  • Efficient utilization of chemicals, pesticides to control pest and diseases.
  • Water requirement of crops is very limited and easy to control no more flooding your garden.
  • Modern techniques like Hydroponic (Soilless culture), Aeroponics and Nutrient film techniques are possible under greenhouse cultivation with proper monitoring.
  • The greenhouse not only provides controlled micro-climate to the growing plants it also facilitates a common roof under which you can raise a variety of crop at the same time.
Benefits of Greenhouse Gardening.

Types of greenhouse:

There are varieties of a greenhouse; each of them is intended to meet the specific needs. There are advantages of each type for a particular application; in general, there is no particular type of greenhouse, which can be constituted as the best. The different types of greenhouses are based on shape, utility, material, and construction are listed below:

  1. Greenhouse type based on shape: 
  • Lean to type greenhouse.
  • Even span type of greenhouse.
  • Uneven span type of greenhouse.
  • Ridge and furrow type.
  • Sawtooth type.
  • Quonset greenhouse.
  • Interlocking ridges and furrow type Quonset greenhouse.
  • Ground to ground greenhouse.
  1. Greenhouse type based on Utility 

Classification can be done depending on the functions or utilities. Out of the different utilities, artificial cooling, and heating are more expensive they are classified into two types.

  1. a) Greenhouses for active heating.
  2. b) Greenhouses for active cooling.
  1. Greenhouse type based on construction

The type of construction predominantly is influenced by base material, though the covering material also influences the type. Higher the span stronger should be the material and more structural components are used to make sturdy tissues. For smaller spans, simple designs like hoops can be used. So based on construction, greenhouses can be classified as follows:

  1. a) Wooden framed structure.
  2. b) Pipe framed structure or PVC greenhouse.
  3. c) Truss framed structure.
  1. Greenhouse type based on covering material

Covering materials are a vital component of the greenhouse structure. They have an immediate influence on the greenhouse effect, inside the structure and they modify the air and temperature conditions inside. The types of frames and technique of fixing also vary with covering material. Therefore based on the type of covering material they may be classified as:

  1. a) Glass glazing.
  2. b) Fiberglass reinforced plastic (FRP) glazing
  3. Plain sheet
  4. Corrugated sheet.
  5. c) Plastic film
  6. UV stabilized LDPE film.
  7. Silpaulin type sheet.

iii. Net house.

Read: Indoor Gardening Ideas.

How Does a Greenhouse Work?

We already discussed that a greenhouse can help increase plant growth and production and even allow you to raise plants that wouldn’t normally survive in outdoor climate. Understanding how the practice works can help you to get the most out of your greenhouse.

Greenhouses Provide Light and Heat

As we are well aware of the fact that plants demand light, warm temperatures, air, water, and nutrients to survive and grow; different plants have different requirements for each of these requirements. Greenhouse functions by providing the first two requirements for your plants, but the facility of last three are up to you.

Providing Heat

Greenhouses are found warmer than outdoors because all that sunlight coming in through the clear glass or plastic walls gets trapped and turns into heat when it hits a solid surface, for example, ground or the plants inside the greenhouse. Light is basically a form of energy, which is why plants can use it to perform photosynthesis. The trapped heat warms the air inside the greenhouse and because a greenhouse is relatively air-tight, the warmer air stays inside, raising the temperature.

When There’s No Sun

The plastic or glass that makes up most of a greenhouse’s structure is favorable for letting in the maximum amount of light. As long as the sun is shining this doesn’t matter because light energy comes in faster than the heat can get out. At night, however, all that heat energy will quickly depart, leaving your plants at lower night-time temperatures. In order to defend your tender plants, you need either to store excess heat during the day or use an artificial heat source at night. For this many types of artificial heaters are designed specifically for use in greenhouses which are easily available online as well as in stores.

Homemade Greenhouse ideas for home gardening

If you wish to have a greenhouse at your own home you can certainly build a small greenhouse at your own and another and much easier way is to buy greenhouse kits which are easily available in various online sites as well as in stores dealing with gardening stuff. These kits are self-sufficient and come along with the base structure and installation instructions, you can also modify your portable greenhouse by DIY and some creativity according to the need of your plants and space.

Read: Organic Composting Process.

For homemade greenhouse as far as the design and structure are concerned, greenhouses are often dome-shaped but they can also show an arched roof or any shape you desire as long it is favoring your plant growth. A backyard grower also has the opportunity to build or buy their own cost-effective growing structures it could be virtually any size, shape or design. Materials used for constructing the walls, known as glazing, can be made of acrylic, PVC, double-layered polyethylene, plastic, fiberglass, or glass. When you are constructing your own greenhouse main objective should be less input and more output you can use cheap greenhouse ideas by using cost-effective building material. Glass does not insulate, however, so it can turn out to be a high-priced way to cover your greenhouse while unfortunately making it less efficient at the same time. It’s also twice the cost of poly weaves and polycarbs. Glass in the higher elevations of your greenhouse also tends to magnify light, which in turn will create hot spots on the leaf surfaces of your plants.

A greenhouse can be a beautifully lit, fantastically green, comfortable and airy space for a variety of your plants. Before installing or constructing greenhouse you must observe climatic conditions of your area. By determining the type of outdoor climate you have, understanding the limiting factors that particular climate imposes on the plant growth and finding the best type of greenhouse structure to overcome those limitations is what all growers shall do first.

Like for region with temperatures of well over 100°F (38°C) year round combined with low humidity. A proven greenhouse structure for this type of extreme climate is actually just a simple tent with poles put deeply into the ground, constructed with high-tensile steel wires to form a basic structure over which a sole layer of fine insect mesh is stretched and secured around the edges.

This forms a shaded and insect-proof structure that allows adequate air exchange to prevent the heat build-up. Inside the setup, humidity can be improved by fogging or misting, which also reduces the temperature often to levels well lower than those of the outdoor environment.

For tropical climate, designs can be as simple as a rain cover or plastic roof with open or roll-up sides covered with insect mesh. In larger greenhouses, the structure is best designed with a ‘sawtooth’ roof layout, which allows good venting of the hot air inside the greenhouse on clear days.

Misting systems and air-movement fans can be used to cool the environment inside this type of structure and movable thermal screens can be engaged to reduce incoming sunlight on bright, cloudless days and—pulled back—to allow maximum light penetration under the cloudy situation.

Despite the type or design of the greenhouse or what plant is being grown, a tall greenhouse structure provides a better environment for plant growth and acts as a buffer against minor changes in external temperatures.

The only high-quality plastic film should be used as shielding material—it should be UV stabilized, with suitably long life and you should make sure that you can get replacement cover for the greenhouse whenever required.

For maintaining the ideal greenhouse temperature and humidity we can protect reservoirs and grow beds simply by covering them up. Leaving nutrient reservoirs and grow beds open in the summer is a bad idea because the grow media, walls, and water will absorb sunlight will heat up your system. Note that covering your grow beds and reservoirs also prevents evaporation which is another strategy for keeping the system cool. If you wish to keep the temperature up objects with the potential to store heat can be kept inside. For example, those water-filled, black-metal barrels designed to absorb heat will absorb heat in the summer (at night) as well as winters.

Read: How to Mulch Your Garden.

The ideal greenhouse for summer can be anything with a diffused cover and good ventilation—preferably, something with roll-up side walls and doors at both ends. Having a greenhouse with a roof vent is also a very good decision; roof vents allow you to release the hot air that can gather in your greenhouse, allowing you to keep the cooler air that stays lower in the structure. On a hot summer day, a greenhouse with a roof vent, roll-up sidewalls, and doors on both ends will allow you to open up, avoid solar gain and in turn cool both the plants and the soil.

Circulation fans are another very important part of a greenhouse.

For maintaining the optimum light requirements you can add a light deprivation or blackout capability to a greenhouse for increasing productivity. Normally when growing outdoors you have to wait for the natural the harvest season. With a blackout cover, though, you can force early flowering.

A light deprivation cover can be manually pulled over the greenhouse and as long as you create the correct light period every day, you should be able to start your harvest long before the usual time period. Internal and external systems for light control are both optional.

Care to be taken when buying greenhouse

When shopping for a greenhouse you have numerous options but keep in mind that price should not be the only aspect you consider. Always look for the product reviews by users, checking things like the thickness of the frame and the type of material used its durability. Make sure the greenhouse can handle the wind and snow conditions in your area as well.

You can start out with really basic Greenhouses and it can be upgraded over time. If you can’t afford roll-up walls now, add them next season.

The problem with buying your greenhouse from a big dealer is that the catalogs may show an attractive picture of an ideal greenhouse but you might not actually be getting everything that’s in the picture.

Keep in mind that most greenhouse companies sell parts for you to do it yourself. Covers, locking hardware and other miscellaneous parts might be all you need to create a growing area that suits you, so you need to complete your homework before clicking the buy button.

Sanitation and maintenance of greenhouse

Proper cleaning of the constituents of the greenhouse is important in order to provide the optimum environment to the growing plants as they are being cultivated in an almost closed system so there are more chances of infection and disease infestation if the sanitation practices are not followed properly. Following points are listed out for the maintenance and care of greenhouse.

Removal of Weeds

Providing a weed-free environment is one of the most essential steps you can take to keep your greenhouse clean. In addition to competing with your plants for nutrients, water, sunlight, and space, weeds in your growing area can be a truthful source for pest and insects attack. Make sure to uproot them as they appear. Also be watchful for weeds growing outside of your greenhouse as seeds can easily enter growing spaces via the ventilation system, wall cracks and the simple action of opening and closing doors.

Floors, Walls & Ceilings of Homemade Greenhouse

Cleaning your greenhouse or growing area from top to bottom is important. Though this is not always practically possible when you are actively growing, it should be done whenever possible. This will remove debris and hopefully any pest insects hiding in the cracks. The floor of the greenhouse should be cleaned in a greenhouse weekly, if not daily. This is the most likely area other than the plants for insects and diseases to lurk in.

Fixtures of Homemade Greenhouse

During major cleaning of your greenhouse space, fixtures such as fans, and vents should also be cleaned. The fixtures should be wiped down regularly between major cleanings to reduce the incidence of airborne pathogens. Consider doing this monthly, if not weekly.

Read: How to Grow Microgreens Indoors.

Tables & Work Areas of  Homemade Greenhouse

Like fixtures, tables and work areas in the greenhouse should be cleaned and sanitized frequently. When there are plants on them and a complete clean is not possible, just make sure there is no debris left or soil on them. Between crops, all tables and work areas should be sanitized using a disinfectant whenever you are cleaning the entire space.

Hoses & Watering of Homemade Greenhouse

The first time water is turned on for the day or after long periods of immobility, the initial discharge of water should be directed into the drain. This should be done for 30-60 seconds in order to expel out any sediment present in the line or any insects or pathogens that have set up in the hose. For this reason, prevent the end of the hose from getting in touch with the floor.

When the water is running, manually check the water temperature. During warmer months, the lines that carry water heat up quickly, as a result, can raise the water temperature. Discharging this hot water onto plants can weaken their root system, making them more susceptible to insect and disease infestation. The same is applicable during colder months. Near-freezing water temperatures can shock the root systems of plants that have not been acclimatized to the cold, resulting in stressed plants that are more susceptible to pathogens and diseases.

Try to avoid giving water on the foliage, especially on cloudy days. This excess moisture doesn’t always evaporate and can provide a good condition for fungi to grow. When irrigation is needed, it should be done in the morning or early afternoon.

Debris

It is not recommended to collect spent blossoms, dead plants, and stems and used soil in a bucket to be added later to a compost pile. While this is a commendable practice, a container needs to be emptied on a daily basis. When left in the greenhouse for a prolonged period of time, these materials start to decompose quickly in such containers, especially when closed, and they tend to release unwanted gases which cause a foul smell.

Pots, Containers & Tools of Homemade Greenhouse

Already used pots should be disinfected before using again with a bleach solution or equivalent. All organic matter should be removed prior to disinfecting. Implements such as pruners and trowels and anything that will be making contact from plant to plant should be disinfected with hydrogen peroxide or alcohol. For certified-organic growers or those who follow strict organic practices to raise a crop, there are several disinfectants available on the market compatible with organic food production.

That’s all folks about Homemade Greenhouse or Building a Greenhouse on your own at home.

Read: How to Extract Catnip Oil.

Spring Gardening Tips, Ideas, Techniques

Spring gardening tips

Today, we will discuss the spring gardening tips, ideas, techniques. Spring is the time which you step back into your garden after a harsh and long winter. This would be happy for you, but it is also a kind of relief. Though there is still some sort of winter chill in the environment, there are lots of tasks for you to take care now if you want to get your garden back to its shape before the temperature starts increasing.

Many successful gardeners believe that gardening should always keep adding joy to our lives and not stress. So, in this article, we would like to discuss a few tasks to get habituated to your outdoor space. This can be taken care of one after the other as you have much time. Spring is a wonderful season where you get time for the assessment of the damage which is caused during the winter season, fix the tools, fill all the holes present in the garden’s landscape, perform required pruning, prepare new beds, start planting from bare-root or grow the plants in containers, feed, start composting, be friendly with the birds, adding a mulch layer and tuning up your drip system.

It seems like you will need to do a lot of things, but if you once go through the list and check all the things one after the other, your neighbors will start envying your garden and it will become your most favorite place to have some leisure time. Always remember that, if you walk or dig the soil which is completely frozen, then it will compact it and the roots of the plant will require soil in order to survive best. Hence, if the ground is very hard or completely saturated with water, you will need to wait patiently. Below are a few spring gardening ideas and spring garden basics to be learned. If you are going to start any gardening in spring, you must read this spring gardening tips.

Spring Vegetable Garden.

Read: Ideas for Summer Gardening.

Spring gardening tips:

  • The first thing you will need to do is to assess the trees. Make a note of the limbs of the trees which have to be cut, mainly the ones which overhang structures. You can also hire an arborist for maintenance only if you have large trees. After that, you will need to assess the trees which are of mid-level. You will need to remove the perennial foliage of the previous year and convert it completely into a pile of compost. Then, you will need to assess the trees which are at the ground level. Remove the mulch by using a rake from the beds which are planted along with bulbs prior to the appearance of foliage and make sure that you are refreshing the mulch in others areas of planning after the soil becomes warm. At last, you will need to give a last glance on the entire garden by checking the steps, fences, and pathways if there is anything to repair which has occurred due to thawing and freezing.
  • Make sure that you are tuning up all the tools of gardening. If you did not store the tools of gardening in a proper way at the time of winter, you will need to give your gardening tools some sort of attention to make sure that their shape is good when the time has arrived to work. Bypass pruners will be of great advantage when sharpened. Handles made of wood will be advantageous when you clean, sand and massage them by making use of linseed oil. Do remember to make a note of missing things and get tools for the coming season of growing.
  • Select new varieties of plants for the sections of the garden which do not have any plants. You can go with perennials, shrubs, and trees for the plantation at the time of spring. People will most won’t realize that the nurseries would be happy to bring special types of plants which they mostly do not have in stock.
  • If you have grass in your garden, spring is the most essential time to divert your attention towards your turf. Make sure that you are servicing your leaf blower and mower. If you have any other perfect tools to sharpen the blades of the mower, you can do it by yourself. Now your mower can be refilled with oil and do the installation of new spark plugs. Make sure that you are lubricating the moving parts of the tools if required. Now clean the garden from the remains of the winter and start looking for the areas which require reseeding prior to mowing.

Read: Neem Oil Pesticide Formula.

  • The branches of the plants which are damaged, diseased and dead have to be removed. Trim the shrubs which are blooming in the summer like roses, hydrangea. Start pruning the wood which is damaged by cold after the plants started the growth in spring. Prune the shrubs which are growing in the spring and even the trees have to be pruned after flowering.
  • It is completely possible for the creation of a new planting bed where there is no bed existing before. The most essential thing is to start digging the soil, adding more amount of oxygen and making the soil free of compaction and then adding certain amendments such as compost which will immediately create the soil which is living and also rich. The area of planting has to be cleared as soon as the soil is worked by cutting the weeds and debris. You can spread compost for a layer of 5-inch and any kinds of amendments on the soil and then start cultivating it to a depth of 12 inches with a fork. Rake it completely smooth before you start the plantation.
  • Though it looks somewhat frightening, plantation from the bare-root will take complete advantage of the best time of planting for several plants which include roses, fruit trees, daylilies, hostas. Bare-root planting means that the plants will come to you alive but not with growing which is active i.e., they won’t be coming in a container which is filled You will need to select a cloudy and cool day to perform these tasks.
  • You can start the transplantation of the plants which are grown in containers during any time of the growing season except at the time of midsummer. Always make sure that you are watering them in a thorough manner after and before they go into the ground. The crops which grow in the early stages of spring will consist of cool-season flowers such as poppies, sweet peas, and vegetables like spinach, lettuce, and parsley.
  • Your garden starts to wake up and will love to have some amount of fuel. For this, you can start applying a fertilizer which is balanced or fish emulsion surrounding the shrubs and trees whenever you see the new growth. You can spread the fertilizer which has high acid and pine-needle mulch around the plants which love acid like camellias, citrus, blueberries. Start fertilizing the perennials when the plants start growing actively.
  • Start a pile of compost or make use of the compost bin if you are not having one already. Start by collecting the debris of the plants and leaves which are raked up from your garden. You will need to find the same amounts of materials which are rich in carbon like straw, dried leaves and the materials which are rich in nitrogen like weeds and grass clippings. You will need to cut these first to fasten the process of decomposition. There are two important approaches to the composting to be done in the backyard. A hot pile will be built all at a time with greens and browns as alternate layers. It is turned on a regular basis and will provide a result within a few months. On the other hand, a cold pile has to be added on a regular basis and should not be turned. The compost which is finished will take a longer time for formation and is generally removed from the bottom of the pile.
  • If you have already created a spot to welcome birds, it is a great time to refresh your feeders. The feeders have to be disinfected by cleaning them making use of the scrub with a bleach solution which is weak. Wash and dry the feeders in a thorough manner before you refill them again, The bird baths have to be scrubbed by making use of the solution of bleach, after that you can wash them and again refill. The bord baths and feeders have to be cleaned for the entire season. If you are a beginner in taking care of the bird life, you can even fill the plant saucer with water to welcome new birds into your garden.
  • The simplest thing to do is to give your garden a layer of mulch which is fresh. A thick layer of several inches of your favorite mulch like straw finished compost, wood chips will give a clean look. At the same time, it will also help in suppressing the weeds and restoring the moisture.

Read: Best Practices of Organic Farming.

Monsoon Gardening Ideas, Tips, Techniques

Monsoon Gardening Ideas, Tips, and techniques in India

Today, we discuss the topic of monsoon gardening ideas, techniques in India. All the garden plants will require a very good amount of moisture, but at the time of monsoon, you will face a lot of challenges. The challenges of gardening during monsoons will be like waterlogged plants, soil erosion, leaching of nutrients in the soil, problems with pests and diseases. If you want to face these challenges and reduce these sort of problems, you will need to go through the below gardening tips for monsoon season in India to learn how to protect your plants in monsoon. In order to decrease the impact of the problems which are based on water, you will need to have a very good observation and also some amount of thoughts and strategies. The best plants to grow in monsoon are hibiscus, Gulmohar, Coleus, Jasmine, Monsoon cassis, etc. In this gardening article, we will discuss how to take care of your plants in monsoon. Below are a few strategies which most of the successful gardeners use to prevent any issues caused at the time of rains. As a gardener, you must be aware of monsoon gardening techniques.

  • You will need to have a very good drainage system to take care of your plants in the rainy season. For this, you will need to elevate your garden with the plantation in mounds or raised beds. This will help in the prevention of water logging in the roots of the plant and soil.
  • Make sure that you are growing your plants in containers or by making use of vertical systems. You can also consider a few examples such as Planters which are wall mounted or railing, window boxes which will drain very well. The best alternative is to make use of pots on castors or wheels, so that they can be moved around whenever required to shelter.
Tomato Gardening in Monsoon.

Read: Summer Gardening Ideas in India.

  • It is not correct to waste the rainwater which is valuable during the heavy rainfalls and later pay for the water in summers or when the temperature is high and also dry. You can harvest it by redirecting the rainwater to the place where it is desperately needed. Swales are one of the most useful features of the permacultural designs and are mainly useful for your garden if it is located at a slope. You can build a swale which is usually called as a raised mound on the contour to soak the water as it is flowing down the slope. A raised mound will slow down the rainwater and will let it settle in a shallow trench in order to get the soil to be soaked. Raised mounds are also of great help for harvesting the water for food plants which are thirsty like fruit trees and bananas which can undergo plantation on the raised mound’s top.
  • Make sure that you are adding some amount of organic matter to your soil. A very good amount of soil humus will hold the moisture just like a sponge where the plants require it desperately. Humus is defined as a rich black soil which has undergone the process of decomposition completely and will provide a boost up to your plants when they are in stress.
  • The soil structure which is good will help in draining away the excess amount of moisture. If the soil in your garden is sandy, it will undergo good draining but will not retain the nutrients and moisture. The clay soil is the one which will hold the moisture but it has a very poor drainage system because of which there is a chance of root rotting if there is any waterlog. In the weathers which are dry, it will work. If the structure of your garden soil is poor, it is very much essential to add organic matter. For instance, leaf mold, compost, manures, other mulches.
  • In order to decrease the risk of the most common diseases at the time of monsoon, you will need to support your garden plants with ties and stakes or any other sort of vertical structures. This will help the foliage to not lie on the wet soil. If the growing of the plants is done in a vertical direction, then it will increase the flow of air around the garden plants and there would be no overcrowding.
  • The pests need to be concentrated more and have to be given a very hard time during monsoons. Snails and slugs are the ones which will survive in the weathers which are wet and it is your responsibility to make sure that you are not giving any chance to those pests to feast on your plants. Make use of tepees and vertical growing so that they cannot climb, even if they climb, they will get exposed and then they will become a feast for birds. You can also make use of eggshells by sprinkling them around the base of the seedlings which are sensitive or delicate. This is done because the edges which are sharp will be like a bed of nails for their tummies which are soft and slim and will be most effective at keeping these away until the establishment of young plants takes place.
  • When you bake the eggshells on a tray by keeping them in an oven for at least 10 minutes, they will become hard and also crunch in a perfect manner. You can maintain a container to collect for all the new seedlings irrespective of the weather.
  • A Mulch layer will help you to take advantage of the rainwater as it will help in retaining the important moisture in the garden soil. The other advantages are that it will decrease splashing which leads to diseases in plants and also plays a vital role in the prevention of soil erosion by giving a buffer.
  • When you feed your garden soil with granules which release slowly, trace rock materials, organic fertilizers which are powdered, it will help in retaining the soil nutrients. Always keep in mind to restore the nutrients which are lost at the time of leaching because of heavy rainfall.
  • Make sure that you are applying a foliar spray. A quick foliar spray which consists of seaweed or liquid kelp or fish emulsion for the leaves of the plant is a perfect mixture which will help the plants to grow back quickly.
  • Make sure that you are harvesting your garden plants on a regular basis. You will need to choose the plants which are edible in the weather which is humid wet. This is done because there is a chance of spoiling the vine or stalk due to the attack of pests or diseases when the produce stays on them for a long time.
  • Remember to follow the practices of water management. The basic rule of watering the plants in the weather which is humid is that you will need to avoid watering the leaves of the plant. Splashing will lead to the creation of ground for breeding of fungal spores which will further lead to mold diseases and mildews and will transfer them to every plant in your garden.
  • If you are having a low-lying area in your garden which has occurred naturally, you will need to collect the harvest and run-off water instead of wasting it. You can add a plant or a small pond or move it to the plants which are water-loving so that their roots will take up the moisture and will leave the plants which love the dry atmosphere.
  • Weeding is the most important part of the maintenance of the garden at the time of monsoons. Weeds will grow in a rapid way at the time of rains and will soak the nourishment which is for your plants. So, make sure that you are trimming your garden regularly so that you can avoid any growth of harmful weeds.
  • Make use of fertilizers and earthworms at the time of monsoon to make sure that the soil in your garden is not losing its fertility. Earthworms will play a major role in keeping the garden soil aerated and will also ensure that the water gets filtered below the surface.
  • Light is the main problem to worry at the time of monsoons, mainly if you have the plants which are dependent mostly on the sunlight. You can try making use of artificial sources of light to meet this requirement. This is an effective way to get rid of the excess number of monsoon insects from your garden. You can let some toads or frogs enter your garden as they will not cause any harm to your garden and will also help to keep your garden free of insects.
  • A small thing to remember is to not walk on the soil which is wet, mainly at the place where to are interested to plant new saplings. Walking on the wet soil will pack the particles of soil and will remove the oxygen which is required.
  • You can also make use of perforated sheets to protect your garden plants from rainfall. The perforated sheets are becoming popular as an important thing at the time of monsoon than the opaque sheets which will make the growth of the plants difficult. Perforated sheets will protect the plants from excess rain by giving them the required moisture.
  • You will need to remove the algae which are slimy and start growing as soon as the monsoon arrives. You will need to check the surface of your garden soil on a regular basis for the patches of green algae and make sure that you are removing them immediately.
  • We hope that the above tips have cleared your ambiguity to some extent on how to maintain your home garden during the monsoon. It is not the time to get trouble as it is also the perfect time for the growth of plants. The rain will reduce the need for watering your plants on a regular basis. But you will need to do a few things to maintain the garden which you love.

That’s all folks about monsoon gardening ideas in India.

Read: Vertical Vegetable Gardening Ideas.

Summer Gardening Ideas, Tips, Techniques in India

Summer Gardening Ideas, Tips in India

Today, we discuss the topic of summer gardening ideas, tips, and techniques. Whenever we think of summers, the things which get into our minds are mangoes, soft drinks, and ice-cream and at the same time, we suffer because of sweat due to which we feel the need of A/C. We, human beings will arrange something or the other to save ourselves from the heat by choosing the fresh summer foods and cooling hacks. But our gardens will mostly end up by taking the harsh sunlight and the temperatures which will keep on increasing. Excess heat will create pressure on the garden plants, especially to the varieties which are raised in the home garden and will make the plants get dried up and wither. In this article, we will be helping you know how to take care of your plants in the summer season. Below are a few simple ways on how to protect your plants from summer heat to make sure that the summer does not leave your garden plants dry. One must be aware of summer gardening ideas if they are venturing into gardening.

Growing Flowers in Summer.
  • Watermelons are the best choice to grow in summer. These plants are mainly seasonal. Few plants will grow their best in winter whereas the others will survive in summers. With perfect manure and hydration, cucumbers, chillies, brinjals, and watermelon will be the best plants for the summer season and these can also be grown in pots.
  • You can also buy shade cloth for your garden plants in order to save them from the heat of summer. These cloths are very easily found in the horticultural stores and also you can buy them online. The thickness of the fabric may change. You will need to select the fabric as per the type of plants in your garden. Installation of shade cloth can be done all across the trees or partially on the plant sides.
  • Watering your plants in summer season is a very essential part. Always prefer to water your garden plants early in the morning or early in the evening. The water which you use in these hours will be cool when compared to afternoons. The perfect time to water your plants will be before 9 AM and after 5:00 PM.

    Watering Plants in Summer.
    Watering Plants in Summer.

Read: How to Make a Seedbed for Your Home Gardening.

  • Always make sure that you are watering your plants in small amounts. The watering tools such as buckets, mugs, water sprinklers will be efficient for watering your plants. Make sure that you avoiding the usage of water hose for mugs and sprinklers. Along with summer, we will get a period of dry weather which will, in turn, lead to an increase in the water scarcity. It is very much essential to make use of most of the means of watering plants which are economical.
  • The plants in your garden will act as your friends sometimes. The plants which are sturdy and big will be of help most of the times by providing shade for the plants which are small and are very much delicate or sensitive. You will need to take into consideration a buddy system for your garden and then you will need to start planning the arrangement of your gardening trees with this strategy in your mind.
  • Make sure that you are regularly monitoring the moisture in the garden soil. There is a chance that you may water your plants too much. Before you start using the sprinkler for watering your plants, do remember to check if the garden soil is moist under the ground surface. It is very much essential to just wait until the soil gets somewhat dry or you can just sprinkle the water on the branches or leaves rather than the soil.
  • Prevention of water from getting stagnated is very important. This should be done irrespective of the water on the soil, trays or pots. The water which is standing will lead to an infestation of mosquitoes which will, in turn, lead to the overdose of H2O in your plants.
  • The plants which give rise to flowers are the ones which will be of great help in adding some beautiful colors to your garden in summer. Bougainvillaeas, Roses, and Marigold are few of the flowers which will keep your garden lively even in the harsh heat.
  • Though most of the garden plants have lost benefits because of sunlight, the heat which is rising in the urban areas will cause more harm than benefits to the garden plants. If the plants in your garden are potted, you will need to move them to a spot in which there is a balance of shade and light.
  • Along with watering, composting is the other important thing which will help you to keep your garden plants, mainly the ones which are flowering and fruit-bearing healthy and also hydrated. The compost can be prepared easily at home or you can also prefer to buy organic compost from the garden community groups.
  • The plants which are grown in indoor locations will not need much amount of sunlight. Though they do not thrive for excess sunlight, it is always better to place them next to a window which allows some amount of sunlight so that they can survive in a healthy way.
  • Apart from watering and compost, the other thing which is mandatory during the months of summer is mulch which is generally used in the description of the material which is spread on the surface of the soil in order to keep it cool. This will help in the prevention of weeds and also helps in hydration. Mulch will consist of the bark of the tree, newspaper, compost, grass bits, leaves which are shredded and sawdust. You will need to turn the mulch for every few days and always make sure that you are not forgetting to replace it when the decomposition of mulch takes place.
  • Unluckily, you cannot take leniency when in the gardening at the time of summer. The plants will definitely require hydration and the lawns which are big will drain your home because of the excess amount of water. You will be required to reduce watering and also trimming at the time of these months.
  • Trimming will do the best by creating a very good impact on your garden plants. You will need to cut the branches which are dried, twigs and also flowers from your garden plants for one time in a week.
  • If you are a beginner in gardening or you still do not have a garden ready yet, you can start gardening by planting on the rooftop of your house. The soil will help in cooling your home in a natural way and making use of plastic sheets as a base will be of great help in the prevention of seepage. Gardening in India for beginners is not that easy because of the tropical climates. You will need to gain some sort of experience and study about the gardening by making use of most of the sources like articles about gardening or by visiting any neighbor or friend who already has a garden. The rooftop garden cost in India will vary according to the design you have chosen for your garden but mostly it would be Rs. 150 per square feet.

That’s all folks about summer gardening ideas and tips.

Read: How to Conserve Soil Moisture in Your Garden.

Garden Seedbed Preparation for Home Gardening

Garden Seedbed Preparation:

Today, the topic of discussion is how to make a garden seedbed at home. How to prepare the garden seedbed for home gardening: Agriculture was born long centuries ago and since then it has been a driving force of the human civilization. Tracing the past times’ agriculture brought to the abandon of nomadism for the construction of villages. The action which represents the borderline between “hunters” and “farmers” is the seeding of some plants that are useful to sustain and complete human’s diet. This transition found its origin and this is how lots of species grew and evolved spontaneously. Thanks to the seeding, it was possible to grow more and more species.
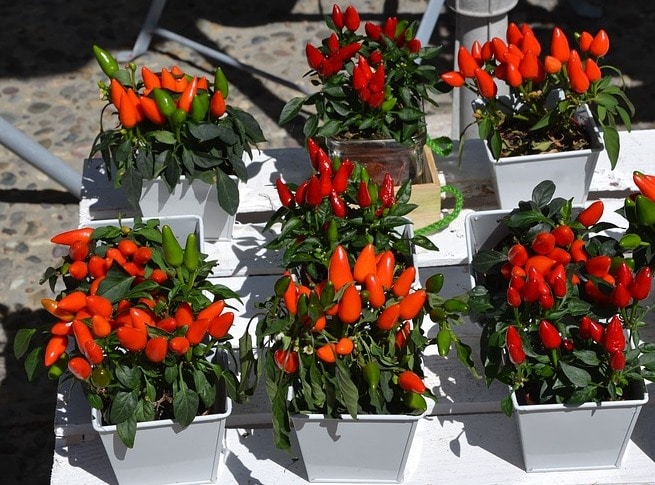
Kitchen gardening has undergone a revolution over the past decade as people are now more aware of the pros of growing own fresh vegetables and are now keen to exploit the resurgence of interest in healthy home-grown vegetables, this has pushed the idea of ‘convenience gardening’.

When talking of home gardening preparation of seedbed is the important factor that allows raising seeds and decides the success of crop and. The seeding needs a preliminary preparation of the soil, in order to create a suitable environment for the seed to grow. Now we’ll see how it’s possible to create a seedbed by analyzing the right conditions which allow the development of the seed.

Seedbed Preparation.

The seeding requires a preliminary preparation of the soil, in order to generate a suitable environment for the seed to grow up. Now we’ll see how it’s possible to raise seedbed by analyzing the right conditions which allow the development of the seed.

We can define seedbed as; it is a small area of the garden set aside for raising tender young plants for transplanting to other areas of your home garden. In order to set up a seedbed first, we need to understand the necessities of a germinating seed because eventually, we are raising a seedling from seed in our seedbed so for raising a superior seedbed we need to understand the factors which are important for the germination of seed.

Read: How To Test Garden Soil pH Value.

Conditions for the germination on a garden seedbed

The steps to properly preparing a seedbed will make more sense when you are aware of the overall needs for seed germination. A key to plant growth rests in the concept that there must be a good seed to soil contact. Good seed to soil contact helps the seed to make use of the moisture in the soil and later the emerging plant can utilize the available nutrients in the soil.

For its sprouting, the seed needs heat, water, and oxygen in a soil which allows the coleoptile (grass) and cotyledon (legumes) to grow with the help of sunlight. The actual germination phase doesn’t need sunlight because the energy and the matter useful to cover the starting needs are provided from the nutritive supplies present within the seed. There are two types of species: positive photosensitivity species which call for the sunlight to activate the process of germination; negative photosensitivity species; they can initiate the germination without sunlight. However seedbed-preparation sunlight doesn’t affect the germination in most of our crops, often the burial is unnecessary. A good covering can protect the seed and keep the right conditions of temperature and humidity.

The temperature can change from one species to another. In moderate weather conditions, ideal temperatures are between 18 and 24°C. The species which grow in Spring (normally these are tropical or subtropical as soy and bean) need a specific temperature.

The temperature of the soil it’s important for spring crops because after a cold season the species are more demanding. In order to “warm up” the land it’s necessary to work on it, the work reduces the presence of leftover which can cover the surface by slowing down the evaporation and the heat for irradiation. In addition to this, soil work facilitates the evaporation of water: a dry land has less thermal inertia and it warms up quicker than a wetland. A warm land allows anticipating spring seeding.

For the beginning and the success of the germination process, the water or moisture content in the soil has to be sufficient and must reach the embryo of the seed; besides, it has to be available constantly during the entire process until the development of the roots, because they can take up water also with active mechanism.

The third factor for the germination is oxygen which has to be available inside the land. With the break of the protective tegument caused by the absorption of water, the oxygen soaks into the seed and allows the metabolism of germination, various biochemical cycles and the protein-based synthesis of other substances.

The structure of the soil should allow the protrusion of the rootlet and the growth of the crop, which emerges from the soil and creates its first leaves (when the cotyledon stays buried under the soil). It’s important that the small plant reaches the atmosphere before finishing the stock of reserved nutrients. When the cotyledon emerges from the soil, they are now able to perform the photosynthesis with the development of leaves and roots which allows the plant to improve its growth.

So the summary is in order to raise a healthy crop the transition of mere seed to developing seedling must be smooth for this you require a fine seedbed which can facilitate the easy germination and growth of seedling by fulfilling all the crucial factors discussed above.

Advantages of raising a garden seedbed for home gardening

Versatility: The seedlings take up less room while they are small so the rest of the garden can be utilized for other purposes while they are developing or can be covered with cardboard sheeting or mulch to keep down weeds and ensure the preservation of moisture for further operations.

The seedbed can start off new plants while other parts of the garden have vegetables waiting to mature to harvest.  Once harvested, the seedlings can be transplanted, giving them a head-start for succession planting without waiting for more time you will have your stock ready.

Seedbeds demand less effort than starting everything in pots. You must be thinking of portability that pot gardening offers you can start early warm-season crops like tomatoes and peppers in pots so they can easily be moved indoors if a late frost occurs but for other cool-season vegetables a seedbed is perfect and most recommended.

Small-seeded vegetable crops such as brinjal, chili, tomato, capsicum, cabbage, cauliflower, broccoli, lettuce, onion, etc. are first raised in nursery beds are often recommended to be started in a seedbed and, if you are careful when transplanting them, it can even benefit them by causing a better root-system to form.

A seedbed that is weed free allows the desired crop to grow without fierce competition for nutrients, space, and sunlight.

You can save your time by raising seeds in your home nursery as we don’t have to wait for certain temperature but instead we could do this a month earlier by raising seedling in the seedbed for the appropriate temperature conditions.

Better germination will ensure high yields.

Read: How to Plant Carrots in Containers.

Ideal garden seedbed

Seedbed preparation has a very significant role. You should pay the right attention because this is what can make the difference between good and bad production.

First of all, the soil must have a good rate of humidity or moisture content in order to keep the seed in contact with the water, a prerequisite this will activate the process of germination. Ideal conditions such as uniformly firm soil to a depth of 5 inches (12.7 centimeters), adequate soil moisture, and weed free. Each of these characteristics helps the seed to have the best chance to germinate and thrive. A seedbed that is weed free facilitates the desired crop to grow without competition for nutrients, space, and sunlight.

The seedbed has to be firm because that indicates that moisture down in the soil can be brought up for seed germination. Fluffy soil at the surface typically means too much air is trapped in the soil and that will dry out the conditions and seeds will not germinate.

If soil is too stressed from work, it can become dry (in Spring and in Autumn it is a common problem in the Mediterranean Region). A soil which has never been treated before can be cold (in Spring this aspect affects the continental areas and north of Europe). In both cases, it’s necessary to slow or delay the seeding. In order to obtain a good result, it’s important to carry out a non-excessive level of work during the soil preparation.

The excessive water has to be drained and this operation is possible when the soil is free from surfaces which can block (or slow down) the infiltration of water. When there is a lack of water here again you should look for the presence of a surface can be an obstacle for the capillarity.

Since the germination and the entire physiological development need a balanced relationship between air and water present in the soil, it’s very vital that the water circulates properly in the soil. Efficient preparation of the soil allows a good structure of the land, which produces a balanced interaction between micro and macropores of soil, this is the only state in which air and water can circulate.

The creation of an exterior crust obstructs the emergence of little plants. Soil full of loam and clay, the exterior crust is caused by the production of subtle soil during the seedbed preparation especially when weather conditions are dry. In this way, there is the creation of a resistant layer of soil which obstructs the emergence of the crop. For fine emergence of small seedlings, it is most to crush all the clumps.

In order to avoid the creation of the exterior crust and guarantee a balanced interaction between micro and macropores (the ideal condition is around 50%), it’s necessary to reduce the intensity of work during the seedbed preparation. To achieve this purpose, do not carry out operations which can create turmoil in the soil and clumps.

Read: How to Mulch Your Garden.

Steps of garden seedbed preparation for home garden

The Ideal Location for Seedlings

Seedbed or place where you have decided to raise your seedlings should be barren with no signs of the presence of any parasites or spores or any history of the soil-borne disease as their presence will hamper the growth of seeds. If you are not able to localize any place in your piece of land you have the option of raised seedbed in containers made up of plastic, aluminum or wooden boxes. When working directly on the field you should choose a light position not exposed to harsh winds but not overshadowed either.

Next step is preparing the soil

Preparing a ‘Fine Tilth’

A ‘fine tilth’ in a gardening dictionary is the perfect soil structure for seeds.  The soil has to be crumbly but not dusty.  This is where most of the effort comes in and how you prepare the perfect tilth will mainly depend on the soil type you have:

Sandy soils will need plenty of organic matter mixed in such as compost, green manure so that they can retain moisture well.

Heavy clay or silt soils will necessitate breaking up and either adding fine organic matter or mixing with lighter sandy soil can assist to achieve this.  You should avoid preparing a tilth if the soil is sticky such soil needs to dry out first.  Equally, very dusty soil is bad as it will just form a hard crust after rain which is not helpful to young little plants.

Why waste efforts? You certainly don’t need to dig the ground because the young seedlings will only have shallow root systems and digging just brings weed seeds or spores to the surface.  Likewise, the soil will not need to be much enriched unless you plan to also grow plants on to maturity in the bed.

After preparing the soil you can now sow the seeds of your desired crop and water the sown seeds by sprinkling or use handy water sprayer carefully by not allowing water stagnation.

Keep observing the seedbed for proper germination or any disease symptom as the seedlings start appearing you can transplant them into your vegetable garden.

Read: Sheep Fattening Business Plan.

Winter Gardening Care, Tips, and Ideas

Winter gardening tips in India

Today, let us learn winter gardening tips, care, and ideas. Caring for plants in winter is very easy. In winter, you should just be quiet without disturbing the plants with activities like over-watering and pruning. They will be hibernation in winters and can be left undisturbed. Making your plants rest in winter is like cleaning them and eradicating the unnecessary dead and diseased parts and also covering them with mulch. This is done as the temperature becomes low, then the watering and fertilizing requirements of the plants will also get reduced.

Different variety of plants will show different methods of adaptation to low temperatures. Few plants which have broad leaves will lose their leaves for the conservation of very limited energy which they take from the sun. Few plants which are evergreen such as conifers will develop leaves which look like needles with slanting canopy and allows the snow to slide through and does not collect over the plant. Few plants such as Poinsettia will go into the mode of flowering at the time of winter season by having foliage which is developed in an active manner at the time of warmer periods. In this article, we will discuss how to take care of plants in winter in India or winter gardening

Winter Gardening.
Winter Gardening.

Winter gardening tips in India:

  • Cleaning the plants is very important. It means that you will need to remove the dead parts and the infected parts of the plants like stems, leaves, and flowers. If the infected parts of the plant are not removed, then the parts which are unnecessary may enhance the fungus or eggs of insects at the time of winters which may, in turn, infect the other parts of the plant too. When you are removing the dead, diseased and the rotten parts of the plant, you will need to use clean and disinfected scissors or gardening shears in order to prevent the spreading of diseases from one plant to another.
  • You have to remember removing the weeds which are undesired and are growing near to your plants surrounding them. You should remove the weeds because, if they start growing, then they will compete for nutrients from the soil with your garden plants leading to unhealthy growth of the plant. The top-soil has to be tilled for removing the weeds from its roots, otherwise, it will grow again. It would be better if you water the topsoil prior to tilling so that it will become softer which will, in turn, makes it easier to pull out the weeds which are unwanted. Take very good care that you are not just throwing away the weeds near to your plants as there are chances that they may spread and grow back at the time of spring. The weeds can be used in the process of composting.
  • After you remove weeds from the soil, you should cover the soil with some organic mulch like bark and shredded leaves. Always make sure that you are using the dry leaves which have fallen naturally like mulch, shed by deciduous shrubs and trees which will decompose readily. Mulching will keep the topsoil in warm conditions at the time of winter which will protect the plant roots from the damage caused by the frost. Anyways, make sure that you are not spreading the mulch too nearer to the stem as it may cause rotting in the stem.
  • Few plants which will be tender like caladium can be kept in indoor locations at the time of winter where it would be warm and humid to some more extent than the weather which is in the outdoor locations. Few deciduous plants can also be moved indoors or to shade as the winter arrives so that they will lose fewer leaves because of less exposure to cool weather conditions. Few tropical plants like ferns will require high humidity for their growth and survival. Hence you will need to shift them to indoor locations after the autumn as the air in winter is dry and also less humid which does not suit for such plants.
  • If you are located in an area which will get heavy rainfall at the time of winters, make sure that you are taking care of relocation of your plants present in containers to shade, as over -watering at the time of winters will cause rotting to the roots leading to the death of the plants. If you are unable to move the plants, then make sure that you are checking the drainage of the planters on a regular basis in order to prevent the roots from standing in water. Mulching will decrease the impact of heavy rainfall on the top-soil and will let the water to drain better, by improving the soil’s porosity.
  • Winter is the best time for starting seeds in the indoor locations for many annual herbs and also flowers. This is done as the conditions which are present in the indoor locations will be perfect for them to undergo the process of germination as it would be warmer and also more humid than the outdoor locations. You will be required to wait till the spring for sowing seeds directly in the outdoor locations. If you wait till spring, then you will have less time for your plants to come to the stage of maturation and also for the development of fruits and flowers will the start of next winter. This will decrease production.
  • Flowering bulbs like Gladioli and Dahlias are very much sensitive to cold temperatures and they will also die in grounds at the time of winter. If you want to divide the bulbs, then winter is the perfect time to perform this. You will just need to dig the bulb out from the soil by making sure that you are taking good care of the plant from not getting the bulb gets damaged by digging to sufficient depth. After that, remover the small offset bulbs which are growing around the main bulb by making use of a knife which is very sharp.
  • Dividing the bulb for every 3 years is very much important for the prevention of overcrowding of the plants which are growing from the offset bulbs as it will decrease the flowering and will badly affect the plant’s health. New bulbs, as well as the old ones, can be planted with a good amount of spacing in the coming spring.

Read: Container Tomato Gardening.

Things you should not do to your plants in winter:

  • Do not prune your plants too much at the time of winters as they will not be able to develop new growth at the time of months which are cool. As the plants will store their food in their stems and leaves which they will use for survival in the winter months, they will not be able to recover from too much pruning which will also lead them to death. You can anyways cut off the infected parts or old parts of the plants without even causing any disturbance to the other parts of the plant.
  • Activities such as root-pruning and repotting should be postponed will the spring starts. This has to be done as the transplantation will disturb the plant roots and damage them making them not to regrow and also recover.
  • There is no requirement for the fertilization of your plants at the time of the lean season of growth. As the metabolism of the plants will decrease at the time of winter, they will not need a large number of nutrients for survival. If you fertilize your plants too much, then it would be leading to problems such as wilting of leaves, brown tips, decreased flowering and it may also lead to the death of the plants.
  • Plants will require water when they are growing in an active manner at the time of warmer months as the water will help the roots in the absorption of nutrients from the soil. Hence, you will need to avoid the soil to dry out and you can wait for few more days prior to watering the plants again. In the months which are cooler, the rate of evaporation of soil moisture will become low. Hence the frequency of watering plants in winter should also be decreased.

That’s all folks about winter gardening.

Read: Argan Oil Extraction Process.

Container Tomato Gardening for Beginners

Container Tomato Gardening:

Today the topic is about container tomato gardening.From your dining table to your beauty recipes, tomato is an omnipresent and most widely used ingredient in our everyday life. In culinary art tomato is used as a key ingredient in every recipe all over the world be it your salad or dip, tomato adds flavor to your food in every way. This makes tomato most desirable crop, whenever a person thinks of stepping in the field of gardening the preference is ‘tomato’ because tomato plants are responsive and easy to maintain.

But what if you don’t have any backyard space to grow red juicy tomatoes???

No need to worry tomato is a versatile crop and you can grow plenty of tomato in containers or in pots as well. All you need is to read this article as today we will talk of all aspects of growing tomato in containers. Growing tomato plants in containers also eliminate the need for an extensive in ground exercises like weeding and constantly worrying about any disease or insect infestation. So let’s get started.

Tomato Plant in Pot.

Tomato is botanically known as Lycopersicon esculentum also called Solanum lycopersicum which belongs to the nightshade family Solanaceae. It is an edible vegetable, often red colored, berry of the plant is called tomato. The species is known to be originated in western South America and domestication is thought to have occurred in Central America. The word tomato has its original roots from word tomato that gave rise to the Spanish word ‘tomato’ from which the English word tomato was derived. A very well known fruit, tomatoes are widely grown throughout the world is an erect or spreading annual plant varying in size from 30cm to 2 meters or more. If you want to grow tomatoes at home, you must be aware of container tomato gardening. Most of the tomato types are suitable for container tomato gardening.

Read: Identifying Organic Foods.

Uses of tomato:

  • Fruit – raw or cooked can be used as a flavorsome vegetable in cooked foods or can be eaten out of hand as a dessert fruit. It is greatly used in salads and as a flavoring in soups and other cooked foods.
  • A juice made from the fruit is often sold in various health food shops
  • The fruit can also be dried, tinned and ground into a powder that can be used as a flavoring and thickening agent in soups, bread or pancakes.
  • Edible oil is obtained from the tomato seeds
  • It is very much loved raw in salads.
  • The pulped fruit is an extremely beneficial skin-wash for people with oily skin which is why tomato based cosmetic ranges are in demands. Sliced fruits are a quick and easy treatment for burns, tanning, and sunburn.
  • A decoction or essence of the tomato root is ingested for the treatment of toothache.
  • The skin of tomato fruits is a good source of Lycopine which is an antioxidant and imparts tomato red color, a substance that has been known to protect people from heart attacks.
  • Lycopine has also been shown to have a very valuable effect upon the prostate and is being used progressively more to treat enlarged prostate and the difficulties in urination that accompany this disorder.
  • Tomato is high in iron content and has a good proportion of vitamin C is often recommended to people with anemia as it helps in raising the hemoglobin

Types of tomatoes:

Healthy Tomato Plant.

There are hundreds of tomato varieties varying in size, color and growth pattern. From marble-sized grape or cherry tomatoes to juicy salad, tomatoes have different sizes. Their color also ranges from deep crimson to orange, yellow, green, purple, and even chocolate.

Types of tomato on the basis of their growth habits:

Determinate Tomatoes are the bushy type that grows 2-3 feet (60-90cm) tall, and then the buds at the ends of all the branches form flowers instead of leaves. They flower all at once, set and ripen their fruit, then die.

Indeterminate Tomatoes are vining types that need caging or staking for support when loaded with fruit, they continue their vegetative growth and along with fruit setting until frost kills them. They’re generally last longer than the determinate tomatoes, and produce larger crops over a longer period.

Types of tomato on the basis of their fruit size and use habits:

Cherry and Grape Tomatoes

If you’re growing tomatoes for the first time or growing tomatoes in containers, Cherry Tomatoes are a good option to start. Cherry and grape tomatoes are small, usually less than the size of 2.5 cm, and they grow in large clusters. Cherry tomato plants bear small sized fruit which means they’re more appropriate if you’re growing tomatoes in containers. They tend to have better disease resistance than the larger tomato varieties, and they’re more tolerant to drought stress and poor soil.

Read: Garden Soil pH Testing Guide.

Salad Tomatoes

Salad Tomatoes form bear fruit with a size of 5-7.5 cm (in diameter), they are perfect for slicing on sandwiches or chopping into salads. They’re usually a little tarter and juicier than cherry tomatoes with some acid to balance their sweetness. Some may have undertones of tropical fruits. Salad tomatoes make a great, quick tomato sauce and are more preferred for everyday usage. To meet the demand more work has been done to get quality variety with high yield potential as a result salad tomatoes have more cultivars than any other type of tomato.

Tomato Flowering.
Tomato Flowering.
Beefsteak Tomatoes

Beefsteak Tomatoes generate large and heavy fruits. These are the big, thick, meaty tomatoes that are so appreciated for sandwiches and it is one of the main reasons for growing these tomatoes in western countries. Some varieties of beefsteak tomatoes may reach size about 6” (15cm) in diameter. Beefsteak tomatoes need a longer growing season and high-temperature demand than the smaller varieties, so they may not be suitable for short-summer or cool-summer gardens and not for raising them in containers.
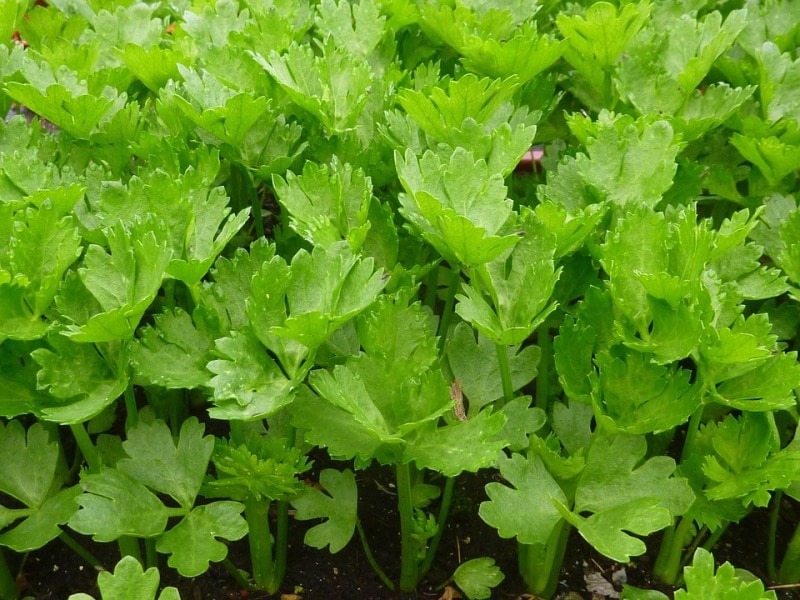
Roma (Paste) Tomatoes

Roma (Paste) Tomatoes are the dense Italian plum tomatoes with sweet, firm flesh, high pectin content which makes its coat thick; it doesn’t have not much juiciness and contains less seed. It is the perfect sauce tomato since it thickens naturally and needs less cooking time to evaporate off the excess moisture. Their low moisture content gives them extended fresh storage time or shelf life, and they’re great for drying or topping pizzas.

Types of tomato on the basis of their genetic constitution:

Heirloom tomatoes:

Heirloom tomatoes are often open-pollinated, which means that they are pollinated naturally, by agencies like birds, insects, wind, or human activity they reproduce true to form from the saved seeds. Heirloom tomatoes have high potential and variability because their DNA hasn’t been manipulated. They are known for superior flavor under local optimum conditions, and their seeds have been passed down through ancestors and saved for generations. These juicy, thin-skinned beauties can’t be shipped long distances due to less shelf life. These heirloom tomatoes can be grown easily at home in containers.

Varieties of heirloom tomato suitable for growing in containers:
Black Tomatoes.
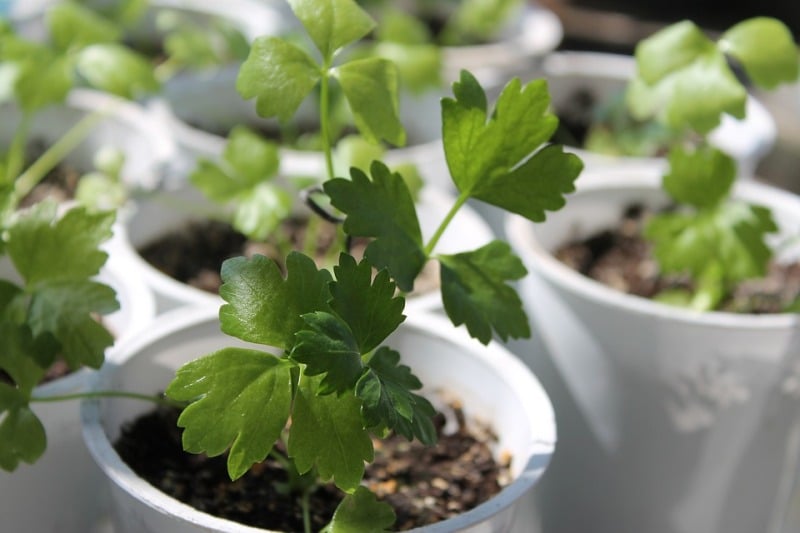
Black Tomatoes.
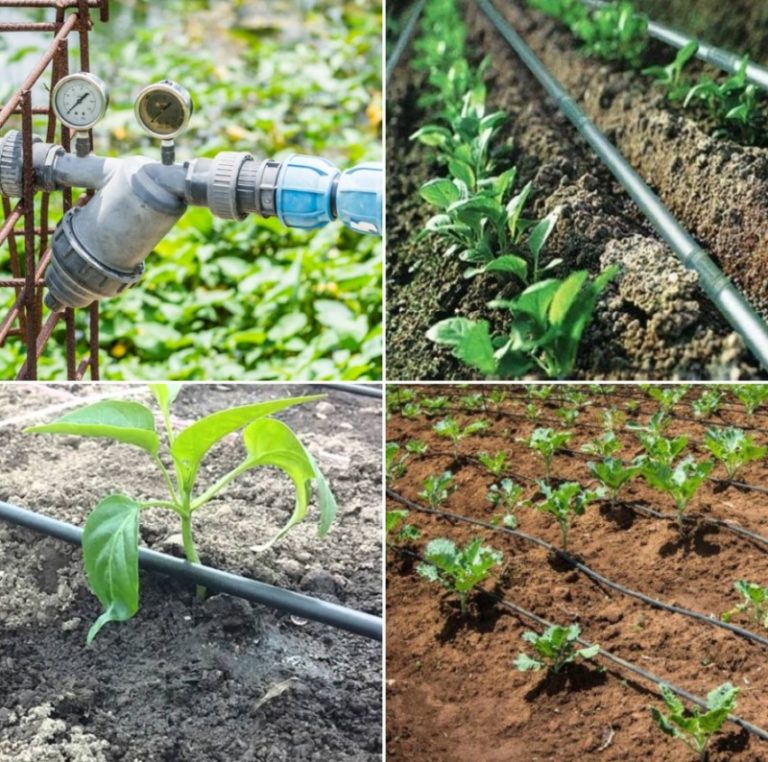
Heirloom Cherry Tomatoes:

  • Black Cherry
  • Pantano Romanesco
  • Valencia
  • Stupice
  • Black Zebra
  • Green Zebra
  • Clear Pink Early
Hybrid tomatoes:

These are the modern world tomatoes developed by crossing two different varieties of tomatoes with an objective to develop new combination with high quality, high yield characteristics, disease resistance, ease of harvesting and longer shelf life. Hybrid varieties are most widely used tomatoes.
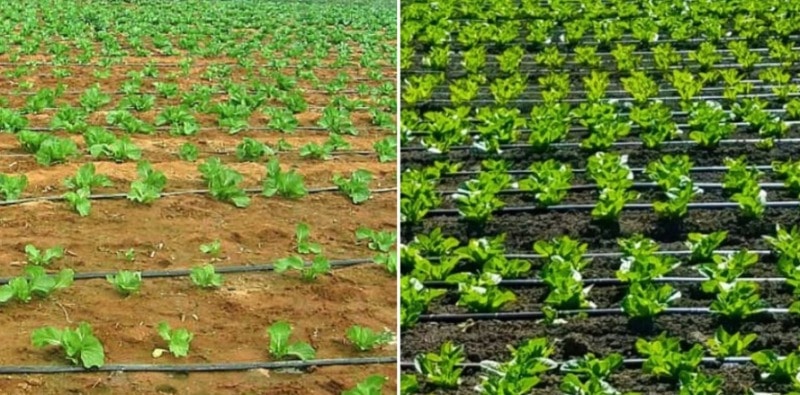
Container Tomato Gardening Types.
Short season hybrid tomato varieties suitable for container gardening
  • Tumbler

This determinate type tomato plant produces compact sized sweet cherry tomatoes only in duration of 50 days.

  • Patio F1 Hybrid

A determinate hybrid that produces tennis ball sized fruit within 70 days.

  • Bush Early Girl Hybrid

This perennial favorite is common in nurseries. Shows disease resistance with a compact and Produces small fruits within 54 days.

  • Oregon Spring

Bred for short-season gardening, this determinate plant in 58 days the plants offers fruit for harvesting.

  • Better Bush Hybrid

This determinate plant has a strong stem so you can get away with little or no staking or caging. Takes only 68 days to harvest.

  • Sungold

This variety has a compact yellow cherry tomato which produces fruit within 56 days.

Read: How to Grow Carrots in Pots.

A complete guide for growing tomatoes in containers or pots

Tomato Container Gardening Guide.

The first and foremost point to be noted down is you should have a proper place for keeping your tomato plant container which receives at least 6-8 hours of sunlight. All types of tomatoes can be easily grown in containers but you must select variety according to your requirement and climatic adaptability rest plants need an appropriate container, climate, and soil and moisture availability to thrive.

Find the right container

To cultivate tomatoes in pot or container you must be alert and careful when choosing the container as it works as a sole reservoir from which your plant will fulfill all its needs.

The tomato plant has a deep root system so your container must be of 25 cm deep at least with 4- to 5-gallon capacity.

The size of the container also varies with the type of tomato plants bushy tomato plants require smaller container than the vine indeterminate tomatoes.

If your area has hot summers, then it is advised to use non-porous containers such as plastic or glazed ceramic to cut down the water loss from pot surface.

Wood containers are another option but they may face termite attack.

Clay pots are porous and allow water to evaporate from the soil through the surface of the pot hence, tomato plants in them need more frequent watering than those in non-porous containers.

Each container needs at least four drainage holes at the bottom; you can drill additional holes if necessary.

To speed down the rate of evaporation you can use light-colored containers that will capture less heat.

Good drainage and healthy roots go together for ensuring proper drainage without washing off all your soil you can line up the bottom of the container with any tray or saucer with the net.

Give your plants a fine start by using clean containers. Before planting, clean all parts of the container with soap and water, and rinse them well with water.

The next tasks are to disinfect them with a solution that is one part household bleach and nine parts water and to rinse them thoroughly with water.

Use potting soil for enriching tomato plant with nutrients

Instead of usual garden soil, it is recommended to use a mix of potting soil that contains vermiculite or perlite and fill your container up to 6 to 8 inches.

Cut a layer of mesh window screen to fit the interior bottom of each pot or container, and put the screen in place before adding the soilless potting mix so that the mix doesn’t seep out out the pot’s drainage holes.

The potting mix must be light and well drained so that it provides proper aeration and moisture to the developing plants.

You can always enrich your soil with balanced organic fertilizers to uplift the fertility gradient.

Sowing tomato seeds in the container

It is the most important step in container gardening, you have two options when growing tomatoes either sowing the seeds directly into the container or fetching seedlings from the nursery and then transplanting it into the container. You can also raise tomato seedling yourself with the help of a growing tray.

Raising tomato seedlings at home
  • For this, you need a pot or growing tray with holes at the bottom for the drainage. Make pour in the soil in the tray or pot by leaving at least space of ½ inch at the top and now wet the soil by sprinkling water.
  • Dig small holes in the soil with the help of small stick by keeping proper distance after this sow the seeds and cover it with some loose potting soil.
  • Again sprinkle some water on it and keep the pot in a warm place.
  • After 10-12 days you will observe the sprouted tomato seeds.
  • As the true leaves appear, start feeding them with fertilizers if required and keep the pot in sunlight for 6-7 hours a day with a constant supply of sufficient water.
  • As they reach the height of 2 to 3 inches your seedlings are ready to be transplanted to the desired container make sure when you transplant the seedlings mix the potting soil with the organic fertilizers.
Provide Enough Water

Tomato plants grown in containers are more exposed to environmental conditions than the in ground tomatoes because they’re not bordered by as much insulating growing medium. Your container tomato plants’ potting mix should be watered every day and during summers twice per day, particularly if the containers are in full sunlight or are clay pots. Windy conditions also call for more frequent watering. Water each container’s potting mix unless you see water coming out the container’s bottom drainage holes. Conversely, tomatoes’ potting mix shouldn’t be constantly kept wet, which promotes root rot. If the moist potting mix clings to your finger or a wooden pencil after you inserted it into the top 2 inches of a tomato plant’s potting mix and removed it, then the potting mix doesn’t require watering.

Supports for tomato plants: stalking and training

As soon as your tomato plants attain a height of 2 to 3 inches they need to be supported. For the determinate of bushy tomato varieties you can use tomato cage or stakes for indeterminate varieties you can use string trellis, tall stake or strong cages you can make a web-like structure with nylon net or simple thread for support.

Thinning tomato plants

When you observe excessive vegetative growth in your tomato plants such as condition where tomato leaves or branches growing too close starts blocking sunlight and air you can trim such branches to encourage proper interception of light and hence high yield.

Countering Insect, pest, and diseases in tomato plant

Always be alert and consistently monitor your containers. Keep a check on your plant’s health, look for any larvae and other insects, and be watchful about for the signs and symptoms of any disease.

  • Give your plants good soil & fertilizer and regular watering; healthy plants are much more likely to resist diseases and other problems.
  • Keeps your container free of weeds though it is a rare problem in case of container gardening and remove debris where insects can breed and diseases can incubate.
  • Change your growing medium i.e. soil so that soil-borne pathogens never have more than a season to get themselves established.
  • Remove unhealthy foliage; pull unhealthy plants to cut down on the spread of fungal spores.
  • You can opt for resistant varieties to minimize the loss due to insect, pest infestation or any diseases attack.
  • You can use biological material such as Neem oil cake to ward off pests like aphids, flies, and caterpillars.
  • Do not over water your container as standing water and soggy soil may cause disease like root rot which affects the yield of your tomato plant.
Harvesting and storing tomatoes
Harvesting of Tomatoes.

Tomatoes can be harvested based upon the maturity duration of the variety used rest basic thumb rule is harvest tomato when they easily come off from the vine with a simple twist. After harvesting wash off fresh juicy tomatoes can store them at room temperature indoors (65°-70°F) or in a shady place outside, for longer duration you can store them in refrigerator wholly or even in its pulpy form.

That’s all folks about tomato container gardening.

Read: How To Conserve Soil Moisture.

How to Identify Organic Food in India

How to Identify Organic Food:

Today, let us learn the topic of “How to Identify Organic Food”. In the recent past, many people are looking towards organic food like Organic Fruits, Organic Vegetables, Organic Rice and Organic cereals and Pulses and likewise. Taking the demand into interest, many entrepreneurs are establishing Organic Shops which is giving huge income returns. Organic foods also have a huge export value which has the capability to earn high-income returns in the field of agriculture. Nowadays, almost all types of foods are available in organic form. Organic foods are mostly sold in good packaged containers and covers. However, there also exists some fake organic products that are sold with fake labels and fake organic brands that lead to a loss for the customer and good returns for the Fake organic brands.

Most of the people have doubts like fake organic products in India, is Organic food really organic, organic food tester, fake organic products and so on. In this post, we will let you know How to identify organic vegetables, how to identify organic fruits, how to identify organic rice, how to identify organic cereals, how to identify organic pulses and likewise. It is now a day easy to identify genuine organic foods in India as the government is taking strict and proper measures to control fake organic products marketing. Even though, let us first know about the advantages of having organic food.

Advantages of Organic Food:

Organic Nuts.
Organic Nuts.
  • Organic foods are healthy and they are delicious also.
  • They are free from harmful chemicals that are highly dangerous to our health.
  • Organic foods are free from synthetic pesticides like chemical fungicides and chemical insecticides.
  • Organic fruits and Organic vegetables are free from minute quantities of chemical residues that are harmful and even carcinogenic to our human health.
  • Organic cereals and Organic pulses demand are also increasing in the present past.
  • Many people in the urban and town areas are preferring Organic food.
  • In addition, Organic fruits and Organic Vegetables have a longer shelf life than regularly grown foods as they are mostly grown naturally in farmer fields or entrepreneurs field.
  • Establishing Organic shops and organic businesses also lead to creating huge employment opportunities to youth which is a major problem to the youth nowadays.
  • Furthermore, Farmers growing organic foods known as Organic Farmers are earning huge incomes as the Organic foods are sold at a high cost with huge demand for Organic fruits and Organic Vegetables.

Read: How To Test Garden Soil pH.

Demand for Organic products:

The demand for organic products in India is increasing rapidly. The huge demand or huge margins are gained from exporting organic foods. Countries like Venezuela and Germany import Organic Foods from India and further export those foods to China and American countries which may again gain huge margins as the demand for organic foods in such countries is very high than over here.

Fake Organic Foods:

  • Fake Organic foods are most commonly seen in the markets even in authorized markets also.
  • They can be easily identified by their physical appearance.
  • Fake Organic fruits and Vegetables taste very delicious than the foods that are normally grown.
  • They may not be packed in good or quality packing materials. Sometimes, fake organic foods are also packed in good packages but difficult to identify by seeing the package.
  • Fake organic foods have less shelf life compared to real organic foods.

How to Identify Organic Foods:

Organic Cherries.
Organic Cherries.

A simple and easy step to identify fake organic food is the points which we have given above which you may identify the real organic foods to an extent. Below are the three easy steps to identify Organic Foods.

Read: Growing Carrots in Pots.

3 steps to Identify Organic Foods
  1. Organic Food Logo: Jaivik Bharat Logo is the logo that is designed in order to identify Real Organic Foods from fake organic products and fake Organic Foods. The Organic Food Logo will be completely in green color. It consists of letter capital O with a leaf on the left side and a tick mark on the above side of the second the leaf. The tick mark indicates the certification of FSSAI to the respective Organic Product or Organic Food. The two green leaves represent nature. The circle or letter o indicates the holistic wellness at a global platform while synthesizing or producing or cultivating organic foods or products. The whole logo will be in green color that represents the agriculture eco-friendly environment with sustainability and healthy life of the consumer or Organic Food consumer.
  2. Organic Food tester: Even though it is difficult to test Organic food at the consumer level, it may be tested in various residue laboratories by sending the sample or doubtful organic food to the respective lab. It may be known as organic food testing lab. Sometimes, it may also incur a huge cost to test a single sample of doubtful organic products.
  3. Organic foods from farmers: Nowadays, many marginal farmers are producing organic foods like Organic fruits, organic vegetables, organic rice, etc. at their own fields which we can trust them easily. Such type of direct farmer field Organic produced may also cost less price as compared to the certified Organic grower. In addition, there are also some FPO s or Farmer Producer Organisations where they sell organic products directly to some regular customers at specific points or locations.

This is all about simple and easy ways to identify fake organic foods or organic products from the real ones and easy steps to know genuine organic foods.

Conclusion:

JaivikBharath logo is the simple, easy and one and only way to identify Organic Food. Hope you never go for uncertified organic food and only buy Organic Food if it has JavikBharath logo simply Organic Food logo.

Read: How To Extract Aloe Vera Juice.

Garden Soil pH Testing Methods, Techniques, Ideas

0

Garden Soil pH Testing Methods

Let us discuss today the garden soil pH testing procedure. Let us get into  Garden soil pH testing methods, techniques, and ideas: As home gardeners, you must have come across a common suggestion to test for your garden’s soil pH and grow plants accordingly soil pH is one of the key factors that that affects the growth and productivity of your garden. Plants can access nutrients from the soil only if the soil pH is within a favorable range. If the soil is outside of that range, when if you can add all the fertilizer that your plants desire and it will never make it into your plants. Our gardener friends often write us about problems they face while raising their home gardens, like the appearance of yellowish green foliage due to iron deficiencies triggered due to the alkalinity of garden soil as iron is readily available to plants in 5 to 6.5 range of soil pH. Garden soils are usually described as acidic or alkaline but the meaning of these terms and their relationship with the plant growth is not clearly understood by some gardeners and unfortunately, they end up choosing wrong plants for soil with different pH levels.

So, today as promised we have another stock of information for successful home gardening, we will discuss what is soil pH and Easy pH testing methods for garden soil.

Every home gardener must have knowledge about garden soil pH testing methods for successful gardening.

What is soil pH?

pH simply stands for “potential of hydrogen”, in chemistry it is often defined as, the negative common logarithm of the activity of hydrogen ion in solution mathematically written as  pH= ─Log(H⁺). In simple words, we can define pH as, a measure of the relationship of hydrogen ions (H⁺) to hydroxyl ions (OH). It is a mathematical expression to measure the number of hydrogen ions present in the soil. For a gardener’s purpose, pH indicates how acidic or alkaline the soil is. The pH measurement is a logarithmic scale that varies from 1 to 14. Something with a pH of less than 7 is acidic; 7 is neutral and anything higher than 7 is grouped as alkaline. Because it is a logarithmic scale, each value increases by 10 times. For instance, a pH of 8 is 10 times more alkaline than a pH of 7. For the home gardening needs, it is sufficient to know whether your soil is alkaline or acidic for the reason that certain nutrients can only be accessed by plants when the soil pH falls into an acceptable range and no amount of fertilizer can improve plant’s health until the soil pH has adjusted.

Read: How to Grow Carrots in Pots.

 Role of soil pH in home gardening:

Generally speaking, when taking round in your home garden if your plants are growing healthy, with no signs of serious problems then your soil pH is probably in an acceptable range. However if your plants are looking stressed, discolored, or not growing vigorously, one of the primary thing you should do is test your soil pH.

Your garden soil’s pH can have a deep effect on what nutrients are available to your plants. This is especially significant for those who prefer using synthetic fertilizers to feed your crops. If you are already using compost and working with manures you might find the pH of your soil adjusting to perfection without your efforts. Knowing your soil pH is the key to understand if essential minerals will be readily available to the hungry roots of your plants. Most of the plants thrive best in neutral soil or in soil that is slightly acidic. If your soil is acidic or too alkaline, then your plants will not grow to their full potential.

The good news is, in spite of what soil your plants are growing in, you can always modify the soil pH level so that your plants can thrive. Another choice is to select plants that you know will thrive best in the soil that you already have. While most plants can adapt to any soil pH in the neutral range of 6.0 to 7.5, some plants have distinct preferences such as Blueberries and Azaleas prefer very acidic soil, and Lilacs and Clematis can grow in more alkaline soil.

Soil Acidity:

The lower the pH of the soil, the greater will be the acidity. Soil pH should be maintained at above 5.5 in the topsoil and about 4.8 in the subsurface. In broad-spectrum soil, acidity is a major environmental and economic concern. If remains untreated, acidity will become a problem in the subsurface soils, acidic soils cause significant losses in production and the choice of the plant will be restricted to acid-tolerant species and varieties hence opportunities to grow a variety of crop may be reduced.

Effects of soil acidity

Plant growth and most soil reactions, including nutrient availability and microbial activity, are favored by soil with a pH range of 5.5 – 8.

Acid soil, chiefly in the subsurface also restricts root access to water and nutrients.

Aluminum toxicity
  • When soil pH drops, aluminum becomes soluble. A small drop in pH can result in a large increase in soluble aluminum. In this form, aluminum retards root growth, restricting access to water and nutrients.
  • Poor crop and pasture growth, yield reduction and stunted growth as a result of inadequate water and nutrition.
Nutrient availability

In very acid soils, all the major plant nutrients (nitrogen, phosphorus, potassium, sulfur, calcium, manganese and also the trace element molybdenum) may be unavailable, or if available will be in inadequate quantities. Plants can show deficiency symptoms despite ample fertilizer application.

Microbial activity

Low pH in topsoil may influence microbial activity, most notably decreasing legume nodulation. The resulting nitrogen deficiency may be indicated by reddening of stems and petioles or yellowing and death of oldest leaves on grain legumes.

Causes of soil acidity

Soil acidifies because of the concentration of hydrogen ions in the soil increases. The main cause of soil acidification is an inefficient use of nitrogen, followed by the export of alkalinity in produce.

Ammonium-based fertilizers are major contributors to soil acidification. Ammonium nitrogen is readily converted to nitrate and hydrogen ions in the soil. If nitrate is not taken up by plants, it can leach away from the root zone leaving behind hydrogen ions thereby increasing soil acidity.

Read: Garden Mulching Process.

Management of acidic soils

  • Soil testing: Knowledge of how soil pH profiles and acidification rates vary across the garden will assist in effective soil acidity management.
  • Liming: Liming is the most economical method of managing soil acidity. The amount of lime required will depend on the soil pH profile, lime quality, soil type, farming system, and rainfall.
  • Complementary management strategies: If soil pH is low, using tolerant species/varieties of crops and pasture can reduce the impact of soil acidity. Although this is not a stable solution because the soil will continue to acidify without liming treatment.
  • A number of management practices can reduce the rate of soil acidification. Management of nitrogen fertilizer input to reduce nitrate leaching is most important in high rainfall areas.

Alkaline Soil

If you live in an area that has little rain throughout the year, coupled with heavy clay soil, there is a bright possibility to have a highly alkaline garden.

  • Zinc and Copper Deficiencies

The elements zinc and copper play great roles in plant metabolism but are markedly scarce in alkaline soils. Zinc is a key nutrient that forms chloroplasts for photosynthesis. Deficiencies causes delayed or stunted vegetative growth. During the summers, lack of copper within the soil is evident across the plant’s leaves and stems; copper is a must have for proper metabolism especially for plant enzyme production. Leaves and shoot tips become stunted and scorched as the plant shows signs of dieback.

  • Iron Deficiency

Iron is a chief element required for chlorophyll, it is one micronutrient that should be available to plants on a constant basis. Without a proper supply of iron in alkaline soils, the plant cannot absorb the sun’s energy for the plant’s food production. Iron deficiency manifest as leaf chlorosis in which green foliage turns pale and yellow. If the deficiency continues, the whole plant succumbs to dieback since it cannot photosynthesize for energy and food. 

  • Manganese Deficiency

Also used in chlorophyll synthesis and functioning, manganese is another important micronutrient. Its reduction in alkaline soils also contributes to chlorosis in plants. Some plants may exhibit gray stripes or spots across the leaf structures as a result of low manganese concentration.

  • Presence of excess salts in the soil retards the germination of seeds and growth of seedlings. Plants die before bearing fruits.
  • Alkali salts in the soil also affect the plant growth by reducing the size of leaves in alkali soil, plant roots remain superficial, and the bark of stem turns brown or black, green tissues are less developed.

Factors which make the soils alkaline:

These are:

  1. Poor drainage in an arid region,
  2. Rapid evaporation of alkaline soil solution, and
  3. Excess uptake of alkaline salts and little percolation.

Management of alkali soils:

Chemical method: Application of calcium sulfate (gypsum) in the soil reduces alkalinity to a great extent and makes the soil fertile.

Mechanical practices such as improving drainage and leaching, the mechanical shattering of clay pans, and scrapping. The alkali salts are removed by:

(1) Scraper or by rapidly moving streams of water,

(2) Deep plowing of the land which reduces the alkalinity and makes the soil more permeable.

(3) Application of green manures has been found most successful in the reclamation of alkali and saline soils.

(4) Spreading of straw and dried grasses and leaves on the alkaline soil.

(C) Cultural method (growing salt tolerant plants) Some plants are resistant to alkali salts such as Barley, wheat, oats, grapes, and sugar-beet is best suited to grow in alkaline soil.

In India, Dr. Neel Ratan Dhar (1935) succeeded in reducing the alkalinity of the soil with the application of molasses and press-mud. The molasses is fermented by soil microbes and as a result of fermentation organic acids are produced which lower the alkalinity and increase the availability of phosphates and other important salts. The press- mud contains Ca which forms calcium salts that reduce the content of exchangeable sodium. Phosphate helps in the microbial fixation of nitrogen into nitrogenous compounds in the soil which ultimately fixes fertility of the soil.

How to test garden soil pH at home: easy ideas

You have some easy options when it comes to testing your soil’s pH. There are many do-it-yourself testing kits available in local garden centers and you can easily locate soil testing laboratories for more precise and reliable results. But here are few do-it-yourself ideas for testing soil pH

Materials required:
  • A handful of gardens soil without any plant material twigs or leaves
  • Garden spade or shovel
  • Bucket to mix soil
  • 2 containers
  • Measuring cup
  • Tablespoon
  • White vinegar
  • Distilled water
  • Baking soda
  • pH test strips, also recognized as litmus paper
Step 1: Collecting Soil Samples

A flat spade works greatly for the collection of soil samples.  Scooping out soil from only the top layer will not give you a precise result.  You need to get soil exactly from where the roots of your plants will be getting nutrients.  According to your preference, each location can be tested separately. To get a good sample, dig down at least 6-8 inches and make a hole. Now position the spade 2 inches back from the opening and go down to the depth of the hole.  Obtain about a ½ cup soil from the length of the spade.  This is the soil that you will use as your soil sample.

Put the sample into the bucket or container that you will be using.  Do this in several different areas of your garden and then mix the samples together well for eliminating any error due to biasness of area.

Step 2: Testing the Soil

Testing for Alkalinity

  1. Take a soil sample from 4 to 6 inches below the surface of your garden. If you have a small garden, you can mix soil from three or four different samples from different locations. If you own a large or a spread out garden, it is preferred to test several samples separately.
  2. Remove stones, twigs, or other foreign debris from the soil, and break up any large soil clumps.
  3. Put about 1 cup of soil into a clear glass container.
  4. Add enough water to turn the soil into mud.
  5. Add 1/2 cup of vinegar and stir slightly.

If you observe fizzes, foams, or bubbles, your soil is alkaline. If not, you can test it for acidity.

Testing for Acidity
  1. Take a soil sample from 4 to 6 inches below the surface of your garden. Do not attempt this second test on the soil you poured vinegar on.
  2. Remove stones, twigs, leaves, or other foreign debris from the soil, and break up any large clumps.
  3. Put about 1 cup of soil into a clear and clean glass container.
  4. Add an adequate amount of water to turn the soil to mud.
  5. Add a 1/2 cup of baking soda and stir.

Another rather easy method for testing soil pH is using litmus paper test

To get an actual pH measurement of the soil you can use pH test strips, also known as litmus paper, with the full range of readings from 1.0 to 14.0.   For this mix, some of your soil with distilled water until it is the consistency is like a milkshake wait until the soil particles settle. Once the liquid clears, put a strip in the mixture for about 20-30 seconds, and then dip in distilled water to clean off the mud.  Now compare the color of the strip with the color codes furnished with the test strips where its color indicates the pH.

How to correct  garden soil pH

It takes time to change the pH of the soil, often months, and it will need to be a consistent process. Left alone, the soil will sooner or later revert back to its natural pH. However, you won’t have to adjust all your soil, except it is extremely acidic or alkaline. You can regulate the areas where you are growing plants that need a different pH.

Mainly, the pH of acidic soil is raised by the addition of lime. While the pH of alkaline soil is lowered by adding some form of sulfur. How much to amount is to be added depends on current soil pH, the texture of soil (clay, sand, loam) and what you will be growing.

Once you have brought your soil pH into an acceptable range, you will need to reapply either lime or sulfur on a regular basis, to keep it there. This is best done in the offseason, so that the amendment has time to work its way into the soil slowly, without harming plant roots. It’s also a good idea to re-evaluate your soil about every 3 years, to see if adjustments have to be made.

That’s all folks about garden soil pH testing procedure.

Read: Learn Aloe Vera Juice Extraction Process.

Planting Carrots in Pots – A Complete Guide

Guide for Planting Carrots in Pots

Today, let us learn the planting carrots in pots. Carrot whose scientific name is Daucus Carota is a biennial plant which belongs to the family of Apiaceae and is also herbicious. This will also produce a taproot which is edible. The carrot plants will need cool temperature to moderate temperature and these cannot be grown in summer especially in the regions which are usually warm. Hence growing carrots in winter would be helpful. Carrots will need soil which is loose and also packed. If the space in your garden is limited, you can choose to grow carrots in pots. Most of the carrots which have standard length will not be able to grow so long in pots, only the carrot varieties which are small can survive in them. Always ensure that the pot you are using to grow carrots is deep and also allows the root to grow in a good manner into the soil and keep the soil moist in order to increase the growth. For home gardening of carrots, one must have good knowledge of planting carrots in pots.

Planting Carrots in Pots.

Preparation of pot:

  • Always choose a carrot variety which is shorter. The carrot varieties which are smaller will be flexible for growth in a pot rather than the carrot varieties with a standard length. It is also a very good idea to select the varieties which have less time for maturing. Smaller varieties of carrots are like Romer, Thumbelina, Parisienne, Little finger. You also have options such as Shin Kuruda, Danvers half long, Parmex.
  • Select a pot which is wide and has a depth of at least 1 foot. As carrots will grow underground, the root system will require more space for their growth. In the same way, you can grow more numbers of carrots depending on the width of the pot.
  • The pot should have very good drainage holes for the prevention of additional water from damaging the carrots by causing rot.
  • The type of pot is not a big deal as long as it has a sufficient amount of depth. You can use any type of pot which is made of clay, stone or plastic. The shape also depends on your decision, it can be circular or rectangular.
  • If there are no drainage holes present on your pot, then you can start drilling your own drainage holes.
  • Now, it is time to clean your pot with water and soap. If the pot is previously used for any other plant growth, you will need to scrub the pot internally before you start the plantation of your carrots. The eggs of microscopic insects and the bacteria will mostly hide in the used pots and these may reduce the growth of your carrots by infecting them.
  • Choose a potting medium which is well-drained and loose. You can use both the soil and soilless mixtures. If you are interested in purchasing the soil, choose the one which is meant for the vegetables which are to be grown in pots. If you are purchasing the soil on your own, make sure that you are adding peat moss to it. It will make up to 50% of your soil. As an alternative, you can also add the horticultural sand to the potting medium and it will almost make 25% of the soil.
  • You can also try by adding a mixture of red soil, compost which is decomposed and the sand which is added in similar proportions for a soil media you are making for yourself.
  • You can also take into consideration the coco peat mixed with a little amount of perlite for a potting medium which has no soil.
  • You can search and find all these components in your local garden stores, For help, you can also approach any sales agent.
  • Now, the pot must be filled with soilless or soil medium. Please make sure that you are leaving at least 1 inch of space in between the medium’s top and pot’s rim. You can also add a slow releasing fertilizer to the soil, but you will need to select the one which has less content of nitrogen. The ratio can be 5-10-5. Nitrogen will help in the encouragement of the growth of leaf instead of the growth of carrots.

Read: How to Mulch Your Garden.

Plantation of carrot seeds:

  • You can start planting the carrot seeds after the completion of the first frost if you are planting the carrots in the outdoor locations. The temperature preferred for the growth is around 13°C or it can also be a little bit warm. So it is always better to start the plantation in the early stages of spring. Anyways, the seeds will not do their best if the temperature is more than 29°C.
  • The holes must be dug at a depth of a ½ inch. The carrots must have a distance of at least 1 inch between them. The plantation can be done apart if you would desire to. You can drop at least 2-3 seeds of carrot in one hole. The seeds of carrot are very small and are really difficult for plantation. If you drop a few seeds, that would be okay. You can prune the plants afterward as soon as they start sprouting.
  • The holes must be completely filled with your potting medium. Make sure that you are not packing the medium into the holes. If you do so, there is a chance that your seeds get crushed. Rather than that, drop the soil medium in a light manner into each and every hole. Always ensure that you are filling all the holes. In a gentle manner, tap the soil down as soon as you are done.
  • The seeds need to be watered in a thorough manner. You will need to add sufficient amount of water for making the medium wet. There is no requirement to make puddles, but the soil you are using should be wet when you touch. Just being moist is not sufficient. The seeds will require sufficient water to initiate the process of germination.
  • You can make use of a sprayer so that there would not be any requirement to stir the seeds.
  • Your pot has to be kept in full sun. Most of the carrot varieties will love to be in full sun. That means they will need full sun for a complete day. Select a place in your backyard or terrace which do not receive any shade in the day time where your carrots will get sufficient light for growing well. Always make sure that you are gaining some knowledge about the carrot varieties you are growing. For example, few carrots may like the partial sun.

Read: Neem Oil Pesticide Formulation.

Caring your carrots:

  • The carrots need to be watered on a daily basis especially when the weather is warm. You may also require to water them two times a day at the time of sunny and hot weather. Make sure that you are not letting the soil to stay dry to any amount of time.
  • Touch the soil with your finger to see if it is moist. If it is not moist, it means that it has to be watered.
  • In most of the scenarios, tap water will work very well for carrots. Anyways, if the water which you are using is treated with a water softener, you should use distilled water.
  • Your carrots have to be fed with fertilizer for one time in a week so that it would help in their growth. You can try the fertilizer with N-P-K ratio 5-10-10 where the nitrogen is less in content. This will help the roots to grow rather than the leaves. Anyways, it is not that required to use fertilizers for the growth of carrots.
  • The carrots have to be thinned once they reach a height of 1 inch. Once they begin to grow into seedlings, you will need to remove any additional plants with the help of gardening shears or scissors. The carrot plants need to be spaced for about 3 inches apart so that it would help them in their growth.
  • Please make sure that you are not pulling the seedlings which are unwanted as they would cause damage to the other carrot plants present in the pot.
  • You can use some more amount of growing medium to solve any problems with growth. If you see that your carrots are leaning, you will need to make them straight in a gentle manner and add soil so that they get stabilized. In a similar way, if you see that your carrots are peeking through the soil’s top, you will have to cover them with some more amount of soil. When the carrots come out of the soil, they will turn into green color at the top. It will not cause harm to them, but they seem to be less attractive.
  • Your carrots need to be sprayed with antifungal spray if you see any white mildew. The pot carrots will not be prone to pests and diseases, but there is a chance that they get few fungal infections depending on the time. You can see a substance which is white and powdery present on the leaves. You can also purchase antifungal sprays or prepare it on your own.
  • Prepare a spray which is against mildew by mixing a tablespoon of baking soda to 4 liters of water with a pinch of liquid used for dishwashing. Stir it and apply to the plant with a spray bottle one time in a week.

Harvesting carrots:

Carrot Harvest.
Carrot Harvest.
  • Your carrots have to be harvested when their color reaches the peak. Based on the variety of carrots, they could be red, orange, purple. Basically, they will be taking at least 60 days to be matured completely and reach the perfect color. Catch hold of the greens close to the root’s top and in a gentle manner, wiggle them out of place. The sooner you harvest the carrots which are mature, they will be sweeter when you eat them.

That’s all gardeners about planting carrots in pots or growing carrots in containers. Keep growing plants!.

Read: Aloe Vera Juice Extraction Process. 

Garden Mulching Types, Techniques, and Ideas

0

Garden mulching types, techniques, and ideas

Today, let us discuss the topic of garden mulching types, techniques, and advantages. Mulch is a layer of material applied to the surface of the soil. Mulch in the garden is usually, but not exclusively, organic in nature. It may be permanent for example plastic sheeting or temporary example, bark chips. It can be applied to bare soil or around existing plants. Mulches of manure or compost will be incorporated naturally into the soil by the action of worms and other organisms. The procedure is used both in commercial crop production and in gardening, and when applied correctly, can dramatically develop soil productivity.

Many materials are applied as mulches, which are used to retain soil moisture, regulate soil temperature, suppress weed growth, and for aesthetics. They are applied to the soil surface, around trees, paths, flower beds, to check soil erosion on slopes, and in production areas for flower and vegetable crops.

Garden Mulching Benefits:

Mulching is a must if you want a healthy garden, weed-free garden (either vegetable or flower), plus it makes the garden look tidier. Certain types of mulch act as organic pest control so your hard work won’t be destroyed by creepy, crawly varmints.

For those who wonder if mulching is another term for composting, it is not. Mulching differs from composting in their function. Whereas composting is to enhance the soil and create it more fertile, mulching is to protect the soil from losing its nutrients.

Regulates Soil Temperature

Mulch prevents moisture evaporation from the soil and helps keep even soil moisture and temperature throughout the growing season. Plants need less water when mulch is applied to the soil, so that means less usage of a natural resource and less work for you.

Stops Weed Growth

A 2 to 4-inch layer of mulch prevents weeds from growing in the garden. The sunshine can’t enter through to the soil so the weed seeds can’t germinate, thus eliminating the competition for moisture and food with garden plants and weeds. 

Soil Amendments

As the organic mulch decomposes it adds nutrients to the soil to give food for developing plants. The decomposing matter improves soil structure, improves drainage and helps prevent soil compaction.

Organic Pest Control

Mulch acts as an insect and disease trap, trapping and killing pests before they reach tender garden plants. Certain wood mulches, like wood bark and ashes from a wood heater, also perform as an organic pest deterrent while improving the overall health of the garden.

Organic Mulch

Tree bark mulch can be purchased in different shades of color to match the garden decor, but it’s not necessary to spend money on mulch. Grass clippings, nut hulls, pine straw, leaves, compost, well-rotted manure and shredded newspaper all are superb forms of free organic mulch. Some landfills offer free wood chips and compost if you’re willing to load and haul it manually.

Inorganic Mulch

Inorganic items can be used to keep weeds from taking over the garden. Plastic sheeting, roofing paper, shingles or any item that you can have left over from a building project can be used. Inorganic mulch is not the best option since it will not decompose and improve soil structure, but it will serve the purpose.

Read: How To Grow Microgreens Indoors.

Different types of garden mulching:

Mulches are obtainable in many forms. The two main types of garden mulch are inorganic and organic. Inorganic mulches include various types of stone, lava rock, geotextile fabrics, and other materials. Inorganic mulches do not decompose and do not want to be replenished often. On the other hand, they do not develop soil structure, add organic materials, or provide nutrients. For these reasons, most horticulturists and arborists desire organic mulches. Different garden mulch ideas are given below;

Compost:

Use compost as mulch. Basically spread it around the garden, applying it up to 40mm deep. Compost has great evaporation control and is excellent for adding humus to the soil. It is more expensive than other forms of mulch, however, this is a huge option if you have a compost bin and only have a small area to mulch.

Pea straw:

Pea straw mulch is perfect for roses, flowers, vegetable gardens, trees, shrubs, and fruit trees. This kind of mulch stimulates growth and insulates roots from weather extremes. It does break down quickly and will want to be topped up on a regular basis. It is very high in nitrogen, so pea straw mulch is ideal for poor soils. Pea straw is normally sold in bales, is easy to handle and transport.

Sugar cane mulch:

Sugar cane mulch is ready from dried sugar cane leaves and tops and is sold in bales. It is less expensive than other mulches, simple to handle and more readily available. This type of sugar cane mulch breaks down quickly, encourages soil organisms and is excellent for vegetable gardens. Top it up frequently.

Barks and wood chips:

These types of mulches take longer to break down so it’s more economical, as you don’t have to apply it as often. Barks and chips are best used around recognized plants like shrubs and trees where immediate soil improvement is not required. Wood-based mulch can cause nitrogen deficiency, which causes plant leaves to turn a yellow color. This can be overcome by adding blood and bone, which adds additional nitrogen to the soil.

Mulch Material.
Mulch Material.
Hay or Straw:

A 6 to 8-inch layer of hay or straw provides excellent annual weed control. These materials decompose quickly and should be replenished to keep down weeds. They stay in place and will develop the soil as they decay. Avoid hay or straw that is full of weed seed and brambles. Fresh legume hay, such as alfalfa, supplies nitrogen as it rapidly breaks down. Hay and straw are readily obtainable in rural areas, but city dwellers may not be able to obtain hay easily.

Read: Homemade Liquid Fertilizers.

Lawn cuttings:

Lawn cuttings are a classic basis for mulch. If you use them, be sure not to spread them too thickly, as they may heat up while they break down (creating a mini-compost pile). They help maintain weeds down pretty good.

Pebbles and gravels:

If you want to go long-lasting mulch, pebbles and gravels work well. These include products such as scoria, gravel, and stone river pebbles. This kind of mulch is best suited to succulents and Mediterranean-type plants like lavender. It won’t develop the soil structure, but it will help reduce soil evaporation.

How to apply Mulch:

There are two cardinal systems for using mulch to combat weeds. First, lay the mulch down on soil that is previously weeded, and second, lay down a thick enough layer to discourage new weeds from coming up through it. Is mulch good for plants? Mulch may make a garden look tidy, but the work it does to develop the growing conditions for plants is what makes it most appealing. Those layers of bark or pine straw improve soil texture, suppress weeds, and conserve water.

It can take a 4 to 6-inch layer of mulch to totally discourage weeds, although a 2- to 3-inch layer is usually enough in shady spots. If you recognize that a garden bed is filled with weed seeds or perennial roots, you can use a double-mulching technique to prevent a weed explosion. Set plants in place, water them well, then extend newspaper and top it with mulch.

Mulches that retain moisture (like wood chips) can slow soil warming. In spring, pull mulch away from perennials and bulbs for quicker growth. Wet mulch piled against the stems of flowers and vegetables can origin them to rot; keep mulch about one inch away from the crowns and stems.

Mulch piled up against woody stems of shrubs and trees can cause rot and encourages rodents (such as voles and mice) to nest there. Maintain deep mulch pulled back about 6 to 12 inches from trunks.

Using mulch in the vegetable garden has become a popular and almost necessary item. The process of mulch is given below;

Water the Soil for Garden Mulching: 

It is important to water your soil prior to mulching. Dry soil and mulch combined can really prevent water from soaking into the ground. Use a garden hose and allow the water to soak into the soil 6 to 8 inches.

Remove Weeds: 

Remove existing weeds from the region you plan on mulching with a trowel, weeding tool or by hand. Be sure to get all of the plants, with the roots, out of the ground.

Add Mulch: 

After deciding what type of mulch you want to use, layer it on your beds about 2 to 4 inches deep. It must be thick enough to block light and keep weeds from sprouting. Be careful to maintain the mulch away from the crown of plants, as it could potentially kill them.

Replenish Mulch: 

Organic mulches break down gradually over time. Replenish when just a thin coating remains. By adding mulch, you are improving soil and reducing the need to water and pull weeds. If you use rubber or stone mulch, just check its condition each period to see if it needs replenishing, replacement or rearrangement.

Tips for Using Garden Mulch:

  • Maintain mulch at least an inch away from plant stems to avoid rot and fungus problems.
  • Leave at least half grass clippings on the lawn. They are a very important source of nutrients.
  • Clippings used as garden mulch must be sun-dried for a day or so. Do not use clippings from lawns pleasure with herbicides or toxic pest controls.
  • Use leaves that age at least nine months. These allow the growth-inhibiting phenols to be leached out.
  • Safe plastic mulch with Earth Staples. Cover the whole row before planting, and then cut planting holes as needed. You can cut the plastic in half lengthwise, and snuggle it up near the plants from each side.
  • Beneath the mulch, apply a nitrogen-rich fertilizer. Organic mulch particularly leaves and wheat straw can rob the soil of nitrogen as it is decomposing.

Picking Mulch for Your Garden:

Two basic kinds of mulches are organic and inorganic. Organic mulches contain formerly living material such as chopped leaves, straw, grass clippings, wood chips, shredded bark, sawdust, pine needles, compost, and even paper. Inorganic mulches contain black plastic and geotextiles (landscape fabrics).

Both types discourage weeds, but organic mulches improve the soil as they decompose. Inorganic mulches don’t break down and develop the soil, but under certain circumstances, they’re the mulch of choice. For example, black plastic warms the soil and radiates heat through the night, keeping heat-loving vegetables such as eggplant and cherry tomatoes cozy and vigorous.

Before and After Mulch Care:

Mulch offers great benefits to both soil and plants such as weed control and moisture retention.

The following before and aftercare measures listed will maximize the use and benefits mulch provides:

Before application

Flowerbeds must be weeded prior to mulching and edges defined.

Water your flowerbed prior to relating mulch to lock in moisture.

If receiving a blower truck application:

Sprinkler heads and small, delicate plants must be flagged or covered with a pail. Decorative items must be removed from the garden beds.

Please ensure house windows are closed as fine dust can occur during the application process.

For health and safety reasons, please maintain pets inside or on a leash during the application. Your yard must be clear of any pet feces.

After application:

Mulch must not be pushed against plant or tree stems. Please ensure you leave a 2 to 3 inch (7-10 cm) clearance and 6 inches (15 cm) for large trees.

Water all mulched areas using a rain gauge in your beds until one inch (25 mm) level has been obtained. Watering will lock the mulch in place and help the finer section settle to the bottom for maximum weed control. Periodically monitor the soil below the mulch for moisture levels. The soil must feel damp, not soaked.

In the summer, if high winds are expected, give mulch a good soaking to help it stay in place. Protect mulch from blowing away in dry winters by moving some snow onto the area. In the spring renew mulch and its initial color by giving it a light rake. In the fall, the mulch can be turned with a shovel to position the fallen leaves under.

As your mulch naturally breaks down, it provides the soil with added nutrients.  It will also require to be topped up to maintain a 2 to 3 inch (7-10 cm) layer every 3 to 5 years. In humid areas, it is probable for mold to appear. Mold does not pose any danger to people, pets or plants. It can be restricted by applying baking soda onto the affected areas.

That’s all folks about Garden Mulching Ideas. Keep Gardening!.

Read: Argan Oil Extraction Methods.

Growing Microgreens Indoors at Your Home

Growing Microgreens indoors

Today, we go through the topic of growing microgreens indoors at your home. The definition of gardening has changed thanks to several methods that enable as to have our own gardens and even gardening is not only limited to the soil now. The biggest problem in today’s era is to obtain true nutrition in our plates half of the world is facing the demon of malnutrition due to poor food habits and majorly poor availability of nutrient-rich vegetables.

We always aim at waking people about various cultivation processes on their own and we are constantly working to enrich you with the right knowledge about gardening at your own place so that you can have your share of nutrition and healthy veggies in your own space. So let’s decide to quit bargaining and stop stressing you about freshness and price of vegetable at the store, no long queues rather spend time watering your own herbs and vegetables.

So a way different from conventional indoor home gardening, today we will discuss another technique for having a perfect mix of nutrients complete guide on growing microgreens indoors.

What are microgreens?

Well, some of you might be unaware of word microgreen, microgreen as the name implies it is a new, tender shoot of a vegetable plant. Also known as “vegetable confetti,” microgreens are at times confused with sprouts that are germinated seeds which are consumed wholly, root, seed, and shoot. Microgreens, however, include a variety of edible immature greens, harvested with scissors less than a month after germination, when the plants are up to 2 inches tall. The stem, cotyledons (or seed leaves) and the first set of true leaves are all edible. These are the immature greens, harvested following their sprouting stage, typically within 10-15 days when the first two seed leaves, also known as cotyledons, have appeared.

Microgreen Sprouts.
Microgreen Sprouts.

Why grow microgreens?

Microgreens are raised when you let a sprouted seed go a little bit further into growing, but don’t let it completely mature. These greens are tender, sweet, and insanely good for you—they are literally one of the healthiest veggies.

Newly sprouted, tiny microgreens are known to have a high nutrient impact as compared to their mature plant counterparts. Research shows that microgreens have far more nutrient density than mature leaves, although this varies from species to species, and of course depends on the growing conditions, like soil and nutrients.

An experiment assayed about 25 microgreen varieties of different crop and found that red cabbage (Brassica oleracea L.), cilantro (Coriandrum sativum L.), garnet amaranth (Amaranthus hypochondriacus L.) and green daikon radish (Raphanus sativus L.), had the maximum concentrations of biochemicals such as ascorbic acids, carotenoids, phylloquinone, and tocopherols, respectively. Another remarkable experiment specifically observed vitamin and mineral levels of buckwheat (Fagopyrum esculentum), which was grown under different color LED lights. They established that vitamin C content was considerably higher when grown under white lights, compared to red or blue lights or in a dark.

Read: How to Make Liquid Organic Fertilizers at Home.

Uses of microgreens

Extreme winters and summers make your garden almost barren and left your field with almost null vegetation but our demand for fresh veggies and herbs remains the same. Microgreens can be grown indoors all winter long or even all year long if you don’t have an outdoor space to raise fresh veggies for yourself.

  • Microgreens make an amazing winter substitute for lettuce or other cooking greens.
  • Microgreen with sprout salads makes a power packed breakfast material.
  • You can also use them on sandwiches or in salads.
  • Over the past several years, microgreens have been showing up in fine dining restaurants

They traditionally were used as a flavourful edible dress or garnish for a dish, but now it’s not uncommon to find them as the dish.

Which seeds work best for raising microgreen?

You can use almost any vegetable seed to grow microgreens Salad greens, leafy vegetables, herbs, and even edible flowers can be grown as microgreens, though some varieties are better suited than the others. Beginners often begin by growing one type of seed, among the easiest-to-grow varieties of microgreens, are Kale, Basil, broccoli, cauliflower, cabbage, mustard, chia, sunflower or buckwheat they can be grown in a single container. You can also easily raise different seeds in several containers, and mix your microgreens after harvesting.

You can also start with seeds for salad mixes and specially selected microgreen mixes available in online stores that combine greens with similar growth rates, compatible flavors and beautiful coloring including reds, purples, and greens. Since they are specially created keeping growth success in mind, they offer a great variety of tastes, textures, and nutrition hence they are the best choice for first-timers.

Growing microgreens indoors at your home

Microgreens are grown on soil based system preferably indoor. If your climate is suitable, microgreens can be also be grown outdoors in the garden, under shade but indoor cultivation of microgreen is more awarding and preferred. Like all fragile seedlings, you will have to guard them against weather extremes and drying winds and all time ready hungry garden pests are the biggest threat when growing outdoors.

Here’s how to grow your own: Always keep in mind that you will need a sunny windowsill for cultivating your microgreens or at least some good LED grow lights.

Required tools

  • two  growing trays (preferably one that fits in another) or you can get readymade growing trays or just regular containers
  • scissors
  • cardboard (cut to size of growing tray)
  • organic potting soil
  • microgreen seeds
  • spray bottle

 Find your container

  • You’ll need something to grow microgreens in. Containers work as growing trays or beds for microgreens. You can select a shallow plastic container with drainage holes. Generally, transparent containers are used to keep a keen eye on microgreen growth and any contamination can be checked easily. You can use a regular seed starting trays which are readily available at most garden centers and hardware stores but frankly, you can use pretty much anything. As these greens aren’t going to stay in them for very long, so it doesn’t have to be anything very special.

Read: Techniques of Indoor Gardening.

Light Source:

  • For germination seeds require light, air and moisture. There are two ways for providing light to your microgreen seeds the natural way or the artificial way. For the natural way, all you need is a sunny window. Simple! Microgreens require about four hours daily of direct sunlight to flourish. In winter months, some may need even more. Leggy, pale greens are a sign of inadequate sunlight. Light needs can also be satisfied by using grow light. You can grow a tray of microgreen under grow out lights for this you don’t need any kind of special light or light bulbs. Just get the cheapest fluorescent light or LED whichever you can find an outfit it with two regular fluorescent lightbulbs. Hang the light about four inches above the table where you are going to set your growing tray.

Steps to grow microgreens indoors:

  • Use a growing tray (or another container) and if it doesn’t have holes already in the bottom, then add some drainage holes with a pair of sharp scissors carefully. Stick this growing tray into another growing tray with no holes. This will let the moisture drip through to the container and the second tray will act as a bowl or collector.
  • Add around an inch of moistened potting soil to the growing tray. As they won’t develop a very complicated root system, which means you don’t need a whole lot of soil. About two inches worth should be more than enough. After pouring the soil lightly level and flatten this with the help of cardboard.
  • Just broadcast your seeds across the surface of the soil. No need to worry about getting it perfectly geometric or spaced out equally. Try to scatter the microgreen seeds as evenly as possible across the top of the soil so that picking those stays easy.
  • Next, add soil using a coarse wire-mesh sieve a very fine (⅛-inch) layer of dry potting mix to the top of the seeds. Gently press down again with the help of cardboard taking care not to over-compress the soil.
  • Add water, as you don’t want seeds swimming in the water, but you do want them to be very damp. Mist or wet the surface of the soil with your water spray bottle.
  • Keep the soil consistently moist. Prevent soggy soil by draining off any excess water that collects in the drip tray after watering.
  • Cover the entire growing tray with a humidity dome or just a piece of muslin cloth. You can also just cover the microgreens with another growing tray. In order to sprout plant requires warmth and moisture not necessarily sunlight because that can be replaced with artificial lighting. Check daily and sprinkle water, if it is looking dry.
  • Once the seeds have sprouted this usually takes 3-8 days, remove the top of the container and begin spraying water twice daily and make sure that your microgreens are getting between 4-8 hours of sunlight or LED grow lights.
  • If you notice some of your microgreens growing in an irregular pattern, try rotating your tray every few days. The seeds closer to the light this is especially in case of growing in a sunny window might grow faster than the ones that are further away.
  • You’ll be able to harvest as soon as the first two leaves start forming usually 10-15 but may vary crop to crop or on growing conditions.
  • To harvest, you can either clip the microgreens with sharp kitchen scissors or uproot them with hands.

That’s all guys about Microgreens Growing Indoors.

Read: How to Identify a Sick Rabbit.

Indoor Gardening Techniques and Guide

Indoor Gardening Techniques and Guide

Today, we learn the topic of indoor gardening techniques and ideas. If you live in a small apartment or don’t have a garden to speak of but you still have a love for planting and cultivation, you don’t have to give up your dream. Maybe you’re not going to be producing a crop that will keep you and your family fed for the whole year, but it will bring you satisfaction and joy. One must know indoor gardening techniques for becoming an expert in home gardening.

Studies have shown that growing the smallest of patio or windowsill gardens will reduce your stress and improve your mood. There is nothing to lose – get your gloves on and start planting!

Here is a short guide to help you begin:

Balcony Gardens 

You’re truly lucky if you have a balcony. Even if it doesn’t get much sun, it’s a perfect place to start. A great type of plant to consider for a balcony is something that climbs and will cover your space and turn it into a green oasis. Here are some great climbers:

  • Beans – These are perfect if you need privacy and would love a wall of green separating you from the outside world. Beans and peas make a lovely cover and grow quickly. For this, the only special tools you will need are strings to put up for them to climb on. You can use small nails to attach them to the ceiling above. You can harvest these through the summer and fall.
  • Grapes – these will keep for multiple years, unlike beans. There are many types to choose from and for the balcony garden, we recommend sweet dessert grapes – something to put on the table and enjoy when guests come over. An important requirement is a large, solid planter. Wood or metal are the best choices here. You will also need to train it properly, using a solid lattice. You may need to find out if your landlord will allow this if you’re renting.
  • Squash, pumpkins, and cucumbers – these also need a solid planter, but once it’s in, your squashes will be easily guided along a strong lattice. In the season, they will hang down and ripen in the autumn sun. They will also make a great and impressive cover, with their large leaves and pretty flowers.
  • Tomatoes – yes, tomatoes! You don’t think of them as climbing plants but climb they do and to great heights. There are multiple different kinds of tomatoes, like Triple Crop that acts more like a pole bean than a tomato! It’s not only useful but amazing to see. Be sure to get the right kind when you look for seeds.

    Balcony Flower Garden.
    Balcony Flower Garden.

Read: How to Make Liquid Fertilizers for Garden Plants.

Seedlings and Getting the Plants You Want

Speaking of seeds, it’s a much better idea to grow plants from seeds, especially if you are looking for a very specific type of plant (like the designer climbing tomato). It’s not very likely that they’ll have exactly what you want or need in your local gardening store.

Looking for seeds online might be your best bet. If you don’t want to turn half of your apartment into a sprouting colony, with little delicate seedlings on every windowsill and tabletops, you should get a greenhouse. Yes, if you’re a patio or balcony warrior, there are amazing small greenhouses available out there, and they’re made just for you. They will lean against your balcony wall and are meant not to take much space. But they still do the same job that a full garden greenhouse would.

They will make it possible to start your own seedlings and shield them from cold weather and wind until they are big enough to support themselves, and the weather is nice enough to let them wander outside by themselves. Think of it as a plant daycare.

Indoor Kitchen Gardens

If you want to have an indoor herb garden, you are not alone. Even those cooks who have space outside prefer having some plants inside, especially aromatic herbs. They add beauty to the kitchen and are very useful when you want to toss something fresh in a stew or salad.

Indoor Gardening Ideas.

Shelf Life – because plants love sunlight, a windowsill is the natural place to keep all your greens. Plants like basil, cilantro, parsley, rosemary, lovage, spinach, and a never-ending parade of sprouts should be put in beautiful ceramic pots and displayed on the windowsill with pride.

Special tools – if you have space and the means to get equipped, don’t hesitate to get a plant cultivator. Those dishwasher looking appliances will automate your growing while looking sleek and modern. They have a glass door through which you can observe your plants, ecological lighting and full hydroponics set up.

Sprouter – a sprouting tray is probably one of the most economical and dirt-free indoor growing methods you can have. Not to mention fast! If you’re craving those nutritious microgreens, they will take days to sprout and to end up on your plate. If you can’t get a sprouter, then use an empty jar instead. Just soak the sprouts and continue to rinse them daily, using a cloth to drain your jar. Place on the windowsill, and you’ll be eating green in a little over a week!

Read: Organic Composting Guide.

Go Vertical – there are many indoor vertical garden designs. Those space-saving gardens can be mounted on a wall and not take up much space. This can be as simple as mounting rows of shelves in close proximity and choosing nice pots to line them with. It can mean a row of hanging pots or a stand-alone shelf. Go high!

Pets and Plants – If you are short on space and think you can’t have a pet OR a garden then think again. There are tiny hydroponic systems available where your small aquarium can feed a modest hydroponic garden which will be conveniently located on the “second floor” of your aquarium. You can grow aromatic herbs and keep them fed and happy while providing your fish with unique living experience, and your guests with a great conversation piece.

Indoor Gardening is Worth It

Even if you don’t have enough “crops” to be self-sufficient – it’s not what home gardening is all about. It’s about satisfaction, beauty, and the joy that watching something grow brings.

It’s also a great tool to teach children who grow up in an urban environment where their food comes from, and how to appreciate it more. Once they know how much work it takes to grow something, they’ll look at it differently and more respectfully.

That’s all folks about Indoor Gardening Techniques and Ideas. Happy gardening!.

Read: Palmarosa Oil Extraction Process.