Home Gardening

Outdoor Gardening

Organic Gardening

Modern Gardening

Urban Gardening

Gardening Business

Home Blog Page 2

Unlock Blooms: 9 Reasons Why Your Potted Chrysanthemum is Not Blooming

0

By understanding the potted Chrysanthemum flowering problems and taking the necessary steps to address them, you can help your Chrysanthemum thrive and produce beautiful blooms. With proper care and a little bit of knowledge about pests, diseases, and growing conditions, you can enjoy vibrant flowers all season long. 
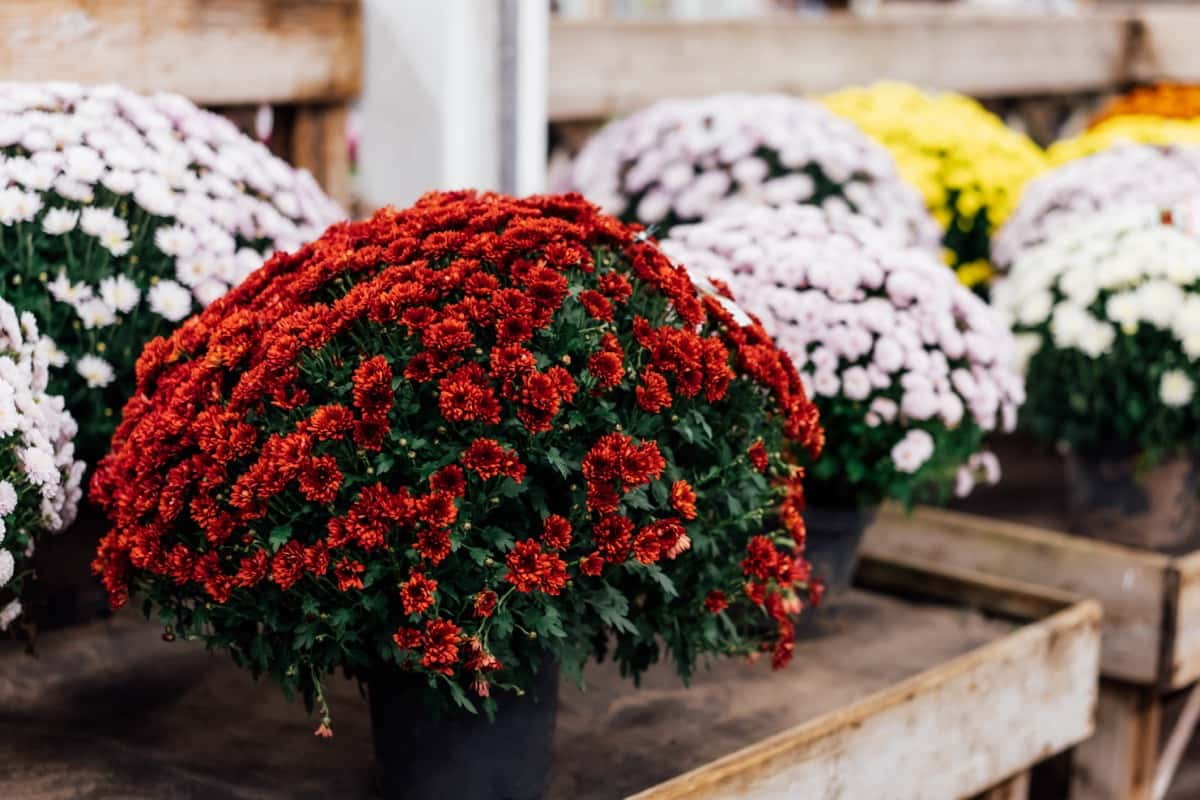
Reasons Why Your Potted Chrysanthemum is Not Blooming

9 Reasons Why Your Potted Chrysanthemum is Not Blooming

Late-Bloomers 

Just because your Chrysanthemum hasn’t bloomed yet doesn’t mean it never will. Be patient and give it some time. Sometimes, all it needs is a little extra care and the right conditions to show off its blossoms in all its glory. Keep caring for your plant as usual, ensuring it has adequate sunlight, water, and nutrients. With a bit of patience and perseverance, those buds may surprise you when they decide to make their grand entrance into the world of vibrant blooms. 

Lack of Sun 

One potential reason for potted Chrysanthemum not flowering could be the lack of sunlight. These beautiful flowers thrive in bright, indirect light, so if they’re not getting enough sun exposure, they might struggle to produce those gorgeous blooms. Chrysanthemums typically need around 6 hours of sunlight each day to flourish.

If your plant is placed in a shady corner or hidden behind larger plants, it may not be receiving an adequate amount of sunlight. Remember, sunlight plays a crucial role in photosynthesis. Without enough sun, your Chrysanthemum may not have the energy it needs to bloom abundantly. 

Overcrowded Containers 

When the plant’s roots don’t have enough space to spread out and grow, it can impact its overall health and blooming potential. Overcrowding can cause stress on your Chrysanthemum, hindering its ability to focus on producing those beautiful blooms you are looking forward to seeing. 

To encourage potted Chrysanthemum blossoms, consider repotting your Chrysanthemum into a larger container with fresh soil. Make sure there is ample room for the roots to expand comfortably without being cramped. Giving your plant some breathing space may just be the boost it needs to start flourishing again. 

Nutrient Deficiency 

If your Chrysanthemum lacks essential nutrients like nitrogen, phosphorus, or potassium, it may struggle to bloom to its full potential. Nutrient deficiencies can manifest in various ways, from stunted growth to pale leaves and lackluster blooms. To ensure your potted Chrysanthemum gets the nutrients it needs, consider using a high-quality fertilizer specifically formulated for flowering plants.

In case you missed it: How to Grow Chrysanthemums from Seed to Harvest: Planting and Care Guide for Beginners
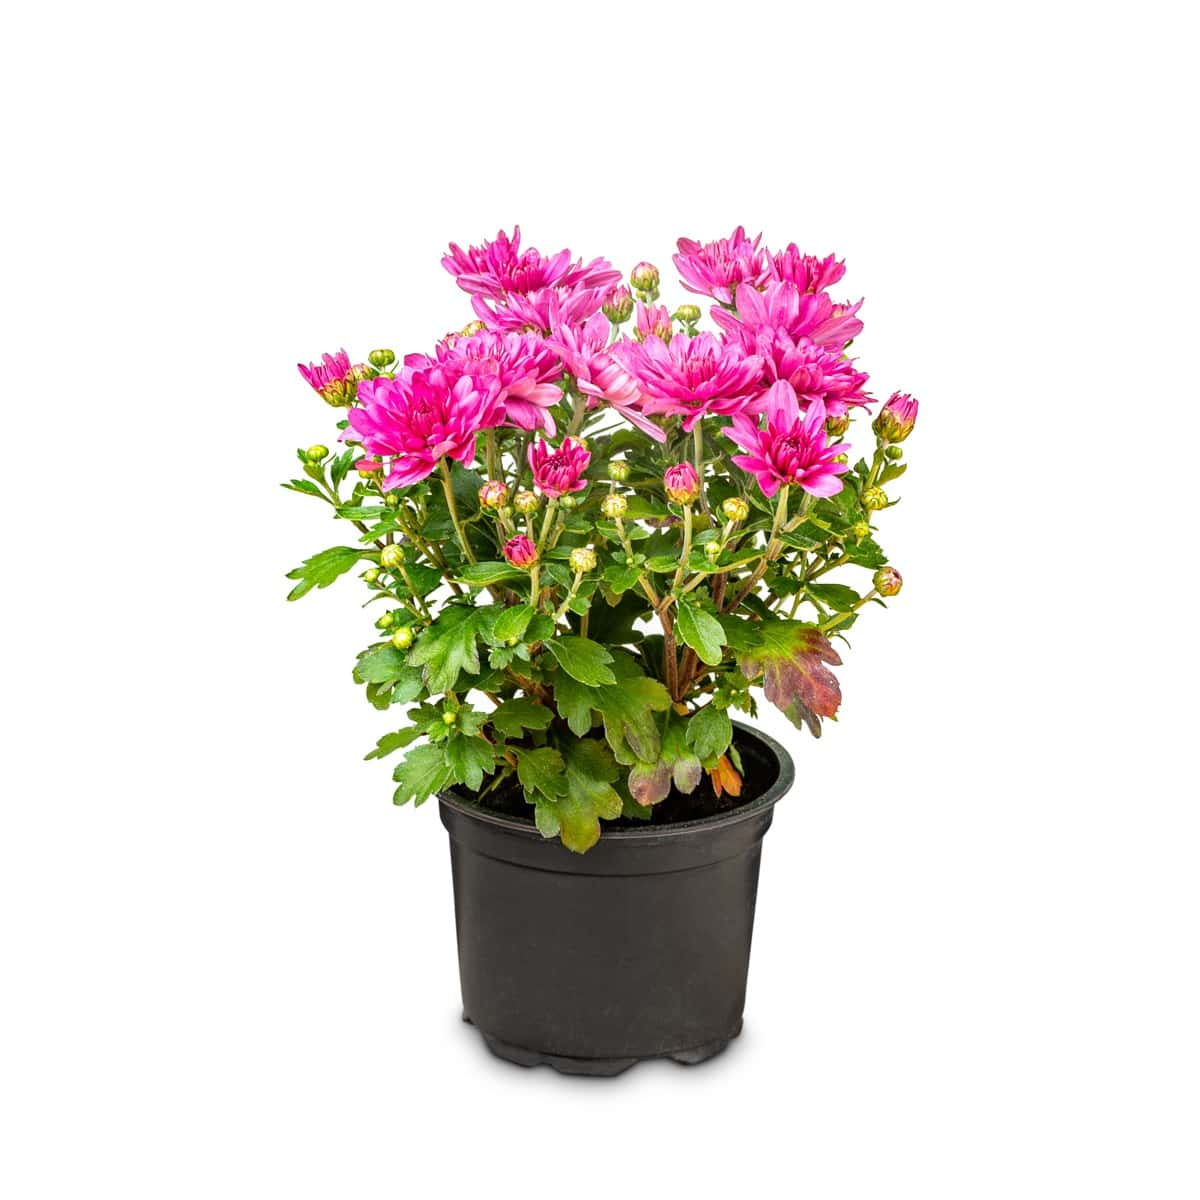
Chrysanthemum in a pot

Regularly feeding your plant with the right nutrients can help promote abundant blooms. Remember that each plant has unique nutritional requirements, so it’s essential to research the needs of Chrysanthemums to address any deficiencies effectively. 

Inadequate Chilling Period 

One possible common cause of potted Chrysanthemum flower failure could be an inadequate chilling period. Chrysanthemums require a period of cooler temperatures to set buds and bloom successfully. If your potted Chrysanthemum has not been exposed to the right amount of chill hours, it may struggle to go through its natural blooming process. Without this chilling period, the plant may remain in a vegetative state and fail to produce flowers as expected. 

To ensure that your Chrysanthemum thrives and blooms beautifully, it is essential to provide it with the necessary chilling period. This can mimic the conditions it would experience in its natural habitat during the fall season when these plants typically bloom. 

Waterlogged Soil 

When the roots of your plant sit in water for too long, they can’t access the oxygen they need to thrive. This lack of oxygen can hinder proper growth and blooming. To encourage potted Chrysanthemum blossoms, ensure your pot has adequate drainage holes at the bottom. Excess water should be able to flow out of the container freely. Regularly check the moisture levels in the soil. Consider repotting your Chrysanthemum if you suspect that its current container doesn’t facilitate proper drainage.  

Excess Nitrogen 

Excess nitrogen in your potted Chrysanthemum can be a real blooming buzzkill. While this nutrient is essential for plant growth, too much of a good thing can lead to disappointing results. When nitrogen is abundant in the soil, your Chrysanthemum may put all its energy into producing lush green foliage at the expense of blooming flowers. Nitrogen imbalance can throw off the delicate flowering cycle of the Chrysanthemum plant, leaving you scratching your head, wondering why those vibrant blooms just won’t show up.

In case you missed it: Best Fertilizer for Chrysanthemum: Homemade, Liquid, NPK, Organic, and Schedule
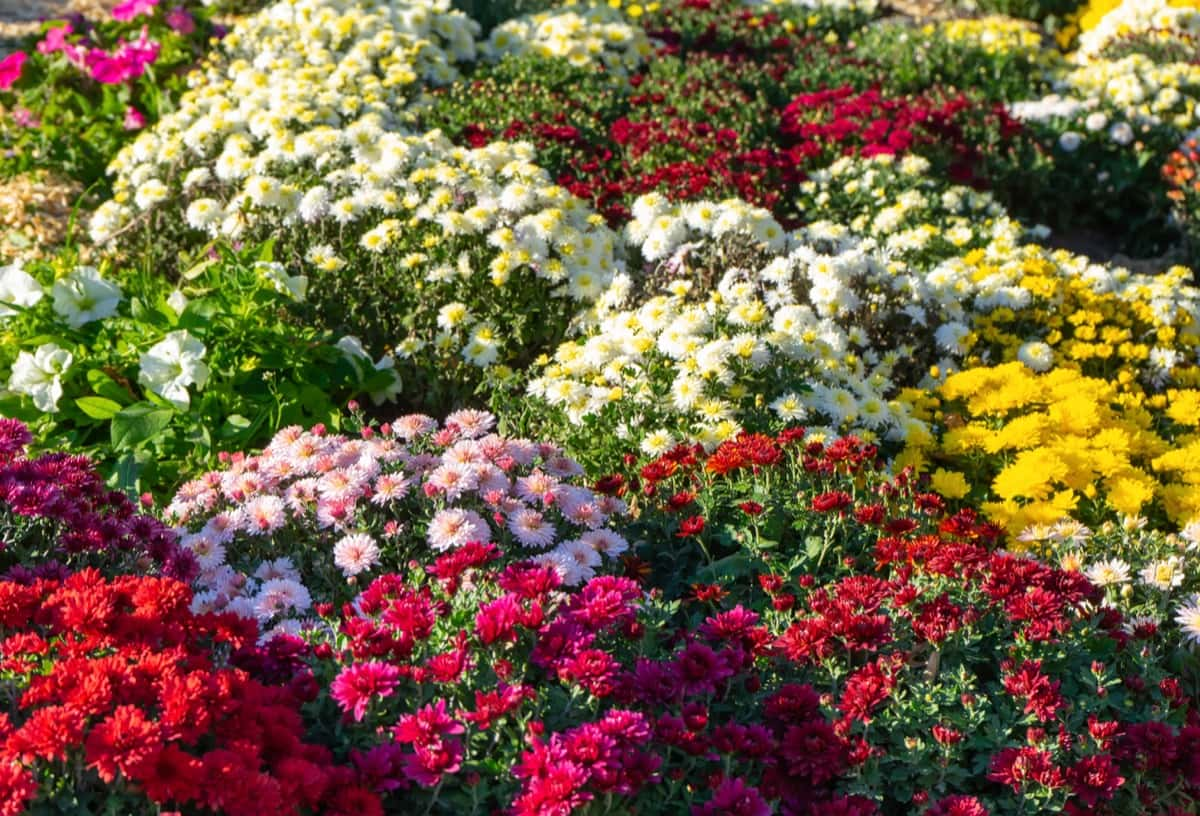
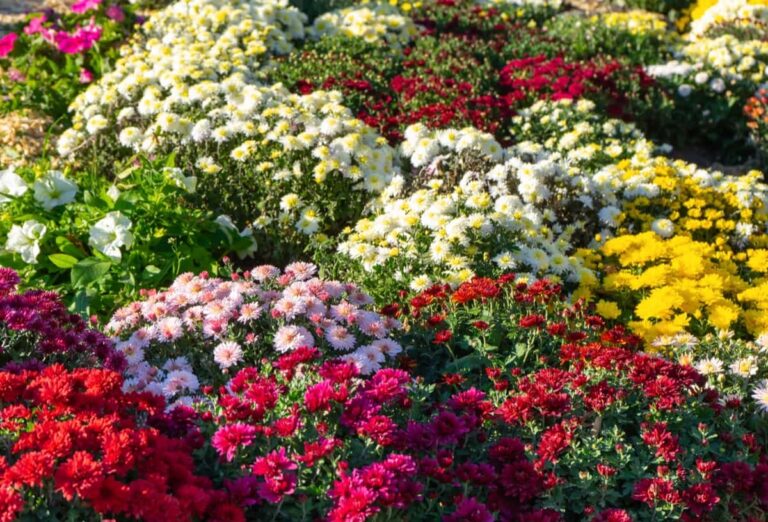
Fresh Bright Red, Purple And Yellow Chrysanthemums Bushes in a home garden

It’s like being stuck in traffic when you’re already running late – frustrating and counterproductive. To remedy this issue, consider adjusting your fertilizer routine or opting for a balanced formula with lower nitrogen levels. By finding the right balance, you’ll give your Chrysanthemum the best shot at reaching its full blooming potential and dazzling you with a stunning floral display. 

Pests And Diseases 

One of the common causes of potted Chrysanthemum flower failure is due to pests and diseases. These pesky intruders can damage your plant, affecting its growth and ability to produce those beautiful blooms you’ve been eagerly waiting for. Aphids, spider mites, and caterpillars are just a few of the critters that might be causing trouble in your Chrysanthemum’s pot. Keep an eye out for any signs of infestation, such as yellowing leaves, distorted growth, or visible pests crawling around. 

To combat these unwanted visitors, consider using natural remedies like neem oil or insecticidal soap. Regularly inspecting your plant and removing any affected leaves can also help prevent further damage. In addition to pests, diseases like powdery mildew or botrytis can also hinder blooming. Make sure to provide adequate air circulation around your plant and avoid overhead watering, which can create a damp environment ideal for disease development. By taking proactive measures to address pest and disease issues promptly, you’ll give your potted Chrysanthemum the best chance at thriving and eventually gracing you with its vibrant flowers. 

Pruning 

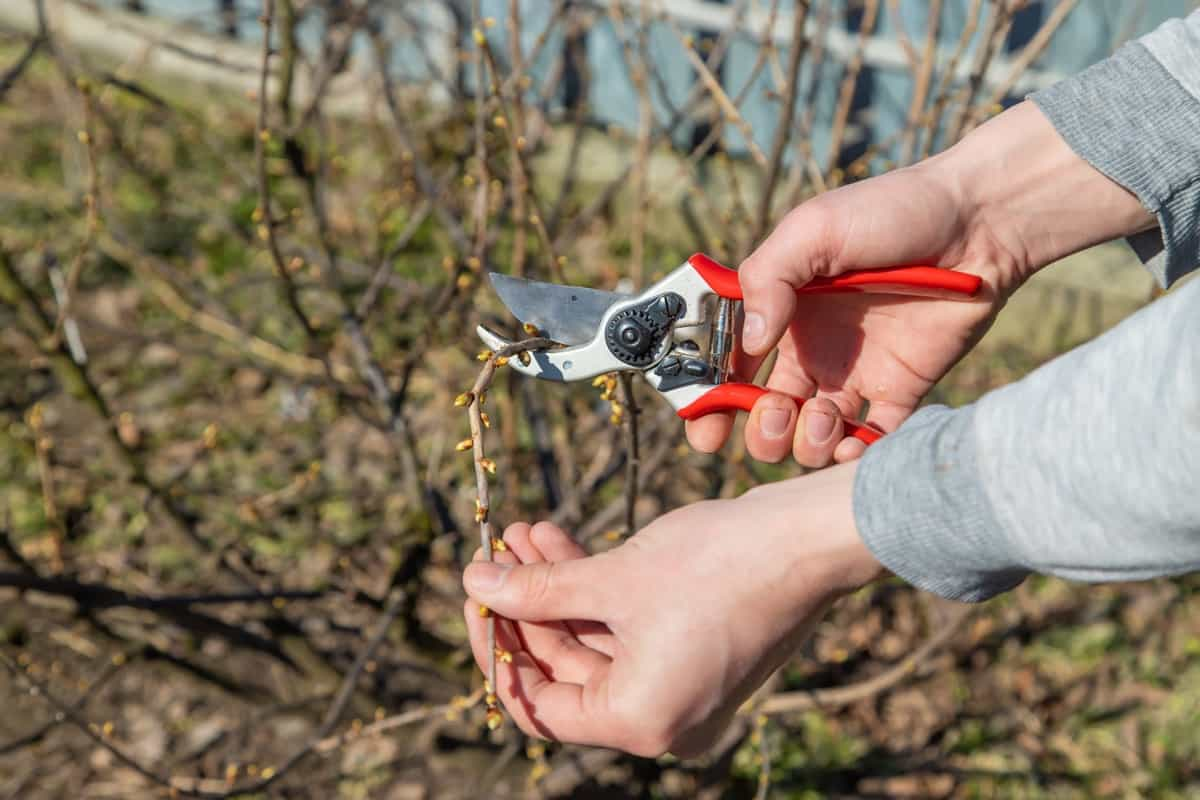
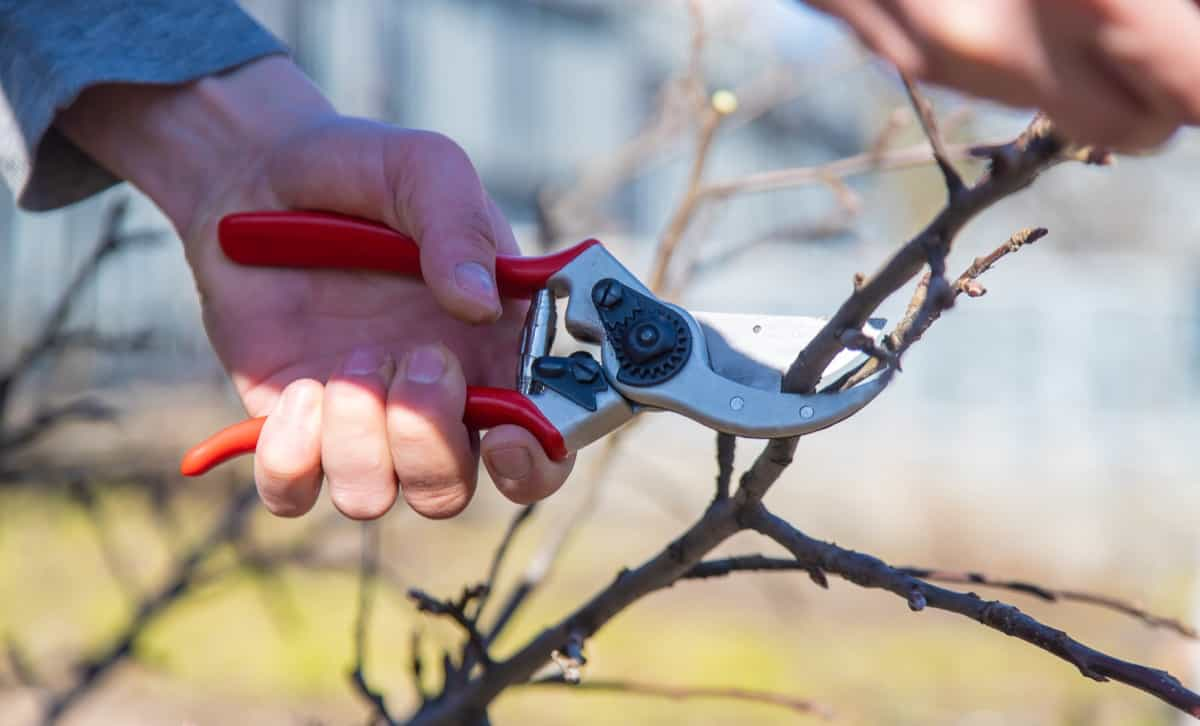
Pruning plays a crucial role in the blooming of your potted Chrysanthemum. This simple task involves removing dead or faded flowers and trimming back leggy growth to restore blooming in potted Chrysanthemums. It helps redirect the plant’s energy towards producing more buds, resulting in a fuller and more vibrant display. Regular pruning also prevents overcrowding within the pot, allowing for better air circulation around the plant.

In case you missed it: Homemade Fertilizers for Rosemary: A Guide to DIY Organic Fertilizers
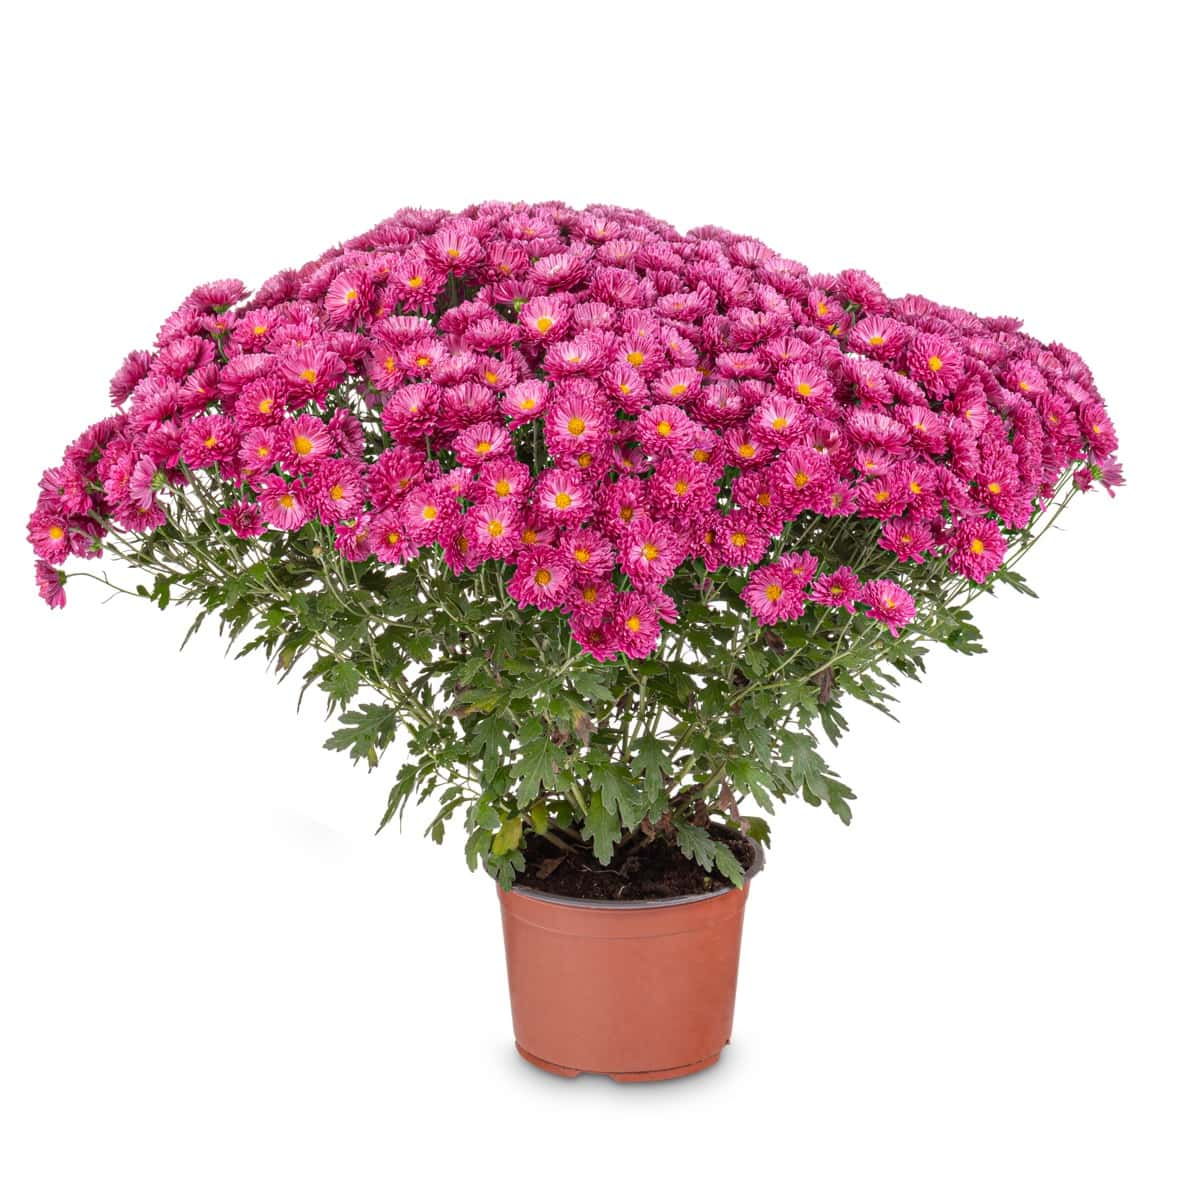
Pink chrysanthemum flower pot

This is essential to prevent diseases that can hinder flower production. When done correctly, pruning promotes healthier growth and enhances the overall appearance of your Chrysanthemum plant. Remember to use clean and sharp gardening shears when pruning to avoid damaging the stems. Aim to prune regularly throughout the growing season to maintain a well-shaped plant with abundant blooms. 

Conclusion 

Potted Chrysanthemums are a delightful addition to any home or garden, but it can be frustrating when they fail to bloom. By understanding the common reasons for potted Chrysanthemum not flowering, such as insufficient sunlight, you can take steps to rectify the situation and encourage your plant to thrive. Remember that with proper care and attention, your potted Chrysanthemum will eventually reward you with its beautiful blooms. 

8 Reasons Why Your Potted Hibiscus is Not Blooming: Fix it with Simple Solutions

0

If your potted Hibiscus is not blooming as expected, there are several factors to consider. From inadequate sunlight and improper watering to nutrient deficiencies and pests, identifying the root cause is essential for encouraging blooming. By addressing potted Hibiscus flowering problems and providing the right care, you can help your Hibiscus thrive and reward you with beautiful blooms. Remember that patience and consistency in care are key when it comes to enjoying a vibrant and flourishing potted Hibiscus plant. 

8 Reasons Why Your Potted Hibiscus is Not Blooming

8 Reasons Why Your Potted Hibiscus is Not Blooming

Watering Problems 

One common reason why Hibiscus is not blooming in the pot is due to watering problems. Understanding the watering needs of your plant is crucial for its overall health and flowering potential. Overwatering deprives the plant of essential nutrients and oxygen. On the other hand, underwater can cause stress and hinder flower production. To ensure optimal blooming, it’s important to find a balance in your watering routine. Check the soil moisture regularly. Avoid following a strict schedule and, instead, adjust based on environmental factors.  

Excess Nitrogen 

Excess nitrogen can be a sneaky culprit when it comes to your potted Hibiscus not blooming. While nitrogen is crucial for plant growth, too much of it can lead to lush green foliage at the expense of flowers. The imbalance created by excessive nitrogen levels can disrupt the flowering process and leave you wondering why your Hibiscus isn’t showing off its vibrant blooms. 

One common source of excess nitrogen is over-fertilization. It’s easy to get carried away with feeding your plants, but moderation is key when it comes to nutrient levels. Opt for a balanced fertilizer specifically formulated for flowering plants like Hibiscus, and follow the instructions carefully to avoid overdoing it. If you suspect that excess nitrogen may be hindering your Hibiscus from blooming, consider switching to a fertilizer with lower nitrogen content or adjust your feeding schedule accordingly.  

Too much Phosphorus 

If your potted Hibiscus is refusing to bloom, the culprit might be too much phosphorus in the soil. While phosphorus is crucial for plant growth, excess can cause Hibiscus pot plants not to produce blooms. When there’s an imbalance of nutrients in the soil, such as an abundance of phosphorus, it can disrupt the plant’s ability to uptake other vital elements like potassium and magnesium. This disruption can lead to stunted growth and a lack of blooms on your Hibiscus. 

In case you missed it: 10 Reasons Why Is My Ice Plant Not Blooming: Remedies and Treatment

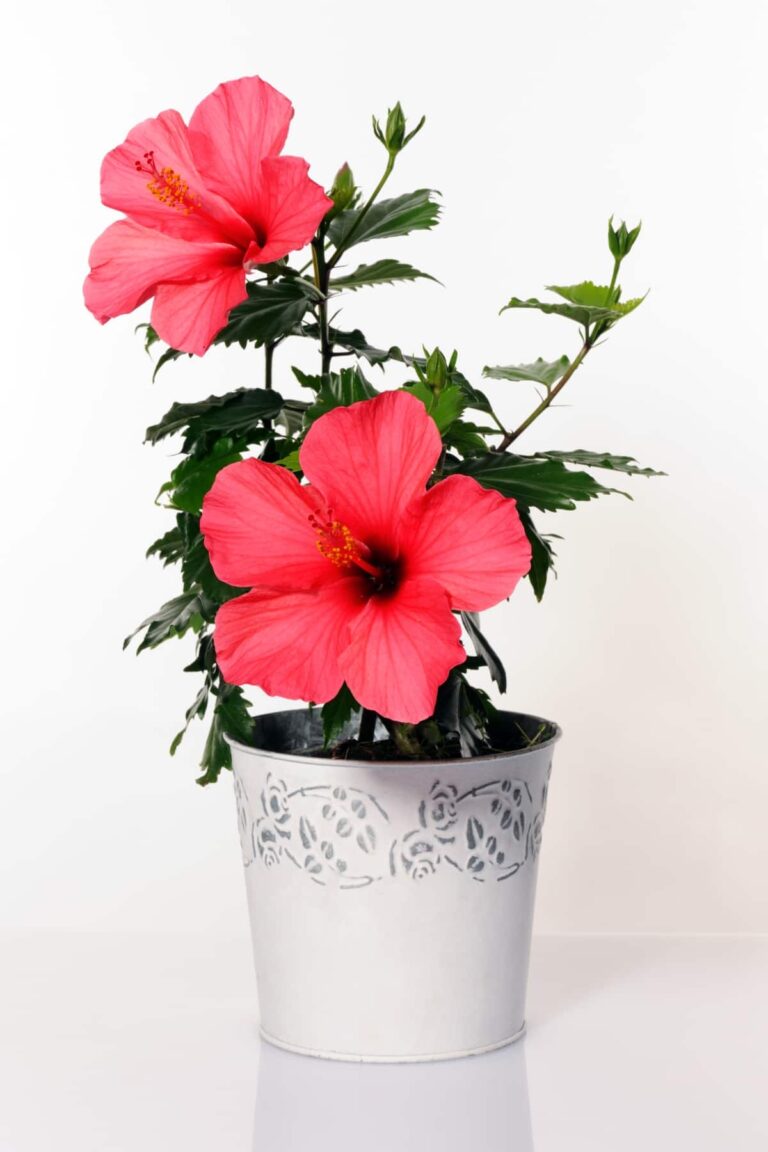
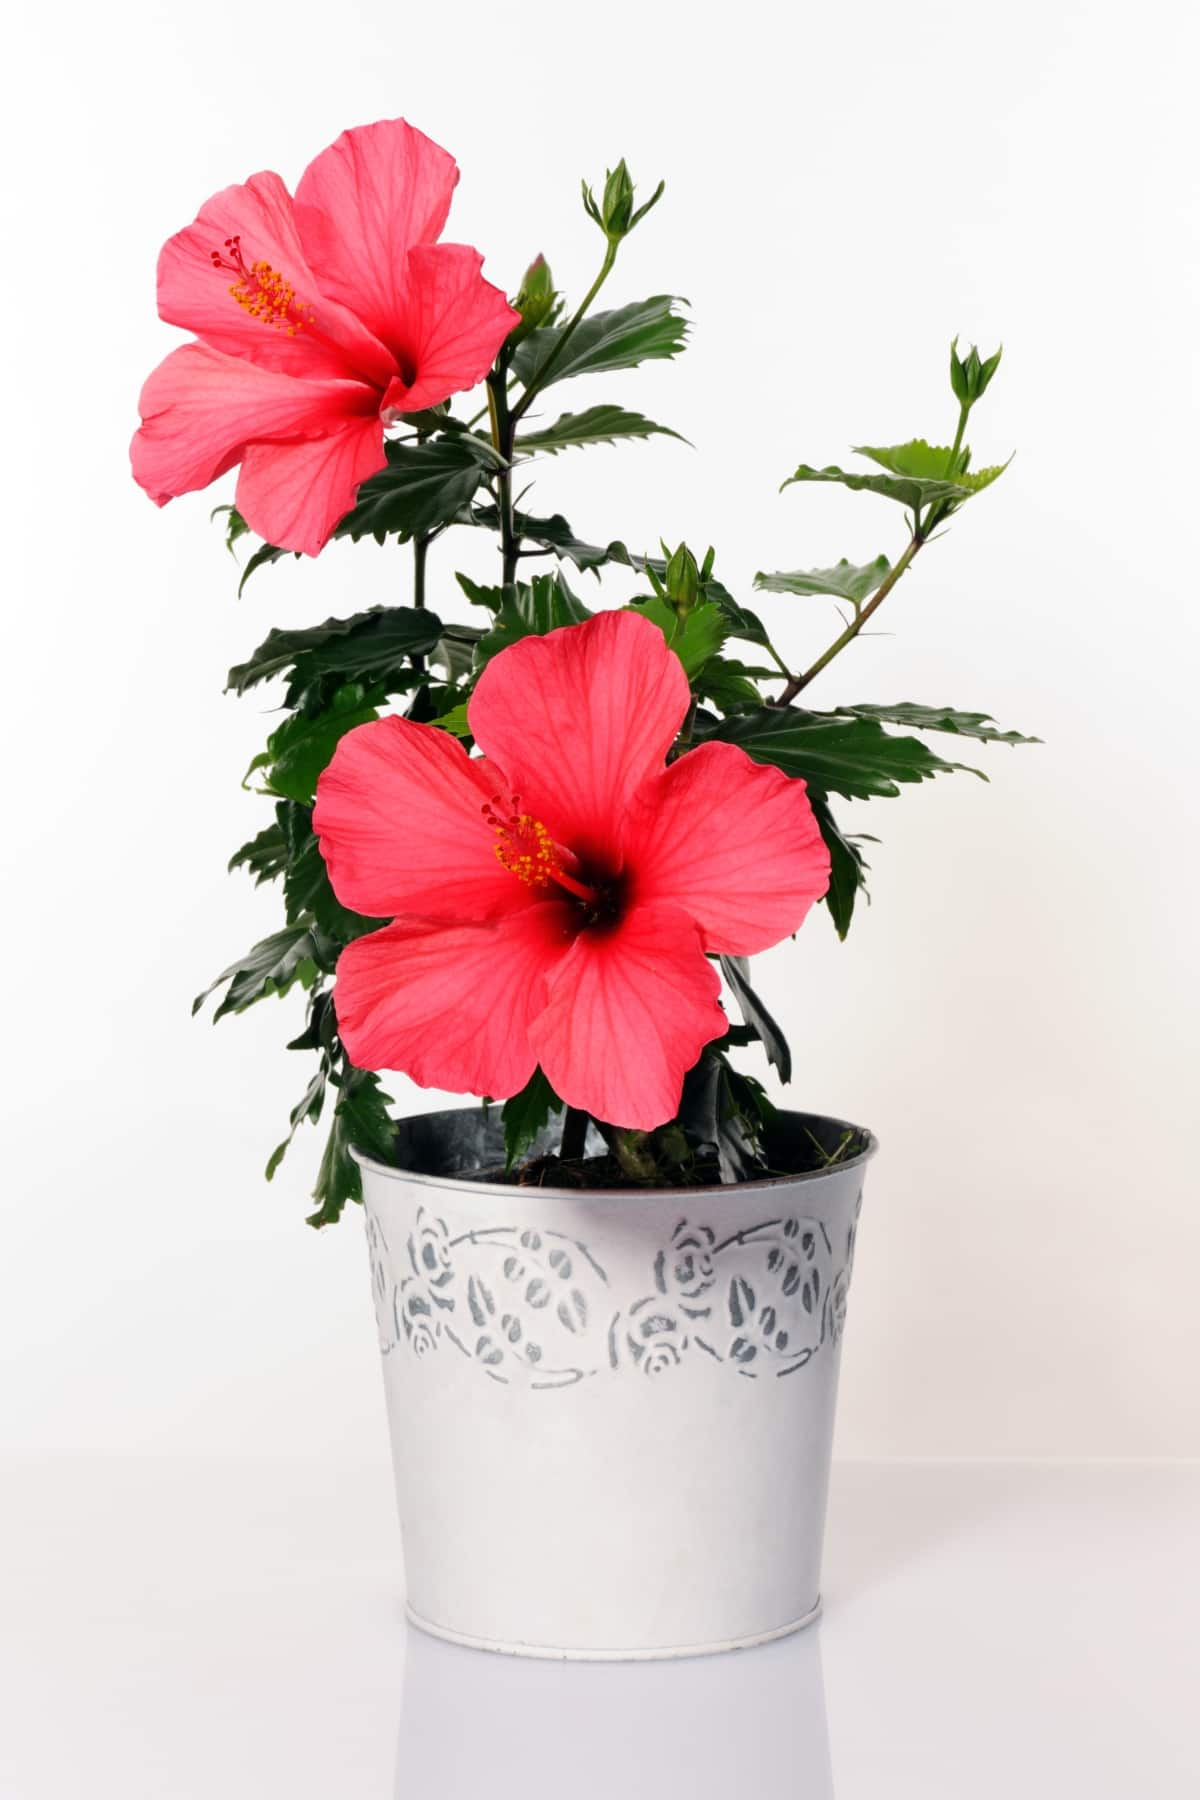
Pot with Hibiscus

Excessive phosphorus levels can also have negative effects on soil pH levels, making it more difficult for plants to absorb certain nutrients they need to thrive. To maximize potted Hibiscus flower yield, consider using a fertilizer with lower phosphorus content or opting for organic alternatives that promote balanced nutrient uptake by your Hibiscus plant. By being mindful of the phosphorus levels in your potted Hibiscus’s environment, you’ll be one step closer to helping it bloom beautifully once again. 

Poorly-Drained Soils 

One common reason why your potted Hibiscus may not be blooming is due to poorly drained soils. When the soil doesn’t drain properly, it can lead to waterlogged roots, causing stress to the plant. This stress can inhibit flowering and overall growth. Excess water around the roots restricts oxygen uptake and nutrient absorption by the plant, hindering its ability to produce vibrant blooms.

To check if your soil drainage is an issue, observe how quickly water drains after watering. If it sits on top for too long or causes pooling at the bottom of the pot, you might have a drainage problem. To improve drainage, consider repotting your Hibiscus in a well-draining potting mix or adding perlite or sand to increase aeration in the soil. Additionally, ensuring that your pot has proper drainage holes can help prevent waterlogging and promote healthier root growth.  

Too much Shade 

If your potted Hibiscus isn’t blooming, it could be due to too much shade. Hibiscus plants require 6 hours of direct sunlight daily to produce those beautiful blooms. Too much shade can also lead to leggy growth and sparse foliage, further inhibiting blooming. Make sure your Hibiscus is getting the light it needs to grow healthy and vibrant.

Observe how the shadows fall throughout the day in your garden or balcony and find a spot that gets ample sunlight for optimal blooming potential. A little sunshine goes a long way when it comes to encouraging gorgeous Hibiscus flowers. 

Temperature Fluctuation 

Hibiscus plants thrive in consistent temperatures, so that sudden changes can disrupt their blooming cycle of Hibiscus. Fluctuations in temperature, especially drastic shifts between hot days and cool nights, can stress the plant and inhibit flower production. For optimal blooming, it’s essential to provide a stable environment for your Hibiscus.

In case you missed it: 10 Reasons Why My Potted Hydrangea Not Blooming: Treatment and Remedies

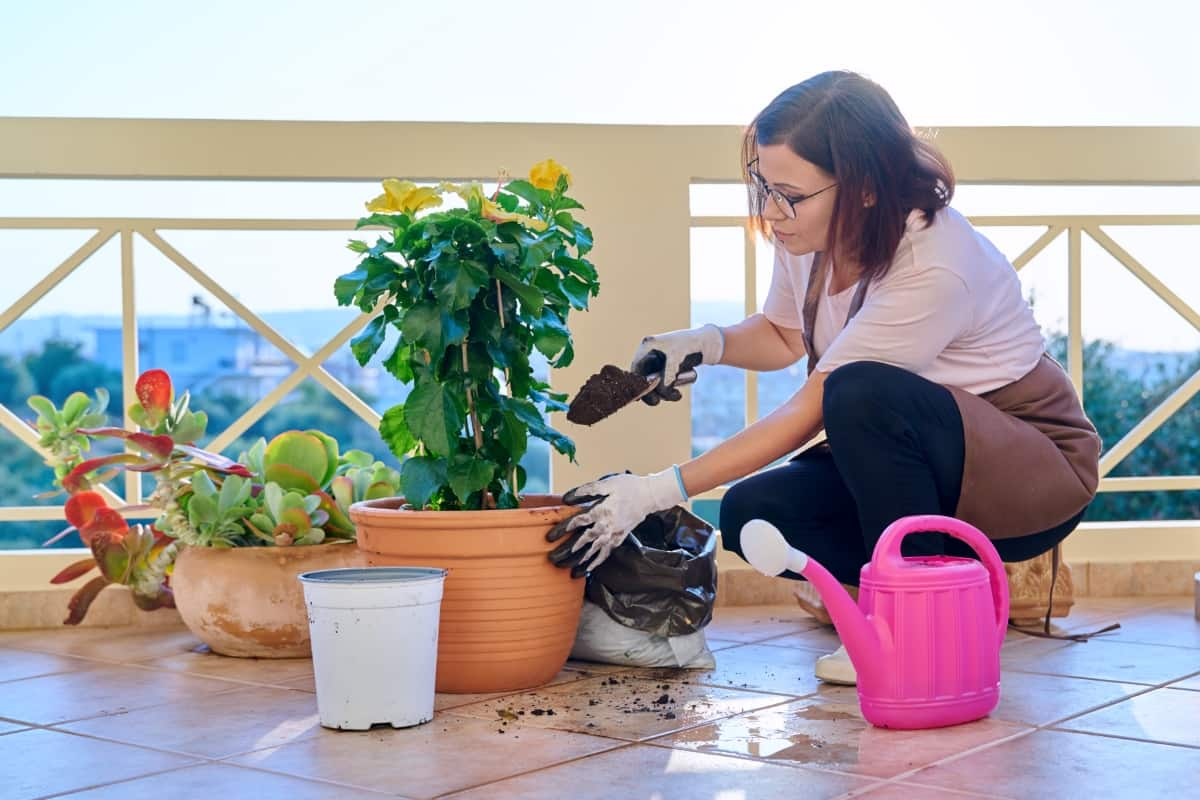
Woman Replanting Hibiscus Plant

To help your potted Hibiscus overcome the challenge of temperature fluctuations, consider moving it to a more sheltered location where it is shielded from extreme heat or cold. This adjustment encourages blooming in Hibiscus plants. 

Wrong Time to Prune 

Hibiscus plants generally benefit from light pruning after their flowering period has ended. Avoid heavy pruning in late summer, as this can reduce the number of flower buds for the following growing season. It’s best to prune your Hibiscus during its dormancy period in late winter or early spring before new growth begins. By being mindful of when you prune your potted Hibiscus, you can help ensure that it thrives and produces an abundance of vibrant blooms for you to enjoy. 

Attack by Pests 

One common reason for potted Hibiscus not flowering as expected could be due to an attack by pests. These tiny intruders cause stress and hinder its ability to produce those beautiful blooms you’re eagerly waiting for. Pests like aphids, spider mites, and mealybugs are known culprits that can infest Hibiscus plants. They feed plant sap, weakening it and disrupting its growth cycle. Keep a close eye on the leaves and stems for any signs of these unwanted visitors. 

In case you missed it: 10 Reasons Why is My Goldfish Plant Not Blooming: Remedies and Treatment

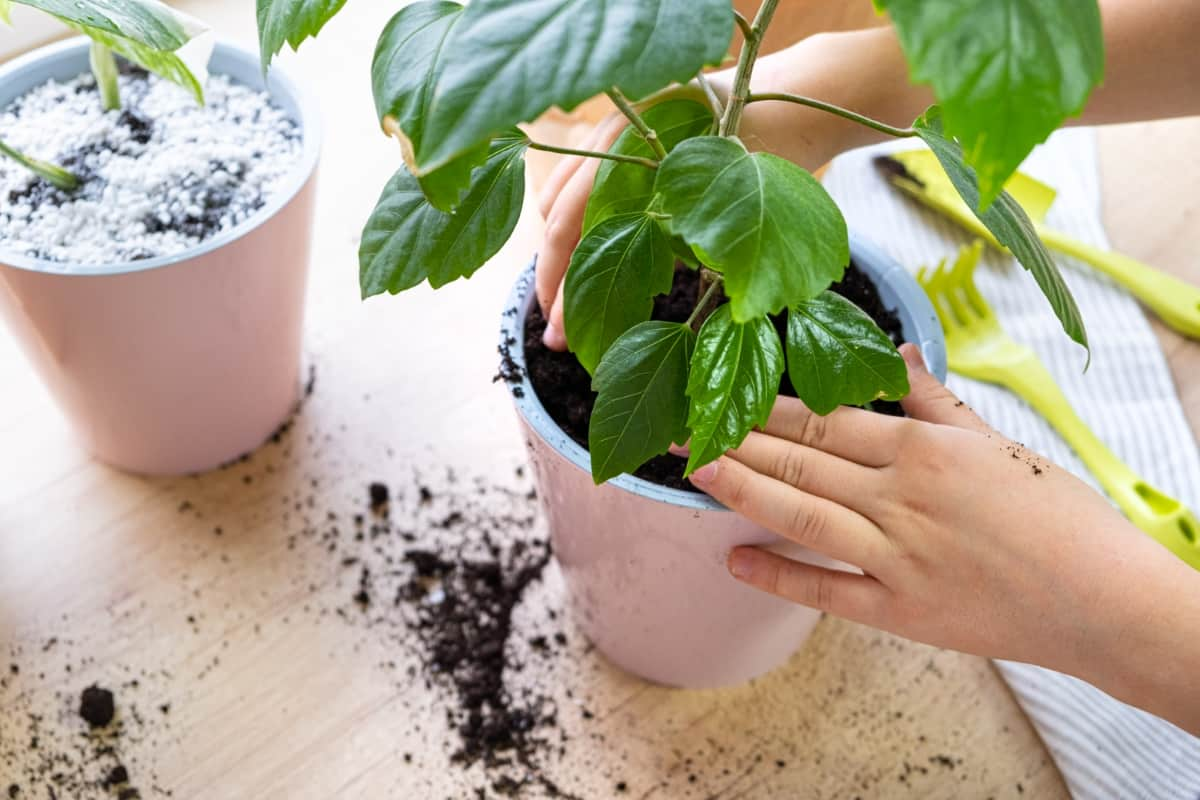
Process of Planting Hibiscus Houseplant

To combat pest infestations, consider using natural remedies like neem oil or insecticidal soap. Regularly inspecting your plant for early signs of pests can help prevent a full-blown invasion that could harm your Hibiscus further. By staying vigilant and taking proactive measures against pests, you can help ensure your plant thrives and eventually bursts into a stunning display of colorful blooms. 

Conclusion 

By understanding potted Hibiscus blooming issues and taking appropriate actions like adjusting watering schedules, balancing nutrients, ensuring proper drainage, providing adequate sunlight exposure, maintaining consistent temperatures, timing pruning correctly, and addressing any pest infestations promptly – you can help your potted Hibiscus thrive and bloom beautifully.

Remember that nurturing plants is a learning process that requires patience and observation. By staying attentive to your plant’s needs and making necessary adjustments along the way, you can create an environment where your potted Hibiscus will flourish with vibrant blooms for you to enjoy. 

Unlock Blooms: 9 Key Reasons Your Potted Frangipani Won’t Flower

0

Frangipani flowers, also known as plumeria, are the best addition to any garden or indoor space. Their delicate petals in shades of white, pink, and yellow have a sweet fragrance that captivates the senses. Caring for a potted Frangipani plant can be a rewarding experience. By understanding the blooming process and addressing any potential issues that may hinder blooming, you can help your Frangipani thrive and produce beautiful flowers.

9 Key Reasons Your Potted Frangipani Won't Flower

Remember to be patient and consistent in your care routine, as these tropical plants require time to adjust and bloom. With the right conditions and attention to detail, you can enjoy stunning Frangipani blooms in your home or garden. 

9 Key Reasons Your Potted Frangipani Won’t Flower

Lack of Sunlight 

One of the most common reasons why your potted Frangipani is not flowering is due to a lack of sunlight. Frangipanis are sun-loving plants that thrive in bright, direct sunlight for several hours a day. If your plant is not receiving enough sunlight, it may struggle to produce blooms. Make sure to place your Frangipani in a spot where it can receive at least 6 hours of sunlight daily. If you notice that your plant is not blooming as expected, try moving it to a sunnier location. Remember that proper sunlight exposure is crucial for the overall health and blooming potential of your potted Frangipani. 

Overwatering or Underwatering 

Overwatering or underwatering your potted Frangipani can be detrimental to its blooming potential. Frangipanis prefer well-draining soil that allows excess water to escape easily. When you overwater your plant, the roots may suffocate as they become waterlogged, leading to yellowing leaves and bud drop. 

On the other hand, underwatering can stress the plant and inhibit flower production. Frangipanis are drought-tolerant but still need regular watering during hot periods. To troubleshoot Frangipani plant blooms, ensure that you water your Frangipani deeply but infrequently. Let the top few inches of soil to dry between waterings to prevent issues associated with both overwatering and underwatering. 

Temperature Fluctuations 

One of the reasons potted Frangipanis may not be blooming is due to temperature fluctuations. Frangipani plants thrive in warm and consistent climates, so drastic changes in temperature can disrupt their growth cycle. Fluctuations between hot days and cool nights can confuse the plant, leading to stress and a delay in flowering. It’s important to place your Frangipani in a location with stable temperatures, away from drafts or heating vents. 

In case you missed it: 10 Reasons Why Is My Ice Plant Not Blooming: Remedies and Treatment

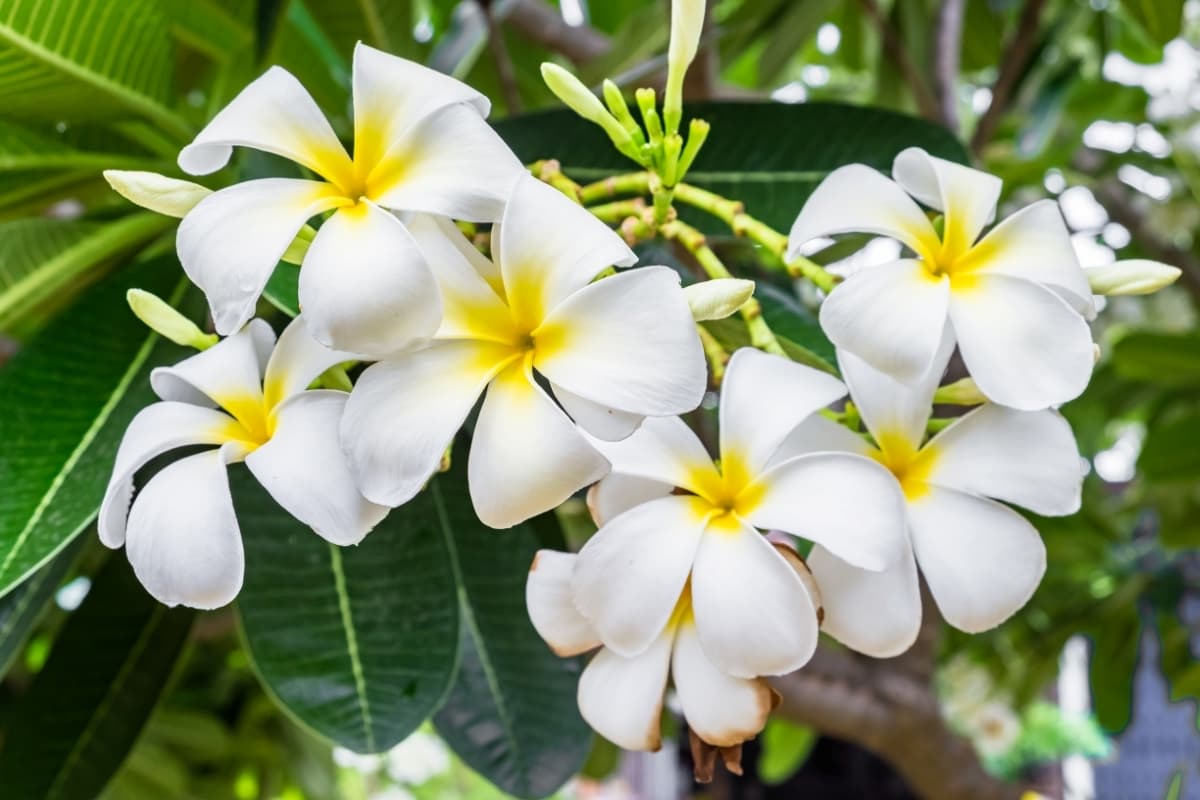
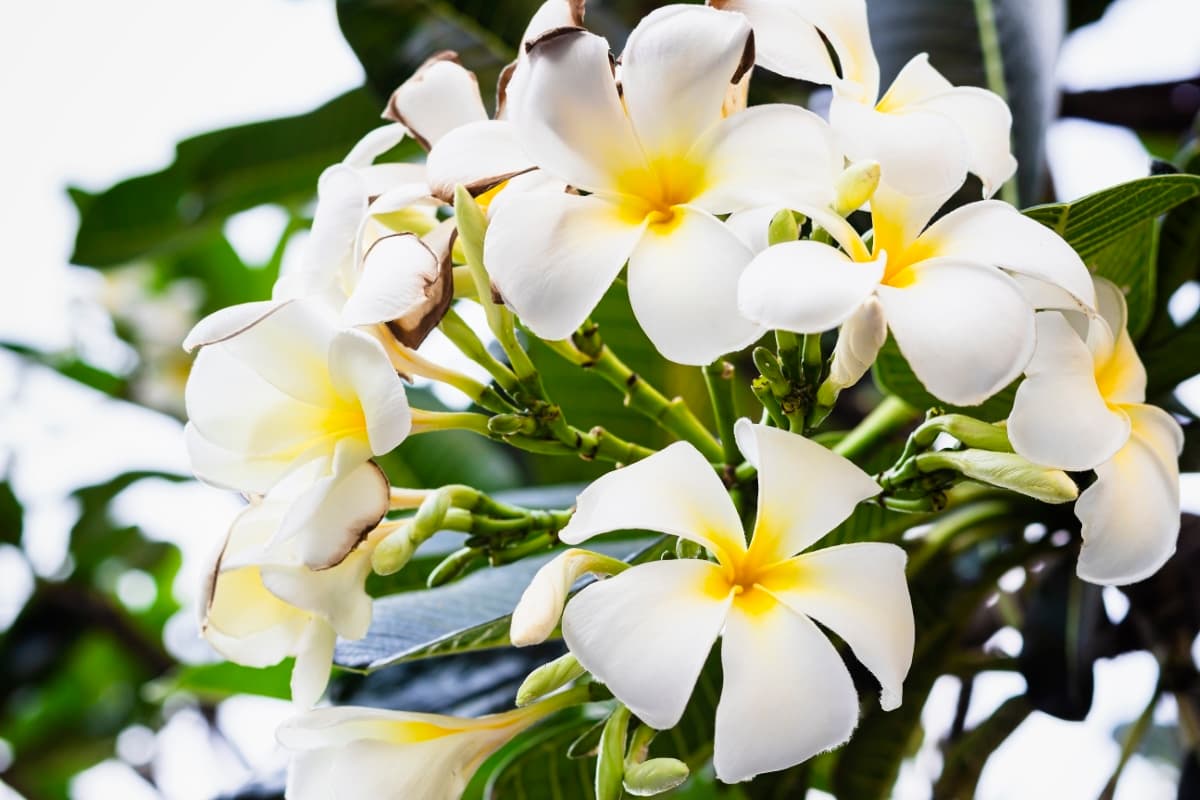
Frangipani flower

Extreme heat or cold can also affect Frangipani blooms. High temperatures may cause buds to drop prematurely, while chilly conditions can slow down Frangipani growth and flower production. To help your Frangipani adjust to temperature changes, consider moving it indoors during extreme weather or providing shade during scorching summer days. 

Nutrient Deficiencies 

Nutrient deficiencies can be a significant factor contributing to your potted Frangipani not blooming as vibrantly as you’d hoped. If your Frangipani lacks essential nutrients like nitrogen, phosphorus, or potassium, it may struggle to grow healthy leaves and flowers. Without the proper balance of these key elements, the plant’s overall health and flowering capacity can be compromised. 

To encourage potted Frangipani flowering, consider using a balanced fertilizer designed for flowering plants. This will help provide your Frangipani with the necessary nutrients it needs to flourish and bloom beautifully. Be sure to follow the instructions on the fertilizer packaging carefully to avoid over-fertilizing, which can also harm your plant.  

Pests and Diseases 

Pests and diseases can damage your potted Frangipani, causing it to struggle with blooming. From pesky aphids to fungal infections, these unwanted guests can disrupt the plant’s growth cycle. Aphids feed plant sap, weakening them in the process. Mealybugs are another common nuisance that can infest your Frangipani.

Fungal diseases can also hinder blooming by affecting the overall health of the plant. Ensure good air circulation around your Frangipani and avoid overhead watering to prevent these issues. Regularly checking your plant for pests or diseases is crucial in promoting blooming success. 

Poor Soil Quality 

Having poor soil quality can be a major reason why your potted Frangipani is not blooming as expected. Frangipani plants thrive in well-draining soil that is rich in nutrients. If the soil lacks essential nutrients or has become compacted over time, it can hinder the plant’s growth and flowering capabilities. 

In case you missed it: 10 Reasons Why My Potted Hydrangea Not Blooming: Treatment and Remedies

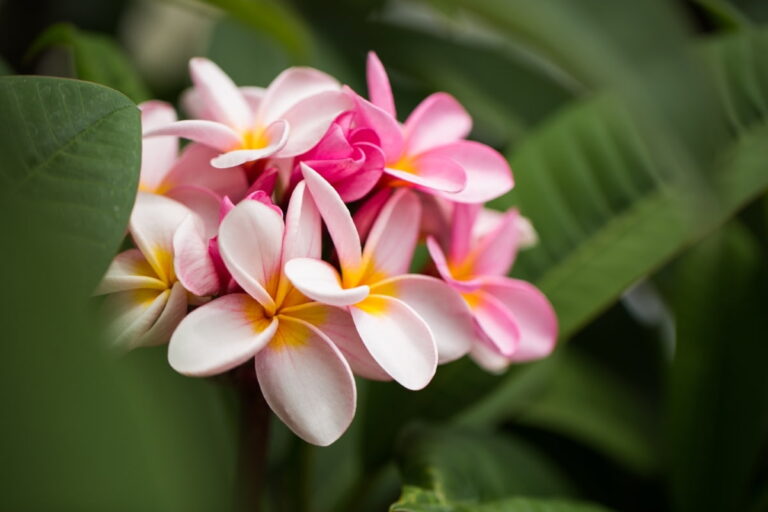
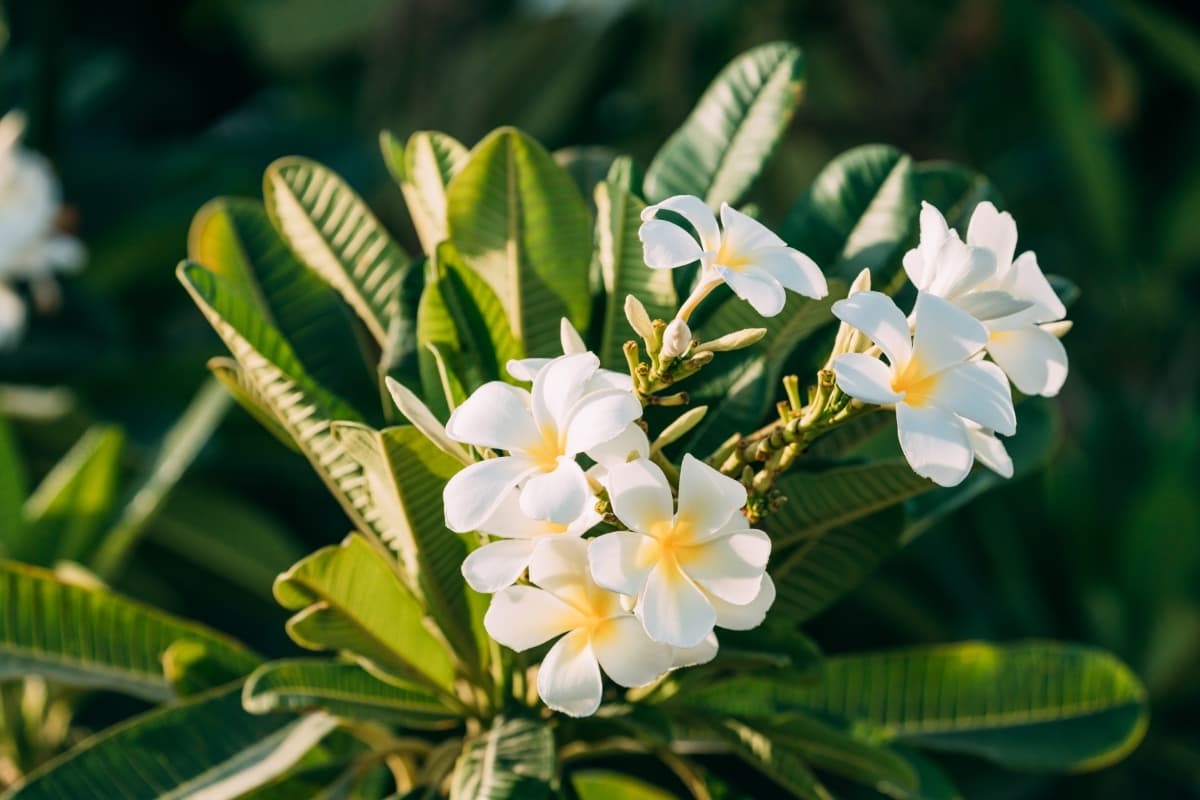
Plumeria

To ensure your Frangipani receives the proper nourishment it needs to bloom, consider repotting it with a fresh, high-quality potting mix specifically formulated for tropical plants like Frangipani. Regularly check the condition of the soil by observing its texture and moisture levels. Adjust watering frequency accordingly to prevent waterlogged or overly dry conditions that can stress the plant and impede blooming potential. 

Improper Pruning Techniques 

When it comes to improving potted Frangipani plants’ blooms, improper pruning techniques can hinder their blooming potential. Remember, less is often more when it comes to trimming your Frangipani. Avoid using dull or dirty tools for pruning, as they can introduce infections that harm your plant. Always use sharp and clean tools to make precise cuts without damaging the plant.

It’s essential to know where and how to prune your Frangipani correctly. Removing healthy branches or buds accidentally can delay or even prevent blooming altogether. Properly educating yourself on the best practices for pruning Frangipani plants will help ensure a healthy and vibrant display of blooms when the flowering season arrives. 

Wrong Pot Size or Type 

Having the right pot for your potted Frangipani is crucial for its blooming success. The size and type of the pot can greatly impact the plant’s growth and flowering capabilities. If your Frangipani is not blooming, it might be because it has outgrown its current pot. A small or cramped pot restricts root development and can hinder flower production.

On the other hand, a too large pot can lead to waterlogging, causing root rot and nutrient deficiencies. Choosing the correct type of pot is also important. Porous pots like terracotta allow better airflow to the roots. Plastic pots retain moisture better but can sometimes lead to overwatering if drainage holes are inadequate. 

Inadequate Fertilization 

Frangipanis are heavy feeders and require a balanced diet of nutrients to thrive and produce those beautiful blooms. When it comes to fertilizing your potted Frangipani, timing is key. During the growing season, regular feeding every 2-3 weeks with a well-balanced fertilizer will help promote healthy growth and flowering. However, during the winter months, when the plant is dormant, reduce or cease fertilization altogether. 

In case you missed it: 10 Reasons Why is My Goldfish Plant Not Blooming: Remedies and Treatment 

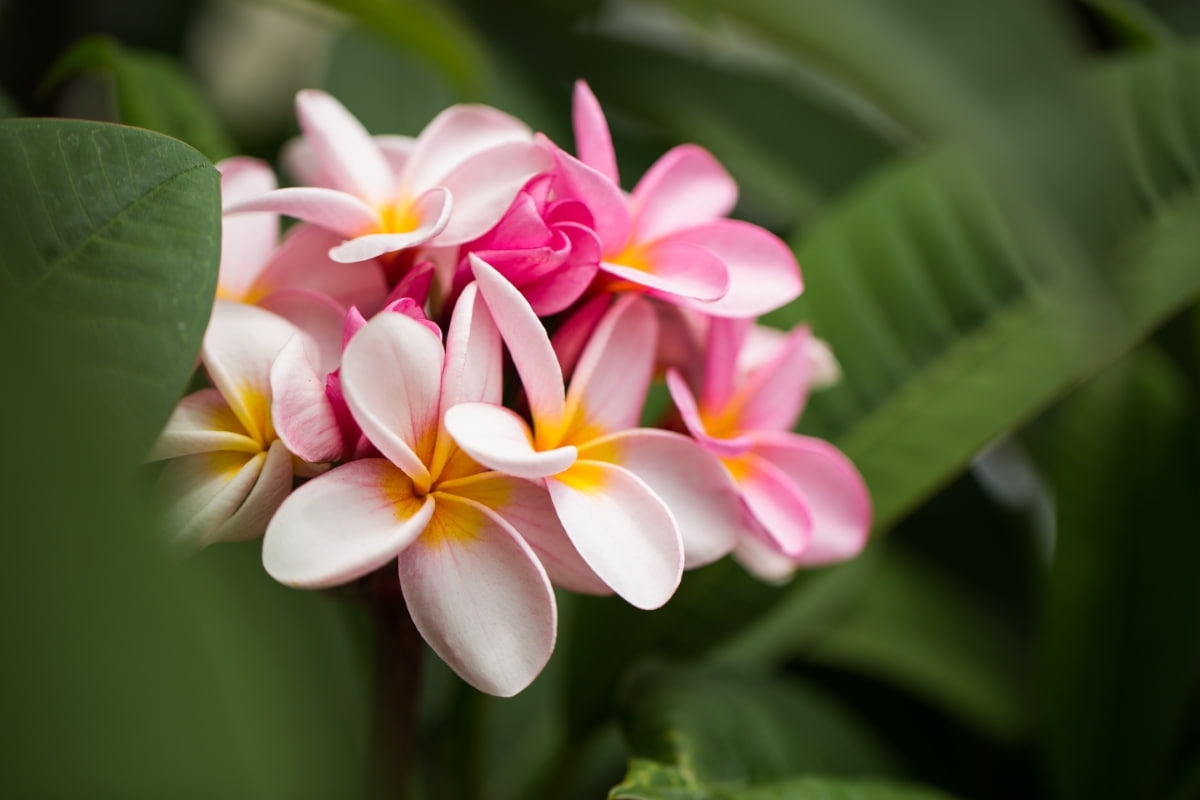
Frangipani

Choosing the right type of fertilizer is crucial for your potted Frangipani’s health. Look for a fertilizer specifically formulated with a higher phosphorus content to encourage blooming. Always follow the manufacturer’s instructions on how much and how often to feed your plant.

Conclusion 

Remember, with the right care and attention, your potted Frangipani can bloom beautifully. By addressing factors like sunlight exposure, watering practices, nutrient levels, pest control, pruning techniques, pot size and type, fertilization routine, and temperature conditions – you can set the stage for a thriving plant. Remember to observe your plant closely and make necessary adjustments along the way. 

10 Reasons Why Is My Ice Plant Not Blooming: Remedies and Treatment

0

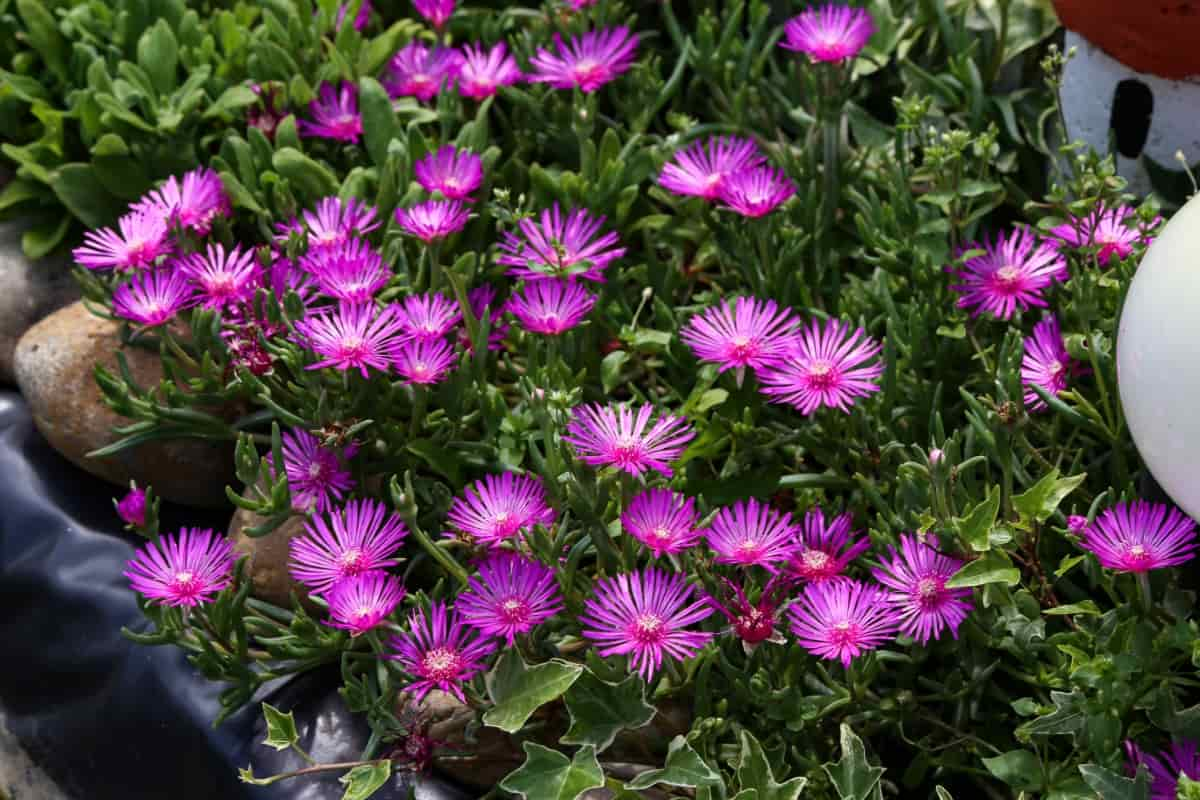
Ice plants are beautiful and low-maintenance plants that can thrive in various conditions. If your Ice plant has blooming issues, identify the root cause and implement the remedies. By ensuring proper soil drainage, watering practices, and control pests and diseases, you can help your Ice plant flourish and bloom vibrantly.

10 Reasons Why Is My Ice Plant Not Blooming

Gives your plant some time to adjust to any changes you make before expecting immediate results. With care tips for Ice plant flower growth and attention, you’ll soon be enjoying a stunning display of colorful blooms from your Ice plant. 

10 Reasons Why is My Ice Plant Not Blooming

Insufficient Sunlight 

Ice plants thrive in bright, direct sunlight for most of the day. Without an adequate amount of sun exposure, they may struggle to produce vibrant blooms. If your Ice plant is located in a shaded area or blocked by tall structures, it might not be getting the necessary sunlight it needs to flourish.

When it comes to maximizing Ice plant flower yield, consider moving it to a spot where it can get 6-8 hours of sunlight daily. Remember, these colorful succulents are sun-lovers and need ample light to trigger their blooming cycle. By ensuring they get enough sunshine each day, you can help encourage healthy growth and revive Ice plant blooms. 

Improper Pruning 

When it comes to caring for your Ice plant, knowing how and when to prune is crucial for overcoming barriers to Ice plant flowering. Improper pruning can cause stunted growth, reduced flowering, and overall poor plant health. If you’re cutting back too much or at the wrong times, you might be inadvertently removing potential flower buds along with the excess growth. To troubleshoot non-blooming Ice plants, make sure to research the proper pruning methods specific to this plant species. 

Overfertilization 

Overfertilization can be a common reason why your Ice plant is not blooming as expected. When you notice your Ice plant lacking blooms despite regular fertilization, it may be time to reassess your feeding routine. Overdoing it with fertilizer can overwhelm the plant’s system and inhibit its ability to produce flowers.

This excess of nutrients can also manifest in visible signs like burnt leaf edges or stunted growth. To boost Ice plant flowering performance, consider scaling back on the amount or frequency of fertilizing sessions. Opt for a balanced fertilizer specifically formulated for succulents like Ice plants and follow the instructions carefully to avoid overapplication. 

Inadequate Watering 

One common reason for Ice plants not blooming is inadequate watering. Ice plants are succulents that require well-drained soil and infrequent but deep watering to thrive. If you notice your plant looking wilted or the leaves starting to shrivel, it may be a sign of dehydration.

To encourage Ice plant blossoms, make sure you water your Ice plant deeply once every 1-2 weeks during the growing season, allowing the soil to dry out between waterings. When it comes to troubleshooting the lack of blooms in Ice plants, avoid overwatering, as this can cause root rot and other issues. Adjust your watering schedule based on the weather conditions in your area. 

Soil Drainage Issues 

One common reason why your Ice plant is not producing flowers is due to soil drainage issues. When the soil doesn’t drain properly, it can also create a breeding ground for harmful pathogens that can attack the plant’s roots. To address Ice plant blooming challenges, consider amending your soil with materials like perlite or sand to improve drainage. Additionally, planting your Ice plants in raised beds or containers with drainage holes can help prevent water from pooling around the roots. 

In case you missed it: 10 Reasons Why is My Wisteria Not Blooming: Remedies and Treatment

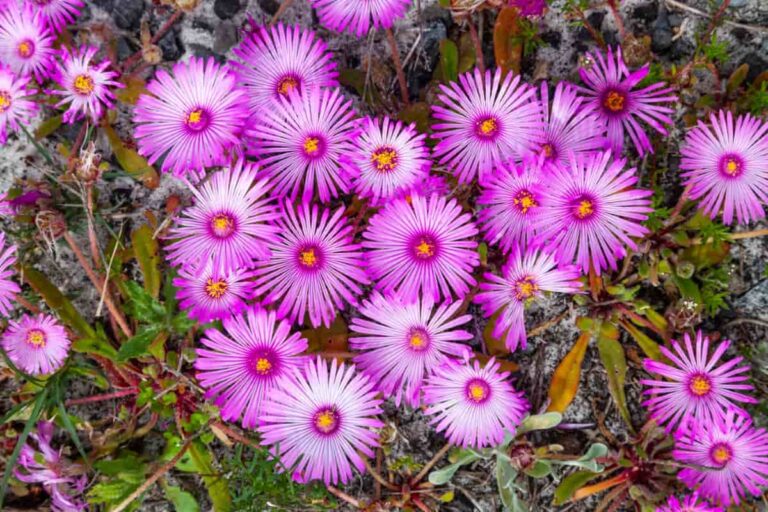
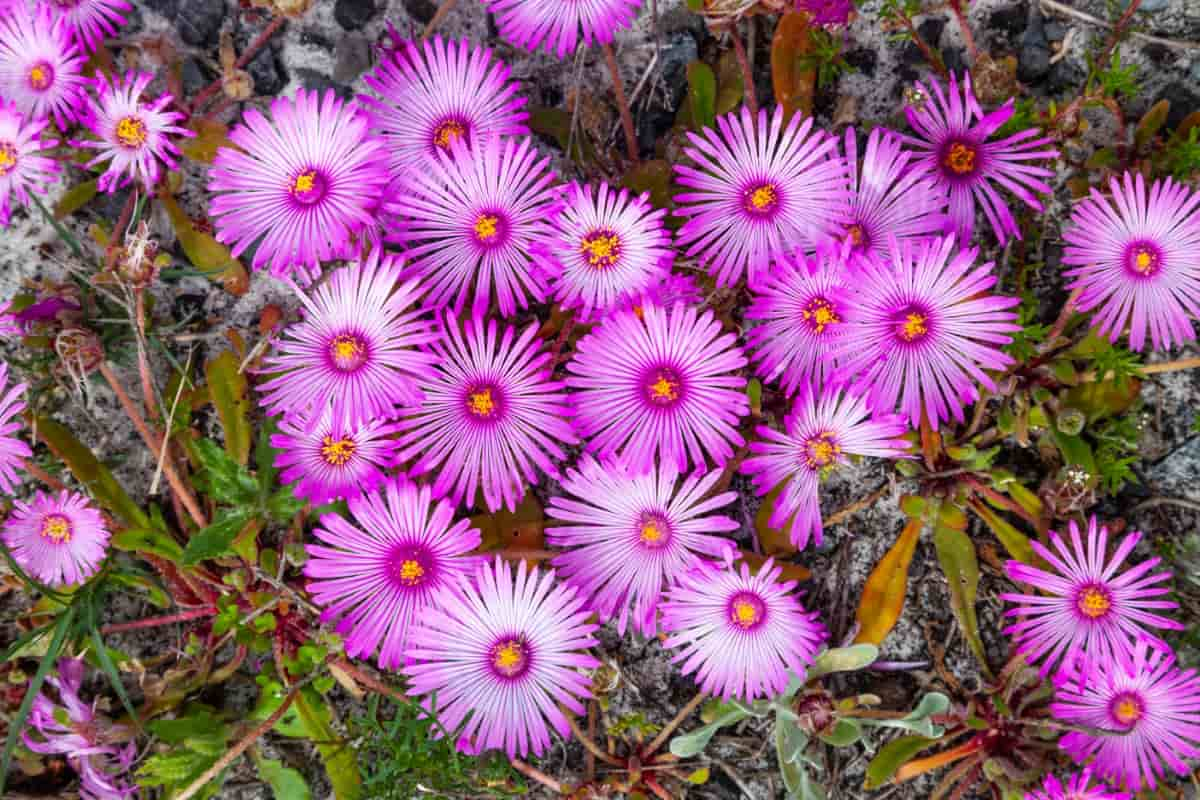
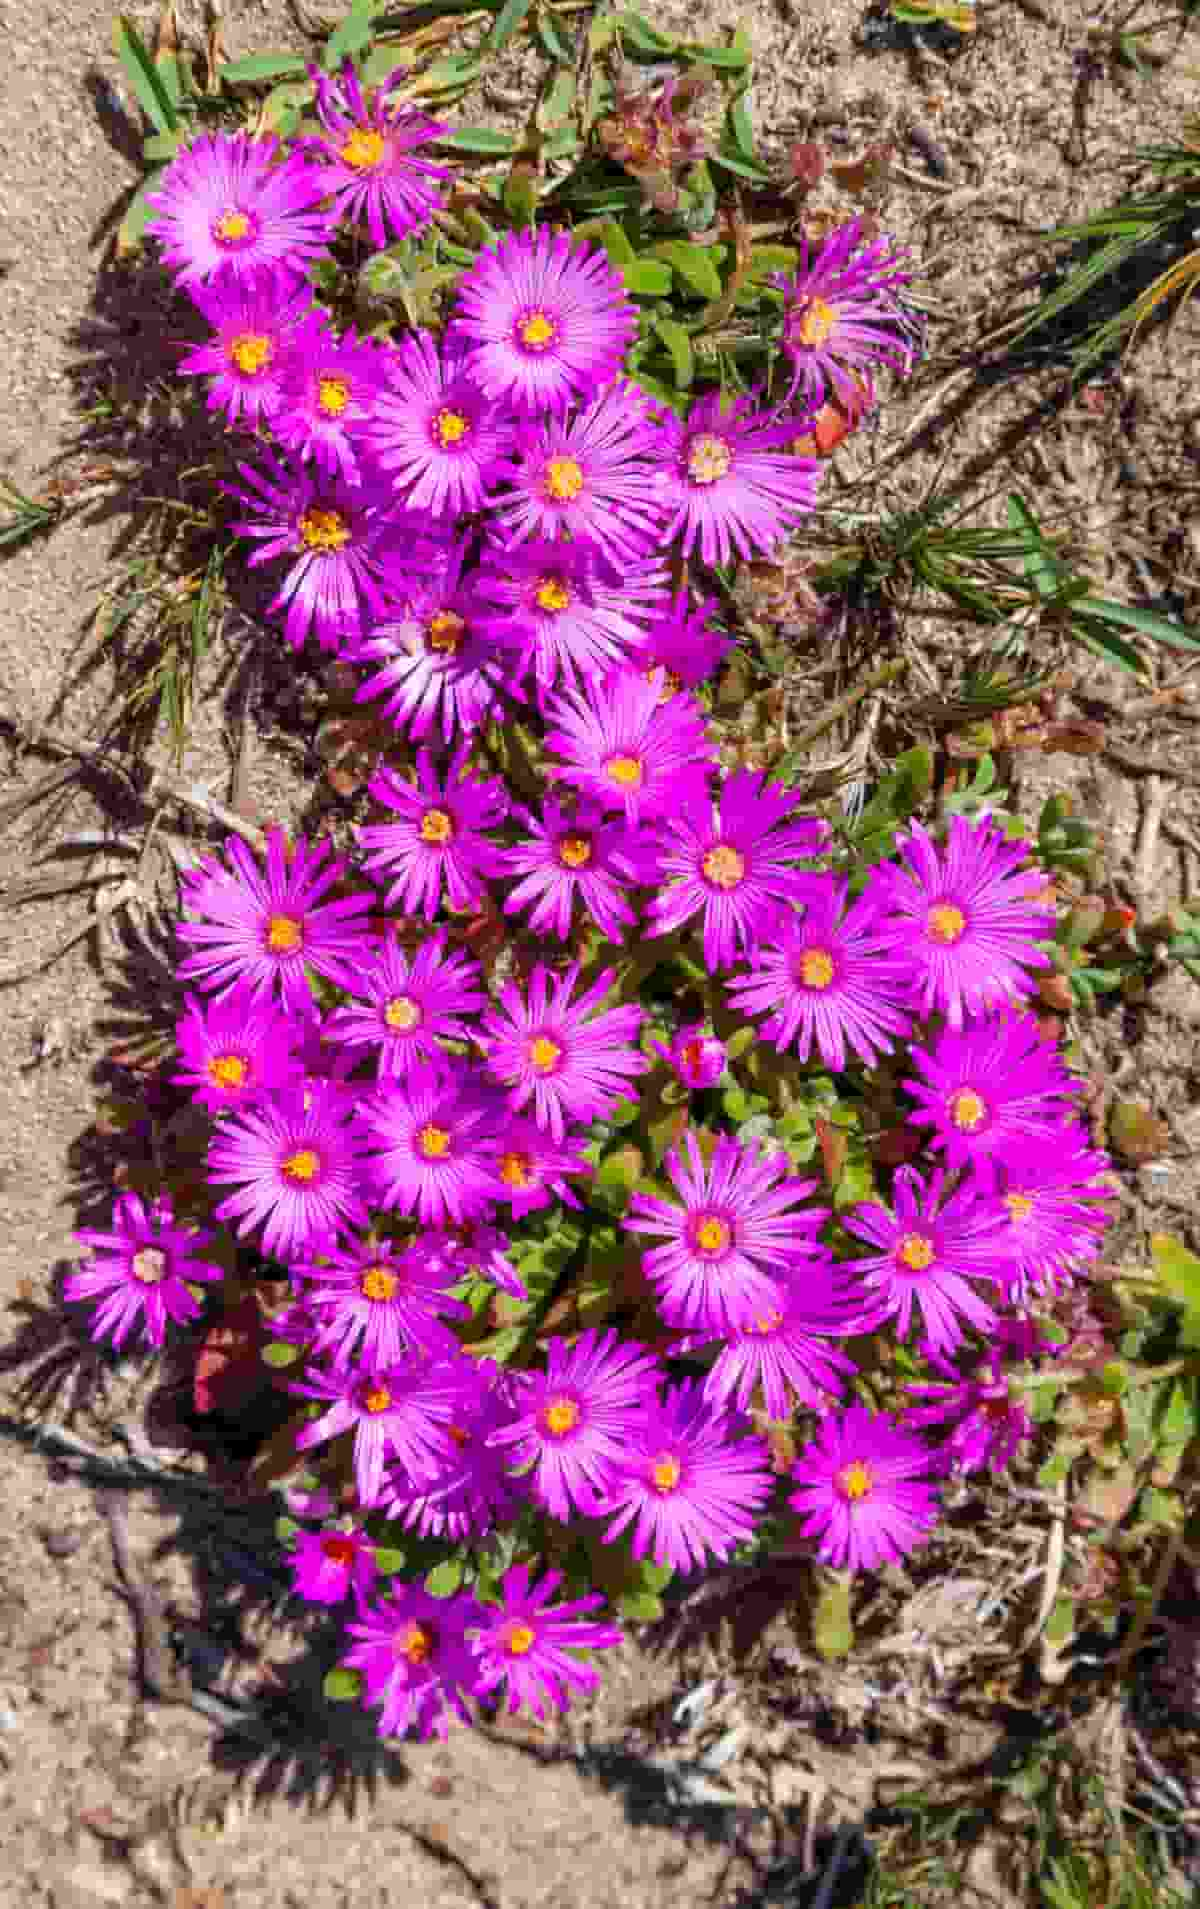
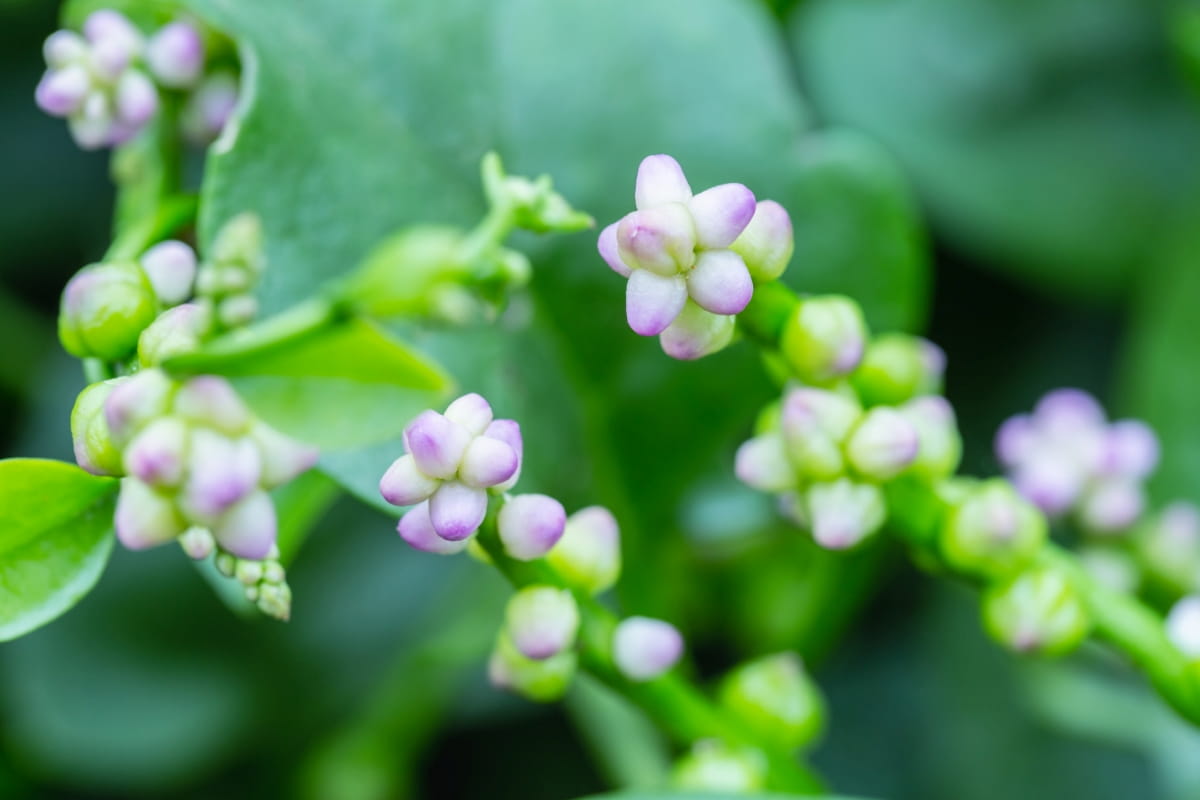
Mesembryanthemums

Pest Infestation 

A pest infestation can be a major buzzkill for your Ice plant’s blooming potential. These tiny invaders not only feast on your plant but also disrupt its growth cycle. From aphids to spider mites, pests can wreak havoc on the delicate balance of your garden ecosystem. Keep an eye out for any signs of pest activity, such as yellowing leaves, sticky residue, or visible bugs on the foliage.

Prevention is key when dealing with pests – regularly inspect your plants and maintain a clean garden to deter unwanted visitors. When it comes to enhancing Ice plant flower development, consider using natural remedies like neem oil or insecticidal soap to combat infestation without harming beneficial insects. Remember to follow instructions carefully and avoid overusing chemicals that could harm both pests and beneficial bugs in your garden. 

Disease 

One of the reasons why your Ice plant may not be blooming could be due to a pesky disease that has taken root in your garden. Diseases can weaken the plant, making it difficult for it to produce beautiful flowers as it should. Keep an eye out for any unusual spots or discoloration on the leaves, as this could be a sign of a disease spreading. 

Preventive measures such as proper watering techniques and good air circulation can decrease the risk of diseases affecting your Ice plant. It’s essential to remove any infected parts of the plant promptly to prevent further spread. Additionally, using fungicides or other treatments recommended for specific diseases can help combat them effectively. 

Improper pH Levels 

Having the right pH level in your soil is crucial for the health and blooming of your Ice plant. If your Ice plant is not flowering as it should, improper pH levels might be the culprit. Ice plants thrive in slightly acidic to neutral soil with a pH range between 6.0 and 7.0. When the pH level is too high or too low, it can inhibit nutrient uptake, leading to stunted growth and lack of blooms. If the pH is off, you can adjust it by adding amendments like sulfur to lower the pH or lime to raise it. 

Overcrowding 

If your Ice plant seems crowded, try thinning out the surrounding vegetation to give it some breathing room. This simple step could make a big difference in its blooming potential. Overcrowding can also create a favorable environment for pests and diseases to thrive, further hindering the plant’s ability to bloom. By addressing this issue, you may help your Ice plant regain its health and vitality. 

In case you missed it: 10 Reasons Why is My Goldfish Plant Not Blooming: Remedies and Treatment

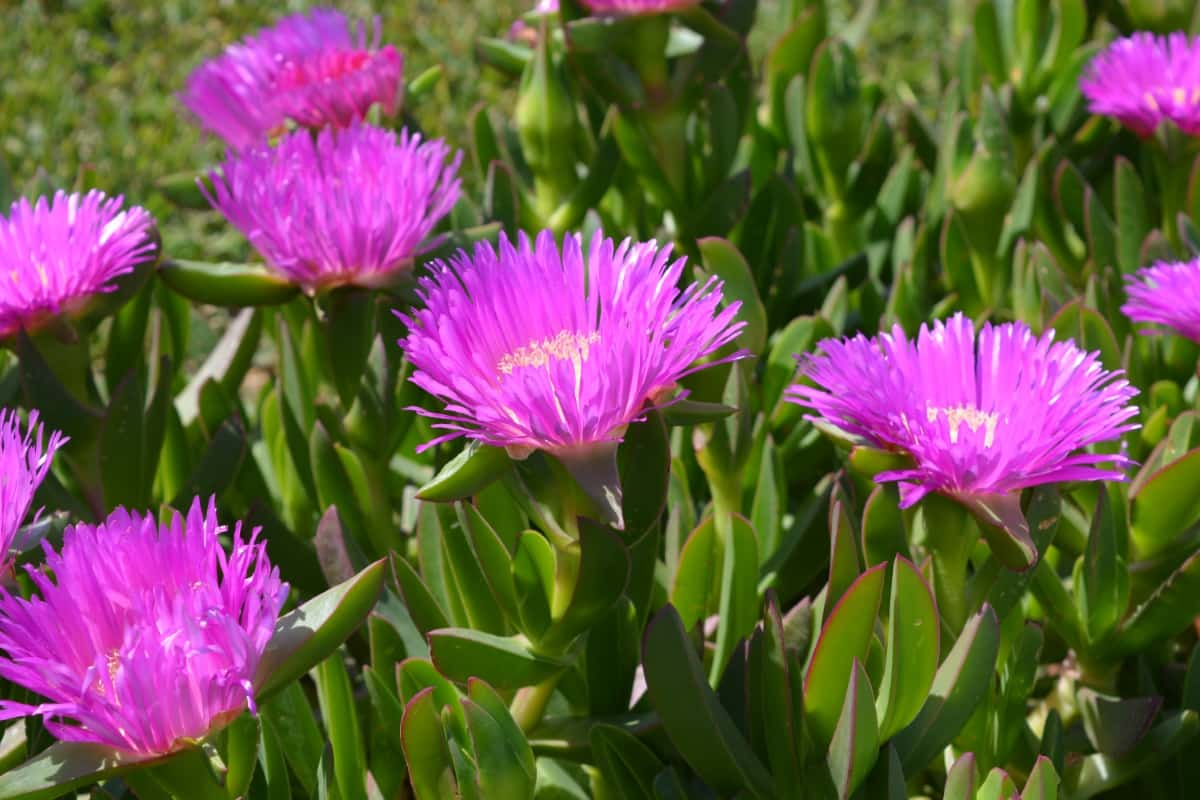
Carpobrotus Flowers

Environmental Stress 

Environmental stress can be a significant factor in preventing your Ice plant from blooming. This type of stress can manifest in various ways, such as extreme temperatures, strong winds, or even pollution. Plants like the Ice plant are sensitive to their surroundings and can struggle to bloom when facing unfavorable environmental conditions.

High heat levels or prolonged exposure to direct sunlight can cause stress on the plant, affecting its ability to produce flowers. Strong winds can also impact the growth of your Ice plant, as they may lead to dehydration and physical damage.  

In case you missed it: 10 Reasons Why Your Anthurium Plant is Not Blooming: Treatment and Remedies

Blooming Cactus Plant

Conclusion 

If your Ice plant is not blooming, there could be various reasons for it. By identifying the specific issue affecting your plant and implementing the appropriate remedies and treatments, you can help encourage blooming and promote overall plant health. How to encourage Ice plants to flower?

Provide adequate sunlight, proper pruning, balanced fertilization, optimal watering practices, good soil drainage, pest control measures when needed, disease prevention strategies, maintaining suitable pH levels, avoiding overcrowding of plants, and minimizing environmental stress factors. With care and attention to these aspects of Ice plant cultivation, you can increase the chances of vibrant blooms in your garden or landscape. 

Note: The images presented in this post are intended solely for representation purposes. The images are meant to serve as visual aids and should not be relied upon as accurate representations of their real-life counterparts.

10 Reasons Why My Potted Hydrangea Not Blooming: Treatment and Remedies

0

Potted Hydrangeas are a delightful addition to any garden or indoor space. Their vibrant blooms and lush foliage can brighten up any corner with their beauty. If your potted Hydrangea is not blooming as expected, don’t fret. By addressing potted Hydrangea flowering problems such as improper pruning and lack of adequate sunlight, you can help maximize potted Hydrangea flower yield. Remember that with proper care and attention to its needs, your Hydrangea can thrive and reward you with stunning blooms. 

10 Reasons Why My Potted Hydrangea Not Blooming

10 Reasons Why My Potted Hydrangea Not Blooming

Improper Pruning 

One common reason why your Hydrangea is not blooming in the pot as expected could be due to improper pruning. When it comes to overcoming barriers to potted Hydrangea flowering, pruning plays a crucial role. However, if done incorrectly, it can hinder blooming rather than promote it.

Improper pruning can remove potential flower buds or disrupt the plant’s growth cycle. To enhance potted Hydrangea flower growth, make sure you understand the proper techniques for pruning. It’s essential to prune at the right time of year and in the correct manner based on the specific type of Hydrangea you have. 

Insufficient Light 

Hydrangeas thrive in bright, indirect sunlight, so if they are not receiving enough light, they may struggle to produce blooms. Make sure to place your potted Hydrangea in a location where it can get at least 4-6 hours of sunlight per day. If you notice that the plant is stretching towards the light or has pale leaves, it might be a sign that it needs more sun exposure. 

Consider moving your Hydrangea to a spot with better lighting conditions or supplementing it with artificial grow lights if natural light is limited. Remember, proper lighting plays a crucial role in the blooming process of your potted Hydrangea plants. 

Inadequate Watering 

Hydrangeas are thirsty plants, and not giving them enough water can lead to stress and stunted growth. When it comes to watering your potted Hydrangea, consistency is key. Make sure the soil is moist but not waterlogged. Check the soil regularly by sticking your finger about an inch deep – if it feels dry, it’s time to give your plant a drink. During hot summer months, you may need to water more frequently as evaporation rates increase. However, be cautious of overwatering as well, which can cause root rot and other issues. 

Nutrient Deficiency 

One common reason for potted Hydrangea not flowering as expected is nutrient deficiency. When it comes to dealing with potted Hydrangea bloom deficiency, nitrogen, phosphorus, and potassium are key nutrients that play a key role in promoting flower production. If your plant lacks these nutrients, it may struggle to bloom to its full potential.

When it comes to boosting flower production in potted Hydrangeas, consider using a well-balanced fertilizer specifically formulated for flowering plants to restore blooming in potted Hydrangeas. Regularly inspect the leaves of your Hydrangea for any signs of yellowing or discoloration, which could indicate nutrient deficiencies that need addressing. 

Improper Soil pH 

The common cause of potted Hydrangea flower failure is due to improper soil pH. Hydrangeas are unique in that the color of their blooms can change based on the acidity or alkalinity of the soil they are planted in. If your Hydrangea’s soil pH is off, it can affect its ability to absorb essential nutrients. To troubleshoot non-flowering potted Hydrangeas, it’s important to ensure that your Hydrangea is planted in well-draining soil with a pH level that suits its variety – typically around 5.5 to 6.5 for most cultivars.

In case you missed it: 10 Reasons Why is My Wisteria Not Blooming: Remedies and Treatment

Hydrangea Flower in A Pot

How to make potted Hydrangeas bloom? If you find that the pH level is too high or too low, there are ways to adjust it accordingly. For acidic-loving Hydrangeas like blue varieties, adding sulfur can help lower the pH. On the other hand, if your Hydrangea prefers alkaline conditions like pink varieties, incorporating lime into the soil may be necessary. 

Frost Damage 

When temperatures plummet unexpectedly, these delicate beauties can be left vulnerable to the cold. Frost can cause wilting, browning of leaves, and even damage to the roots. To troubleshoot the lack of blooms in potted Hydrangeas, it’s crucial to keep an eye on weather forecasts and take necessary precautions.

Covering your Hydrangea with a light cloth or moving it indoors during particularly cold nights can help protect it from harm. Additionally, placing mulch around the base of the plant can provide added insulation. Trim away any damaged parts carefully and ensure that the plant receives adequate sunlight and moisture to aid in its recovery process. 

Pests and Diseases 

Pests and diseases can damage your potted Hydrangea, causing it to struggle and not produce those beautiful blooms you’ve been eagerly waiting for. These pesky invaders can range from aphids sucking the sap out of your plant to powdery mildew leaving a white powdery residue on the leaves. Aphids are tiny insects that eat the tender new growth of Hydrangeas, while spider mites create fine webbing between leaves as they suck vital fluids from the plant.

Keep an eye out for any signs of these pests and act promptly before they cause serious damage. In terms of diseases, powdery mildew is a common culprit that thrives in humid conditions. This fungal disease can weaken your Hydrangea’s overall health and reduce its ability to bloom. Ensure good air circulation around your plant and avoid overhead watering to prevent this issue from taking hold. 

Transplant Shock 

One common reason why your Hydrangea pot plant is not producing blooms is due to transplant shock. When you move a plant from one location to another, it can experience stress as it adjusts to its new environment. This shock can disrupt the normal growth and blooming cycle of your Hydrangea. Transplant shock often occurs when the plant’s roots are disturbed during the transplanting process.

In case you missed it: 10 Reasons Why is My Goldfish Plant Not Blooming: Remedies and Treatment

Taking Care of Flowers

It can take some time for the roots to establish themselves in their new home, which may delay or inhibit flowering. To improve potted Hydrangea flowering performance, make sure it is receiving adequate sunlight, water, and nutrients. Be patient with your plant as it acclimates to its new surroundings. Avoid overwatering or fertilizing during this sensitive period. 

Genetic Factors 

Genetic makeup determines many aspects of a plant’s growth and development, including its ability to produce flowers. Some varieties of Hydrangeas are simply bred to bloom less abundantly than others due to their genetic traits. If you find that no matter what you do, your potted Hydrangea refuses to bloom as profusely as you’d like, it may be worth considering the possibility that its genetics are influencing this behavior. While there may not be much you can do to change the inherent characteristics of the plant itself, understanding this aspect can help manage expectations and tailor care practices accordingly. 

Environmental Stress 

Factors like extreme temperatures, strong winds, and pollution can all contribute to environmental stress. Hydrangeas are sensitive plants that thrive in stable conditions, so sudden changes in their environment can hinder their ability to bloom. When it comes to tips to encourage blooming in potted Hydrangeas, consider providing some protection for your Hydrangea during periods of extreme weather by moving it to a more sheltered area or using mulch around the base. 

Additionally, be mindful of any nearby sources of pollution that may be affecting your plant’s health. Regularly inspect your Hydrangea for any signs of distress caused by environmental factors and take appropriate measures to address them promptly. 

In case you missed it: 10 Reasons Why Your Iris is Not Blooming: Remedies and Treatment

Flowers in The Garden

Conclusion 

It’s essential to understand that many factors can contribute to your potted Hydrangea not blooming. With proper care and attention to detail tailored to your Hydrangea’s specific needs, you can encourage potted Hydrangea blossoms. 

10 Reasons Why is My Wisteria Not Blooming: Remedies and Treatment

0

Wisteria plants are known for their beautiful cascading clusters of flowers that adorn gardens and trellises. If your wisteria is not blooming as expected, do not worry. By ensuring it receives adequate sunlight, water, and nutrients and addressing any potential issues, such as pruning at the wrong time or lack of proper support, you can encourage your wisteria to bloom abundantly. 

10 Reasons Why Is My Wisteria Not Blooming

10 Reasons Why Is My Wisteria Not Blooming

Immaturity of the Plant 

When it comes to wisteria plants not blooming, one common reason could be the immaturity of the plant. Younger plants may focus more on establishing their root system and foliage before putting energy into blooming. If your wisteria is still in its early stages, don’t worry too much if you haven’t seen any blooms yet. Give it time and proper care, allowing it to mature at its own pace. 

Pruning Practices 

Pruning practices play a crucial role in the blooming of your wisteria. When it comes to pruning, timing is everything. To encourage wisteria blossoms, it’s essential to prune at the right time of year. Typically, wisteria should be pruned twice a year: once in late winter and then again in mid-summer. 

During the winter pruning session, focus on removing any overgrown branches to promote new growth. This will help maintain the plant’s shape and prevent it from becoming too unruly. In contrast, summer pruning is all about controlling the size of your wisteria by trimming back excessive growth. 

Insufficient Sunlight 

Wisterias are known to thrive in full sun conditions, so if yours isn’t getting enough light, it might be affecting its blooming ability. Ensure that your wisteria is planted in a spot where it receives 6 hours of direct sunlight each day. If nearby trees or structures are blocking the sun’s rays from reaching your plant, consider pruning them back to allow more light in. Remember that even though wisterias can tolerate some shade, they truly flourish when bathed in sunlight. 

Nutrient Deficiency 

If your wisteria lacks key nutrients such as nitrogen, phosphorus, or potassium, it may struggle to produce flowers. This deficiency can result from poor soil quality or inadequate fertilization practices. To troubleshoot wisteria bloom failure, consider using a balanced fertilizer specifically designed for flowering plants. 

Additionally, mixing organic matter into the soil can help provide vital nutrients for your wisteria. How to get wisteria to bloom? Regularly monitoring the health of your plant and adjusting its feeding regimen accordingly can make a significant difference in promoting healthy growth and abundant blooms. 

Improper Watering 

Improper watering can be a common reason for wisteria not flowering as expected. Wisterias prefer moist, well-draining soil, so finding the right balance is key. Giving your plant excess water can cause root rot, while not providing enough water can cause stress and hinder its ability to produce flowers. To enhance wisteria flower development, check the soil moisture regularly. Make sure to water deeply, but allow excess water to drain away. 

In case you missed it: 10 Reasons Why Your Iris is Not Blooming: Remedies and Treatment

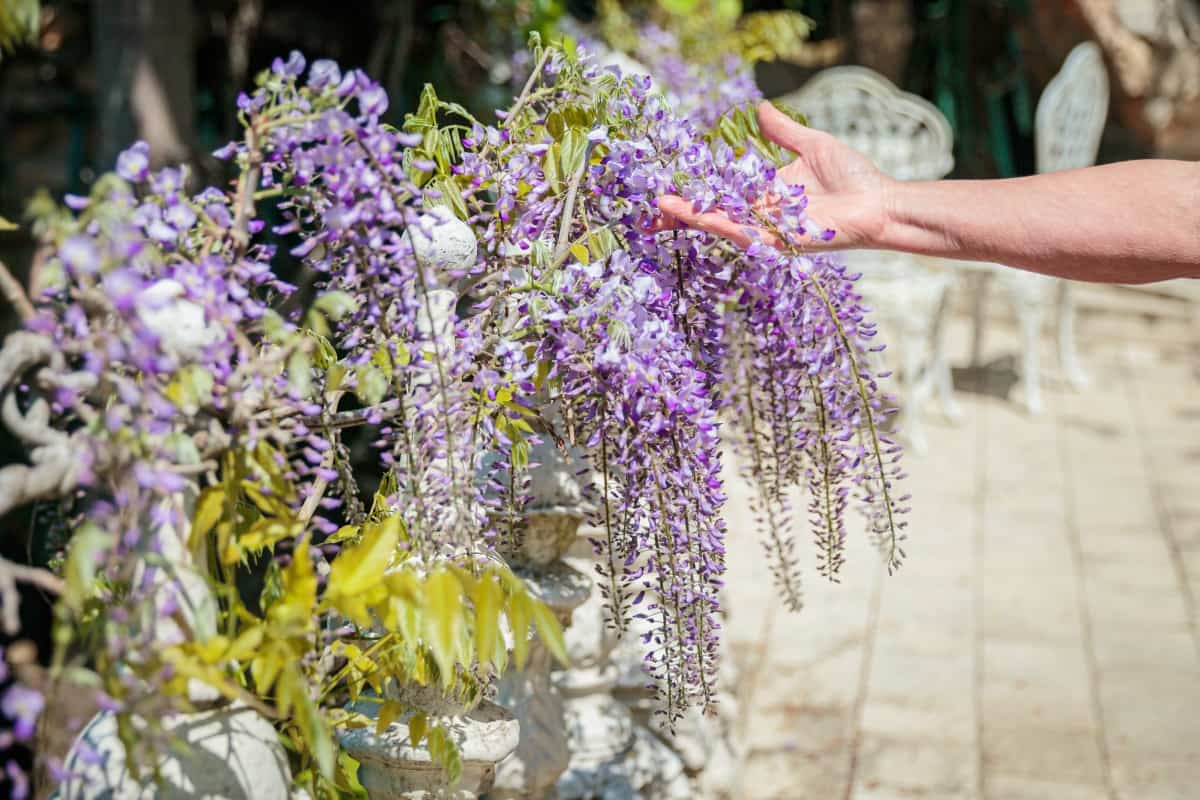
Branch of Wisteria

Temperature Extremes 

Living in extreme temperatures can take a toll on your wisteria plant. When it’s too hot, the buds may dry out before they even have a chance to bloom. Similarly, during harsh winters, the cold can damage the delicate flower buds, leading to a lack of blooms come springtime. To overcome barriers to wisteria flowering, consider providing some shelter for your plant during particularly hot or cold spells.

This could involve moving potted wisteria indoors during heatwaves or covering outdoor plants with frost cloth in winter. When it comes to maximizing wisteria flower yield, ensuring that your wisteria is planted in well-draining soil it can also protect the roots from getting too hot or too cold. 

Over-Pruning 

Over-pruning your wisteria can actually hinder its ability to bloom. While it’s important to prune wisteria regularly, doing it too aggressively can remove the flower buds along with the excess growth. When you cut back your wisteria too much, you might be inadvertently limiting its blooming potential for the upcoming season. How to encourage wisteria to flower? Instead of going overboard with your pruning shears, allow the plant to develop and mature naturally. By striking a balance between pruning and letting it grow, you’ll likely see an increase in blooms over time. 

Pest Infestation 

A pest infestation can be a real buzzkill when it comes to your wisteria not blooming. Those sneaky critters can wreak havoc on your plant without you even realizing it. From aphids to spider mites, these tiny intruders can suck the life out of your wisteria and leave it looking sad and wilted. When it comes to addressing wisteria blooming challenges, keep an eye out for any signs of pest activity on your plant, such as yellowing leaves, sticky residue, or visible bugs crawling around. If you spot any unwanted visitors, take action immediately to prevent further damage. 

Disease 

Diseases can be a major factor in why your Wisteria does not produce flowers as expected. Powdery mildew appears as a white powdery content, affecting the plant’s ability to photosynthesize effectively. Root rot causes weakened roots and poor nutrient absorption. Leaf spot disrupts the plant’s overall health. To boost wisteria flowering performance, make sure to remove affected parts of the plant promptly and dispose of them properly.  

In case you missed it: 10 Reasons Why Your Anthurium Plant is Not Blooming: Treatment and Remedies

Wisteria Tree Blooming

Soil pH Imbalance 

If you notice that your wisteria isn’t blooming as it should, it might be due to a soil pH imbalance. Wisterias prefer slightly acidic to neutral soil with a pH level between 6.0 and 7.0. An alkaline or acidic soil can prevent the plant from absorbing essential nutrients properly, leading to poor blooming performance. To determine your soil’s pH levels, you can use a simple testing kit available at most garden centers. 

Suppose the test reveals that your soil is too alkaline or acidic for wisterias. In that case, you can amend it by adding organic matter to help adjust the pH levels gradually over time. How to make wisteria bloom? Regularly monitoring and maintaining the optimal pH balance in your soil will promote healthy growth and abundant blooms on your wisteria vine. 

In case you missed it: 10 Reasons Why Your Agapanthus is Not Flowering: Remedies and Treatment

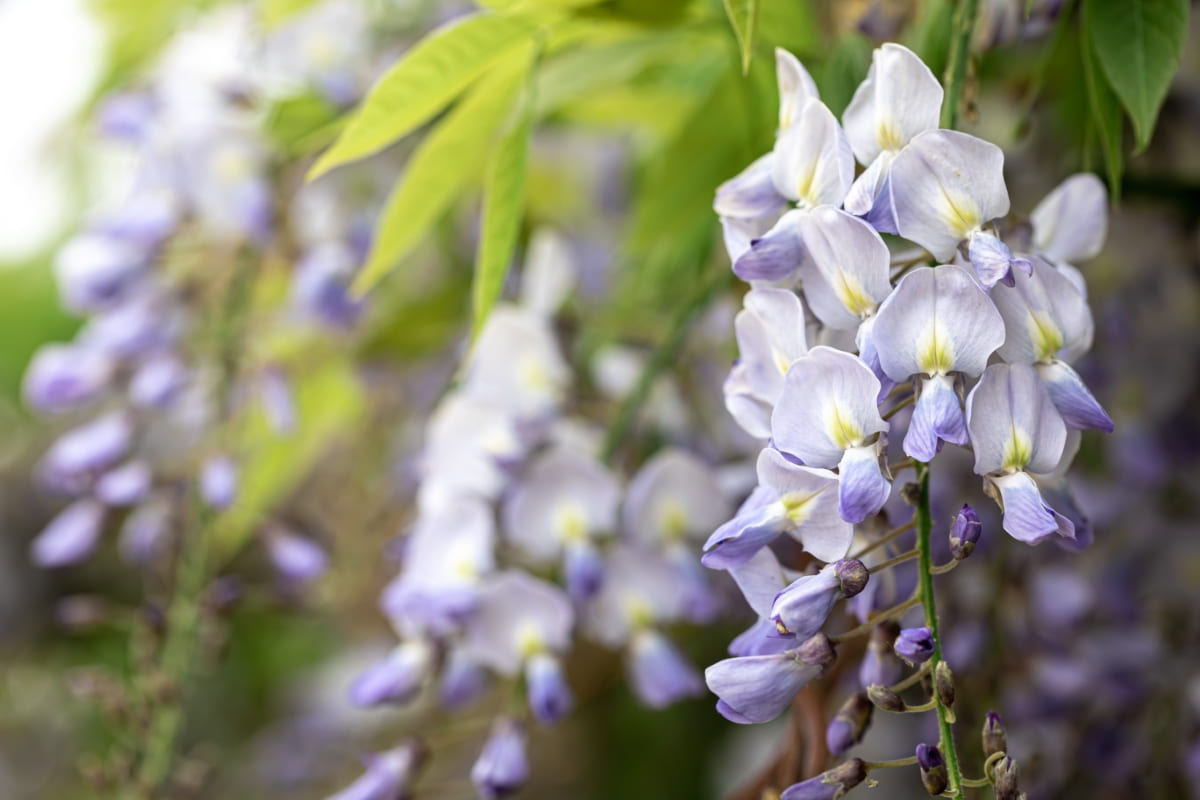
Wisteria

Conclusion 

In the journey of nurturing a wisteria plant, encountering challenges like a lack of blooms can be discouraging. However, with proper care, you can address the underlying Wisteria blooming issues. By ensuring your plant is mature enough, practicing correct pruning techniques, providing adequate sunlight and nutrients, maintaining proper watering habits, safeguarding against temperature extremes and pests, as well as monitoring for diseases and soil pH balance – you can solve Wisteria flowering problems. 

10 Reasons Why is My Goldfish Plant Not Blooming: Remedies and Treatment

0

The Goldfish plant is a beautiful and unique addition to any indoor garden. While it can be frustrating when your plant isn’t blooming as expected, there are several factors to consider, such as light, humidity, temperature, and proper care routines. Goldfish plants are characterized by their glossy and deep green leaves that serve as a striking backdrop to the bright blooms they produce. How to get Goldfish plants to bloom? With proper attention and nurturing your Goldfish plant can reward you with an abundance of colorful flowers that will surely brighten up any space. 

10 Reasons Why Is My Goldfish Plant Not Blooming

10 Reasons Why is My Goldfish Plant Not Blooming

Insufficient Light Exposure 

If your Goldfish plant is not producing flowers, one possible reason could be insufficient light exposure. Goldfish plants thrive in bright, indirect light but can tolerate lower light conditions as well. However, without adequate light, they may struggle to produce flowers. To remedy this Goldfish plant blooming problem, consider moving your plant to a warmer location with filtered sunlight. Keep an eye on how the plant responds to its new environment and adjust accordingly. 

Improper Watering 

One common reason your Goldfish plant may not be blooming is improper watering. Goldfish plants require consistent moisture, but overwatering can lead to root rot and inhibit blooming. On the other hand, underwater can cause stress to the plant, causing a lack of flowering. To troubleshoot the lack of blooms in Goldfish plants, it’s essential to allow the top inch of soil to dry out between waterings.

In case you missed it: 10 Reasons Why Your Iris is Not Blooming: Remedies and Treatment

Improper Watering 

How to make the Goldfish plant bloom? You can use a well-draining potting mix and ensure that excess water can drain easily. When watering, make sure to water thoroughly, but avoid leaving the plant sitting in standing water. 

Nutrient Deficiency 

Nutrient deficiency can be a common culprit when it comes to your Goldfish plant not blooming as vibrantly as you’d hope. This beautiful plant requires essential nutrients to thrive and produce those stunning blooms that we all love to see. If your Goldfish plant is lacking key nutrients such as nitrogen, phosphorus, or potassium, it may struggle to bloom properly. It’s important to ensure that you are providing the right balance of fertilizers specifically formulated for flowering plants. 

Consider using a high-quality fertilizer designed for blooming plants and follow the recommended feeding schedule to prevent nutrient deficiencies. Remember, moderation is key when fertilizing your Goldfish plant – too much can actually do more harm than good. Keep an eye out for any signs of yellowing leaves or stunted growth, as these could be indicators of nutrient deficiencies in your precious Goldfish plant. 

Inadequate Humidity Levels 

One often overlooked factor that could be hindering its growth is inadequate humidity levels. Goldfish plants thrive in humid environments, much like their natural habitat in tropical regions. When the air in your home or office is too dry, it can prevent your Goldfish plant from blooming to its full potential.

Low humidity levels can cause the plant’s leaves to become crispy and brown at the edges, making it difficult for new blooms to emerge. When it comes to non-blooming Goldfish plant solutions, consider placing a humidifier near your Goldfish plant or misting its leaves regularly with water. You could also group your plants to create a microclimate of increased humidity. 

Pot-bound Roots 

If your Goldfish plant is not blooming, pot-bound roots could be the culprit. When roots become cramped and overcrowded in a small pot, they struggle to access water and nutrients essential for healthy growth. This can lead to stunted development and a lack of blooms. To encourage Goldfish plant blossoms, consider repotting your Goldfish plant into a slightly larger container with fresh, well-draining soil. Regularly check the roots of your plant for any signs of overcrowding or circling.  

Temperature Extremes 

Goldfish plants are sensitive to temperature extremes, so it’s essential to create a consistent environment for these delicate beauties. High temperatures above 30°C can stress your plant and inhibit blooming, while cold drafts or sudden drops in temperature below 10°C can also disrupt their flowering cycle.  

To overcome barriers to Goldfish plant flowering, keep it away from heaters, air conditioners, or drafty areas that could subject it to fluctuations in temperature. Consider moving your Goldfish plant away from windows during extreme weather conditions to shield it from direct sunlight or chilly drafts. Creating a moderate environment will help encourage healthy growth and vibrant blooms all year round. 

Overfertilization 

Overfertilization is a common issue that can hinder the blooming of your Goldfish plant. When you give your plant too much fertilizer, it can cause an excess build-up of salts in the soil, causing root burn and nutrient imbalances. This imbalance can prevent the plant from focusing its energy on producing flowers. 

In case you missed it: 10 Reasons Why Your Anthurium Plant is Not Blooming: Treatment and Remedies

Overfertilization 

To maximize Goldfish plant flower yield, always follow the instructions on the fertilizer packaging. Remember that more is not always better when it comes to feeding your plants. It’s crucial to stick to a regular fertilizing schedule and dilute the solution as recommended. 

Pests and Diseases 

Pests and diseases can damage your beloved Goldfish plant, causing it to struggle to produce those vibrant blooms you love. Common pests like spider mites, aphids, and mealybugs can infest your plant if not properly monitored. Keep an eye out for any signs of these pesky critters so you can act promptly. 

Diseases like root rot or powdery mildew can also hinder blooming by weakening the overall health of the plant. Ensure proper watering techniques to prevent waterlogged soil that may lead to root issues. Consider using natural remedies or treatments specifically designed for plants to combat these diseases effectively. Regularly inspecting your Goldfish plant for any abnormalities will help catch pest infestations or diseases early on before they become a bigger problem.  

Pruning Neglect 

One common reason why your Goldfish plant may not be blooming is pruning neglect. Goldfish plants benefit from regular pruning to encourage new growth and flowering. If you’ve been avoiding trimming back your plant, it could be hindering its ability to produce blooms. Overgrown branches can block light from reaching the lower parts of the plant where flowers typically form. 

To boost Goldfish plant flowering performance, grab some clean pruning shears and start by removing any dead or damaged branches. Then, trim back overgrown stems to promote new growth and flower production. How to encourage Goldfish plants to flower? Regularly checking on your Goldfish plant’s pruning needs will help ensure a healthy and vibrant display of colorful blooms in the future. 

Genetic Factors 

When it comes to your Goldfish plant not blooming, genetic factors could be playing a role. Each plant has its unique genetic makeup that influences its growth and flowering patterns. Some Goldfish plants may simply have genes that predispose them to bloom less frequently or produce fewer flowers compared to others. This is a natural aspect of plant diversity and should be accepted as part of the beauty of nature. 

While you can’t change the genetics of your Goldfish plant, understanding this factor can help you manage your expectations and appreciate the uniqueness of each plant in your collection. Embrace the individuality of your plants and enjoy caring for them regardless of their blooming frequency. 

Conclusion 

If your Goldfish plant is not blooming, do not lose hope. By addressing common Goldfish plant blooming issues such as light exposure, watering habits, nutrient deficiencies, humidity levels, root health, temperature control, fertilization practices, pest and disease management, pruning techniques, and genetic factors, you can help your plant bloom beautifully.

Remember that each plant is unique and may require some trial and error to find the perfect balance for optimal growth. With patience and care tips for Goldfish plant flower growth, you can create a conducive environment for your Goldfish plants to flourish with vibrant blooms all year round. 

Maximize Your Space: Ultimate Guide to Balcony Gardening with Grow Bags

0

Balcony gardening with grow bags is a fantastic way to maximize your space and bring nature into your home. With the right setup and care, you can create a beautiful oasis right outside your door. Whether you’re growing herbs, flowers, or vegetables, grow bags offer a flexible and convenient solution for urban gardeners. 

Balcony Gardening with Grow Bags

Introduction to Balcony Gardening with Grow Bags 

Benefits of Using Grow Bags 

When it comes to grow bag gardening benefits, grow bags offer numerous benefits for urban gardeners, allowing you to cultivate plants compactly and efficiently. Their lightweight design makes them easy to move around, maximizing sunlight exposure for your plants. 

Choose the Right Size and Material for Grow Bags 

When choosing to grow bags for a balcony garden, consider both size and material carefully. Opt for sizes that accommodate the root systems of your chosen plants while ensuring proper drainage. Quality materials like breathable fabric promote aeration and prevent root circling, leading to healthier plant growth.  

Planning Your Balcony Garden 

Assessing Your Balcony’s Sunlight and Space 

When it comes to planning urban gardening with grow bags, the first step is assessing the sunlight and space available. Take note of how many hours of sunlight your balcony receives each day. Consider the layout of your balcony and determine where you can place grow bags for optimal growth. Make sure there is enough room for plants to spread out and access sunlight without overcrowding. 

Selecting Plants Suitable for Grow Bag Cultivation 

Focus on selecting plants suitable for a DIY balcony garden. Herbs like Basil, as well as vegetables like Tomatoes and Peppers, do well in grow bags. Think about what you enjoy eating and what grows best in your climate. When it comes to the best plants for grow bags, carefully considering these factors, you can create a vibrant balcony garden that also provides you with fresh herbs and vegetables right at your fingertips. 

Essentials for Grow Bag Gardening 

Quality Soil and Compost Mixtures 

When it comes to choosing soil for grow bags, quality soil and compost mixtures are essential. Choosing a well-balanced mix can provide the necessary nutrients for your plants to thrive in a confined space. Look for options rich in organic matter that promote healthy root development. 

Importance of Proper Drainage in Grow Bags 

Proper drainage is another key factor in ensuring your grow bag garden flourishes. Without adequate drainage, waterlogged soil can lead to root rot and other issues. Opt for grow bags with sufficient drainage holes or create additional openings if needed. Balcony gardeners often underestimate the importance of good-quality soil and proper drainage until they encounter problems like stunted growth or wilting plants.  

In case you missed it: Heat-Tolerant Outdoor Plants for Home Yards, Terrace, Balcony, and Containers

Recycled tea bags for growing plants on balcony

Setting Up Your Grow Bags 

Arranging Grow Bags for Optimal Growth 

When it comes to setting up your grow bags for optimal growth on your balcony, placement is key. Ensure that your grow bags receive adequate sunlight based on the plant’s requirements. Consider using a variety of sizes and heights to create visual interest and maximize space utilization. Arranging your grow bags in a staggered formation can help prevent overcrowding and allow each plant to access sufficient light and airflow.  

Tips for Securing Grow Bags on a Balcony 

To secure your grow bags on a balcony, consider using hooks or railing brackets specifically designed for this purpose. Alternatively, you can use Velcro straps or bungee cords to fasten the bags securely in place. Remember to check the stability of the setup regularly, especially during windy conditions.  

Planting Techniques in Grow Bags 

Starting Seeds vs. Transplanting Seedlings 

When planting in grow bags, you have two main options: starting seeds or transplanting seedlings. Starting seeds allows for a more hands-on approach while transplanting seedlings offers a head start. Whichever method you choose, ensure the roots have ample room to grow. 

Maximizing Space with Vertical Gardening Methods 

Vertical gardening with grow bags is a fantastic way to maximize space on your balcony. Consider utilizing trellises or hanging planters to grow upwards and save valuable floor space. This technique not only enhances aesthetics but also increases air circulation around plants. By incorporating vertical gardening methods alongside traditional horizontal planting in grow bags, you can create a lush and bountiful garden even in limited spaces. 

Watering and Nutrition Management 

Efficient Watering Practices for Grow Bag Plants 

When it comes to watering tips for a grow bag garden, make sure to water consistently but avoid overwatering. Check the soil moisture frequently by inserting your finger into the soil if it feels dry, it’s time to water. When watering, aim to water around the plant rather than overhead to prevent foliage diseases. Utilize a watering can or drip irrigation system for precision watering. Mulching the top layer of soil can also help retain moisture and reduce evaporation. 

Understanding Fertilization Needs for Different Plants 

Different plants have varying fertilization needs, so be mindful of this when choosing a fertilizer. Consider using organic options for a more acceptable approach. Follow the instructions carefully and apply accordingly to provide your plants with essential nutrients. 

Pest and Disease Control 

Identifying Common Pests and Diseases in Balcony Gardens 

Pest and disease control is a key aspect of balcony gardening with grow bags. Common pests like aphids, spider mites, and caterpillars can damage your plants if left unchecked. Similarly, diseases such as powdery mildew or fungal infections can stunt growth and lead to plant decline. 

Organic Methods for Managing Pests and Diseases 

When it comes to organic balcony gardening, opting for organic pest management methods is not only environmentally friendly but also safe for your edible crops. Utilizing natural predators like ladybugs or introducing beneficial nematodes can keep pest populations in check without the need for harmful chemicals.

In case you missed it: How to Deal with Pests and Diseases in Balcony Garden: Natural and Organic Remedies

Spring gardening using Grow bags

When it comes to pest control in balcony gardens, Neem oil spray is another effective organic solution for combating pests while maintaining the health of your plants. Additionally, practicing good garden hygiene by regularly removing dead leaves and debris can prevent disease outbreaks before they start. 

Seasonal Care for Grow Bag Gardens 

Adjusting Care with Changing Seasons 

As the seasons shift, it’s essential to adapt your balcony garden care accordingly. With winter approaching, preparing your grow bags for the colder months is crucial for plant survival. Keep an eye on weather forecasts and start transitioning your plants indoors if needed. 

Preparing Your Grow Bags for Winter 

Consider investing in frost protection materials such as fleece covers or mini greenhouses to shield delicate plants from harsh temperatures. Remember to reduce watering frequency as plants enter dormancy and adjust fertilizer application accordingly. Pruning back any overgrown foliage can help rejuvenate your plants come springtime. Inspect your grow bags regularly for signs of pest infestations or diseases that may thrive in cooler weather conditions. Taking proactive measures now can prevent issues from escalating later on. 

Harvesting and Pruning 

Best Practices for Harvesting Vegetables and Herbs 

Harvesting your homegrown vegetables and herbs is a rewarding experience that lets you enjoy the fruits of your labor. When it comes to harvesting, be sure to pick vegetables at their peak ripeness for the best flavor and nutrition. For Lettuce and Spinach, harvest the outer leaves to encourage new growth from the center. 

Pruning Techniques to Encourage Growth 

Pruning plays a key role in maintaining plant health and promoting vigorous growth. Regularly trim off dead or damaged leaves to redirect energy towards healthy parts of the plant. Also, prune back overgrown branches to improve air circulation and prevent disease. Remember, each plant has specific pruning needs, so research individual requirements for optimal results.  

Sustainability and Upcycling in Balcony Gardening 

Reusing Grow Bags and Organic Waste Composting 

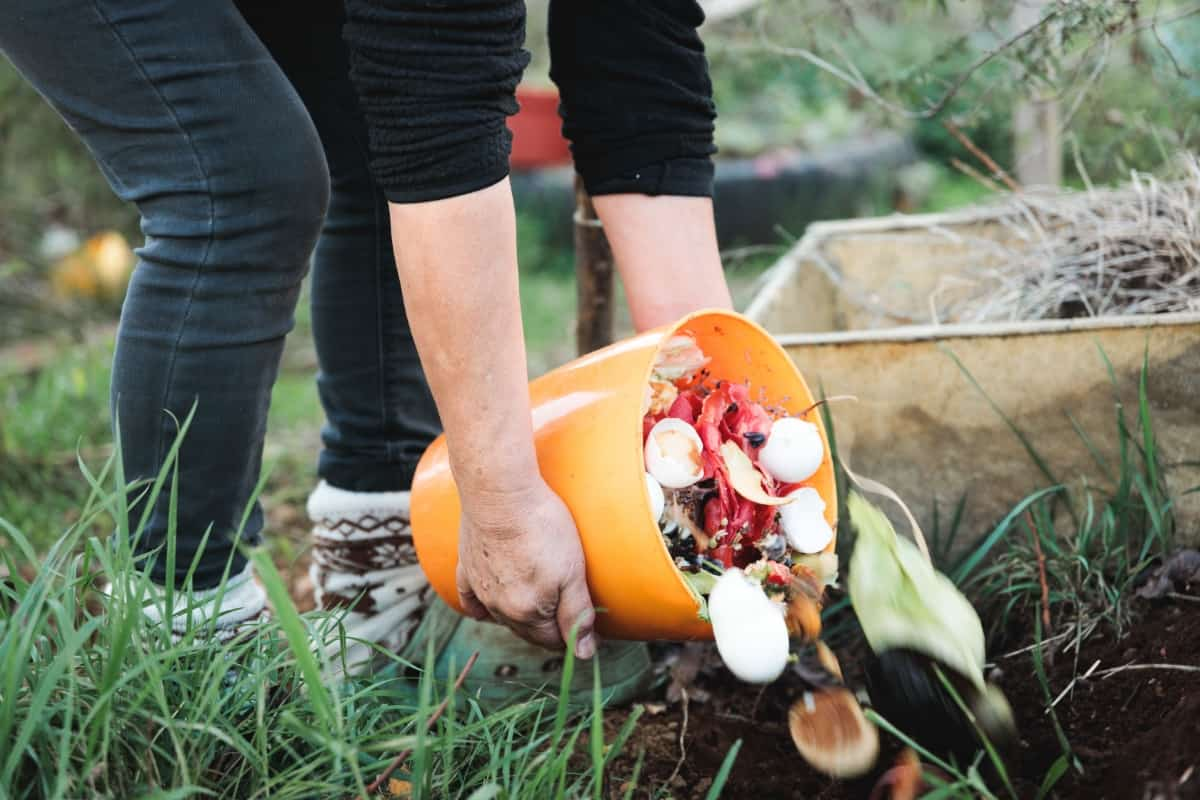
Sustainability is key in balcony gardening. When it comes to space-saving gardening techniques, instead of discarding used grow bags, consider reusable grow bags for multiple growing seasons. By doing so, you not only reduce waste but also save money in the long run. When it comes to composting for balcony grow bag gardens, organic waste composting is another sustainable practice to adopt. Transform your kitchen scraps into nutrient-rich compost that can be used to feed your plants. It’s a natural way to close the loop in your balcony ecosystem. 

Water Conservation Techniques for Balcony Gardens 

Water conservation should also be a top priority for balcony gardeners. Implementing techniques like drip irrigation or collecting rainwater can help minimize water usage while keeping your plants healthy and thriving. Being mindful of how you use water can make a big difference in promoting Sustainable Balcony Gardening. 

In case you missed it: The Importance of Soil and Fertilizer in Balcony Vegetable Gardening

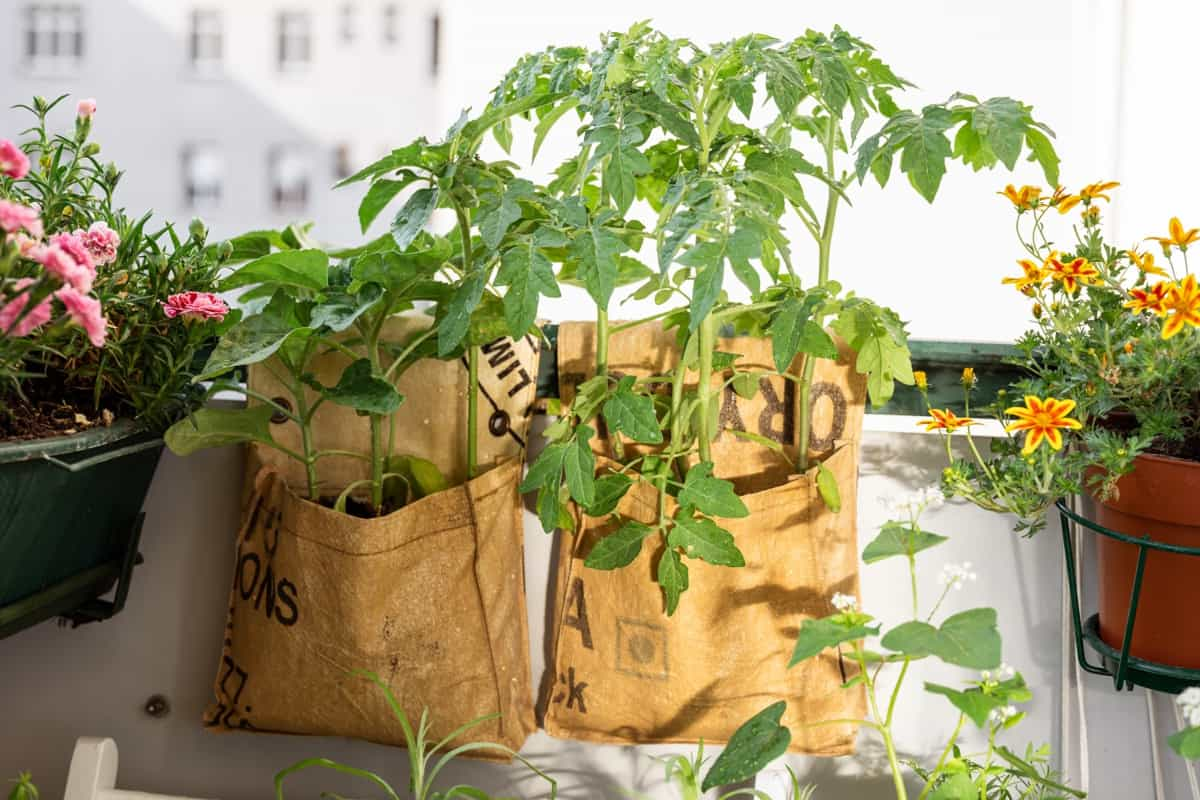
Tomatoes growing in grow bags in a  balcony

Conclusion 

In balcony gardening for beginners with grow bags, the possibilities are endless. From maximizing your space to enjoying fresh produce right at home, this method offers a convenient and sustainable way to cultivate plants in small spaces.

By carefully planning your balcony garden, following the grow bag setup guide, Choosing the right materials, and implementing proper care techniques, you can create a flourishing oasis just outside your door. Remember to adjust your care routines according to the changing seasons and always be mindful of sustainability practices such as upcycling and water conservation. 

10 Reasons Why Your Iris is Not Blooming: Remedies and Treatment

0

Irises are vibrant flowers that can add beauty to any garden. If your Iris plant is not flowering as expected, there could be various reasons behind it. By understanding the factors that affect no blooms on Iris plants, such as improper division, pests, and diseases, you can take the necessary steps to ensure that your Irises thrive and bloom beautifully.  

Reasons Why Your Iris is Not Blooming

Reasons Why Your Iris is Not Blooming

Insufficient Sunlight 

Shade Exposure 

The lack of sunlight can leave your Irises feeling weak and Iris plants not producing flowers. Shade exposure can be caused by nearby trees casting shadows or buildings blocking out the light. It’s important to ensure that your Irises are getting at least 6-8 hours of direct sunlight daily to thrive. Without it, they may struggle to produce those vibrant blooms you’ve been eagerly waiting for. 

Obstructions Blocking Sunlight 

Obstructions like tall bushes or structures can also hinder the sunlight from reaching your Iris plants. To enhance Iris plant flowering, take a moment to assess their surroundings and trim back any obstacles that may be stealing away precious sunshine.  

Improper Watering Regimen 

Overwatering 

Proper watering is key for the health of your Iris plants. Overwatering can lead to waterlogged soil, causing root rot and preventing blooms from developing. Remember, Irises prefer well-draining soil, so excessive moisture can be detrimental. 

Underwatering 

Underwatering can also prevent your Iris from blooming. Dry soil deprives the plant of the essential hydration it needs for growth and flower production. It’s important to strike a balance in watering – not too much, not too little. To improve Iris plant blooms, monitor the soil moisture levels regularly.  

Nutrient Deficiency 

Lack of Essential Nutrients 

Irises require specific nutrients to thrive, and a lack of essential elements in the soil can hinder their growth. 

Soil pH Imbalance 

Why won’t my Iris plant bloom? One of the common Iris plant blooming issues is soil pH imbalance, which affects nutrient availability for the Iris plants. If the pH is too high or too low, certain nutrients may become inaccessible to the plants, leading to flowerless Iris plants. To ensure your Irises are getting the necessary nutrients, amend the soil accordingly by adding fertilizers or organic matter to improve nutrient levels and balance the pH. 

Crowded Rhizomes 

Rhizome Overcrowding 

Crowded rhizomes can be a common culprit behind your Iris plant’s lack of blooms. When the rhizomes are packed too closely together, they end up competing for essential resources like water, nutrients, and space in the soil. This overcrowding can hinder the growth and development of your Iris plants. 

In case you missed it: 10 Reasons Why Your Anthurium Plant is Not Blooming: Treatment and Remedies

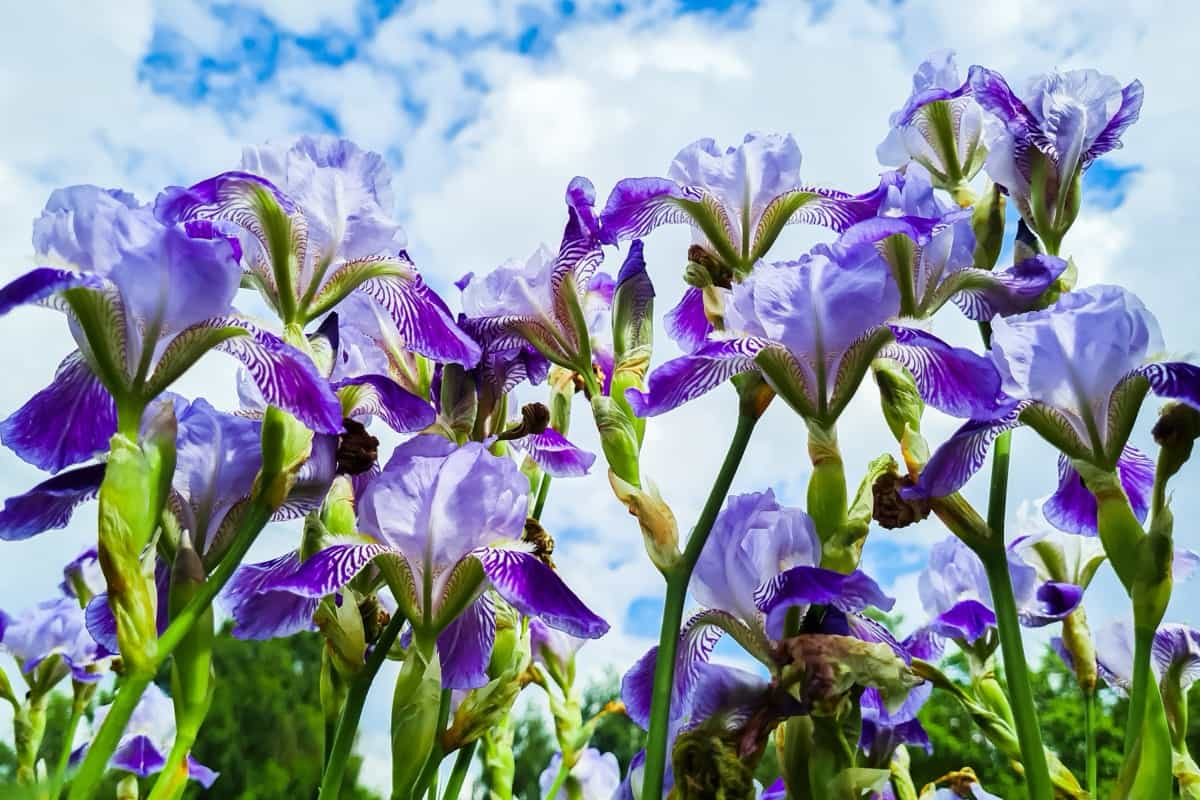
Iris Flowers in the Garden
Competition for Resources 

To troubleshoot Iris plant blooms, it’s crucial to give your Irises adequate room to spread out and thrive. Consider dividing overcrowded clumps of rhizomes to create more breathing space for each plant. By doing so, you allow them to access the necessary resources without having to battle it out with their neighbors. Keep an eye on the density of your Iris bed and make adjustments as needed to prevent overcrowding issues from stifling their growth potential.  

Pest and Disease Infestation 

Aphid Infestation 

Pests and diseases can damage the health of your Iris plants, hindering their ability to bloom vibrantly. One common culprit is the aphid, those tiny sap-sucking insects that can quickly multiply and weaken your Irises. Keep an eye out for these sneaky critters and take prompt action to prevent them from causing damage. 

Fungal Diseases 

Fungal diseases are another threat that can affect the overall well-being of your Iris plants. Moist conditions combined with poor air circulation create a perfect environment for fungi to thrive. When it comes to Iris plants not showing flowers, ensure proper watering practices and avoid overhead irrigation that can lead to excess moisture on leaves. 

Incorrect Planting Depth 

Shallow Planting 

Incorrect planting depth can significantly impact the blooming of your Iris flowers. Planting too shallow might expose the rhizomes to drying out, leading to stunted growth and fewer blooms.  

Deep Planting 

On the other hand, planting too deep can cause the rhizomes to rot due to poor drainage. When it comes to Iris plant not flowering solutions, ensure that when planting your Iris position them at a depth where the top of the rhizome is slightly below the soil surface. This will offer them adequate protection while allowing for proper development. 

Environmental Stress 

Extreme Temperatures 

During the peak of summer, your Iris plants might be feeling the heat – literally. Extreme temperatures can stress out these delicate flowers, causing them to struggle and potentially fail to bloom as expected. When the sun beats down relentlessly, it can zap the energy reserves of your Irises, leaving them weary and unable to produce those beautiful blooms you’ve been eagerly waiting for. 

Drought Conditions 

Lack of water means that these beauties are not getting the hydration they need to thrive and showcase their full potential. The dry spell can leave them parched and struggling to stay vibrant in such harsh circumstances. To help your Irises combat environmental stress from extreme temperatures and drought conditions, consider providing some shade during scorching days or increasing watering frequency when rainfall is scarce. 

Inadequate Division 

Infrequent Division 

Infrequent division can lead to overcrowded rhizomes, resulting in stunted growth and lackluster blooms. Dividing your Irises at the right time is crucial for their overall health and vitality. 

Division Timing 

Timing is key when it comes to dividing Iris rhizomes. Spring or late summer are typically the best times to divide them, ensuring they have enough time to establish themselves before their next blooming season. By neglecting this important task, you could be hindering the potential beauty of your Irises. Keep an eye on the growth patterns and take action when necessary to promote healthy blooms year after year. 

Variety-Specific Requirements 

Chilling Requirements 

Different Iris varieties have specific needs to thrive and bloom beautifully. Some types of Irises require a period of chilling to stimulate flowering, mimicking their natural habitat conditions. This chilling requirement is essential for triggering the growth cycle and promoting robust blooms. 

In case you missed it: 10 Reasons Why Your Flower Plant is Not Blooming: Remedies and Treatment

Iris Gardening
Light Preferences 

While some may thrive in full sun exposure, others prefer partial shade to prevent scorching or wilting of the delicate petals. It’s crucial to understand the unique light requirements of your Iris variety to ensure optimal growth and blooming success. 

Aging Rhizomes 

Decline in Rhizome Vitality 

As time passes, the once-vibrant rhizomes in your garden may start showing signs of aging. The vitality that once fueled their blooming beauty begins to fade, impacting the overall health of your Iris plants. Aging rhizomes can lead to reduced flowering, smaller blooms, or even stunted growth. These changes indicate a need for renewal and rejuvenation within your Iris bed. 

Need for Renewal 

How to make the Iris plant bloom? Consider dividing and replanting the aging rhizomes to promote new growth and ensure healthier blooms in the future. This process allows for better nutrient absorption and reduces competition among overcrowded rhizomes. By recognizing the natural cycle of plant life and taking proactive steps to address aging rhizomes, you can maintain a thriving Iris garden year after year.  

In case you missed it: Blooming Borders: 15 Best Border Flowers for Your Garden

Iris Farming

Conclusion 

If your Iris plant is not blossoming, it may be due to a combination of factors ranging from insufficient sunlight and improper watering to nutrient deficiency and pest infestations. By identifying the specific issue affecting your Irises, you can take necessary steps to address them and encourage healthy blooming in the future.

Remember that caring for Irises requires attention to detail and understanding their unique needs. With the right care and maintenance practices in place and following Tips for Iris plant blooming, you can enjoy vibrant blooms year after year. 

10 Reasons Why Your Anthurium Plant is Not Blooming: Treatment and Remedies

0

Anthurium plants are a versatile addition to any indoor space, with their vibrant blooms adding a pop of color and personality. However, if your Anthurium plant is not flowering as expected, there could be various reasons behind it. From inadequate light exposure to lack of dormancy period, identifying the root cause of why won’t your Anthurium plant blooms can help you take the necessary steps to encourage flower production. By troubleshooting Anthurium plant blooms and providing their needs, you can soon enjoy the stunning blooms that make Anthurium plants so special. 

Why Your Anthurium Plant is Not Blooming

Why Your Anthurium Plant is Not Blooming 

Insufficient Light Exposure 

Low Light Levels 

Anthuriums thrive in bright, indirect light. If your plant is not receiving enough light, it may struggle to produce flowers. Low light levels or inadequate duration of light exposure can hinder the blooming process. 

Inadequate Duration of Light Exposure 

To ensure your Anthurium blooms beautifully, consider moving it to a spot where it can receive more natural light. Remember that sufficient lighting is essential for the overall health and flowering of your Anthurium plant. So, if you notice a lack of blooms, take a look at its lighting conditions and make adjustments accordingly. Keep in mind that each plant has specific needs when it comes to light exposure. 

Improper Watering Practices 

Overwatering 

One of the most common reasons for No blooms on Anthurium plants is improper watering practices. Overwatering can lead to root rot, causing stress on the plant and inhibiting flower production. Make sure you allow the soil to dry out between waterings to prevent this issue partially. 

Underwatering 

Anthurium plants require consistent moisture, so if you are not watering enough, the plant may become dehydrated and fail to produce flowers. Be mindful of the soil’s moisture levels and adjust your watering routine accordingly. Finding the right balance is key when watering your Anthurium plant. 

Nutrient Deficiency 

Lack of Essential Nutrients 

One of the Anthurium plant blooming issues could be nutrient deficiency. These gorgeous plants require specific nutrients to thrive and produce vibrant flowers. Lack of nitrogen, phosphorus, and potassium can hinder the flowering process. It’s crucial to ensure that your Anthurium is receiving the necessary elements for healthy growth. 

Imbalance in Soil Fertility 

An imbalance in soil fertility can also impact flower production. Too much of one nutrient or not enough of another can throw off the delicate balance needed for optimal blooming. Consider testing your soil to determine if adjustments are needed. 

Unsuitable Temperature Conditions 

Extreme Temperatures 

Anthurium plants are sensitive to temperature changes, making it crucial to provide them with the right environment. Extreme temperatures can stunt growth and cause flowerless Anthurium plants. High heat can lead to wilting leaves and scorched blooms, while cold drafts can cause yellowing foliage. 

Temperature Fluctuations 

Fluctuating temperatures confuse Anthuriums and disrupt their flowering cycle. Sudden shifts from hot to cold stress the plant, affecting its ability to produce vibrant flowers. To avoid Anthurium plant lacking blooms, maintain a consistent temperature range around your Anthurium plant. During winter, keep your Anthurium away from drafty windows or heaters that may expose it to drastic temperature variations. In summer, shield it from direct sunlight that could raise the temperature excessively. 

In case you missed it: 10 Reasons Why Your Agapanthus is Not Flowering: Remedies and Treatment

Red Anthurium

Root Bound Conditions 

Limited Root Space 

Root bound conditions can hamper the blooming of your Anthurium plant. Limited root space restricts the growth and development of roots, leading to nutrient deficiencies.  

Poor Drainage 

Poor drainage exacerbates the issue, causing waterlogged soil that suffocates the roots. When roots are confined within a small container, they become overcrowded and unable to absorb essential nutrients efficiently. This stunts overall plant growth and diminishes flowering potential. When it comes to Anthurium plant not flowering solutions, ensure your Anthurium has adequate room for root expansion by repotting it into a larger container when necessary. 

Pest Infestation 

Aphids 

Pest may seem harmless at first, but it can wreak havoc on your Anthurium plant if left unchecked. Aphids cause leaves to curl and distort. If you do spot aphids, consider using natural remedies to prevent them without harming your precious Anthurium. 

Mealybugs 

Mealybugs appear as white cottony masses along stems and leaf nodes, sucking out plant juices and leaving behind a sticky residue. To combat these pests effectively, you can start by inspecting your plant regularly for any signs of infestation.  

Disease Issues 

Fungal Infections 

Anthurium plants are susceptible to disease issues like fungal infections and bacterial diseases, which can hinder their blooming. Fungal infections often manifest as powdery mildew or leaf spot, causing yellowing or browning of leaves. These infections thrive in humid conditions and poor air circulation. 

Bacterial Diseases 

Bacterial diseases such as bacterial blight can lead to dark lesions on leaves and stems. They spread through contaminated tools or water, impacting the overall health of the plant. To prevent these diseases, it’s crucial to maintain proper airflow around the plant by not overcrowding it with other plants. 

Incorrect Pot Size 

Pot Too Small 

One possible reason for Anthurium plants not producing flowers could be the pot size. If your plant is in a pot that’s too small, it may restrict root growth and limit nutrient uptake. 

Pot Too Large 

On the other hand, if the pot is too large, excess soil can hold onto water, leading to root rot. How to make Anthurium plant bloom? When choosing a pot for your Anthurium, opt for one that allows for proper drainage and gives the roots room to spread out comfortably. 

In case you missed it: 10 Reasons Why Your Flower Plant is Not Blooming: Remedies and Treatment

Red Flowers

Improper Humidity Levels 

Low Humidity 

Maintaining the right humidity levels for your Anthurium plant is crucial for its overall health and blooming potential. Low humidity levels can cause dry and crispy leaves. To ensure optimal growth, consider placing a tray of water near your plant to increase moisture in the air. This will help mimic the plant’s natural tropical environment. 

High Humidity 

While high humidity can create a breeding ground for pests and diseases. On the other hand, if you’re dealing with high humidity, make sure there is proper air circulation around the plant. 

Lack of Dormancy Period 

Absence of Rest Period 

Anthurium plants, like many other flowering plants, require a period of rest to bloom. This dormancy period is essential for their growth and flowering cycle. Without this resting phase, Anthurium plants do not show flowers. During dormancy, Anthuriums slow down their metabolic processes. This allows them to conserve energy and prepare for the next blooming season. Without this rest period, the plant’s resources may become depleted, hindering its ability to flower. 

Importance of Rest for Flowering 

To enhance Anthurium plant flowering, provide consistent environmental conditions. Maintain stable light levels, temperature range, and humidity levels throughout the year. Avoid sudden changes that can disrupt the plant’s natural rhythm. By understanding the importance of dormancy for your Anthurium plant, you can help it thrive and bloom beautifully in its own time. 

In case you missed it: 10 Reasons Why Your Plant Buds are Falling off: Prevention and Remedies

Anthurium Flowers in A Garden

Conclusion 

By addressing these issues, you can improve Anthurium plant blooms. Keep in mind that patience and dedication are key when nurturing your plants. So, make sure to provide the right conditions, follow Tips for Anthurium plant blooming, and pay attention to your Anthurium needs for those vibrant blooms to brighten up your space. 

10 Reasons Why Your Aquaponic Plants Are Not Flowering: Remedies and Treatment

0

Aquaponics is a fantastic way to grow plants and fish together in a symbiotic environment. From inadequate lighting and nutrient deficiencies to improper pH levels and overcrowding, various factors can hinder the flowering process in your aquaponic system. By identifying Aquaponic plant flowering problems early on and taking the necessary steps to address Aquaponic plant growth obstacles, you can help encourage your plants to bloom beautifully. With proper care, you can overcome barriers to flowering in aquaponics and enjoy thriving aquaponic gardens filled with lush greenery and vibrant blooms.  

Reasons Why Your Aquaponic Plants Are Not Flowering

10 Reasons Why Your Aquaponic Plants Are Not Flowering

Nutrient Imbalance 

Lack Of Essential Nutrients

One of the common reasons for the Lack of flowering in aquaponics could be a nutrient imbalance. If your plants lack essential nutrients, they may struggle to reach their full potential. It’s crucial to ensure that the nutrient levels in your system are well-balanced for optimal plant growth. 

Adjusting Nutrient Levels

When it comes to Aquaponic gardening troubleshooting, consider adjusting the nutrient levels in your aquaponic setup. You can do this by monitoring the nutrient content in the water and making necessary adjustments accordingly. Adding organic supplements or fish-friendly nutrients can help boost flower formation in aquaponic environments.  

Inadequate Light Exposure 

Insufficient Light Reaching Plants

One of the flowering issues in aquaponic systems could be inadequate light exposure. Insufficient sunlight reaching your plants can hinder their ability to bloom and thrive. Plants require a certain amount of light to undergo photosynthesis and produce flowers. If your setup doesn’t receive enough natural sunlight, consider investing in supplemental grow lights to increase the light exposure for your plants. 

Increasing Light Exposure

Positioning your aquaponic system in a location with better natural light or adjusting the placement of your grow lights can make a significant difference in encouraging flowering in your plants. Remember, each plant species has specific light requirements, so it’s essential to research the optimal lighting conditions for the types of plants you are growing in your aquaponics system.  

Improper pH Levels 

Ph Levels Outside the Optimal Range

Having the right pH levels in your aquaponic system is crucial for overall health and minimizes the causes of poor flowering in aquaponic setups. When pH levels are off, it can hinder their ability to flower and thrive.  

Monitoring and Adjusting pH 

Monitoring and adjusting the pH regularly is key to ensuring that your plants get the optimal environment they need. Invest in a quality pH testing kit to accurately measure the levels in your water. If you find that the pH is outside of the recommended range for your specific plants, take action immediately. Adjust the pH by adding natural buffers or acids to bring it back into balance. 

Temperature Fluctuations 

Drastic temperature changes 

Temperature fluctuations can be a real challenge for your aquaponic plants. Sudden changes in temperature can stress out your plants and hinder their ability to flower properly.  

Maintaining Stable Temperatures

Consistent temperatures are key for optimal plant growth. Drastic temperature swings can throw off the delicate balance needed for flowering to occur smoothly. It’s like trying to dance on shifting sands – not exactly a recipe for success. To combat Non-flowering plants in aquaponics, consider ways to regulate the temperature in your aquaponics system.

In case you missed it: Steps to Growing Onions in Aquaponics: Explore from How to Plant to Harvest

Growing peppers hydroponically under phytolamps

Insulating roots, using shading techniques during extreme heat, or even adjusting your water circulation patterns can all help stabilize those up-and-down temps that have been throwing off your plant’s groove. 

Overcrowding 

Excessive Plant Density

Overcrowding in your system can hinder their growth and blooming potential. When there are too many plants competing for resources like nutrients and space, it can stunt their development. To give your plants the breathing room they need to thrive, consider thinning out overcrowded areas. This process involves removing some of the excess vegetation to create more space for each plant to spread its roots and grow comfortably. 

Thinning Out Overcrowded Plants

Resolving flowering problems in aquaponics by allowing each plant to access essential nutrients more effectively. This can cause healthier and more productive growth, ultimately increasing the likelihood of flowering and fruiting. Remember, maintaining a balanced environment is key to fostering optimal conditions for your aquaponic plants.  

Lack of Pollination 

Absence of Pollinators

One possible reason for Aquaponic plant flowering failure could be the lack of pollination. In an indoor setting, natural pollinators like bees and butterflies might not have easy access to your plants. Without proper pollination, your plants won’t produce fruits or flowers to their full potential. 

Hand-pollination Techniques 

You can take matters into your own hands with hand-pollination techniques. By using a small brush, transfer pollen from one flower to another. This simple yet effective method mimics the work of natural pollinators and can help kickstart the flowering process in your aquaponic setup. 

Insufficient Root Space 

Restricted Root Growth

One of the Aquaponic gardening flower development issues could be insufficient root space. When roots are cramped and restricted, they can’t access the essential nutrients and water for optimal growth. 

Providing Adequate Root Space

To Improve flower yield in aquaponic setups, consider providing your plants with adequate root space by transplanting them into larger containers or hydroponic systems that allow for better root development. By giving your plants room to spread their roots and thrive, you’re setting them up for success in reaching their full flowering potential. Remember, healthy roots lead to healthy plants. So, don’t underestimate the importance of ensuring sufficient root space for your aquaponic setup.  

Water Quality Issues 

Poor Water Quality

Water quality is crucial for flower production in aquaponic gardens. Poor water quality can hinder their ability to flower and thrive. Testing and maintaining water parameters regularly are essential to ensure optimal conditions for your plants. Check key parameters such as pH, ammonia, nitrites, nitrates, and oxygen levels. Monitoring these factors will help you identify any issues with water quality promptly. 

Testing and Maintaining Water Parameters

Regularly adjust the pH levels to keep them within the ideal range for your plants. Fluctuations in pH can cause stress in the plants and prevent them from flowering properly. Aerate the system if necessary to ensure an adequate supply of oxygen reaches the plant roots. 

In case you missed it: Top 12 Fruits to Grow in Aquaponics

checking the quality of water using an electronic device

Pests and Diseases 

Pest Infestation

Dealing with pests and diseases in your aquaponic system can be a real challenge. Pest infestations can quickly spread, affecting the health of your plants. One effective way to manage pests is by introducing natural predators that feed on harmful insects. Ladybugs, for example, are great allies in controlling aphids and other plant-damaging bugs. Additionally, practicing good hygiene by regularly cleaning your aquaponic setup can help minimize the risk of disease outbreaks. 

Disease Prevention and Management

When it comes to maximizing flower growth in aquaponic systems, maintaining proper water quality is key. Regularly testing the water parameters and ensuring they are within optimal ranges can significantly reduce the likelihood of diseases taking hold in your system. In cases where pests or diseases do appear, swift action is crucial. Consider organic remedies like neem oil as a gentle yet effective way to tackle pest problems without harming your fish or plants.  

Genetic Factors 

Genetic Predispositions

Genetic factors play a key role in enhancing flowering in aquaponic systems. Some plant varieties are naturally predisposed to flower more readily than others due to their genetic makeup. When selecting which plants to grow in your system, consider choosing varieties known for their prolific blooming capabilities. 

Selecting Appropriate Plant Varieties

Certain plant species have been bred specifically for their ability to flower under varying conditions, making them ideal choices for aquaponic setups. By opting for these genetically enhanced varieties, you can enhance flowering in aquaponic systems. Keep in mind that genetic predispositions also affect other aspects of plant growth, such as disease resistance and overall health.  

In case you missed it: Top 20 Flowers To Grow In Aquaponics

Row of fresh vegetable salad garden

Conclusion 

Ensuring the optimal growth and flowering of your aquaponic plants requires a combination of factors to be carefully managed. By addressing issues such as nutrient imbalance, inadequate light exposure, improper pH levels, temperature fluctuations, overcrowding, lack of pollination, insufficient root space, water quality issues, pests and diseases, and genetic factors, you can create the best environment for your plants to thrive. 

10 Reasons Why Your Agapanthus is Not Flowering: Remedies and Treatment

0

A healthy Agapanthus plant should reward you with beautiful blooms. By understanding the reasons Agapanthus won’t bloom and implementing the appropriate remedies and treatments, you can encourage it to bloom again.  

Reasons Why Your Agapanthus is Not Flowering

10 Reasons Why Your Agapanthus is Not Flowering

Insufficient Sunlight 

One possible reason could be insufficient sunlight. Agapanthus thrives in full sun or partial shade, so if they’re not getting enough light, it could hinder their flowering capabilities. Check the location of your agapanthus. Sunlight requirements for Agapanthus is at least 6 hours of sunlight daily to bloom successfully. To improve Agapanthus bloom, try moving your Agapanthus to a sunnier spot in your garden where they can soak up those rays. Remember, proper sunlight exposure is crucial for these beautiful flowers to reach their full blooming potential. 

Overcrowding 

When plants are crammed together too closely, they have to compete for resources like nutrients and sunlight. In an overcrowded environment, the roots of the Agapanthus may struggle to access enough water and essential minerals from the soil. This can directly impact their ability to bloom vibrantly. Additionally, crowded plants may also block each other’s access to sunlight, which is crucial for healthy flower development. When it comes to Agapanthus overcrowding solutions, consider transplanting or dividing your Agapanthus to give them more space to thrive. 

Nutrient Imbalance 

Agapanthus plants require a balanced mix of essential nutrients to thrive and produce stunning blooms. If there’s an excess or deficiency of certain nutrients, it can hinder flowering. To address this issue, consider conducting a soil test to determine the nutrient levels present. Based on the results, you can then tailor your fertilization approach accordingly. 

When it comes to fertilizers for blooming agapanthus, it’s important to use fertilizer specifically formulated for flowering plants like agapanthus. Look for products with balanced NPK ratios to ensure your plant receives the right nutrients in the right proportions. 

Water Stress 

These beautiful flowers require consistent moisture to thrive and produce blooms. Underwatering can lead to wilting leaves and stunted growth. On the other hand, overwatering can cause root rot and prevent flower production. Finding the right balance is key. When it comes to Watering tips for agapanthus, ensure your Agapanthus receives an adequate amount of water.

In case you missed it: 10 Reasons Why Your Flower Plant is Not Blooming: Remedies and Treatment

purple agapanthus gardening

Check the soil to assess moisture levels – it should be moist but not waterlogged. Consider using drip irrigation systems to provide a slow, steady supply of water to the roots. This method helps avoid wetting the foliage, which can promote diseases. 

Poor Soil Conditions 

Having poor soil conditions can be a major reason why your Agapanthus is not flowering as expected. If your soil lacks essential nutrients or has become compacted over time, it can hinder the growth and blooming of your agapanthus. To address this issue, adding organic matter can help improve soil structure and provide a better environment for your Agapanthus to flourish. When it comes to soil conditions for agapanthus, make sure that the soil has good drainage to prevent waterlogging. 

Lack of a Cold Period 

Agapanthus plants often require a period of cooler temperatures to trigger flowering. Without a Cold period for agapanthus, the plant may not produce flowers as expected. During colder months, some Agapanthus varieties need a break from warm conditions to prepare for blooming in the following season. This cold period helps stimulate flower production and ensures healthy growth.

If your plant is kept consistently warm without experiencing cooler temperatures, it might struggle to initiate its flowering cycle effectively. To encourage blooming in your agapanthus, consider providing it with some exposure to lower temperatures when possible. This natural process can help reset the plant’s internal clock and promote the development of beautiful blooms when the growing season arrives again. 

Age of the Plant 

As your Agapanthus plant ages, its ability to produce flowers may decrease. It’s a natural process for plants to slow down flower production as they get older. The energy that was once used for flowering may now be directed towards survival and growth instead. Younger plants are often more vigorous and prone to producing an abundance of beautiful blooms.

In case you missed it: Natural Fertilizer Recipes for Flowers: Discover from Banana Peel to Epsom Salt

White Agapanthus flower in the garden

As your Agapanthus matures, it might take longer intervals between flowering cycles or produce fewer flowers overall. This doesn’t mean the plant is unhealthy; it’s just a normal part of its life cycle. To Maximizing Agapanthus blooms, ensure it is receiving adequate sunlight, water, nutrients, and proper care. 

Pruning at the Wrong Time 

Pruning at the wrong time can hinder your Agapanthus from blooming to its full potential. It’s essential to understand the plant’s growth cycle before grabbing those pruning shears. During active growth periods, like spring and summer, avoid heavy pruning as this can remove potential flower buds. Instead, focus on deadheading spent blooms to encourage new growth. 

Late winter or early spring is typically the best time for a more substantial prune to promote healthy flowering later in the season. When it comes to pruning Agapanthus for flowers, cutting back old foliage and stems allows for fresh growth to emerge unimpeded. Overzealous pruning in fall or late summer may disrupt the plant’s ability to store nutrients for winter and regrowth in the next season. 

Disease or Pest Issues 

Dealing with pesky diseases and pests can be a real headache for your Agapanthus plants. These intruders can wreak havoc on your beautiful flowers, causing them to wilt or not bloom at all. Keep an eye out for common issues like powdery mildew. Another common pest is aphids, tiny insects that cause yellowing leaves and stunted growth. When it comes to Agapanthus pest control, consider using natural remedies like neem oil to keep pests at bay without harming beneficial insects. Regularly check plants for any signs of disease or infestation so you can take action promptly. 

Incorrect Pot Size 

When it comes to Pot size for agapanthus, the size of the pot matters more than you might think. If your Agapanthus is not flowering, one possible reason could be that it’s in an incorrect pot size. Agapanthus plants prefer to have some space for their roots to grow and expand. If the pot is too small, it can restrict root growth and ultimately impact flower production. To encourage Agapanthus flowers, consider repotting your Agapanthus into a larger container that allows room for the roots to spread out comfortably.

This will help promote healthier growth and potentially encourage blooming in the future. Remember that proper drainage is also essential when selecting a new pot for your agapanthus. To minimize Agapanthus flowering problems, make sure there are adequate drainage holes to prevent waterlogging, which can further hinder flower development. 

In case you missed it: 12 Best Water Management Strategies for Flower Gardens

purple agapanthus flower

Conclusion 

There are various reasons why your Agapanthus is not flowering as expected. By addressing issues such as insufficient sunlight, overcrowding, nutrient imbalance, water stress, poor soil conditions, lack of a cold period, the age of the plant, pruning at the wrong time, disease or pest issues, and incorrect pot size, you can help your Agapanthus thrive and bloom beautifully. With this Agapanthus care guide, you can enjoy a flourishing garden filled with vibrant Agapanthus blooms. 

Ultimate Guide to Brown Turkey Fig: Steps to Growing Brown Turkey Figs

0

Brown Turkey fig trees are a delightful addition to any garden, offering not only delicious fruits but also beauty and shade. Remember, providing the right climate conditions, preparing the soil properly, and knowing when and how to harvest your figs are key factors in cultivating a thriving fig tree. Whether you use your harvest for cooking or reap the medicinal advantages of these versatile fruits, Brown Turkey figs are sure to bring joy to your life. 

Ultimate Guide to Brown Turkey Fig

Ultimate Guide to Brown Turkey Fig

Introduction to Brown Turkey Figs 

Overview of the Brown Turkey Variety 

When it comes to Brown Turkey fig varieties, you might be surprised at the options available. When it comes to the growth rate of Brown Turkey fig trees, they are known for their moderate speed in reaching maturity. These trees typically start producing fruit within 1-2 years after planting, with optimal fruit production occurring around 3-5 years. When it comes to Brown Turkey Fig tree size, these trees typically reach a height of 15-30 feet when fully mature, with an equal spread. 

Benefits of Growing Brown Turkey Figs 

One of the key benefits of growing Brown Turkey Figs is their high yield potential. With proper maintenance, these trees can produce an abundance of tasty figs for you to enjoy throughout the season. Not only do Brown Turkey Figs taste great fresh off the tree, but they also make excellent additions to jams, preserves, and baked goods. Their versatility in culinary applications makes them a valuable asset in any kitchen. 

Selecting Your Planting Site 

Sunlight and Temperature Requirements 

When selecting the perfect spot for your Brown Turkey Fig tree, sunlight and temperature are key factors to consider. These trees grow well in full sun, so choose a spot that gets 6 of sunlight each day. In terms of temperature, Brown Turkey Figs prefer warm climates but can tolerate some cold weather. It’s important to protect them from harsh winds and frost during the winter months. 

Soil Type and Drainage 

As for soil type and drainage, the best soil for Brown Turkey Figs is well-draining soil, and it is essential for the health of your fig tree. Sandy loam soils with a slightly acidic pH level are ideal. Ensure proper drainage by planting your fig tree in an elevated area or amending the soil with organic matter to improve its structure. 

Planting Your Brown Turkey Fig Tree 

Best Time to Plant 

When it comes to planting a Brown Turkey fig tree, timing is everything. The best time to plant your fig tree is in the spring or fall. Propagating Brown Turkey Fig Trees is an exciting way to expand your fig tree collection or share the love of figs with friends and family. Before you start digging, make sure to choose a sunny place with well-draining soil for optimal growth. 

Planting Steps and Initial Care 

Once you’ve found the perfect location, dig a hole wide as the root ball but just as deep. Remove the tree from its container and place it in the center of the hole. Fill in around the roots with soil, making sure not to bury the trunk too deeply. After planting, give your fig tree a good drink of water. Keep an eye on moisture levels in the following weeks – fig trees like consistent watering but don’t like soggy feet. 

Watering Requirements 

Establishing a Watering Schedule 

When it comes to watering Brown Turkey Fig trees, establishing a proper watering schedule is essential for the health and growth of your Brown Turkey fig tree. During the growing season, it’s crucial to ensure that your tree receives consistent moisture without becoming waterlogged. Generally, young trees require more frequent watering compared to mature ones. 

Adjusting for Weather and Soil Conditions 

Adjusting your watering routine based on weather conditions is key – hot and dry periods may call for more water, while rainy spells may necessitate less. Take into account the type of soil in which your fig tree is planted; well-draining soil will require less frequent watering than compacted or clay soils. 

In case you missed it: How to Propagate Weeping Fig (Ficus Benjamina): In Water, Cutting, Soil, Air, and Rooting Hormone

Fresh Figs on The Plant

Fertilization and Soil Management 

When and How to Fertilize 

Fertilization and soil management play a crucial role in the success of your Brown Turkey Fig tree. Knowing when and how to fertilize is key to maintaining soil health for optimal growth. When it comes to fertilizing Brown Turkey Fig tree, timing is everything. It’s best to apply fertilizer in the early spring before new growth begins. Slow-release organic fertilizers are ideal for fig trees as they provide nutrients gradually over time. 

Maintaining Soil Health 

Regularly monitoring the pH levels of your soil is essential for ensuring that your fig tree has access to the necessary nutrients. Adjusting pH levels if needed will help prevent nutrient deficiencies and optimize nutrient uptake by the roots. In addition to fertilization, proper soil management involves mixing organic matter into the soil regularly. This helps improve soil structure, moisture retention, and nutrient availability for your fig tree’s roots. 

Pruning and Shaping 

Pruning Techniques for Healthy Growth 

When it comes to pruning Brown Turkey Figs, remove any dead branches to encourage new growth. Trim back any overlapping branches to allow for better air circulation within the canopy. 

Seasonal Pruning Guide 

During the dormant season, prune your fig tree by cutting back about one-third of the last year’s growth. This will stimulate new shoots and improve the overall tree structure. As the growing season progresses, continue to monitor your fig tree for any unwanted growth or crowded areas. Regularly remove suckers at ground level to direct energy towards fruit-bearing branches. Prune selectively to maintain an open canopy that allows sunlight penetration into the center of the tree. 

Pest and Disease Prevention 

Common Pests and Diseases 

When it comes to growing Brown Turkey Figs, keeping pests and diseases at bay. Common pests that may affect your fig tree include aphids, scale insects, and spider mites. These tiny creatures can sap the vitality of your plant if left unchecked. In terms of diseases, fig trees are susceptible to fungal infections like leaf spot and root rot. 

Organic and Chemical Control Options 

To prevent pest infestations, consider using organic methods like introducing ladybugs or lacewings to control aphids naturally. Neem oil spray is also effective in deterring various pests without harming beneficial insects. Maintain good airflow around your tree by pruning regularly and avoiding overhead watering.

For more severe Brown Turkey Fig pests and diseases problems, chemical control options such as insecticidal soap or sulfur-based fungicides can be used as a last resort. Always follow the instructions when using chemical treatments on your fig tree to ensure safe and effective results. 

Pollination and Fruit Set 

Understanding Fig Pollination 

When it comes to the pollination of Brown Turkey Fig trees, understanding the pollination process is key to maximizing fruit production. Figs are unique in that they have an unusual way of pollinating – through a specialized wasp. These tiny wasps crawl inside the fig and transfer pollen from one to another flower, enabling the fruit to develop. 

Maximizing Fruit Production 

To ensure successful pollination and abundant fruit sets, it’s essential to create a welcoming environment for these beneficial wasps. Planting flowering plants nearby can attract them to your garden, helping increase pollination rates. Additionally, avoiding chemical pesticides that harm these insects is crucial for a healthy ecosystem. 

In case you missed it: Different Types of Fig Varieties: Distinct Types and Their Characteristics

Fresh Figs

Maximizing fruit production also involves proper care and maintenance of your brown turkey fig tree throughout the growing season. Regular watering, fertilization, and pruning will help promote strong growth and bountiful harvests year after year. 

Harvesting Brown Turkey Figs 

Signs of Ripeness 

When it comes to harvesting Brown Turkey figs, knowing when they’re ripe is crucial for the best flavor. Look for a change in color from green to a deep purple-brown hue and a slight softening of the fruit. The fig should also feel slightly heavier in your hand. 

Harvesting and Storage Tips 

To harvest, gently twist the ripe figs off the tree, being careful not to damage the delicate skin. If they don’t come off easily, they may need more time to ripen. Once picked, store them in a single layer in the fridge for up to 5 days or freeze them for longer preservation.  

Winter Care and Protection 

Preparing Your Fig Tree for Winter 

As winter approaches, it’s essential to prepare your beloved Brown Turkey Fig tree for the cold months ahead. One key strategy is to ensure your tree receives adequate water before the ground freezes. This helps insulate the roots and keeps them healthy during dormancy. 

Frost Protection Strategies 

For Brown Turkey Fig winter protection, consider wrapping the trunk with burlap or a special tree wrap material. This can prevent sunscald and reduce the risk of damage from extreme temperature fluctuations. Another effective method is to apply mulch around the base of the tree. Mulch keeps the soil temperature more stable and protects roots from freezing. If you live in an area with harsh winters, you may want to consider building a simple frame around your fig tree and covering it with breathable fabric for added protection against snow and ice. 

In case you missed it: Best Fertilizer for Fig trees/Anjeer: Organic, Homemade, Liquid, Natural, NPK, Compost, How and When to Apply

Fig

Conclusion 

Growing Brown Turkey Figs can be rewarding for any gardener, whether you are a seasoned pro or just starting. Remember to select the planting site carefully, provide proper Brown Turkey Fig care with watering and fertilization, prune and shape your tree regularly, prevent pests and diseases naturally, when possible, maximize fruit production through pollination techniques, harvest at peak ripeness, protect your tree during winter months.

These are all essential aspects of successfully growing Brown Turkey Figs. With dedication and attention to detail throughout each stage of growth, you can enjoy sweet and delicious figs straight from your backyard. 

How to Grow Acai Berry: Propagation, Planting, and Care  

0

Growing Acai Berry trees can be a rewarding experience for any gardener. With their delicious and nutritious Berries, these trees not only add beauty to your garden but also provide you with a superfood right at your fingertips. By following the propagation, planting, and care tips, you can successfully cultivate healthy Acai Berry trees and enjoy their benefits for years to come. 

How to Grow Acai Berry

How to Grow Acai Berry

Introduction to Acai Berries 

Understanding Acai Berry Trees 

When it comes to understanding Acai Berry trees, it’s important to note that they grow well in warm and humid climates with sufficient rainfall. They require well-drained soil and prefer partial shade to full sun exposure. When it comes to Acai Berry tree size and growth, it can grow up to 60 feet tall and produce clusters of small purple Berries.  

Health Benefits of Acai Berries 

Acai Berries have gained popularity worldwide because of their antioxidant-rich properties. From boosting heart health to improving digestion, these little gems offer a myriad of health benefits. When it comes to Acai Berry’s health benefits, these are packed with vitamins, minerals, and essential fatty acids, and Acai Berries are nature’s gift to your well-being. 

Choosing the Right Location 

Climate Requirements for Acai Berries 

When it comes to Acai Berry tree climate requirements, choosing the right location is key. Acai Berries thrive in tropical climates with high humidity and plenty of rainfall. Make sure your chosen spot receives ample sunlight throughout the day for optimal growth. 

Soil Type and Site Selection 

When it comes to Acai Berry soil preferences, a well-draining sandy loam soil rich in organic matter is ideal for Acai trees. Avoid waterlogged or compacted soils that can stunt their growth and development. Site selection is the key factor in the success of your Acai Berry cultivation efforts. Look for an area sheltered from strong winds to protect the delicate foliage of the trees. Consider planting them near other fruit-bearing plants to promote cross-pollination and enhance overall fruit production. 

Planting Acai Berry Trees 

Optimal Planting Season 

When it comes to planting Acai Berry trees, timing is key. The optimal planting season for Acai Berries is during the warmer months when the soil is well-drained and temperatures are consistently above 16°C. 

Step-by-Step Planting Process 

Before diving into the planting process, make sure to choose a sunny spot with fertile soil that has good drainage. Prepare the soil by loosening it up and incorporating organic matter to promote healthy root development. Dig a hole deeper than the root ball of your Acai Berry tree. Gently remove the plant from its container and place it in the center of the hole, making sure it sits at ground level. Backfill with soil and water thoroughly to help settle the roots. 

Mulch the tree to retain moisture and suppress weeds. Remember to keep an eye on watering needs, especially during dry spells, ensuring consistent moisture levels for optimal growth. With patience and proper care, your newly planted Acai Berry tree will establish itself and thrive in its new home. 

Watering and Humidity 

Establishing a Watering Schedule 

Watering the Acai Berry tree is like giving it a refreshing drink on a warm day. Establishing watering schedules is key to keeping these tropical beauties happy and healthy. A balance of moist, well-drained soil is ideal for optimal growth. 

Importance of Humidity for Acai Trees 

Acai Berry trees thrive in high humidity levels, so if you live in drier climates, consider using misters or humidifiers to create the perfect atmosphere for your plants. During the growing season, check the soil moisture regularly and water deeply when needed.  

Fertilizing Your Acai Berry Tree 

When and How to Fertilize 

Fertilizing the Acai Berry tree is crucial for its growth and fruit production. In general, you should aim to fertilize your Acai tree at the beginning of the growing season, typically in early spring. This will provide the necessary nutrients for healthy development. 

Recommended Fertilizer Types 

When choosing a fertilizer, opt for a balanced formula specifically designed for fruit-bearing plants. Look for organic options that are rich in nitrogen, phosphorus, and potassium. These essential nutrients support overall plant health and encourage robust fruit production. To apply the fertilizer effectively, follow the instructions on the product packaging carefully.

Remember that moderation is key when fertilizing – less is often more when done correctly. Regularly monitoring your Acai tree’s growth and observing any signs of nutrient deficiency can help you adjust your fertilization schedule accordingly. 

Pruning and Maintenance 

Pruning Techniques for Healthy Growth 

Pruning Acai Berry trees is essential for promoting healthy growth and ensuring optimal fruit production. Start by removing any dead branches to prevent the spread of infections. Trim back excessive growth to maintain a manageable size and shape. 

Regular Maintenance Tips 

When pruning Acai Berry trees, make clean cuts to encourage new growth. Regularly inspect your tree for pests or disease signs, addressing them promptly to prevent further damage. Maintaining your Acai Berry tree involves regular watering, especially during dry periods, and providing adequate nutrients through fertilization.

In case you missed it: Ultimate Guide to Growing Aronia Berries: Tips, Tricks, and Best Practices

Black Currant Berries

Keep an eye on humidity levels as these trees thrive in humid environments. By implementing proper pruning techniques and consistent maintenance practices, you can enjoy a thriving Acai Berry tree that yields delicious Berries year after year. 

Pest and Disease Management 

Common Pests and Diseases 

Pest and disease management is crucial when growing Acai Berry trees. When it comes to Acai Berry pests and Diseases, these are susceptible to fungal infections such as root rot and leaf spot. Some common pests that may affect your plants include aphids, mites, and caterpillars. 

Prevention and Treatment Methods 

To prevent pest problems, you can introduce beneficial insects like ladybugs or lacewings to control populations naturally. Neem oil can also be the best treatment for certain pests while being environmentally friendly. Proper spacing between plants, good air circulation, and avoiding overwatering can decrease the risk of fungal issues. If you notice any signs of disease on your Acai Berry tree, promptly remove infected leaves or branches to contain the spread. 

Pollination and Fruit Production 

Understanding Acai Berry Pollination 

Understanding the pollination process of Acai Berry trees is essential for maximizing fruit yield. Acai Berries are predominantly self-fruitful, meaning they can produce fruit without cross-pollination from another tree. However, having multiple trees nearby can enhance pollination and increase fruit production. Bees and other insects are key pollinators for Acai Berry trees. Their role in transferring pollen between flowers is crucial for successful fertilization and fruit development. Providing a habitat that attracts these beneficial pollinators can help ensure an optimal fruit set. 

Maximizing Fruit Yield 

Maximizing Acai Berry Yield also involves maintaining healthy soil conditions and proper care throughout the growing season. Adequate watering, fertilization, and pruning practices contribute to robust growth and abundant harvests of Acai Berries. 

Harvesting Acai Berries 

Signs of Ripeness 

When it comes to Acai Berry Harvesting Tips, knowing the signs of ripeness is crucial for reaping the benefits of your labor. Acai Berries are ready to be harvested when they have reached a deep purple color and are slightly soft to the touch. Keep an eye out for clusters of ripe Berries hanging from the tree branches. 

Harvesting Techniques 

To harvest Acai Berries, gently pluck them from the cluster using a twisting motion to avoid damaging the delicate fruit. It’s important to handle them with care as they can easily bruise. Once you’ve gathered your bounty, it’s time to enjoy or process them into delicious Acai products like smoothie bowls or juices. Harvesting Acai Berries is not just about getting your hands on these superfoods; it’s also about appreciating nature’s bounty and savoring the fruits of your labor. 

Propagating Acai Berry Trees 

Seed Propagation Methods 

Propagating Acai Berry Trees is an exciting journey for any avid gardener. When it comes to seed propagation, soak the Acai Berry seeds in water for 24 hours before planting them in well-draining soil. Keep the soil moist but not waterlogged to encourage germination. 

Clonal Propagation for Uniformity 

If you’re looking for uniformity in your Acai Berry trees, clonal propagation might be the way to go. This method involves taking cuttings from a healthy parent plant and helping them to grow roots of their own. By doing so, you ensure that the new plants will closely resemble the original ones in terms of quality and characteristics. 

In case you missed it: Best Berry Plants for Home Gardens: Berry Varieties for Home Gardeners

Bilberries

Conclusion 

Growing Acai Berry trees can be a rewarding experience for any gardener or farmer. By understanding the specific requirements of these tropical plants and providing proper Acai Berry Tree Care, you can enjoy an abundant harvest of Berries packed with antioxidants and health benefits. 

Ultimate Guide to Growing Satsuma Plum: Exploring Planting, Pruning and Care  

0

Satsuma Plums are a delightful addition to any garden, with their sweet and juicy fruit that can be used in a variety of culinary creations. By understanding the origins and characteristics of Satsuma Plums, as well as learning how to properly care for and prune them, you can ensure a bountiful harvest year after year. With these Japanese Plum Growing Tips, your Satsuma Plum tree will impress family and friends alike. 

Growing Satsuma Plum

Growing Satsuma Plum

Introduction to Satsuma Plums 

Overview of Satsuma Plums 

Satsuma Plums, also known as Blood Plums or Red Plums, are delicious and vibrant fruits. These Plums are prized for their sweet flavor and deep red flesh, making them a favorite among many fruit lovers. 

Origins and Characteristics 

Originating from Japan, Satsuma Plums are known for their distinct deep red skin and tender flesh. These Plums thrive in warm climates and are prized for their early ripening, making them the best choice among home gardeners and commercial growers alike. With their high sugar content and refreshing taste, Satsuma Plums are perfect for eating fresh or using in various culinary creations. 

Choosing the Right Location 

Sunlight Requirements 

When it comes to Sunlight Needs for Satsuma Plums, choosing the right location is key. Start by selecting a spot that gets full sunlight for at least 6-8 hours a day. Sunlight is crucial for the tree’s growth and fruit production.  

Soil Type and Drainage 

When it comes to Soil Requirements for Japanese Plums, they thrive in well-draining soil that is rich in organic matter. Consider testing your soil pH levels before planting to ensure it falls within the range of 5.5-6.5 for Satsuma Plums. If needed, amend the soil accordingly with compost or other organic materials to create a suitable environment for your tree to flourish. 

Planting Satsuma Plums 

Best Time to Plant 

Planting these juicy fruits can be a rewarding experience. The ideal time is in late winter or early spring when the soil temperatures are mild. 

Step-by-Step Planting Guide 

When it comes to Planting Satsuma Plum, select a spot with well-drained soil for your Satsuma Plum tree. Dig a hole as wide as the root ball and slightly shallower than its depth. Place the tree in the center of the hole, ensuring that it sits at ground level once covered. Gently backfill the hole with soil, tamping down lightly as you go to remove any air pockets. Water frequently after planting to help settle the soil around the roots. Remember to provide adequate water during dry periods, especially in the first year after planting.  

In case you missed it: Italian Plum Trees: A Comprehensive Guide for Varieties, Planting and Care

Picking Ripe Plums

Watering and Mulching 

Watering Schedule 

Watering the Satsuma Plum tree is essential for its growth and fruit production. It’s important to establish a regular watering schedule, especially during the hot summer months when the tree needs more moisture. Aim to water deeply but infrequently to encourage deep root growth. 

Benefits of Mulching 

Mulching around the base of your Satsuma Plum tree can provide numerous benefits. Mulch suppresses weed growth and regulates soil temperature. Additionally, as mulch breaks down, it adds organic matter to the soil, which improves its overall health. Applying a layer of mulch around your Satsuma Plum tree will not only conserve moisture but also provide insulation for roots during extreme temperatures. 

Fertilizing Your Satsuma Plum Tree 

When and How to Fertilize 

Fertilizing Japanese Plum is essential for its overall health and productivity. It’s recommended to fertilize your Satsuma Plum tree in early spring before new growth appears.  

Recommended Fertilizers 

Choose a balanced fertilizer specifically formulated for fruit trees, ensuring it contains essential nutrients like nitrogen, phosphorus, and potassium. Slow-release fertilizers are ideal as they provide consistent nourishment over time. When applying fertilizer, spread it around the drip line of the tree, avoiding direct contact with the trunk.  

Pruning and Training 

Pruning Techniques 

Pruning and training your Satsuma Plum tree are essential for promoting optimal growth and fruit production. When it comes to Pruning Satsuma Plum Trees, start by removing dead or diseased branches to maintain the health of the tree. Additionally, thin out crowded areas to allow for better air circulation and sunlight penetration. 

Training for Optimal Growth 

Training your Satsuma Plum tree involves shaping its structure from a young age. Begin by guiding the main trunk upwards with stakes if needed. As the tree grows, prune lateral branches to encourage a strong framework that can support heavy fruit loads in the future. Regularly inspect your Satsuma Plum tree for any signs of overgrowth or crossing branches that may impede airflow within the canopy.  

Pest and Disease Management 

Common Pests and Diseases 

When it comes to Pest Control for Satsuma Plums, keeping an eye out for pests and diseases is crucial for a thriving tree. Common pests that may target your Plum tree include aphids, scale insects, and caterpillars. These pesky invaders can cause damage to the leaves and fruit if left unchecked. In terms of diseases, keep an eye out for fungal infections such as brown rot or powdery mildew. 

Organic Control Methods 

When it comes to Satsuma Plum pests and Disease Management, consider using beneficial insects like ladybugs or lacewings that prey on aphids. Neem oil spray is effective in controlling various pests while being safe for the environment. Prune any affected branches promptly and avoid overhead watering to prevent spreading. 

In case you missed it: Plum Gardening For Beginners, How to Start

Ripe Cherry Plums

Pollination Requirements 

Importance of Cross-Pollination 

When it comes to Satsuma Plum Pollination, understanding pollination is key. These trees rely on cross-pollination for fruit production, meaning they need pollen from a different variety of Plum trees to achieve optimal yield. 

Suitable Pollinator Varieties 

Choosing suitable pollinator Satsuma Plum Varieties is crucial in ensuring a successful harvest. Look for Plum tree varieties that bloom around the same time as your Satsuma Plum, such as Santa Rosa or Burbank. Bees are essential in transferring pollen between trees, so having a diverse selection of flowering plants in your garden can attract these pollinators. By carefully selecting compatible pollinator varieties and creating a bee-friendly environment, you can enhance the chances of abundant fruit set on your Satsuma Plum tree.  

Harvesting Satsuma Plums 

Signs of Maturity 

When it comes to harvesting Satsuma Plums, timing is key. One sign of maturity to look out for is the fruit’s color – a deep orange hue indicates readiness. Another indicator is the firmness of the Plum; it should yield slightly when gently pressed. Avoid picking Plums that are too hard or soft, as they may not be fully ripe. 

Harvesting Techniques 

To harvest, simply twist the fruit upwards until it detaches from the tree easily. Be careful not to damage any surrounding branches or fruit during this process. Use pruning shears if necessary for harder-to-reach fruits, but handle with care. 

Winter Care and Protection 

Preparing for Winter 

As winter approaches, it’s essential to prepare your Satsuma Plum tree for the cold months ahead. One crucial aspect of winter care is ensuring your tree is adequately protected from frost. Frost can damage the delicate blossoms and young fruit, impacting next year’s harvest. 

Frost Protection Measures 

Winter Protection for Satsuma Trees, consider wrapping the trunk with insulating material or using frost cloth to cover the entire canopy. Pruning your tree before winter sets in can also help minimize potential damage from snow or ice accumulation on branches. Removing dead or diseased wood will not only improve airflow but also reduce the risk of breakage under heavy snow loads. 

In case you missed it: 18 Common Plum Tree Problems: How to Fix Them, Solutions, and Treatment

Plums

Conclusion 

Growing Satsuma Plums can be a rewarding experience for any home gardener. Remember to give it the right care, from choosing the right location to pruning and protecting it during winter. With proper Satsuma Plum Tree Maintenance, you’ll soon enjoy the sweet taste of freshly harvested Satsuma Plums from your backyard orchard. 

10 Reasons Why Your Plant Buds are Falling off: Prevention and Remedies

0

Plant buds are the small, delicate structures on a plant where leaves, flowers, or shoots develop. They are essential for the growth and development of plants as they signify new life and growth. Buds contain all the necessary components needed for future growth, including nutrients, hormones, and genetic information. The importance of plant buds lies in their ability to produce new branches, leaves, and flowers.

10 Reasons Why Your Plant Buds are Falling off

They serve as reservoirs of energy that fuel the plant’s continuous growth and reproduction. Without healthy buds, a plant may struggle to thrive and reach its full potential. Understanding the significance of plant buds can help gardeners appreciate the intricate processes involved in botanical development. By nurturing these tiny structures with proper care and attention, knowing Causes and solutions for bud loss enthusiasts can witness the beauty of nature unfolding right before their eyes. 

10 Reasons Why Your Plant Buds are Falling off

Improper Watering 

One of the most common reasons why your plant buds may be falling off is improper watering. When it comes to Watering tips for healthy buds, watering your plants too much or too little can lead to stress and damage, causing the buds to drop prematurely. Overwatering can suffocate the roots, leading to root rot and nutrient deficiencies that impact bud development. On the other hand, underwatering can cause dehydration and nutrient imbalances, resulting in wilting buds that eventually fall off. 

It’s crucial to understand the specific water needs of each plant species you have in your garden. Some plants prefer consistently moist soil, while others thrive in drier conditions. By observing your plants closely and adjusting your watering routine accordingly, you can Enhance plant bud retention. 

Nutrient Deficiency 

Lacking essential nutrients like nitrogen, phosphorus, or potassium can weaken plants, leading to bud drop. To prevent this issue, consider using Remedies for falling plant buds like a balanced fertilizer to ensure your plants get all the necessary nutrients they need to thrive. Additionally, regularly testing your soil can help identify Nutrient requirements for bud development. 

If you notice any nutrient deficiency signs such as yellowing leaves or stunted growth, act promptly by addressing the specific nutrients lacking through targeted fertilization. Remember that each plant has unique nutritional needs, so it’s important to research and understand what your specific plants require for optimal health and blooming success. 

Pest Infestation 

A pest infestation can be a frustrating issue for plant owners, causing damage to your beloved greenery. These unwanted guests, like aphids, spider mites, or mealybugs, can wreak havoc on your plants by feeding on their sap and weakening them. Signs of pest infestation include yellowing leaves, distorted growth, or sticky residue on the plant. Introducing natural predators like ladybugs or using insecticidal soap can help control the population of these pesky invaders. Additionally, maintaining good airflow around your plants and avoiding overcrowding can make it less favorable for pests to settle in.  

In case you missed it: 10 Reasons Why Your Flower Plant is Not Blooming: Remedies and Treatment

Apple Tree Buds

Disease Infection 

When your plant buds start falling off, one of the potential culprits could be disease infection. Disease infections often manifest through symptoms like discolored spots on leaves, wilting foliage, or abnormal growth patterns in the buds. It’s essential to diagnose the specific disease affecting your plants accurately to implement targeted treatment measures effectively. Prevention is key when combating disease infections in plants.

Maintaining proper air circulation around your plants, avoiding overhead watering, and regularly inspecting for any early signs of diseases can help mitigate the risk of infection spreading. In case you suspect a disease infection in your plants, promptly remove and dispose of any infected parts to prevent further spread. Consider plant disease treatment, like using organic fungicides or bactericides as a natural remedy against plant diseases, while promoting overall plant health through proper nutrition and care routines. 

Environmental Stress 

Factors such as sudden temperature changes, exposure to strong winds, or even pollution can cause stress on your beloved greens. Plants that are constantly subjected to harsh environmental conditions may start shedding buds as a defense mechanism against these stressors. It’s their way of reallocating resources to ensure survival in challenging surroundings. 

To help environmental stress on plants, consider providing some plant care for bud protection. This could involve placing them in a more sheltered location, using mulch to regulate soil temperature and moisture levels, or even investing in some shade cloth during extreme heat waves. 

Incorrect Pruning 

Incorrect pruning can have detrimental effects on your plants, causing their buds to fall off. When you prune too much or at the wrong time, it disrupts the plant’s natural growth cycle and stresses it out. Make sure to educate yourself on the proper pruning techniques for each type of plant in your garden. Always research when is the best time to prune specific plants to avoid this issue.

Additionally, using dull or dirty tools during pruning can introduce infections that harm your plants further. Remember that less is often more when it comes to pruning; only trim what is necessary for healthy growth. Over-pruning can weaken the plant and lead to bud loss. Take care with each cut you make, and prioritize precision over quantity. 

Soil pH Imbalance 

Having the right soil pH level is crucial for the overall health of your plants. When the pH balance is imbalanced, it can cause various issues, including bud drop. Plants have specific pH preferences, and when the soil deviates from this range, it can affect their ability to absorb essential nutrients properly.

In case you missed it: 10 Common Herb Gardening Mistakes and How Every Beginner Should Avoid Them

Peony Bud

This imbalance can result in weakened plant structures and ultimately cause buds to fall off prematurely. To prevent soil pH imbalance, consider testing your soil regularly using a simple kit. Soil pH adjustment for plants can be done by adding lime to raise acidity or sulfur to lower it. 

Over-Fertilization 

Over-fertilization can be a common mistake that many plant owners inadvertently make in their quest for lush, green foliage and vibrant blooms. While it may seem like more fertilizer equals better growth, excessive nutrients can actually harm your plants. Plants have specific nutrient requirements, and too much of a good thing can lead to nutrient imbalances or toxicity.  

When applying fertilizers, always follow the instructions on the packaging and avoid the temptation to overdo it. Remember that less is often more when it comes to feeding your plants. Monitor your plants for stress or nutrient deficiencies that may indicate over-fertilization. If you suspect that you’ve been too generous with the fertilizer, consider flushing out the soil with water to help remove some of the excess nutrients. 

Insufficient Light 

Plants need adequate sunlight to thrive and produce healthy buds. If your plants are not getting enough light, they may become weak and struggle to develop flowers properly. Indoor plants especially require sufficient natural or artificial light to grow successfully. Consider placing your plants in areas where they can receive ample sunlight throughout the day. If natural light is sufficient, you can supplement with grow lights to ensure your plants get the necessary light exposure. 

Keep an eye on your plant’s growth patterns – if you notice elongated stems or pale leaves, it could be a sign of insufficient light levels. Adjust their placement accordingly to provide them with more brightness. 

Extreme Temperature Fluctuations 

Extreme temperature fluctuations can damage your plants, causing stress and leading to the dreaded bud drop. Sudden shifts from hot to cold can shock your plant’s system, making it difficult for them to thrive. When temperatures swing wildly, plants struggle to regulate their growth and development properly.

This instability can disrupt the delicate balance needed for buds to form and stay healthy. To prevent temperature effects on plant buds, try to maintain a favourable environment for your plants. Shield them from drastic temperature changes by placing them in areas with stable conditions. 

In case you missed it: Top 10 Fast-Growing Herbs You Can Grow from Seeds

Blooming Kalanchoe

Conclusion 

After exploring the various reasons for plant buds falling off, it’s clear that proper care and attention are crucial to ensure healthy growth. By addressing issues such as improper watering, nutrient deficiencies, pest infestations, disease infections, environmental stressors, incorrect pruning, soil pH imbalance, over-fertilization, insufficient light exposure, and extreme temperature fluctuations, you can significantly improve the health of your plants. With a little bit of knowledge and proactive measures in place, Gardening tips for preventing bud fall, you can prevent bud drop in plants and enjoy flourishing greenery all year round. 

Nourish to Flourish: The Best NPK Ratio for Houseplants

0

Houseplants bring life and vibrancy to indoor spaces, but they rely on the right nutrients to thrive. Understanding the Optimal N-P-K ratio of houseplants with the right balance of nitrogen, phosphorus, and potassium. By finding the right N-P-K ratio for houseplants, you can ensure they receive the nutrients needed to flourish. Whether your plant prefers a high or low N-P-K ratio, make sure to fertilize accordingly. With this Houseplant fertilizer guide, you can nourish your houseplants effectively and watch them flourish in return. 

Best NPK Ratio for Houseplants

Best NPK Ratio for Houseplants

Understanding the Basics of N-P-K 

One crucial aspect of plant nutrition that often gets overlooked is understanding N-P-K ratios. N-P-K stands for Nitrogen, Phosphorus, and Potassium – these three are essential Indoor plant growth nutrients. These ratios play a significant role in the health and development of your green companions. 

Why N-P-K Ratios Matter for Indoor Plants 

You can use nitrogen for houseplant foliage and vigorous growth. Phosphorus for root development and encourages flowering. Potassium for houseplant vitality and boosting disease resistance. By grasping the basics of N-P-K ratios, you can tailor your plant’s diet to meet its specific needs efficiently. Whether you have leafy greens or blooming beauties, understanding these ratios will help you nourish your houseplants to flourish. 

The Science Behind N-P-K Ratios 

Nitrogen (N): Foliage and Growth 

Nitrogen (N) plays a crucial role in promoting lush foliage and vigorous growth in your plants. It helps them stay green and vibrant. 

Phosphorus (P): Root Development and Flowering 

Phosphorus (P) is essential for root development, ensuring strong and healthy roots that support overall plant growth. It also contributes to flower production, enhancing the beauty of flowering plants. 

Potassium (K): Plant Health and Disease Resistance 

Potassium (K) supports overall plant health by aiding in disease resistance mechanisms. It helps plants withstand stressors and promotes resilience against pests and diseases. 

Ideal N-P-K Ratios for Common Houseplants 

Ratios for Leafy Greens vs. Flowering Plants 

When it comes to nourishing our beloved houseplants, understanding the ideal N-P-K ratios is key to their flourishing growth. For leafy greens like Ferns and Spider plants, a higher nitrogen (N) ratio promotes lush foliage and vibrant green leaves. These plants thrive with a fertilizer blend high in nitrogen. 

On the other hand, flowering plants such as Orchids or Roses benefit from a balanced phosphorus (P) ratio to support root development and enhance blooming. A fertilizer with an excess phosphorus content can boost flower production and overall plant health. 

Customizing Nutrition for Succulents and Cacti 

Succulents and cacti have unique nutritional needs due to their water-storing capabilities. They prefer a lower nitrogen ratio to avoid excess vegetative growth. Customizing their nutrition with a specialized succulent fertilizer ensures they get the right balance of nutrients for optimal health. 

In case you missed it: Benefits of NPK in Hydroponic Farming: How it Works and Why it is Important?

Fertilizer on Farmer Hand for Seedling

Organic Versus Synthetic Fertilizers 

Pros and Cons of Organic N-P-K Sources 

When it comes to the best fertilizer for houseplants, the choice between organic and synthetic fertilizers is an important one to consider. Organic fertilizers come from compost, bone meal, or seaweed. They provide a slow release of nutrients, promoting long-term soil health and microbial activity. 

When to Choose Synthetic Fertilizers for Houseplants 

When it comes to Synthetic vs organic fertilizers for indoor plants, synthetic fertilizers are manufactured in a lab and offer a quick nutrient boost to plants. They are easily soluble and can deliver specific N-P-K ratios tailored to plant needs. Synthetic options may be preferable when immediate results are desired or for correcting severe nutrient deficiencies. While Organic houseplant fertilizer N-P-K promotes overall soil health and sustainability, they can take longer to show visible effects on plant growth compared to synthetics.  

How to Apply N-P-K Fertilizers 

Proper Timing for Fertilization 

When it comes to applying N-P-K fertilizers for indoor plants, timing is key. Fertilizing during the plant’s active growing season will ensure optimal nutrient absorption and utilization. Before applying any fertilizer, make sure your plants are well-watered to prevent root burn. Choose a balanced N-P-K ratio suited for your plant type – leafy greens may prefer higher nitrogen levels for lush foliage while flowering plants benefit from a balanced mix. 

Techniques for Even Application 

When it comes to N-P-K fertilization techniques, dilute the fertilizer in water according to package instructions. When it comes to N-P-K application for indoor gardening, use a watering can with a fine rose attachment to distribute the solution evenly across the soil surface. Avoid direct contact with leaves to prevent burns or discoloration.

Remember that less is often more when it comes to fertilization – overdoing it can lead to nutrient imbalances or burnout. Regularly monitor your plants’ growth and adjust fertilization frequency as needed based on their performance and health indicators. 

Adjusting N-P-K Ratios for Plant Life Stages 

Seedlings and Young Plants 

When it comes to nurturing your houseplants, understanding their needs as they grow is essential. Seedlings and young plants require a different N-P-K ratio than mature plants to support healthy development. When it comes to Adjusting N-P-K for plant stages, providing a balanced mix tailored to each stage ensures optimal growth. 

For seedlings and young plants, focus on higher phosphorus levels to promote robust root systems and encourage flowering later on. As they mature, adjusting the ratio towards more nitrogen can boost foliage growth and overall plant vigor. 

Mature Plants and Repotting Needs 

When it’s time for repotting, consider adjusting the N-P-K ratio based on the new pot size and soil volume. This transition period is crucial for supporting the plant’s adjustment to its new environment. When it comes to Nutrient ratios for potted plants, adapting the nutrient balance according to your plant’s life stage sets them up for success at every growth phase. By fine-tuning their nutrition, you’re giving them the best chance to thrive in your home oasis. 

Monitoring and Adjusting N-P-K Based on Plant Health 

Signs of Nutrient Deficiency 

Keeping a close eye on your houseplants is crucial for their well-being. Signs of nutrient deficiency can manifest in different ways, like yellowing leaves or stunted growth. These indicators signal that adjustments to the N-P-K ratio may be necessary. 

Correcting Nutrient Imbalances 

Correcting nutrient imbalances requires attention to detail and understanding the specific needs of each plant. By observing how your plants respond to different fertilizers, you can tailor their nutrition accordingly. Be proactive in addressing any deficiencies by choosing fertilizers with the right N-P-K ratios for targeted nourishment.

In case you missed it: Best Fertilizer for Grapefruit Trees: Organic, NPK Ratio, How and When to Apply

Rosemary in Pots

Regular monitoring and adjustments based on plant health ensure optimal growth and vitality. Remember, each plant is unique, so it’s essential to treat them as individuals when assessing their nutrient requirements. With precision fertilization for houseplants, you can provide personalized care to help your houseplants thrive. 

DIY Fertilizer Mixes for Optimal N-P-K Ratios 

Homemade Compost and Liquid Fertilizers 

One way to ensure they thrive is by using DIY fertilizer mixes with optimal N-P-K ratios. Homemade compost and liquid fertilizers are fantastic options for providing balanced nutrition naturally. When crafting your fertilizer, consider using natural ingredients like kitchen scraps, coffee grounds, eggshells, and seaweed. These items are rich in nutrients that can benefit your plants without harsh chemicals. 

Using Natural Ingredients for Balanced Nutrition 

Composting organic matter creates a nutrient-rich soil amendment that improves soil structure and fertility over time. Liquid fertilizers made from steeped compost or plant materials provide an immediate boost of nutrients directly to the roots of your plants. Experiment with different combinations of ingredients to find what works best for your indoor garden. By incorporating DIY houseplant fertilizer recipes into your routine, you’re giving your plants the nourishment they need to flourish beautifully. 

Watering Practices with N-P-K Fertilization 

Importance of Water in Nutrient Absorption 

Water is crucial for plants to absorb nutrients efficiently. When applying N-P-K fertilizers, watering practices play a crucial role in ensuring proper nutrient absorption. Water helps dissolve the fertilizer and carries the nutrients to plant roots where they are needed most.  

Avoiding Over-Watering and Nutrient Leach 

It’s important to strike a balance with watering – too much water can lead to over-watering, causing nutrients to leach out of the soil. On the other hand, insufficient watering can hinder nutrient uptake and stunt plant growth. To avoid nutrient leaching, water your plants thoroughly, but ensure excess water drains away properly. This way, you can prevent valuable nutrients from being washed away with each watering session.  

In case you missed it: Best Fertilizer for Plumeria: Organic, Natural, Homemade, NPK Ratio, When and How to Apply

Caring Indoor Plants

Conclusion 

In the world of houseplants, nourishment is key to flourishing growth and vibrant blooms. Understanding the importance of N-P-K ratios in fertilization can impact in the health of your indoor plants. With some DIY fertilizer mixes and Houseplant care and nutrition, you can create an environment where your houseplants truly thrive. 

Ultimate Guide to Mexican Bird of Paradise: Explore from Propagation to Planting and Care

0

The Mexican Bird of Paradise is a versatile plant that can bring vibrancy and beauty to any garden or landscape. With its striking orange flowers, drought tolerance, and low maintenance requirements, it is the best choice for both beginner and experienced gardeners alike. From propagation techniques to creative landscaping ideas, this ultimate guide has provided you with all the information you need to grow and care for Caesalpinia mexicana successfully.  

Mexican Bird of Paradise Plant

Introduction to Mexican Bird of Paradise 

Overview of Caesalpinia mexicana 

This stunning plant is not only a favorite among gardeners for its striking appearance but also holds historical significance in various regions. With its bright orange flowers and fern-like leaves, it adds a pop of color to any landscape. 

Historical and Cultural Significance 

Caesalpinia mexicana has been used traditionally for medicinal purposes by indigenous communities, showcasing its importance beyond just aesthetics. Its resilience in different climates and soil conditions makes it the best choice for both novice and experienced gardeners alike. Whether you’re looking to enhance your outdoor space or dive into the rich history behind this botanical wonder, Mexican Bird of Paradise is sure to captivate with its beauty and heritage. 

Choosing the Right Location 

Sunlight Requirements for Optimal Growth 

When it comes to Growing Caesalpinia pulcherrima, choosing the right location is key for optimal growth. These vibrant beauties thrive in full sunlight, so make sure to place them where they can soak up those rays all day long. 

Ideal Soil Conditions and Drainage 

When it comes to the best soil for the Mexican Bird of Paradise, well-draining soil is a must. Mexican Bird of Paradise plants don’t like wet feet, so ensure the soil allows excess water to flow away easily. A mix of sandy and loamy soil works best. When planting your Caesalpinia mexicana, consider the drainage in the area. Avoid low-lying spots that could result in waterlogging during heavy rains. Instead, opt for slightly elevated ground where water can drain away efficiently. 

Planting Your Mexican Bird of Paradise 

Best Time to Plant 

When it comes to planting the Mexican Bird of Paradise, timing is key. The best time to plant this vibrant beauty is in the spring when the soil has warmed up and frost danger has passed. 

Step-by-Step Planting Guide 

Choose a sunny place with well-drained soil for optimal growth. Dig a hole, remove the Mexican Bird of Paradise plant from its container, and place it in the center of the hole. Backfill with soil, making sure to tamp it down gently to remove any air pockets. Water regularly after planting to help settle the soil around the roots. Mulch around the base of the plant to retain moisture and suppress weeds.  

In case you missed it: 10 Reasons Why Your Flower Plant is Not Blooming: Remedies and Treatment

Red Peacock Flower

Watering and Nutritional Needs 

Establishing a Watering Routine 

Watering the Mexican Bird of Paradise is crucial for its health and growth. Establishing a consistent watering routine will help maintain optimal soil moisture levels. This plant thrives in well-draining soil, so be mindful not to overwater. During the growing season, ensure the plant receives regular deep watering sessions rather than frequent shallow ones. This will encourage deep root growth and overall plant resilience. In hotter months, monitor the soil moisture closely to prevent dehydration. 

Essential Nutrients and Fertilization Schedule 

When it comes to Fertilizing Caesalpinia pulcherrima, providing essential nutrients through fertilization is key. Use a balanced fertilizer specifically formulated for flowering plants during the active growing period for best results. Remember, moderation is key when fertilizing – too much can harm the plant rather than help it flourish. Stay attentive to your Mexican Bird of Paradise’s nutrient needs to promote healthy growth and vibrant blooms throughout the year. 

Pruning and Maintenance of Caesalpinia mexicana 

When and How to Prune 

Pruning the Mexican Bird of Paradise is essential to keep it healthy and flourishing. Regular pruning helps shape the plant, remove dead or damaged branches, and promote new growth. When it comes to pruning your Mexican Bird of Paradise, aim to do so in late winter or early spring. Trim back any overgrown or crossing branches to maintain a balanced form. Remove any diseased or pest-infested parts promptly to prevent further spread. During the growing season, you can lightly prune to control size and shape as needed.  

Seasonal Maintenance Tips 

As part of seasonal maintenance, ensure your Caesalpinia mexicana receives adequate water, sunlight, and nutrients for optimal health. Keep an eye out for any signs of pests or diseases that may require attention. Regularly monitoring your plant will help you catch issues early on before they become severe complications. 

Pest and Disease Management 

Common Pests and How to Combat Them 

Common Mexican Bird of Paradise pests are aphids, spider mites, and whiteflies. These cause damage to the leaves and stems if left unchecked. To combat these pesky critters, you can use neem oil as a natural remedy. 

Identifying and Treating Diseases 

When it comes to Caesalpinia pulcherrima diseases, keep an eye out for fungal infections like powdery mildew or root rot. If you notice any symptoms of the disease on your plant, promptly treat it with appropriate fungicides or by adjusting your watering routine. By staying vigilant and taking proactive measures, you can keep your Mexican Bird of Paradise healthy and thriving in your garden. 

Encouraging Blooms 

Factors Influencing Flowering 

Encouraging blooms in Mexican Bird of Paradise is a rewarding experience that can bring vibrant colors and beauty to your garden. One key factor influencing flowering is sunlight. When it comes to Mexican Bird of Paradise sunlight needs, it requires 6-8 hours of direct sunlight daily for optimal blooming. Proper watering is essential.

In case you missed it: Effective Strategies for Managing Mango Flowers to Boost Yields

Mexican Bird of Paradise Gardening

Fertilizing regularly with a balanced fertilizer high in phosphorus can promote healthy flower production. Pruning back leggy growth and spent flowers can redirect energy toward new blooms, so don’t be afraid to trim when needed. 

Tips to Maximize Blooming 

Paying attention to the Temperature tolerance of the Mexican Bird of Paradise and protecting your plant during cooler months can help prevent damage and encourage continued blooming. 

Propagation Techniques of Mexican Bird of Paradise 

Propagating from Seeds 

Propagation of Mexican Bird of Paradise can be an exciting journey for plant enthusiasts seeking to expand their green thumb skills. One way is Seed propagation of Caesalpinia pulcherrima, which requires a bit more patience but can be rewarding. To start, collect fresh seeds from mature pods and soak them in warm water overnight before planting in well-draining soil. 

Propagating from Cuttings 

Alternatively, propagating from cuttings offers a quicker method to grow new plants. Select a healthy stem cutting with at least two nodes and remove any leaves near the base. Dip the Mexican Bird of Paradise cutting end in rooting hormone and plant it in peat moss and perlite mixture. Keep the soil moist and provide indirect light for optimal growth. 

Winter Care and Protection for Mexican Bird of Paradise 

Preparing for Cooler Temperatures 

As the temperatures drop, it’s essential to ensure your Mexican Bird of Paradise is well-prepared for the winter months ahead. Providing adequate care and protection during this time will help your plant thrive when spring comes around again. Before winter sets in, make sure to remove any dead leaves from around the base of the plant.  

Overwintering Strategies 

When it comes to overwintering Mexican Bird of Paradise, consider applying a layer of mulch around the base of your Caesalpinia mexicana to insulate the roots and retain moisture. If you live in an area with particularly harsh winters, you may need to consider additional protection, such as wrapping the plant with burlap or moving it indoors temporarily. Be sure to monitor weather forecasts and adjust your strategy accordingly. 

Troubleshooting Common Issues in Mexican Bird of Paradise 

Dealing with Leaf Yellowing and Drop 

This common issue can be attributed to various factors, including overwatering, nutrient deficiencies, or inadequate sunlight. To address the Mexican Bird of Paradise leaf drop, ensure proper drainage in the soil to prevent waterlogging and adjust your watering routine accordingly. 

Addressing Lack of Flowers 

If you’re facing a lack of flowers on your Caesalpinia mexicana plant, it may be due to insufficient sunlight or nutrients. When it comes to Troubleshooting Mexican Bird of Paradise problems, make sure your plant is receiving adequate sunlight each day and consider fertilizing with a balanced fertilizer rich in phosphorus to encourage flowering.  

In case you missed it: From Seedling to Bloom: Tailoring DIY Flower Plants Fertilizers to Different Growth Phases

Mexican Bird of Paradise Plant

Conclusion 

Whether you are a seasoned gardener or a beginner, the Mexican Bird of Paradise is a vibrant and low-maintenance plant that can add exotic beauty to your garden. From its propagation through seeds or cuttings to its planting and care, this plant offers an array of possibilities for creating a stunning outdoor space. By following these guidelines on how to propagate, plant, and care for this striking plant, you can enjoy its colorful blooms year-round. 

Ultimate Guide to Devils Backbone Plant: Explore from Propagation to Planting and Care 

0

The Devil’s Backbone plant, also known as Pedilanthus tithymaloides, is a unique and fascinating addition to any indoor or outdoor garden. With its distinctive zig-zag stems and vibrant green leaves, this plant is sure to add interest and character to your space. Growing Devil’s Backbone comes with a plethora of benefits that make it a must-have in any garden or landscape.  

Devils Backbone Plant

Introduction to Devil’s Backbone Plant 

Overview of Pedilanthus tithymaloides 

Devil’s Backbone plants are a unique and fascinating addition to any garden or landscape. With their striking appearance and easy propagation, these succulents can thrive with minimal care. With its striking zigzag stems adorned with small green leaves, this plant adds exotic beauty to any indoor or outdoor space. 

Historical Significance and Common Names 

In some traditions, these are a symbol of protection against evil spirits, while in others, they represent resilience and adaptability in harsh environments. The diverse array of common names for the Devil’s Backbone reflects its widespread popularity across different regions. Whether referred to as Redbird Cactus, Zigzag Plant, or Slipper Spurge, each name carries with it a blend of folklore and botanical fascination surrounding this captivating succulent species. 

Devil’s Backbone plant varieties 

When it comes to Devil’s Backbone plant varieties, one popular variety is the ‘Nana’ or Dwarf form, known for its compact size and cute appearance. It’s perfect for small spaces or as a desktop companion. Another striking option is the ‘Variegatus,’ which features stunning green and white marbled leaves, adding an elegant touch to your indoor garden. 

Choosing the Right Location 

Ideal Lighting Conditions for Devil’s Backbone 

When it comes to finding the best spot for Growing Pedilanthus tithymaloides, lighting is key. When it comes to Devil’s Backbone light needs, it thrives in bright, indirect light, making it ideal for placement near a window with sheer curtains.  

Temperature and Humidity Preferences 

In terms of temperature and humidity preferences, Devil’s Backbone plants prefer warm temperatures ranging between 20 to 30°C during the day and slightly cooler at night. They also consider misting the plant occasionally or placing a humidifier nearby. Finding the right balance of light exposure and environmental conditions will help your Devil’s Backbone plant flourish and grow vibrantly. 

Soil and Planting Requirements 

Selecting the Perfect Soil Mix 

When it comes to Devil’s Backbone soil requirements, selecting the best soil mix is essential for their growth and health. Opt for a well-draining soil mix that prevents waterlogging, as these plants are sensitive to overwatering. Peat moss, perlite, and sand mixture work well to provide moisture retention and drainage. 

In case you missed it: 6 Succulent Beauties: Easy-to-Grow Indoor Plants with Stunning Colours

Ingredients for the soil of home potted plants
Potting and Repotting Guidelines 

When potting or repotting your Devil’s Backbone plant, select a pot that contains drainage holes to prevent root rot. When it comes to best pots for Devil’s Backbone, ensure the pot is slightly larger than the plant’s current root system to allow room for growth, but avoid oversized pots that can retain excess moisture. During Repotting Pedilanthus tithymaloides, gently loosen the roots and place the plant in its new container at the same depth as before. Fill in with fresh soil mix and lightly compact around the base of the plant to provide stability. 

In case you missed it: 15 Indoor Plants That Don’t Cause Allergies: Best Hypoallergenic Plants for Indoor Garden

Fertilizer for potted plants

Watering and Feeding 

Establishing a Watering Schedule 

When it comes to Watering Devil’s Backbone plant, setting the right schedule is key to ensuring optimal growth. These unique succulents thrive in well-draining soil, so it’s important not to overwater them. During the growing season, watering frequency increases slightly but always monitors the moisture levels in the soil. A good rule of thumb is to water thoroughly once every 7-10 days, depending on your specific environment. 

Fertilization Needs for Optimal Growth 

When it comes to Fertilizing Devil’s Backbone, apply a balanced liquid fertilizer every 4-6 weeks. Be sure not to over-fertilize, as this can lead to salt build-up in the soil. 

Pruning and Maintenance 

How to Prune Devil’s Backbone for Shape and Health 

Pruning the Devil’s Backbone plant is essential for maintaining its shape and overall health. Start by inspecting the plant for any damaged or overgrown branches that need to be removed. When pruning, aim to create a balanced and uniform appearance while also promoting new growth. Focus on cutting back leggy stems to encourage bushier growth. Remove any yellowed or diseased leaves promptly to prevent the spread of infections. 

Regular Maintenance Tips to Keep Plants Thriving 

Regular maintenance is key in keeping your Devil’s Backbone thriving. Check the plant regularly for pests or diseases and take action immediately if detected. Clean the leaves with a soft cloth to keep them free from dust buildup. 

Propagation Methods 

Propagating Devil’s Backbone from Cuttings 

One of the common methods of propagation is through stem cuttings. To propagate Devil’s Backbone from cuttings, choose a healthy stem and snip it just below a leaf node. Allow the cutting of Devil’s Backbone to dry for a few days before planting it in well-draining soil. 

Seed Germination Tips and Techniques 

Another option for propagating Devil’s Backbone is through seed germination. Collect mature seeds from your plant and plant them in a wee-drained mixture. Keep the soil moist but not soggy and provide warmth and bright light for optimal germination. Experimenting with different propagation methods can be an exciting way to increase your Devil’s Backbone collection while learning more about this fascinating plant species. 

Pest and Disease Management 

Identifying Common Pests and Diseases 

Pest and disease management is a key aspect of indoor care for the Devil’s Backbone plant. Being able to identify common pests and diseases early on can help prevent any serious damage to your beloved plant. Keep an eye out for Devil’s Backbone plant pests like aphids, mealybugs, spider mites, and scale insects that often target Devil’s Backbone plants. 

In terms of Devil’s Backbone disease, root rot can be a concern if the plant grows in soil that doesn’t drain well. Yellowing leaves or mushy stems could indicate this issue. Preventative measures like proper watering practices and using well-draining soil can help mitigate these risks. 

Organic and Chemical Management Strategies 

For organic pest control, consider using neem oil or insecticidal soap as effective alternatives to harsh chemicals. Regularly inspecting your plant for any infestation is key to staying ahead of potential issues. On the other hand, if chemical solutions are necessary due to severe infestations, opt for products specifically formulated for indoor plants and follow instructions carefully to ensure the safety of your Devil’s Backbone. Remember that prevention is always better than cure when managing pests and diseases in your plant collection. 

Encouraging Blooming 

Understanding the Blooming Cycle 

Understanding the blooming cycle is key to promoting flowering. The Devil’s Backbone typically blooms in response to changes in light and temperature, so ensuring it gets enough sunlight and warmth can trigger its flowering process. 

Tips to Promote Flowering 

When it comes to Devil’s Backbone flowering tips, make sure your plant is well-fed with a balanced fertilizer during the growing season. This will provide the necessary nutrients for healthy flower production. Additionally, pruning your Devil’s Backbone can help stimulate new growth. Watering plays a crucial role in encouraging flowering as well. Keep an eye on soil moisture content and ensure they are consistent but not waterlogged. Proper hydration will support robust flower development. 

Seasonal Care Adjustments 

Winter Care Strategies for Devil’s Backbone 

When it comes to Devil’s Backbone winter care, as temperatures drop, it’s crucial to protect your plants from frost by placing them indoors or providing adequate insulation. During the winter months, reduce watering frequency to prevent overwatering and root rot. Adjust the lighting conditions as daylight decreases, ensuring your plant still receives enough light to thrive. 

Adjusting Care in Summer Months 

In contrast, summer calls for increased watering due to higher evaporation rates. Monitor soil moisture levels closely and adjust accordingly to keep your Devil’s Backbone hydrated during hot weather. Summer also brings the need for more frequent feeding as plants are actively growing. Consider using a balanced fertilizer specifically formulated for succulents to support healthy growth during this season. 

Troubleshooting Common Problems 

Addressing Leaf Loss or Discoloration 

When it comes to troubleshooting Devil’s Backbone problems, dealing with Devil’s Backbone leaf drop or discoloration in your Devil’s Backbone plant can be concerning, but fear not; there are solutions to help your plant thrive. If you notice yellowing or browning leaves, it could be a sign of overwatering.

Adjust the watering schedule and ensure proper drainage to prevent root rot. On the other hand, if the leaves are turning pale or dropping excessively, insufficient light might be the issue. Move your plant to a brighter location while avoiding direct sunlight that can scorch the delicate foliage. 

Solutions for Growth Issues and Pest Infestations 

For growth issues like leggy stems or stunted development, consider pruning back leggy parts to promote bushier growth. When it comes to pest infestations such as spider mites or mealybugs, treat them promptly with neem oil or insecticidal soap. Regularly inspect your plant for pests and act immediately to prevent further damage. 

In case you missed it: Calandiva Plant Care: Pruning, Propagation, and Indoor Care

Devils backbone indoor plant

Conclusion 

Mastering the art of caring for Devil’s Backbone plants is a rewarding journey that requires patience, attention to detail, and a deep appreciation for nature. Remember to tailor your care routine based on seasonal changes and adjust as needed to ensure your Devil’s Backbone thrives year-round. Embrace the challenges that may arise along the way as opportunities to learn and grow your gardening skills. 

Ultimate Guide to Troubleshooting Seed Starting Problems

0

Identifying the root cause of seed starting problems requires patience, observation, and a bit of trial and error. Don’t get discouraged if things don’t go perfectly from the start – every mistake is an opportunity to learn and improve. With the tips and techniques, you’ll be better equipped to tackle any challenges that come your way.

Seed Starting Problems

Remember to stay proactive in preventing future issues by maintaining good hygiene practices, providing optimal growing conditions, and staying vigilant for signs of trouble. By mastering the art of troubleshooting seed starting problems, you’ll not only increase your chances of success but also deepen your understanding of plant growth and cultivation. 

Seed Starting Problems

Planting Too Deep 

When it comes to starting seeds, one common issue that many gardeners face is planting them too deep. Planting your seeds at the incorrect depth can hinder their ability to germinate and grow properly. Seeds have specific requirements for how deeply they should be planted, so it’s essential to follow the guidelines on the seed packet or instructions.

If you bury them too far beneath the soil surface, they may not receive enough oxygen or light to sprout. To avoid this problem, make sure to read the planting instructions carefully and follow them precisely. Using your finger can help ensure you’re planting at the correct depth.  

Overwatering 

Over-watering seedlings is a common issue that many new gardeners face when starting seeds. It may seem like you’re nurturing your plants by giving them lots of water, but too much can harm them. One way to avoid overwatering is to ensure that your containers have good drainage holes to allow excess water to escape. Another tip is to let the top layer of soil dry before watering again. This helps prevent waterlogging and promotes healthier root growth. Monitoring the moisture level of your soil regularly can also help you avoid overwatering.  

Incorrect Temperatures 

Incorrect temperatures can be a common issue when it comes to seed starting. It’s crucial to provide the right environment for your seeds to germinate and thrive. Seeds have specific Temperature control for germination, so make sure to check the recommended range on your seed packets.

If it’s too cold, seeds may struggle to sprout; if it’s too hot, they could become stressed or even die. A simple fix is using a heat mat or adjusting the location of your seed trays to ensure they are at the right temperature. Keeping a close eye on the thermometer can help you maintain a stable environment for successful germination. 

Inadequate Light 

Plants need sufficient light to thrive, especially during their early stages of growth. When they don’t get enough light, they can become leggy or pale. If you notice that your seedlings are reaching toward the closest light source or seem stretched out, it’s a sign that they’re not getting adequate light. This is because plants naturally want to maximize their exposure to sunlight for photosynthesis. 

In case you missed it: Expert Guide on How to Transplant Cucumber Seedlings for Maximum Harvest

Seedling Pots

When it comes to Light requirements for seed starting, consider placing your seedlings in a brighter location with more direct sunlight or invest in grow lights if natural light is lacking. When it comes to leggy seedlings solution, provide the right amount of light, you’ll help them develop strong and healthy stems and leaves, setting them up for success as they continue to grow into robust plants. 

Damping Off 

Seedling damping off is a common seed starting problem that can be frustrating for beginners. It’s when your seedlings collapse at the soil line, seemingly overnight. This is caused by a fungal disease that thrives in moist conditions. To prevent pests/diseases in starting seeds, make sure to use sterile potting mix and containers.

Avoid overwatering your seedlings; let the top layer of soil dry out between waterings. Adjust watering practices and ensure proper ventilation to create an unfavorable for fungal growth. By taking proactive measures and keeping a close eye on your seedlings, you can minimize the risk of damping off and increase the success of your seed starting endeavors. 

Improper Seed Stratification 

Seed stratification is a crucial step in the germination process for certain plant seeds. It involves simulating natural conditions that Seed dormancy breaking, allowing them to sprout. Improper stratification can result in low or failed germination rates. Some seeds require cold, moist conditions to break dormancy, while others need warm temperatures.

Failure to provide the correct stratification conditions can lead to Poor seedling growth. To properly stratify seeds, you may need to refrigerate them for a specific period or soak them in water. Researching the specific requirements of each type of seed is essential for successful germination. 

Dry Soil/not Enough Moisture 

One common Seed starting soil problem that many gardeners face is dry soil or insufficient moisture. When Underwatering seedlings, they struggle to germinate and establish healthy roots. To Troubleshoot slow seed germination, it’s essential to keep a close eye on your seedlings’ moisture levels. Make sure the soil stays moist but not waterlogged. Using a spray bottle or mister can help you control the amount of water you’re adding. 

Consider covering your plant trays with a clear plastic dome or using a humidity dome to maintain moisture levels in the soil and create a greenhouse effect for better growth conditions. If you notice your soil drying out quickly, try placing your containers on a tray filled with water so they can absorb moisture from below through capillary action. Remember, different seeds require different levels of hydration, so be mindful of their individual needs as well. 

Planting Too Early 

Planting your seeds too early can lead to a host of problems. Wait until the recommended planting time according to the specific requirements of each plant species. Rushing the process may result in disappointment later on. Seedlings that are exposed to chilly temperatures can become stressed and susceptible to diseases. It’s best to be patient and let nature take its course. Even if you’re eager to get started, remember that patience is key when it comes to successful seed starting. Trust the timing and follow guidelines for optimal results. 

Soil Imbalance 

Ensuring the right balance of nutrients in your DIY seed starting mix recipes is crucial for the healthy growth of your plants. Soil imbalance can lead to stunted growth, yellowing leaves, or even plant death. Excess nitrogen in the soil causes excessive leafy growth but hinders fruit production.

In case you missed it: How to Grow Nectarine from Seed: A Comprehensive Guide for Beginners

Planting seeds

On the other hand, reusing seed starting mix may result in poor root development. Calcium deficiency might manifest as blossom end rot in tomatoes, while magnesium deficiency can cause yellowing between leaf veins. Testing your soil before planting seeds is essential to determine its nutrient levels and adjust accordingly with organic fertilizers or compost. 

Seed Viability 

Over time, the viability of seeds can decrease, leading to poor Seed germination rates. To ensure successful seed starting, it’s crucial to use fresh, viable seeds. Factors such as improper Seed storage best practices or age can affect the viability of seeds. Always check the expiration date on seed packets, or store saved seeds in a cool, dry place for maximum longevity. 

Performing a simple germination test before planting can help determine if your seeds are still viable. If you find that your older seeds have low viability, consider purchasing fresh ones from reputable sources for better results in your gardening endeavors. 

In case you missed it: Apricot Tree Propagation with Seedling, Grafting, and Tissue Culture Methods

Young flower seedlings

Conclusion 

Troubleshooting seed germination issues can be a challenging yet rewarding experience for any gardener. Remember, planting too deep, overwatering, incorrect temperatures, inadequate light, damping off, improper seed stratification, old seeds, dry soil or lack of moisture, planting too early, soil imbalance, seed viability, hardening off seedlings can impact the success of your seed starting efforts. By being aware of these potential problems and taking proactive steps to address them, you can give your seeds the best possible chance of thriving. 

10 Reasons Why Your Flower Plant is Not Blooming: Remedies and Treatment

0

By identifying Flowering plant blooming issues and troubleshooting non-blooming flowers, you can help your plant thrive and bloom beautifully. Remember to provide adequate sunlight, proper watering, and good soil quality, and keep pests and diseases at bay. With a little care and attention, you can find Causes of flower plants not blooming and enjoy a vibrant garden filled with blooming flowers all season long.  

Flower Plant is Not Blooming

Flower Plant is Not Blooming

Insufficient Sunlight Exposure 

Assessing Sunlight Requirements 

One common culprit of non-blooming could be insufficient sunlight exposure. Before you panic, take a moment to assess the sunlight requirements of your specific plant species. Different flowers have varying requirements when it comes to light intensity and duration. 

Providing Adequate Light for Flowering Plants 

It’s crucial to provide adequate light for flowering plants to thrive and produce beautiful blooms. If your plant seems lackluster, boost flower plant bloom frequency by considering moving it to a sunnier spot where it can soak up those essential rays. A sunny windowsill or a well-lit corner in your home might just be the remedy your plant needs. 

Improper Watering Practices 

Overwatering Causes Root Rot 

Overwatering can be a common issue that leads to root rot, which can wreak havoc on your plant’s health. When it comes to solutions for the lack of flower blooms, find the right balance in watering – not too much and not too little. 

Underwatering Leads to Stress 

When they don’t receive enough water, they struggle to thrive and reach their blooming potential. Enhancing flower plant flowering potential by monitoring the soil moisture levels is key to ensuring your flowers are getting just the right amount of hydration. Remember, each plant has its own watering needs based on factors like species, size, and environment.  

Nutrient Deficiencies 

Identifying Lacking Nutrients 

Nutrient deficiencies can be a major factor affecting flower blooming when it comes to Blooming problems in plants. It’s essential to identify what nutrients your plant is lacking to ensure it thrives. Diagnosing flower plant bloom issues like yellowing leaves or stunted growth, which could indicate specific deficiencies. 

Fertilization Methods for Blooming Plants 

Fertilization is key in providing the necessary nutrients for your flowering plants to bloom vibrantly. How to make flowers bloom? Choose a fertilizer specifically formulated for blooming plants with an equal balance of nitrogen, phosphorus, and potassium. Consider using organic fertilizers that release nutrients slowly over time for sustained growth and Promoting flower plant blossom production.  

Inappropriate Temperature and Climate Conditions 

Effects of Temperature Extremes 

Having the right temperature and climate for your flowering plants is crucial for their blooming success. Extreme heat or cold can stunt growth and prevent blooms from forming. Plants like consistency, so try to keep temperatures within a comfortable range for them. Avoid placing them near drafty windows or heating vents that could cause sudden fluctuations. If you notice your plant struggling in current conditions, consider moving it to a more suitable spot where it can thrive. 

Creating Optimal Climate Conditions 

Creating optimal climate conditions may involve using humidifiers or placing water trays nearby to increase moisture in the air. A well-balanced environment will encourage healthy growth and beautiful blossoms. Remember, plants are sensitive to changes in their surroundings, so be mindful of any shifts that could impact their overall well-being. 

In case you missed it: Natural Fertilizer Recipes for Flowers: Discover from Banana Peel to Epsom Salt

Marigold Field

Rootbound or Overcrowded Roots 

Repotting or Root-Pruning Solutions 

Rootbound or overcrowded roots can stunt the growth and blooming potential of your beloved flower plants. When roots outgrow their containers, they become tangled and unable to absorb nutrients efficiently. Repotting is a simple yet effective solution to give your plant’s roots more room to spread out and thrive. Choose a larger pot that contains good drainage holes to prevent waterlogging, which causes root rot. 

Ensuring Proper Drainage 

If repotting seems daunting, consider root pruning as an alternative method. Gently trim the outer layer of roots before placing them back in the same container with fresh soil. Proper drainage is key for preventing water from pooling at the bottom, which can suffocate the roots. Ensure that excess water can escape by using well-draining soil mixtures and pots with adequate drainage holes. 

Pest Infestations 

Common Pests Affecting Flowering Plants 

Pest infestations can be a real buzzkill for your flowering plants. Those tiny invaders like aphids, spider mites, and whiteflies can wreak havoc on your beautiful blooms. They suck the sap out of leaves, weaken the plant, and inhibit flower production. 

Implementing Pest Control Measures 

Implementing pest control measures is crucial to protect your plants. You can start by regularly inspecting the undersides of leaves for any signs of pests. Introducing natural predators like ladybugs or using insecticidal soap can help keep those pesky critters at bay without harming your flowers. Resolving flower plant blooming delays by maintaining a healthy balance between pests and their natural enemies is key to preventing infestations from taking over. 

Disease Infections 

Recognizing Signs of Diseases 

Disease infections can be a real buzzkill for your blooming plants. It’s crucial to keep an eye out for flower plant flowering troubles like yellowing leaves, spots, or wilting. If you spot these symptoms, act fast to diagnose the issue correctly. 

Treatment and Prevention Strategies 

Treatment options may change depending on the type of disease affecting your plant. Some may require pruning of affected areas, while others might need fungicides or other treatments. Prevention is key – maintain good airflow around your plants and avoid overwatering to reduce the risk of diseases taking hold. You can increase Improving flower plant bloom rate by regularly inspecting your plants can help catch any issues early on before they become out of control. 

Improper Pruning or Trimming 

Effect on Flowering Potential 

Improper pruning can significantly impact the flowering potential of your plants. When you trim at the wrong time or cut too much, it disrupts the plant’s ability to produce blooms. Correct pruning techniques are essential for promoting healthy growth and maximizing flowering. 

Correct Pruning Techniques for Blooming Plants 

To Encourage flower bud development, learn about the specific pruning needs of your plant species. Some flowers bloom on new growth, while others on old wood. Understanding this will guide you in when and how to prune effectively. Avoid cutting indiscriminately; instead, target dead or diseased branches for removal. Use sharp, clean tools to make cuts that promote healing and prevent diseases from entering the wounds. Proper timing is crucial – prune during dormant seasons or right after blooming ends for most flowering plants. 

In case you missed it: How to Grow and Care for Crocosmia Flowers: A Step-by-Step Guide

Hibiscus Flowers

Stress from Environmental Factors 

Addressing Environmental Stressors 

When Addressing flower blooming challenges, environmental stressors could be a major factor to consider. These stressors can include extreme temperatures, insufficient sunlight, or poor soil quality. Assess the conditions in which your plant is growing and make necessary adjustments. Ensure that your flower plant receives adequate sunlight based on its specific requirements. Some plants grow well in full sun, while others prefer partial shade. Positioning the plant in the right location can significantly impact its blooming potential. 

Providing Protection from Harsh Conditions 

When it comes to non-blooming flower plant remedies, addressing environmental stressors is crucial. Harsh conditions like extreme temperatures or intense sunlight can hinder its growth. Providing protection through measures like shade cloth or relocating the plant to a more suitable place can make a big difference. 

Age or Maturity of The Plant 

Understanding Flowering Stages 

Understanding the age and maturity of your flowering plant is crucial for managing expectations. Young plants may take time to establish their root systems and reach a stage where they can bloom.  

Patience for Young Plants to Mature and Bloom 

Different plants have varying timelines for blooming, so it’s essential to research the specific species you’re caring for. Some plants may take longer than others before producing flowers, so don’t get discouraged if you don’t see blooms right away. As your plant matures, it will allocate more energy towards flowering once it reaches the appropriate developmental stage. Just like people, plants go through growth phases that are necessary for them to thrive and produce beautiful blossoms. 

In case you missed it: 13 Types of Brown Flower Names: Best Types of Brown Flowers

Indoor Plants

Conclusion 

In the journey of nurturing flowering plants, it’s essential to follow tips for encouraging flower blooms. Whether it’s providing adequate sunlight, proper watering, nutrients, or protection from pests and diseases, each aspect plays a crucial role in ensuring your plant blooms beautifully. With care, attention to detail, and a bit of knowing steps to stimulate flower plant blooming, you can create the best environment for your flowering plants to showcase their vibrant colors and delicate blossoms. 

Natural Fertilizer Recipes for Flowers: Discover from Banana Peel to Epsom Salt

0

Natural fertilizers for flowers offer a sustainable and organic way to nourish and promoting healthy growth and vibrant blooms. Making your own fertilizer at home is not only rewarding but also helps create an eco-friendlier garden that thrives in harmony with nature. 

Natural Fertilizer Recipes for Flowers

Benefits of Using Natural Fertilizers for Flowers 

Natural fertilizers offer Homemade Nutrients for Blooming Flowers without harsh chemicals. By using natural ingredients, you can enhance the  health of your plants while reducing environmental impact.  

Understanding Your Flower’s Nutritional Needs 

Chemical-free flower fertilizers provide essential nutrients in a gentle and balanced manner, supporting overall plant health. Each type of flower has specific requirements for nutrients like nitrogen, phosphorus, and potassium. Natural fertilizers cater to these individual needs by providing organic sources of these vital elements. 

Natural Fertilizer Recipes for Flowers

Banana Peel Tea 

Ingredients and Preparation 

Banana peel tea is like a magical elixir for your flowering plants, packed with nutrients to make them thrive. To whip up this natural fertilizer, start by collecting banana peels – the more organic, the better. Chop them into small pieces and toss them into a container filled with water. Leave it to steep for a few days until you notice the water turning slightly brownish. 

Application Method for Flowering Plants 

Once ready, strain out the banana peels and dilute the concoction with fresh water before applying it to your beloved blooms. This Nutrient-Rich Soil Amendments for Flowers will provide your flowering plants with essential potassium and other minerals that promote healthy growth and vibrant blossoms. Simply pour this homemade banana peel tea at the base of your flowering plants or use it as a foliar spray for an extra boost. 

Eggshell Fertilizer 

Rich Source of Calcium 

Eggshell fertilizer is an Organic Bloom Boosters to provide calcium to your flowering plants naturally. Rich in nutrients, eggshells can help strengthen cell walls and improve overall plant health. Incorporating eggshell fertilizer into your gardening routine is an eco-friendly and cost-effective way to promote blooming and strong growth in your beloved flowers. 

How to Make and Use Eggshell Fertilizer 

To make eggshell fertilizer, start by collecting clean and dry eggshells. Crush them into small pieces. Sprinkle the crushed shells around the plants or mix them into the soil before planting. The calcium from the eggshells slowly releases into the soil as they break down, providing a steady nutrient supply for your flowers. This gradual release helps prevent nutrient overload and ensures optimal absorption by your plants. 

In case you missed it: From Seedling to Bloom: Tailoring DIY Flower Plants Fertilizers to Different Growth Phases

Nature

Coffee Grounds as Fertilizer 

Benefits for Acid-Loving Flowers 

Coffee grounds are a fantastic natural fertilizer that can help plants like Azaleas, Hydrangeas, and Rhododendrons to thrive. Not only do coffee grounds enrich the soil with essential minerals like potassium and phosphorus, but they also improve drainage and attract earthworms—a gardener’s best friend. 

Preparing and Applying Coffee Grounds 

After brewing your coffee, allow the ground to dry out. Once they’re cool and dry, sprinkle them around the base of your acid-loving plants. The grounds will slowly release nitrogen into the soil as they decompose, providing a nutrient boost for healthy growth. 

Composting for Flowers 

Basics of Composting 

Composting for flowers is like giving them a gourmet meal, packed with all the nutrients they need to thrive. It’s not just about throwing scraps into a pile; it’s an art form that benefits both your plants and the environment. 

How to Create Flower-Friendly Compost 

To create flower-friendly compost, start by collecting kitchen scraps like fruit peels, vegetable trimmings, and coffee grounds. Mix in some yard waste like grass clippings and dried leaves for added richness. Layer these ingredients in a bin or designated compost area. Remember to turn the compost to aerate it and speed up decomposition. The magic of composting lies in patience – let nature do its work as the materials break down into black gold for your flowers. 

Wood Ash Fertilizer 

Potassium for Flowers 

Wood ash is a Natural Potassium Source for Flowers, it is an essential nutrient for flowering plants. 

Guidelines for Using Wood Ash Safely 

To use wood ash safely as fertilizer, make sure it’s from untreated wood without added chemicals. Spread a thin layer around your plants, avoiding direct contact with stems or leaves. Consider incorporating wood ash into your compost pile to enrich the soil over time. Remember not to overdo it – excessive potassium can harm some plants. A little goes a long way in supporting healthy flower development. Before applying wood ash, test your soil pH levels; too much alkalinity can affect plant growth negatively. 

Fish Tank Water 

Using Aquarium Water for Nutrients 

When you change the water in your fish tank, instead of pouring it down the drain, consider using it to give your flowers a boost. The aquarium water is rich in beneficial nutrients like nitrogen and trace minerals that can promote healthy growth in your plants. These nutrients act as natural fertilizers, helping your flowers thrive without the need for chemical additives. 

Application Tips for Flower Gardens 

To use fish tank water in your garden, simply pour it directly onto the soil around your flowers. Make sure to dilute it with fresh water if it’s too concentrated to avoid over-fertilizing. This way, you’re recycling and providing an Eco-Friendly Flower Nutrition to your beloved blooms. By incorporating fish tank water into your gardening routine, you’re not only reducing waste but also creating a sustainable Flower Feeding of nutrient-rich hydration for your beautiful flower beds. 

In case you missed it: 12 Best Water Management Strategies for Flower Gardens

Garden

Seaweed Fertilizer 

Micronutrients and Growth Hormones 

Seaweed fertilizer is a powerhouse of micronutrients and growth hormones that can work wonders for your flowers. This Green Gardening Flower Fertilizers not only supplies essential nutrients but also promotes robust growth and vibrant blooms in your garden. 

Preparing Seaweed Extract for Flowers 

To prepare Flower Growth Organic Solutions like seaweed extract for your flowers, start by rinsing the seaweed to remove excess salt. Chop or blend the seaweed into small pieces to release its beneficial compounds more effectively. Next, steep the chopped seaweed in water for a few days, allowing it to ferment and create a nutrient-rich solution. The longer you let it sit, the more potent the fertilizer becomes. Once ready, dilute the seaweed extract with water before applying it to your flower beds or potted plants. 

Green Tea Brew 

A Gentle Nutrient Boost 

Green tea isn’t just for sipping – it can also work wonders in your garden. Brewing up a batch of green tea fertilizer is like giving your flowers a gentle nutrient-packed hug. Plus, it’s an Eco-Friendly Flower Fertilizer to nourish your plants without harsh chemicals. 

Making and Applying Green Tea Fertilizer 

To make this Organic Flower Fertilizer, steep a few bags of green tea in water until it cools. Make sure the tea is at room temperature before using it in your blooms. When applying the green tea brew to your flower bed, pour it directly onto the soil around the base of your plants. This allows the roots to absorb all those beneficial compounds and thrive. 

Epsom Salt Fertilizer 

Magnesium for Blooming Flowers 

Epsom salt, Homemade Plant Food for Flowers, can also work wonders for your blooming flowers. Its magnesium content is like superfood for them. To make an Epsom salt solution, simply dissolve one tablespoon of Epsom salt in a gallon of water. 

Recipe for Epsom Salt Solution 

This DIY Flower Fertilizer Recipe can give your flowers the boost they need to blossom beautifully. Apply the Epsom salt solution to the base of your plants once a month during the growing season. The magnesium in Epsom salt aids in photosynthesis and helps with nutrient absorption, promoting healthier and more vibrant blooms.  

In case you missed it: Blooming Borders: 15 Best Border Flowers for Your Garden

Watering Flowers in A Garden

Conclusion 

Incorporating natural fertilizers into your flower care routine can not only benefit the growth of your plants but also contribute to a more sustainable gardening practice. Experiment with these DIY natural fertilizer recipes for flowers, and with organic flower garden care, discover the wonders they can do for your blooming beauties. Remember to observe how your plants respond to each treatment and adjust as needed. With a little bit of creativity, you can nurture vibrant, thriving flowers while minimizing the use of synthetic chemicals in your garden. 

Homemade Fertilizers for Malabar Spinach: Get More and Large Green Leaves

0

Malabar Spinach is a popular leafy green vegetable that thrives in warm climates. When it comes to growing this nutritious plant in your garden or balcony, using Homemade Fertilizers for Malabar Spinach can make a significant difference in its growth and yield. Malabar Spinach is a versatile and nutritious vegetable that can thrive with the right care. Experiment with different natural fertilizers to see what works best for your plants, and enjoy a bountiful harvest of this delicious leafy green. 

Understanding Nutrient Requirements 

Understanding the Nutrient Requirements of Malabar Spinach to achieve vibrant and lush green leaves. Malabar Spinach thrives on a balanced diet of essential nutrients like nitrogen, phosphorus, and potassium. Homemade fertilizers offer a cost-effective way to provide these vital elements. 

Benefits of Homemade Fertilizers 

By creating your Homemade Organic Fertilizers for Malabar Spinach, you can tailor them to meet the specific requirements of your Malabar Spinach. Not only are homemade fertilizers beneficial for plant growth, but they also promote soil health and sustainability in your garden. Experimenting with different homemade fertilizers allows you to find what works best for your Malabar Spinach.  

Homemade Fertilizers for Malabar Spinach

Composting Basics 

Creating a Balanced Compost Pile 

Creating a balanced compost pile is the key to nurturing those vibrant green leaves. Start by layering brown materials like dried leaves or straw with green materials such as kitchen scraps and grass clippings. This mix provides essential carbon and nitrogen for healthy decomposition. 

Best Compost Ingredients for Malabar Spinach 

The best compost ingredients for Malabar Spinach include nutrient-rich components like vegetable peels, coffee grounds, eggshells, and yard waste. These elements break down into valuable nutrients that feed your plants naturally. Regularly turn your compost pile to aerate it and speed up the decomposition process. 

Homemade Fertilizers for Malabar Spinach

Keep it moist but not soggy, allowing beneficial microbes to thrive and work their magic in creating nutrient-rich humus. By Composting for Malabar Spinach, you’re not only reducing waste but also providing your Malabar Spinach with a sustainable source of nourishment that will result in lush, flourishing foliage. 

Manure Tea 

Preparing Manure Tea 

Manure tea is a powerful organic fertilizer that can work wonders for your Malabar spinach plants. To prepare this nutrient-rich concoction, simply mix well-aged manure with water in a bucket or container. Let it sit for a few days to steep and create a potent liquid fertilizer. 

Application Tips for Malabar Spinach 

When applying manure tea to your Malabar spinach, make sure to dilute it properly with water to avoid over-fertilizing and potentially damaging your plants. A good rule of thumb is to use one part manure tea to five parts water before watering your plants. Remember, consistency is key when using manure tea as a fertilizer for Malabar spinach.

Aim to apply the solution every two weeks to ensure your plants get a steady supply of nutrients for optimal growth and leaf production. With its high nitrogen content, manure tea can help promote lush green foliage and robust growth in your Malabar spinach plants. 

Eggshell Fertilizer 

How to Make Eggshell Fertilizer 

To create DIY Malabar Spinach Growth Boosters like eggshell fertilizer, start by collecting used eggshells. Clean them thoroughly to remove any remaining egg white or yolk. Once clean and dry, crush the eggshells into small pieces. This will speed up the decomposition process when added to the soil. 

The Benefits of Calcium for Malabar Spinach 

When it comes to Eggshell Calcium for Malabar Spinach, calcium plays a vital role in promoting strong cell walls in plants, improving overall structure and resilience against diseases. By incorporating eggshell fertilizer into your gardening routine, you’re ensuring that your Malabar Spinach receives an extra dose of this crucial nutrient for optimal growth. 

In case you missed it: How to Prevent Spinach Bolting: Causes, Identification, How to Fix, and Solutions
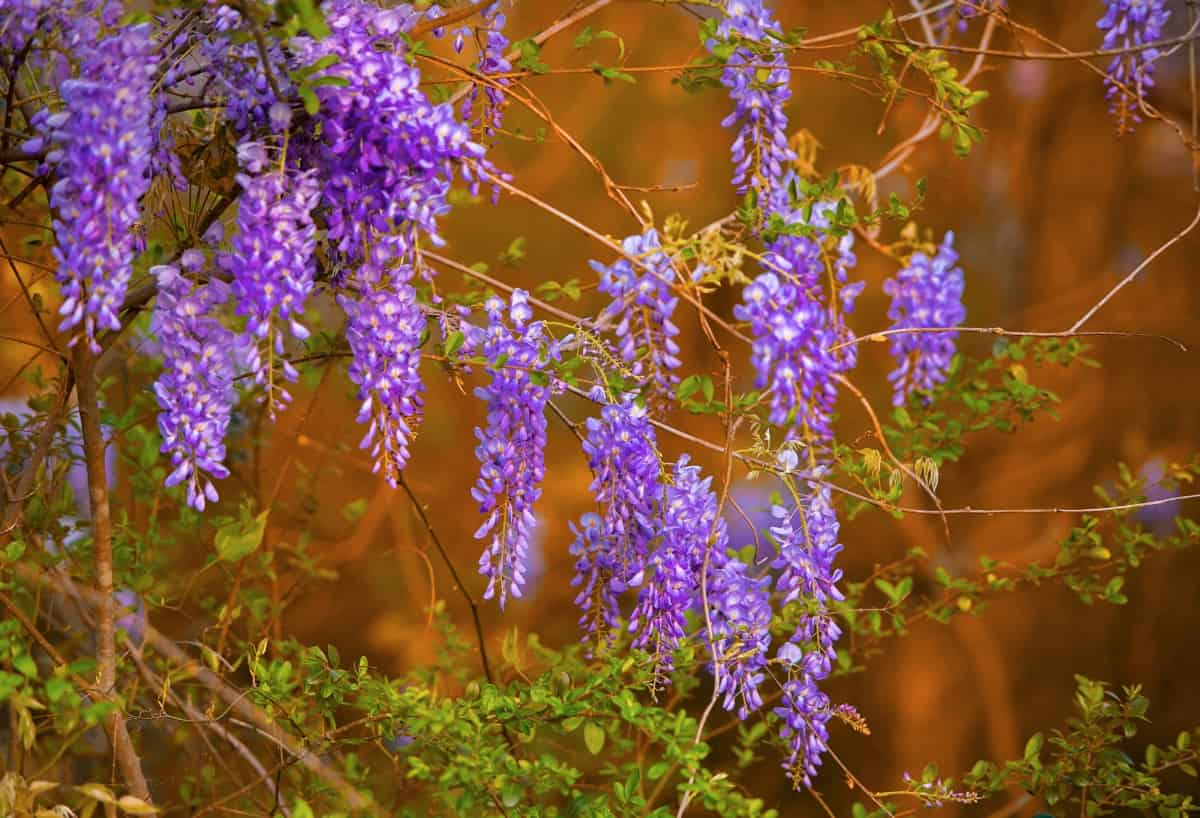
Eggshells

Banana Peel Fertilizer 

Preparing Banana Peel Fertilizer 

When it comes to Banana Peel Fertilizer for Malabar Spinach, it can also work wonders as a natural fertilizer for your Malabar Spinach. Rich in potassium, banana peel fertilizer can give your plants the boost they need to grow large and healthy green leaves. To prepare this nutrient-rich fertilizer, chop up some banana peels and bury them around the base of your Malabar Spinach plants. Over time, as the peels decompose, they will release potassium into the soil, promoting strong growth and vibrant foliage. 

Potassium Boost for Healthy Growth 

Not only is banana peel fertilizer effective, but it’s also an Eco-Friendly Malabar Spinach Nutrition to recycle kitchen waste. To provide your Malabar Spinach with a potassium boost, consider using banana peel fertilizer. Banana peels are rich in this nutrient and can be easily incorporated into your homemade fertilizers. Incorporating potassium-rich fertilizers into your gardening routine can lead to larger green leaves on your Malabar Spinach plants. 

Coffee Grounds as Fertilizer 

Utilizing Coffee Grounds in the Garden 

Coffee grounds contain high nitrogen, which is an essential nutrient for plant growth. When using Coffee Grounds as Plant Food for Malabar Spinach, they help promote healthy leafy green growth, making them ideal for leafy vegetables like Malabar Spinach. Malabar Spinach thrives in slightly acidic soil, and the natural acidity of coffee grounds can aid in maintaining the optimal pH balance for your plants. 

Acidic Soil Adjustment for Malabar Spinach 

To utilize coffee grounds in your garden, sprinkle them around the base of your Malabar Spinach plants or mix them into the soil during planting. Over time, you’ll notice healthier and more vibrant foliage thanks to this organic fertilizing hack. 

In case you missed it: Growing Malabar Spinach from Seeds (Bachali Kura)

Coffee Beans and Grounded Coffee

Fish Emulsion 

Making Your Fish Emulsion 

Fish emulsion is a nutrient-rich fertilizer that can benefit your Malabar spinach plants. Making your fish emulsion at home is a cost-effective and sustainable way to provide essential nutrients to your garden. To prepare it, simply blend fish scraps with water and let it ferment for a few weeks. 

Application Frequency and Rates 

When it comes to Fish Emulsion for Malabar Spinach, applying fish emulsion to Malabar spinach ensures that you do not overdo it. A diluted solution of one part fish emulsion to four parts water is ideal for feeding your plants without causing a nutrient burn. During active growth periods you can apply fish emulsion every two weeks. In contrast, during dormant stages like winter, reduce applications to once every month. 

Wood Ash Fertilizer 

Producing and Using Wood Ash Fertilizer 

Wood Ash Potash for Malabar Spinach and trace elements help your plants thrive. To make your wood ash fertilizer, collect the ashes from your fireplace or bonfire. Make sure it’s fully cooled down before use. Mix the wood ash into your compost pile or directly sprinkle it around the base of your Malabar Spinach plants. 

Potassium and Trace Element Supply 

Potassium plays a crucial role in plant development, helping with root growth and disease resistance. The trace elements found in wood ash can also provide essential nutrients for overall plant health. 

Seaweed Fertilizer 

Harvesting and Preparing Seaweed Fertilizer 

When it comes to Seaweed Extract for Malabar Spinach it is a natural and nutrient-rich option for boosting the growth of your Malabar Spinach. Harvesting seaweed from the beach or purchasing dried seaweed is the first step in preparing this beneficial fertilizer. To make seaweed fertilizer, rinse the seaweed to remove excess salt, chop it into small pieces, and steep it in water for a few weeks until it breaks down into a dark liquid. This liquid is then diluted with water before being applied to your plants. 

Micronutrients and Plant Growth Stimulants 

Seaweed contains essential micronutrients like magnesium, potassium, and zinc that promote healthy growth and development in plants. Additionally, seaweed fertilizers are known for their plant growth stimulants that help improve root development and increase resistance to stressors. 

Vermicomposting for Malabar Spinach 

Vermicomposting for Malabar Spinach is like having a team of tiny workers diligently creating nutrient-rich soil for your plants. These little red wigglers are nature’s recyclers, breaking down organic matter into black gold that will make your Malabar Spinach thrive. Setting up a vermicomposting bin is easy and low maintenance. All you need is a bin, some bedding material like shredded newspaper or cardboard, and, of course, the star players – the worms.

Just toss in your kitchen scraps (excluding citrus fruits and onions), and let the worms do their magic. The nutrient-packed worm castings produced through vermicomposting are full of beneficial microorganisms that promote healthy root growth in Malabar Spinach. By incorporating vermicompost into your gardening routine, you’re not only feeding your plants but also reducing waste sent to landfills.  

In case you missed it: Growing Malabar Spinach on Terrace from Seed (Bachali)

Pink Flowers

Conclusion 

There are numerous options for homemade fertilizers that can help your Malabar spinach thrive and produce large green leaves. By incorporating these Natural Fertilizer Recipes for Vegetables into your gardening, you can ensure that your Malabar spinach receives the essential nutrients it needs for healthy growth and abundant harvests. Experiment with different homemade fertilizers to find what works best for your plants, and enjoy a bountiful supply of fresh, nutritious Malabar spinach from your garden. 

Natural Fertilizer Recipes for Vegetables: Discover from Composting to Application

0

Incorporating natural fertilizers into your vegetable gardening routine not only benefits your plants but also the environment. By understanding the basics of composting and how to apply natural fertilizers properly, you can enhance the health of your vegetable garden while reducing reliance on synthetic chemicals. 

Natural Fertilizer Recipes for Vegetables

Experiment with different Organic vegetable garden fertilizers, observe how your vegetables respond, and adjust as needed. With time and practice, you will develop a deeper connection to your garden as you nurture it with organic ingredients straight from nature. Embrace the process of using natural fertilizers, enjoy watching your vegetables thrive, and savor the bountiful harvests that result from your sustainable practices. 

Natural Fertilizer Recipes for Vegetables

Introduction to Natural Fertilizers 

Benefits of Using Natural Fertilizers 

Natural fertilizers are a sustainable way to nourish your plants without harsh chemicals. By using natural fertilizers, you can promote healthier soil ecosystems and reduce environmental impact. 

Understanding Your Vegetable Garden’s Nutritional Needs 

Understanding your vegetable garden’s nutritional needs is key to successful gardening. Different vegetables require different nutrients at various stages of growth. By choosing the right natural fertilizers rich in essential nutrients like nitrogen, phosphorus, and potassium, you can support optimal plant growth and yield. Natural fertilizers also help improve soil structure and fertility over time. They enhance microbial activity in the soil, leading to better nutrient uptake by plants.  

Composting Basics 

Setting Up Your Compost Bin 

Composting is like nature’s way of recycling, turning kitchen scraps into nutrient-rich soil for your vegetable garden. To start Composting for vegetable gardens, you’ll need a bin or pile in a sunny spot with good drainage. Layer brown materials with green materials, such as fruit peels and coffee grounds, to create the perfect balance. 

Materials to Compost for Vegetable Gardens 

Don’t add meat, dairy, or pet waste to prevent odors and attract pests. Keep your compost moist by watering occasionally. Turn the pile to aerate it and speed up decomposition. As the materials break down, they’ll transform into dark, crumbly compost that smells earthy – a sign that it’s ready to be added to your garden beds. Compost is not only an Eco-friendly fertilizer for gardening but also beneficial for nourishing your plants naturally.  

Manure as Fertilizer 

Types of Manure and Their Nutrient Content 

When it comes to using manure as a natural fertilizer for your vegetable garden, not all types are created equal. Different animals produce manure with varying nutrient contents that can benefit your plants in various ways. For example, chicken manure is high in nitrogen, phosphorus, and potassium, making it a very good fertilizer. On the other hand, cow manure is rich in organic matter but lower in nitrogen compared to chicken manure. 

How to Safely Use Manure in Your Vegetable Garden 

Using manure safely involves proper composting or aging to avoid burning your plants with excess nutrients. Fresh manure should never be used directly on vegetables due to the risk of contamination.  

In case you missed it: How to Make Organic Insecticide Spray: Protect Your Garden with Natural Pest Control

bio-fermented water for plants

Green Manures and Cover Crops 

Selecting Cover Crops for Soil Enhancement 

Green manure works wonders by improving soil fertility, reducing erosion, and suppressing weeds. When selecting green manure crops for soil health, consider legumes like Clover for nitrogen fixation or grains like Rye for weed suppression. 

Incorporating Green Manures into Your Soil 

Incorporating green manures is a breeze – simply sow them over your garden beds after harvesting vegetables. As these plants grow, they’ll add organic matter to the soil when turned under. This process enhances soil structure and provides a nutrient-rich environment for future plantings. Experiment with different cover crop combinations to see what works best for your vegetable garden.  

Homemade Liquid Fertilizers 

Simple Compost Tea Recipe 

Homemade vegetable fertilizer recipes are a fantastic way to nourish your plants naturally. One popular option is the simple compost tea recipe, where you steep compost in water to create a nutrient-rich solution that benefits soil and plants alike. 

Seaweed Extract for Trace Minerals 

Another excellent choice is seaweed extract, packed with essential trace minerals that promote plant growth and health. Just a small amount of this powerful elixir can work wonders for your veggies. By incorporating DIY liquid fertilizer for vegetables, you’re not only feeding your plants but also enriching the soil organically. 

Eggshell and Coffee Grounds Fertilizer 

Preparing Eggshell Powder for Calcium Boost 

Eggshells are a source of calcium, essential for strong cell walls in plants. To prepare Eggshell fertilizer for plants, simply save your eggshells, rinse them thoroughly, allow them to dry completely, and then grind them using a blender or food processor. 

Using Coffee Grounds to Improve Soil Fertility 

Coffee grounds in vegetable gardens can also benefit your soil by improving its fertility and structure. Mixing both eggshell powder and coffee grounds into your soil can give your vegetables the nutrient boost they need to thrive. Plus, it’s a sustainable way to recycle kitchen waste while caring for your garden naturally. 

Wood Ash as a Potassium Source 

Benefits of Wood Ash in the Vegetable Garden 

Wood ash is not only a great way to recycle waste from your fireplace or bonfire but also a fantastic source of potassium for your plants. Potassium helps in plant growth, helping with root development, disease resistance, and overall health. Wood ash as a plant nutrient can be easily applied by sprinkling it around the base of your plants or mixing it into the soil. However, it’s essential to use wood ash sparingly as excessive amounts can raise the pH level of the soil. 

How to Apply Wood Ash Fertilizer Safely 

Apart from providing potassium, wood ash also contains other beneficial minerals like calcium and magnesium that can improve soil fertility. Before applying wood ash to your garden, make sure it is fully cooled down to avoid any potential harm to your plants. 

In case you missed it: Homemade Insecticide for Houseplants: Homemade Remedies for Natural Pest Control on Houseplants

Watering with fertilizers of young vegetable in a home garden

Banana Peels and Other Kitchen Scraps 

Making Fertilizer from Banana Peels 

Banana peels and kitchen scraps can be a treasure trove of nutrients for your vegetable garden. Instead of tossing them in the trash, consider turning them into valuable fertilizer. The banana peel fertilizer recipe is rich in potassium, which is crucial for plant growth and fruit development. To make banana peel fertilizer, simply chop up the peels and bury them near your plants. 

Composting Kitchen Scraps for Nutrient-Rich Soil 

Kitchen scraps like vegetable trimmings, eggshells, and coffee grounds can also be composted to create nutrient-rich soil amendments. By collecting these scraps in a compost bin or pile, you can reduce waste while simultaneously enhancing your garden’s fertility. Composting kitchen scraps not only enriches the soil but also maintains a healthy balance of microorganisms that support plant growth. 

Worm Farming for Vermicompost 

Setting Up Your Worm Bin 

Setting up a worm bin is easier than you think. All you need is a designated container, bedding like shredded newspaper or leaves, and red worms ready to munch on organic waste. 

Harvesting and Using Worm Castings in Your Garden 

When it comes to harvesting worm castings, patience is key. Let those wriggly workers do their job breaking down food scraps and creating nutrient-rich compost for your garden. Once the casting material looks dark and crumbly, it’s time to separate the worms from the finished compost gently. Using worm castings is like giving your plants a gourmet meal. These black gold nuggets are packed with essential nutrients that boost soil fertility and plant growth naturally. Simply mix them into your soil or brew up a compost tea for an extra punch of goodness. 

Natural Fertilizer Application Tips 

Best Practices for Applying Natural Fertilizers 

When it comes to applying natural fertilizers for your vegetable garden, timing is key. Make sure to spread the fertilizer across the soil and avoid piling it up around the base of plants. Water the area well after application to help nutrients penetrate the soil. 

Monitoring Your Vegetable Garden’s Health and Fertility 

Monitor your garden regularly for signs of nutrient deficiencies, like yellowing leaves or stunted growth. Adjust your fertilizer application based on these observations to ensure that your plants are receiving the nutrients they need to thrive. Consider conducting a soil test periodically to determine which specific nutrients your soil may be lacking. This will help you tailor your natural fertilizer applications, accordingly, promoting healthy plant growth and abundant harvests.  

In case you missed it: How to Deal with Pests and Diseases in Balcony Garden: Natural and Organic Remedies

Farmer spraying fertilizer for tomato bushes in a greenhouse

Conclusion 

Incorporating natural fertilizers into your vegetable garden not only promotes healthier plants but also contributes to a more environmentally friendly approach to gardening. From composting kitchen scraps to creating nutrient-rich teas, there are various methods you can explore to nourish your vegetables naturally. By utilizing natural fertilizers, you can avoid the use of harsh chemicals that may harm the soil and surrounding ecosystems. Additionally, natural fertilizers help improve soil structure and fertility over time, leading to better yields and tastier vegetables. 

How to Grow Tulsi in Home Garden: Discover from Propagation to Planting

0

Growing Tulsi in the home garden can be a rewarding and enjoyable experience. Not only does this sacred plant offer numerous health benefits, but it also adds beauty and fragrance to your outdoor space. If you choose to propagate from seeds or cuttings, remember to provide the right conditions for your Tulsi plants to thrive. Ensure they receive adequate sunlight, water them regularly, and protect them from extreme temperatures. Once your Tulsi plants are established, you can harvest their leaves and use them in various culinary dishes or herbal remedies.  

How to Grow Tulsi in Home Garden

How to Grow Tulsi in Home Garden

Introduction to Tulsi 

Understanding Tulsi: Significance and Uses 

Tulsi is a sacred plant in Hindu culture and has been revered for its spiritual and medicinal properties for centuries. Apart from its religious importance, Tulsi offers a wide range of uses in daily life. The medicinal benefits of Tulsi are treating various ailments such as colds, coughs, respiratory disorders, digestive issues, and even stress relief. 

Different Varieties of Tulsi Plants 

There are several varieties of Tulsi plants available to grow in your home garden. The most common ones include Rama Tulsi, Krishna Tulsi, Vana Tulsi, Kapoor Tulsi, Amrita Tulasi, and more. 

Getting Started with Tulsi 

Choosing the Right Location for Planting 

Choosing the right location for planting your Tulsi is crucial to ensure its healthy growth. Tulsi plants thrive in warm and sunny environments, so it’s best to select a place that gets 6-8 hours of sunlight each day. This could be in your garden, balcony, or even a sunny windowsill. 

Soil Preparation and Seed Selection 

Tulsi prefers well-draining soil with good fertility. You can increase the drainage by mixing organic matter into the soil. It’s also important to ensure that the pH level of the soil falls within the range of 6-7. When it comes to seed selection, there are different varieties of Tulsi plants available, such as Krishna Tulsi, Rama Tulsi, and Vana Tulsi. Each variety has its unique flavor and medicinal properties. Choose seeds based on your preferences and intended use. 

Planting Tulsi 

Best Time to Plant Tulsi Seeds 

Tulsi is a sacred plant in many cultures and has been used for centuries for its medicinal properties. The ideal time to plant Tulsi seeds is during the warm summer months when the soil temperature is consistently above 21°C. This ensures optimal conditions for germination and healthy growth.  

Techniques for Planting and Germination 

When planting Tulsi seeds, sow them about 1/4 inch deep into well-draining soil. It’s essential not to bury them too deeply as this can prevent successful sprouting. After sowing, lightly water the area to moisten the soil without oversaturating it. 

To aid germination, maintain consistent moisture levels by watering gently whenever the topsoil starts to feel dry. Be patient, as Tulsi seeds may take anywhere from one week up to several weeks to germinate, depending on temperature and humidity. Once your Tulsi seedlings have emerged, thin them out if they appear overcrowded. Allow adequate space between each plant so they have room to grow and receive ample sunlight. 

Watering Your Tulsi Plant 

Understanding Water Requirements 

Watering your Tulsi plant is crucial to ensure its healthy growth and development. Understanding the water requirements of Tulsi will help you provide optimal care for this sacred herb. Tulsi plants prefer moist soil, but overwatering can lead to root rot. The Watering schedule for Tulsi will depend on various factors such as temperature, humidity, and the type of soil in which your Tulsi is planted. 

Tips for Effective Watering Practices 

To effectively water your Tulsi plant, it is recommended to use a watering can or a gentle spray nozzle on your hose. This helps prevent excessive force that could damage the delicate leaves. When watering, make sure to aim for the base of the plant. Wet foliage can lead to fungal diseases, so it’s best to keep them dry whenever possible. 

In case you missed it: Growing Tulsi in Pots (Holy Basil), Planting, Care Guide

The Sacred Bush

Nutrition and Soil Management 

Fertilizing Your Tulsi Plant 

Proper nutrition is key for the healthy growth of your Tulsi plant. Fertilizing Tulsi organically by using compost or well-rotted manure. When applying fertilizer, make sure to follow the recommended dosage mentioned on the packaging. Overfertilization can cause nutrient burn and damage the plant’s roots. It’s best to apply fertilizer during the growing season, typically spring through summer. 

Maintaining Soil Health and pH Balance 

In addition to fertilization, maintaining soil health is crucial for your Tulsi plant’s overall well-being. The best soil for Tulsi plants is the pH of the soil between 6 and 7. To maintain optimal soil health, consider adding organic matter like compost or leaf mulch regularly. This helps retain moisture in sandy soils while improving drainage in clayey soils. Remember to water your Tulsi plant deeply after applying fertilizer to prevent any potential burning effect on its delicate roots. 

Pruning and Maintenance 

When and How to Prune Tulsi Plants 

Pruning and maintaining your Tulsi plants are essential for their healthy growth and abundant foliage. Pruning Tulsi plants properly helps to shape the plant, remove dead or diseased leaves, and encourage new growth. You should start pruning once your plant has established a good amount of foliage.

To begin with, make sure you have clean and sharp gardening scissors or pruners. This will prevent any damage to the stems while cutting. When it comes to pruning Tulsi, always remember not to cut more than one-third of the plant at a time. This ensures that the plant can recover from pruning without stress.  

Regular Maintenance Tips for Healthy Growth 

Regular maintenance is equally important for keeping your Tulsi plants thriving. Make sure you provide adequate sunlight (at least six hours) for optimum growth. Water deeply but infrequently, as Tulsi prefers slightly dry conditions between watering sessions. It’s also crucial to fertilize your Tulsi plants every two weeks during active growth using organic fertilizers rich in nitrogen and potassium. These nutrients promote lush green foliage and enhance overall health. 

Pest and Disease Management 

Common Pests and Diseases Affecting Tulsi 

One common pest that affects Tulsi is aphids. These tiny insects cause stunted growth and yellowing leaves. Another pesky problem for Tulsi growers is powdery mildew. This fungal disease appears as a white coating on the leaves, leading to wilting and, eventually, death if left untreated. 

Organic Solutions for Pest and Disease Control 
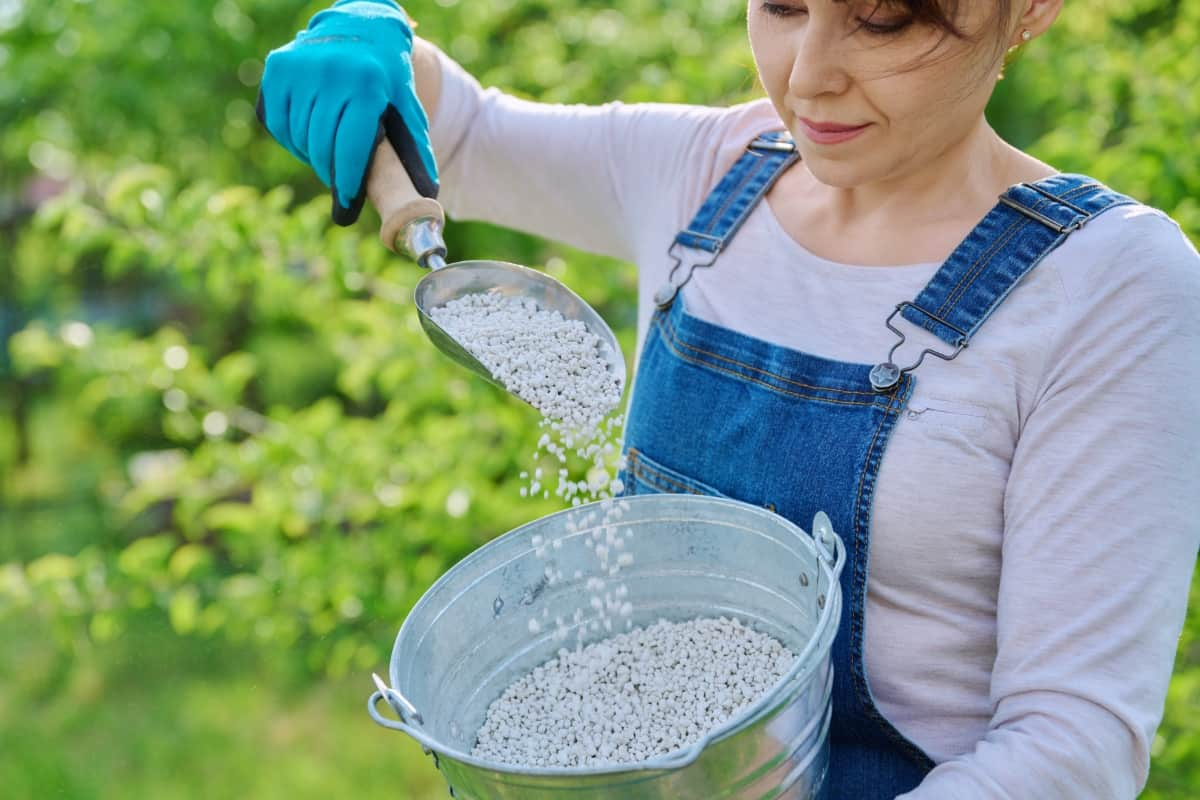
When it comes to Organic Tulsi cultivation, to control aphids, you can try spraying water and dish soap mixture onto the affected areas or introducing ladybugs into your garden, as they are natural predators of aphids. To combat powdery mildew naturally, you can use a solution made from neem oil mixed with water or milk mixed with water sprayed onto the affected parts of the plant. 

Harvesting Tulsi Leaves 

Optimal Time for Harvesting 

When it comes to Tulsi leaf harvesting techniques, timing is crucial. The optimal time to harvest your Tulsi leaves is when the plant has grown several sets of true leaves. These are the fully developed leaves that appear after the initial seedling stage. Waiting until this point ensures that you will have a good yield of flavorful and aromatic leaves. 

Techniques for Harvesting and Storage 

To harvest the Tulsi leaves, simply pinch off individual stems or branches using your fingers or sharp scissors. It’s important to avoid pulling on the plant as this can damage the root system. By gently removing just a few branches at a time, you can encourage continuous growth throughout the growing season. 

In case you missed it: Homemade Fertilizer For Tulsi Plant (Organic)

Holy Basil Flower

Once you’ve harvested your Tulsi leaves, it’s important to handle them with care. Avoid bruising or crushing the delicate foliage, as this can diminish its flavor and aroma. To store your freshly harvested Tulsi leaves, you have a few options. One method is air-drying – simply spread out the leaves in a single layer on a clean surface away from direct sunlight and let them dry naturally over several days. 

Propagation of Tulsi 

Propagating Tulsi from Cuttings 

Tulsi is a versatile and sacred herb that holds immense significance in Indian culture. If you’re looking to grow Tulsi in pots, there are two common methods of propagation: propagating Tulsi from cuttings or growing Tulsi from seeds. To propagate Tulsi from cuttings, start by selecting healthy stems with a few sets of leaves. Make sure the cutting is about 4 to 6 inches long. Remove the bottom leaves and dip in rooting hormone powder for better success rates. Then, plant the cutting in a potting mix and keep it moist until roots develop. 

Growing Tulsi from Seeds: A Step-By-Step Guide 

Growing Tulsi from seeds requires some patience but can be equally rewarding. Start by soaking your seeds overnight to enhance germination rates. Sow them directly into well-prepared soil or seed trays filled with potting mix. Maintain consistent moisture levels while ensuring good drainage. Regardless of the method you choose, make sure to provide adequate sunlight and warmth for successful propagation. Once your new plants have established themselves, continue to care for them by watering them regularly and providing proper nutrition. 

Winter Care for Tulsi 

Protecting Tulsi During Cold Weather 

When it comes to winter, it’s important to take extra care of your beloved Tulsi plant. Your Tulsi survives and thrives indoors during this chilly season. Make sure to bring your Tulsi plant indoors before the first frost hits. Cold temperatures can be detrimental to its growth, so finding a warm and well-lit spot inside is crucial. Choose an area near a window where it can receive ample sunlight throughout the day. 

Indoor Care Tips for Tulsi in Winter 

When it comes to Winter care for Tulsi plants, maintaining proper humidity levels is also essential for indoor Tulsi care in winter. Dry air from heaters can cause stress and leaf drop in these sensitive plants. To combat this issue, consider using a humidifier or placing a tray filled with water. 

Another tip is to protect your Tulsi from drafts and sudden temperature changes indoors. Keep it away from doors or windows that may open frequently and expose it to cold gusts of wind. Continue providing adequate nutrition by fertilizing sparingly during winter months. A balanced liquid fertilizer applied every 4-6 weeks should be sufficient for maintaining healthy growth. 

Tulsi in Containers 

Selecting Containers and Potting Mix 

Tulsi can be easily grown in containers. When growing Tulsi in containers, selecting the right container and potting mix is crucial for its successful growth. Choose a container that contains good drainage holes to prevent waterlogging. Clay or terracotta pots are ideal choices as they allow the soil to breathe and excess water to evaporate.

However, you can also opt for plastic or ceramic pots if they have proper drainage. Next comes the selection of potting mix. Tulsi prefers well-drained soil with a pH level between 6 to 7. You can prepare a mixture by combining equal parts of garden soil, compost, cocopeat, or perlite for better moisture retention. 

Care Tips for Container-Grown Tulsi 

When caring for container-grown Tulsi, ensure that the plant receives ample sunlight. Place the container in an area where it gets 6-8 hours of direct sunlight daily. Watering is another important aspect; always check the moisture level before watering and avoid overwatering, which may lead to root rot. To promote healthy growth and abundant foliage, feed your Tulsi plants with organic fertilizers every two weeks during the growing season. Mulching around the plant helps retain moisture and suppresses weed growth. 

Utilizing Tulsi Leaves 

Medicinal Uses and Health Benefits 

Tulsi leaves are renowned for their immune-boosting properties. They support the body’s natural defenses against infections and diseases. Tulsi is often used to alleviate coughs, colds, and asthma. It can help reduce inflammation in the body and relieve symptoms of arthritis.  The antibacterial and antiviral properties of Tulsi make it effective against various infections, such as urinary tract infections and skin ailments like acne. Tulsi is also known to aid digestion by soothing stomach issues like indigestion, bloating, or gas. 

Culinary Uses of Tulsi Leaves 

Apart from its medicinal uses, Tulsi adds a unique flavor profile when Using Tulsi leaves in cooking. Its slightly peppery taste pairs well with both sweet and savory dishes. You can add fresh Tulsi leaves to salads or sprinkle them over soups for an aromatic twist. 

In case you missed it: Best Berry Plants for Home Gardens: Berry Varieties for Home Gardeners

Holy Basil Flower

Conclusion 

Growing Tulsi in your home garden can be a rewarding and fulfilling experience. Not only does this sacred plant hold immense spiritual significance, but it also offers numerous health benefits and culinary uses. By following the proper techniques for propagation, planting, watering, nutrition management, pruning, pest control, harvesting, and winter care, you can ensure the healthy growth of your Tulsi plants. 

Unlocking Success: A Complete Manual for Growing Azaleas in Pots

0

Growing Azaleas in pots can be a rewarding and fulfilling experience. These beautiful flowering plants bring vibrant colors and a touch of elegance to any space, whether it’s a small balcony or a spacious garden. From choosing the correct pot and soil to providing proper watering and drainage, each aspect plays a crucial role in their growth. With dedication and attention to detail, you can create an enchanting display of blooming beauty with your potted Azaleas. 

Growing Azaleas in Pots

Growing Azaleas in Pots

Benefits of Growing Azaleas in Containers 

Azaleas, with their vibrant and showy blooms, are a delightful addition to any garden. Container gardening Azaleas offers several benefits that make it an attractive option for gardening enthusiasts. One of the key advantages of growing Azaleas in pots is flexibility. Containers allow you to move your plants around easily, ensuring they receive the optimal amount of sunlight and shade throughout the day.  

Overview of Azalea Varieties Suitable for Pots 

Some popular choices include Encore Azalea hybrids, which offer multiple blooming cycles throughout the year, and dwarf, evergreen varieties like ‘Gumpo Pink’ or ‘Hino Crimson.’ These compact cultivars are perfect for smaller containers or indoor settings. 

Selecting the Right Container 

Choosing the Appropriate Size and Material 

Selecting the right Azalea container size is crucial for their overall health and growth. When choosing a container, there are two main factors to consider: size and material. It’s important to choose a container that allows enough room for the roots to grow and expand. Aim for a pot with a diameter that is at least twice the width of the plant’s root ball. Now, onto materials. There are various options available – from plastic to terracotta to ceramic.  

Ensuring Proper Drainage for Healthy Root Growth 

Regardless of the material you choose, ensuring proper drainage is essential for healthy root growth. Remember, selecting the right container sets your Azaleas up for success by providing adequate space and allowing excess water to drain away effectively. 

Potting Mix and Soil Requirements 

Ideal Soil pH and Composition for Azaleas 

One factor to consider is the ideal soil pH for Azaleas, which ranges between 4.5 and 6.0. When it comes to preparing the best soil for Azaleas in containers, there are a few key tips to keep in mind. Avoid using heavy garden soil or clay-based mixes as they can retain too much water, leading to root rot. Instead, opt for a lightweight mix that provides good drainage. 

Tips for Preparing a Well-Draining Potting Mix 

A suitable Azalea potting mix usually consists of peat moss, perlite, and pine bark fines. The peat moss retains moisture while allowing excess water to drain away efficiently. Perlite or vermiculite improves aeration within the potting mix while also helping with drainage. Pine bark fines add structure and aid in moisture retention without becoming compacted over time. 

Planting Azaleas in Pots 

Step-by-Step Guide to Planting Azaleas 

When planting Azaleas in pots, there are a few key steps you need to follow for success. First, choose a pot that is large enough to accommodate the root system of your Azalea but not too big that it overwhelms the plant. A good rule of thumb is to select a container that is about one and a half times the size of the root ball. 

Next, ensure proper drainage by placing rocks or broken pottery pieces at the bottom before adding your potting mix. This will help prevent waterlogged soil and promote healthy root growth. Azaleas prefer well-draining soil with slightly acidic pH levels ranging from 4.5 to 6.0. You can achieve this by mixing peat moss, pine bark fines, and perlite or vermiculite. 

In case you missed it: Effective Strategies for Managing Mango Flowers to Boost Yields

Pink Azaleas
Proper Planting Depth and Spacing 

When spacing multiple Azaleas in one larger container, be mindful of their mature size and arrange them accordingly so they have room to grow without overcrowding each other.  

Watering and Moisture Management 

Understanding Azalea’s Watering Needs 

Watering potted Azaleas is a crucial aspect of their care, as it directly affects their health and growth. Azaleas prefer consistently moist but not waterlogged soil. When watering your Azaleas, aim for deep watering rather than frequent light watering.  

Tips for Avoiding Overwatering and Underwatering 

To prevent overwatering, ensure that excess water drains away freely from the container after each watering session. Avoid using saucers underneath, as they can trap excess moisture and lead to root rot. During hot summer months or when indoor heating dries out the air indoors, consider misting your Azalea’s foliage with room temperature water occasionally. This helps increase humidity levels around them without saturating their roots excessively. 

Lighting Conditions for Potted Azaleas 

Selecting the Right Location for Optimal Light Exposure 

When it comes to growing potted Azaleas, providing them with the right amount of light is key for their overall health and blooming potential. These vibrant plants thrive in bright but indirect sunlight, making it important to choose the perfect spot for them. Ideally, place your potted Azaleas in an area that receives morning sun and afternoon shade. This will protect them from scorching heat while still giving them enough light to promote healthy growth.  

Supplemental Lighting Options for Indoor Azaleas 

If you’re growing Azaleas indoors or have limited access to natural sunlight, don’t worry. There are supplemental lighting options available that can ensure your potted Azaleas receive adequate light. LED grow lights are the best choice among indoor gardeners. These energy-efficient lights provide a full spectrum of light that mimics natural sunlight. Position the LED grow lights above your Azaleas at a distance recommended by the manufacturer’s instructions. 

Temperature and Humidity Considerations 

Ideal Temperature Range for Azaleas in Pots 

These delicate plants thrive best within a specific temperature range. Generally, Azaleas prefer temperatures between 15°C to 21°C. However, some varieties may tolerate slightly higher or lower temperatures. 

Humidity Management Tips, Especially Indoors 

When it comes to humidity, Azaleas appreciate a moderate level that mimics their natural habitat. Ideally, aim for around 40% to 50% relative humidity. To increase humidity levels indoors, you can place your potted Azalea on a tray filled with water and pebbles. As the water evaporates from the tray’s surface, it creates added moisture around the plant.  

Fertilization and Nutrient Requirements 

Choosing the Right Fertilizer for Azaleas 

When it comes to Fertilizing potted Azaleas, it’s important to consider their specific nutrient requirements. Look for a balanced formula that contains macro and micronutrients like nitrogen, phosphorus, potassium, iron, and magnesium. These nutrients are vital for leaf development, flower production, and overall plant vigor. 

Feeding Schedule and Application Techniques 

The feeding schedule for Azaleas will depend on the type of fertilizer you choose. Typically, fertilizing every four to six weeks during the growing season (spring through summer) is recommended. Application techniques also play a role in ensuring effective nutrient uptake by your potted Azaleas. It’s best to apply liquid or water-soluble fertilizers directly onto moist soil around the base of the plant rather than on foliage or flowers. This allows roots to absorb nutrients efficiently. 

Pruning and Maintenance 

How to Prune Azaleas in Pots for Shape and Health 

When it comes to Pruning potted Azaleas, the first step is to assess the shape of your Azalea plant. Look for any dead or diseased branches that need to be removed.  

In case you missed it: 12 Best Water Management Strategies for Flower Gardens

Flowering of Colourful Azaleas in Flower Pots in greenhouse
Regular Maintenance Practices to Keep Azaleas Thriving 

Consider the overall form you want your Azalea to have. Prune back any long or unruly branches to maintain a compact and balanced shape. Be mindful not to remove too much foliage at once, as this can stress the plant. In addition to shaping, regular maintenance practices are crucial for keeping your potted Azaleas healthy. This includes removing spent flowers (known as deadheading) regularly throughout the blooming season. 

Pest and Disease Management 

Common Pests and Diseases Affecting Potted Azaleas 

When it comes to Azalea pests in pots, Azaleas are susceptible to several common pests, including aphids, spider mites, and lace bugs. These tiny creatures cause discoloration and leaf damage. Regular inspection of your Azaleas is crucial for early detection. Azalea plants can also fall victim to various diseases, like powdery mildew, root rot, and leaf spot fungus.  

Organic and Chemical Control Methods 

You can manually remove insects by spraying them off with a strong stream of water or using insecticidal soap solutions made from natural ingredients like neem oil or garlic extract. 
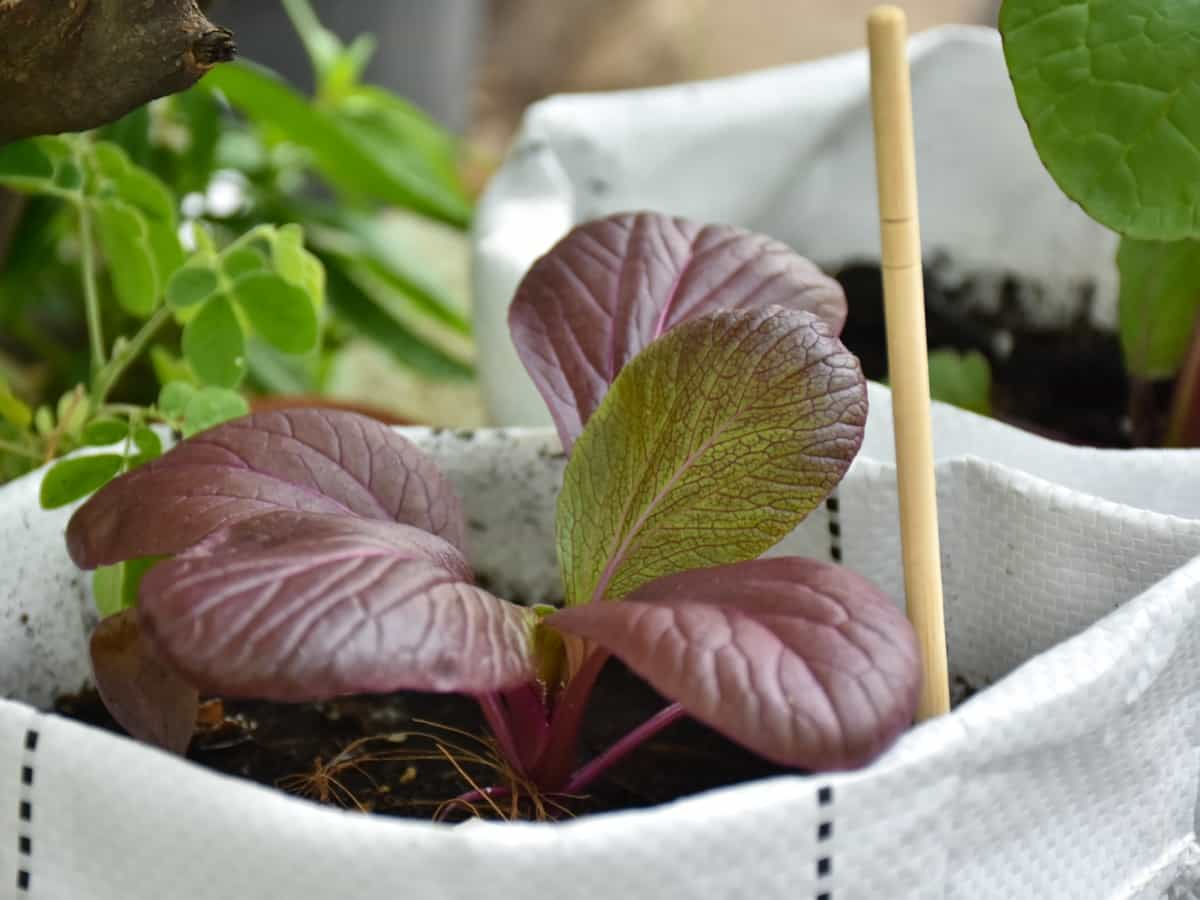
In some cases, chemical interventions may be necessary to combat severe infestations. Be sure to choose pesticides specifically labeled for use on Azaleas in containers and follow the instructions carefully. To prevent disease outbreaks in your potted Azaleas, maintain proper watering practices by allowing the soil surface to dry out slightly between waterings.  

Seasonal Care Tips 

Adjusting Care Routines for Different Seasons 

In colder regions, winter protection is especially crucial to safeguard your Azaleas from freezing temperatures. During the fall season, gradually reduce watering to prepare your Azaleas for dormancy.  

Winter Protection and Cold Weather Precautions 
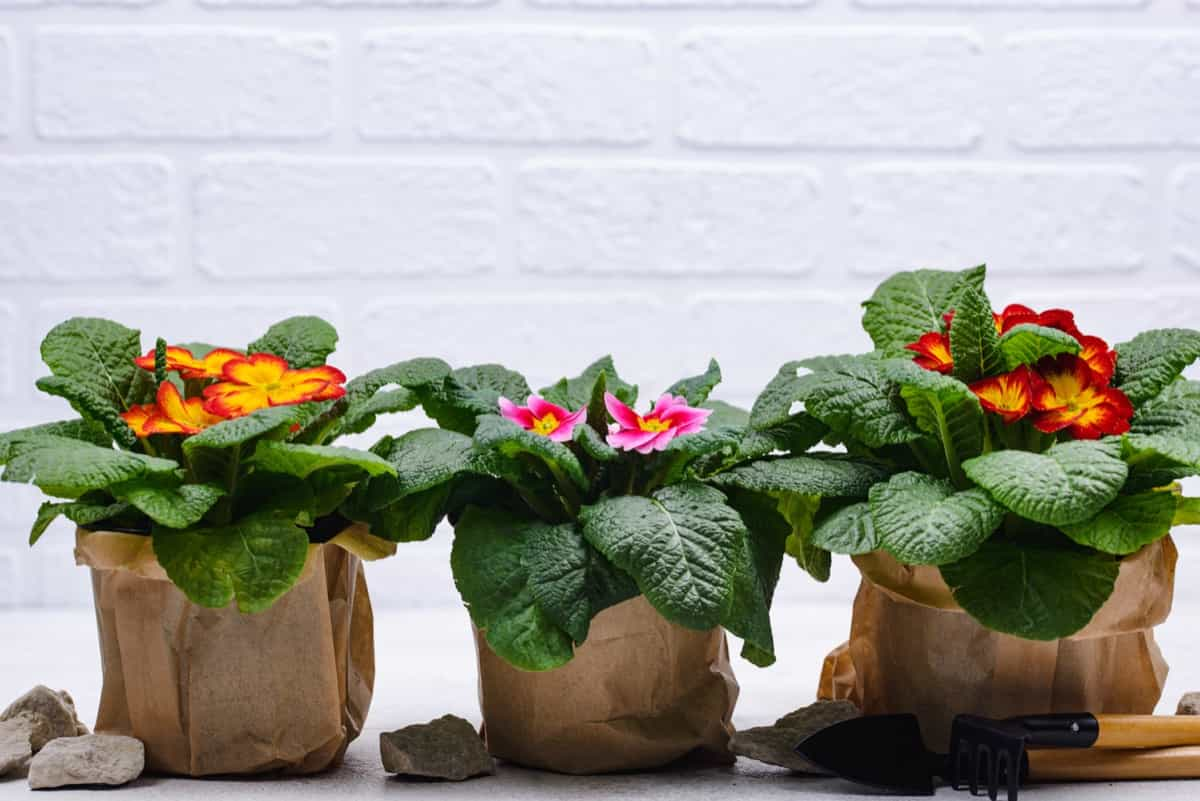
When it comes to Winter care for potted Azaleas, move them indoors if possible or place them in a sheltered area such as a garage or shed where they can be shielded from harsh winds and extreme cold. If bringing your Azaleas indoors isn’t an option due to limited space or lack of sunlight, consider using frost blankets or horticultural fleece to cover and insulate them during cold snaps. Be sure to remove these covers during milder periods so that air circulation is not compromised.  

Propagation Methods for Azaleas in Pots 

Propagating Azaleas from Cuttings 

To propagate Azaleas in containers from cuttings, begin by selecting healthy stems that are approximately four inches long. Make sure to choose stems that are not flowering and have several sets of leaves. Remove any leaves from the bottom of the cutting so that only a few remain at the top. Next, dip the bottom end of each cutting into rooting hormone powder before placing it into a container filled with moist potting mix.  

Tips for Successful Seed Propagation 

Another propagation method is seed propagation. While this method requires more time and patience, it can be rewarding when successful. Start by collecting seeds from mature Azalea plants in late summer or early fall. To increase germination rates, stratify the seeds by placing them inside a plastic bag and refrigerating them for several weeks before sowing them in pots filled with well-draining soil mix. 

Decorative Tips and Container Ideas 

Enhancing the Aesthetic Appeal of Potted Azaleas 

Choose containers that complement the vibrant colors and delicate blooms of Azaleas. Opt for materials like terracotta or ceramic for a classic touch, or go for modern options like metal or fiberglass.  
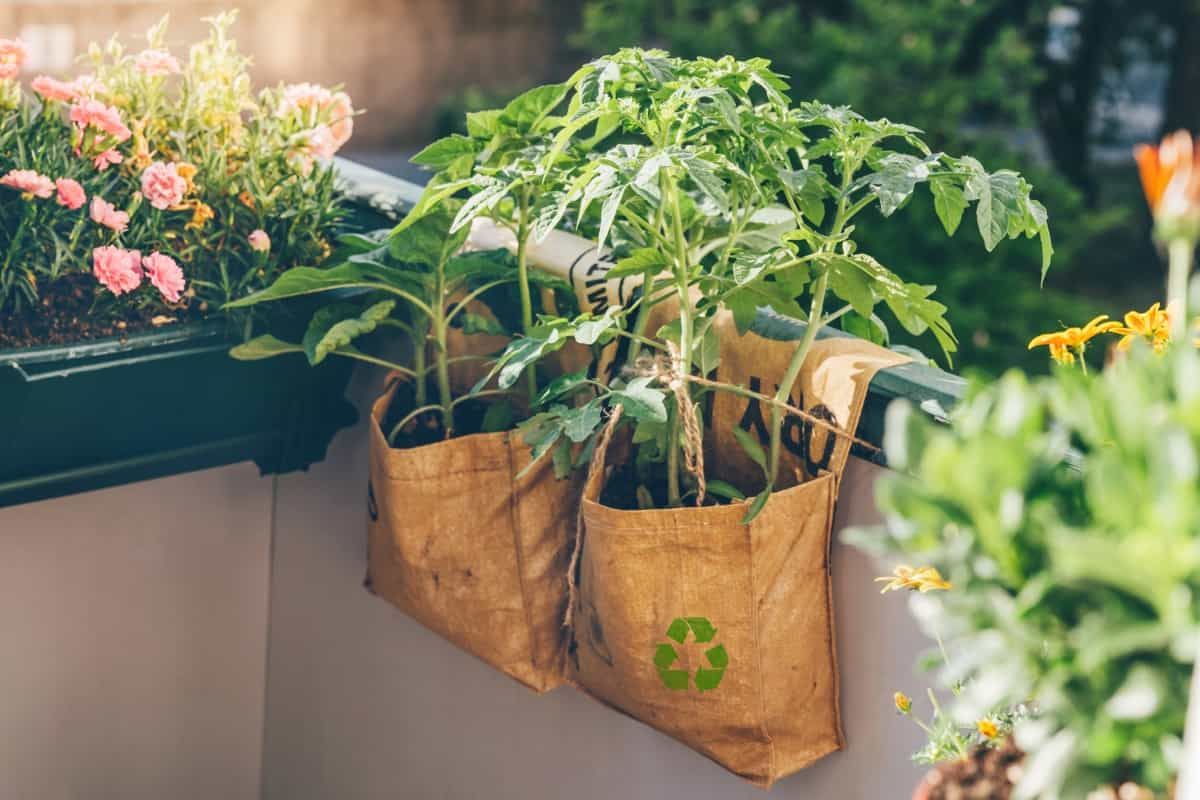
Creative Container Options for Indoor and Outdoor Settings 
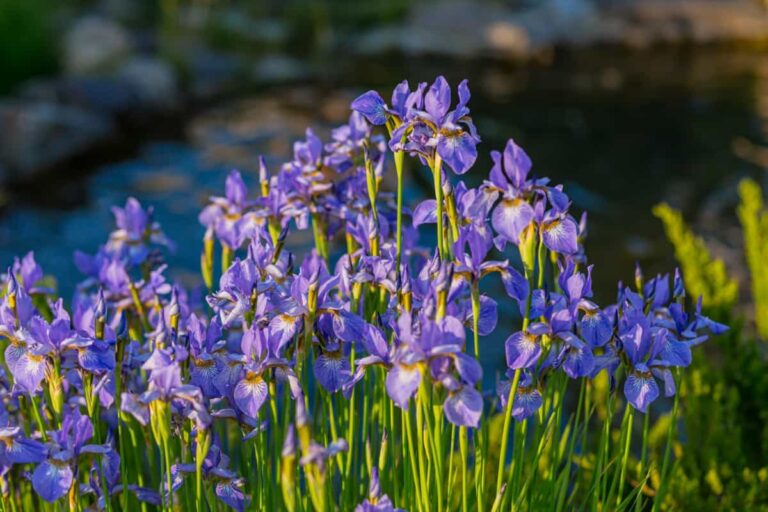
For an elegant look indoors, consider placing your potted Azalea in a decorative ceramic pot. The vibrant blooms against the smooth surface create a stunning contrast that is sure to catch anyone’s eye. Alternatively, if you’re going for a more rustic feel, try repurposing vintage tin cans or wooden crates as planters. This adds character and charm while giving your Azalea a unique home. If you have limited space on your patio or balcony, hanging baskets are perfect for showcasing cascading varieties of Azaleas.  

Troubleshooting Common Issues 

Identifying and Addressing Yellowing Leaves 

When it comes to growing Azaleas in pots, keeping an eye out for any signs of trouble is crucial. One common issue many gardeners face is yellowing leaves. If you notice your Azalea’s leaves turning yellow, it could be a sign of nutrient deficiency or improper watering. To address this problem, try adjusting the fertilizer application and ensure that the soil has good drainage. 

In case you missed it: Blooming Borders: 15 Best Border Flowers for Your Garden

Red azalea flowers in bloom
Dealing with Wilting, Drooping, or Leggy Growth 

It’s important to strike a balance when it comes to watering your potted Azaleas – aim for moist but not waterlogged soil. If you find that your Azalea’s growth appears leggy and stretched out instead of bushy and compact, insufficient light exposure could be the culprit. Azaleas require bright but indirect light for optimal growth. Consider moving them to a location where they receive more sunlight or supplement with artificial lighting if necessary. 

Harvesting and Enjoying Azalea Blooms 

Tips for Prolonging and Enjoying Azalea Blooms 

When harvesting Azalea blooms, it’s important to choose flowers that are fully open but not yet wilting or fading. Look for blossoms with vibrant colors and a healthy appearance. Gently snip them off using sharp pruners or scissors, making sure to leave some foliage on the stem. 

Using Cut Flowers for Indoor Arrangements 

To prolong the life of cut Azalea flowers, it’s crucial to place them in water as soon as possible after cutting. Fill a vase with water and add floral preservatives if available. Remove any leaves from the stems that would be submerged in water. Change the water every two days and trim about half an inch from each stem at an angle before placing them back in the vase. 

Conclusion 

After exploring various decorative tips and container ideas to enhance the aesthetic appeal of potted Azaleas, growing these beautiful flowers in pots is a rewarding and fulfilling experience. By following the right techniques and Potted Azaleas guide and providing optimal care, you can unlock the full potential of your Azaleas. 

Winter Pruning Guide: Learn About Cutting Back Plants in Dormant Season

0

Winter pruning is a crucial aspect of maintaining the health and beauty of your plants. While it may seem counterintuitive to prune during the cold season, there are several benefits to doing so. Understanding dormancy and its impact on pruning and Winter Garden maintenance can help you make informed decisions about when and how to cut back your plants. 
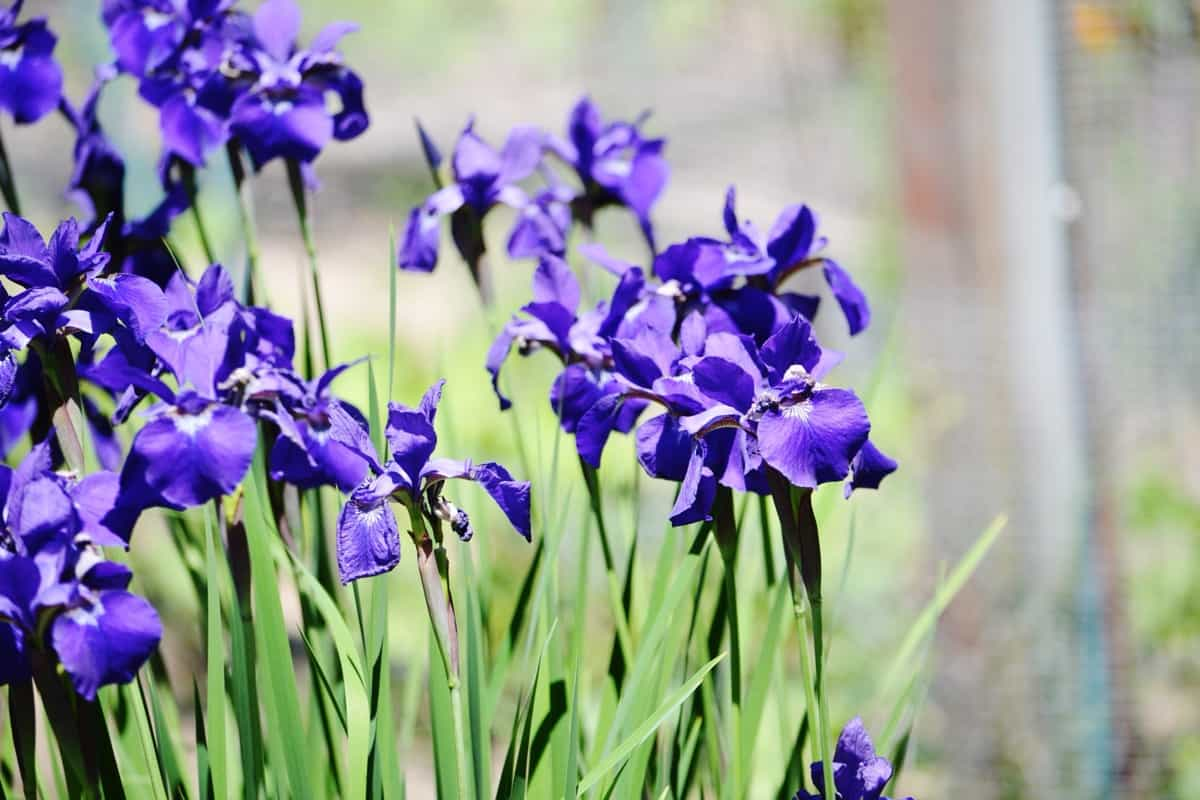
Winter Pruning Guide

Winter Pruning Guide

Benefits of Pruning in the Cold Season 

When it comes to Winter pruning benefits, winter pruning allows for better visibility of the plant’s structure. With fewer leaves obstructing your view, you can more easily identify damaged or diseased branches that need to be removed. Additionally, winter pruning stimulates new growth in the spring. By strategically cutting back certain branches, you encourage the development of stronger, healthier shoots once warmer weather arrives. Furthermore, winter pruning helps shape your plants for optimal growth. 

Understanding Dormancy and Its Impact on Pruning 

Understanding dormancy is key when it comes to Pruning in winter months. Dormancy is a period of rest that many plants go through during colder months when temperatures drop and daylight hours decrease. During this time, sap flow slows down significantly as energy is conserved within the roots. Pruning during dormancy minimizes stress on the plant because it reduces sap loss through freshly cut wounds. Additionally, without active growth happening above ground, there’s less risk of shock or damage from cutting back branches. 

Tools and Equipment for Winter Pruning 

Essential Pruning Tools 

When it comes to Winter plant care tips, having the right tools for Winter pruning is essential. These tools not only make the job easier but also ensure that you can make clean and precise cuts. First up are the hand pruners or secateurs. These are perfect for making small cuts on branches up to ¾ inch in diameter. For larger branches, you’ll need loppers. They have longer handles and more cutting power than hand pruners, allowing you to trim thicker branches with ease. 

Sanitizing Equipment to Prevent Disease Spread 

To prevent disease spread while pruning, it’s crucial to sanitize your tools between each cut. You can use rubbing alcohol to disinfect your tools. Additionally, investing in good-quality gloves will protect your hands from thorns and other potential injuries during the pruning process. 
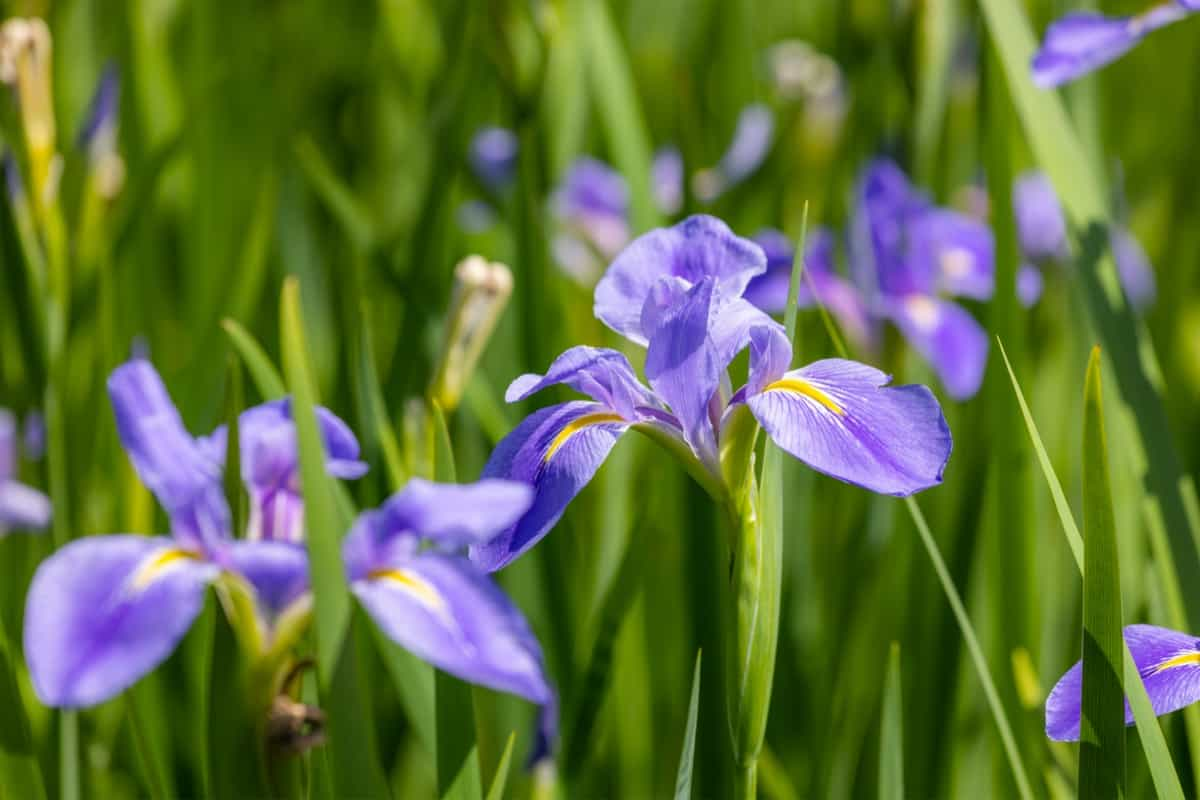
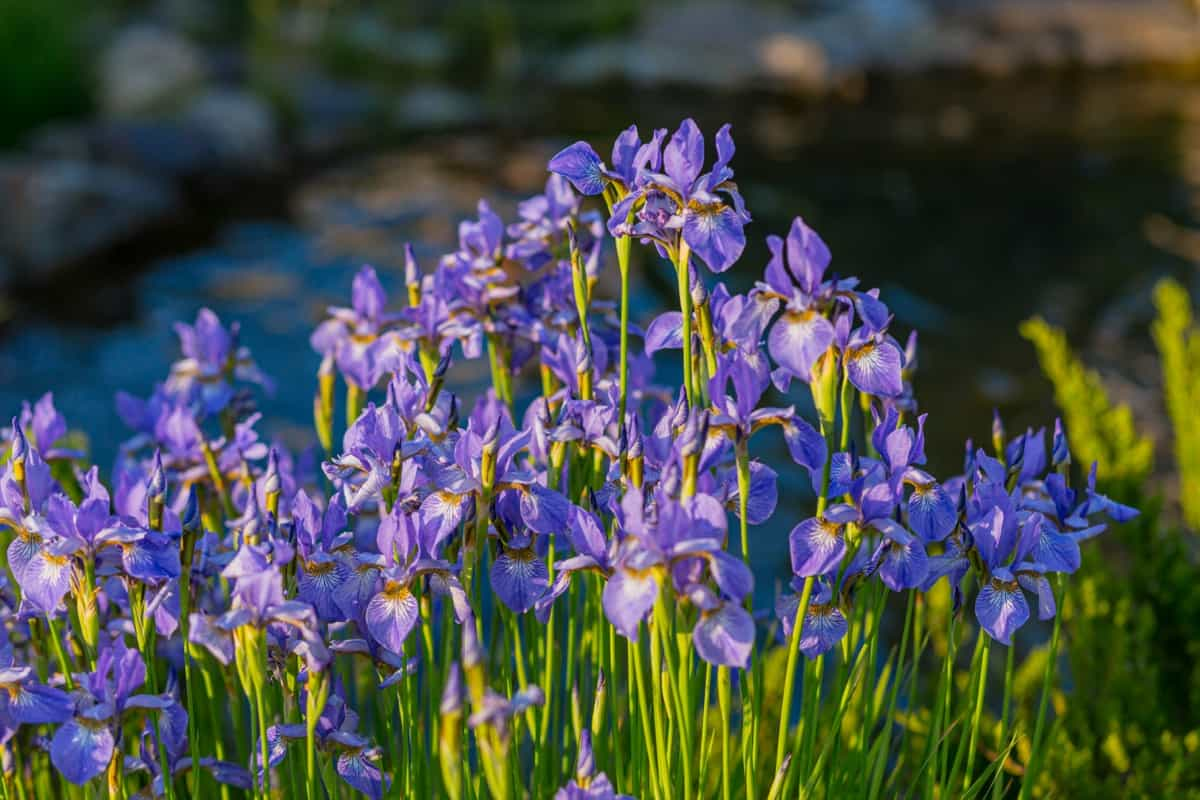
Deciduous Trees and Shrubs 

Identifying Pruning Needs 

When it comes to pruning deciduous trees and shrubs during the winter season, there are a few key factors to consider. First and foremost, understanding the needs of each plant is crucial. One important aspect of pruning deciduous trees and shrubs is maintaining their overall health. By trimming dead or diseased branches, you can prevent further damage from spreading. Additionally, proper pruning techniques can promote better air circulation and sunlight penetration into the canopy, resulting in healthier growth. 

Techniques for Healthy Cuts 

To make healthy cuts while cutting back plants in winter, it’s important to use sharp tools that won’t crush or tear the branches. Clean cuts not only reduce stress on the plant but also minimize potential entry points for pests or diseases. When making cuts on larger branches, it’s essential to follow proper technique by using three separate cuts: one on the underside of the branch about 6 inches away from where you want to remove it; another cut a few inches further out along the top side of the branch; finally, a third cut just outside of where you want to remove it completely. 

In case you missed it: How to Grow Hawthorn Trees: Propagation, Planting, Pruning, and Winter Care

pruning branches with pruning shears

Evergreens and Conifers 

Timing and Tips for Pruning Evergreens 

Evergreens and conifers add year-round beauty to any landscape with their lush green foliage. Timing is crucial when pruning evergreens, as it can impact their growth and overall health. In general, early winter or late fall is the best time to prune evergreens. This allows enough time for new growth to emerge before the next growing season begins.

It’s important to note that certain types of evergreens, such as pine trees, should be pruned in early spring instead. When pruning evergreens, there are a few tips you should keep in mind. First and foremost, avoid removing more than one-third of the tree’s total foliage at once. Removing too much can stunt its growth and weaken its structure.  

Special Considerations for Conifer Pruning 
Special considerations must be taken when pruning conifers like Cedars or Junipers due to their unique growth patterns and structures. These trees often have multiple leaders (main upright stems), so it’s crucial not to cut them all at once. Instead, select a dominant leader and remove competing ones gradually over several years. Another important aspect of conifer pruning is understanding how they naturally grow in layers or tiers. When Winter tree trimming, aim for an even shape while maintaining this natural layering effect.  
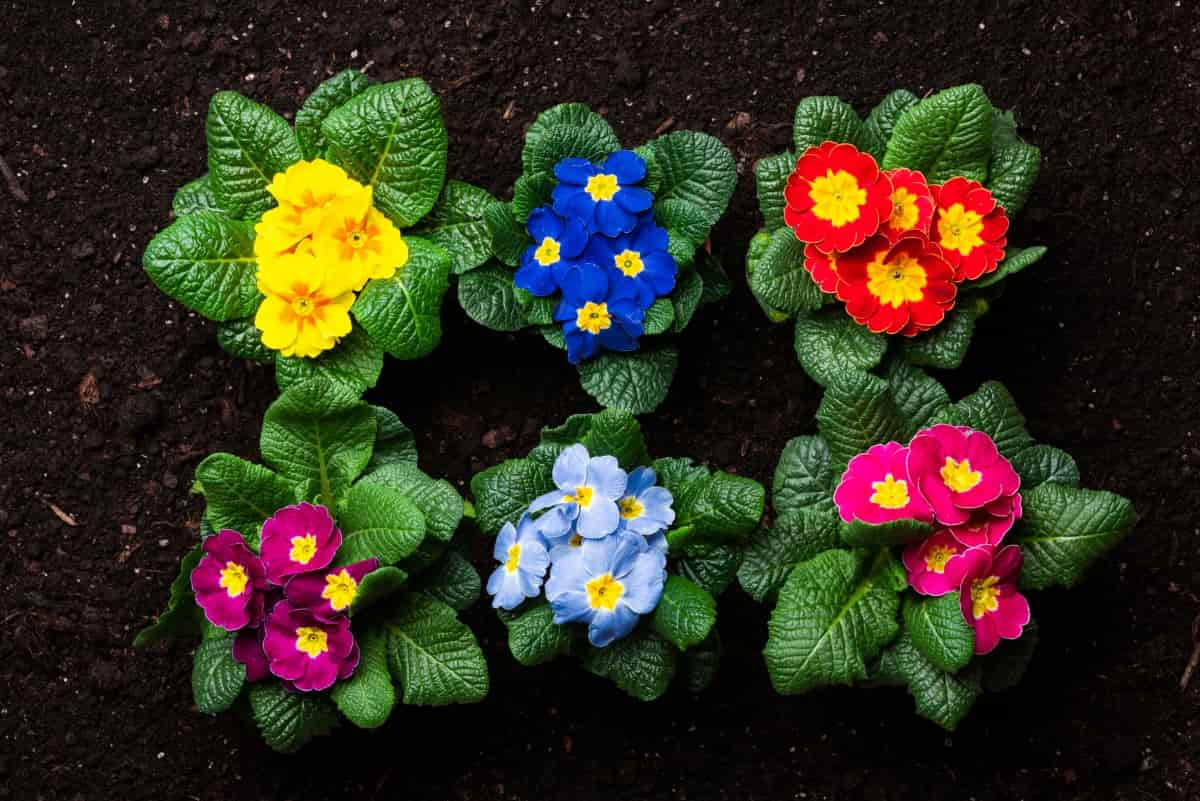
Fruit Trees and Bushes 

Enhancing Fruit Production Through Pruning 

Fruit trees and bushes are a delight to have in any garden or orchard. Pruning these plants during the winter season is crucial for enhancing fruit production and maintaining their overall health. 

Winter Pruning Strategies for Various Fruit Trees 

When it comes to Winter pruning for fruit trees, pruning Peach trees involves thinning out the branches to improve airflow and prevent overcrowding. Additionally, removing some of the older wood stimulates new growth and encourages higher fruit production. For Apple trees, it’s important to remove any dead or diseased branches, as well as those crossing each other.  

When it comes to berry bushes like Raspberries or Blackberries, winter pruning is an excellent opportunity to eliminate weak or damaged canes. By doing so, you promote stronger new growth that will bear more abundant berries come summer. For citrus trees such as Oranges or Lemons, selective pruning can help maintain their shape while allowing sunlight into the inner branches. This promotes proper ripening of fruits throughout the tree instead of just on the outer edges. 

Roses and Flowering Shrubs 

Preparing Roses for Spring Blooming 

When it comes to roses and flowering Shrubs pruning in cold weather, proper pruning is essential for promoting healthy growth and abundant blooms. As winter sets in, it’s the perfect time to prepare your roses and shrubs for a spectacular display in the spring. For roses, start by removing any dead or diseased branches. This prevents the spread of disease and encourages new growth. Next, prune back any crossing or rubbing branches to improve air circulation. 

In case you missed it: Pruning Houseplants – Basics, Ideas, Techniques, Tips For Indoor, Balcony

pruning branches using a tool
Pruning Methods for Flowering Shrubs 

When it comes to Winter pruning for flowering plants, each variety has its own unique pruning needs. Some shrubs benefit from Winter plant rejuvenation pruning, where old wood is removed to encourage new growth from the base. Others require more selective pruning to shape their form and promote flowering on new wood. Regardless of the specific method used, always make clean cuts just above an outward-facing bud or branch junction. This ensures that new growth will be directed in a desirable direction. 

Ornamental Grasses and Perennials 

Cutting Back Ornamental Grasses 

Ornamental grasses and perennials are a beautiful addition to any garden, adding texture, movement, and color throughout the year. When cutting back ornamental grasses, late winter, before new growth emerges is the best time to prune these plants. Use sharp pruners or shears to cut back the entire plant close to the ground. This will help remove dead foliage and promote fresh growth for the upcoming season. 

Managing Perennials for Health and Vigor 

Managing perennials requires a slightly different approach. Some perennials benefit from being cut back in late fall or early spring when they enter dormancy. Removing dead stems and foliage not only improves their appearance but also prevents diseases from overwintering in your garden. However, not all perennials need drastic pruning. Some benefit from simply removing spent flowers or trimming back leggy growth during the growing season to encourage more blooms.  

Safety Measures and Techniques 

Proper Pruning Techniques to Avoid Injury 

When it comes to Dormant season pruning techniques, safety should always be a top priority. Proper pruning techniques can help you avoid injury and promote healthy growth in your plants. It’s important to use the right tools for the job. Invest in high-quality pruning shears, loppers, and saws that are sharp and well-maintained.

Dull or damaged tools can lead to uneven cuts and increase the risk of accidents. Before you start pruning, make sure to sanitize your tools. This prevents the spread of diseases between plants. Simply wiping down your equipment with a solution of bleach or rubbing alcohol will do the trick. 

Safety Gear and Best Practices 

When making cuts, always follow the proper technique. Start by identifying any dead or diseased branches that need removal. Then, make clean cuts just above a bud or lateral branch using smooth strokes. Avoid leaving stubs as they can become an entry point for pests and disease. Wearing appropriate safety gear is also crucial when pruning. Never forget about ladder safety when pruning taller plants.  

Post-Pruning Care 

Wound Care and Healing 

One crucial aspect of post-pruning care is wound care. When making cuts during pruning, you create wounds on the plant that need attention. Applying a wound dressing or sealant can help protect the cut surface from disease and pests. In addition to wound care, mulching is another essential step. Mulch retains moisture in the soil and regulates temperature fluctuations around the plant’s roots. Apply organic mulch around your pruned plants, being careful not to pile it up against the trunk or stems. 

Mulching and Watering After Pruning 

Proper watering is also crucial after pruning. While some plants may require more water immediately after pruning due to increased stress, others may need less frequent watering until new growth appears. It’s important to monitor each plant’s moisture needs individually. Remember that post-pruning care should be tailored to each specific type of plant and its requirements.  

Common Mistakes to Avoid 

Pruning and Its Consequences 

Overenthusiastic gardeners may be tempted to go overboard with pruning in the winter, but it’s important to know when enough is enough. One common mistake that many people make is over-pruning their plants. While pruning can promote healthy growth and shape your plants, excessive trimming can weaken them and leave them vulnerable to disease or pests. 

In case you missed it: Ultimate Guide to Orchid Aerial Roots Care: Tips for Healthy Growth and Maintenance

Spring pruning
Timing Errors: When Not to Prune 

When it comes to Seasonal pruning tips, knowing when not to prune is just as crucial as knowing when to prune. Some plants have specific flowering times or growth patterns that should be respected. For example, spring-blooming shrubs like Lilacs and Forsythias are pruned immediately after they finish flowering. Another timing error is pruning during a plant’s active growth period. This can inhibit its ability to heal properly. It’s best to wait until the dormant season for most plants, such as late fall through early spring, when they are not actively growing. 
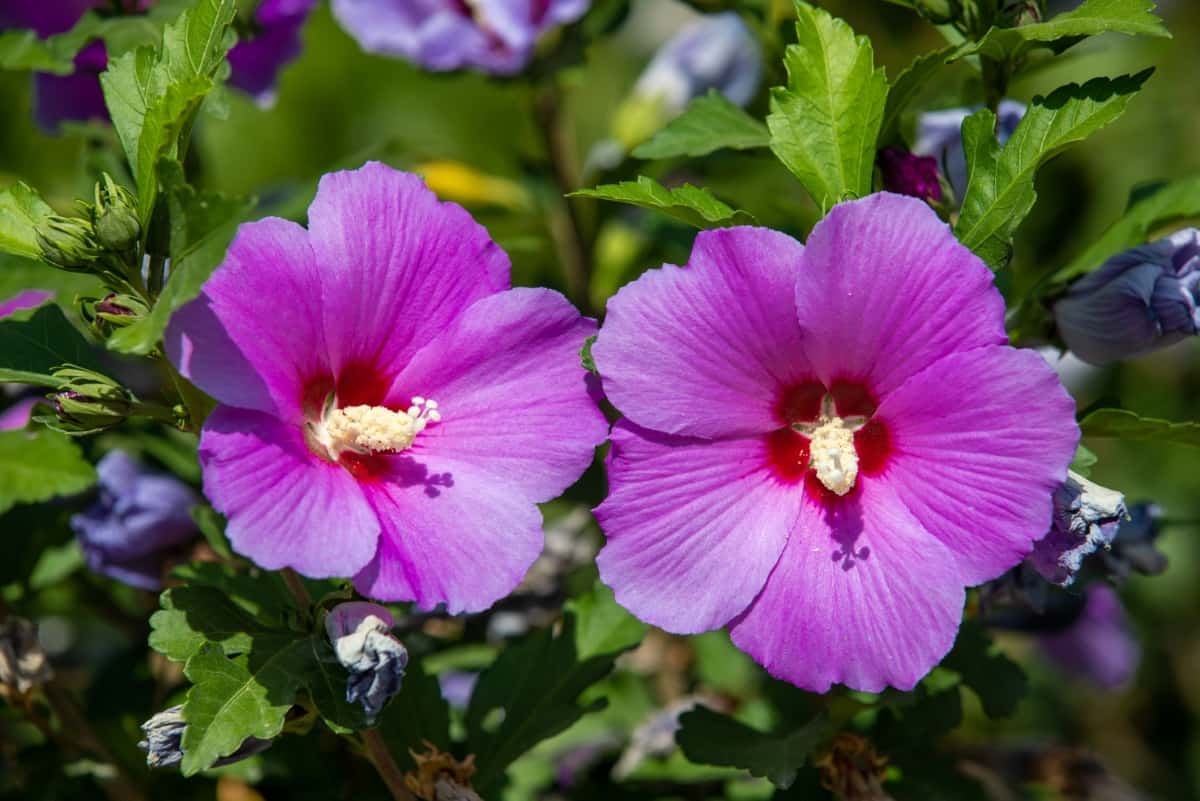
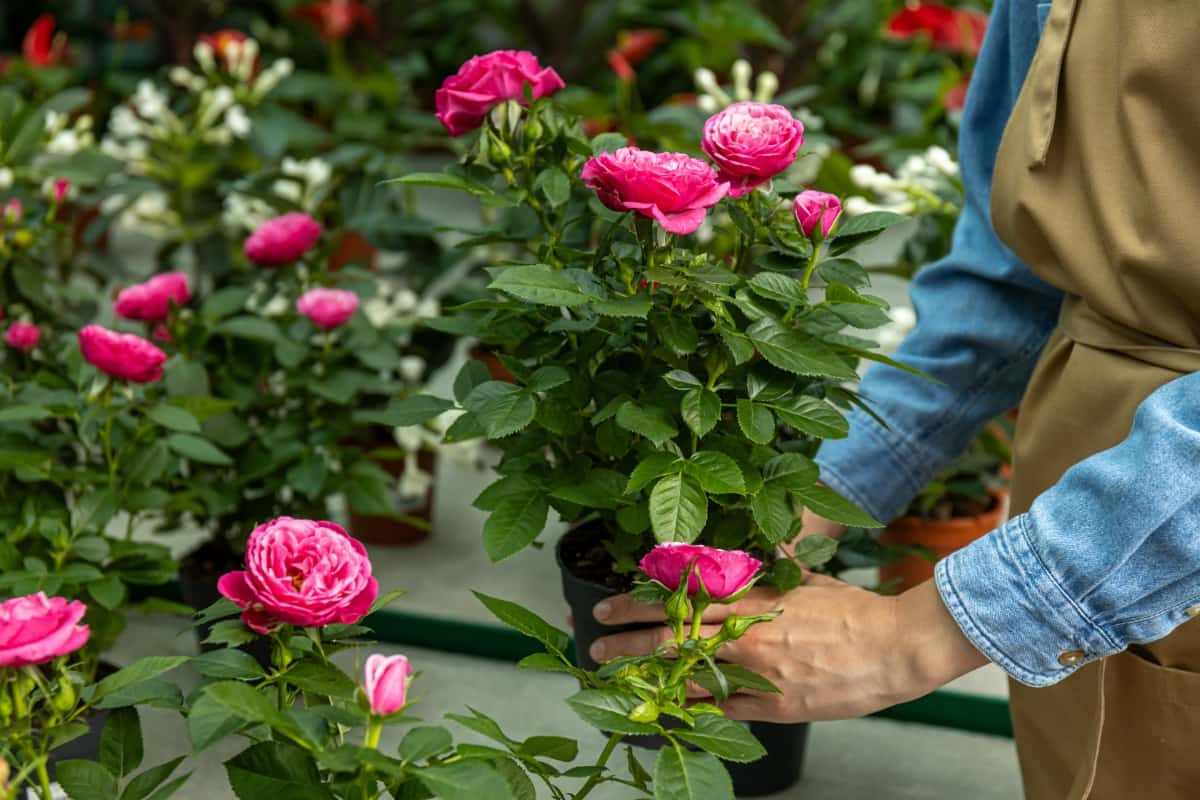
Conclusion 

Winter pruning is an important practice for maintaining the health and vitality of your plants. By understanding the benefits of Cold season plant trimming and considering the specific needs of different plant types, you can effectively shape and rejuvenate your garden. 

Ultimate Guide to Orchid Aerial Roots Care: Tips for Healthy Growth and Maintenance

0

Caring for Orchid aerial roots is an essential aspect of maintaining the overall health and vitality of your plant. By understanding how to identify common issues and implementing prevention and treatment strategies, you can ensure that your Orchid’s aerial roots thrive. 

Orchid Aerial Roots Care

Orchid Aerial Roots Care

The Role of Aerial Roots 

Orchid roots play a key role in the overall health and well-being of these stunning plants. While most people are familiar with the underground roots that absorb water and nutrients from the potting medium, Orchids also possess aerial roots that serve important functions. When it comes to the Importance of aerial roots, Aerial roots have a unique ability to absorb moisture from the air, making them essential for Orchids growing in their natural environments.  

Identifying Healthy vs. Unhealthy Roots 

Identifying and encouraging healthy aerial roots is relatively easy if you know what to look for. Healthy ones tend to be plump firm, and have a bright green coloration. In contrast, unhealthy aerial roots may appear shriveled, mushy, or discolored. 

Proper Watering Techniques 

Watering Frequency and Amount 

Proper watering is crucial for the healthy growth of Orchid’s aerial roots. The frequency and amount of water largely depend on the needs of your Orchid species. Generally, it’s recommended to water Orchids once every 7-10 days during active growth periods, allowing the potting medium to dry out slightly between each watering.  

Signs of Overwatering and Underwatering 

To determine if you’ve provided enough water, pay attention to the weight of the pot. If it feels light when lifted, it may be a sign that your Orchid needs watering. On the other hand, if it feels heavy or saturated even after several days since its last watering, this could indicate overwatering. Similarly, observing the condition of your aerial roots can give clues about hydration levels. Healthy roots are typically greenish-gray and plump with a silvery sheen when wet but turn grayish-white when they’re thirsty. 

Maintaining Ideal Humidity Levels 

Creating a Humid Environment 

One of the key factors in Aerial roots in indoor Orchid care is maintaining ideal humidity levels. Orchids thrive in humid environments, as they closely resemble their natural habitat. To create a humid environment for your Orchids, you can use various methods, such as misting the leaves and aerial roots regularly or placing a tray filled with water. Monitoring humidity levels is crucial to ensure that your Orchids are getting the right amount of moisture. Aim for a range between 50-70% humidity, which is considered optimal for most Orchid species. 

Monitoring and Adjusting Humidity 

If you find that humidity levels are too low, there are several ways to adjust them accordingly. One easy method is using a humidifier to increase moisture in the air around your plants. Alternatively, grouping Orchids can help create microclimates with higher humidity levels. On the other hand, if you notice excessive condensation on glass surfaces or mold growth around your plants, it may indicate high humidity levels. In such cases, providing better airflow by using fans or opening windows slightly can help reduce excess moisture. 

Light and Temperature Requirements 

Optimal Light Conditions 

When it comes to Aerial root propagation, choose healthy roots, and Orchids generally prefer bright, indirect sunlight. Placing them near a window with sheer curtains or in a well-lit room is usually sufficient. However, direct sunlight can scorch their leaves, so it’s important to provide some shade during the hottest part of the day. 

Ideal Temperature Range 

As for temperature, most Orchids enjoy a moderate range between 18°C and 24°C. Nighttime temperatures can dip slightly lower without causing harm. Keep in mind that different types of Orchids may have slightly different preferences when it comes to lighting and temperature. Some varieties may require more intense light or cooler temperatures than others. Consulting specific care instructions for your particular species will ensure you meet their unique needs. 

In case you missed it: Growing Orchids Hydroponically – a Full Guide

Orchids Flowers in Pots

Fertilization and Nutrition 

Selecting the Right Fertilizer 

Selecting the right fertilizer for your Orchids is crucial for their overall health and growth. There are various types of fertilizers available in the market, so it’s essential to choose one that suits the specific needs of your Orchid species. Generally, a balanced fertilizer with nitrogen (N), phosphorus (P), and potassium (K) is recommended. 

Fertilizing Schedule and Dosage 

When it comes to Fertilizing Orchid aerial roots, consistency is key. Orchids typically require regular feeding during their active growing season, which is usually spring through early fall. Dosage is another important factor to consider when fertilizing your Orchids. Over-fertilization can cause root burn and other nutrient imbalances, while under-fertilization can result in stunted growth or yellowed leaves. 

Enhancing Air Circulation 

Importance of Airflow 

When it comes to Managing aerial roots in Orchids, one aspect that is often overlooked but crucial to their overall health is air circulation. Adequate airflow around your plants plays a vital role in preventing the buildup of moisture and stagnant air, which can cause fungal diseases and root rot. Good air circulation regulates temperature and humidity levels as well. Orchids thrive in environments with moderate humidity, so proper airflow can help prevent excessive moisture from settling on leaves or in the potting medium. 

Improving Air Circulation Around Orchids 

To improve air circulation around your Orchids, there are several simple steps you can take. First, make sure that your plants are not crowded together; give them enough space so that each plant has room for its foliage and roots to grow freely. Placing fans strategically near your Orchid collection can also help promote better airflow. 

Repotting and Potting Medium 

When and How to Repot 

When it comes to Orchid care, repotting is an essential task that should not be overlooked. One sign is when the pot becomes too crowded with roots or when the potting medium breaks down and no longer provides adequate drainage. Additionally, if you notice that your Orchid has stopped growing or blooming, it may be a good indication that it needs a new home. But before you grab a new pot and start digging up your Orchid, there are a few things to consider.

First, choose the right pot size for your plant. Orchids prefer snug pots, so opt for one that allows for about 1-2 inches of space around the roots. Now, let’s talk about how actually to repot your Orchid. Pruning aerial roots if you observe any damaged roots when repotting. Gently loosen the remaining healthy roots from their current container and place them into the new pot filled with fresh potting medium. Give your newly potted Orchid some time to adjust to its new environment before watering again – typically, about a week or two should suffice. 

Choosing the Right Potting Mix 

There are various options available on the market, such as bark chips, sphagnum moss, perlite mixtures, etc. It’s important to choose a well-draining mix that allows air circulation around the roots. 

Pest and Disease Management 

Identifying Common Issues 

Pest and disease management is a key aspect of caring for Orchid aerial roots. By understanding common issues, identifying them early on, and implementing prevention strategies, you can ensure the health and vitality of your plants. One of the most common pests that affect Orchids is aphids. These tiny insects cause damage to leaves and stems. To prevent infestations, regularly inspect your Orchids for signs of aphids, such as curled or distorted leaves.

If you spot these pesky critters, treat them with a mild soap solution or an insecticidal spray specifically formulated for Orchids.  Another frequent problem is fungal infections like root rot. Overwatering or poor drainage can create the perfect conditions for fungi to thrive in the potting medium. To prevent this issue, make sure to water your Orchids appropriately and choose well-draining potting mixes. 

Prevention and Treatment Strategies 

One important strategy is providing proper watering techniques. Overwatering can cause root rot, allow the medium to dry out slightly between waterings. On the other hand, underwatering can cause dehydration and stress on the roots, so finding a balance is crucial. Protecting aerial roots from pests involves maintaining suitable humidity levels. Orchids thrive in humid environments, but excessive moisture can encourage fungal or bacterial infections. Use a humidifier or place your Orchid on a tray with water-filled pebbles to create an ideal level of humidity. 

In case you missed it: Orchid Growing For Beginners – Tips, Ideas, Techniques

Fresh Pink Orchid in Pot

Seasonal Care Adjustments 

Care Changes Through Seasons 

During warmer months, such as spring and summer, Orchids thrive in bright light conditions with temperatures ranging between 18°C to 24°C. The increased sunlight intensity during this time promotes strong root development and vibrant blooms. However, it’s important to protect your Orchids from direct sunlight that can scorch their leaves. 

In contrast, as fall approaches and winter sets in, you need to make certain changes in caring for your Orchids. Lower temperatures require adjusting the lighting conditions accordingly. Providing adequate warmth becomes essential while avoiding exposure to cold drafts or sudden temperature fluctuations that can harm delicate roots. 

Preparing for Dormancy 

Preparing your Orchid for dormancy is another crucial step during colder months. This period allows the plant to rest and recharge before entering a new growth phase when temperatures rise again. Reduce watering frequency but maintain hydration levels by misting aerial roots occasionally. Be mindful not to overwater, as excessive moisture can lead to root rot.

Remember that each season brings unique challenges and opportunities for proper Orchid care. Stay attuned to these adjustments by monitoring temperature variations closely and providing appropriate light levels throughout the year. 

Monitoring and Maintenance 

Regular Inspection of Roots 

Monitoring and maintaining the health of your Orchid’s roots is essential for ensuring its overall well-being. Regularly inspecting the roots allows you to catch any potential problems early on and take appropriate action. During your inspections, pay attention to the color, texture, and smell of the roots. Healthy Orchid roots should be firm with a light green or silver-gray color. They should also have a slightly velvety texture. If you notice any mushy or discolored roots, it may indicate root rot or other issues. 

Addressing Root Problems 

Addressing root problems promptly is crucial for preventing further damage to your Orchid. If you spot any unhealthy or damaged roots during inspection, carefully trim them using sterilized tools. Be sure to remove only the affected portions while leaving healthy segments intact. After trimming, apply an antifungal treatment to prevent infections from spreading. It’s important not to exceed recommended dosages, as excessive use can harm your plant. 

In addition to regular inspections, proper maintenance practices are vital for keeping your Orchid’s aerial roots healthy. Avoid overwatering by allowing the potting medium to dry out between waterings, but don’t let it completely dry out, either. Proper airflow around the roots is equally important in preventing fungal growth and promoting oxygen exchange. Consider placing fans near your Orchids or providing gentle air circulation through open windows or vents. 

In case you missed it: Easy to Grow Orchid Plants for Beginners: Soil, Propagation, Planting, and Care

Orchid in Pot

Conclusion 

In the world of Orchid care, proper maintenance of aerial roots is crucial for the overall health and vitality of these exquisite plants. By understanding their role and implementing effective care strategies, you can ensure that your Orchids thrive and continue to grace your space with their beauty.