Apricot trees are a delightful addition to any garden, with their beautiful blossoms and delicious fruit. Understanding the different propagation methods is key to growing your Apricot tree. There are several ways to propagate Apricot trees, each with benefits and considerations. Consider factors such as time constraints, desired outcomes, available resources, and experience level when deciding which method to use.
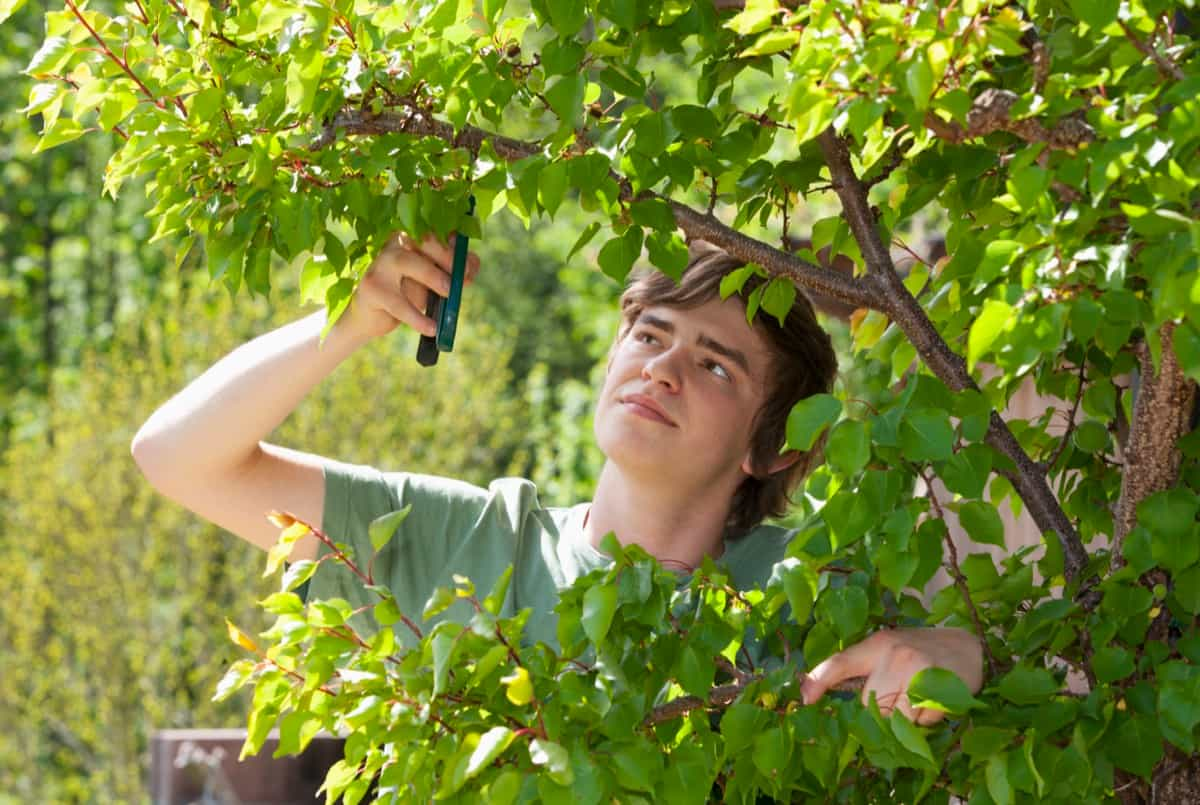
Remember that successful propagation also depends on providing proper care and attention to young plants during their establishment phase. Regular watering, adequate sunlight exposure, and protection from pests and diseases are all crucial for the healthy growth of Apricot trees propagated through any method.
Apricot Tree Propagation
Seedling Propagation of Apricot Trees
Seedling propagation is one of the most common methods to propagate Apricot trees. It involves growing new plants from seeds collected from mature Apricot fruits. To begin, select healthy and ripe Apricots for seed collection. Remove the flesh from the fruit and wash the seeds thoroughly to remove any residue or pulp. Once clean, allow them to dry completely before planting.
Next, choose a suitable location for planting the seeds. Apricots prefer well-drained soil in full sun, so prepare the soil accordingly. Dig a small hole and place each seed about an inch deep into the soil, ensuring proper spacing between them. Germination may take several weeks or even months, so be patient during this stage. As they grow, thin out weaker seedlings to give more space and nutrients to stronger ones.
Grafting Techniques for Apricot Tree Propagation
Grafting is a fascinating technique used for the propagation of Apricot trees. It involves joining two different plant parts together to create a new, stronger tree. Several grafting techniques can be employed when propagating Apricots. One popular method is whip and tongue grafting. This technique requires precision and skill, as it involves cutting the scion (the desired variety) and the rootstock to fit perfectly together like puzzle pieces.
In case you missed it: How to Grow Apricots from Seed to Harvest: Check How this Guide Helps Beginners
The two sections are bound together with tape or grafting wax until they heal and grow. Another common method is cleft grafting, which is simpler but equally effective. In this technique, a vertical cut is made into the rootstock and wedged open using a knife or chisel. The scion is inserted into the cleft so that its cambium layers align with the rootstocks. Once again, binding materials secure the union until healing occurs.
Budding as a Method of Apricot Tree Propagation
Budding is another common method used for Apricot tree propagation. This technique involves inserting a bud from the desired Apricot variety into the bark of a rootstock tree. The bud then grows and develops into a new Apricot tree. You must select healthy and disease-free buds from an established Apricot tree to perform budding.
It’s important to choose dormant but plump buds with viable tissues. The best time for budding is usually in late summer when the bark is slipping easily. The first step in budding is making a T-shaped incision on the rootstock tree’s bark. Carefully lift the flaps of bark to expose the cambium layer underneath. Insert the selected bud into this opening, ensuring it fits snugly without air pockets.
Next, secure the bud in place by tying it with grafting tape or using rubber bands. This helps protect it and ensures proper contact between its tissues and those of the rootstock. After budding, monitor your newly budded trees closely for signs of growth and success. With proper care and maintenance, these grafted trees can develop into healthy Apricot plants that bear fruits true to their parent variety.
Whip and Tongue Grafting for Apricot Trees
Whip and tongue grafting is a popular technique used for propagating Apricot trees. This method involves joining a scion, the desired variety of Apricot, to a rootstock. The process may sound intimidating, but with practice and patience, it can be mastered. To begin whip and tongue grafting, you’ll need to select healthy scions from mature Apricot trees during their dormant season. These scions should have several buds along their length. Similarly, choose a compatible rootstock providing the necessary vigor and disease resistance.
In case you missed it: 19 Common Apricot Tree Problems: How to Fix them, Solutions, and Treatment
The first step in the grafting process is preparing the scion and rootstock by making clean cuts using sharp tools. The whip cut creates an angled sloping cut on both pieces of wood while ensuring they match perfectly when joined together. Next comes the tongue cut – this involves creating a long incision down the center of each whip-cut surface to form two tongues that interlock tightly when combined. Making precise cuts is crucial for a successful union between the scion and rootstock.
After securely aligning the tongues on both pieces, bind them tightly with grafting tape or parafilm to prevent any movement or drying out. Ensure proper alignment so that cambium layers are in contact as they promote healing and nutrient flow between parts. Once done with binding, protect your newly grafted plant by enclosing it in plastic wrap or placing it inside a humidity dome until bud break occurs around 4-6 weeks later. Then, gradually expose your growing plantlet to outdoor conditions before transplanting it into its permanent location.
Cleft Grafting for Apricot Tree Propagation
Cleft grafting is a common and effective method used for Apricot tree propagation. This technique involves making a vertical cut into the rootstock, creating a cleft or V-shaped opening. Then, a scion from the desired Apricot variety is inserted into the cleft. The success of cleft grafting largely depends on proper alignment between the scion and rootstock cambium layers. Ensuring they match up as closely as possible for successful graft union formation is crucial. Once the scion is inserted, it is important to secure it tightly using grafting tape or rubber bands.
This helps provide stability and promotes successful healing at the graft site. Cleft grafting is typically done during late winter or early spring when the rootstock and scion are dormant. The timing ensures minimal sap flow, reducing stress on both parts of the plant. After grafting, protecting the newly grafted area from extreme weather conditions or potential damage is essential. Wrapping with horticultural film can help shield against these threats while providing an optimal environment for healing and growth.
Tissue Culture Propagation of Apricot Trees
Regarding propagating Apricot trees, tissue culture is a modern and efficient method that has gained popularity among growers. This technique involves growing plants in a sterilized laboratory environment, using small explants from the parent plant. To begin the tissue culture process for Apricot tree propagation, careful selection and preparation of the explant is crucial. The explant can be taken from various plant parts, such as shoot tips or axillary buds.
In case you missed it: Homemade Insecticide for Houseplants: Homemade Remedies for Natural Pest Control on Houseplants
It should be disinfected thoroughly to exclude contaminants before being placed in a growth medium. Once the explant is prepared, in vitro shoot multiplication takes place. This step involves placing the explant in a nutrient-rich medium containing growth hormones like cytokinins and auxins, stimulating cell division and promoting shoot development. Under controlled conditions with proper lighting and temperature control, multiple shoots can be generated from a single explant.
Explant Selection and Preparation in Apricot Tree Tissue Culture
Apricot tree tissue culture involves selecting and preparing explants small pieces of plant material to initiate new growth in a laboratory setting. The success of tissue culture propagation relies heavily on carefully selecting and preparing these explants. Selecting healthy and disease-free plant material is crucial when choosing an appropriate explant for Apricot tree tissue culture.
This ensures the resulting tissue cultures are free from potential pathogens or contaminants. Young shoots or buds are often preferred as they are more successful in initiating new growth. Once the appropriate explants have been selected, they must be prepared before being placed into culture media.
This typically involves surface sterilization, where the outer layer of the explant is treated with disinfecting agents such as bleach or alcohol. The goal is to eliminate any microorganisms that may hinder successful tissue culturing. After sterilization, the explants are carefully dissected into smaller pieces, ensuring that each piece contains viable cells capable of regenerating into whole plants. Special care should be taken not to damage delicate tissues during this process.
In Vitro Shoot Multiplication for Apricot Tree Propagation
One of the modern methods used for Apricot tree propagation is in vitro shoot multiplication. This technique involves growing multiple shoots from a small piece of plant tissue in a laboratory setting. To begin, explants are selected from healthy Apricot plants and sterilized to remove potential contaminants.
In case you missed it: How to Grow Flowering Dogwood Trees: A Step-by-Step Guide for Planting to Care
These explants can be obtained from various plant parts, such as leaf or stem tissues. Once sterilized, they are placed onto a nutrient-rich agar medium that contains growth hormones. Under controlled conditions, these explants start developing into new shoots. The growth hormones present in the medium help stimulate cell division and elongation, producing multiple shoots.
The process requires careful monitoring and regular sub-culturing to ensure optimal growth rates. As the shoots multiply, they can be transferred to fresh media with different hormone concentrations to promote further proliferation. After several rounds of multiplication, an abundant supply of healthy shoot cultures can be obtained for subsequent stages of tissue culture propagation or transplantation into the soil.
Acclimatization and Transplantation of Tissue-Cultured Apricot Plants
During acclimatization, tissue-cultured Apricot plants are gradually exposed to external conditions, allowing them to adapt and strengthen before transplantation. This process requires careful temperature, humidity, light levels, and water supply monitoring to ensure optimal growth.
Transplantation involves carefully transferring the tissue-cultured Apricot plants from their sterile culture vessels into pots or field soil. Handling the young plants carefully during this transition is essential to avoid damaging their growth. After transplantation, it is important to continue properly caring for and maintaining the tissue-cultured Apricot plants.
Frequently Asked Questions on Apricot Tree Propagation
What is the Difference Between Seedling Propagation and Grafting for Apricot Trees?
Seedling propagation involves growing a new Apricot tree from a seed, while grafting involves attaching a branch or bud from an existing tree onto another rootstock. Seedling propagation allows for more genetic diversity but may result in unpredictable traits, while grafting ensures that the new tree inherits the characteristics of the parent tree.
In case you missed it: How to Grow Oranges from Seed to Harvest: Check How this Guide Helps Beginners
Which Method is Best for Beginner Gardeners?
For beginner gardeners, seedling propagation may be the easiest method, requiring minimal equipment and expertise. It also provides an opportunity to learn about different varieties through experimentation.
Can I Use Seeds from Store-Bought Apricots for Seedling Propagation?
Yes, you can use seeds from store-bought Apricots for seedling propagation, but remember that these seeds might not always grow into trees with desired traits due to cross-pollination during cultivation.
Conclusion
Each approach has its benefits regarding simplicity or control over traits inherited from parent trees. However, if one chooses to propagate their Apricots, proper selection and preparation are vital to ensure healthy growth and successful transplantation. By understanding these different methods, growers can choose the most suitable technique for their specific needs and enjoy an abundant supply of juicy Apricots straight from their orchards.
- Broccoli Seed Germination and Selection
- Asparagus Seed Germination and Variety Selection
- Seasonal Flower Gardening: Best Practices for Spring, Summer, Fall, and Winter
- How to Grow Hibiscus from Flower
- Plantation Ideas for Home Decoration: A Beginners Guide
- Flower Garden Designs and Layouts for Beginners
- Planting and Spacing Techniques in Papaya: A Beginner’s Guide
- Growing Gold: Essential Techniques for Planting Pineapples
- How to Make Kalanchoe Plant Bushy: Home Remedies and Solutions
- 11 Reasons Why Your Gardenia is Not Blooming: Home Remedies and Solutions
- Eco Elegance: The Guide to Designing a Drought-Tolerant Landscape
- Gardening on a Slope: Strategies for Hillside Landscaping
- Nourish and Flourish: Top Organic Mulches for Thriving House Plants
- Everything You Want to Know about Indian Mogra Flower: Discover Uses and Growing
- Green Thumb Success: Expert Tips for Cultivating Greenhouse Pumpkins All Year Round
- Maximize Growth & Flavor: The Ultimate Guide to Companion Planting in Herb Gardens
- How to Control Rhododendron Problems Naturally: Home Remedies and Organic Ways to Fix Them
- Natural Magic: The Remarkable Benefits of Cinnamon for Plants
- Best Steps to Revive Dying Tulip with Natural and Organic Treatment
- 10 Reasons Why Your Angel Trumpet is Not Blooming: Remedies and Treatment
- How to Fix Periwinkle Leaf and Flower-Related Problems: Natural Remedies and Solutions
- How to Fix Zinnias Leaf and Flower Problems: Discover Natural and Home Remedies
- Organic Steps to Induce Lemon Tree Flowers: A Comprehensive Guide
- Bloom Booster: Crafting the Perfect Homemade Bougainvillea Fertilizer
- Optimizing Growth: A Guide to Applying NPK Fertilizer for Potted Plants
- 10 Best Homemade Fertilizers for Rubber Plant: DIY Recipes and Application Method
- How to Boost Female Pumpkin Flowers: Effective Steps for More Flowers and High Yields
- Transform Your Indoor Garden: Top Benefits of Pink Salt for Houseplants
- 10 Best Homemade Fertilizers for Peacock Plants (Calathea): Easy DIY Guide
- Unlock Blooms: 9 Reasons Why Your Potted Chrysanthemum is Not Blooming
- 8 Reasons Why Your Potted Hibiscus is Not Blooming: Fix it with Simple Solutions
- Unlock Blooms: 9 Key Reasons Your Potted Frangipani Won’t Flower
- 10 Reasons Why Is My Ice Plant Not Blooming: Remedies and Treatment
- 10 Reasons Why My Potted Hydrangea Not Blooming: Treatment and Remedies
- 10 Reasons Why is My Wisteria Not Blooming: Remedies and Treatment
- 10 Reasons Why is My Goldfish Plant Not Blooming: Remedies and Treatment