A step by step guide for growing potatoes from seed
Today, we learn the topic of growing potatoes from potato seed (Aloo), potato plant care, and harvesting process of potato roots. Potato is a starchy tuber which is not only delicious but also nutritious. This is a great source of protein, potassium, fiber, Vitamin B6, Vitamin C, and Iron. There are plenty of ways you can consume potatoes but they will taste their best when they are completely fresh mainly when you are growing them on your own. Growing potatoes is simple, but it is essential to start their growth in a soil which is acidic to provide them with an adequate amount of sun and water. Apart from this, they will have to be grown at the time of winter when the climatic conditions are cool as they are the ones who love to be grown in the cooler climatic conditions.
Growing potatoes from seed potato:
- You will have to select a perfect time for plantation. As potatoes are the plants which love to be grown when the climatic conditions are cool, you can plant them at the time of winter and grow them through winter when the climatic conditions are somewhat warm making sure that the ground where you are planting potatoes does not freeze at the time of winter. Make sure that you are planting potatoes after 15 days of the last frost.
- Potatoes will not begin to grow until the temperature of the soil is 7°C. So make sure that you are not planting the seed potatoes prior to the last frost.
- For the plantation, select a location in your garden which is sunny. Though the potatoes love cool climates, they will do their best in a place which gets light for at least 6 to 8 hours in a day. You can also go with the plantation of potatoes anywhere you wish. You can also consider planting them directly in the ground or in any garden beds.
- Now, it is time for amendment of the soil. The best soil you can consider for the growth of potatoes is the one which is loose and slightly acidic. The best pH level of the soil should be in between 5 and 7 and you can also raise the acidity by tilling the manure which is aged, compost which is matured or any fertilizer which is rich in the content of potassium into the soil.
- Soil tilling will help in breaking everything up and makes sure that the soil is perfect and loose for the growth of potatoes.
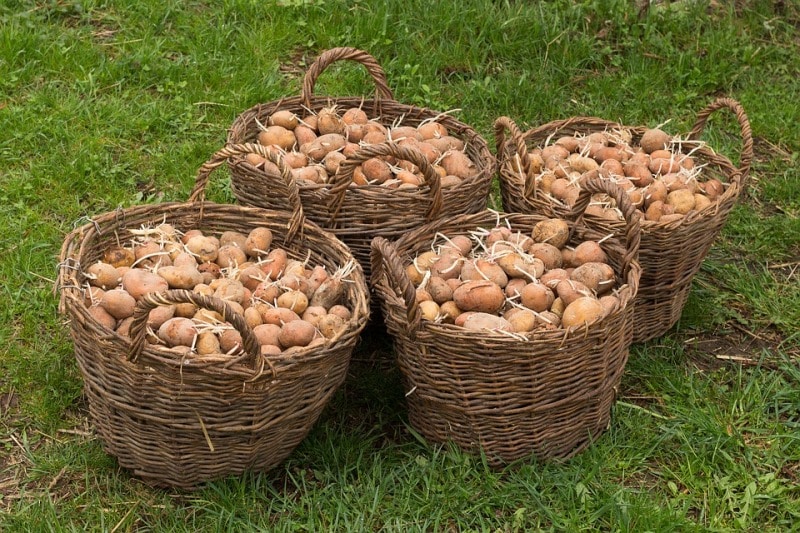
- The seed potatoes have to be sprouted now. Sprouting potatoes is an important stage in the growth of potatoes. Potatoes are the ones which grow rapidly when they are grown from a seed potato. This is a potato which is let for sprouting 15 days prior to your selected date of the plantation, layout the seed potatoes anywhere which receives an adequate amount of sunlight and that is in between 16°C to 22°C. The potatoes have to be left in the light for sprouting until the time of plantation arrives.
- Make sure that you are using the potatoes which are small and healthy for seed potatoes.
- If you find that your seed potato is bigger than an egg, you can cut into half. Make sure that there is a minimum of two eyes or sprouts for a piece.
- You can also consider growing any potato variety you love, but you will have to ensure that you are making use of potatoes which are fertilizer-free and which are not treated with any of the sprout-inhibitors. This will help in the prevention of the potatoes from getting sprouted and you will not be able to start the growth of a new plant from it.
- Make sure that you are digging straight rows in the soil. When you see sprouting in your potatoes, it means that it’s the time for plantation. Make use of a shovel or spade for digging to a depth of 4 inches in the garden bed. The rows should be at a depth which will hold the potatoes. The rows should be at a distance of at least 3 feet from each other.
- Potatoes which are grown in rows in the ground which lead to the production of very good yields as long as the soil has a good quality.
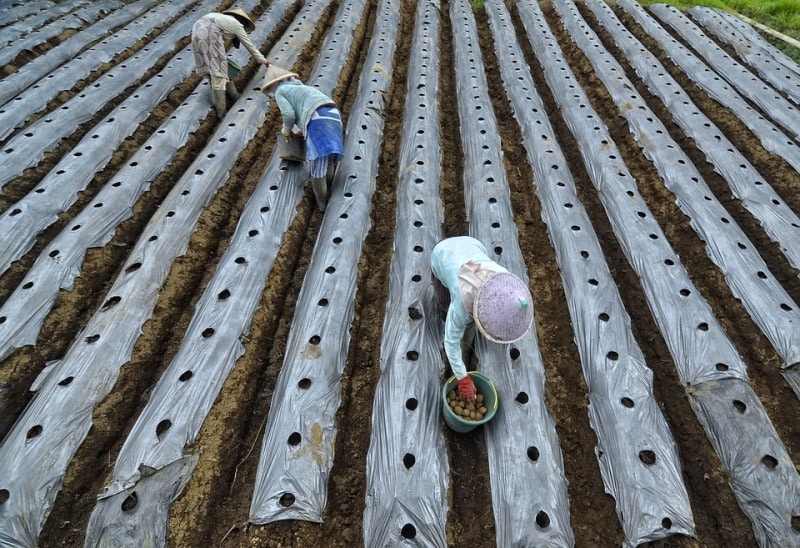
- Now, it is the time for the plantation of seed potatoes. The seed potatoes can be placed in the trenches directly by placing the sprouts in them. The sprouts should face upwards looking towards the sky. The potatoes have to be planted at a distance of 12 inches from each other. When you fill the rows with the seed potatoes, they should be covered with soil up to 4 inches.
You may also like Growing Stevia Hydroponically.
Growing potatoes in the container:
- Growing potatoes in bags or containers are simple. The first thing you will have to do is to purchase the seed potatoes. These are different from the potatoes you usually purchase at the grocery store or markets. Seed potatoes are called tubers and these are grown for the replantation and not for consumption. Some table stock potatoes can be used for the purpose of the plantation, but they generally do not give rise to the yield which is strong.
- The seed potatoes have to be purchased prior to 15 days to 1 month before the plantation. This is the perfect time which the potatoes take for sprouting.
- Make sure that you are not using the potatoes you have purchased at the normal grocery stores as seed potatoes. These are the potatoes which are treated for the prevention of the production of shoots so that they will have a longer shelf life.
- Make sure that you are removing the seed potatoes out of the back as soon as possible after the purchase. There would be chances of growth of fungi when you leave them in the bag.
- The seed potatoes have to be placed in an open container in a place which is dark and cool. Place the tubers with their eyes towards upwards in any container or you can also make use of an egg carton. After that, the container has to be set in a place where the temperature is cool. You can consider kitchen cupboard for that. You will have to monitor this every day to check the growth of the eyes.
- A potato eye is most importantly a sprout. You will be able to see small growth which is whitish or green which would be coming out of the skin of potatoes.
- Once you see sprouting in your potatoes, make sure that you are not rotating them. You should wait for more sprouts to develop on the ones which are facing upwards.
- The best temperature for the seed potatoes to sprout is 10°C.
- All the eyes of the potatoes have to be trimmed except the 3 large ones. Based on the number of eyes, there would be a growth of spuds. Anyways, the size of the potatoes will be dependent on the number of potatoes you are growing from one tuber. When you are prepared for plantation, find the 3 strong eyes and rub the others with your fingers or you can also dig them out by making use of a sharp knife.
- If you have decided to take off the sprouts by making use of a knife, the cut has to be kept shallow. Just remove the sprout itself and a thin layer of the skin of the potato.
- The eyes should have a size between 0.5 inches to 5 inches when you have started the process of trimming and plantation.
- The pots which you select for the plantation of potatoes should have a height of at least 18 inches and a diameter of 18 inches. If you have decided on the plantation of more than 7 potatoes in a container, then you will have to choose the larger one.
- Provide an adequate amount of space for your potatoes so that it would help them to grow and also for the development of roots and tubers. If you have selected a very small pot, the potatoes will not sprout completely.
- The grow bags or pots which are taller will provide you sufficient space to fill the pot with soil as you see the shoots of potato growing.
- Usually, each of the seed potatoes will require up to 8 liters for their growth in a container. This can be taken into consideration when you are planting extra potatoes.
- The plastic pots which are sturdy can be found in any of the garden stores and these are the best options when you are growing potatoes. They will be black which will allow them to maintain the warmth and these generally have built-in drainage holes. You can also take into consideration the usage of fabric growing bags, but these will not be that aesthetically pleasing.
- If you are choosing a plastic pot which is heavy, ensure that you are putting it on a dolly. This will make it possible for moving your potatoes as required at the time of watering.
- If you are residing in an area which has warmer climatic conditions, make sure that you are avoiding the usage of pots which are dark-colored. These will attract plenty of sunlight and will overheat the plants.
- The pots have to be washed making use of warm water and soap before the plantation takes place in them. It will help to kill any bacteria which is harmful.
- Select a pot which has drainage holes at the bottom. Else, you can also make use of a drill for the creation of at least 3 drainage holes.
- Place a fiberglass screen at the bottom of the pot.
- Each pot has to be filled with small stones and pebbles until ¼th inch is covered at the bottom of the pot. The air gaps which are present in between the saucer and the pot which are being created by the pebbles will let the water to drain in an effective way.
- Buy a container growing medium for the plantation of potatoes. The basic potting soil medium for containers which can be found at any of the gardening stores present in your locality would be fine for the growth of potatoes. Anyways, you can also go with the creation of your potting soil mix by combining ⅓ rd of compost. ⅓ rd of perlite and ⅓ rd of peat moss or coco coil in a large barrel or you can also use any large bag.
- Now, it is the time to fill your pot with 6 inches of the growing medium. The complete bottom of the container has to be covered. The soil has to be patted lightly by making use of your hands to ensure that it is packed in a firm manner. If the soil is not that solid, there is a change of potatoes sinking to the bottom of the container.
- The fiberglass screen and the stones layer has to be completely covered and they should not be visible after the addition of soil.
- Combine an organic fertilizer as per the instructions on the package. Make use of space for sprinkling organic fertilizer which is in the form of granules on the top of the soil’s first layer in the container. The quantity that you are using will be based on the fertilizer type which you are purchasing and the pot size.
- Select a fertilizer which is mainly used for container gardening.
- Once the establishment of potatoes takes place, you will have to start feeding them liquid fertilizer for every 15 days.
- Now, the seed potatoes have to be placed in the soil with their eyes facing upwards. The tubers have to be planted at a distance of 6 inches from each other. Make sure that they are not touching each other or the pot’s edge.
- When the potatoes are positioned, you can press them in a gentle manner into the soil along with the fertilizer mix.
- Make use of a spade for adding more soil into the container in a gentle manner which leads to the creation of an even layer. When you are done, the seed potatoes will be hidden completely. Make use of your hands to pat the soil in a gentle manner and also make sure that you are not crushing the tubers.
- Based on the pot size, you may be required to add some amount of growing medium.
- The soil in the pot has to be watered until you see it draining. Make use of a watering can for adding the water slowly to the pot. When you see that the water is flowing out of the drainage holes of the pot, you can stop watering.
- Potatoes will grow their best in the moist soil, but not the one which is soggy.
- You can also consider adding a straw layer for keeping the soil moist and also shaded all across the day.
You may also check Summer Gardening Ideas, Tips, Techniques.
Care and maintenance of potato plants:
- The potato plants have to be watered in a regular manner for maintaining the soil in a moist condition. Potatoes love an adequate amount of water. So it is essential to maintain the soil moist, but make sure that you are not soaking it wet at the time of growth. Also, ensure that the potato plants are getting about 2 inches of water on a weekly basis mainly at the stage of flowering.
- You will have to stop watering the potato plants when you see that the foliage is turning yellow and is dying back as this is an indication that the harvest time of potatoes is coming soon.
- Start building up some additional soil surrounding the base of the potato plants when they are growing. When the potato plants have reached the height of 6 inches, add some extra amount of soil around the base of every potato plant. This method is called as hilling and this will help in the protection of potatoes from sunburn and will also give support to the potato plants at the time of their growth. The potatoes have to be hilled again every time the plants grow to a size of 6 inches.
- Potatoes which have been exposed to sunlight will lead to the production of a toxic chemical called solanine. This will appear as a green layer on the outer part of the tuber.
- Make sure that the harden is being weeded regularly. Potato plants are the ones which do well when there is no competition of weeds. When you see weeds growing in your garden, dig them or pull them out by making use of the hand to make sure that the potatoes are getting all the essential nutrients they are required to grow.
Management of pests and diseases of potatoes:
It is not too late to check Growing Tulsi in Pots.
- Buy the varieties which are resistant to diseases. For the reduction of chances of diseases for your potatoes, you can buy a variety which is resistant to diseases. Few varieties of potatoes are Winston, Agria, King Edward.
- Make sure that you are avoiding potato blight by rotating your potato planting locations on a yearly basis. Make sure that you are waiting for three years prior to the plantation of potatoes in your last location. Overcrowding will also be a problem for potatoes. So make sure that you are providing them with an adequate amount of space.
- Reduce the pH of the soil to avoid the scab. Scab is the most common disease which can be seen by the legions which are present on the potatoes. There might be the development of scab on your potatoes of the soil pH is way too high. You can take into consideration adding sulfur to the soil to reduce its pH level.
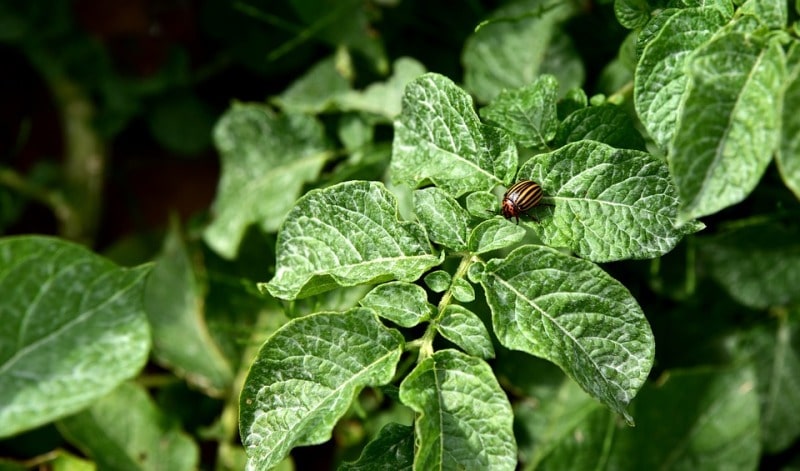
- The pests have to be removed manually using your hand or water. Potato beetles have to be removed using your hand. Aphids can be removed by spraying water in a sharp stream. As an alternative, you can also consider removing these pests by making use of an insecticide which is made naturally or you can also find this at any garden store present in your locality.
Harvesting potatoes:
You may also like Growing Garden Sorrel.
- The new potatoes can be harvested after the flowering stops. New potatoes are the ones which have been removed before they were let to develop completely. When your potato plants are about 3 months old, they will start flowering. When you see that the flowering has stopped, you will have to wait for another 15 days and then start harvesting your new potatoes by digging and pulling them out of the ground.
- New potatoes are the ones which are smaller and have skin more tender than the ones which are matured. People frequently harvest a few new potatoes for the creation of more space for the remaining potatoes to get matured.
- The foliage which is browning has to be cut when you see that it started dying back. As the potato plants are getting matured, the foliage will start to turn yellow and die as the plants reach the end of their life cycle. When this takes place, make sure that you are removing the brown foliage by making use of scissors or garden shears. As soon as the foliage is dead, you will have to be patient for another 15 days prior to the harvesting of potatoes.
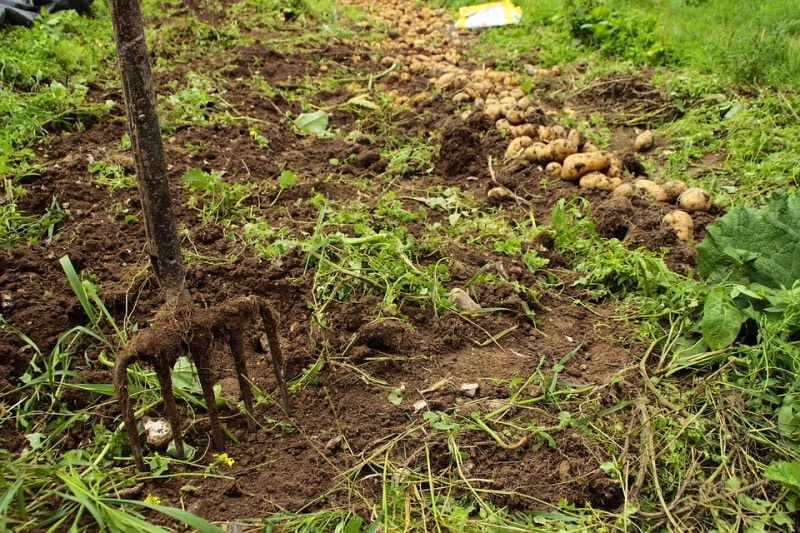
- The potatoes have to be dug out of the ground. Once you see that all the foliage is dead and you have given 15 days time for the potatoes to reach the stage of maturity, you can start digging potatoes. Make use of a space or shovel to dig down into the soil in a gentle manner for unearthing the potatoes. This will make sure that you are not puncturing or bruising any of the potatoes while using the spade.
- Based on the potato varieties you have planted, your potatoes will be prepared for the harvest at anytime between 2 to 3 months starting from the date of the plantation.
You may also be interested in Vertical Gardening Techniques.
Storing potatoes:
- The potatoes have to be laid to cure in a place which is cool and dry. After you dig the potatoes, you can have to start transferring them to a garage or any porch which is covered. You can also shift them to a place which is cool, shaded, try and also has good ventilation. The potatoes have to be left there for a minimum of 3 days to 15 days so that they get cured. This will provide them some time to get matured and will help them to keep for longer. The best temperature for the potato curing will be in between 7° C to 16° C. Make sure that you are not curing the new potatoes as they have to be consumed within the first few days of harvesting.
- The dirt which is present on the potatoes which are cured has to be removed. Make use of a vegetable brush or any cloth for this purpose. Make sure that you are not washing the potatoes with water as this will make them get spoiled faster.
- Keep in mind that you should not wash the potatoes until you are prepared to consume it.
Facts about growing potatoes:
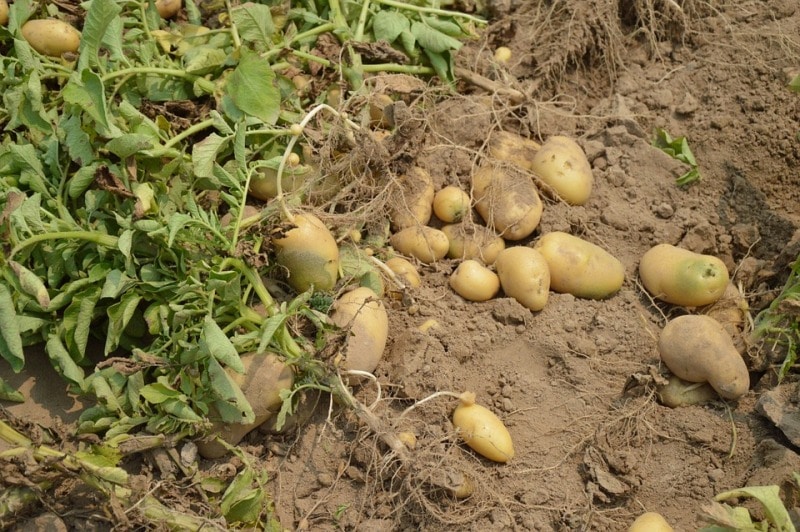
- It is always best to grow the potatoes from seed potatoes rather than the ones which are purchased from a grocery store as they will be grown using a sprout inhibitor for preventing them from sprouting.
- Potatoes love to grow in the climates which are cool but free of frost. So consider the plantation of potatoes starting from the end of winter to the end of spring as early as 1 to 1 ½ month prior to the last frost date at the time of spring based on the number of days your potato variety requires to reach the stage of maturity.
- The seed potatoes have to be provided with the soil which is loose, deep and acidic and it should have a pH between 5 and 7. You should also add a good amount of nitrogen and potassium which will help them to have a very good start.
- You can plant the seed potatoes completely or you can also cut them into pieces with one eye per potato at least.
- New potatoes are generally the young tubers. These potatoes will have soft skin than the potatoes which are matured and should be consumed immediately after the harvest. It would take at least 3 months after the plantation for most of the varieties of potatoes to start the production of tubers which are sufficiently large to eat.
That’s gardeners about growing potatoes in your home garden or outdoor garden. Keep gardening!.
You may be interested in Apple Ber Cultivation Income.