Home Gardening

Outdoor Gardening

Organic Gardening

Modern Gardening

Urban Gardening

Gardening Business

Home Blog Page 74

Making Liquid Fertilizers at Home for Garden Plants

Making liquid fertilizers for garden plants

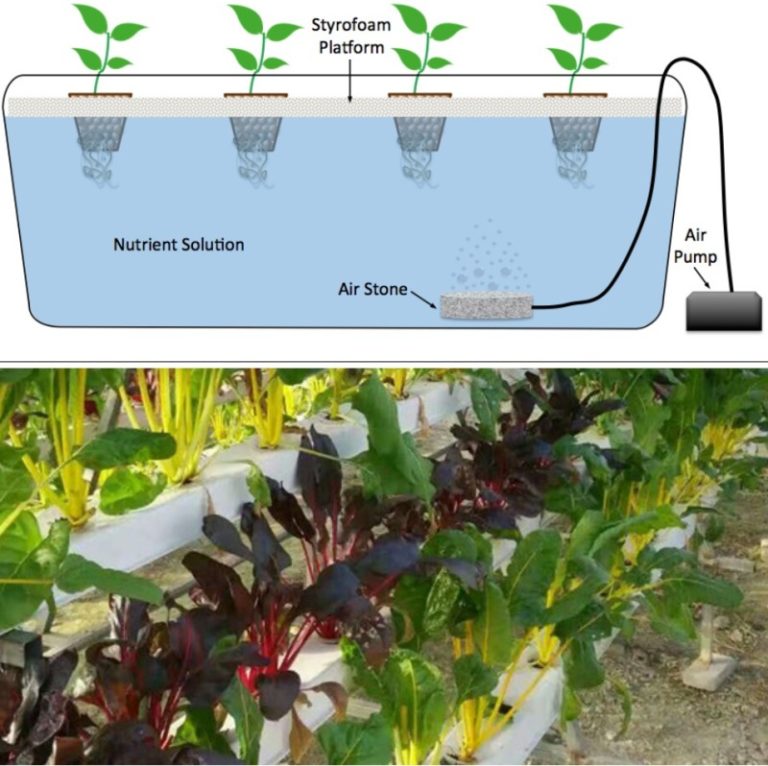
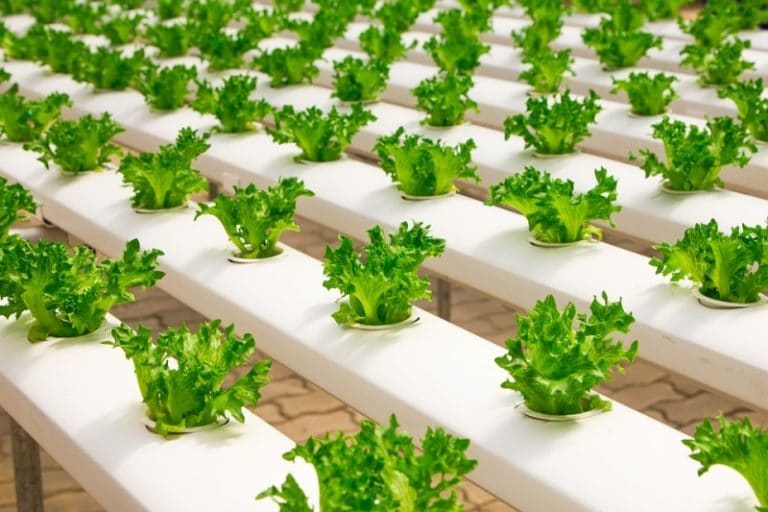
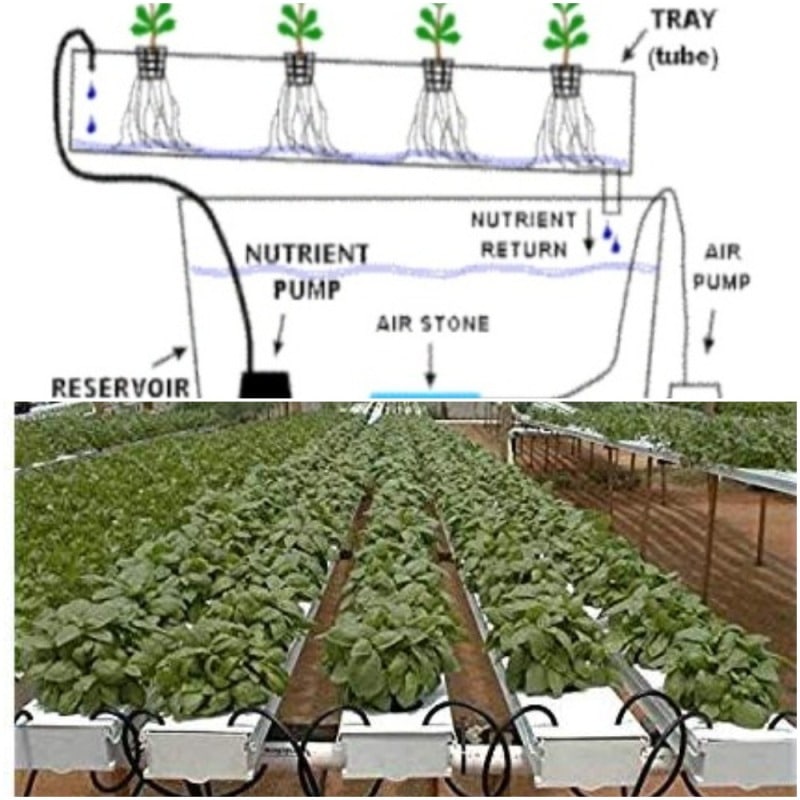
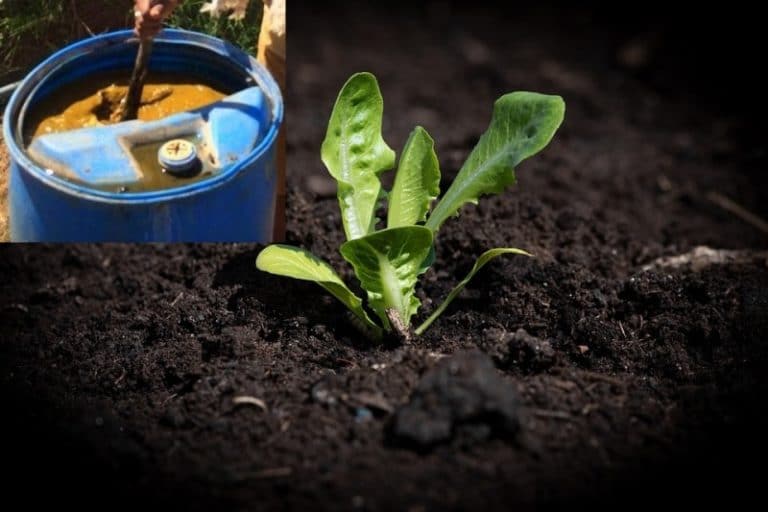
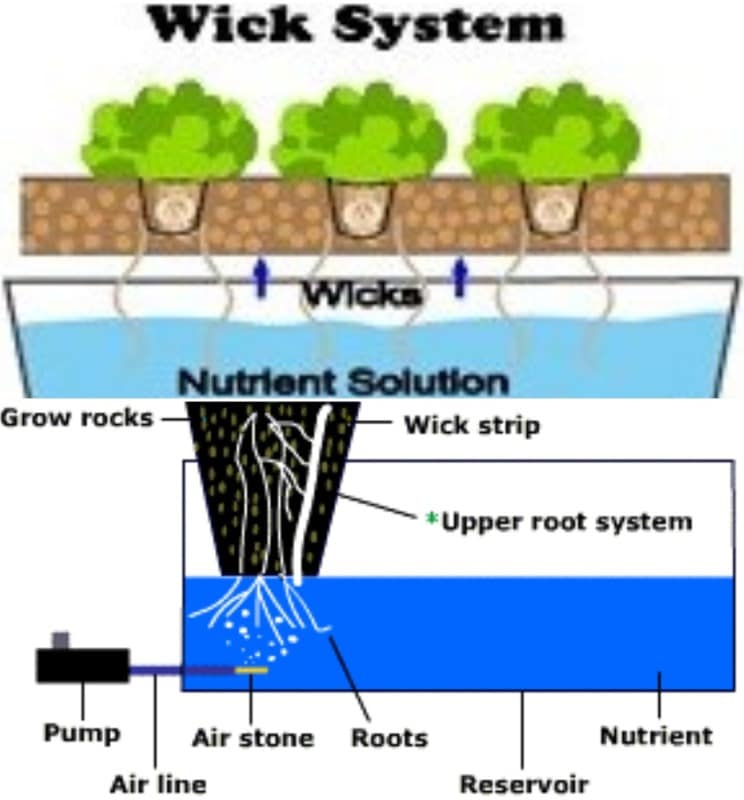
Today, we learn the topic of making liquid fertilizers for your home garden. Liquid fertilizer for the garden plant is fast-acting. Liquid fertilizer can be faster acting than a dry or granular fertilizer because the fertilizer has already dissolved into the liquid and hence plants will take it up quickly in larger quantities. The use of liquid fertilizer is now very important due to the new systems of faring such as the hydroponic system. Fertilizer function is a very crucial way of increasing crop yield; not only the crops benefit, but the soil also advantages in case of organic fertilizer.

Home gardeners use liquid fertilizer as they are;

  • Safe
  • Used in many more ways than dry chemical fertilizers
  • Produce results faster

For these above reasons, many homeowners believe liquid plant foods are improved fertilizer than those made as granular fertilizers, like those used in a liquid grass fertilizer. One can grow good quality produce right from their home garden if they are aware of making liquid fertilizers at home.

Make liquid fertilizer from dry fertilizer:

How to turn a dry organic fertilizer blend into a liquid fertilizer? The method is very simple. You simply soak granular organic fertilizer in water, let it sit for 24 hours, and strain out the liquids. This works equally as well for store-bought granular organic fertilizers as it does for homemade fertilizer recipes.

  • Use one cup of fertilizer for each gallon of water.
  • Soak the fertilizer in the water, and allow it to sit for 24 hours. Stir periodically.
  • Strain out the solids, and use the liquid as a fertilizer at a rate of one to two cups per perennial, 2 to 4 cups per shrub, or 6 to 8 cups for trees.
  • The liquid can be used full strength for foliar feeding or spraying on leaves or can be diluted with a small quantity of water to make sure the entire root zone of the plant is evenly covered. For container plantings, for example, I would use 1 to 2 cups per gallon and basically soak the entire pot.
  • There is no want to waste the solids, which still have nutrient value. Use them as a low powered fertilizer on established landscape plantings which need a mild boost.

Homemade liquid fertilizer from vegetable scraps

The ingredients used for homemade liquid fertilizer from vegetable scraps are; vegetable scraps, Epsom salt, and water.

Start by saving all cooked or raw vegetable scraps. Save them in the freezer. You can save the water from boiling pasta or vegetables, which is also a good source of nutrients. To create the “scrap puree” which will form the base for your fertilizer, thaw frozen scraps and puree them in a blender with enough water to make a smooth consistency. Pour the pureed scraps into a large bucket. For every blender-full of puree scrap, add 1/2 tsp Epson salt and one capful of ammonia to the bucket. Repeat this procedure until all your scraps are pureed. Stir the bucket and allow it to sit overnight. To combine up a batch of liquid fertilizer, add one quart of puree to one gallon of warm water, and shake to mix. Apply to the soil at the base of plants. Steeping time required for this vegetable scraps is twenty-four hours.

Read: Organic Composting Process.

Homemade liquid fertilizer from weeds and yard trimmings

The ingredients used for homemade liquid fertilizer from weeds, yard trimmings, mowed grass, and water.

Choose freshly pulled or plucked weeds from garden trimmings such as tomato suckers work as well and put a few handfuls in a five-gallon bucket. Load it into the rest of the way up with water, and leave it to steep for the allotted time. The steeping procedure is best done outside, as it can get a little smelly. When ready, affect the soil at the base of your plants. Steeping time required for this procedure will be approximately four weeks.

Homemade liquid fertilizer from manure

If you live in an agricultural region, or if you have livestock of your own, you can make a truly exceptional liquid fertilizer from livestock manure. This process required a bucket, some water, and a shovelful of manure, steep for four weeks and apply to the soil at the base of your plants. While it might sound disgusting, manure is incredibly high in nitrogen and the ultimate “waste” product. Finding a use for the stuff is actually rewarding. Steeping time required for this procedure will be approximately four weeks.

Making liquid fertilizers:
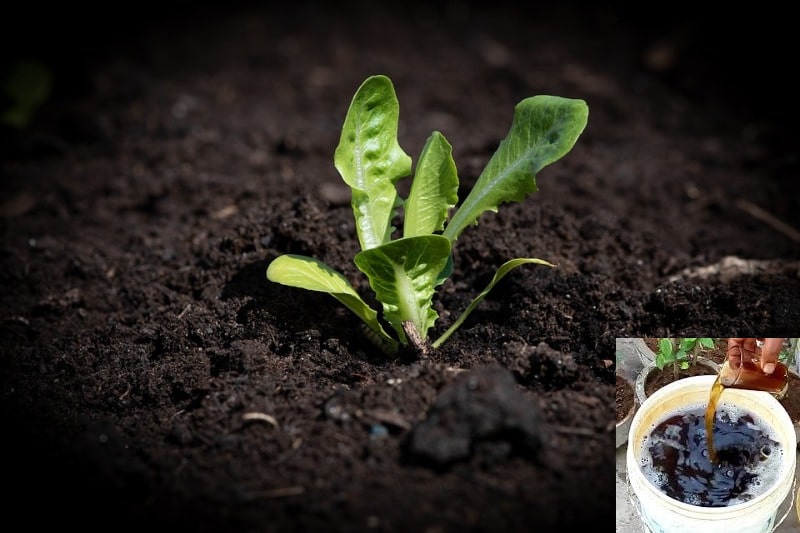
Making Liquid Fertilizers at Home.

Liquid fertilizer can be made from two major sources; plant and animal; they are easy to create and the steps involved in making any of these liquid fertilizers are simple to carry out.

How to make liquid fertilizer from animal materials?

Animal liquid fertilizer can be prepared from farm animal waste or dung. You can use any of poultry, goat and sheep or cattle dung to create tea fertilizer. You will require a big drum or tank to prepare your fertilizer; also, you need a permeable sack, a wooden rod, a long rope, and a large stone.

Sundry the animal manure and collect all in the permeable sack. Put the large stone in the sack with the manures. Fill the drum or tank with water, if possible to more than half of the tank.

Put the sack inside the tank with the rope tied to the top of the sack at one end and to the rod at the other end such that the rod provides as an anchor to suspend the sack in the tank with the aid of the rope. You can cover the tank with a cloth or fly net to avoid unruly interference by flies. Stir the water every day for about ten days. By then, liquid fertilizer is ready for use.

How to make liquid fertilizer with plant materials?

Plant liquid fertilizer is prepared from plant materials; you can use any plant for this purpose. You want the plant leaves, you can use more than one plant leaves say grass-legume combination to have a mixture of nutrients. You need wood ash to supply the minerals and acts as a pest repellent. Other materials needed are permeable sack, long rope, wooden rod, tank, and stone; as used in the animal liquid fertilizer process.

The procedure is the same as the animal source, but you have to work on the leaves before adding to the sack. You are required to chop the leaves into fine pieces before adding to sack. After adding the chopped leaves into the sack, insert the wood ash and mix with the leaves vigorously for even distribution.

Add the stone inside the sack to stop the sack from floating. Tight the top of the sack with the rope as completed in the animal source; fill the tank with water and insert the sack in the water as directed in the animal liquid fertilizer. Cover the tank with a cloth or fly net as directed above; stir every morning till about ten days. Then, your plant liquid fertilizer is ready for use.

Read: How to Grow Spinach In Pots.

Types of liquid fertilizer

Compost Tea

Compost tea is a way to make the most of all that compost we are making from kitchen scraps and household waste. It’s a method of gleaning much of the nutritional goodness of compost into a ready-made spray. For those without enough compost on hand to cover the total garden, this is a great option. Vermicompost fertilizer also works great.

It begins with finished compost that is the very old stuff that has completely broken down into beautiful richness. This ensures pathogens won’t be a problem. To make the tea, basically, fill a five-gallon bucket a third of the way with the compost and then the remainder of the way with water (harvested rainwater is best.) This must steep for three days and be stirred at least a few times a day. Then, the compost can be strained out and the mixture diluted (10:1, water for tea) to be sprayed onto all plants. It’s very good for watering seedlings.

Green Tea

Believe it or not, old grass clippings and weeds create a wonderful fertilizer. The fresh or green clippings are full of nitrogen and phosphorus, two mineral components used in the famous NPK blends of typical fertilizers (the other being potassium, which can come from organic banana peels.) Comfrey makes fantastic green tea for the plants.

For this tea, we’ll require filling that five-gallon bucket two-thirds of the way with fresh grass clippings, and maybe some organic banana peels, before adding the water. Then, again, let it steep for 3 days, stirring as often as possible. Strain the solid bits out of the tea, and combine it with equal parts of water to apply in the garden, especially leafy crops.

Fish Pond Water

Fish ponds, for those who have them, are a great supply of nitrogen-rich water to go into the garden. Combine fertilizes with the regular cleaning cycle, and both the plants and animals will truly benefit. Plus, it’ll be some efficient multi-tasking for the homeowner or gardener.

In this case, it is important to be sure that the water isn’t treated, and obviously, it is important to look out for the small fishes and other aquatic life, as they might not like to be earthbound. Then, apply the water quantity as is. The fish manure has already been diluted by the water in the tank or in the pond.

Seaweed Soup

Seaweed is a highly respected terrestrial garden addition, as it adds all of the valuable minerals of the sea, a whole host of trace elements that will maintain our food rich in nutrients. Though seaweed is often useful for gardens as amazing mulch, it can be used to make liquid tea, what we are calling seaweed soup, as well.

Seaweed is available at garden centers, but it can be harvested responsibly, i.e. in moderation from mid-beach spots, where it has washed ashore far sufficient to dry out a bit but not so far as to become infested with bugs. Rinse the seaweed to eliminate some of the salt before filling our five-gallon bucket with it. This time it must steep for at least a couple of weeks prior to straining out the seaweed, which can then be used as mulch.

That’s all folks about making liquid fertilizers for your garden. Keep Gardening!.
Read: How to Conserve Soil Moisture.

Growing Curry Leaves in Backyard (Kadi Patta)

Growing curry leaves in your backyard

Today, we learn the topic of growing curry leaves in backyard. In earlier days the financial strength of any country was measured in terms of its agricultural diversity especially its richness in spices and condiments. Before the trend of exchanging currencies, spices and condiments were also a medium of barter system. When talking of spices and condiments how can we not mention curry leaves?

These are the aromatic leaves which are an indispensable part of curry making and various delicacies. These leaves are used as an important ingredient in different parts of the world like India, Thailand and other Asian countries. Curry leaves are being grown as an important culinary plant since long back and are also commonly found in kitchen gardens because of its various culinary and medicinal uses and its easy cultivation and low maintenance.

Botany of Curry Leaf Plant:

Curry plant is universally known with its scientific name Murraya koenigiia which belongs to the orange family Rutaceae. Curry plant is also known with different names across the globe in different languages.

Curry Leaf Plant.
Curry Leaf Plant.

Vernacular names in other languages are:

Hindi: Kathnim, Mitha neem, Curry or curry patta, Gandhela, Bareanga, and Kadi Patta

Kannada: Karibevu

Malayalam: Karriveppilei

Sanskrit: Krishna nimba

Tamil: Karivempu, Karuveppilei

Telugu: Karevepaku

English: Curry leaves.

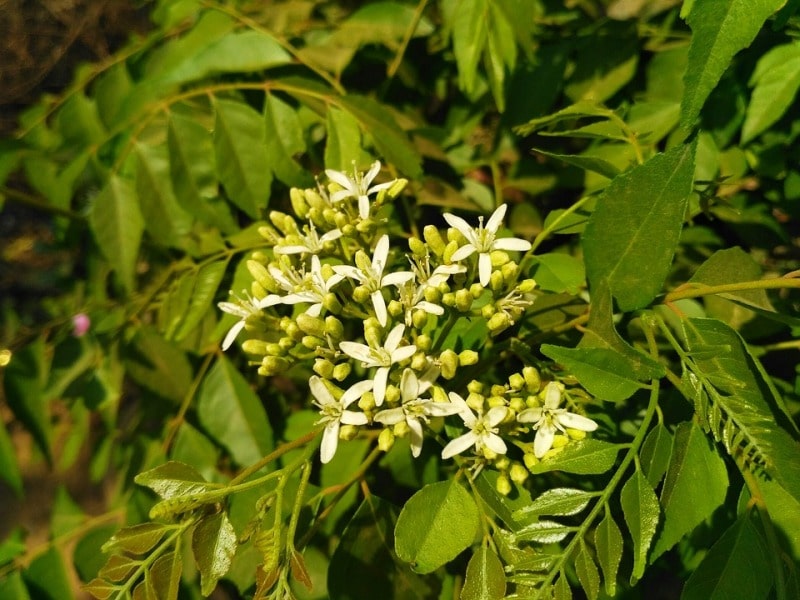
The shrub is more or less deciduous in growth habit. The height varies from 1 m to 6 meters. A strong smelling shrub or small tree, aromatic leaves are pinnate, pubescent, or glabrous. Leaflets are small, obliquely ovate, elliptic, lanceolate or rhomboid. Flowers are white in color and many flowered. Fruits are ovoid or sub-globose, becomes black when ripened. Seeds are embedded in mucilage.

An economically important part of curry plant is its leaves; it is used as an herb for preparation of a variety of dishes such as curry, stews, soup, and many such delicacies. Curry leaves are full of balanced nutrients it contains carbohydrate and a noticeable quantity of dietary fiber. One can find a great amount of moisture, a good fraction of protein, a slight portion of fat and outstanding amount of minerals in it; calcium, iron, and phosphorus are there in a considerable amount. In addition to these, it has lots of vitamins. The leaves are a fine source of vitamin A. They are also a rich source of calcium, but due to the presence of oxalic acid in high concentration (total oxalates 1.35%, soluble extracts 1.15%), its nutrient availability is affected.

Read: How to Make Organic Compost for Home Garden.

Forms of Curry Leaf:

  • Fresh: best form to be used as it has the best of its characteristic aroma and taste.
  • Dried and powdered: simply by shed or sun drying this form is used for long term storage.

Trade in Curry Leaf/Plant:

India is the ranks first and it is the largest producer and consumer of curry leaf. Countries like Burma, Malaysia, South Africa are also producing the curry leaf. The Southern state of Tamil Nadu is one of the major curry leaves producing region. The trade in the spice is limited to a few Asian countries which are also strengthening the economy with time.

Use of Curry Leaf/Plant:

  1. in food

The plant is extensively used in South Indian states for flavoring various dishes. It is also used for its characteristic aroma in Srilanka. The leaves can be taken raw or sauted. The leaves are used in fresh or dried form for flavoring curries, vegetable, fish and meat dishes, soups pickles, buttermilk preparations, chutneys. India Curry leaves are known by the name of kari-pattha, kadi patta. In contemporary period foreign countries used curry powder to give their food an Indian taste.

  1. Medicinal Use

The spice is said to have many medicinal properties. It is used in the conventional medicinal system for improving the digestive system, skin conditions and as a treatment for diabetes. Curry leaves are also used for hair treatment and it is known curry leaf paste helps in regeneration of hair follicles and strengthening them.

Chemical Properties:

The chemical composition of Curry leaf plant defines the aroma and its taste. Essential Oil Components-

The essential oil is present on oil glands of curry leaves which imparts its aroma and a different taste, the chemical composition of essential oil are monoterpenes including ß-phellandrene, a-pinene, ß-pinene. In some species sesquiterpenes found to be the main constituent.

Best growing practices of curry leaf plant:

It’s always desirable to have your share of important fresh spices at your home for making your dishes more palatable with a quick addition of aromatic leaves like curry leaves. so we are here to guide you with key notes of cultivating curry leaves with few requirements both at your backyard or at field level.

Soil and climate suitable for Curry Leaf Plant

There, it is easy to grow even for a beginner. It just desires full sun and moderate watering to thrive. Cultivation of curry leaves do not require a particular atmosphere and can be grown in a dry atmosphere as well. In places where the minimum temperature goes beneath thirteen-degree (˚C), the development of plant will be somewhat influenced and favored. The favorable temperature range for raising the curry leaf plant is 26-37˚C. Light textured Red sandy loam soil is ideal for its cultivation. It can tolerate temperature up to 37°C. But below 16°C, its growth is affected.

Varieties of Curry Leaf Plants:

There are 2 improved varieties of curry leaf widely under cultivation in India —DWD 1 and DWD 2. Both of these have a good aroma. The varieties have an oil content of 5.22% and 4.09% respectively. Variety DWD 1 is sensitive to the winter season. During winter its growth is poor, whereas DWD 2 is cold tolerant variety. It gives a higher yield than DWD 1. ‘Senkaampu’ is a well known local cultivar grown in many regions of Tamil Nadu.

Read: How To Grow Spinach In Pots.

Propagation:

Curry leaf is primarily propagated through seeds. For raising seedlings, properly ripened fruits are collected from high-yielding plants. It is advised to remove the hard outer shell of seed before sowing for faster germination. The seeds are sown either in nursery or polybags filled with a mixture of 1:1:1 sand, soil and farmyard manure. Seeds usually germinate in 3 weeks and One-year-old seedlings are preferred to be planted in the field. It can also be propagated by root suckers. There are a number of root suckers present near its plants. They are removed from the main plant during the rainy season and planted immediately to propagate a new plant. Stem cuttings and plantlets are also used for raising new plants. Regular pruning or picking of leaves is essential to promote the fresh foliage growth.

Soil Preparation for growing curry leaves in backyard:

The soil should be fertile and should have good organic matter. In deep, fertile and light soil transplanting is done directly in small pits. Whereas in poor and hard soil, pits are taken at the size of at least 1.5×1.5×2 ft. length, width, and depth respectively. The pits are dug about six months before planting and left open to weather for few months after which they are filled with well rotten composts and green leaves.

Planting:

when planting a curry plant in your backyard kitchen garden it is recommended to grow your plant directly in the soil surface rather than raising it in the pot or any container because it attains a good height and growth that your container cannot hold up and when growing in pots proper cutting and pruning becomes a headache so let your curry plant grow well on ground and enrich your dining table with lovely aroma and taste.

Manure and fertilizers:

Usually, curry leaf plant is not given inorganic or chemical fertilizer as they affect its aroma which is the key character. But for higher yields, its plant may be given 10kg farmyard manure and NPK @ 60:80:40g/plant/year and some biofertilizers such as manure. The fertilizers may be applied at the onset of the monsoon.

Aftercare and maintenance:

The pit should be irrigated properly if there is no availability of rain. The plant should be irrigated at 3-day intervals at least if there are no rains. The field should be kept weed free by proper rouging. The plants should be trained and pruned to keep a height of about 1m. Their terminal buds are recommended to be removed for encouraging lateral branching. A least of 5–6 branches are kept per plant.

Watering your curry leaf plant:

If proper irrigation facilities are convenient the plants should be regularly irrigated. However, moisture conservation techniques should be adopted both to conserve rainwater or irrigation water when growing plants in a huge area. Mulching is an advantageous practice. At the same time, adequate drainage facilities should be provided. When cultivating curry plant at home you can simply water your plant every alternate day or so because it doesn’t demand much water.

Topping:

Leaves are the economic product of the curry leaf tree. To achieve maximum leaf production the plants are topped first at around 100 cm height. This encourages profuse branching on all sides. Allow them to grow and develop leaves. Then they are again pruned to encourage further branching. After every pruning or topping of branches, an additional dosage of NPK and compost mixture should be applied and irrigated. This will result in profuse growth of leaves. Topping is done in such a way that each plant acquires a good shape allowing all branches and leaves to have adequate sunlight.

Harvesting:

The pruning or topping is also a part of the harvesting of leaves. The leaf quality will decline if the plant is allowed to flower and fruit. So unless seed production is not indented, pruning and harvesting of leaves should be done before flowering. Similarly where there is winter harvesting is done before the leaves start shedding.

At commercial level Harvested leaves are graded, bundled and marketed or sent to processing units for the extraction of oil.

Diseases and Pests:

Luckily, the curry leaf plant is not critically infected by diseases and pests. If required very mild pesticides can be used at least 15 days before harvesting of leaves. If there are chances of incidence a preventive spray of malathion or tobacco decoction, etc could be sprayed. For controlling soil-borne pests and diseases about 1-2 kg of neem cake per plant per year is suggested.

Additional Tips for Growing Curry Leaves in Backyard:

  • Don’t overwater it, especially in winter.
  • Let the soil dry out during water spells as it likes well-drained dry soil.
  • Plant it in a small container and then regularly update the size of the container to the next one as the plant progress its growth which is not a rewarding process.
  • Place it (colder zones) indoors or in a greenhouse in winter.
  • Use compost and good quality nitrogen-rich fertilizer for lush green foliage.
  • Don’t plant it in the windy spot as it grows upright and has weak rooting system and trunk it may bend or break. 

That’s all gardeners about growing curry leaves in backyard.

Read: Palmarosa Oil Extraction Process.

Organic Composting for Urban Gardening

Organic composting steps, process, and method

Today, we discuss the topic of Organic Composting for Urban, Outdoor and Home Gardening. What is compost manure? Compost manure is a mixture of decaying organic matter used to fertilize the soil. Compost is generally made from gathering plant material, such as leaves, grass clippings, and vegetable peels, into a pile or bin and letting it rot. Manure and other substances are often added to improve the mixture or to speed its decomposition. In a nutshell, compost manure is decomposed organic matter. Composting is a natural method of recycling organic material such as leaves and vegetable scraps into a rich soil amendment that gardeners have fondly nickname black gold.

Compost is decomposed organic material that is formed when bacteria in the soil break down garbage and biodegradable trash, resulting in a product rich in minerals that is an ideal garden or landscaping amendment. In fact, its nature’s an ideal amendment and can be added to the soil any time of year without the fear of burning plants or polluting water.

Organic compost manure is rotten plant and animal waste. Composting produces an organic fertilizer high in plant nutrients which develop soil physical characteristics, reduces organic waste on the farm and eliminates pathogens.

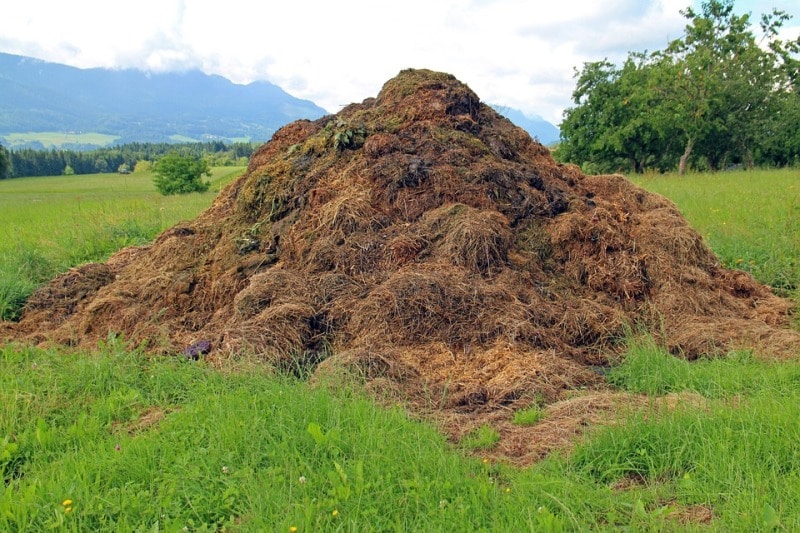
Accumulation of Cow Dung.

Easy steps to organic composting:

Choose your type of backyard compost bin:

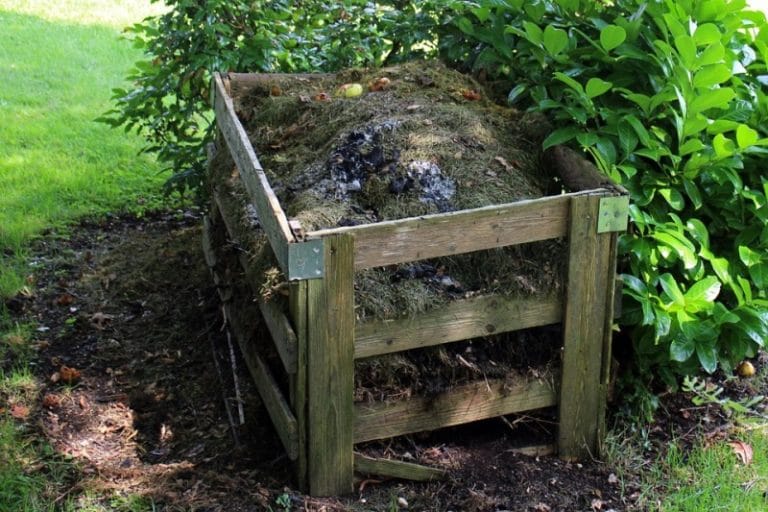
Use either an open pile or a compost bin. Bins have the advantage of being neat, maintaining animals out and preserving heat. You can purchase compost bins from a selection of garden and home stores, or you can build your own compost bin. The size and type of bin you purchase or build will depend on how much compostable material generates.

Choose your composter location:

You must choose a location which is flat, well-drained and sunny. Most importantly, you must find a convenient location.

Alternate layers:

Start with a layer of materials like twigs to allow for drainage and aeration. Cover this material layer with leaves. Then basically alternate between layers of green materials (nitrogen-rich material) and browns (carbon-rich material).

Add kitchen and yard waste as they accumulate:

Collect kitchen compostables in a container in your kitchen. Find a handy position to store this container on the counter, under the sink or in the freezer. When the container is full, empty its contents into the compost bin.

Whenever add food scraps or yard waste, be sure to top it with a layer of browns. If you do not add browns, compost will be wet and break down more slowly. If possible, assemble and store dry leaves in old garbage in the fall so can use them in your compost year round. Depending on the form of compost bin or pile you have chosen there can be specific ways of adding and maintaining compost.

Add layers until your bin is full:

The bin contents or pile will shrink as it begins to decompose.

Maintain your compost bin:

To get finished compost quickly, check your compost bin and make sure the following conditions are met:

  • When you add fresh material, be sure to combine it in with the lower layers.
  • Materials must be as wet as a rung-out sponge. Add dry materials or water, whichever is needed to make this moisture level.
  • Mix or turn the compost once a week to help the breakdown procedure and eliminate odor.
Harvest your compost:

Completed composts will be dark, crumbly and smell like earth. You must be able to have finished compost within four to six months of starting your bin.

The completed compost will end up at the top of the bin or compost pile. Remove all the finished compost from the bin, leaving unfinished materials in the bin to maintain decomposing. Be sure the decomposition procedure is complete before you use your compost; or else, microbes in the compost can take nitrogen from the soil and harm plant growth.

Read: How To Grow Brinjal in Pots.

How to make compost manure:

Compost manure can be prepared from any waste material, but the duration varies with the nature and type of the ingredients used in its preparation. The duration of compost manure is dependent on the nature of the ingredients used in the process; some compost takes about four months or more, but the one am about to share with you takes just four days and you have your compost ready to boost the productivity of your soil.

The ingredients needed for compost manure preparation:

You need these below ingredients to prepare your compost. These materials are:

  • 1 part Poultry manure
  • 2 parts of Spent mushroom compost
  • 1 Charcoal
  • 2 liters of Molasses or sugar or honey
  • Half part of Effective Microorganisms
  • 2 parts of Clean Soil
  • 20 liters of water

Also, you require a compost bin or a compost pit. Compost pit importance is the same as a compost bin because they serve the same function; they serve as the site of operation, where you prepare compost. Compost pit is a permanent arrangement; it looks like a pit where prepare the compost; while the compost bin is mobile and durable but limited in the amount of compost it can accommodate.

The poultry manure is the waste material gotten for poultry birds. Spent mushroom compost is the second material; it can’t get spent mushroom compost, I mean the spent substrate of mushroom farming, then restore with 1 part rice bran and 1 part wood shavings. Also, you can replace the molasses with sugar or honey, but of course those are expensive.

Organic composting process for home gardening

Composting is nature’s system of recycling. Composting system biodegrades organic waste. That is food waste, manure, leaves, grass trimmings, paper, wood, feathers, crop residue, etc., and turns it into an important organic fertilizer.

Composting is a natural biological procedure, carried out under controlled aerobic conditions (requires oxygen). In this procedure, various microorganisms, including bacteria and fungi, break down organic matter into simpler substances. The effectiveness of the composting procedure is dependent upon the environmental conditions present within the composting structure, i.e. oxygen, temperature, moisture, material disturbance, organic matter and the size and action of microbial populations.

Composting is not a mysterious or complicated procedure. Natural recycling (composting) occurs on a continuous source in the natural environment. Organic matter is metabolized by microorganisms and extreme by invertebrates. The resulting nutrients are returned to the soil to maintain plant growth.

Organic composting is very easy to manage and can be carried out on a wide range of scales in almost any indoor or outdoor environment and in almost any geographic position. It has the potential to control most of the organic material in the waste stream, including restaurant waste, leaves and yard wastes, farm waste, animal manure, animal carcasses, paper goods, sewage sludge, wood, etc. and can be simply incorporated into any waste management plan.

Since approximately 45 to 55% of the waste stream is organic matter, composting can play a significant role in diverting waste from landfills thereby conserving landfill space and dropping the production of leachate and methane gas. An efficient composting program can produce a high-quality soil amendment with a variety of end users.

The essential elements necessary by the composting microorganisms are carbon, nitrogen, oxygen, and moisture. If any of these elements are lacking, or if they are not present in the proper proportion, the microorganisms will not flourish and will not present adequate heat. A composting procedure that operates at optimum performance will convert organic matter into stable compost that is odor and pathogen free, and a poor breeding substrate for flies and other insects. It will considerably reduce the volume and weight of organic waste as the composting procedure converts much of the biodegradable component to gaseous carbon dioxide.

The composting procedure is carried out by three classes of microbes –

  • Psychrophiles – low-temperature microbes
  • Mesophiles -medium temperature microbes
  • Thermophiles – high-temperature microbes

Read: How To Grow Palakura In Pots.

Tips and techniques of organic composting

Here are a few more tips for organic compost making;

  • Help start a new compost pile with blood meal, cottonseed meal, well-aged manure or by compost starter. They are rich in nitrogen and help “fire-up” the microbes dependable for breaking down organic matter into compost.
  • Chop or shred materials before putting them in the compost pile or compost bin. The lesser it is, the faster it will break down.
  • Use a kitchen compost pail for storing food scraps. It will reduce the number of trips you create to the compost pile.
  • Plants that have been treated with pesticides and herbicides like weeds and lawn clippings should be avoided.
  • Add a lot to your pile at once, rather than in small doses to support the pile to heat up.
  • Turning composts will introduce oxygen and speed up the composting procedure.
  • Keep your compost pile or bin in the sun. Microbes are more active when warm conditions.
  • Activators can obtain a slow compost heap sped up.
  • Finished compost is generally less than half the volume of the materials you started with, but it’s much denser.
  • Apply finished compost to your garden about 2 to 4 weeks before you plant, giving the compost time to integrate and stabilize within the soil.

Benefits of organic composting for home gardening:

Many benefits of organic compost are given below;

Organic compost energizes the soil food web, which is made up of microscopic bacteria and fungi, along with earthworms, crickets, and several other life forms. Many fungi form symbiotic, or mutually rewarding, partnerships with plant roots, production it possible for vegetables to feed themselves more efficiently. Compost enhances the ability of tomatoes and other vegetables to stand up to common diseases and can improve their flavor and nutrition, too. Compost helps the soil retain moisture. Through composting, you enhance the garden’s ability to grow healthy plants while reducing your volume of trash.

  • Compost maintains soil fertility level.
  • Increases the nutrient level of the soil or develop the soil’s physical condition by improving soil structure and aeration.
  • Compost increases the infiltration capacity of the soil, thus reducing surface runoff.
  • It helps to retain plant nutrients and moisture.
  • Well-decomposed compost buffers soil response and control soil temperature.
  • Increases soil microbial action which helps mineralization of applied chemical fertilizers, making them more obtainable to crops.

How to apply compost manure to the soil of the garden?

Compost manure is best applied using the topdressing process of fertilizer application. You can as well apply the compost as mulch on the plant. Or you plough into the soil through land preparation.

The compost supplies nitrogen into the soil and other essential nutrients required for plant growth. Aside from replenishing the soil nutrient, the compost manure helps to improve the soil structure, hence, providing an enabling and good environment for the soil organisms to thrive.

Organic compost manure is highly recommended for sustainable agricultural practice and organic farming. It is a cheap method of improving the soil quality and conversely increasing crop yield.

Read: Process of Palmarosa Oil Extraction.

Growing Spinach in Pots (Palak) in Home Garden

Growing spinach in pots

Today, we discuss the topic of growing spinach in pots. Spinach is a leafy vegetable whose scientific name is Spinaciaoleracea. This belongs to the family of amaranth and has a relation with quinoa and beets. The native of spinach is Persia, but now most of the production of Spinach takes place in the United States and China. It has a lot of nutrients and Antioxidants and it is considered to be a healthy diet. Taking spinach as a part of your diet will improve the health of your eyes, decreases the stress and prevents cancer, decreases the levels of blood pressure.

There are lot many ways for the preparation of Spinach. You can buy it fresh or it is also available in a canned way. It can be eaten raw or cooked. It is very delicious and can be mixed with other vegetables too for the purpose of consumption. What are we waiting for? Let’s get into the details of growing spinach in pots.

Orchard Spinach.
Orchard Spinach.

Spinach is termed as Palakura in Telugu, PasalaiKeerai in Tamil, Palakcheera in Malayalam, Palak in Hindi, KempuBaayiBasale in Kannada, Palang in Bengali, Palak in Gujarati, Bhajji in Konkani, Sag in Marathi, Poi or Palak in Oriya, Palak in Punjabi

Spinach is considered to be a great alternative while adding in salads, sauces, soups and also stir-fries. It is a crop which can be grown in cool climates and also grows very well in pots. These can be kept in balconies with shade and in the areas which have low temperatures. Growing spinach in pots is a good idea as it will give you lots of time for the harvest of leaves before the pests attack them. The complete process will include preparation of pot, sowing seeds and harvesting the spinach plants. In this article, we will learn how to grow spinach in pots and the tips for growing spinach.

Japanese Spinach.
Japanese Spinach.

Spinach varieties for pot growing:

  • Savoy spinach
    • Regiment
    • Bloomsdale
  • Semi-savoy spinach
    • Tyee
    • Catalina
    • Teton
    • Indian summer
  • Smooth-leafed spinach
    • Space
    • Red cardinal

Preparation of pot for growing spinach in pots:

  • Buy a pot which has sufficient width and depth for your seeds. Raising spinach ins a pot will need a depth of at least 6 inches and a width of at least 14 inches. A pot which has a diameter of 14 inches can hold 4 plants of spinach.
  • Select a pot which is made up of wood, glazed ceramic or concrete. These are the material which will allow the best growth of food. Make sure that you are avoiding porous materials such as unfired clay and terracotta as these are the ones which can leech the chemicals which are soluble in water across their surface.
  • Always remember not to make use of the pots which are contaminated with asbestos or lead. For instance, the pots which are old will be coated with paint which is lead-based. Before the year 1970, the paints used to have high concentrations of lead.
  • You can buy the potting soil if you do not want to mix it on your own. This is an easier choice, but you will not have complete control over the ingredients. You should use the potting mix which is of high quality i.e., which has a high content of organic matter. The perfect texture of the soil is loamy and crumbly.
  • Do not use the soil which will clog the drainage. The soil which drains well is very important for increasing the spinach growth in pots.

Read: How to Grow Brinjal in Pots.

Preparation of potting mix for growing spinach in pots:

  • If you are interested to prepare potting mix on your own, you can make use of the ⅓ drainage material such as perlite, composted bark, ⅓ rd of the material which can hold water such as peat, coir, vermiculite and ⅓ rd of organic matter which has been rotten down such as worm castings, manure, compost.
  • In the first place, you will need to sprinkle half cup of nitrogen sources which are organic such as a meal of soya or alfalfa into the middle of the pot and scratch it into the soil’s bottom. Then top the soil with at least 3 inches of potting mix or potting medium.
  • You can also consider adding amendments which are animal-based like fish meal, manure which is composted, feather meal, worm castings.
  • After that, consider adding a ¼ cup of bat guano to the potting medium in order to provide it with nutrients which are of high quality.
  • If you have several pots to fill, it is generally less expensive to mix the potting soil on your own than going with a potting soil which is a commercial one.

Soil pH test for growing spinach in pots:

  • Now, it is time to test the soil pH. Spinach will survive in the soil which is alkaline in a slight manner. It will need the soil whose pH is between 6 to 7.5. If the acidity of the soil goes below 6, the leaves and stems of the spinach plant will turn into a yellow color. You will need to add some amount of limestone to the potting soil to adjust the level of soil pH in a manual way.
  • If the potting soil is very low in magnesium, you can consider adding dolomitic limestone for increasing the pH. If the soil has high magnesium levels, then you can consider adding limestone to increase the pH.
  • For the adjustment of pH, you can also consider adding the egg shells which are crushed in a fine manner or even wood ashes.
Soil pH for Growing Spinach.

The soil has to be loosened before the plantation of your spinach seeds. You can make use of a small shovel which is generally used for gardening and dig the soil for about 10 inches before you start sowing the seeds of spinach. This space can be filled with potting soil and amendments which are organic like manures, leaves from deciduous trees and yard trimmings. This will help in the creation of air pockets which will in turn help in the facilitation of air and penetration of water.

Read: How To Setup A Raised Garden.

Sowing the seeds of spinach:

  • In order to get the best results, you can plant your spinach at the time before summer and winter. For the spinach plants which are grown in the autumn season, make sure that you are keeping your spinach plant in a place where it can receive a lot of sunlight. As the days will be short and the intensity of the sun will be less, you will need your spinach plant to take the rays as much as possible. For the plantation which takes place in spring, the spinach plants have to be placed in a location where they can receive some amount of shade.
  • If you are raising the spinach at the time of summer, select varieties which are resistant to bolt such as Tyee. The pots have to be placed in the locations where the plants can receive shade partially from other types of structures of vegetables and harvest them prior to the length of the day will reach 14 hours.
  • If you are in the regions which have a tropical or subtropical climate, then you will need to keep your pots in complete shade.
  • Now start punching your spinach seeds into the potting soil. You will always need to punch them for a depth of at least ½ inch. After that, you should cover them with soil lightly.
  • Now, consider adding a ½ inch of fine mulch after the seeds are sown to help the seeds with the retention of moisture.
  • Growing spinach indoors will allow the seeds to undergo the process of germination. Hence, allow them to grow in their pots by leaving them in the indoor locations for at least 21 days before bringing them into the outdoor locations.
  • As an alternative, you can also place the pots in the outdoor locations after seeding is finished as long as the ground is warm. Though you are not planning to plant the spinach on the ground, it is a very good indication that your spinach can grow in outdoor locations. Spinach will have the ability to survive in the temperatures which are as low as −10 °C.
  • The best temperature required for the soil in order to grow spinach is 11 to 27°C.
  • There should be space in between the seeds of the spinach so that there would be proper growth. The seeds have to be planted about 1 inch distant from each other. Once they start growing, trim them by making use of scissors or garden shears so that they are at least 3 inches distant to each other.
  • Retain the seedlings which are strong and cut the sprouts which are weaker to the ground.
  • Your spinach plants have to be watered frequently for the prevention of soil from getting dried out. Spinach will do its best with a rainfall of at least 1 inch in a week. If there is no good rain, you will need to provide them with 4 soakings in a week. The plants which are growing in pots will need abundant water. Always make sure that the soil is not dry.
  • The soil must be kept damp on a regular basis, but it should not be soggy. Over moisture will cause damage to the growth.
  • You should never allow your spinach plants to get dried out at the time of summer as this will give rise to bolting and will cause harm to the growth.
  • Spinach which is bolted can be eaten. Anyways, it is difficult and has a bitter taste.
  • The soil of the spinach plant has to be fertilized on a regular basis. The spinach plants can be grown by fertilizing them by making use of liquid fertilizer or plant food. You can also make use of products which consist of nitrogen in high quantities. You will need to use a slow-release fertilizer. Cottonseed meal or organic fish emulsion are two options which can be used as an alternative.
  • The temperature of the soil has to be monitored by making use of soil thermometer. After the spinach plants are kept in their desired position, you will need to monitor the temperature of soil by making use of a thermometer. The seeds of spinach will undergo the process of germination in low temperatures like 4°C, though the perfect range is between 11 to 27°C. The absolute minimum temperature is -8°C and the maximum temperature is 33°C.
  • Spinach is very sensitive towards heat. When the temperature of the soil is above 24°C, you will need to move the spinach into the shade so that it would be safe.
  • The maintenance of spinach has to be done throughout winter for the early crop in the next year. The temperature of the soil has to be monitored in a proper way.
  • Always remember that whenever the temperature of the soil is low, there is limited nitrogen. Give your spinach plants plant food which is soluble in water when you see new growth at the end of winter.

Harvesting the spinach plants:

  • The leaves of spinach plant have to be cut-off early if you are growing baby spinach. You can harvest your plants when they are just 2-3 inches in terms of length. You can also pinch off the spinach leaves at the stems by making use of your fingernails. You can also make use of scissors or garden shears for the leaves which are tougher. It is always suggested to harvest the leaves which are fully grown with a tiny stem. The leaves which do not have stems will get rot rapidly.
  • If you want to have adult spinach, then you should remove the leaves of spinach after 1 and a ½ month. In order to harvest the adult spinach plants, make sure that they have a minimum of seven leaves which are having a length of 4 inches. Make use of the garden shears to cut the leaves which are outside and make sure that the plant continues its production in the pot. Once it has produced a flower stalk which is tall, you can harvest the plant by removing the main stem.
  • Bolting will take place when the plants of spinach send up a seed stalk that flowers gradually. Flowering will make the leaves inedible and also bitter at the taste. If the plants which are mature start growing taller in less time period, it is an indication of spinach bolting. If this happens, you will need to pull up the entire plant and harvest the leaves.

Storage of spinach:

You can store the spinach leaves which you harvested in the refrigerator. If you are not going to use the spinach right away after harvesting, store the spinach leaves which are unwashed in a plastic bag for about 1 week. If you are storing the spinach in your freezer at 0°C, it can last for about a year.

Common pests of spinach:

There are several insects which will attack the plants of spinach. Anyways, the spinach pests which are most common are:

Aphids: Aphids are considered to be the most common pests of spinach. The enemies which are present in nature will monitor them carefully. If you still want to be careful, you can make use of neem oil.

Cutworms and wireworms:

Cutworms will cut the seedlings which are young at the level of the ground and the wireworms will depend on the roots and foliage for food. The transplants which are older will not attract these insects. These insects will always get attracted to the seedlings which are tender. In order to trap the wireworms, you can start the plantation of the carrots which are grown completely in the pot. Pull the carrots from the soil for every 2 days and take off the wireworms which are trapped. Cutworms will mostly respond to spinosad spray.

Flea beetles: These are the insects which will feed on the foliage which is young. The damage caused by flea beetles can be seen through several small holes which leave the leaf to look as if it is been hit by a shotgun. The leaves affected by flea beetles will sometimes have pitted areas too. These insects will be so tiny that they will not even be visible to the eye. You can make use of mulch which is reflective under the plants.

Snails and slugs: These also will cause holes on the leaves of spinach. The holes caused by these will be larger than the ones created by flea beetles. You can make use of traps and baits to control these insects in the best way.

Leaf miners: These insects will leave tan trails on the spinach leaves. As they will be feeding on the leaves internally, the contact insecticides will not work in an effective way. The leaves which are infested should be removed and should be destroyed before the larvae get matured.

Common diseases of spinach:

Downy mildew: This disease will cause light green or yellow colored spots on the top layer of the spinach leaves along with white colored fungus on the beneath the layer of the leaf. There is no cure to this disease and the only option is to remove the spinach plants which are infected by this disease. You can prevent this disease by placing the plants at appropriate distances so that there would be good air circulation and water has to be applied directly to the soil so that the foliage will be dry.

Damping off: This disease will cause the seedlings to fall off and die as soon as they start emerging. You will need to plant the seeds which are of good quality and also avoid too much watering so that you can at least prevent the disease to some extent. The compost has to be processed in a thorough way in a hot pile prior to adding it to the soil in the pot.

That’s all folks about growing spinach in pots. You can apply the above information for growing spinach from seed, growing spinach from cuttings, growing spinach in balcony, growing spinach in cotainers, growing spinach in backyards, palak growing tips, growing spinach in summer, growing spinach in winter, planting palak in pots, growing spinach from scraps, growing spinach indoors under lights, growing spinach in polyhouse, how to grow spinach indoors, and growing spinach in greenhouse. You migh be interested in Bamboo Rice Farming.

Growing Brinjal in Pots (Eggplant) at Home

Growing Brinjal in Pots

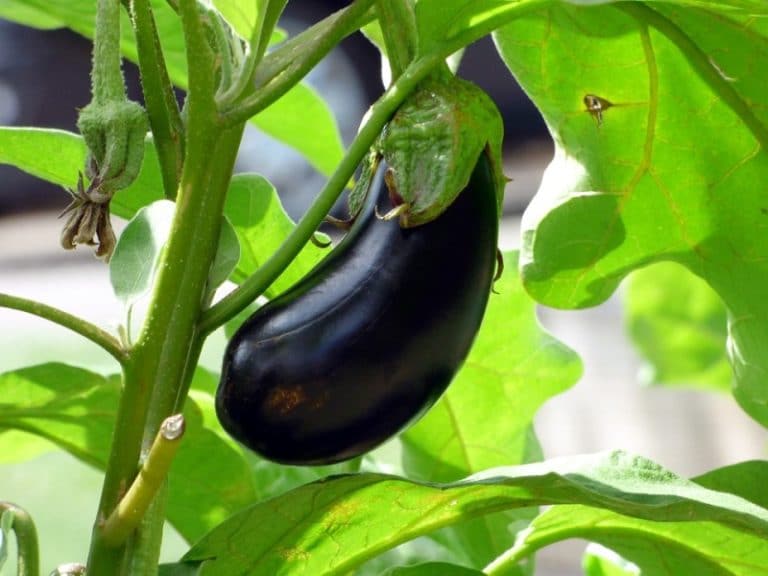
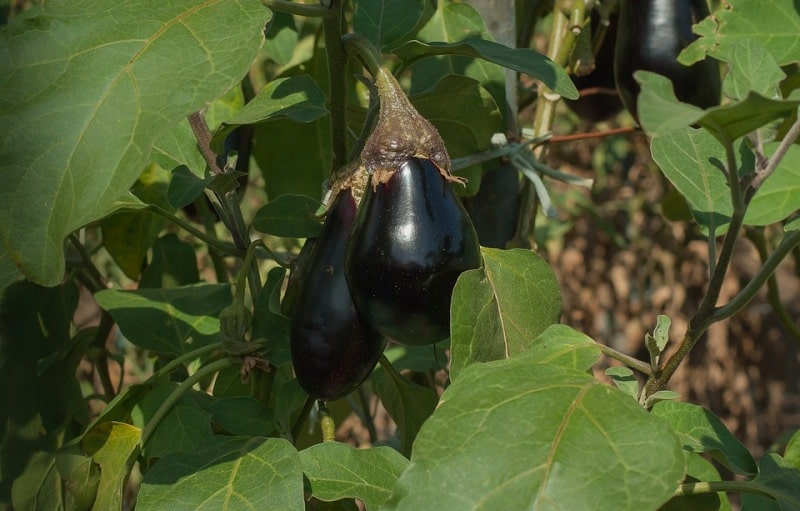
Hi  Home Gardeners, today we discuss growing brinjal in pots. Brinjal which is also called as Eggplant or Aubergine is a perennial plant which belongs to the family of Solanaceae. It will be grown by many of us for its edible fruits. This will require a temperature which is warm and the native of Brinjal is Southeast Asia. Brinjal recipes are very popular. Brinjal is generally grown as an annual plant and the stem of this plant is straight and bushy. The leaves of the brinjal plant are large and are lobed in a slight manner. This plant has pendant violet flowers which are solitary and have a height of 2 inches. The fruit of this Brinjal plant will look like a berry which is having an egg-shape. The color of this fruit varied from red to dark purple, yellow, white, green and sometimes, this will also have stripes

Generally, brinjal will need a large amount of space for the purpose of their growth, but there is a chance for you to grow them in a Pot if you have a large one. Large amounts of sunlight are the main thing to keep your brinjal happy. This is especially because of the fact that the brinjal will survive in the soil which is warm. The soil must also be kept moist in a thorough way and should be fed with fertilizer and also organic matter. All gardeners should know growing brinjal in pots as it is very easy to grow.

Growing Eggplant in Homegarden.

Now, Lets us see how to grow brinjal in pots:

Preparation of pot:
  • You will need one pot for two seeds respectively. If you prefer to use seedling trays and other types of Pots which are made of plastic, then it would be easy for you to transfer the seedlings into Pots which are larger in the further stages.
  • The pot you choose must have a capacity of at least 20 liters and each brinjal should have at least 1 feet of space for the purpose of growth. Hence, it would be better if you plan to plant one brinjal per Pot.
  • Brinjal will love warm temperatures and the clay pots are the ones which restore heat in a better way than the plastic does. You will need to choose an unglazed pot if you can make sure that you would remember watering the plants often. If you know that you are bad at remembering to water plants, then go with the pots which are glazed. Unglazed pots will make the soil dry more rapidly than the glazed ones. So brinjal which is growing in the unglazed pots has to be watered frequently.
  • Compared to plastic pots, clay pots are heavier which makes it easier for them to support the mature brinjal’s weight.
  • Make sure that the pots have drainage holes so that they would help to drain out the excess water balance the level of moisture present in the soil. The holes of drainage will let the excess amount of water to leave the pot reducing the risk of root rot.
  • Scrub each and every pot internally and externally by making use of scrub, soap and warm water. If you are not interested in cleaning the pots, then it would be a risk for you as the eggs of microbes and harmful bacteria which are present in the pots may destroy your brinjal plants.
  • A better and simple choice to combine two parts of potting soil and one part of sand. The soil will provide the plant with nutrients which it requires whereas the sand will take care of the moisture control. You will need to mix a small amount of compost and 5-10-5 fertilizer in the soil for providing more amount of nutrition to the plant. A 5-10-5 fertilizer will consist of little concentrations of nitrogen, phosphorus, and potassium with additional phosphorus for the promotion of strong roots and to improve the Brinjal plant yield.
  • The brinjal plants will have minimum upward growth without any kind of support and as a result, you will get minimal fruit. A tomato cage can be provided to your brinjal plant with a good amount of support.

Read: How To Control Aphids In the Home garden.

Plantation of seeds for growing brinjal in pots:
  • Brinjal plants will need a temperature of minimum 13°C or more, which will be tough to provide in the outdoor location at the time of spring. You can start planting your brinjal plants indoors when April month starts.
  • Place the soil in a loose manner into your pot, but make sure that it is not getting compressed.
  • Make a hole of at least ½ inch at the center of each pot or compartment of the tray by making use of your fingers or a pen’s rounded end.
  • Two seeds have to be planted as this will improve the chances of at least one seed to sprout. When you plant more than two seeds, there are chances that it deprives the seeds of the nutrition and the need for rooting.
  • Now, drop additional potting soil on the seeds lightly to cover them rather than packing the soil inside.
  • Select a window which gets full sun for a minimum of 8 hours in a day. Full sun will provide the brinjal plant with sufficient warmth and light to improve the growth.
  • The soil must be kept moist. To see this, keep touching the soil to know if it has become dry. Make sure that you are not making the soil too moist, mainly when you do not have drainage holes to the pot. Learn how to prevent the soil from drying out easily.
  • In each and every pot put the two seedlings which are strong and cut another one which is present down to the level of the soil. Do not pull out the seedling which is weaker as this may disturb the seedling roots you desire to keep.
Transplantation in growing brinjal in pots:
  • Start preparing your brinjal plants for transplantation as soon as the plants reached a minimum of 15 cm in terms of height. You will only do this when the outdoor climate has become sufficiently warm. Brinjal plants will grow their best when kept in outdoor locations, even in pots as they will have more exposure to sunlight and can also be pollinated.
  • After this, you will need to set up a staking system in your pot. The feet of the stake it a tomato cage should be kept at the bottom of the pot in a flat manner. The stake has to be positioned in an upright manner.
  • Now, the pot has to be completely filled with the potting soil. The soil has to be packed around the tomato cage or stake and also ensure that the stake is helping in a firm manner in its place. You will need to leave 1 inch of space in between the soil’s top and the pot’s rim.
  • A hole has to be dug in the soil. It should be as wide and deep as the pot your seedlings are presently located in. The hole should be dug at the pot’s center.
  • The seedling which is stronger has to be removed from its previous pot. The seedling which is weaker should be thinned out.
  • The soil has to be made wet to make it compact. The soil which is moist and compact will make it easy for the transplantation to take place than the soil which is dry and crumbly.
  • If the seedling is present in a Pot which is made of plastic, you can remove it from the pot by bending the plastic and moving it up and down with some random movements.
  • If the seedling is present in a pot which is stiff, you may be required to slide a towel carefully into the side of the pot and take out all the contents present in the pot. The pot has to be tipped on its side and slowly, the seedling has to be guided out of the pot.
  • The seedling has to be placed in the hole present in its new pot. The seedling has to keep as straight and upright as possible.
  • The potting soil which is excess has to be packed around the seedling so that it would be fixed in place. Make sure that you are not pressing it too much using your force as it will damage the root system completely. You will need to fill the space which is empty so that the seedling will be in its place in a firm manner.
  • Once all this is done, water the soil. The brinjal plant must be provided with thorough watering but make sure that you are not allowing puddles to develop on the soil’s top.

Read: How To Grow Thotakura In Pots.

Caring your brinjal plant:
  • The pot has to be placed in a sunny spot. An outdoor location which receives full sun is a perfect one as both sun and light are important for the promotion of good yield. Brinjal plants will survive in the soil which is warm.
  • Make sure that you are watering your brinjal plant on a daily basis. In climates which are hot and dry, your brinjal plant will need to be watered several times in a day. Touch the surface of the soil and feel the soil by making use of your fingers and water the soil if it is dry. If you allow the soil to get dried, it will decrease the number of brinjal plants you can grow.
  • You can add liquid fertilizer for every one or two weeks for one time. You can use a fertilizer which is soluble in water and water your brinjal plant before you add it to the soil instead of adding to the soil which is dry. You will need to follow the instructions which will be present at the back of the label determining the correct amount of fertilizer to be used.
  • If you see that the leaves of your brinjal plant are becoming pale, you should increase the dose of fertilizer. A fertilizer with the ratio of N-P-K at 5-10-5 will help your brinjal plant if it is only lacking the nutrients and has no other problem.
  • Make sure that you are not digging the soil more than ½ inch when putting fertilizer. If you dig deeper than a ½ inch, it may cause disruption in the roots of brinjal plant which are shallow.
  • Make sure that you are monitoring the pH of the soil present in the pot. The soil which has a pH which is ranging from 6 to 6.8 will be able to fulfill the requirements of your brinjal plants. A pH meter or a litmus paper can be used to provide you with perfect results.
  • If you want to improve the pH of the soil, you can try that by making use of agricultural lime.
  • If you want to reduce the pH of the soil, then you can do that by adding organic matter like plant litter or compost or you can also use fertilizer which has urea in it.
  • You will need to tie your brinjal plant to a stake for the promotion of its growth in an upward direction. When your brinjal plants start to climb, tie the stem of the plant in a loose manner to the stake by making use of twine or thread made of thin fabric. If you tie the thread too much tightly, then it may choke the stem or cut it.
  • Monitor the plants for pests. Cutworms are the most common pests which will attach the brinjal plants, but they can generally be wiped off by keeping a cutworm collar on the plant. You can also use an organic pesticide to wipe off all the cutworms and other types of pests.
Harvesting your brinjal plant:
  • You can start harvesting your brinjal plants once you see that their skin is looking glossy. The fruit will stop growing and in many cases, you will be seeing it grow to the size of a large orange. The time period this takes will change based on the variety of brinjal plant you select, but your brinjal plant will actually be ready for the harvest within 2-3 months after the plantation of seeds.
  • Remove the brinjal from its vine by making use of pruning shears. The vegetable will need to have a stem which is short at the time of removal.

That’s all folks about growing brinjal in pots.

Read: Techniques of Profitable Planting.

Garden Aphids Control Methods – A Complete Guide

A Guide for Garden Aphids Control Methods

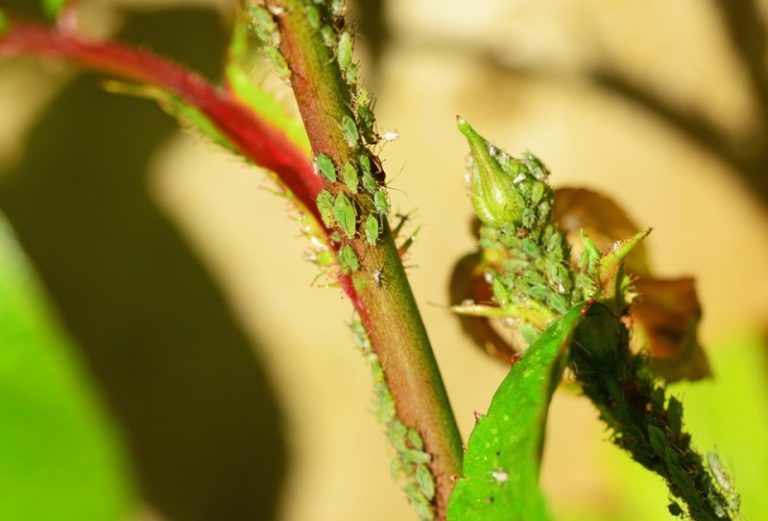
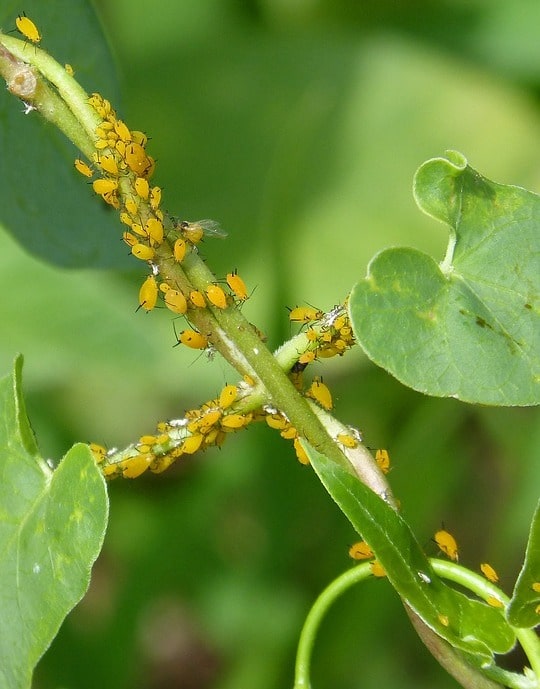
Hello gardeners, today, we discuss the topic of “Garden Aphids Control Methods”. What are Aphids? Aphids are the tiny soft body insects that feed on plant leaves mostly. They are pear-shaped green or brown or black in color. The Aphid insects suck the cell sap of the plant leaves. They move slowly on plant leaves. Adult aphids are wingless. Aphids are called with various names like green flies, a plant louse, etc. Aphids size about pinhead. On the abdomen region, there is a pin-like project known as cornicles. They are the most common insect pests in the urban gardens, home gardens, and poly houses and greenhouses. There are about 1500 to 1600 species out of which 80 to 90 species of aphids cause damages to plants. Aphids live mostly in shade areas. As many of the urban gardeners are facing the problem of aphids infestation in their home gardens. We have come up with this article on How to Control Aphids at home gardens or urban gardens. In this post, we will let you know how to differentiate aphids from another aphid-like insect, the life cycle of aphids, how to find out the symptoms caused by aphid damage, organic control or management of aphids and chemical management of aphids.

Garden Aphids.
Garden Aphids.

Aphids are the insects that belong to Hemiptera order and class Insecta which most insects are the sucking plant pests. For a healthy garden, one must be aware of garden aphids control methods.

Read: How To Grow Amaranth in Pots (Thotakura).

How to find Aphids on Urban garden plants

  • As they are tiny and green it is easy to find them. The color may vary from light yellow to green.
  • Presence of cornicles on their body.
  • We can find easily by observing the colonies.
  • Some of the aphids are commensalism with the ants.
  • Aphids have 2 pairs of wings and three pairs of legs.

The life cycle of aphids

Aphids are the insect pests that have a complicated life cycle. The wingless mother known as stem mothers reproduces without fertilization known as parthenogenesis. These stem mother cells give birth to young ones which further fly on to the new host plants feeds on them. In the late summer or early winter, these insects give birth to male and female aphids. Aphids have egg nymph and adult stages. Eggs of aphids are elliptical or oval in shape with pale yellow to light green color that may further turn to black color. The Nymphs are wingless green to yellow in color. They secrete some wax gland secretions from their body during adverse environmental conditions known as woolly aphids. These secretions attract the ants and the ants feed on this gell secretions and protect the aphids from various insect predators.

Symptoms produced by Aphids infection

  • The symptoms of aphids infestation can be easily seen in the plants.
  • Colonies in clusters are seen on the infested plant stems, leaves and buds.
  • On young shoots, distortion and wilting are seen.
  • The premature death of the seedlings.
  • Yellowing of the leaves.
  • Honeydew secretions on the heavily infested plants leave or stems.
  • There are also some symptoms like mosaics, chlorosis, gall formation, stunting that are indirectly caused by aphids as they act as a vector for many plant disease-causing viruses.

Economic damage to garden plants

  • Most of the Aphids cause damage to garden plants by sucking their leaves cell sap which directly affects the photosynthesis and leads to death or economic damage to the infested plants.
  • In addition, some aphids act as a virus vector where the transfers plant disease viruses like alfalfa mosaic virus, Cucumber mosaic virus or CMV, PVY or Potato Virus Y which causes heavy and severe damage to the plants.
  • Aphids almost transmit 40 to 50 plant viruses.
  • There are also some quarantine viruses where aphids transmit.

Management of Aphids in Home Gardens

Although it is difficult to control or kill Aphids, proper integrated pest management (IPM) practices may ultimately lead to effective control and management of Aphids in Home gardens as well as in Poly houses and greenhouses. It includes Biological control using various insect predators and organic control of aphids and chemical management of aphids.

Monitoring of Aphids in Urban Garden

  • Monitoring plays an important role in urban gardens. Rapid checking for Aphids at an early stage may have higher chances to compete for control of Aphids in the urban gardens.
  • The early you check, the early you can eradicate the Aphid insect pests at less cost and investment.

Read: How To Apply Neem Oil for Your Garden Plants.

Organic control of Aphids or Natural control of Aphids

  • It includes spraying of various natural leaf extracts or plant-based extracts.
  • It is also known as a natural control of Aphids.
  • Spray Aphid repellent sprays like Garlic spray and neem leaf oil spray or neem oil @ 2 to 5 % based on the incidence that controls the Aphids to an extent at home gardens.
  • Use yellow sticky traps for every 100 plants that control Aphids naturally.
  • Grow trap crops around the greenhouses.
  • Natural enemies lacewings also act as a predator on Aphid insects.
  • Release or mass produce various Aphids predators or parasitoids like ladybird beetles and Aphidiuscolemani that control the Aphid insect pests naturally.
  • There are also some parasitic wasps that lay eggs on aphids that ultimately kills the Aphids.

Nonchemical methods to control Aphids

  • It includes the use of aphid or virus-free seedlings in the urban garden.
  • Use screens at greenhouses or urban gardens to control Aphids.
  • Use Aphids transmitted virus free cultivars.
  • Grow trap crops like plants that attract various natural enemy insect predators that feed on the aphids.

Chemical to control Aphids in Urban gardens

  • There are many and various chemicals that are available in the market that effectively controls the Aphid pests at urban gardens. However, never go for heavy doe spray of these chemical insecticides in the urban garden. Even if you use, spray at fewer concentrations of insecticides and use nose mask, gloves while spraying f chemical insecticides at urban gardens.
  • Seed treatment of the urban garden seeds with synthetic chemical insecticides like imidachloprid @ 10 ml per kg seed or thiamethoxan @5gm per kg seed.
  • However, you can also spray NSKE or Neem Seed Kernel Extract @ 5% whenever you see Aphid incidence in your urban garden. Spray imidachloprid or chloranthriniliprol @ 0.5 to 2% on infested urban garden plants.
  • In addition, you can also go for stem smearing of the Aphid infested Urban garden plants with Imidachloprid 17.8 SL 1 ml + 20 ml plain water.

That’s all folks about garden aphids control methods.

Read: Nematodes in Agriculture.

How To Grow Thotakura (Amaranth) In Pots

How To Grow Thotakura In Pots (Amaranth)

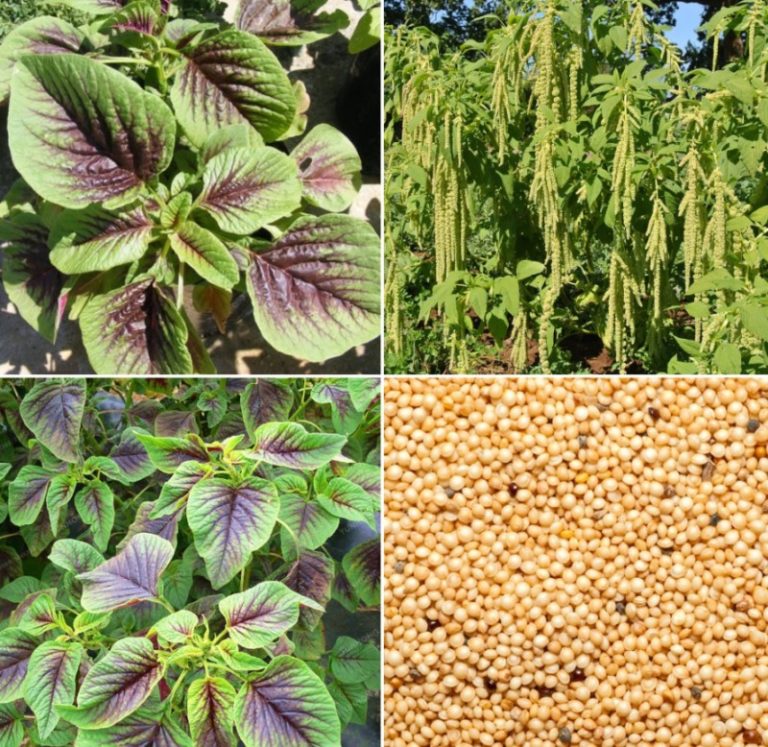
Today, we learn the topic of “How To Grow Thotakura (Amaranth) In Pots/Containers. How to grow Thotakura in pots is a question for many people. Edible Amaranth is one of the leafy vegetables which belongs to Asia and has a lot of nutrients which are essential to the human body. This leafy vegetable is also called as “Chinese Spinach” and “Yin Chai”. It is mostly used in the recipes of China and Southeast Asia for soups and fries. Amaranth recipes are popular across Asia. Amaranth in Telugu is called as Thotakura. The Amaranth leaves will look similar to the normal Spinach in terms of texture and appearance and are frequently used as an alternative to spinach. Amaranth will survive well in temperatures which are warm.

The leaves, grains, and stem of Amaranth can be used for the purpose of cooking. The plant is so much versatile that each and every part of the amaranth can be consumed.  The flowers of amaranth plant are bright in color and in a few cases, they will grow straight or they will trail down. The Amaranth flowers will produce seeds which are called as amaranth grain. The amaranth greens are used as leaves. Few amaranth varieties will be used for amaranth grain and few of them will be used for amaranth leaves.

There are many varieties of amaranth and each of them will have a varied color of leaves. Amaranth color will be starting from striped red to dark green. Few varieties are harvested for the sake of their seeds which are very nutritious just like the leaves whereas the other varieties are used for the ornamental purposes. Amaranthus tricolor is an ornamental plant which looks striking. The following amaranthus plants are used for the purpose of grains:

  • Amaranthus cruentus
  • Amaranthus retroflexus
  • Amaranthus caudatus
  • Amaranthus hypochondriacus.

If you want amaranth plant to be grown for the purpose of leaves, then the below varieties of amaranth can be considered.

  • Amaranthus Tricolor
  • Amaranthus dubius
  • Amaranthus blitum
  • Amaranthus cruentus
  • Amaranthus viridis.

Most of the varieties of edible amaranth will grow quick. The plants will take up to 5 weeks to come to a height of 12 inches. The leaves must be harvested in two ways. The complete plant can be cut at the root base or you can only cut the leaves which are at the top by leaving a minimum of two leaf nodes from the roots. You can see new leaf growth from these nodes which will be prepared for another harvest within just three weeks from the first one. Below steps describe growing amaranth for food. One must be aware of “How To Grow Thotakura (Amaranth) In Pots” for growing this wonderful leafy vegetable.

Read: Neem Oil Pesticides Formulation for Garden Plants.

How To Grow Thotakura/Amaranth – Seed sowing:

In order to sow the seeds, you will need to sprinkle them in a thin way on a pot with medium size and is filled with potting soil which is loose. The soil has to be topped with a thin layer of compost or you can also use potting soil for that. After that, the soil has to be watered slightly. Monitor the pot occasionally in order to make sure that the soil remains moist, But take care that you are not making the soil soggy.

After a few days, the seeds will start the process of germination. After 7 days, you can start exposing the seedlings to the outdoor sunlight and this has to done slowly. The plants will survive very well even in the partial sun, but the thing is that they will grow rapidly if they receive sunlight for a minimum of 4 hours a day.

Amaranth Harvest:

How To Grow Thotakura/Amaranth for leaves:

When you are trying to harvest amaranth, you can do it in two parts. When the amaranth is grown for the purpose of its leaves, the harvesting can be done after 20 days from the time of sowing. The leaves are tender and are much tastier and creamier. The plants will be allowed to grow up to 8 feet. The plants of amaranth will have a thick stem which can also be consumed.

How To Grow Thotakura/Amaranth for grains:

The grains are amaranth are the seeds which develop after the flowers of the amaranth plant. Harvest of the seeds of amaranth will take much time than the harvest of amaranth leaves. The stalks of amaranth flower will start to dry out when the grains of amaranth are prepared for the harvest. When you rub the amaranth flower in a gentle manner, you can see the grains dropping. Here, the flowers can cut and also dried. Amaranth can be beaten by putting it in a bag for releasing all the grains and it can be winnowed for getting seeds for the purpose of separation from the chaff.

Care and Maintenance:

The plants need to be watered when you feel that the soil is dry. This can be done by touching the soil before watering. The amaranth plants will be sturdy and they have the capability to withstand a little amount of drought even at the time of peak summer. Anyways, the leaves of Amaranth will get scorched when they are exposed to a large amount of sunlight or for longer durations of sunlight. In this case, you will need to move the amaranth plants to a partially shaded area by exposing them to sunlight only in the mornings at the time of summer.

Generally, amaranth is not that prone to pests and diseases. If required, you can spray pesticides which are organic in order to control the pests. The fertilization can be done by making use of fresh compost after 30 days in order to help in the leaf growth.

Read: How To Make Kitchen Compost.

Amaranth/Thotakura benefits:

Good source of protein:

Amaranth nutrition is of high quality. The protein which is present in amaranth is of very good quality. It provides 10 grams of protein with one cup of cooked amaranth grain. Protein is generally used by each and every cell of our body and is very essential for building the mass of muscles, improving the neurological functions, digestion, balancing hormones and keeping a decent mood. Amaranth flour consists of proteins and the fhe foods which involve proteins are very advantageous for the prevention of weight gain. They will make us feel full and will need more work for the body for digestion than the carbohydrates which are refined.

Decrease inflammation:

Amaranth is capable of reducing inflammation which is a common problem for every human being. When the toxins of dier and environment raise in the body, the immune system will become overactive and will stimulate defence cells and hormones which cause damage to the tissues. When the immune system starts to attack healthy tissues of the body, it means that you are suffering from an autoimmune disorder like inflammation. As the foods which are rich in proteins like grains will help human beings to fight inflammation, amaranth is perfect for your body. A major advantage of foods which are anti-inflammatory is that they will relieve pain which is in arthritis and gout.

Improves the health of bones:

The calcium which is present in the grains of amaranth will allow the human body to make use of the mineral for repairing bones and strengthening them. Including the foods which are rich in calcium in your diet is very much essential as it will help the broken heals or bones which are weak. Deficiency of calcium will raise the risk of a fracture and the osteoporosis which is getting developed, which is when the areas which are weakened had their formation in the bone which will lead to the fractures and pain.

Studies have proved that the consumption of amaranth is an effective and interesting way to raise the value of nutrition of calcium, iron, and zinc. Calcium is very much essential as if we do not have sufficient calcium in the body, bones will be prone to become pliable and weak by making them more prone to breaks and fractures.

Lowers cholesterol:

Amaranth grain is food which plays a vital role in lowering the cholesterol of the body. Amaranth also helps in the process of digestion by raising the faecal excretion. This is because of the content of fiber present in amaranth. This fiber will combine the cholesterol in the digestive system and will make it get excreted from the body. Consuming the foods which have a high content of fiber will help the body to lower the cholesterol in a natural way. The fiber will act in the bile which will be made from cholesterol, by taking it out of the body with the help of a stool. Because of this, the liver is needed to prepare more bile, which will use the stored cholesterol of the body by reducing the cholesterol totally.

Improves digestive system:

As Amaranth is very rich in the content of fiber, it will lead to the stimulation of the digestive system and will help in the regulation of excretion of waste from the body. Because of the structure and its inability to absorb it, the fiber will pass through the digestive system without getting absorbed by the enzymes of digestion within the stomach, taking the toxins, fat, waste and the particles of cholesterol out of the gut. Fiber which is soluble is very important for proper digestion as it will dissolve into a gluey mass and will trap bacteria, fats, toxins, and sugars. Besides digestion, amaranth also has the capability of preventing other conditions of health like leaky gut syndrome.

Helps in fighting diabetes:

In order to decrease the high levels of blood sugar, you can have one cup of amaranth as a part of the diabetic diet as it will provide a good amount of manganese. Manganese is required for proper production of digestive enzymes which are responsible for gluconeogenesis. This process will involve in the conversion of amino acids of proteins into sugar and the sugar balance in the bloodstream.

Amaranth Gluten free:

Amaranth is free of gluten, so the people who are sensitive to gluten are free to have this grain which is very advantageous. The sensitivity of gluten is a group of symptoms which have a relation with the reaction to protein which is found in gluten. The severity of sensitivity to gluten is a disease of celiac, but the studies found that the gluten sensitivity which is non-celiac which will cause symptoms which are less severe, like headache, joint pains, fatigue. Symptoms of intolerance to gluten will consist of fatigue, joint pains, depression, miscarriage. The diet for sensitivity towards gluten will consist of amaranth.

Helps pregnant women:

The folate which is present in amaranth will help the body to make new cells, especially by playing a role in synthesizing DNA. For the women who are pregnant, deficiency of folate will lead to the defects in the neural tubes, like spina bifida. This deficiency will lead to defects like malformation of heart and limb. The intake of folate foods in an adequate manner is required for the replication of DNA. So without having folate, the cells of the fetus will not be able to grow in a proper way. That is why folate is known as the most essential vitamin for a pregnancy which is healthy.

It is very essential to have very good levels of blood folate before being pregnant as the replication of the fastest cell happens in the very early stages.

Helps in loss of weight:

There are several reasons for the consumption of amaranth which will help in the maintenance of weight which is desired and also healthy. Amaranth is a complete fiber and will regulate your digestive system and also decreases inflammation. Amaranth will strengthen the bones by letting you be active physically and decreases the risk of bone fractures. It is also a major protein source which will keep you full for longer duration and raises the levels of endurance. The grain of amaranth will be especially high in lysine which is an amino acid found in fewer quantities in other types of grains. Lysine is very much essential for proper growth and it will also play an important role in the carnitine production which is a nutrient responsible for the conversion of fatty acids into energy and also helps in lowering the cholesterol. Athletes will use lysine sometimes as a supplement for protein as it will raise the energy and helps in the stimulation of growth of muscles.

That’s all folks about How To Grow Thotakura In Pots.

Read: Rosemary Oil Extraction Methods.

Neem Oil Pesticide Formulation for Garden Plants

Neem Oil Pesticide Formulation, Application for Garden Plants

Today, we learn neem oil pesticide formulation and application of it. The neem plant is a quick growing and long-living tree, native to Burma in India. From there the neem tree has spread and is now developed all over the world. Neem oil, the most popular neem plant product, is prepared by pressing the neem seed kernels. The kernels can have as much as 50% oil. Neem seed oil is an ingredient in many skin care products. In India, most of the neem oil is used in neem soap, but there are also used in neem shampoos, lotions, creams, etc. The neem leaves of the neem plant are the most versatile and most easily available resources.

They do include the same active ingredients as the seeds, just in a much lower concentration. The bark of the neem tree is not used as the seeds or leaves. There is not as much of it, it does not regenerate as quickly, and it is somewhat more difficult to use. Because of its dry and hard nature, the ingredients are more complex to extract. If you are into organic gardening, you must know the importance of neem oil and neem oil pesticide formulation.

Neem oil:

What is neem oil? A natural byproduct of the neem tree is neem oil. The oil is harvested from the neem trees seeds and leaves. While it has been used as a natural pesticide for hundreds of years, you’ll find it in many products you use in your home, including:

  • Cosmetics
  • Toothpaste
  • Dog shampoo
  • Soaps

Neem Oil is among the mainly powerful natural pesticides and insecticides; it covers more than 200 species of chewing and sucking insects. It’s totally non-toxic and does not have any adverse effect on plants if used accordingly.

Take one-liter warm water and combine a half teaspoon of insecticidal soap. Stirring vigorously combine one teaspoon of neem oil in it. Fill it in a sprayer. Keep shaking the sprayer or else neem oil will start to float on the surface. You can use the spray within 8 hours, but the fresh spray is recommended.

Read: Types of Grow Lights in Indoor Gardening.

Guide on using neem as a pesticide

Neem Tree Pesticide

Pesticides have a bad reputation for harming soil, the honeybees, and our health. It’s no wonder that more gardeners are choosing to grow using organic and natural methods, especially when it comes to pest and disease control. If you are one of those gardeners looking to create positive changes to your health and the environment, then neem oil is a great addition to your gardening regimen.

Neem oil is extracted from the seeds of the neem tree, an evergreen that is native to India. Neem oil has been used many ways in the garden, around the home, as medicine, and in beauty products. It is organic, biodegradable, and has been creating to have “no unreasonable adverse effects” by the Environmental Protection Agency.

Seeds from the Asian neem tree (Azadirachta indica) contain brownish yellow color, bitter neem oil, which contain a pesticide and insect repellent called azadirachtin. Neem oil is a broad spectrum pesticide, which means that it kills a large range of fungi and insects. Although neem oil is less toxic than other pesticides, you must wear protective clothing when you use it. Dilute two tablespoons of 70 percent neem oil in one gallon of water to prepare a neem oil spray, recommends Southern Agricultural Insecticides.

Neem oil insecticide:

Neem oil insecticide works as a systemic in several plants when applied as a soil drench. This means it is absorbed by the plant and spread throughout the tissue. Once the product is in the plant’s vascular system, insect intake it through feeding. In some cases, the oil coats the breathing holes of insects and kills them. It is a helpful repellent for mites and used to manage over 200 other species of chewing or sucking insects according to product information, including:

  • Aphids
  • Mealybugs
  • Scale
  • Whiteflies

Neem helps control tiny insect pests like tiny aphids, whiteflies, mealybugs and other sucking insects that collect on leaves and stems. Neem oil will suffocate insect pests on contact if you carefully cover the plant with the insecticide. Azadirachtin prevents insects from feeding & prevents larvae from maturing. It works best against immature insects, so you must apply it in the early stages of infestation. Repeat the application at least once a week, as suggested by the University of California Integrated Pest Management Program. Neem oil acts as an insect repellent.

How neem oil pesticide works

Neem oil is used as an insecticide. Pure neem oil can kill soft-bodied insects and mites on contact, which is one cause why you want to spray it in the early morning or evening when the pollinators aren’t out as much, to avoid spraying them. But that’s not the main process of action of how it controls pests.

First, neem oil repels insects and other animals directly when they encounter it on the neem leaves. And when you spray it on the garden soil, the plant will take it up systemically, which will deter insects from feeding even more. But for those insects who do still feed, the oil contains several components that are not going to bode well for them, the most active and well-researched being a metabolite known as azadirachtin.

When a plant-feeding insect feeds on a neem leaf that has been sprayed with pure neem oil, the azadirachtin interferes with the insect’s hormonal organism, which inhibits their eating, mating, and egg laying patterns. It inhibits growth which prevents the larvae from molting and eggs from hatching. Because azadirachtin acts on the hormonal system, insects don’t increase resistance in future generations, thereby making it a sustainable solution.

Neem oil used as a fungicide. Organic compounds in the neem oil spark an immune response to prevent fungal diseases such as mildew, black spot, rust, scab, leaf spot, and blights. And quality, cold-pressed neem oil will occasionally control some of these diseases when they’re already present. It’s been used as a seed treatment to successfully prevent phytopathogenic fungal diseases, but I’ve not used it for that myself.

Read: Water Culture System of Hydroponics.

Neem leaf as natural pesticides:

Neem has long been used for its medicinal properties and culinary properties. It is known to be used as a deterrent to pests. This medicinal herb has a bitter taste and strong odor that can keep the bugs away from your plants, but non-toxic to animals, birds, plants, and humans. It’s best to spray neem oil on young plants where it is said to be efficient for about 22 days. Add some neem oil with a dash of liquid soap and some warm water and stir gradually. Add it to a spray bottle and use instantly.

Fungicide

Neem oil protects several plants against fungal diseases when applied in the earliest stages of infection. For example, it controls powdery mildew, which causes a white color coating on vegetable, fruit and ornamental plant leaves. Thoroughly spray the plant and repeat the application every 7 to 14 days. Neem oil controls other fungus diseases such as rust, which causes yellow color, orange or brownish-black areas on a wide variety of plants.

Neem oil is a great fungicide:

You can use neem oil to prevent or even kill fungus on plants. Use neem oil for powdery mildew and other general fungal diseases. Neem oil fungicide is helpful against fungi, mildews and rusts when applied in a one percent solution. It is deemed helpful for other kinds of issues such as;

  • Black spot
  • Scab
  • Rust
  • Leaf spot
  • Anthracnose
  • Tip Blight
  • Sooty Mold
  • Root rot

To prevent fungi, spray susceptible plants every 7 to 14 days until the fungus is no longer a threat. To kill fungi, spray plants once a week until the fungi clear up, and then sprays every 2 weeks to keep it from coming back.

Protect your veggies from pests and fungus:

Neem oil has a dual function in the vegetable garden as both a pesticide and a fungicide. Neem oil works on arthropod pests that often eat vegetables, containing tomato hornworms, corn earworm, aphids, and whiteflies.

In addition, neem oil controls fungi that grow on vegetable plants, they are included;

  • Mildews
  • Rusts
  • Leaf Spots
  • Wilts
  • Stem rots

If you want to use neem oil on vegetable plants, spray them in the evening time and again in the morning. Spraying at these times helps make sure you are not causing any harm to beneficial insects, such as bees, that help pollinate vegetable plants.

How to apply neem oil foliar spray?

Some plants can be killed by neem oil, particularly if it is applied heavily. Before spraying at an entire plant, check a small area of the plant and wait 24 hours to check to see if the leaf has any damage. If there is no damage, then the plant must not be harmed by the neem oil. Apply neem oil only in indirect light or in the evening to avoid foliage burning and to allow the action to seep into the plant. Also, do not use neem oil in extreme temperatures, either too hot or cold. Avoid function to plants that are stressed due to drought or overwatering. By using neem oil insecticide about once a week will help kill pests and keep fungal issues at bay. Apply as you would other oil-based sprays, making sure the leaves are totally coated, especially where the pest or fungal problem is the worst.

How to mix Neem oil for plants?

The oil cannot be sprayed alone; it needs a solvent to dissolve in it before function. You can think of water availability, but it cannot be used here. This is because neem oil does not dissolve in water. Instead of using water, we will use a solution of black soap as an element of Neem oil spray recipe. Black soap element is naturally organic and a proven repellant; hence, neem oil pesticide formulation consists of the neem oil and black soap.

Initially, dissolve the black soap in water; about 5kg can be dissolved in 25liters. This solution and Neem oil are the two recipes to create organic pesticide here; Follow the steps about to reveal identifying how to dilute Neem oil.

  • Compute 1 ml of the Neem oil in the knapsack sprayer
  • Compute 1 liter of the black soap in the knapsack sprayer as well.
  • Shake vigorously until getting a milky solution. You can then add water content to knapsack sprayer until it is filled.

Your organic insecticide spray is now ready for many applications. This is how to mix Neem oil for plants.

That’s all folks about “Neem Oil Pesticide Formulation and it’s application in home gardening”.

Read: Mushroom Training Centers.

Grow Light Types, Importance in Indoor Gardening

Grow Light Types, Importance in plant growth

Today, we discuss the topic of grow light types and role in indoor gardening. As you know grow lights are a boon for indoor gardening. A huge spaceship landed on the surface creating a crater deep in the earth, a group of weird looking less like an animal but more like humans step down from the ship but unfortunately, one of them got separated from its group and is left behind. When the weird thing encounters with a good human, this man protects him from danger and offers him fresh juicy fruits and good smelling food but it doesn’t accept anything anyhow it spends night constantly looking out of the window. In the morning with the first ray of light the little creature gets excited, looks out of the window and some apparatus kind of thing glows on his head. The man looks astonished as the creature an alien with excitement screams out “dhoop” means sunlight. Well, friends, this was a fictional Bollywood movie which was based on the fact that every living, be it a plant, an animal or human requires sunlight for its metabolic functions or for preparing its food hence sunlight or works like magic. We all livings are consumers and we depend on our producers a.k.a PLANTS for our food and for our survival.

But how does a plant prepare their food? Why plants are called producers?

The answer is they prepare their own food. Have you ever seen a factory producing your favorite fruit or vegetable? Obviously NO

The reason we call nature “a mother’’ is because it provides everything that keeps us alive. All plant’s leaf appears green because of the presence of a pigment called chlorophyll also known as the kitchen of plant cell this where the plant prepares food but not at its own plant requires light, oxygen, and water for preparing its food and ultimately for its survival. So this was all about how plants grow and what they need. Light plays a key role in the plant’s existence and it is necessary for the plant to survive and thrive as it serves as a primary energy source. No plant will continue to exist for long without light.

As we all know because of advances in the field of science we no longer only rely on soil for raising our plants or gardens. Thanks to the techniques like hydroponics for indoor gardening we can cultivate a range of vegetables, fruits, and herbs at own home even at our balcony or living areas. There are different types of hydroponic system available to choose from in accordance with the system’s feasibility or grower’s choice of plants and availability of space. A hydroponic system basically raises plant by providing all required nutrients and minerals in liquid form with a good amount of dissolved oxygen but wait!!! What about sunlight?? Just as our earth revolves around our sun, so too does your indoor garden. The amount of light you have will determine what size of garden you can grow and what type of plants you can put into it. One of the most important things to understand when growing plants indoors is the rule of limiting factors. The success of your garden is determined by limiting factors; If your plants do not receive enough of one variable then your plants will not attain their maximum growth rate in spite of how much of any other variable your plants are given.

Definitely, you cannot invite the sun in your living area. So how your plants growing in soilless culture or inside your home will survive without sunlight??

The solution is to grow lights or artificial lights specially designed for indoor gardening technique. This article will help you understand how lighting works and how much is required. So keep reading about what types of lights you can use and what you can use them for. So let’s discuss the importance of grow lights, and grow light types of grow lights for available indoor gardening and how to set up grow lights in indoor gardens?

Grow Light Types for indoor gardening

Incandescent Bulb

Incandescent lamps are typical household light bulbs. Incandescent has come under increased scrutiny over the last few years as they are extremely inefficient. Incandescent has an efficiency rate of about 5% and the spectrum of light produced is not ideal for the growing plants. Incandescent also produce a large amount of heat which will raise your cooling costs. Hence skilled indoor growers do not recommend using incandescent lamps for growing plants.

Fluorescent Grow Lights

The standard fluorescent bulb, commonly denoted T12, makes a decent grow light for indoor houseplants especially when starting with seeds, best results have been observed when it is used along with the supplementary natural light by gardening at the place where lighting needs are modest. Fluorescent Grow Lights are fairly weak in light intensity, however, and must be placed within a few inches of the plant to have much of an effect.

Compact fluorescent bulbs (CFLs)

An excellent option for small spaces Compact Fluorescent Lamps (CFL) is another popular form of fluorescent bulbs and was designed as an efficient alternative to incandescent bulbs. CFL’s use comparatively less power and have a longer life than the usual incandescent bulbs.

CFL’s are a good choice for the small-sized indoor gardens or beginners because they don’t require ballast or fancy wiring; they can be simply screwed into a standard socket. It is important to mention if you opt for CFL as indoor lightening tool you should try and use a  reflector because CFL’s generate light in all directions, so you could be wasting light if you don’t use a reflector.

Fluorescent Lamps

Fluorescent lamps are a great alternative for indoor plant growth, particularly high-output fluorescent T-5 Fluorescent Fixture bulbs. They are found 3-7 times more efficient than incandescent, which mean it will consume less electricity while emitting more light. Fluorescent lamps are accessible in a wide range of spectrums.

But Fluorescent bulbs are not perfect for large plants, as they do not go through as deeply as High-Intensity Discharge lamps. Fluorescent lamps may be a feasible option for growing large plants if you have lights above and to the side of the plant.

LED Grow Lights

While they are noticeably more expensive than fluorescent bulbs, LEDs exploit half the electricity and last five times longer, more than paying for themselves in the long run. Though the average LED bulb from the hardware store is not designed for plant growth.LED grow bulbs are competent of producing much greater light intensity than fluorescent bulbs and are available in the full-spectrum form. A simple thumb rule: Fluorescent bulbs are often used when growing just a handful of plants; LEDs are preferable for larger plantations since for them you can accomplish higher light intensity per square foot. Another advantage of LEDs? They generate very little heat compared to other bulbs, an issue that can become challenging when you have a lot of lights in a small space and less heat would further bring down your electricity bill by reducing your cooling load.

Read: Benefits of Indoor Moss Gardening.

LED Light Indoor Gardening.
HID Grow Lights

HID or High-Intensity Discharge Lamps are the top picks among experienced indoor growers. It is the chief option for large indoor plantings. Like two sides of the coin, High-Intensity Discharge Lamps are extremely powerful, they have a very high light output and are 4 to 8 times more efficient than incandescent lamps but are high-priced to purchase, and they consume electricity inefficiently and require particular light fixtures, and give off a lot of heat.  Still, they are very effective today; they are a top choice among growers and are extensively used. If you wish to grow large plants like tomatoes or lemon, HIDs are good to put money on because the beam of light penetrates farther into the foliage than with other bulbs.

There are two kinds of HID bulbs. High-pressure sodium (HPS) bulbs which are best for flowering (low spectrum), while MH (metal halide) bulbs are required to prop up vegetative growth (high spectrum); the two grow light types are often used in combination. Unfortunately, each type requires its exclusive fixture.

Since HID lamps produce a large amount of heat, so when using them extra ventilation and proper reflector height should be taken into consideration especially when planning a grow enclosure and hanging your lights. Preferably, you should hang your lights about 2 feet from the top of your plants. A better manner to check the favorable height of your lights is to keep your hand just above the plant – If the heat from the light is too hot for your hand, then it’s too hot for your plant as well.

Metal Halide (MH) Bulbs

Another class of grow lights, MH bulbs emit blue spectrum lights which are ideal for the vegetative stage of the plant.  The UV rays of MH lights have analogous effects on plant life. These grow lights are great for greenhouses and for hydroponics gardening. MH bulbs are used on young plants which help out the plant to grow faster and most commonly 400-watt metal halide light is recommended for indoor gardening.

These bulbs approach with a spectrum of colors which is suitable for the growth of the plants. Specific indoor plants grow well in green light but most of them have a preference for red light which accelerates the speed of the plant growth. You can also use MH bulbs in a combination with HPS lights to get more desired lighting effects.

Read: Garden Permaculture.

Factor affecting the cultivation of indoor plants under grow lights:

  1. The correct Colour

As we know natural light or Sunlight consists of the complete spectrum of light which includes all even colors of the rainbow:  main colors being red through yellow to blue and violet. similar to plants growing outdoors in the sunlight, indoor plants grow up best under full-spectrum bulbs, which produce a balance of cool and warm light that imitates the natural solar spectrum. They’re brilliant for seedlings as well as houseplants, culinary herbs, and other small plants.

By learning how plants use light and about the fixture options, you can select an indoor grow lights system that is right for the plants you want to grow.

Most Common grow light Types used for indoor gardening

  • LED lights
  • Fluorescent lights

Both of the grow light produces full-spectrum light. However, LEDs are said to be better for the environment and your budget both. They deliver the bright; full-spectrum light that plants desire, with a supplementary spike of blue light to stimulate stronger root growth, enhanced photosynthesis, and ensure good growth.  One must purchase lights which energy-efficient, economical and which purposely meet the demanding needs of plants, not the multi-purpose LEDs. They’re great for your plants. High-tech LEDs are calibrated specifically for indoor growing.

It is known that LEDs use half the electricity and lasts longer than fluorescent bulbs.

They’re environment-friendly, mercury-free LED tubes don’t shatter like glass, so smaller quantity end up in the landfill.

  1. The correct Intensity

The intensity of light that a plant receives is determined by the brightness of the bulb and by how close the plant is to the light source. Plants differ in their requirement for light intensity. Usually, those plants that are native to tropical jungles or shady forests do not need as much light as plants that evolved in dry, sunny climates.

Some flowering houseplants, such as African violets and begonias, are happy being 10 to 12 inches away from the source of light. Foliage plants, such as ivy or philodendron, can be placed as much as 36 inches away from a light source. But many flowering plants, such as orchids, and citrus, as well as most of the vegetable plants, require a much higher light intensity to flower and produce fruiting.

  1. The Right Duration

No matter what kind of plants you are growing, you must give them a break. When it’s dark, plants respirate, which is also an important part of their growth process. The equilibrium of rest time to active growth time affects many biological processes, including the growth rate, and the setting of buds and fruit. Hence right lightening duration i.e. light and dark hours must be maintained in accordance with the plant’s requirement,

Most of the Vegetable seedlings need 14-18 hours of light a day.

Plants are usually divided into three categories with respect to their preferred day length:

  • Short-day plants
  • Long-day plants
  • Day-neutral plants.

Category of Short-day plants includes plant such as chrysanthemums, kalanchoe, azaleas, and begonias, which thrive on less than 12 hours of light per day. In fact, these plants must typically go through a series of even shorter days before they set buds and flower.

While Long-day plants require 14 to 18 hours of light every day. Most seedlings of vegetables and garden flowers are long-day plants. When they don’t receive enough light they get pale and stressed.

Day-neutral plants, includes foliage plants, geraniums, coleus and African violets which are usually satisfied with 8 to 12 hours of light all year-round.

Warm vs. Cool: Understanding the Colour Spectrum in Grow Lights

When you are hunting for grow lights, you’ll notice they are labeled with figures like 2700K or 4000K. This refers to their relative warmth or coolness on the color spectrum – the higher the number, the cooler the light. Vegetative growth of a plant is generally best around 6500K, though many plants call for a period of warmer light, around 3000K, in order to produce flowers, and consequently fruit. In other words, if your objective is to simply produce seedlings, leafy green vegetables, or root crops, then you only need higher spectrum bulbs. If you want to grow flowers, or any fruiting plant such as cucumbers, tomatoes, peppers, lemon, etc then you will require low spectrum bulbs.

How to Install Grow Lights

Installation requirements vary significantly depending on the scope of your indoor garden and the grow light types being used. But we have slated down a few basic steps to get you started.

After selecting the desired kind of grow bulb for your indoor garden first you will have to find a way to support the bulbs over the plants at the appropriate height. And unless you’re growing something that will stay at more or less the same height all through its lifespan, you’ll also need a way to raise the light rack as the plants grow. This is generally accomplished through some sort of pulley system or by simply hanging the light fixtures with metal chain in that way you can simply adjust the height by changing the link the light fixture.

It is generally wise to install a timer with your grow lights to make sure they get the proper amount of light as required by your plants, and also that they get it at the same time each day. If your lights bring a high level of heating in your growing area then you must install a ventilation system to avoid heat stress. You can also make use of light reflectors and all sorts of other grow light accessories to accomplish optimum results. Grow lights are easily available in online sites and stores specially dedicated to gardeners along with product’s specifications and installation practices.

Choosing the Right Light

There are many factors to think about when purchasing a grow light. The most important factors that you will need to consider are your budget, enclosure type & size, plant type, and available ventilation facilities at your place. Your budget is a primary factor when choosing the right kind of light. Low-budget growers are comfortable with fluorescent tubes, usually a size T5. It is suggested to small-scale growers to start indoor gardening with the compact fluorescent bulbs.

That’s all gardeners about grow light types for your indoor gardening

Botanical Gardening Techniques; Ideas; Tips

Botanical Gardening Techniques, Functions, Benefits, Setup

Today, we talk botanical gardening techniques. Basically, a garden is defined as a place where flowers, vegetables or fruits are grown. But when coming to the botanical gardens, they are like an institution which educate scientific workers and the normal public to bring up a sort of interest in plant life. Most of the people think that botanical gardens are valued by only botanists, horticulturists, home gardeners, and foresters. But the fact is that it is valued by millions of tourists internationally.

A botanical garden should consist of morphological gardens to show how the dispersal of seeds takes place in plants, genetics garden or breeding garden to show the heredity laws, taxonomic garden to show the families of plants. There should also be an economic plants section, an arboretum, nurseries, and greenhouses for the cultivation and propagation of genetic and delicate plants.

A botanical garden is generally considered as an institution of research in botanicals, mainly on the flora which is native to the region. It should consist of a library, studies of photography and also recreation. However, all the fundamental aspects of botany will come under the botanical garden and this has become the center of cultural activities of any region in which it is located. One must know botanical gardening techniques if they are trying to set it up.

Functions of Botanical garden/Techniques of botanical gardening:

Botanical Garden Functions.
  • Botanical gardens will serve just like outdoor laboratories.
  • They will start the studies on the ecosystems which are temperate and tropical to know about their biota, prior they are gone to science and get preserved.
  • They will act as centers of germplasm bank of the similar species of the plants which are economically important.
  • They will take care of the establishment of youth museums and nature centers to concentrate on the destroying ecosystems and degradation of the environment.
  • Maintenance of the ornamental plants which are not much attractive and are also abandoned.
  • The botanical gardens will offer training to the people in the urban areas about the tree plantation.
  • They will involve in the collaboration of the university and a few other for conducting research on the biology of the environment.
  • Botanical gardens take up the responsibility of organizing the educational programmes for the creation of awareness among children about the environment and train teachers about the same.
  • These are the centers where rare and endangered species are conserved.
  • These provide living plant materials for the purpose of research.
  • These play a major role as centers of pollution indicators by raising the plants which are susceptible to pollution.
  • Almost all of the economic plants are actually introduced across the world through botanical gardens.
  • They also play a vital role in inspiring poets and literature by giving them aesthetic pleasures.

Read: Miniature Gardening Techniques.

Benefits of Botanical garden:

Benefits of Botanical Gardening.
Improve your mental health:

There are various studies which prove that being in the outdoor locations is good for mental health, attention as well as memory. A study which was made by researchers has found that a 1 ½ hour walk in a setting which is natural will reduce the stress and will clear any problems related to the brains like mental illness and depression.

Environmental protection:

Botanical gardens are great for the environment in several ways. They play a vital role in in the conservation of plant species which are endangered as well as by the seed banks and they are also advantageous to the pollinators such as butterflies, bats, bees and birds which play an essential role in crop production and the maintenance of the health of the plant life. Moreover, green spaces will help in the filtration of pollutants present in the air, low temperatures in the cities and also help in the protection of waterways from the runoff which is a contaminated one. By offering support to the botanical gardens, you are indirectly supporting your Mother Nature.

Add some culture:

Botanical gardens will often organize cultural events such as exhibition of art or music. That means that these are representing the culture of the region and preserving the culture too.

Helps you be active:

Make sure that you are not letting that aesthetic environment of botanical garden fool you. Botanical gardens are the places where you can jog through the trails and plants and increase your heart rate. You can also make use of exercise classes like tai chi, yoga, pilates. In a few cities, you will also find “boot camp” fitness style classes in the settings of the botanical garden. In order to involve your entire family, you can go through the events calendar of the botanical gardens to check if there are any friendly events for your kids.

Starting a Botanical garden:

Gather people:

In order to start a botanical garden in your locality, it is essential to first gather a few people who are interested to contribute and participate in your project. You will need to search for the individuals who will be able to support the botanical garden and would be able to set up an organization and meetings to discuss how a botanical garden helps the community and what kind of botanical garden would be best for the community. You will have to make a decision between a garden with flowers, trees, and vegetables or a combination of these three. You will also need to decide if you want to go with organic garden mainly if fruits and vegetables are grown in it.

Raising funds:

You can arrange a meeting with the local organizations and businesses in your locality who may help by providing you with the required supplies and also the information on botanical gardening. Establishment of a happy relationship with the florists, nursery and the local hardware store will add advantage to you as they will try to do their best on the project. You can also talk to a member of the city council to check if they have any plan for events only for gardeners in that particular city so that the botanical garden association can take advantage of that.

Preparation of your botanical garden site:

You will need to search for a site which has water availability and also good soil. It is mandatory to get permission from the landlord and other authorities which are related. The agreement of lease should be finalized for at least 2 years in order to work as hard as possible. Also, ensure that the previous use of the land did not make it contaminated with hazardous chemicals.

Designing your botanical garden:

You will then start the design preparation for the garden which will suit not only the lot but also the needs of the gardeners. You should plan the plots’ size and layout. The organization of labors should be done to clear the lot and set up the garden. Ensure that the plots are marked in a clear way and are also divided for the sake of gardeners to take charge of that particular plot and manage it individually.

Read: Polyhouse Floriculture Benefits.

Maintenance of your botanical garden:

To maintain a botanical garden, you will first need to prepare the rules about sharing and getting tools for the garden. You should arrange a discussion on how all these rules and people who come up should be enforced and upheld. Even a little maintenance which has to be done to the botanical garden has to be discussed as the weeds may cause an issue in the areas of the botanical garden. It would be good if you have a bulletin board which is a rainproof one for the announcements which cause the problem to the garden and its members.

Tips to maintain your botanical garden:

  • The first tip is to water your botanical garden in a smart way. This will give your garden and efficiency along with some sort of irrigation.
  • Watering should be done on a regular basis at high temperature.
  • You should take proper care of your botanical garden by saving them from any sort of diseases. There are chances of many turf diseases which like fungi which usually develop in the climates which are warm and humid.
  • Watering should be done early in the morning so that it would reduce the humid conditions.
  • Try to avoid fertilizers in the midst of summer and wait till the arrival of autumn. You can release the fertilizer gradually two times a year during spring and autumn in order to get tremendous results.
  • It would be better if you have a gardener for your community to take care of all the things which are required for your botanical garden. If you are hiring anyone, make sure to tell him to clear all the mower blades by making use of sterilizing agent before he is watering the plants. This is because most of the pests will be carried to the plant through tools and types of equipment which are used for gardening.

That’s all for botanical gardening techniques. Keep gardening!.
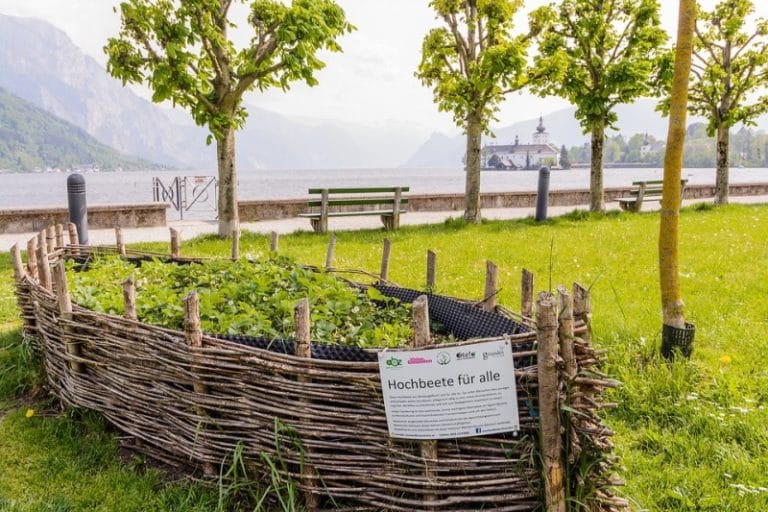
Read: How To Keep Farm Records.

Miniature Gardening Techniques, Ideas, and Tips

Miniature Gardening Techniques, Ideas, and Tips

Today, we learn the topic of miniature gardening design and techniques. A living garden of a tiny scale, but looks like a garden which is full-sized is a miniature garden. This will look like it has shrunk completely in size. Miniature gardens will consist of dwarf plants which grow very slowly, a patio, an in-scale bedding plant, miniature gardening accessories where all the elements get related in scale and are proportionate to one another as the garden gradually grows.

Creation of a miniature garden

Preparing your pot or container:
  • You have an option to place your miniature garden in a different variety of containers starting from glass bowl to a terracotta pot. You should search for a container which consists of holes for drainage beneath it so that the water gets drained through the soil when the watering is done to your miniature garden.
  • The pots made of terracotta are the best suitable ones as they will mostly come with drain holes and are also good at holding the potting medium. Search for a terracotta pot which will be able to hold a variety of plants as you will always want a container which is large enough to place your miniature garden.
  • You can make a decision on reusing a clay pot which is broken. You can use it only if it is broken on one end of the pot. You can take up the piece which is broken and add it as a property in your miniature garden.
  • You should use potting soil which is regular for laying down at the container’s bottom. You will be able to find the potting soil medium at a plant nursery in your locality.
  • You will need to choose small stones of different colors and also textures to use them in your miniature garden as elements of decoration.
  • If you have a plan to use a glass bowl for your miniature garden, you should have charcoal used in horticulture along with potting soil medium. This charcoal will be of great help to the plants by allowing them to grow even more better in the glass container. You can lay down the charcoal and the stones at the glass bow’s bottom.
Miniature Roses.
Miniature Roses.
Choosing plants for your miniature garden:

While choosing plants for your miniature garden, you have to go for the plants which will remain small and also require very less trimming. You should also make sure that you are selecting plants which can be grown easily even in little space but produce blooms which are very attractive. Few miniature garden plants are herbs such as basil, sage, thyme, oregano, Firecracker plants, geraniums, Begonias, Dwarf liquorice, spider plants, winter greens.

Read: Ideas for Indoor Moss Gardening.

Including the soil and plants to the pot or container:
  • You will need to start this step by rinsing the container and drying it completely. Then you should fill the container with potting soil medium up to the rim. The potting soil can be a bit higher on one end if you are interested to keep your plants visible from one side.
  • You will need to dig small holes for the plant roots by making use of a small knife or shovel.
  • You can also plan the layout of your miniature garden before you start your plantation by deciding where you want to keep your plants and also the miniature garden accessories. After deciding this, as per your design, you will have to dig the holes in the potting soil.
  • If you are making use of a glass container, you will need to lay a 1-inch layer of small stones at the container’s bottom in the first place. This will make sure that your plants are getting a sufficient amount of nutrients in the container. This will also help the plants in proper draining.
  • After this, you will need to add a ½ inch layer of charcoal which is used in horticulture. As the last step here, you should add a 3-inch layer of potting soil medium.
  • Once the soil is laid, you should start preparing your plants. This will make sure that they are growing in a healthy way in your miniature garden. You can start preparing your plants by taking them out of their usual pots or containers. Also, avoid breaking or touching the ball of the root. After that, trim the leaves of the plants which are damaged by making use of miniature garden tools like tiny pair of garden shears.
  • Keep the plants in the holes which are prepared. Once the plants are kept in place, the soil must be patted on the roots.
  • The taller plants must be placed in the garden’s back whereas the shorter ones should be placed in the front. You should also try having different varieties of plants in each spot so that your garden will have patterns and colors which are attractive and also interesting.
  • If the opening of the container which you are using for your miniature garden is narrow, you can make use of two chopsticks for positioning the plants in the soil.
  • Once all these things are done, water the plants.
Adding the accessories of miniature to the garden:
  • You can also let out your creativity by placing the accessories of the miniature in between the plants of your miniature garden as long as it is miniature in terms of size.
  • You can also make a decision on adding the structures of miniature to your gardens such as a miniature bridge, a fence or a set of tables and chairs all are of the miniature. You also have an option of adding miniature figures for the creation of a garden scene. As a final step, you can add miniature food items.
  • If you are opting for a normal miniature garden, you can make a decision of adding simple elements such as beads, marbles or any decorative wood pieces.
  • Once you add the plants to your miniature garden, you can start decorating it with miniature garden decors like figurines and rocks. You can also try a variety of accessories by placing them beside your plants to check what looks best.
  • You can also use simple and general items like decorative rocks, stones, and marbles which are colored and twigs. You can also be creative here and make the garden look colorful.
  • You can also choose a particular theme for your miniature garden, you can add different accessories which will suit the theme. Miniature gardening decorations with a theme will make your garden look more artistic. Example of a well-known miniature garden theme is a fairy-garden. This will have mini chairs, mini benches, mini eggs, etc. You can also get miniature gardening ideas from sources like the internet and few gardening books.
  • The stone pathway will be another accessory which can be added to your miniature garden and this would be a permanent one. You can make use of tiny stones for the creation of a pathway or a stone and marble mixture.
  • Make use of a small shovel for drawing lines in the soil in order to make a mark about the location of the pathway would be. After that, lay down the stones for the formation of a path. Place the stones very close so that they will form a pathway.
  • Make sure that you are using the stones of different colors and also mix marbles with the stone for the creation of pathway in your garden.

Caring and maintenance of your miniature garden:

  • Once the preparation of the miniature garden is done, you will need to keep it outdoors or indoors on a surface which is flat such as a table or smooth ground. The garden should be kept in a place where the sunlight is not direct so that the plants will get some amount of sunlight.
  • If your miniature garden is kept in a window which is facing south direction, keep a window shade over it. This will help you by blocking any sort of direct sunlight and will allow only the filtered indirect light in.
  • Windows which are facing south with a shade will provide a large amount of light. You can make a decision on placing your miniature garden to an east-facing or west-facing window as this is the direction which will provide a sufficient amount of light all across the year.
  • Mostly avoid the window which is North-facing as it will not get sufficient indirect light all across the plants by which the plants will not be able to survive.
  • Make sure that you are regularly checking the mini garden soil so that it will not become dry. The soil must be kept damp by running water from the pot once you feel that the soil is dry around the plants’ roots.
  • Based on the plant types in your miniature garden, you should keep watering the plants. If you have any succulents in your miniature garden, for instance, they will not need much watering like herbs. Ensure that you are following the directions of watering which are suggested on the plant’s label.
  • If you are making use of a glass bowl for your plants, watering should be done slowly. When the water will reach the height of the stones which are located at the bowl’s bottom, stop watering.
  • When your miniature garden survives and starts growing, leaves of few plants will be overcrowded in your container. In order to control them, start trimming the plants by making use of tiny gardening shears.

That’s all folks about miniature gardening.

Read: Testing Methods for Seed Viability.

Ebb and Flow System of Hydroponics

All about the Ebb and Flow (Flood & Drain) system

Today we go about ebb and flow system of hydroponics. Hello readers!! So today we are back with desired information about another type of hydroponic system. In further paragraphs, we will be enriching you with a complete guide for Ebb and flow system which is also known as flood and drain system of hydroponic gardening. This system is one of the most widely recognized hydroponic systems present around. It is of intermediate level in difficulty not as complex as some other advanced forms of hydroponics, such as the aeroponics, relatively low-cost to set up, and really versatile. These systems are very popular among home hydroponic growers for many reasons in addition to how simple they are for anyone to put up, you can utilize almost any materials you have laying around to build them with, so you don’t have to pay out much money to cultivate plants hydroponically. Also, they can be built to fit in any accessible space, it is well suited for both indoors or outdoors, and there is no boundary to the diverse and creative freedom to design them for your space. Along with being reasonably priced and easy to establish, plants grow very well in flood and drain systems. The flood and drain system works mainly as it sounds, by merely flooding the plant’s root system with nutrient solution only at regular intervals rather than continuously feeding them.

The principle behind Ebb and flow system:

How a hydroponic flood and drain system works is quite simple. The main element of the flood and drain system is the containers in which plants are growing. You can just grow one plant or many plants/containers in series planted in growing trays. There is a timer that controls the water pumping cycle, as you turn on the pump water with the nutrient solution is pumped through tubing from the reservoir up into the main part of the system by using a submersible fountain/pond pump. The nutrient solution continues to fill (flood) the container (grow tray) and soaks the plant’s roots until it reaches the water limit. Usually, an overflow tube is used to set or mark the limit up to which water should be pumped.

As soon as the water flooding the containers reaches the overflow tube height, it streams back down to the reservoir where it is recirculated back through the system again. The overflow tube maintains the water level height in the flood and drains system, and it also makes sure that the nutrient solution dissolved in water doesn’t drip out from the top of the system while the pump is on. While at the set level, there is a constant circulation of nutrient water in the system for a certain period. At this point, the overflow tube is involved in ensuring the maintenance of the standard water level. When the pump is off, the water comes back down into the reservoir through the drainage system. This is how the Ebb and flow system nurtures growing plants efficiently as well as sustainable.

In simple words we can define its basic working as like in other methods, the basic concept is very simple, the growing plants are placed in a grow tray or in the container, which is periodically filled with nutrient enrich water pumped out of a reservoir placed below. The system exploits gravity to revisit the water to the reservoir to be reused.

Read: Indoor Moss Gardening Ideas.

What do you need to build a Flood and Drain (Ebb and Flow) system:

Before using it or seeing in action this system may seem complicated to beginners because it involves so many different components, but they all come together quite effortlessly and can be assembled in very little time. Once it is assembled, this system desires modest maintenance and cultivates plants efficiently with very less electricity or water use.

So here the list:

  • Container for growing plants.
  • Container (reservoir) to hold the nutrient solution.
  • Submersible fountain/pond pump.
  • Light timer or digital timer to turn the pump on and off.
  • Some tubing to supply water from the pump in the reservoir to the system to be watered.
  • An overflow tube set to the standard water level height.
  • The Growing medium may be clay pebbles.

Basically, the essence of ebb and flow system is the two main parts of the system – the reservoir, plant tray or container and submersible pump with timer.

The Plant Tray or container

The plant tray is also known as flood tray or container is a large, shallow container or several small ones in a system, in which you raise your plants. Plant your seedlings in perforated pots filled with a growing medium such as vermiculite. Make sure the pots that your seedlings are in must be about twice as deep as the flood tray. The flood tray is pumped full of nutrient-rich water from the reservoir placed below, which flows up through the bottom of the pots to the roots of the plants. The water is then streamed back out, allowing the roots to become dry and oxygenated before flooding again.

The Reservoir

Another necessary part of any hydroponic system is the reservoir. This contains water and nutrients that plants require. Usually, one reservoir is enough for most of the Ebb & Flow systems. If your arrangement is big, the size of the reservoir must also grow respectively, or you need some extra reservoirs to supply an adequate amount of nutrients to the plants. The reservoir is installed directly below the flood tray’s stand. It is connected to the plant tray through a tube for flooding and a drain tube. The fill tube is attached to a submersible pump with a timer, which regulates the flow of water up into the flood tray. The drain tube allows gravity to pull the water in reverse to the reservoir after flooding the tray so that the water can be reused. You can make use of the same water for about a week at a time, after making sure to renew the nutrients every time you refill the water. The submersible pump with a timer allows for a lot of control in this type of system because you can customize the length and frequency of irrigation based on your plants need. 

Tubing

The purpose of the pipe is to connect the reservoir to the grow trays or container having plants in it in order to facilitate water in and out of the system.

Overflow Tube

One of the USP of flood and drain system, the crucial function of the overflow tube is to set the level of standard height up to which the nutrient solution in the container reaches. The overflow tube also works to ensure that the nutrient solution does not spill out of the reservoir. Because the water can easily overflow because of the pressure build-up during the pumping process.

Growing Media

Because of the technique by which the system works, the growing media for the Ebb & Flow is recommended and must be strong and heavy so that it doesn’t get saggy and floated. Some experienced growers suggest growing materials such as clay gravel, hydroton, perlite, stonewool.

Other Materials

One of the advantages of the flood, drain type of system is that the materials are cheap. There is also a good scope for material improvisation and lots of freedom for creativity. You can use fancy colored tools such as buckets, tubes, water bottle, trashcans, and storage totes. As long as any container can hold water, they are satisfactory for use.

For people who have experience of hydroponic gardening and are little aware of improvisations can use a suitable material like plastic mosquito netting as filters because any place where water stands will need to be filtered.

Read: How To Grow Herbs in the Backyard.

Different Types of Ebb and Flow Hydroponics

Varieties of flood and drain system are available and are being used by different growers at home as well as the commercial level that uses the same basic principle of using water pumps to supply plants nutrients solution.

  1. Flooding Tray Design

The flooding table/tray flood and drain (ebb and flow) system type setup is handy when you want to place plants in the system, for the time being, want to be moving them around a lot. Instead of flooding separate containers with plants in it, this technique only floods one container. The structure has a shallow rectangular or a squared tray on top of a raised surface. The reservoir usually sits directly underneath with easy access.  The plants are grown in regular plastic pots or baskets and placed in the flooding tray like regular potted plants filled with growing medium. Once the plants attain stability and maturity, they can be transferred into a permanent hydroponic system.

In the process of flooding nutrients to the plants, one side of the tank lets water in from the pool. Meanwhile, the opposite side enables water to move out from the container back into the nutrient solution reservoir. The duty of the overflow tube is to control the height of water in the container up to which water is filled and can be adjusted as needed.

One limitation of using the flooding tray design is the appearance of algae growth, and to avoid this system has to be cleaned out regularly. Because the top of the tray is usually left open, light is allowed to get into the nutrient solution in the bottom of the tray, facilitates algal growth due to which amount of dissolved oxygen depletes.

  1. Plant containers in series design

This type of setup is most commonly used when you managing the different or large number of plants in different containers at the same time. The work is to get the nutrient flows go through all containers uniformly at set water level, before draining back to the reservoir via the tube. It’s imperative to keep in mind that the system with Flood and drain the containers or grow trays to be flooded need to be placed above the reservoir, like on any stand, table top or bench.

That way the water can stream back to the reservoir effortlessly by gravity, and thus drain the system correctly.

First, multiple containers are all connected together through tubing so that when the system is flooded, they all will flood evenly, and all at the same time. For ease, instead of having separate overflow tubes for each of the containers to be watered, there’s generally only one overflow tube. It is fitted to the system at the base where all the containers are connected to. And when the water height reaches the top of the overflow, it spills over and simply goes back to the reservoir and reused in the system again. The standard height of this one overflow tube will set the height of the water level in all of the connected containers with the plants in them. You can modify the water height in all of the connected containers by simply adjusting the height of the single overflow tube.

Again the system allows you to be as creative as you can with a number of buckets/containers for growing plants of different shape, color, and size.

  1. Serge tank (ebb and flow) system design:

The serge tank type of flood and drain setup is functional when more vertical space is required. normally with flood and drain systems, the reservoir is always lower than container having plants so that the nutrient solution can drain out of the system through gravity back into the reservoir via overflow tube, and when the pump is switched off. Rather than relying on the overflow tube for getting the water evenly in all containers, this design uses a primary tank (called as surge tank) for distributing water uniformly in all containers.

It works on the principle of Flood and drain systems with serge tank in flooding sequence that water seeks its own height. In other words, the water height in one container will be the equivalent to that in another container when they are connected below the water line. The serge tank serves as a provisional reservoir that regulates the water height in all the containers with the growing plants in them and is only full during the irrigation cycle.

As the water level rises in the serge tank, the water level rises equally in all the connected plant containers at the same time. This ebb & flow system functions with a pair of pumps. That means there is one pump placed in the reservoir for moving the nutrient solution into the surge tank and all containers. And another one in the surge tank to push the solution back to the reservoir.

There is a submersible pump inside the surge tank that helps force the nutrient solution back to the reservoir there is a float valve in the surge tank that turns on the pump within it once the water gets the standard level. When the water level gets high enough a pump is turned on in the serge tank. The pump in the serge tank then pumps water back into the main reservoir. At this time both the pumps are on. The serge tank type of flood and drain system costs more to put up because there are many more parts required.

Read: Farm Animals Gestation Period.

Indoor Moss Gardening Benefits, Ideas

Indoor Moss Gardening Benefits and Ideas

Today, we talk about indoor moss gardening ideas and advantages. Moss has nature which is unique and also unusual. This is unusual because it will not develop an original root system. Rather than this, moss will produce spores which will develop a root-like structure. This structure which looks like a root will grow into the ground and gets attached to the surface. This particular characteristic of moss will make it a plant which is attractive and suitable for the creation of an indoor moss garden. If you want to create an indoor moss garden, you will need a few basic supplies and little efforts to grow indoor moss garden. You can have an indoor moss garden kit to perform the actions required. In this article, we will discuss a set of instructions which will help you in the creation of indoor moss garden.

  • In the first place, you will be required to grow moss in a container which is suitable. You can make use of container jars which are transparent or you can also just indoor moss garden terrarium jars which are suitable. Moss will be grown easily in vessels such as plastic aquariums, bottles and glass vases. Moss will like humidity for survival so that it will look for a climate which has moisture and warmth.
  • As a next step, you will need to search for the moss which can be grown in an indoor location. You might have few mosses which are grown in the backyard. To get assistance, you can find your moss in the areas which are shaded and in the areas where there is damp soil. You can also find some sort of moss which is been growing in one of your neighbor’s house so that you can take a few cuttings from here.
  • Mosses will grow in any type of soil composition, The soil which has a high content of sand which will prevent the surface from being stable.
  • If you are growing forest mosses in your indoor garden, then do not place garden soil as a base. These species of moss will like a combination of coco peat and garden soil that too in a ratio 3:1
  • Harvesting the moss which is grown outdoors should be done in a careful manner by making use of a shovel. When you are taking a patch of moss, ensure that you are collecting 1 inch of the growing medium with the patch. It is important for the safety of the root system of moss. For the transportation of moss to your house, you will need to place the cut patch in a plate which is made of plastic.
  • Your container should be filled with one-quarter of moss along with stones and gravel. Fill half of your container with soil. As most will like to grow in acidic conditions, you can add a light layer of peat moss on the soil’s top layer. After making a soil layer, do not compress it as moss will like a soil which is loose and not compact. Place a moss patch on the soil layer and then press this down ensuring that it is sitting properly on the soil’s top layer.
  • Place the moss garden in the location of your house which is half shaded and is not in direct sunlight. Mist the moss garden on a regular basis by making use of a spraying bottle with water at room temperature. The moss should be left damp but it should not be saturated with water as too much of water will cause rotting in the moss. Make sure that you are checking your moss garden on a regular basis to get an idea if it has to be misted.

Read: How to Grow Flowers In Polyhouse.

Benefits of moss gardening:

  • Many people won’t see moss gardening as a method for the improvement of air quality of the indoor locations. In reality, moss garden is the one which has no many advantages. It is very easy to install a moss garden indoors like home, office with any type of decor. These days in home decor, people are using a vertical green wall and below are the benefits of having an indoor moss garden.
  • Moss gardens have the capability to improve the air quality in indoors by a process which is called as biofiltration. Pollutants of air will be absorbed by moss and can be converted into water and carbon dioxide. There are then released in the form of clean and pure air. Most of the people forget to clean their HVAC system in a sufficient way. So it is always advised to have moss plants so that it will help them by cleaning the air.
  • A vertical wall of moss will act as a layer of insulation for any indoor location like home, office, etc. The most will generally absorb the heat or cold so that it will enter the building/ This will make sure that your energy bills are low since you will not use much energy to heat or cool your home or office.
  • If you are searching for a way of gardening which involves less work, then you can go with moss gardening. Moss will need less sunlight and should be always kept moist with occasional misting by using water. The water bill will not raise and there is no need to trim the moss regularly as it will grow very slowly.
  • A green wall of moss which is very aesthetically pleasing. A moss garden helps in the creation of a peaceful atmosphere as there are only very few colors and shapes to it.
  • An indoor moss garden will add some sort of life to your indoor location. Your moss garden will be alive and will strive to clean your air, provides insulation to your indoor location along with aesthetic benefits.

That’s all folks about “Indoor Moss Gardening Ideas”.

Read: Methods of Seed Viability Testing.

Polyhouse Floriculture Benefits, Ideas and Tips

Polyhouse Floriculture

Today, let us go through Polyhouse Floriculture benefits, ideas, and tips.

Growing the plants in a polyhouse is a pride for a home gardener. You can not only grow new plants from your present landscape but also get a very good start for your flower garden or you can also grow it in the indoor environment by making use of a polyhouse. Though the plants will grow to their best in your polyhouse, they will completely depend on the setup of the polyhouse. There are few suitable plants to grow in polyhouse as per their climate.

Polyhouse gardening is one of the methods of growing plants in a protected environment. The usage of polyethene plastic is done for covering the structure. This will enable the cultivation of high-value plants in the polyhouse structure.

Few polyhouses have natural ventilation whereas few are completely under the systems of climate control with ventilators and screens which are motorized.

Polyhouse is attaining great significance in recent days. This proves to be advantageous to the farmers since it gets enabled.

Floriculture is a concept which completely belongs to gardening and is motivated towards the understanding and the improvement of all the factors of creation of buds and flowers which involve nutrition which has to be given to plants, watering, management of pests, lighting requirements, etc. The main aim of floriculture is the improvement of plants so that they will yield large buds and flowering times which are the best.

All the flowers cannot be grown in all the seasons. This is a major disappointment for gardeners who love to have beautiful flowers in their gardens. Hence, polyhouse floriculture has come into existence where the flowering plants can be grown in polyhouses irrespective of the varieties and also the season.

Polyhouse gardening flowers:

Ornamental plants can be made a group into annuals and perennials which are shade-loving and they can be divided based on their requirements for humidity and other features which are unique. Few popular ornamental and landscape plants are Geranium, Petunias, Caladiums, Ferns, Chrysanthemums, Impatiens, and Poinsettias.

Read: Raised Gardening Tips.

Benefits of Polyhouse Floriculture:

Polyhouse floriculture is advantageous to the gardeners mainly to those who will prefer organic gardening. Below are some advantages of polyhouse floriculture

  • The plants can be grown in temperature which is controlled which would, in turn, lead to less damage to the plants.
  • The growing of the plants can be done all around the year and a gardener need not wait for any specific season.
  • There is less number of pests and insects in a polyhouse garden.
  • The outdoor climate will not have that much of impact on the plant growth.
  • The size and quality of the flowers grown is higher in the polyhouse garden.
  • There would be very good aeration and also drainage.
  • The ornamental flowers can also be grown without much efforts in a polyhouse.
  • Polyhouse will provide correct facilities to your plants irrespective of the season.
  • The yield of the plants will improve up to 10 times the actual.
  • The growing period will be less.
  • It would very easy to apply the fertilizer and is automatically controlled by drip irrigation.
  • This will make sure that the production of all the plants goes across the year.
  • There would be the production of flowers which are free from blemishes.
  • There would be less water required.
  • Labour which is required is also less.

Types of Polyhouse:

Depending on the climatic control system, polyhouse is of two types:

Polyhouse with natural ventilation:

This type of polyhouse will not have any climatic control system except enough ventilation and fogger system for protecting the plants from harsh climatic conditions and also from pests and diseases which occur naturally.

Polyhouse which is environmentally controlled:

These are built mainly to increase the period of growth of plants or to enhance the yield in the off-season by regulating the temperature, humidity, and light, etc.

Read: Benefits of Garden Permaculture.

Polyhouse Floriculture tips:

  • In the first place, you will need to maintain the correct temperature in your polyhouse. The temperature in day time should not be more than 32°C. In order to maintain this temperature, you will need doors and windows in the polyhouse so that they can be closed and opened to give the flowers ventilation mainly during hot climatic conditions.
  • At nights, the temperature should not be less than 10°C. You can make use of several ways for the maintenance of temperature during night time but it will be completely based on the location of the greenhouse. One simple method to follow is to fill few 6-gallon buckets with water and keep them in the polyhouse so that they will be able to make use of them in the day time. In this method, heat will be restored and the polyhouse will be warm in night times. Make sure that you are placing the water buckets with lids on them so that they will help in the prevention of insects from reproducing in water.
  • To get good circulation of air and also ventilation. You can make use of a circulating fan. The circulating fans can be utilized when the doors and windows are closed. Circulation of air is very essential as it helps the plants to grow in a proper way.
  • Prepare a schedule for watering the plants and make sure that you are following it on a daily basis. If you have a polyhouse which is small, it would be sufficient if you water the plants one time a day, but if it is larger, then you will have to water the plants more often. Also, keep in mind that the requirements of water will increase when there is an increase in the temperature.
  • Tropical plants will require humid conditions for the sake of their growth. If you are growing tropical flowers in the polyhouse, you will need to ensure that you are providing them with humidity trays. It is very simple to make a humidity tray as any plastic tray with pebbles and filled with water can be used as a humidity tray.
  • At last, you have to be careful about the fertilizer requirements of your plants. The plants in the polyhouse can be fertilized with ¼ strength of the fertilizer which is soluble in water. Ensure that the plants are fertilized on a weekly basis.

If you follow all the above tips, you will get the ability to grow several varieties of flowers in your polyhouse. Few of the well-known flowers which can be grown in a polyhouse are zinnia, marigolds, snapdragons, poppies.

Read: Information on Soil Acidity and Alkalinity.

Raised Bed Gardening Ideas, Techniques, Tips

0

Raised bed Gardening Ideas

Today, let us learn Raised bed Gardening Ideas and Tips. Planting on the raised bed has a number of advantages when compared to planting which is done on the ground. Raised bed gardening construction can be done on your own by using several tips available on the internet. You can also go through the raised bed gardening images available in the respective websites which provide you with a lot of raised bed gardening ideas. So, if you are planning for gardening, think and learn raised bed gardening ideas.

Urban Raised Gardening.

Raised buds which are built-in:

Raised bed gardening helps to raise the plants in the soil which is higher than the ground level. Mostly, this will be done with few types of frames made up of wood, hay or any material which is repurposed. The starting cost to set up your raised bed will be completely based on the elaboration you make, but once it is in place, raised beds are inexpensive for maintenance than the traditional gardens, and they also have a lot of advantages.

The primary advantage of raised bed gardening is that it will be able to keep your garden at any place which makes it portable. Plants are mostly healthy and also very productive in a raised bed as the soil quality and drainage will be in your control. If the sides of the raised bed garden build with sufficient width, you can even have a place to sit in it.

It is common to include the plants in a container on a patio, but you should be able to include a raised bed into the patio structure with lumber and bricks easily. This will give a permanent place for perennial plants to get established and also mature.

Raised beds made of sheet metals:

One more greatest benefit of the raised bed gardens is they will sit above the underground frost line. This will make the soil to get warmed up rapidly at the time of spring and you can even start the planting early. If you are interested to keep the soil in a toasty way for the entire summer, try to take into consideration, building the walls for the sake of your raised beds out of some metal type like a sheet metal raised bed. Metal will make sure that all the heat which is coming from the sun is restored in the soil, Sheet metal is simple for the formation into shapes and a fantastic way for giving the heat which is required to grow Mediterranean plants like lavender or sage.

Beds raised in the square foot:

Making use of a raised bed in vegetable growing will let you control the quality of soil and helps in the prevention of getting compacted. The roots of vegetables can grow without any obstructions. The beds will not have a great benefit from being a part of raised bed gardening. Even the 8 inches of these beds will be sufficient for the improvement in the drainage.

Herbal spiral gardens:

Spiral gardens are considered to be a well-known technique of permaculture. They will improve the amount of planting area which is usable without even making use of more amount of space in your raised bed garden. These can be built easily with stone, wood, brick or you can even build it by piling up the soil. The shape which is not usual and the plant swirl will make prepare an attractive focal point in your respective garden. Herbs are the plants of your own choice, but you can grow any type of plants when you are choosing a spiral garden. All the plants will be reachable.

Read: Herb Gardening Design Ideas.

Raised bed with Hoop-house structure:

With a little amount of prior planning, you will be able to create a vegetable garden which longs for multiple seasons. Raised beds will allow you to regulate the conditions of growing in your garden and will put the vegetables invisible to the animals. If you are constructing a hoop house on the top surface of the raised bed, you can be prepared for any type of weather which gives you a good head start at the time of spring and a garden which can even handle the frost.

Border of the Raised beds:

Raised are the great options for yards which have steep slopes. By the construction of beds at their lowest surfaces, you will be able to create an illusion of a garden which is levelled. You can also see that raised bed gardening will not reduce your choices. Prepare your beds with sufficient width so that you will still have a flower garden which is layered and with a border which has shrubs framing the garden’s back and give a lot of room for perennials which will give colors, textures and also drapes which soften the edges.

Trough gardens:

The trough gardens will help us know the simplest ways for the creation of raised bed gardens. You can just fill the troughs use for feeding animals with some good quality soil and start the plantation. There is no requirement of any assembly. You will need to just make sure that you are drilling a few holes for drainage at the bottom before adding the soil. This metal will provide the garden with an industrial look and also helps to warm up the soil at the time of spring. Based on what type of plants you are interested to raise, the beds will require extra care at the time of summer.

Raised beds which are custom designed according to your space:

The design of raised bed gardens can be done in order to fit in any amount of space. With some amount of creativity, you can start creating a complete garden area. This raised bed which is multi-leveled can be constructed by using simple straight lines and it completes with a potting shed and arrangement of night lighting. You will need to add a section of the bench, and you will also have seating to plan for outdoor dining. Once the [plants are filled, this customized garden will give a rustic and completely natural look.

Raised bed Arbour:

Gardening which is done on an Arbor or trellis in a raised bed will make it even more easy for the harvesting of vegetables and will keep them cleaner than when they keep spreading on the ground. Vegetable gardening will let you raise more amount of plants without occupying much space. Food gardens specifically designed for the family will show that irrespective of what you are growing if it is either vines or vegetables which are sprawling, this garden will create a living arbor which will provide the vines with a lot of access to sunlight without taking plants into the shades in raised beds beneath. You can start creating an A-frame by attaching two bamboo poles and tether them and stretch the netting of the garden across.

Read: Garden Permaculture in India.

Space defining in a raised bed:

Gardens built in small spaces will frequently feel cluttered and not care. In contrast to this, the raised beds which are lining this garden will give architecture and structure for four seasons to this little garden. You will be able to create these buds for gardens with any shape from pavers, bricks or even decking material which is a composite one. They will not only define space but also make it look larger by breaking the view. They will also provide some additional seating area in the garden area which has shade.

Raised bed gardening with cinder blocks:

There are several ways to construct raised beds from the materials which are recycled. Raised bed gardening with Concrete blocks is one of the famous methods. Cinder blocks which are old will consist of fly ash, which will remain after burning the coal. Using it around edible plants is still in debate. Anyways, new blocks are prepared from concrete. They will also feel heavier than the cinder blocks which are old and are considered to be acceptable for a vegetable garden. You should be careful because they may leech lime which will increase the pH of the soil.

The raised bed which is Tiered:

Raised beds will not have any sort of limits. Once the raised bed is filled completely with flowers, it will be difficult to see the wood frame which is offering support to them. But it will look better all along the year. However, you can also decorate it with several greens all along your holidays and also across the year. You can construct your own wooden frames or you can layer successively in large containers just by passing metal pipe across the holes of drainage and then isolate them with washers.

Raised bed gardening wood type:

If you have a look around your areas of storage or if you go across few salvage shops in order to get the items which will make the raised beds attractive or easy for assembling, you will be able to create a raised bed garden on your own. This will not only look attractive but also less expensive and requires less maintenance. This will not need painting or even waterproofing. This will have longer durability than most of the products made of wood.

The raised bed gardening on a slope:

Instead of terracing the complete area of a sloping yard, you can start creating a garden at the level of the eye. A patio made of stone and retaining walls will help in the creation of a garden room which will be surrounded by raised beds making it more perfect for relaxation with a beautiful view. This will need a good amount of work in terms of removal of soil and stonework, but you will enjoy the fruits of this hard work for many years.

Milk crate garden:

This can be converted into any shape and this is also portable. You will just need to select a crate and move it more close to the kitchen. There is no requirement to drill the holes for drainage and if you want to change the soil, you can simply lift the crate and throw it in the pile of compost.

That’s all folks about “Raised bed Gardening Ideas and Techniques”.

Read: Impact of Soil Acidity in Agriculture.

Garden Permaculture Benefits, Principles in India

0

Garden Permaculture Benefits, Principles in India

Today, we learn the topic of “Garden Permaculture Benefits”. Permaculture is a gardening movement that is spreading into modern agriculture. It is made up of two words – permanent and agriculture. We tend to think of agriculture, farming, and gardening as backbreaking labor that wrestles the fruits of the earth from the clutches of plant disease, infertile earth, and a multitude of different problems that can threaten our crops and risk yields.

Permaculture was developed with sustainability in mind. In a way, it sounds too good to be true – it’s a way of gardening that doesn’t pollute, feeds into itself, and doesn’t let anything go to waste. It is a relatively new method, conceived in Australia in the 1970s.

The major benefit is that it excludes outside fertilizers that can eventually harm the soil and pollute the land around the fields. This is because it mimics the natural ecosystem, and aims to recreate natural dependence and codependence based relationships that clearly work very well without human interference.

Read: Raised Bed Gardening Setup Guide.

We are only beginning to understand the fact that some chemicals used in industrial agriculture as well as small garden farming, can have a long-lasting effect on the ecosystem, and us, our neighbors and our families for generations to come.

A hallmark of a permaculture garden is actually doing less work. Farmers and gardeners depend on natural processes so much that most of the work that their modern counterparts do like weeding and control management is made null and void. One should know garden permaculture benefits as more interesting things are happing in this field.

Group Permaculture .

The Principals of Permaculture

There are many principals of permaculture – some people say it’s three, some say there’s as many as twelve. But the main principles will always be renewability, integration, recycling, responding to changes.

Seeing the garden as a living thing that goes through cycles, and affects everything around it is key to understanding permaculture. Although gardening is the most popular form of starting permaculture, it’s worth it to look at the role greenhouses can play in permaculture in order to yield more crops and extend the growing period. Greenhouse gardening can be adjusted to reflect your needs as a gardener, and they introduce a great opportunity for control without pesticides, herbicides, and dangers that come with hail, flooding or larger pests. 

How to Run a Permaculture Greenhouse

  • Greenhouses are tricky because they are closed environments. While permaculture mostly deals with an open natural environment, operating a greenhouse with permaculture principles is entirely possible.
  • Solar Energy – the process of irrigation, cooling, and any other processes that require electricity should be powered by sustainable energy sources.
  • Compost inside – in large greenhouses, bringing the composting inside not only feeds the crops with renewable nutrient-rich material but let’s not forget that composting generates heat. This will actually help to keep a greenhouse hot and help with managing resources.
  • Bring in the farm animals – sometimes livestock like chickens are brought into a greenhouse in order to generate CO2 for the plants as well as a valuable fertilizer. In fact, the Polydome, a new concept urban greenhouse in the Netherlands brings in bees, chickens, fish, decomposers like mushrooms, over 50 different crops all together into a sustainable package of crops. Their goal is to show how cities can meet all their food needs while growing food inside their borders.
  • Mix it up – one of the most important principles of permaculture is that monoculture is bad and depletes the soil very quickly. It also puts farmers at risk of one crop failure and being unable to use their resources later on. Like stated above, diversity is key to the success of permaculture.
  • Using bees for pollination – bumblebees can be introduced to a large greenhouse in special boxes. They are less aggressive than honeybees and tend to work better with their human colleagues. The crops pollinated by them will be healthier, look better and yield more. Of course, if introduced properly, honeybees can also work great and produce harvestable honey as well.
  • Think about your community – does your community need 3,000 tonnes of cucumbers? Tomatoes? Whatever single crop that commercial greenhouses grow? If not, maybe it’s time to rethink the concept of who you are benefiting and concentrate on community – permaculture gardens and farms tend to be the main source of all vegetables and a wide variety of resources for their local communities – especially if put in an urban setting.
  • Water management – using as much water from rain collection as you can is good for plants. Managing it well is another secret – instead of traditional irrigation, special high beds can be made that supply water from the bottom – that way nothing is lost to evaporation.

Successful Large Scale Permaculture in India

The Dangers of Green Revolution

Permaculture gardens are successful in countries like the United States, Costa Rica, South Africa, Australia, Netherlands – everywhere in the world.

The idea of permaculture was first introduced in India in the late 1980s by India is an agricultural giant. However, small farmers often struggle and are preyed upon large corporations who control seeds, crops (such as potatoes) and are simply bad for small communities and community scale farming.

Even with monoculture farming and large agribusiness becoming bigger and bigger, India is in a unique position in the word to steer in a different direction and be financially smarter than countries that have bet their economies on products like soybeans, corn, potatoes and other large monoculture crops that are owned by large scale corporations and were part of the “Green Revolution” movement that got started in the 1960s and 1970s.

Of course, the “Green Revolution” helped India to become a grain exporter and adopted “modern” methods of farming from the US, like chemical farming and using large scale irrigation. But all signs point to the fact that it is not sustainable in the long run.

The incessant need for too much water makes farmers look for water deep underground – an expensive endeavor, which sometimes taps into deep salty water and makes the soil unusable for years and years. Because the soil is becoming poorer in nutrients, higher amounts of fertilizers are needed to sustain it – also a steadily rising cost to the farmers. 

Concentrating on Community

Indian farming is mostly compromised of small farms, and the idea of permaculture mostly centers around small farmers.

Today, there are many small farms that are starting to practice and experiment with permaculture. “Agriculture is not just agriculture – it’s a social responsibility,” says Narsanna Koppula, who is a well known Indian permaculturist.

Their elimination of gigantic farms and agribusinesses in favor of small sustainable farms seems almost unimaginable now, but as the climate changes and the demand for community-centered farms continues to grow, it can be beneficial to think about small steps to take in order to make these changes happen.

We don’t have to switch overnight, but living more in tune with the nature that surrounds us and learns how we can live in tune with natural systems that already exist will help us plant a wide variety of crops the whole community can use.

That’s all folks about Garden Permaculture Benefits. Keep growing.

Read: Soil Acidy and Alkalinity Impact on Crop Yield.

Raised Bed Gardening Setup Guide for Dummies

2

Setting up a raised bed gardening

Today, we talk about how to build or setup a raised bed gardening. Raised garden beds are easy to build and also maintain. They offer gardeners as well as a garden with lots of benefits. In this article, we will discuss how to build a raised bed garden on your own as well as some tips to use perfect wood and also soil. Raised beds are considered to be a simple way to get involved in gardening. Irrespective of you purchasing the kit or building your own raised bed garden, there are many best reasons to use raised bed gardening.

Raised bed garden:

A Raised bed garden can also be termed as a Raised bed. This is a large container for planting which will sit on the top surface of the ground and is also filled with plants and soil. This can be also considered as a box which has no top or bottom and is placed in a sunny location. This will be filled with the soil of good quality in order to become a source of pleasure and an attraction to the garden.

Building a Raised wood garden:

Raised Bed Garden.
Raised Bed Garden.

Selection of right wood:

Most of the people will be particular about their wood frame safety. In order to make sure that the wood lasts for a long time, there are many options:

  • Lumber which is pressure treated on a regular basis today will have a combination of chemicals which is applied for the prevention of the soil to get moist and the weather from getting rot. Though the wood which is treated with pressure is considered to be safe for organic growing of plants, few people have some restrictions in using it and there are several alternatives which are environmentally friendly.
  • The woods which are expensive like cedar will consist of natural oils. These will help in the prevention of rotting and will make them last longer. They are very expensive for buying, but they are more durable.
  • Selecting the boards which are thicker will help the wood to last longer. For instance, larch which is thick of 2 inches and is sourced locally should be able to last for at least 10 years without any sort of treatment.
  • Always make sure that you are not using any railroad ties as there is a chance that they are treated with creosote which is considered to be toxic.

Other alternatives to wood are concrete blocks. Anyways, always remember that the concrete will improve the ph of the soil with time and you will need to take care of the soil amendment accordingly in order to grow the best-raised bed garden.

Size of the raised bed:

  • In the first place, you will require a place with its ground levelled and also gets a good amount of sunlight. It should be able to receive sunlight for at least 8 hours a day. This will reduce your options to some extent.
  • When coming to bed size, the width of 4 feet should be common. Lumber is cut more frequently in the increments of 4 foot and you should also access the garden without stepping on to the raised bed. If you make the bed with too much width, then it will make it tough for you to reach the center. This will affect your weeding and harvesting.
  • Length of the bed is very much important. Typical pots mostly have a width of 4 feet and length of 9 feet. You will need to prepare your bed as long as possible or you should build many raised beds for varied crops.
  • The bed’s depth can differ, but soil depth should be the minimum depth. Most of the plants grown in the garden will require 8 to 12 inches for the sake of their roots, so 12 inches would be fine.

Read: Water Culture Hydroponic System.

Preparation of the site for a raised bed:

  • Prior to the establishment of the bed, break up and also loosen the soil below by making use of a garden fork so that the soil will not become compact. You will need to go to a depth of a minimum of 8 inches. For the improvement in rooting, few gardeners would like to cut the top layer, dig down one more layer and then come back to the top layer and combine the layers of the soil together.
  • If you are in a plan to keep your raised bed in a space which is occupied by a lawn, put a cardboard sheet, a tarp, a small piece of fabric which is used for landscaping in order to kill the grass in the first place. After almost 45 days the grass will be dead and can be moved easily.

Build a Raised Garden Bed:

  • Building raised bed garden boxes is a simple method.
  • As support for timber beds, you will need to keep wooden stakes at each and every corner. Keep them inside the bed in such a way that the stakes are not that much visible.
  • You will need to drive the stakes till 2 feet into the ground and should leave the remaining stakes above the ground exposed to air.
  • Also, make sure that the stakes are levelled so that they are present in the ground at a similar height or you will have beds which are not even.
  • The lowest boards should be kept 2 inches below the level of the ground. Also, check that they are levelled.
  • Use the nails which are galvanized for fixing the boards to the stakes.
  • You can also add more rows of boards by fixing them to the stakes.

Raised bed garden soil:

The blend of the soil which you keep into your raised bed is the most important one. Most of the gardeners will fail because of the soil which is poor rather than anything else.

  • The beds should be filled with a topsoil mix, compost and other types of organic material like manure in order to provide the plants with an environment which is rich in nutrients.
  • Also, remember that the raised bed soil will get dried more rapidly. At the time of spring and winter, this will be good, but at the time of summer, you will need to add straw, hay or mulch on the soil’s top so that they would help to restore the moisture.
  • Watering should be done more often as this is very important for the raised beds mainly in the starting stages of growth of plants. After they are established, there will be no requirement of too much maintenance.

Requirements to prepare raised bed garden soil:

Below are the requirements of 4×8 foot raised bed:

  • Topsoil: 4 bags. Make sure that you are not collecting the topsoil from your backyard as there may be chances of weeds and pests in it.
  • Peat moss: 2 buckets.
  • Compost: 2 bags
  • Grass clippings or leaves which are shredded: 2-inch layer. Make sure that the grass clippings are herbicides and also free from fertilizers.

That’s all folks about “Raised Bed Gardening”.

Read: Techniques for Soil Sterilization.

Water Culture Hydroponic System Setup Guide

Water Culture Hydroponic System Setup Guide

Today, we learn water culture hydroponic system. Talking about hydroponics systems, there are six main types to choose from. These are:

  1. Deep Water Culture (DWC)
  2. Ebb and Flow (Flood and Drain)
  3. Wicking
  4. Drip
  5. Aeroponic
  6. Nutrient Film Technique (NFT)

Now, there are also multiple variations of each of these different types of hydroponic systems, but these are the categories of basic designs.

ALL these systems are hydroponics because they are the soil-less method of plant cultivation and because of course you’re feeding the plants by a nutrient-rich water solution instead of planting them in soil. The only disparity is each system is HOW they transport the water, oxygen, and nutrients.

Dear Growers, as promised our team is constantly working to provide you best information about raising your plants in the hydroponic system. So today we are here with the guide for growing plants in water culture hydroponic system. Water Culture systems are about the simplest and most used of all six types of hydroponic systems. While being technically simple, they are still very efficient for growing plants hydroponically. This type of hydroponic system is widely used by home hydroponic growers as they really like simple yet efficient hydroponic system, but this is also preferred by commercial growers on a large scale as well. Primarily the water culture systems are a simple and easy concept. It’s also a very reasonably priced type of system to build easily, and this is one more reason why it’s popular with home growers. Even though the concept is simple, there are plenty of creative ways to use and build water culture systems out of different materials and in different shapes.

Deepwater culture system abbreviated as DWC is often misused as a synonym of Water culture hydroponic system. So what is “DWC,” and why isn’t listed as one of the six types of hydroponic systems? Well, that’s because it’s merely not a different type of hydroponic system at all while it’s just a variation of the already existing type of hydroponic system called a water culture system. As already discussed it is the hydroponics in its purest and simplest form yet most effective type of Hydroponic systems. The reason why it is the most preferred indoor gardening hydroponic system is that it requires the LEAST quantity of material and supplies.

Read: NFT Hydroponics System Guide.

Let’s get into details and know-how to get started:

What is Deep Water Culture (DWC)?

As the name suggests, DWC – Deep Water culture or Direct Water Culture is a hydroponic growing system that maintains plants roots in a well-oxygenated solution full of nutrients and water permanently.

This is unlike other hydroponic methods like the Ebb and Flow, Aeroponics, and Drip System, in which growing plants are only watered on a constant basis but not 24/7. The word “Deep” of Deep Water Culture implies that the developing roots should be sunken deep in the nutrient solution present in the reservoir constantly.

Hence, the reservoir that contains the plants must be able to hold a sufficient amount of water. The more amount of water in it the more will be stability in the nutrient solution and hence less maintenance, monitoring and less stressing about refilling your reservoir.

In case of other hydroponic systems, plant roots are suspended, exposed in the air and are watered continuously by pumps, but in the deep water culture, they emerge in the nutrient solution which has been oxygenated 24/7.

How does DWC Work?

Here in this system roots of growing plants are suspended in nutrient solution 24/7 but what if plants become too much suffocated because of ever available water? As extra is not always favorable, you may have seen some of your plants die off because of over-watering.

But you need not worry as it’s not the case in the DWC, because, besides water, you provide developing plant roots with adequate oxygen, and provide a suitable environment, temperature, nutrients, lights due to which they thrive well

The Principle behind working of DWC

Water Culture hydroponic system operates very easily. The plant is suspended in plant baskets right over the nutrient solution in the reservoir for this styrofoam is often used or plants can be suspended through holes cut in the lid covering reservoir. The plant’s roots hang down from baskets or holes directly into the nutrient solution where they are submerged in the solution. The specialty of DWC is, the plant’s roots remain submerged all the time. Usually, the nutrient solution depth doesn’t need to be deeper than 8 inches. That’s really only needed for larger plants that have larger root systems that need more space and more water requirement.  Simply when using a container like a bucket it needs to be filled high enough to reach the plant’s main root near the top sufficiently. Plants like most of the varieties of lettuce can easily be raised using only 4-6 inches of water in water culture systems. The roots don’t suffocate because they get the air and oxygen they need from the nutrient solution in the form of dissolved oxygen present in the water itself. What you need most in a system full of water like the DWC is oxygen which is also a critical factor for any plant growth. DWC makes the oxygen continuously available by using an air pump and this is how In DWC, plants absorb sufficient oxygen along with the desired nutrients and water around it all days. This helps them to get more rapid growth, and in many cases even better than grown in the soil-counterparts. As the plants’ roots are in the water 24 hours a day, it becomes important to keep the air pump working 24 hours a day too. A lack of air pump in DWC means that plant roots will suffer from being waterlogged and deoxygenated which ultimately may cause the death of the plant. Basically, the air pump helps in rising air bubbles, more the air bubbles the better growth in water culture systems. The bubbles rising should make the water look as it is boiling at a heavy progressing boil. The air bubbles should be rising up through and should make direct contact with the plant roots and provide oxygen to it.

Read: Polyhouse Vegetable Gardening Guide

There are actually two methods of providing aeration and dissolved oxygen to the nutrient solution.

  • Air bubbles
  • Falling water
Air bubbles

For the purpose of aeration, an aquarium air pump and air stones are usually used to provide air bubbles to the nutrient solution for water culture systems, as well as other types of hydroponic systems. The air pump provides aeration and is connected to air stones with an air line/tube. The air stones are made of a porous rock like material; the small pores generate small air bubbles that rise to the top of the water containing a nutrient solution and makes oxygen available to the roots.

The smaller and more the air bubbles, the better aeration of the nutrient solutions. The reason is the simple concept of physics smaller air bubbles provides more contact surface with the water. This contact between the air bubbles and water helps to replace and recycle the dissolved oxygen taken up by the plant’s roots so that the roots stay oxygenated throughout the day.

Falling water

Though this method is not typically used in water culture systems for home hydroponic growers. Surface agitation from falling water splashing around is another superior way of aerating the nutrient solution. The higher the water is falling from, and/or the more quantity of water falling, the more force it has when it hits the water surface. The more downward force, the deeper will be the agitation and hence more aeration ultimately high amount of dissolved oxygen will be resulted. This method of aeration is more widespread in commercial water culture systems because they exercise large volumes of water compared to home growers.

Requirements to build a Water Culture system

Deep water culture is effortless to design on your own.  Just note down what all you will need:

  • Container to hold the nutrient solution (reservoir)
  • Aquarium air pump
  • Air line/hose
  • Air stones (or soaker hose) for creating small bubbles.
  • Plant Baskets, pots, or cups to hold the plants.
  • Some type of growing media.
  • pH meter.
  • pH kits.
  • These above- listed tools can be bought easily from your local hydroponics or gardening supply store or online. There are a few points to be kept in your mind about choosing a reservoir. You should not get a lighter color plastic container as light can pass through it and this will promote algae to grow, affecting the roots’ health.
  • For designing own DWC Firstly, you need to fill your reservoir with the hydroponic nutrient solution.
  • Then, you should check or adjust (if needed) the pH level of your nutrient solution range of 5.5 to 6.5 is usually preferred. If it drifts from the above- mentioned range, you need to adjust it by using some pH kits available in the market.
  • Now you need to fix the air pump to the airline, the airline to the airstone and place the airstone in the reservoir. Place the plants which have visible roots growing out of the Rockwool into the reservoir filled with nutrient medium dissolved in water. You can either surround your plants with the aforementioned growing media or growing media of your choice. Now turn on the air pump for proper aeration.
  • When the plants are young, for water and mineral requirement it is dependent on the growing medium hence it needs to make contact with the nutrient solution and absorb the nutrients from it to water up to the plant roots. As the plant matures, the root system will develop, absorb more nutrients itself and the level of nutrients will decrease in the reservoir.
  • Therefore, every 1-2 weeks and maximum up to 3 weeks, you should remove your plants from the reservoir to replace and refresh the hydroponic nutrient solution, then place the plants again back in the reservoir.

Which Plants to grow in DWC

The plants that are most appropriate to grow with deep culture systems are anything that doesn’t have to flower and have hardwood including many varieties of lettuces and lots of different herbs. These plants grow super quick and healthy. Besides that, you can also nurture tomatoes and peppers even though they take a bit additional effort. 

Advantages and limitations of water culture hydroponic system

Advantages of DWC
  • Rapid growth and credit goes to higher uptake of nutrients and oxygen from the nutrient solution
  • Aeration the roots improves plants’ nutrient absorption hence increase cell growth rate within the plants
  • Since the plant roots are submerged in deep water culture nutrients solution so there is no need for much fertilizer
  • Once you have set up the system, it requires slight maintenance. There are no nozzles, feeder tubes to clog
  • Very less moving parts and assembly makes it manageable.
Disadvantages of DWC
  • There are also a few disadvantages of the DWC system; however, the benefits really overshadow the negative factors, and these shortcomings can be put up with because any type of gardening does require maintenance. These disadvantages are:
  • If in case the air pump gets broken, there is a very small gap to replace it and if the air pump doesn’t work for a long time, the plant growth will rapidly turn down.
  • The nutrient concentration, water level, and pH may vary in small systems.
  • There is a risk of the plant roots sunken in the low-oxygen nutrient solution if an electricity outage or a pump failure occurs.

Well, we have discussed water, oxygen, and all necessities but What About Lighting for Your Plants?

The clear-cut answer is that you have to locate your hydroponics system where your plants can get a minimum of 6 hours of sunlight per day.  It’s a well-known fact is that your plants need light to grow and flourish. Sunlight provides all the lighting that your plants need to grow perfectly by the process of photosynthesis. If you cannot place your system in the direct natural light, then you will have to provide artificial lighting by placing your own indoor grow lights but you will need to select the proper lighting arrangement with the correct spectrum of light, intensity, and power required for plant growth.

Read: Top 10 Banks for Poultry Farming Loans.

NFT Hydroponics System Building; Requirements

NFT Hydroponics System Building; Requirements

Today, we learn to build an NFT Hydroponics (nutrient film technique) basics, pros, and cons. N.F.T (nutrient film technique): A successful hydroponic system: Your dream of having a beautiful green space in your home can be turned true by means of the science of hydroponics that too when you can own a garden that you can both enjoy and use. So, today we are back with a complete guide about N.F.T another yet important hydroponic system among the six.

N.F.T stands for nutrient film technique is a hydroponic growing method in which a small, shallow stream of nutrient-rich water is re-circulated over plant roots through a channel, drain, or tube. This method of hydroponic farming was evolved in the 1960s by Dr.Allen Cooper, since then NFT has become a standard practice and one of the preferred methods of hydroponic gardening. The nutrient film technique (NFT) is quite similar to the ebb and flow hydroponic system as their principle utilizes a pump to move nutrients in a continuous, constant flow. Among these hydroponic systems, N.F.T differs with respect to its configuration the only difference is in case of N.F.T nutrient solution directly flows over the plant’s roots unlike the flood and drain mechanics of Ebb and Flow system.

In the realm of soil-less gardening, the nutrient film technique system (or NFT system) is also quite admired by hydroponic growers due to its effortless yet effective design. The nutrient film technique is commonly used for smaller and quick growing plants like diverse varieties of lettuces. Apart from lettuces, commercial growers are also opting this system to grow various herbs and strawberries.

The principle behind working of N.F.T

The typical NFT hydroponics system.

The nutrient film technique makes use of shallow tubes that are a little angled so that the pump moves the nutrient solution to the higher segment of the system. The nutrient solution steadily moves by the action of gravity to the lower segment.  A tube system with holes made for the plants is used as an alternative of trays, primarily because this arrangement is easier to angle for appropriate flow over the plant roots.

Although there are a variety of ways to devise a nutrient film technique system; however, all of them follows the idea of a very shallow nutrient solution driving down through the tubing directly to the plant roots. The bare roots of the plants will effectively take up the nutrients in the solutions when they come into contact with the water.

Read: Ideas for Modern Gardening.

Most of the growers grow plant directly through the holes, but net pots or plant baskets can also be installed in the setup, however many horticulturalists do not prefer using planting medium (e.g., vermiculite) with the nutrient film system. The roots descend through the net directly into the nutrient solution. The point to be noted is nutrient solution does not completely soak the plant roots. The film makes sure that the whole root is not submerged so the upper part of the roots remains dry hence less fear of waterlogging and anaerobic situations.

When you are using the nutrient film technique it is imperative to not try to cultivate heavy or large plants that need a lot of support this is because the plant’s roots are not in a medium that can uphold the weight of a heavy plant. In such cases, it is essential to use a self-standing trellis or any framework to support plants with heavy fruits such as tomatoes or melons.

NFT is considered an active system because it consists of moving parts. A hydroponic system such as wick system, which is tagged as the simplest hydroponic system is a Passive system because it contains immobile parts it just uses a cotton wick to transport the nutrient solution to the plant root. That’s why it is preferred and often used for demonstration purposes for students or as a simple do-it-yourself method for beginner home gardeners.

What you need to build a nutrient film technique system (NFT)

  1. Container to hold the nutrient solution (a reservoir)
  2. Submersible fountain/pond pump
  3. Tubes to dispense water from the nutrient pump to the NFT growing tubes
  4. Growing tubes for plants to grow in (also known as Channel or gully)
  5. Net pots to contain plants and growing media to start seedlings in
  6. Return system (tubing, channel) to direct the used nutrient solution back to the reservoir

In the NFT system, there are two main components: the grow tray (or channel) and the reservoir that contains nutrients dissolved in water.

  • In the grow tray, there are net pots or plant baskets that contain the growing media (perlite or Rockwool) for providing support to growing plants and absorb nutrients from the nutrient solution. But in some cases, most growers don’t use growing media in the NFT system as the plant roots have had an adequate amount of moisture, nutrients, and oxygen from the system.
  • The plant roots develop into a dense mat in the channel and the foliage sits on top, occasionally provided with support by a trellis arrangement.
  • The NFT system uses a water pump to transport nutrient-rich water to the grow tray and a draining pipe to descend and recycle the unused water nutrient solution back in the reservoir.

And how does all this functions?

How a hydroponic N.F.T. system operates is quite simple. The Nutrient solution is pumped up from the reservoir. Each one of the smaller tubes runs nutrient solution to one side of each one of the growing channels/gully with the plants placed in it. The nutrient solution flows starting from one side to another because the channel is sloped slightly so the water streams downhill.

Read: How To Make Organic Fungicides at Home.

The plants in the growing tubes (channel/gully) are characteristically suspended above the water by placing seedlings started in starter cubes or small one inch baskets with growing media into small holes in the top of the tube. The grow tray is placed at an angle to let the water pour down towards the nutrient return pipe. The surplus nutrient solution will stream out of this pipe and move into another channel or tube, where it is re-circulated through the system again. The roots of the plants are suspended down to the channel where they make contact with the shallow film of the nutrient solution and absorb the nutrients from them. The thin film of the nutrient solution allows the plants to be watered but not entirely soaked. The thin layer (film) of the nutrient solution flows all the way through each of the channel having plants in it to the other side, passing by each plant and wetting the roots on the bottom of the channel. This thinness also permits the upper fraction of the roots to remain dry and have access to oxygen in the air without being water-logged. While the nutrient solution streaming through the channels is very shallow, the complete plants root mass remains moist from the roots being able to pick up moisture on the outside of the roots, as well as through humidity that’s reserved within the tube/channel. The roots that are suspended amid the base of the plant and the water level in the channel not just have moisture to access, but are also able to acquire plenty oxygen from the air surrounding them within the tube/channel as well.

Tools required to build an NFT Hydroponics system

As mentioned any N.F.T system consists of two main components:

The grow tray or channel and Reservoir

The grow tray or channel

It is required to facilitate all of the nutrient solutions to be passed to the developing plant roots; growers make use of slightly downwardly angled tubes or channels instead of the usual flat trays. Using tubes or channels also make it easy to set the grow tray at an angle which eases gardening and also imparts a different look to it. Mostly, the channels are made of impermeable materials such as a PVC pipe, plastic film or a round tube. PVC remains the first preference because of easy availability and it offers more space for growing plants.  On the surface of PVC pipe, holes are made to fit the net pots or plant baskets and seedlings or plants are planted. You can place plants or seedlings in two ways. The first option is to place seedlings directly into the holes of your PVC pipe or channel. Another alternative is to put seedlings into net pots or plant baskets for better stability and then place them into the holes you can also growth medium in pots. Like I have mentioned previously, most of the growers don’t use growing media in the NFT system. If you settle on using it, make sure you don’t put them in excess into the net pots for the roots still deep enough to fall through the bottom. Apart from the seedlings method, you must check and trim the plant roots often to prevent extended long roots that may clog the system.

The reservoir of NFT Hydroponics

The reservoir is joined with the grow tray by means of a nutrient pump on the high end and a nutrient return pipe on the low end. Inside the reservoir, there is an air stone connected to an air pump outside to oxygenate the water by forming small air bubbles. The reservoir is used to hold the nutrient solution since the NFT system is a recirculating one. The reservoir size depends on the number of plants that you want to raise. Suppose if you wish for building a system of 40-50 plants, you will need a reservoir with a minimum 5-gallon capacity. It’s always recommended to have a little more volume capacity than it is needed rather than to be short.

Now coming to the most frequently asked question what plants to grow in an NFT system?

The NFT hydroponic system is most suitable to produce lightweight, fast-growing plants that can be harvested rapidly like different types of lettuces, kales, many oriental vegetables, and herbs as well. People have also successfully cultivated perennial plants like strawberries for commercial production. If you wish for producing heavy fruits like tomatoes or squash, you need a proper independent trellis system to hold up the plants.  The NFT is not appropriate to plant heavy crops that require much support because the roots are not in a medium to hold a lot of weight.

Now let’s chatter about different strengths and weaknesses of the NFT

Strength of NFT Hydroponics (Pros)

  • It makes the inspection of growing roots easy for observing any symptom of disease, feed adequacy, etc. due to the nonexistence of medium.
  • Low water and nutrient consumption has been reported because of the availability of proper humidity and moisture
  • Without doubts, the system is environmentally friendly first of it diminishes the risk of contaminating localized groundwater and second the water which is unused is recirculated back to the reservoir.
  • Unlike other media based systems of gardening, you can stay away from problems related to matters such as supply and disposal.
  • Relatively easy to disinfect and clean roots and components in comparison with other hydroponic systems.
  • Plant roots can keep up a consistent pH and conductivity thanks to regular feeding (and associated flushing) that prevents restricted salt build-up as there is no stagnation.
  • You can also build your system in different shapes and colors as a decorative piece in your living room.
  • This system enables cultivation of a large number of plants at a time in the same system.

Weaknesses of NFT Hydroponics (Cons)

  • The major limitation of this system is, the plants are very susceptible to interruptions in the flow of water from power outages or any other reason. The plants will begin to wilt and stressed very quickly any time the water stops flowing through the system.
  • In a newly planted arrangement, when exposed to intense sunlight, the channels can heat up faster than the root zone would heat in the usual growth medium. However, the constant flow of nutrient solution does have a cooling effect.
  • The channels can become choked-up by roots of vigorous-growing plants hence root growth has to be checked and trimmed at certain interval of time.
  • Pump failure can cause the death of plants.
  • Not suitable for growing plants with large tap-root systems such as carrots.

That’s all folks about NFT hydroponics system.

Read: Greenhouse Farming Training In India.

Jeevamrutham Preparation; Ingredients of Jeevamrutham

0

Jeevamrutham preparation for Home gardening

Today we learn the Jeevamrutham preparation steps. The microorganisms of the soil are the ones which are responsible for the increase in soil fertility of your home garden. For increasing the beneficial microorganisms in the soil, usage of Jeevamrutham is encouraged in organic gardening.

Jeevamrutham includes two words “Jeeva” and “Amrutham” which are derived from Sanskrit and are the most used by Hindus. The word “Jeeva” means a living organism and the word “Amrutham” stands for an elixir of life which has the capability to extend the life of any living organism. In this article, we will discuss how Jeevamrutham can be applied to the life of a crop. It is one of the best ways for the improvement of the number of microorganisms.

For the first 2 years, you can provide as much Jeevamrutham as possible. More culture you add gives you the best results. The environment which is ideal for the microorganisms to survive is that the soil temperature which is in between 24°C to 30°C, the humidity of 88%, and maintaining moisture in the soil. This type of climate is available only in the monsoons. You can also make this happen through mulching. Mulching will help in the creation of micro-environment which will help in the improvement of microorganisms, which will, in turn, result in the formation of humus.

Ingredients required for preparation of Jeevamrutham:

  • Cow urine – ½ liter
  • Cow dung – ½ kg
  • Jaggery – 100 gms
  • Basin powder – 100 gms
  • Topsoil – 2 tablespoons

Jeevamrutham Preparation:

  • In about 3 liters of water, you will need to add cow dung, cow urine, Jaggery, and besan powder.
  • After that, stir all the contents with the stick. The stirring should be done in such a way that there are no lumps in the liquid.
  • In this mixture, you will need to add 7 liters of water so that the solution will become up to 10 liters.
  • This container should be kept in the shade in outdoors or it can also be kept under a tree. Now cover the container with a cloth.
  • The liquid present in the container should be stirred every day in the morning and evening times for about 15 minutes.
  • The preparation of Jeevamrutham will be done in 2 days. This can be applied to plants directly.
  • Jeevamrutham can be sprayed on the plants. This solution will work as an antifungal, anti harmful bacteria spray.

    Garden After Using Jeevamrutham.
    Garden After Using Jeevamrutham.

Read: Homemade Organic Fungicides.

Jeevamrutham types:

Liquid state Jeevamrutham:

This is the one which is explained above.

Semi-solid state Jeevamrutham:

If you are provided with an excess amount of cow dung, then you can use it in the preparation of semi-solid Jeevamrutham.

For the preparation of semi-solid state Jeevamrutham, you will require

  • Cow dung – 50 kg
  • Cow urine – 2 liters
  • Jaggery – ½ kg.
  • Pulses flour – ½ kg
  • One handful of soil which is fertile

You will need to mix all the above ingredients by using little quantity of water. After that, start making small balls from the mixture. These balls must be kept in full sun in order to dry them. After that, these dry balls should be kept near the mouth of the sprinkler. When the water will fall on the semi-solid Jeevamrutham, the beneficial microbes will get activated.

Dry Jeevamrutham:

This Jeevamrutham can also be called as Ghana Jeevamrutham. This can be prepared when there is no water available for the preparation of Jeevamrutham. If there is no labor available to prepare Jeevamrutham, you can prepare it all at once and make use of it later by storing it.

For the preparation of Ghana Jeevamrutham, you will need up to 50 kgs of cow dung. Spread all of this cow dung on the ground evenly for the formation of a layer. After that, add 5 liters liquid Jeevamrutham on this manure. Mix it completely. Now prepare the heaps of the cow dung and cover it by making use of a jute bag. This should be kept covered for 2 days for fermentation. Then, you should spread this mixture on the floor and let it dry in the sunlight.

After this is dried completely, you will need to store it in jute bags in the room. Air should be kept flowing. The storage of Ghana Jeevamrutham can be done for 6 months. At the time of sowing, you can use ghana Jeevamrutham. For each seed, you will need to use 2 handfuls of Ghana Jeevamrutham. At the time of flowering, you will need to add ghana Jeevamrutham between the lines of the plants on the soil. You can expect amazing growth of plants by using this.

Read: How to Beat Heat in Your Home Gardening.

Jeevamrutham application schedule:

The first spray of Jeevamrutham should be done after one month of sowing seeds in your garden. You will need to take 50 liters of water and add 2 ½ liters of Jeevamrutham which is filtered. This mixture should be stirred very well and should be used for vegetable plants. In the time of summer, the spraying should be done early in the morning or evenings. In the time of winters, spraying can be done at any time of the day.

When you see fruits, flowers and vegetables begin growing, you can use 50 liters of water along with 2 liters of sour buttermilk.

Manual application of Jeevamrutham:

When there is less water available and there is not even a sprayer, you can still apply Jeevamrutham to your plants.

In the first month after the seed sowing, you can add 1 cup of Jeevamrutham in between two vegetable plants on the soil surface. This should be repeated twice or thrice in a month.

That’s all about Process of Jeevamrutham making for your organic garden. Keep gardening!.
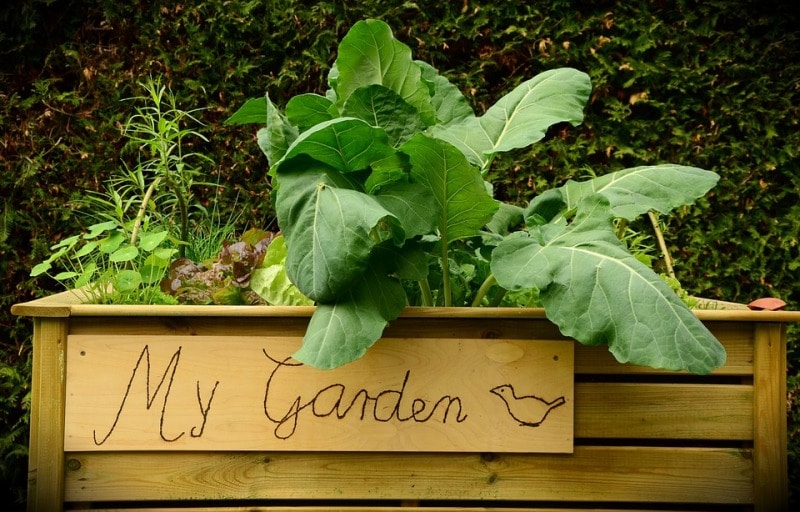
Read: Planting Techniques for Profitable Farming.

Heat Beating Tips for Your Indoor Garden

0

Heat beating tips for your indoor garden 

Today we talk about heat beating tips for your indoor garden plants. Summer has come and it is an exciting thing for an outdoor gardener. But indoor gardeners will not be happy with the summer heat. One of the major problems for the indoor gardeners is the footprint of their heat from the grow lights. In this article, we are going to discuss heat beating tips for your indoor garden. Though you are a new indoor gardener or if you have space which is established, this article will be useful to learn effective ways to cool grow room.

Excess amount of heat in your indoor grow room is never good for your plants. It will not only put extra pressure on your plants but also reduces the plant quality which will, in turn, have an impact on the final plant. This can be more relevant to the gardeners who are specialized in growing culinary or aromatic herbs where good production of oil is the main thing to get the aromas or flavors which are perfect. Moreover, if you are raising the plants which really love cool climatic conditions, such as lettuce or species which are new to high altitudes, then you will need to take maximum care in terms of problems which are caused due to heat.

Grow lights, though they produce intensity and quality of light which is required for a plant to grow healthy, they are also a source of maximum heat production. If you will not deal with the heat emitted from grow lights by making use of ventilation or air conditioners, then there would be a rapid rise in temperatures.

Indoor gardeners should make use of hygrometer or thermometer for the measurements of temperature and relative humidity of the indoor garden. Make sure that you are not resetting the temperature or relative humidity on a daily basis so that you will be able to see troughs and peaks over the past day.

Indoor Garden Plants.

If the temperature of your grow room is 26°C or more than that, and you are not providing the room with more amount of carbon dioxide than needed, then it means that your indoor garden is excessively hot. Your plants may not die but their quality gets affected. Cuttings which are taken from the same parent plant and grown in varied temperatures will smell and taste like different plants.

Read: Guide for Homemade Fungicides.

Tips to beat the heat:

  1. Improvement in the exchange of air:

Turn over your extraction fans and input fans to make the indoor environment cooler, bring more fresh air inside, remove the excess heat from your garden. The speed controller of a fan which is controlled thermostatically can make this happen for you in an automatic way, rather than you to turn the dials manually. Always remember to get the input air from the available coolest places. Few gardeners will make use of an air conditioner in order to cool their input air mainly at the time of summer.

2. Lessen the strength of nutrients:

As it is very hot, your plants will intake more water which will, in turn, force them to take excess nutrients. This will result in toxic issues. To avoid this, you will have to dilute the solution of nutrients by 20% with pure water. Make sure that it is kept well agitated with the air-stone an air-pump.

3. Improvement in the movement of air:

Make use of the oscillating fans in order to allow the air to move freely in your grow room mainly the air which is in between the lights and canopy of the plant.

4. Improvement in humidity:

If there is a decrease in the relative humidity to below 60% and all the plants in your indoor garden are in a vegetative mode or less than 40% when in the flowering stage, making use of a humidifier will have a major effect of cooling on your plants.

5. Switch-off few lights or make them dim:

Increasing your lights will not help in the removal of heat from your grow room. So better try turning-off almost half of the grow lights or you can also use them by making them dim.

6. Cool your nutrients:

Plants will be able to tolerate high temperatures of air. They can tolerate up to

32°C to 38°C, if the nutrients are cooled up to 18°C. The gardeners will make use of a pump for the circulation of the nutrient solution across an aquarium chiller.

7. Usage of air-cooled reflectors:

Hoods which are air-cooled like Blockbuster will let the indoor gardeners take off half of the heat which is generated by lamp prior to its entrance into their garden. Usage of the insulated duct will be better for the improvement in efficiency.

8. Put lights on at nights:

If you are working on the short-day plants which need only 12 hours of lights in a day, then you can keep your lights turned on at nights. This will not only reduce the cost of electricity but also lowers the ambient temperatures making it easier for you.

8.Seal up your indoor garden:

Providing ventilation to the indoor garden at the time of summer will not work for the gardeners.  The gardeners have to cover or seal their grow room by making use of an air conditioner or by addition of carbon dioxide by making use of a tank which is connected to a regulator.

9. Careful watering:

To maintain an indoor garden in summer, you will need to have a perfect water schedule. It is always suggested not to overwater your plants. Most of the indoor plants die because of this mistake. But at the time of summer, plants will need to be soaked thoroughly. The watering should be done deep and also slow. A little amount of water should be watered at a time. If you are rotting your roots, then your plants will die eventually.

10. Monitoring the indoor plants:

You should make it a habit to test the level of moisture in your indoor plants frequently than you normally do. The best method is to check by touching the soil and start watering when the soil is dry. You can also get a moisture meter for testing your plants but you cannot depend on them completely. If you are placing your plants near air-conditioners, they will get dried more rapidly as they suffer from lack of humidity.

11. Do not re-pot your plants:

Good maintenance of plants will need repotting rootbound plants whenever required. Make sure that you are not picking a hot day for doing this. It is very stressful to repot your plants. roots and leaves will be trimmed or sometimes they can even get damaged. The indoor plants will not be able to handle overstress. 

12. Clean maintenance:

It is not a good idea to prune, but make sure that you are cleaning dying or yellowing leaves or even flowers. The leaves which have been dropped will get piled up on the soil making a home for pests mainly the fungus gnats.

That’s all folks about “Heat Beating Tips for Indoor Garden”.

Read: Techniques of Garden Soil Sterilization.

Homemade Organic Fungicides for Garden Plants

0

Homemade Organic Fungicides for Plants

Let us learn today about “Homemade Organic Fungicides”. Fungal diseases are the most common diseases caused by garden plants. Most of the fungal diseases spread through air and water i.e., airborne, waterborne and soil borne. Fungal plant diseases are the most common urban garden problems. In addition, to fungal diseases, the garden plants also suffer from diseases caused by the Bacterial and the Virus pests. However, most of the Viruses are transmitted by Insects and bacterial diseases transmitted by natural and artificial wounds on garden plants. Even though, most of the home gardeners have problems related to the diseases caused by fungal pathogens than others in their home gardens. Commonly seen diseases on Kitchen garden or home garden plants are Leaf spots, Downey mildews, powdery mildews, leaf blights and rusts, etc.

Most of the home gardeners wish to control the diseases caused by the plant pathogens using organic methods or organic procedures to control the fungal disease at their home gardens. However, they are unaware of information and knowledge of the Organic fungicides to control diseases at home gardens. Many of the home gardeners have doubts like which organic fungicides are available and prepared easily at home, how to use homemade organic fungicides, adverse effects of this homemade organic fungicide, etc. Therefore, we have come up with this post on all the information about Homemade Organic Fungicides to Control home garden diseases.

What is Organic Homemade Fungicides:

Homemade organic Fungicide is nothing but a fungicide that I prepared from the available organic of natural ingredients that we commonly use at our home daily.

How do homemade Fungicides work:

Cost of the homemade natural fungicides are preventive fungicides, however, they are also curative in function. We should apply those natural fungicides either before or incidence of the plant pathogenic diseases. Sometimes, we can see some fungal spores on the infested diseases home garden plant. When we apply these natural fungicides they act on the fungal cell wall leading to their death and the preventive natural fungicides help in avoiding the plant pathogen to harbor the garden plant.

How to apply homemade natural fungicides to Kitchen garden plants:

Most of the prepared natural organic fungicides are mixed with oils or soap solution before spraying to the kitchen garden plants at specific concentrations. Avoid spraying high concentrations as it leads to the death of the plants as heavy concentrations are phytotoxic to plants. Always use hand gloves and nose mask while spraying organic fungicides.

When to apply natural organic fungicides to Kitchen garden plants:

It is better or profitable only if we apply those prepared organic fungicides either in the morning before 9 and evening between 4 to 6 PM.

List of Organic Homemade Natural Fungicides for Home Gardens:

There is various type of Organic Fungicides to control home garden plant disease. Most of them are also available online and in the regional markets also. However, it is better to prepare those Natural fungicides at home which we have described below.

Baking Soda Spray:
  • Baking soda is the commonly available household ingredient. It helps in preventing the entry of diseases or plant pathogen to cause diseases to the home garden plants. Mix 5 to 7 gm of baking soda with 1 ml of vegetable oil in a jar and makeup with 1000 ml or 1 lit of distilled or sterile water. Mix the mixture only in glass or ceramic container. Spray the soda mixture on the plants showing diseases symptoms.
Neem Spray:
  • take 100gm of neem leaves and wash thoroughly in running tap water. Sundry those leaves and ground into powder using a grinder. Dissolve 100 gm of the prepared powder in 1000 ml of water and spray the mixture on plants whenever necessary. Neem leaf extract spray is effective against various plant pathogens especially leaf spots.

Read: Techniques of Modern Gardening.

Garlic and Ginger spray:
  • Garlic and Ginger spray is also prepared in the same way as mentioned earlier like Neem oil spray and used at regular intervals whenever necessary.
  • Garlic Fungicide.
    Garlic Fungicide.
Tea compost Spray:
  • The tea that is remained after making tea is mixed with water in equal proportions and sprayed on to the plants for better performance of the garden plants.
Clove oil spray:
  • Purchase the clove oil from any nearest supermarket t and dissolve 100 ml of Clove oil in 100 ml of soap water and makeup with sterile distilled water and spray on the kitchen garden plants for better results. Clove oil spray arrests the growth of the fungal spore for further germination.
Cinnamon Oil:
  • It is also prepared in the same way as Clove oil spray and sprayed on the kitchen garden plants. Cinnamon acts have antimicrobial properties.
Papaya leaf spray:
  • Cut the young and mature papaya leaves and ground into a fine powder. Mix 100 gm of the Papaya leaf powder in 100 ml of water and spray on the kitchen garden plants.
Cow Urine:
  • Cow urine acts as an effective fungicide both in Kitchen garden as well as on commercial agriculture fields. Apply 20% to 30% of Cow urine by mixing with half soap water and half sterile water and spray on the plants which act very effectively to control various plant pathogens.
Bougainvillaea oil:
  • Mix 200 gm of fresh Bougainvillea leaves in 1 lit water. Blend the mixture and apply on the garden plants. It helps in controlling various insects that spread various types of viral diseases from plant to plants.

Other chemical fungicides for garden plants:

If you are unable to prepare these homemade fungicides at home, you can also go for purchasing some synthetic fungicides like Potassium Bicarbonate, Sodium lauryl sulfate, sulfur fungicides that are sprayed at the lower concentration on the garden plants.

Bio Fungicides Spray:

Bio fungicides are the beneficial fungus that attacks the plant pathogenic fungus of garden plants. Bio fungicides also are known as Bio-Control Agents. Most of those biocontrol agents can be mass produced at a home kitchen garden easily. Biocontrol agents include Trichoderma sp. and Pseudomonas sp. However, in order to produce these bio fungicides at our own urban garden, aseptic environment conditions are required.

Conclusion: These are all about the information and guide to controlling various diseases of kitchen garden plants at home organically. Comment below if you have any queries and doubts.

Read: Mushroom Training Centers in India.

Modern Gardening Ideas, Techniques and Tips

0

Modern gardening ideas and tips

Today, we talk about modern gardening ideas and tips. A modern garden will have a style which is streamlined, sleek and sophisticated. Modern gardens can also be termed as contemporary gardens and these designs are very simple and maintain the practices of Asian designs in them. Basically, a modern garden will be more focussed towards Architecture and the materials than on attaining greenery and growing plants. Patterns which are repeating and the Geometric shapes are mostly used in modern outdoor spaces. The actual idea of modern gardening is the creation of a garden which has an organized and controlled look.

Modern gardens mostly depend on the elements of hardscape and structure for the achievement of their minimal look, by using plants as accents for providing color and contrast. These modern garden designs are very rarely haphazard and should be used carefully so that all the elements will work in harmony.

As a gardener, you should be good at knowing modern gardening ideas and tips.

Modern Gardening Techniques.

Ideas for paving modern patio:

The materials for modern paving are clean simple and they have a quality which is organic. Wood and concrete pavers are the best materials to select and these are the ones suggested to landscape designers. These materials can be used individually or they can also be used in conjunction. When you are designing a modern patio, curved lines should not be used. Instead of curved lines, you can go with ninety-degree angles and straight edges.

Features of Modern paving design:

  • It uses a grid pattern which is oversized.
  • It will create straight lines by running materials in a similar direction.
  • It will create geometric patterns.

Concrete:

Rectangular or square concrete pavers are the well-known options for paving a modern patio. They can be used for the formation of a grid by creating a pattern which is geometric. The distances between the pavers can be filled with river rock or even by using gravel. You can also even try grown grass in between the spaces.

Wood decking:

The second option for paving a modern patio is wood decking. Ipe is a Brazilian hardwood which is durable and also has a very good look in a modern setting. You will need to choose the boards which are narrow and make sure that all are running in the same direction. Deck tiles are the other forms of wood materials which can be made use in order to bring a modern look to your patio. These deck woods can be easily snapped into place in the top of the surface of the existing patio as long as it is in the levelled position.

Modern gardening ideas – fencing:

  • To get an idea on front yard fence designs, you can search for the fence design ideas pictures on the internet so that you will get some knowledge of basic designs of the fence. Few modern home fence design ideas are discussed below
  • Corten steel which has permission to rust to a natural brown is a well-known option for modern homes. This fence will demonstrate how it is suitable to challenge the climates of the desert hostile to the fences made of wood because of the humidity which is low and also strong winds. To add interest and height, the addition of wood topper can be done as this will allow little glimpses of what is lying behind.
  • One of the front yard fence ideas is Sheet steel which is coated with powder can be used if you want to use something in a new way. These are actually made for the sake of industrial buildings. These will solve many problems like strong winds, harsh climates which will challenge the fencing materials which are used traditionally. The fences of this type will add beauty to the homes which are almost half centuries old.
  • A simple way for the creation of a modern fence is to run the boards in a horizontal way than that in a vertical position. In this situation, the boards will have changes in widths and will have a little gap in between them. This will lead to the creation of a subtle pattern which attracts the people without even dominating the actual landscape. A simple pergola on the gate can be used as an entrance to the property.
  • You can also use thin strips of wood which are running in a horizontal position. These are the ones which will just give looks to your garden and they are not built for any specific function. These will act as a screen which will separate the parking area and garage from the property. You can plant sculptural succulents by making use of the fence as a backdrop. Make sure that the color if the stain used is matching the garage door finish.
  • Clean lines will be a great help to the fence to look modern and also fresh. And again, the boards are arranged in a horizontal position but here, the posts of the fence are hidden completely. This effect will make it appear like a wooden wall which is solid rather than a fence. This will let the wood beauty to be the center of attraction. If you treat the fence with lacquer, it would bring the natural wood grain out and helps in the creation of complete sheen.
  • There is no rule that each and every fence has to be solid. The fences can have openings which will allow the light through them and show the greenery which is behind. But it is important to make sure that they are providing privacy. The boards which are arranged horizontally in a random manner by making use of aluminum posts will help in creating a modern look.
  • Gabion walls which are made up of metal baskets filled with stones are used more often for the enclosure of modern gardens. They are completely filled with big pieces of rubble or any pieces of stones which are left. The wire grid will help in the creation of industrial look whereas the rock is with rust. Gabions can be used for retaining or they can also be used as free walls.

Read: Pest Repellent Plants Guide.

Modern gardening plants:

When you are choosing plants for your modern garden, you need to keep in mind the concept of simplicity. The main rule is to remember that the modern gardens should have a plant palette stick which is simple and should be used especially to shades and hues of green. A container with a beautiful and colorful plant looks nice but make sure that you are limiting this. The secondary rule is that the plantation of the plants should be done in straight lines as they create some sense of order in your modern garden. The third rule is that the grouping of plants should be done in odd numbers. It is always preferred to group them in three or five. If you want to go with a mass planting of only one variety of plant, you can plant them in a grid pattern.

Few plants suggested for modern gardening are Aeonium, Feather reed grass, Agave, Blue Fescue, Kangaroo Paws, Horsetail Reed.

Ornamental grasses and succulents are some of the best choices for a modern garden. Succulents will come in a large variety of sizes and shapes and will also add some dramatic touch to the modern garden. Ornamental grasses are a very good option for the addition of texture and greenery along the fence.

Modern gardening ideas and tips:

  • A quick way for the update your garden is by painting the fences with a new color. This is also a way which involves less cost. You can use colors such as white, grey, dark brown as these will add an instant modern look to your garden.
  • The raised flower beds which are white in color will help in the creation of a focal point in the modern garden and will give a more modern look like an immediate effect. You can build the raised walls by making use of rendered brick, breeze block or you can even use wood panels for the creation of separate space for the plants which are to be grown.
  • If you have several levels in your modern garden or if you have different sections, you can make use of glass panels for the creation of an open feel. Glass will help in creating a modern look to the garden.
  • If you do not like maintaining real grass and having mud in the house, you can make some investment on an artificial lawn. It will be perfect all across the year. It will need very less maintenance and will not even become muddy. You can also buy a scented spray for grass to make it smell like real grass.
  • If you use accent lighting which you use inside the home, they can make or break the space. You can use spotlights which sine up highlighting the trees. You can also use lighters which highlight the walls or you can go with festoon lighting will help in the creation of a starry sky. These will make an ordinary garden look like a magical one.
  • Opting a few pieces of furniture will help in the creation of another focal point in your modern garden and will also add a modern edge. You can choose pyramid patio heaters which are tall and also a fire pit table which is not only functional but also attractive.
  • You can make use of cushions and garden furniture for the creation of a space for the entertainment of guests and also spend some time in warm climates.
  • Box plants are the ones which are used more frequently in the modern gardens for the creation of a modern look which is sleek. Three box balls placed in planters with different heights will work great to create this look. You can also make use of a box hedge which is an artificial one at the back of your garden fence in order to create a border which is streamlined and also neat.
  • Incorporation of plants which are colorful among these sculptural elements will also be useful to create a garden which is visually attractive. You need to plan the layout of the plants neatly. You should not place the plants with same colors adjacent to each other and arrange the plants according to the heights they grow. It is also worthy to plant the flowering plants in different seasons so that the flowerbeds look attractive all around the year.

That’s all folks about Modern Gardening Ideas, Techniques and Tips.

Read: Greenhouse Farming Training in India.

Pest Repellent Plants Guide for Your Garden

1

Pest repellent plants guide

Today, we learn natural pest repellent plants for gardening. One easy method of keeping pests away is to strategically place insect-repelling plants in the garden or inside your home. Insects tend to avoid these plants because of the essential oils in their effort as a natural bug repellent. Pests are very dangerous; they are great threats to the success of any farm business. Chemical pesticides have been the usual method to control pests on farms; however, its cause of human health has waged a huge campaign against its use. Many of these pesticides are poisonous in nature; this is what exactly eradicates the pest. But, at times, these pesticides do have residual effects on human as an effect of the contamination of the crops during its application.

Preventing insects and rodents from invading the home garden can be tricky at times. While commercial sprays and exterminators provide quick solutions, many of the sprays have harsh chemicals that are toxic to humans and pets. One green solution that decreases household pests is to place certain plants during the home that are known to repel them.

Some examples of pest management techniques being adopted by gardeners/farmers are;

Crop rotation:

Crop rotation is an efficient process of preventing pests from getting used to the types of plants that are being cultivated. The process uses alternating the species of crops that are grown every year. In addition to managing pests, this farming technique also increases the fertility of the soil.

Intercropping:

Intercropping involves simultaneous cultivation of two or more crops on a similar field. When different species of plants are cultivated in the same field, there is a definite distance among crops of the same species. So, it is capable of attracting pests away from their target host plant.

Organic Pesticides:

Another prime cause to switch to organic pesticides is how it allows farmers to turn agricultural outputs into natural pesticides and does not change their health or damage the crops.

There are several measures that can be implemented to control pests on the farm, without the use of chemicals; they are:

Proper Soil Preparation:

If you adopt a conventional tillage system, where the soil is heavily pulverized to expose pests and their habitat to desiccation, you will experience a pest-free condition of your farm.

Read: Polyhouse Vegetable Gardening.

Timely cultivation:

This absorbs studying the reproductive cycle of the prevailing pest, such that, planting is done when the pests are less populated. Also, pests are more active through the dry season, thus, planting during the rainy season is another way to boycott pest.

Though, taking preventive measure is better than controlling. As you plant your crop, there are some plants you can as well plant simultaneously; these plants are called companion and pest repellant plants.

They help to reduce pest population and serve some beneficial purposes like proper utilization of space and enhance crop safety through the provision of habitat for useful plants, the companion plants. These types of plants can be harvested and consumed too. If you are looking for plants that repel flies; or plants that repel aphids; or plants that repel bugs; you can plant any of the below plants alongside your crops and get them protected.

Instead of spending more on chemical pesticides, that is detrimental and expensive, you can invest in the edible pest repellant plants. These are;

Pest Repellent Plants for your Garden:

Beans

Growing beans among eggplant will help repel the Colorado potato beetle.

Parsley

Mix parsley into carrot rows to help repel the carrot fly.

Tomato

Put tomato plants in the asparagus bed after the early spears have been harvested to keep the asparagus beetles away.

Sage

Sage is helpful to all brassicas by protecting them from the white cabbage butterfly. It is helpful to carrots since it protects them from the carrot fly.

Calendula

Add calendula to tomatoes and asparagus to repel tomato hornworm and asparagus beetles.

Basil

Make sure that your garden has tubs of tulsi. The essential oils of the basil plant repel mosquitoes, flies, asparagus beetles and whiteflies. The plant emits compounds that repel a variety of insects.

Neem

The leaves of the neem tree are used to drive away insects like fleas, bugs, and mosquitoes and treat microbial infections as well. A compound known as Azadirachtin in Neem leaves is responsible for its insect banishing powers.

Mint

The fragrant mint herb comes in many varieties and the thing is that they all repel all kinds of insects.

Catnip

The catnip plant contains nepetalactone, a natural cockroach deterrent. The plant is nontoxic to humans and pets and works best when small amounts of catnip are placed in areas where pests have congregated. A spray repellant can be prepared by simmering small amounts of catnip in water and then filling up spray bottles with the liquid. Spray the repellent in corners and at baseboards & doorways. Keep in mind that this bug repellent will attract cats.

Catnip.
Catnip.
Eucalyptus

Plant a eucalyptus tree in your garden. The fragrant oil from this tree drives away all kinds of insects from mosquitoes, sand flies, ticks, midges, stable flies and more. This plant repels aphids, cabbage loopers, and Colorado potato beetle.

Citronella

Citronella grass has essential oils that mosquitoes don’t like. It’s also a good natural repellent for insects which are annoyed by its smell. This citronella plant can grow up to four feet tall in just one season. It does well in a pot, or in the ground in a sunny and well-drained place.

Citronella Pest Repellent Plant.
Lettuce

Lettuce plant is a good companion and a pest repellant plant for the carrot. It repels the pest carrot flies.

Mexican Marigold

This Mexican marigold ornamental plant can be used as a pest repellant; it repels insect and rabbits.

Onion

The onion plant is another spice plant that can be used as a pest repellant. It repels pests like rabbits and cabbage hooper.

Chrysanthemum

Chrysanthemum helps to repel a lot of pests, including spider mites, ticks, and roaches, lice, and fleas aphids. It’s been used to protect other plants from insects, but can also use it as a plant for pest control. The ingredient in these flowers that keeps the pests away is pyrethrum. This ingredient is used in indoor sprays and pet shampoos.

Radish

If you plant cabbage and cucumber, radish plant will repel cabbage maggot and cucumber beetles; it will improve the quality and quantity of your crop. You can as well consume the radish since it is an edible root vegetable.

Petunias

Petunias are sometimes called a natural pesticide because they repel a variety of insects and bugs. They are simple to maintain and are available in a variety of vibrant colors. You can plant them in sunny areas near herbs or vegetables.

Petunia.
Petunia.
Garlic

Garlic plants deter Japanese beetles, root maggots, carrot root flies, codling moths, and can be planted near roses to repel aphids from eating the flowers.

Rosemary

Rosemary will protect some vegetable plants by repelling a wide variety of bugs that will want to feed on the plants you’re growing and plan to eat.

Crown imperial

Crown imperial is a flowering plant from the lily family. This plant repels pests like a rabbit, mice, moles, and ground squirrel.

Tobacco

Tobacco is an annual herbaceous plant. This crop repels pests like carrot flies and flea beetles.

Citronella grass or lemon grass

This originates from tropical Asia; it is from the family of Poaceae. This lemongrass repels insects and even cats.

You can plant more than one of these above plants on your farm, depending on the prevailing pests. This is a natural method of controlling pests. With this preventive measure, you can make quality and organic crop for the populace.

That’s all folks about “Pest Repellent Plants”.

Polyhouse Vegetable Gardening In India

Polyhouse Vegetable Gardening Ideas, Tips, and Techniques

Let us learn today about “Polyhouse Vegetable Gardening”. The Polyhouse vegetable gardening business is very much profitable as it has its own benefits. As one can grow vegetables throughout the year, Polyhouse vegetable gardening is the most successful business in India.

Nowadays, Polyhouse vegetable gardening is becoming popular as there are many benefits of growing vegetables in Polyhouse.

What is a Polyhouse? A Polyhouse or polytunnel is commonly made of transparent, tight, cheap, and flexible Polythene. In this method vegetables can be grown in any season of the year, depending on their requirement, because temperature and humidity can easily be controlled in Polyhouses. Polythene conserves thermal radiation, which increases the temperature and provides sufficient energy for the process of photosynthesis.

For the production of vegetables availability of suitable temperature and relative humidity is a must. These conditions are created in a Polyhouse, particularly for the production of off-season vegetables and fruits in sufficient quantity. The importance of the Polyhouse is further enhanced due to the possibility of the creation of creeper vegetables.

A polytunnel also known as a Polyhouse, hoop greenhouse, or hoop house is a tunnel normally made from steel and covered in polythene, usually semicircular, square, or elongated in shape.

Growing Cabbage in Polyhouse.

In India traditional farming is common, but now new farming method like Polyhouse farming provides better income in a short period of time with less labor. Polyhouse or hoop house farming is an alternative new method in agriculture gaining a foothold in rural India. It reduces dependency on rainfall and makes the possible use of land and water resources. Polyhouse farming can help the farmer generate income around the year raising multiple crops.

Polyhouse farming is a system of protected cultivation in agriculture. Polyethylene plastic is used to cover the Polyhouse structure. Protected cultivation under Polyhouse is gaining very importance these days. It proves to be useful to the farmers since it enables. Off Season cultivation of vegetables enables the farmer to have a better price realization. Which vegetables are grown in Polyhouse? Vegetables that can be grown in Polyhouse include Cabbage, Bitter Gourd, Capsicum, Radish, Cauliflower, Chili, Coriander, Onion, Spinach, Tomato, etc.

Types of Polyhouses

Types of Polyhouse are given below;

  • Low cost or naturally ventilated Polyhouses.
  • Medium cost or Partial climate-controlled Polyhouses.
  • High-cost or Fully climate controlled polyhouses
  • Plastic low tunnels
  • Net houses

The Polyhouse design:

In the Polyhouse design, the poly-houses are constructed with the help of ultraviolet plastic sheets, which last for more than five years. The basic structure of the Polyhouse is prepared with bamboos or iron pipes.

Site selection is a very important factor in Polyhouse design. A good site selection can make all the difference in the functional and environmental operations of a Polyhouse. The soil pH level for the Polyhouse is 5.5 to 6.5. Availability of a continuous source of quality water will be very important.

Read: Surprising Gardening Tricks.

Polyhouse design requirements;

  • Excellent supply of electricity.
  • A ground slope for drainage is an important factor to divert the surface water system from the poly house.
  • Polyhouses must be located away from the buildings and trees to avoid obstruction to sunlight and should be pollution free.
  • A communication facility must available at the site.

Iron pipe structure in Polyhouse is more costly but more durable than bamboo. The structure is fully covered with a 1501-micron thick plastic sheet. Normally, the length of the Polyhouse is 25-30 feet and the width is 4-5 feet. The direction of the Polyhouse is always East to West so that the maximum sunshine is available. The house must not be constructed in the shade. The size of the Polyhouse can differ depending on the necessity. And they can be kept cold or hot depending upon the season.

In the daytime, solar energy helps in increasing the temperature of the Polyhouse. Less energy is lost from the many parts of the Polyhouse. Heating is essential in the winter season. Normally, solar energy is sufficient to maintain the inner temperature of Polyhouse, but sometimes a micro temperature is required to be supplied to some crops. For this reason, a few methods may be followed:

(i) Constructing a tunnel below the earth of the Polyhouse.

(ii) Covering the northern wall of the Polyhouse with jute clothing.

(iii) Covering the entire Polyhouse with jute cloth during nighttime.

(iv) Fitting solar energy-driven device in the Polyhouse.

In the summer season when the ambient temperature rises above 40°C during day time, cooling of the Polyhouse is required, which may be achieved by the following methods:

(i) Removing the internal air of the Polyhouse.

(ii) Sucking external air by putting a fan on.

(iii) Installation of coolers on the eastern or western wall not keeps the temperature low but maintains proper humidity also.

(iv) The temperature of the poly-house can be restricted from running a water-misting machine.

The Polyhouse design tips

Some of the Polyhouse design tips are given below;

  • In Polyhouse farming, we can protect our vegetable crops from any adverse environment such as high humidity or high temperature.
  • The soil pH level will be 5.5-6.5
  • Availability of continuous supply of quality water.
  • The crops grown in a Polyhouse aren’t the conventional paddy and Rabi crops that can be developed in a field. The crops grown in a Polyhouse are generally the unconventional types that do not need further much further processing and can be sold directly in the market.
  • Vegetable crops grown under the Polyhouse are protected from unfavorable environments and hailstorms, heavy rains, or scorching sunshine. They are saved from birds and other wild animals. The humidity of the Polyhouse is not adversely affected by evaporation resulting in less necessity for water. In the limited area of the Polyhouse, insect and pest control is easy and less expensive.
  • A reliable source of quality water is critical for irrigating plants and must be obtained for use in the hoop house throughout the entire season. Efficient methods of watering vegetable crops within a Polyhouse include overhead sprinklers, drip irrigation, soaker hoses, micro sprinklers, sprayers, and emitters, although the manual application of water can meet crop requirements.
  • Polyhouse can protect vegetable crops by preventing the entry of animals and birds into the farm. When we cultivate on the normal farm, nearly 1/3rd of the crops can be lost due to the attack of insects and worms, whereas in Polyhouse farming, we can harvest the crops about three to five times more without much damage or loss.
  • The soil must be accurately prepared and fertilized for the planting of seeds and transplants; therefore, it is very important to regularly collect soil samples so that you are aware of the soil’s characteristics.
  • There will be an increase in the production of vegetables in Polyhouse farming without losing their color and quality.
  • The Polyhouse is prepared in such a way that it can provide water and fertilizers in the required amounts in a controlled manner which can result in high yields.
  • Polyhouse cultivation reduces or removes the need for any pesticides and chemicals, thus maintaining the crops healthier for consumption and not reducing their nutritional values.

Read: Bonsai Gardening Ideas.

The Polyhouse design technique:

In this technique, crops can be grown in pots or in the soil. For growing various vegetable crops, their nursery is grown first. Before sowing the seeds, rotten manure is filled in polythene bags of 10 x 15-centimeter size, along with the same quantity of soil and sand. After that, water is sprinkled on the bags, and seeds are sown in the bags. Small holes are produced in the bags for easy aeration. These bags are kept inside the Polyhouse till the plants develop to about 10-15 centimeters and are then transferred to pots or earth. These plants must be given manure and water from time to time. Generally, the disease does not spread, if at all, a little spray can be required.

For earning a maximum profit during maximum production of the crops grown in the Polyhouse. It is not necessary to pay proper attention to the supply of manure and water to the plants and protects them from disease but their cleanliness and pruning is very important. Luxuriantly growing tomato crop requires sticking or else their plants will fall on the ground and get spoiled.

The Polyhouse design ideas:

Selecting the Right Location:

Initially, Polyhouse farming was introduced with an aim to grow species in colder regions that require a warmer climate. Some of the factors that require to be considered are as follows.

Pollution:

The point of the Polyhouse is to be efficient and provide the best suitable environment for the growth of crops hence it should be away from pollution. Away from pollution basically implies that there shouldn’t be any industrial plants and farming must be done little outside city limits to also avoid vehicular carbon emissions.

Water Stagnation:

The area where the Polyhouse is built should not in any case be a low-lying area which will pave way for waterlogging through the monsoon and water release. This will be destroying the crops.  Extra care must be taken in areas that receive heavy rainfall.

Reachability:

Though the Polyhouse must be located in an area where it is away from pollution and the harmful gases emitted from industries and vehicles, it must be easily accessible and road connectivity should be good. Considering these factors, a good location for the Polyhouse can be selected and the construction can begin.

Low Tech and Cheap Polyhouse:

These are the simplest form of Polyhouses and require the least amount of money to be constructed. They are made of easily and locally obtainable products like bamboo as supporting materials and the construction is done using these. In this method, we will use a simple UV film for cladding and do not have high-tech, temperature adjusters.

However, low-grade temperature and humidity controllers are there which serves the purpose. The light entering the Polyhouse is restricted using shades on the transparent roof to modulate the intensity. They do not want much expertise and can be built in a very short span of time. They are generally used as shelters for crops during heavy rains and snow.

Moderate Tech Polyhouse:

These types of Polyhouses are more durable than the other types since they are constructed using galvanized iron rods which are sturdier and offer additional resilience to natural conditions. The arrangement is screwed and grounded firmly and offers improved protection against high winds and harsh climate.

Thermostats are present in the Polyhouse which accurately can manage temperatures. They are fitted with an exhaust which helps in controlling temperature and humidity. These are most suitable for areas that have a rather dry climate. They need a lot of care and regular maintenance and repairs.

High-Grade Polyhouse:

These are referred for the more technologically advanced Polyhouses that are equipped with the latest technologies and have an automated method for everything.

Naturally Ventilated Polyhouse:

These Polyhouses do not pay much attention to an environmental control system and adequate ventilation is supplied in the Polyhouse. Adequate ventilation and a fogger structure make sure that the crops are protected from other pests and diseases. This kind of Polyhouse is built when the main aim is to prevent the crops from adverse weather and harsh climatic conditions.

Artificially Environment Controlled Polyhouse:

This Polyhouse believes in artificial methods of environment, and management and is used to extend the growth period of the crops. They use environmental control systems to manage the temperature of the room, control the light intensity in the room, and control the carbon dioxide levels and humidity. This is essentially misguiding the plant mechanism to believe in the suitability of the environment and achieve growth of the seasonal plants even during their offseason.

Hydroponics Wick System for Beginners

Hydroponics Wick System Guide

Let us learn today about “HYDROPONICS WICK SYSTEM”. There’s been a lot of buzz about hydroponics all over the internet. This soil-less method of plant cultivation is a sensation and is been taken as an alternative to conventional planting methods. Indeed the soil-less method of raising plants or hydroponics farming has numerous advantages but for any grower, praises aren’t enough!!

For stepping into the world of hydroponics we need to understand how hydroponics is done?

What are the requirements for hydroponics?

Since we are always thriving to serve all correct facts in your platter. Today we will discuss, what are the different types of hydroponics system?

However hydroponic systems work may seem complex at first, but trust me it is not any rocket science. Once you understand them, you’ll see how they work is actually really quite simple.

Types of hydroponic systems:

As we very well know plant roots require three basic things to thrive, water/moisture, nutrients, and oxygen.  So on the basis of availability of these three factors and simply how they facilitate these three things to the plant’s roots we have six different types of hydroponic system. Each type of system has a different approach of providing required factors to the growing plants.

 Six types of hydroponic systems:

  1. Wick system
  2. Water Culture system
  3. Ebb and Flow (Flood & Drain) system
  4. Drip (recovery or non-recovery) system
  5. N.F.T. (Nutrient Film Technique)
  6. Aeroponics

Wick system of hydroponics

Wick system is the simplest hydroponic system out of six; it is a user-friendly system of hydroponic because of its passive nature. In wick system components are stationary it doesn’t have any moving parts, thus it doesn’t require any pumps or electricity. However, some experienced growers still like using an optional air pump placed in the reservoir. Since wick system doesn’t need electricity to work, it’s also fairly useful in places where electricity can’t be used which gives the producer freedom to place his or her system without looking or arranging long wires, switches or sockets.

The wick system is an easy type of system to build when you in the initial stage of learning about hydroponics so it is the best hydroponic system for a newbie. This system is also used by teachers in classrooms as experiments for kids to help them understand how plants grow or to introduce them to the science of hydroponic farming.

Principle of wick system:

Wick system works as its name says in this system water is wick to the growing plants from the reservoir by the simple process of capillary action. The nutrient solution is drawn into the growing roots from the reservoir with a wick. In simple terms we can say, it sucks up water in which nutrient solution is dissolved to the plants through the wick. The bucket/container with the growing plant in it basically is placed right above the container used as a reservoir. That way the nutrient solution doesn’t need to travel up very far to get to the growing media with plants.

What you need to build a wick system:

Simple system and simple requirement which as follows:

  • A bucket or any container for the plant.
  • A bucket or any container for the reservoir.
  • Good wicking growing media like coco peat, Vermiculite, or perlite.
  • Few strips of material like felt or good wicking rope.

For container there is a simple thumb rule:

  • Select container which can hold sufficient or required amount of water
  • It should not leak
  • The container can be made up of any material but it shouldn’t corrode or react with nutrient solution
  • The container should be opaque means it should not allow light to pass through it

These are the only prerequisites for containers used for holding the growing plants and as a reservoir. Rest your creativity is always welcome you can pick any color, any shape, and any size.

Wicks:

The wick itself is probably the most important part of the wick system as evident the name of the system is derived from this component only. The role of the wick is to provide nutrients to the plant, without a good absorbent wick the plants would not get the right moisture and nutrients that they need. So you will likely need to do some testing of different materials to see what works best for your plants. When looking for superior wicking material, you’ll need to use something that’s absorbent, but is still resistant to rotting or it is unreactive. Some commonly preferred  materials as per the recommendation of experienced people who have successfully installed wick system are stuff like, fibrous rope, propylene felt strips, rayon rope or mop head strands, braided polyurethane yarn, wool felt, wool rope or strips, cotton rope, a stripe of fabric from old clothing or blankets, etc.

One must make sure to use adequate wicks to fulfill the plant’s water usage. You’ll likely need at least 2-4 wicks unless it’s a really small arrangement. Also, the length of the wick should be appropriate, as the shorter up to the wick the water has to go from the reservoir to the growing media and roots, the more amount of water it can transport to the growing media.

As per experienced growers, first washing the wick well before you install it in the system, can significantly improve the wicking ability of most materials.

Growing media:

Here the role of growing media as always is to provide anchorage to the growing hydroponic plants. Once the nutrient solution makes it up to the wick to the growing media, One must use an absorbent growing media to further wick up and hold moisture for the growing but without getting soggy because if the growing media becomes soggy it will cause suffocation to the plant’s root due to less oxygen supply. Some of the most frequently used growing media’s for wick systems are coco coir, Vermiculite or perlite. The wick sucks up water and nutrients evenly by capillary action and the plants don’t use or absorb them evenly hence excess nutrients often accumulate in the growing media over time. So for flushing, this excess build-up of nutrients growing media should be thoroughly washed with plain fresh water regularly. Possibly something like about every couple weeks. This reduces the possibility of the nutrient salts building up and getting toxic levels for the plants.

The Reservoir

The wick system reservoir can be large or small depending upon your plant type and its water requirement. Make sure the water level remains high enough so the water (nutrient solution) doesn’t need to travel up very far to get to the growing media and plant’s root zone. The reservoir should be clean and water should be changed completely once in a while too. This is done to avoid infestation of diseases as we know algae and/or microorganisms begins growing in the food-rich standing water, especially if the container is not light proof.

Limitations of the wick system: 

  • The major shortcoming of the hydroponic wick system is that they don’t really work well for larger plants that need more water to grow. This system is more suited to grow smaller non-fruiting plants, like lettuce and herbs.
  • Wick systems also have the disadvantage of being less efficient when delivering nutrients to growing plant.
  • The plants take the nutrients as per their need and leave the rest of the nutrients in the growing medium. This can eventually cause a toxic build-up of minerals in the growing media. So flushing the excess nutrients from the growing media with plain fresh water has to be done regularly, like once a week or so to avoid its ill effect hindering plant‘s growth.

That’s all folks about hydroponics wick system.

Read: Bamboo Rice Farming.

Surprising Gardening Tricks from Around the World

0

Introduction to Surprising Gardening Tricks:

Today, we learn surprising gardening tricks. If you love to garden, you can be sure that there are people like you in every single country in the world. Europe, Africa, South America, North America – you name the location, and there is a 100% chance that there are people there that cultivate plants as a hobby or as a means of supplementing their diet.

Throughout ages, there are different tricks that people have developed to help their plants grow and to scare off pests. Sometimes, these are time-honored traditions and other times they come from modernity and immediate necessity.

Flower Garden.
Flower Garden.

Urban farming has gained in popularity and often, a city dweller will have completely different methods from someone who grew up in the countryside. If you are into gardening you must know these surprising gardening tricks around the globe.

Here are some interesting, surprising and sometimes a bit strange gardening tips from around the world, from the cities and from the country:

Old Coffee – a City Slicker’s Classic

If you’re like me and find old coffee lying around your office (or worse, you car!) at the end of the day, trapped in soggy to-go cups and totally forgotten, don’t despair. You can actually use it to water your windowsill plants or your rose bushes if you have them.

Don’t use this trick more than about once a month if you have plants that like neutral soil. It adds acidity and is nitrogen rich. A great booster, not only for you. This tip is brought to you by office workers of cities big and small. So don’t pour your coffee down the drain, and stop feeling bad about yourself!.
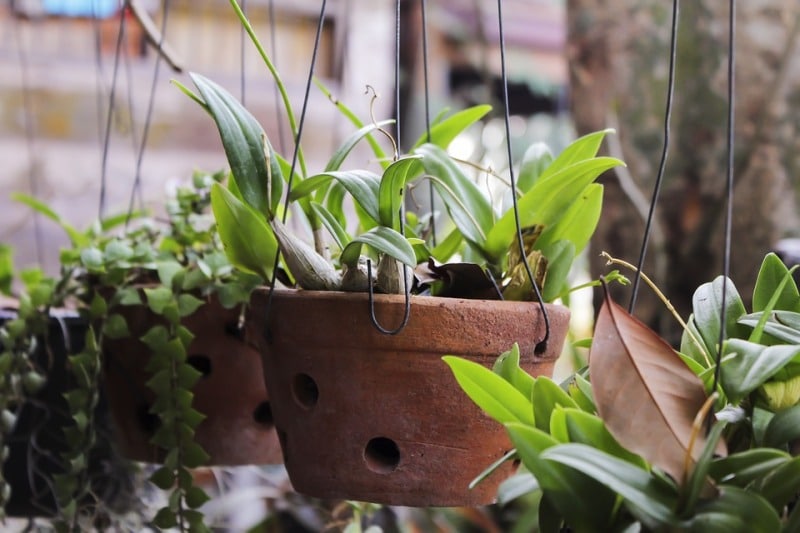
Read: Techniques for Bonsai Gardening.
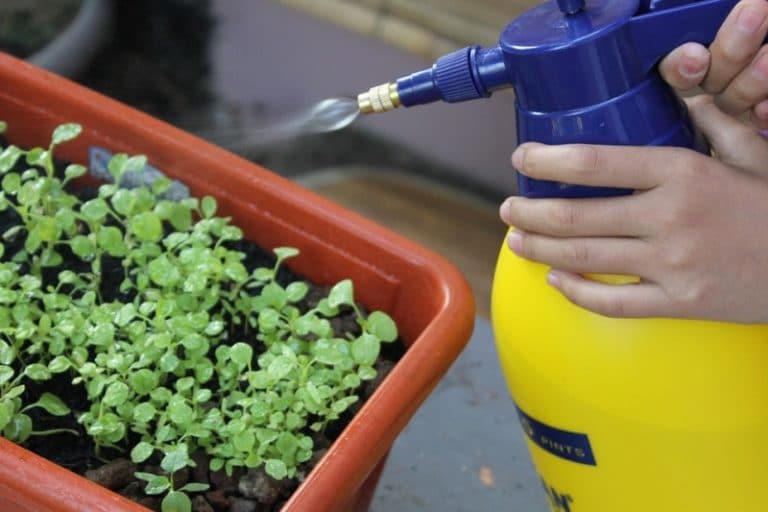
Pflanzensoziologie and Sichtungsgarten  – Welcome to Germany

The Germans are known for order, and when it comes to gardening, this is something we could all learn. A Sichtungsgarten is a “viewing garden” developed for enthusiasts to come and take note of what plants grow well together how they look. These gardens are often attached to institutions that study them, and at the end of the year, you can look at a report of how much maintenance went into taking care of your favorite part of that garden. This includes man-hours, water, and other resources.

If you think that’s too much for you, you don’t have to garden with a stopwatch and a ruler. Simply keep a gardening journal at hand, and take notes of your progress. You will see that it will help you plan a better year to year.

Sack Gardens from Nairobi, Kenya

Listen up if you’re an apartment dweller and move around a lot, or if you just like to rearrange your plants from place to place. The sack garden initiative has started in the poorer areas of Nairobi, where people don’t have enough room to actually farm but need help supplementing their nutritional needs.

The idea is simple – you need a large industrial sack full of good earth mixed with compost and other nutrients. Because they are so much larger than a garden pot, you can use it to grow bigger plants like tomatoes or even tubers like yams, potatoes or Jerusalem artichokes. If you cut holes in the sides of the sack you can make a strawberry pyramid as well!.

In addition, this might help gardeners that are struggling with soil quality, irrigation or have a limited amount of space to grow some serious crops. It’s best to use a jute sack if possible – it breathes better and it can be recycled or composted.

From London With a Victorian Greenhouse

Although Greenhouses can be seen in every major city (the municipal kind or the kind attached to an educational institution) it all started in England during the Victorian era. Today, the creme de la creme of society competed for the most impressive plant collections from overseas – and not only the kind you can plant in your garden – a lot of the plants they collected could not survive the harsher British climate, so they were placed in greenhouses.

These little gems of architecture were usually heated, and some can still be admired to this day in the likes of Kew Gardens. Greenhouses have become absolutely necessary in modern farming and vegetable cultivation. Of course, the industrial greenhouses are a lot different than the classic Victorian buildings.

If you are planning a greenhouse, it’s worth to think about making it a little bit more decorative and thought through than just a plain old metal and glass geometric structure. Wooden greenhouses can be built in a variety of styles, and you can get a little Victorian gem in your garden installation and all if you look around on the internet.

Of course, you don’t have to make it into a tropical garden paradise – use it to jump-start your vegetables early, using a greenhouse vegetable growing guide.

Three Native American Sisters

This is a tradition going back 5,000 to 6,000 of years among the Indian Tribes of North America. The three sisters are actually corn, winter squash, and climbing beans.

Why those three? They are the staple food of these native people and have been a part of their culture for generations. They are always planted together because they are perfect companion plants.

As gardeners, we should think very carefully about companion planting and learn from this great Native American tradition. What they have developed is actually a perfect system of companion planting, even if they didn’t realize the chemistry behind it.

The corn provides a structure for the climbing beans to climb – no need for poles or a lattice. The beans provide nitrogen for the soil and help other plants grow. The squash creeps along the ground, and shades the soil with its wide leaves, helping to eliminate weeds and keep her companion plants happy.

In modern gardening, there are many more of these companion plants, and they include carrots and tomatoes, onions and cabbages, basil and tomatoes.

Learning Gardening Traditions

Sometimes it’s good to look outside of your own growing neighborhood to see what other people are doing, and what good ideas they came up with. An age-old tradition in one place may turn into a new growing trend in another part of the world in a season!.

That’s all folks about surprising gardening tricks.

Read: Bee Pollination Importance.

Bonsai Gardening Techniques; Ideas; Tips

0

Bonsai Gardening Techniques, Ideas, and Tips

Today, let us learn Bonsai Gardening Techniques and Tips. A bonsai tree is a Potted plant. This is a Japanese wort. The traditional art of growing bonsai trees is introduced in Asia and is being practiced for centuries. Bonsai gardening is an art of horticulture which will involve the growth and training of small trees into tiny ones which are termed as Bonsai trees. When it comes to Bonsai trees, only gardening does not matter. It is more than that. It is a therapeutic value as it is a very good activity for the purpose of relaxation. When you are growing a bonsai or training it, it means that you are also training your mind which makes you a calm person.  Chinese believe that the people who take care of Bonsai will get eternity granted. They also have a belief that there is a connection between the human body and the holy spirit, just like heaven and earth.

Though Bonsai gardening is the one belonging to Japan, it basically started in China where the trees got associated with Zen Buddhism. In the initial days, only the Top ranked people in Chinese society learned this art form. After that, Bonsai has become a well-known hobby in Japan. In recent days, Bonsai is popular in the west and is mainly used for the purpose of decoration and recreation.

Bonsai is a mystery and involves a lot of curiosity when you look at it for the first time. Some people believe that the Bonsais are dwarf plants from their genetics. The actual truth is that the gardeners will use a few techniques of growing for this growth to happen and maintains the Bonsais small. If proper methods of growing are followed, the Bonsai will live for a long time just like the original species. For the creation of healthy Bonsai, you will need a lot of time and patience. So make sure you are considering this before you start growing Bonsai on your own.

Bonsai Fruit Tree.
Bonsai Fruit Tree.

Taking care of a bonsai will give an opportunity to take a prolonged thought regarding the growth of natural beauty. Basically, any type of tree can be grown as a bonsai. But, in order to grow a real bonsai, you are required to dig deeper and also need to know more about the techniques of gardening this beautiful plant. It is not that tough to follow these techniques once you grasp them. In this article, we will help you in learning how to make a bonsai tree and how to take care of a bonsai tree so that it grows in a healthy way so that it lives for years. As a successful gardener, one must be knowing the Bonsai Gardening Techniques.

Read: Ideas for Greenhouse Gardening.

Selecting the right species of Bonsai:

When you are about to select the species, it is very essential to consider the climate of your locality and the environment at your home. For instance, few trees will die in freezing conditions while few others are required to freeze to get into a dormant state and to start preparing for the spring. So, be ensured that you are selecting Bonsai tree types which will fit well in the climate you want to put them. A safe thing is to select the species of an indigenous tree or you can also consult the local garden supply staff for any sort of recommendation of what to grow.

The types of bonsai trees which are considered to grow are shrubs, plants which flower, climbers which are popular among Gardenia, Wisteria, Azaleas.

If you are a gardener who has no or less experience, juniper is the best way to go as it is easy for growing and also responds very well for pruning and other techniques of training. Anyways, it is very slow when it comes to growing. If you want other options, then you can go for Japanese black pine or the Chinese elm.

Growing Bonsai indoor or outdoors:

Outdoor Bonsai Tree.

Most of the gardeners will have a misconception about Bonsai trees that they have to be grown in indoor environments. Most of the species of Bonsai, involving all the plants native to the climates which are temperate have to be placed in the outdoors so that they can get sufficient light and experience the changes which occur seasonally in terms of temperature and light just like other trees are. If you are planning to put the trees in the indoor environment, you have to select the tropical and subtropical plants which can thrive in indoor environments where the temperatures will be high and also stable. Even when growing indoors, there is a chance that these trees will suffer insufficient light. If you have enough space to keep the tree in an outdoor environment, there are bonsai plants which are suitable for any type of environment.

If you want to grow your bonsai trees in the outdoor environment, the species which are deciduous like Chinese or Japanese elms, magnolias are very good ones to select.

If you want to grow your Bonsai tree in the indoor environment, you will need to take into consideration the Bonsai trees like Crassula, the Carmona, etc. These are the best indoor Bonsai.

Tree Size role in Bonsai Gardening Techniques:

Bonsai size is very much important as if everything goes in the right way, this Bonsai lives for many years. If you are growing a Bonsai tree which is large, it will need much amount of care from you for the sake of pruning, a large amount of water, abundant sunlight. So you will need to take the size of the Bonsai into consideration before selecting your tree.

There is a guide choose bonsai size, but most of the trees which are grown fully will be small as 5 to 6 inches and tall at 3 feet based on the species. If you have chosen to grow a Bonsai tree from a cutting from another tree, you can start them off even in a smaller way.

Growing Bonsai from seed:

Growing Bonsai from seed is also an essential thing which has to be thought of about when you have a plan to grow. You have to start it from seeds by purchasing them from a store or collecting them from the nearby trees which you would like your Bonsai to be in the near future. The seed from which you attain Bonsai is a seed which has come naturally, creation of Bonsai happens from that, after that, the process of germination takes place by making use of several types of growing techniques.

To grow a Bonsai tree from a seed is a very slow process which requires hard work. It will take several years and there is a chance for you to fail at first but if you keep trying, you will be thrilled by the results you see.

If you are a beginner or if you do not have enough time to grow Bonsai from seed, you can buy a pre-bonsai. You can find Bonsai trees for sale or you can also find one in a forest which is located near to your home. If you have chosen to find the Bonsai in the forest, always keep in mind to ask the owner of the land for the sake of permission and also be very careful that you are not causing any damage to the roots while digging. Also, remember that you will have to select a tree which has small leaves as it would be easier for modelling.

Read: Ideas for Window Gardening.

Bonsai Gardening:

Bonsai are grown indoor:

Ensure that you are keeping your Bonsai in a spot which is bright. If the intensity of light is low, then the growth of the bonsai will also decrease which will weaken your tree. If you are keeping the tree in a window which is south facing one, there are chances that there is less light intensity. Your bonsai tree gets benefited from the lighting which is artificial or from the lighting which is emitted from a light-emitting diode for at least ten hours a day.

Growing Bonsai Indoors.

Bonsai are grown outdoor:

Most of the Bonsai trees which are grown outdoor will require sunlight for at least six hours a day. Most of the conifers should be kept in full sun for their growth to happen. At the time of summer, you will need to bring your tree to indoors at nights when the temperatures go below 40 degrees.

Watering Bonsai plant:

Watering is the most essential part of Bonsai tree care. This should be done once in a span of three days at the time of winter or you can apply a small amount of water on a daily basis at the time of summer. The frequency of watering Bonsai plants will be based on the factors like species, season, climate, soil and size of the tree. So it is very difficult to conclude the amount of water you need or how many times you need to water a Bonsai. Anyways, you will need to understand the guidelines of watering Bonsai plants which are listed below to know about the watering:

  • Please make sure that you are not watering them too much on a daily basis.
  • Keep monitoring your Bonsai plant and make sure that you are watering it when you see the soil becoming dry or dusty.
  • The mixture of soil you use should be the right one.
Fertilizing your Bonsai tree:

The fertilization of the bonsai tree should be done by making use of a specialized fertilizer which is meant to keep the Bonsai trees healthy. Other normal trees keep extending their root system in search of nutrients. Anyways, the plantation of Bonsai will be done in pots and hence it has to be fertilized in order to restore the nutritional content of the soil.

Feeding the Bonsai as part of Bonsai Gardening Techniques regularly in the season of growing, from spring to middle of fall is very important for your Bonsai for survival. The trees which are grown in the indoor environment can be fertilized all across the year.

  • In the Early summer: You will need to make use of a fertilizer which is rich in the content of nitrogen.
  • In summer, you will need to use a fertilizer which is a balanced one.
  • In winter, you will need to use fertilizer to harden the tree for the winter which is about to come.
Training a Bonsai:

Bonsai trees are just the normal plants which are grown in a sophisticated environment. The training of Bonsai will be completely dependent on the style which you want your tree to be. The Bonsai styling will consist of basic methods like wiring and pruning and other techniques which are all advanced ones.

For the people who are just beginning the bonsai gardening, your bonsai should be dependent on the shape of the actual tree and afterward, you can start your experiments on it. Balance, inspiration, and beauty are the essential factors for a Bonsai garden which is elegant.

Select the style of training Bonsai:

For training Bonsai, there are many styles which are followed traditionally.

Formal Upright Bonsai: There are the bonsais which have the trunk upright and straight and the branches which stretch in an even manner around it. These bonsai will have the roots which are strong.

Informal Upright Bonsai: These type of Bonsai trees will have a slant which is natural, than the ones which are growing upwards. The trunk of these bonsai is also thicker in the soil.

Slanting Bonsai: These Bonsai are the ones which are almost like a formal upright bonsai tree but these have a small lean.

Broom Bonsai: The trunk will be straight and will not finish at the tree’s top but somewhere at the middle. All the branches of the tree which have the same size will form a crown which is in the shape of a ball.

Pruning of Bonsai:

Pruning is a basic method for shaping the style of bonsai and correct all the defects. It is very essential that you are not changing the actual shape of the tree too much. Pruning Bonsai must be done constantly and you should also have spots for it for the creation of a beautiful bonsai which has many numbers of leaves and are also strong.

Pruning can be done by trimming with clippers or pinching them out of the buds which are growing newly. Make sure you are not using scissors.

The species of the bonsai tree are different. Few can be pruned for the complete year but most of them are better to be pruned in the early winter or summer. You should also give them time for a few weeks for recovery for the sake of their health.

Wiring of Bonsai:

This is one more technique which is important for shaping the Bonsai trees The tree can be bent and shaped by wrapping the branches with aluminium which is anodized. Anyways, you will have to do it in a careful manner else you will find a messy bonsai growing.  Wiring can be done for the entire year but ensure that you are removing the wire before it cuts into the bark and branches which are growing in a thick way. Rewiring can be done in order to shape but make sure you are not allowing the wires to cut through the bark.

That’s all folks about Bonsai Gardening Techniques.

Read: The Best Organic Farming Practices.