Composting Process for Beginners
Hello gardeners, we are here with a new and very important topic today. The topic is all about composting process at home for beginners. Do you want to know how to composting the process for beginners? Well, and then follow this complete article to know about composting process for beginners.
Introduction to Composting Process for Beginners
Compost is very easily made by decomposing all the organic materials into very simpler organic and even inorganic compounds in a process called composting. This process will easily recycle various organic materials otherwise they are regarded as waste products. Good compost is very rich in plant nutrients and even beneficial organisms.
A Step-By-Step Guide to Composting Process At Home, Types, Steps, Diagram for Beginners

Compost is usually used to improve soil fertility in gardens, landscaping, horticulture, urban agriculture, and even organic farming. The benefits of compost include providing nutrients as fertilizer to the plant, acting as a good soil conditioner, increasing the humus or humic acid content of the soil, and introducing beneficial colonies of microbes in the soil. The natural interaction of the soil, plant roots, and even nutrient or microorganisms of compost improve the complete soil structure. An improved soil structure will easily increase the soil water retention ability and control soil erosion. Compost can be easily used for land and then stream reclamation and eco-friendly wetland construction. As a landfill cover, compost will provide a healthy utilization of waste organic materials.
What is Composting?
Composting is an aerobic method that means that it requires the presence of air of decomposing organic solid wastes. The process involves the decomposition of high organic material into a humus-like material, known as compost, which is a very good fertilizer for plants.
Types of Composting
Composting is nothing but breaking down the organic material. There are three kinds of composting they are listed below:
- Aerobic
- Anaerobic
- Vermicomposting.
Benefits of Composting
It enriches the soil, by helping retain moisture and then suppresses plant diseases and pests.
It will reduce the need for chemical fertilizers.
It will encourage the production of many beneficial bacteria and fungi that break down organic matter to create humus; it is a very rich nutrient-filled material.
It reduces methane emissions from landfills and even lowers your carbon footprint.
How to Make Compost or Composting Process
Composting Process Step 1: Combine green and brown materials
To make your hot-compost heap, wait until you’ve got enough materials to form a pile a minimum of 3 feet deep. You’re getting to want to mix your wet, green items with your dry, brown items. “Brown” materials will include dried plant materials; fallen leaves; shredded tree branches, cardboard, or even newspaper; hay or straw; and excelsior, which add carbon. “Green” materials will include kitchen scraps and even occasional grounds, animal manures (not from dogs or cats), and fresh plant and grass trimmings, which add nitrogen. For best results, start building your compost heap by mixing three parts brown with one part green materials. If your compost heap looks too wet and smells, add more brown items or aerate more often. If you see it’s extremely brown and dry, add green items and water to form it slightly moist.
Composting Process Step 2: Water your pile
Sprinkle water over the pile regularly so it’s the consistency of a humid sponge. You should not add an excessive amount of water; otherwise, the microorganisms in your pile will become waterlogged and will drown. If this happens, your pile will rot rather than compost. Monitor the temperature of your pile with a thermometer to make certain the materials are properly decomposing. Or, simply reach the center of the pile together with your hand. Your compost heap should feel warm.
Composting Process Step 3: Stir up your pile
During the season, you ought to provide the pile with oxygen by turning it once every week with a garden fork. The simplest time to show the compost is when the middle of the pile feels warm or when a thermometer reads between 54°C and 65°C. At now, the layers have served for their purpose of making equal amounts of green and even brown materials throughout the pile, so stir thoroughly.
Composting Process Step 4: Feed your garden

When the compost no longer gives off heat and then becomes dry, brown, and even crumbly, it is fully cooked and then ready to feed to the garden. So add nearly about 4 to 6 inches of compost to your garden beds and into your pots at the beginning of each planting season.
Some gardeners make what is known as compost tea with the finished compost. This will involve allowing fully formed compost to “steep” in water for many days and then straining it to use as a homemade liquid fertilizer.
How to Make a Compost Bin?
Things you will need are listed below:
- Equipment or tools
- Drill and a sharp drill bit
- Materials
- Choose a plastic storage bin that is nearly about 18 gallons or larger
- Kitchen scraps, yard waste, shredded newspaper, and even other compostable materials
- Wire mesh or hardware cloth is optional
- Select a plastic bin
Plastic storage bins are very easily available, and then you might already have one in your home that you are willing to repurpose into a very big compost bin. The bin should be no smaller than 18 gallons, and then it must have a lid. A second bin can be very helpful to catch the liquid that leaches out of the first bin.
- Prepare the bin
You must have air circulating your compost to assist it to decompose faster. To supply this during a plastic bin, drill holes throughout the container. Complete this step outside, because the drilling can create a multitude. Space holes 1 to 2 inches apart, drilling on all sides of the container (including rock bottom and lid). It doesn’t matter what size drilling bit you employ. However, if your holes are large, consider lining the inside of the bin with wire mesh or hardware cloth to stay out of rodents.
- Position the bin
Once you’ve drilled your holes, find an honest spot for your compost bin. Because of its small size, it should fit on most patios, porches, or balconies. Consider putting it outside the door nearest to your kitchen, so you’ll easily compost kitchen scraps. Or place it near your kitchen garden if you’ve got one, so you’ll toss weeds or trimmings into it. It also can go inside a garage or storage shed if you’d rather not check out the composter.
- Fill the bin
Anything you’d contribute to a traditional compost heap can enter your storage container composter. Leaves, fruit and vegetable peels, rinsed eggshells, paper egg cartons, dregs, coffee filters, tea bags, shredded paper, paper napkins, and towels, toilet tissue rolls, and grass clippings all work well. Whatever you increase your composter should be chopped fairly small, so it’ll break down quicker. Chop fruit and even vegetable trimmings with a knife or by running them through a blender or even a kitchen appliance. And crush leaves by running a lawnmower over them a couple of times.
- Maintain the bin
Every day approximately, aerate the bin by giving it a fast shake. If the contents are staying very wet or are smelly, then add some shredded fall leaves, shredded newspaper, or even sawdust to the bin. This may dry out the contents, and help to revive the ratio of greens to browns, which speeds the event of compost. If the contents are very dry, you need to use a sprig bottle to moisten them. Or better to add several moisture-rich items, like fruits or veggies that are past their prime.
- Harvest and use the compost
The compost should be ready to be used after roughly three months. The simplest thanks to harvesting the finished compost from your bin are to run it during an easy compost sifter. Commercial sifters are available; otherwise, you can create a makeshift sifter employing a piece of wire hardware fabric with a quarter-inch grid. Any large pieces that also got to decompose can return to the bin. And therefore the dark, crumbly finished compost is often stored in another container for later use or immediately spread within the garden.
Composting Process – Step By Step
In case if you miss this: Organic Gardening Questions and Answers.

7 Easy steps to composting Process
1. You need to choose your type of backyard compost bin
You can either use an open pile or even a compost bin. Bins have the big advantage of being neat, keeping animals out, and even preserving heat. You can even purchase compost bins from a variety of gardens and any home store, or you can also build your compost bin. The size and the type of bin you choose or build will usually depend on how much compostable material you will generate.
2. You need to choose your composter location
You should choose a location or area which is flat, well-drained and even sunny. Most and very importantly you need to find a convenient location.
3. Alternate the layers
| Browns ———- | Greens ———- | Don’t Compost ——————– |
| Dried leaves | Garden waste | Meat or fish or bones |
| Paper egg cartons | Flowers | Fat or oil or grease |
| Paper towels/napkins | Vegetables | Dairy products |
| Dried grass clippings | Fruit peels | Cooked foods that attract animals |
| Shredded newsprint | Scraps | Pet waste |
| Bark | Coffee grounds | Plastics |
| Coffee filters | Tea leaves/bags | Metals |
| Straw | Eggshells | Glass |
| Sawdust | Flowers | Toxic material |
| Dryer/vacuum lint | Charcoal | |
| Cardboard (cut into very Small pieces) | Chemical logs | |
| Dead house plants | ||
| Shredded brown paper bags |
You need to start with a layer of course materials that mean twigs to allow for drainage and aeration. Better cover this layer with leaves. Then simply alternate between layers of greens materials like nitrogen-rich material and browns like carbon-rich material.
4. Add kitchen and yard waste as they will accumulate
Collect your entire kitchen compostable in a container in your kitchen. Find a very handy place to store this container – on the counter, under the sink, or even in the freezer. When it is very full, then you need to empty its contents into the compost bin.
Whenever you add food scraps or any yard waste, better be sure to top it with a layer of browns. If you do not add browns, your compost will be very wet and break down more slowly. If possible, better collect and then store dry leaves in old garbage in the fall so you can use them in your compost year-round.
Depending on the type of compost bin or pile you have chosen there may be a specific way of adding and maintaining compost. Most of the composters you purchase come with instructions and better to follow these instructions for best results.
5. Better continue to add layers until your bin is full
The bin contents or even pile will shrink as it begins to decompose.
6. Maintain your compost bin
To get finished compost very quickly, you should check your compost bin and then make sure the following conditions are met:
When you add fresh material, better be sure to mix it in with the lower layers.
Materials need to be as wet as a rung-out sponge. Then add dry materials or water – whichever is needed – to reach the moisture level.
Mix or then turn the compost once a week to help the breakdown process and eliminate odour.
7. Harvest your compost
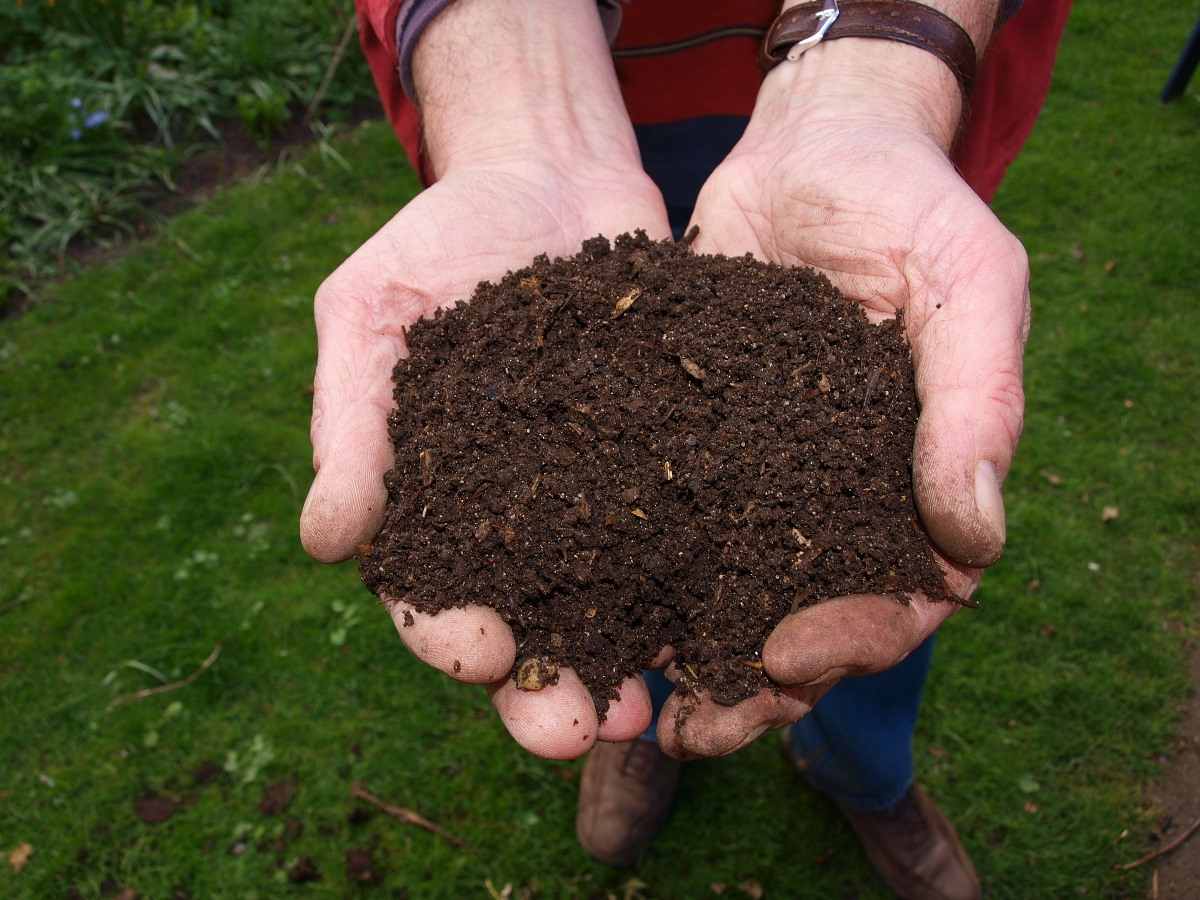
The finished compost will be very dark and crumbly and even smell like earth. You should be able to have finished compost nearly within four to six months of starting your bin.
The finished compost will end up at the top of the bin or even a compost pile. Remove all the finished compost from the bin, by leaving unfinished materials in the bin to continue the decomposing process. Be sure the decomposition process is complete before you use your compost or otherwise, the microbes in the compost could take nitrogen from the soil and even harm plant growth.
Use your compost:
You need to sprinkle your lawn a few times a year.
Better to use your compost as a top dressing for flower beds and then at the base of trees and shrubs.
Mix compost in with the garden and then flower bed soil.
Use as a soil conditioner when planting or even transplanting trees, flowers, and even shrubs by filling the hole with half compost and half soil.
Make a compost tea. Then fill cheesecloth or an old pillowcase with 1 liter of compost. Then again tie the top and ‘steep’ the bag overnight in a garbage can be filled with water. This ‘tea’ can be easily used to water plants and gardens.
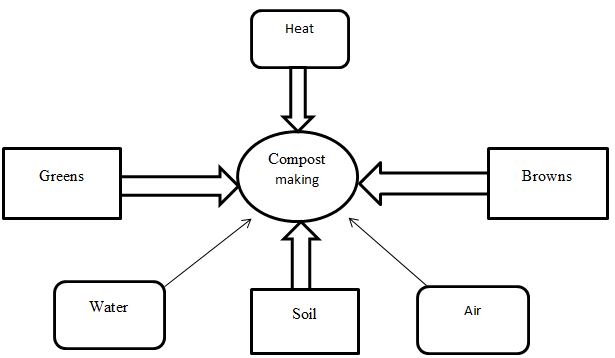
Basic Composting Diagram or Flowchart

Commonly Asked Questions about Composting Process for Beginners
How long does it take for your compost to start to decompose?
It takes three months.
Depending on the size of your compost pile, what you put in it, and then how you tend to it, this process can easily take three months to two years. With a Compost Aerator, it is very easy to add air to the pile. Aeration will give oxygen-hungry microbes what they need to break down materials very faster.
Can I just put compost on top of the soil?
All soils can be easily improved with the addition of compost. Spread the compost in a very thick layer on top of exposed soil. Worms and even other creatures will help the compost meld with the soil. Mulching is not only a very easy way to apply compost but also keeps down weeds and then helps your soil retain moisture.
Can I plant directly into compost?
Growing plants in pure compost can easily cause problems with water retention and even stability as well. So while it may be tempting and planting in pure compost is not a very good idea. That is not to say you should not plant in compost at all. Just an inch or even two of good compost mixed with your existing topsoil is all your plants need to survive.
Does a compost bin need a lid on top?
A compost heap does not have to have a lid. However, a lid will not help to regulate both the temperature and even the moisture levels. You could very easily use a piece of old carpet (preferably Hessian backed rather than foam backed) or a very thick piece of plastic tarpaulin weighed down with stones.
What is the good and best composting method?
A vermicomposting is a very excellent option for the busy and small-space gardener. Red Wiggler worms are the best and most popular choice for worm composting and they are extremely efficient waste-eaters.
- The Role of Watering in Preventing Drying Moringa Pods
- Best Liquid Fertilizer for Flowering Plants
- How to Set Up an Efficient Watering System for Home Garden
- How to Mulch Tulip Bulbs: Expert Tips Best Tulip Blooms
- Common Problems with Potted Figs and How to Solve Them
- How to Prevent Flower Drops in Pomegranate Trees: Effective Tips
- How to Boost Ridge Gourd Flowering and Yield: A Beginner’s Guide
- Effective Pollination Techniques for Maximizing Gourds Yield
- Composting Techniques for Manure in Home Gardens
- A Step-by-Step Guide on Propagation Techniques for Jasmine Plants
- How Do I Make My Garden Less Cluttered: A Beginners Guide
- Growing Red Currants at Home for Beginners
- Gardening Techniques in Planting Vegetables
- Where to Place Indoor Plants in Your Home
- How to Grow Tomatoes Organically at Home: A Comprehensive Guide
- Organic Gardening on a Budget: Low-Cost Methods and Materials
- Gongura Seed Germination and Planting Methods
- Cabbage Seed Germination and Selection