Home Gardening

Outdoor Gardening

Organic Gardening

Modern Gardening

Urban Gardening

Gardening Business

Home Blog Page 75

Window Gardening Ideas, Techniques and Tips

0

Window gardening ideas, techniques, and tips

Today, we are into the learning of window gardening ideas. A window gardening is a particular type of window that juts out into a yard or other exterior area. It contains several shelves & is typically installed in kitchens over the sink or really, any room in the home. Window garden means the increasing of ornamentals in receptacles placed in the windows of the home. Window gardening is a great way to cultivate fresh fruits and vegetables, grow flowers year round and add beauty to your home.

Garden windows are great additions to any home. Window gardens, or windowsill gardens, can be placed indoors or outdoors in the home. Garden window boxes are popularly grown by residents who don’t have access to a garden or a roof to grow plants. Do you use fertilizers or any enhancers for soils or plants when window gardening?  Flowering plants must be fertilized every 2 to 3 weeks in order to keep the blooms coming. Most other green plants & herbs can be fertilized 1-2 times per season. Earthworm castings, compost, and fish emulsion or kelp are all good organic fertilizers. One must be aware of window gardening ideas for better window garden design. So, let us start learning some window gardening ideas and techniques.
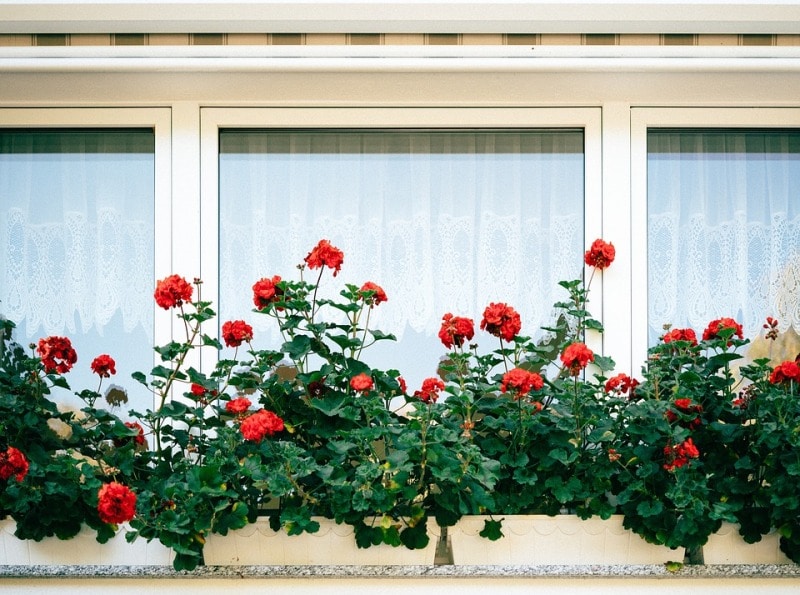
Growing Flowers.
Growing Flowers.

Plants suitable for window gardening:

Flowers suitable for window garden are;

Geraniums, lavender, impatiens, salvia, petunias, daisies, begonias, cacti, zinnias, fuschias, nasturtiums (you can also do all kinds of bulbs).

Herbs grown in the window gardening are;

Lavender, sage, thyme, rosemary, basils, parsley, marjoram, dill, hops, sorrel, lemon balm, bay, sweet basil, lemon verbena, peppermint, spearmint, and jasmine.

Vegetable Plants grown in window gardening are;

Lettuce, onions, carrots, garlic, cabbage, tomatoes, bush and pole beans, peas, scallions, kale, and peppers.

Containers used for your window garden:

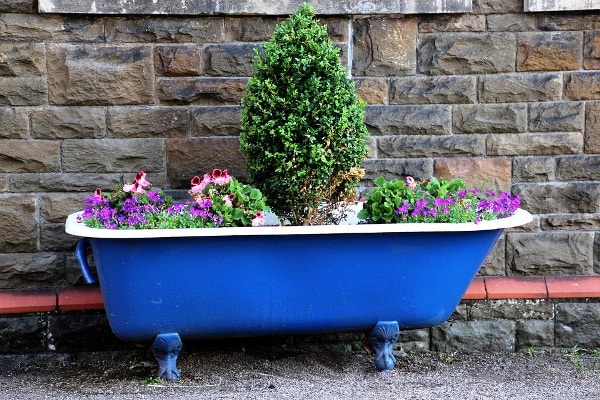
The Containers used for window gardening are of all sizes, shapes, whether of plastic, ceramic, metal, mud or clay pots to wood boxes, hanging baskets, crocks, and washtubs.

A window box placed on the window-sill is one thing; a table located next to the window is another. There is actually no limit here, but you will want your container to have the ability to drain off excess water. This is very important as you don’t want plants to be sitting in water, rotting.

Transplanted Window Container Garden:

The design is to transplant a familiar sight the window container garden to the actual garden, bringing the window with. The glass set against an exterior wall makes for a novel sight, while the hanging containers do the work they were always meant for.

Read: Herb Garden Design, Techniques.

Free Standing Window Hanging Garden:

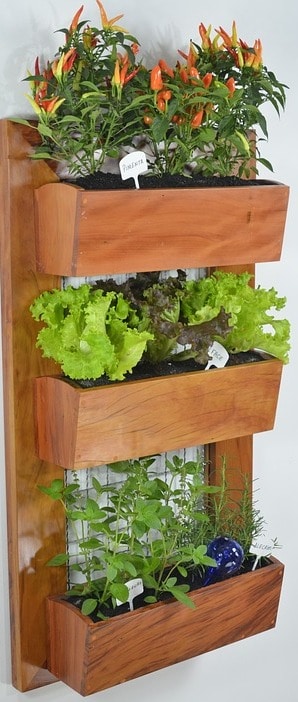
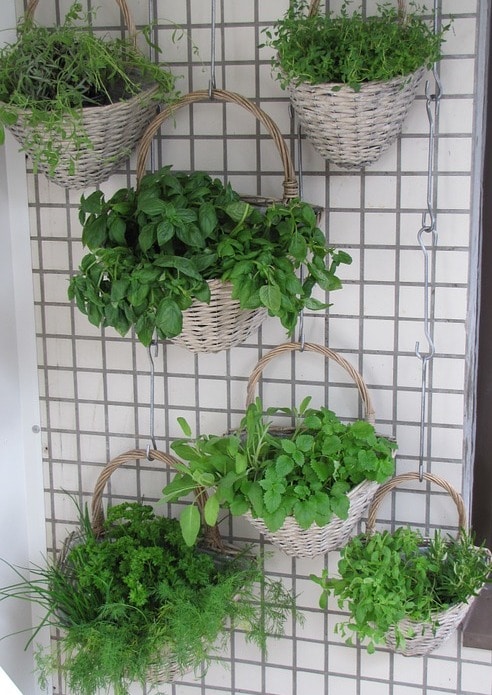
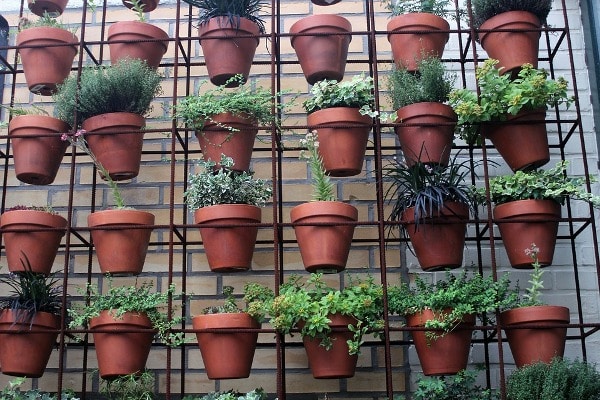
We love this idea because virtually any window frame can be used to generate it. With a bit of work & some ingenuity, you can convert each cell of the frame into a small pocket for container gardening, and then hang the entire thing against a wall, fence, or make a standing frame.

Basket Case:

Option for a basket instead of a box beneath your window for a unique look.

Vertical Garden:

Produce twice plants the visual impact by doubling up on your rows of plants in the window.

Small Window Greenhouse:

Garden windows make a perfect little greenhouse. This idea might take a bit of elbow grease but it’s moderately simple to accomplish, so long as you have a few spare windows sitting around.

Tree Hung Picture Window:

One of the most fascinating ways to reuse a window is to provide its new life with a new context. There’s nothing more interesting than removing the context completely from the window, letting it float in space beneath the branches of a tree. And, adding a few microscopic container gardens to the frame.

Light in your window garden:

In the window gardening plants need light. Consider that, north-facing window you will want to choose plants that require less sun such as ferns, violets, begonias, impatiens, mints, and philodendron.

If you have a south-facing window, your plants will get sunlight for most of the day so you will want to go with sun-loving plants like tomatoes, which need about seven hours of sunlight a day to thrive, (most vegetables & herbs will go into this sun-loving category), geraniums, nasturtiums, dahlias, petunias, cacti (and other succulents). 

Top garden windows decorating ideas:
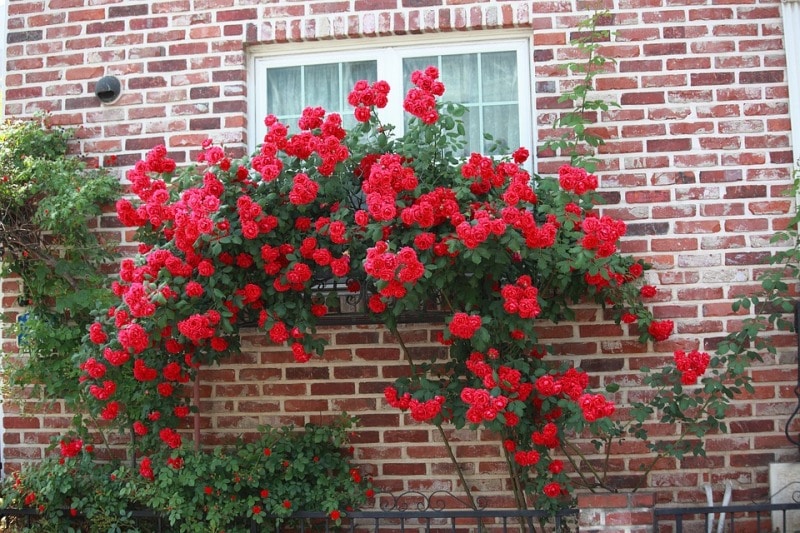
Window Garden Ideas.
Decorate your garden window with fresh plants:

One of the best ways to decorate a garden window is with plants. With the added light garden windows make, it’s the perfect spot for your indoor plants to thrive.

Add some items to give your garden window style:

Use the shelving that comes with these window gardens. Keep in mind; if kitchen counters already have a considerable amount of décor, less is more when styling any window.

Dress up your garden window with easy window treatments:

A simple window treatment or curtains can instantly dress up your window garden view.

Read: Organic Gardening Fertilizers.

Tips for window gardening:

Here are some tips for window gardening:

About Face:

Determine the amount of sunlight that comes into the garden window & what time of the day you get that sunlight. Choose plants that do well with the amount of light you will get from your garden window. Basil, for instance, likes a lot of sun & warmth that comes from a south-facing garden window. Bay needs air circulation to remain healthy & likes an east or west-facing garden window.

Hire a Contractor:

Although it may be tempting to try & install a garden window on your own, doing so is a risky endeavor. Garden windows are fairly complicated to install correctly; even a small mistake can create the frame too snug or too loose, cause the window to open & close improperly, and may put undue stress on the glass panes. Contractors are experienced in installing garden windows & are aware of the several variables involved in the installation process. Proper installation can help your plants thrive & ensure that you don’t have to pay more down the road for repairs and modifications.

Clean it up:

A garden window is a perfect location to display flowering plants that get a little of the outdoors inside. Or, put garden window to work with plants that have some muscle behind their roots, acting as air purifiers.

Use High-Quality Materials:

The key to the success of a window garden is using the correct materials. On wall side windows, our garden windows are completed from the highest-quality materials to ensure that you get the most out of your garden window. For example, we use high-quality plywood & durable Pionite to ensure that your window lasts. Furthermore, we install casement windows on either side to ensure appropriate ventilation.

Sniff it out:

Use your window garden as an air freshener. Herbs like rosemary will provide off a fresh pungent scent.

Take Advantage of Special Features:

The best part of a garden window is that it offers a glimpse of the outdoors while you’re working away in the kitchen. To boost its appeal, even more, insert cheery window coverings or flowers to the sill. Furthermore, because a window allows you to take advantage of sunlight & grow your favorite herbs all year.

Adds Light to Your Home:

Garden windows allow more light into the room, which is a great quality if your kitchen is small or dark; they offer more depth making your room look bigger & brighter. Garden windows allow you to cultivate plants & from the comfort of your own home. That is why a garden window is a perfect window for nature lovers.

Great in the winter:

Cold winters shouldn’t stop gardeners from growing their favorite plants, & they don’t have to with the garden window. These windows allow for the sun to reach your plants & you don’t have to step out into the cold of the winter. Its shelves are a perfect place to put potted veggies & flowers.

Perfect in Any Room:

A garden window is great in just about any style home. Though they are generally found in kitchens, they look good in bedrooms and living rooms as well.  Having a garden window in the kitchen makes it easier to maintain your plants watered and healthy.

Add beauty and value to the home:

Garden windows are designed for beauty. They have about four glass panes one on each side, one in the front, and a slanted pane on top. Depending on the size, the window can have one shelf or multiple shelves. Any adding to the home, such as this, adds value to the property.

Watering the seeds or plants:

Water new plants & seeds frequently. Water from the bottom to prevent rotting the crown & the fruit. The best time to water plants is in the evening or early morning when it is cooler so the water doesn’t dissolve in the heat.

That’s all guys for today about Window Gardening Ideas.

Read: Grafting Methods of Hibiscus.
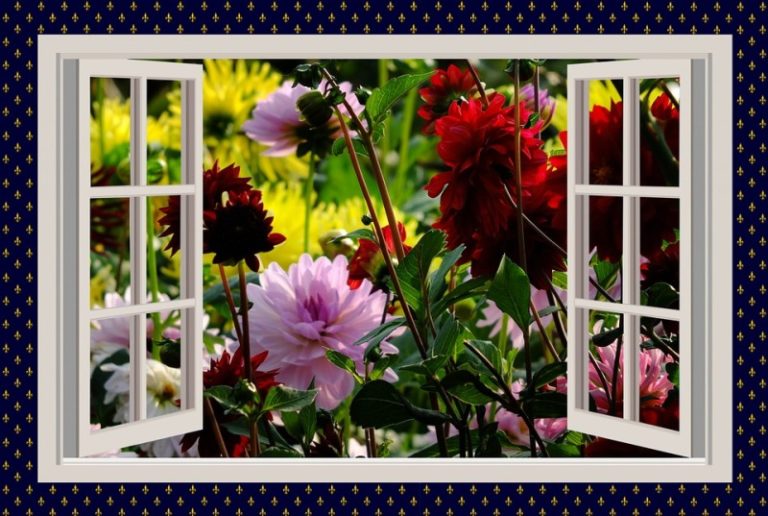
Herb Gardening Design; Ideas; Techniques

0

Herb Gardening Design Techniques:

Let us discuss today the herb gardening design, techniques, ideas, and tips. Winters or summers, morning or evening every day we use herbs in one or other forms. Whether you are sitting at dominos sprinkling oregano on your favorite pizza or you are sipping your chilled lemonade with mint on summer days.

A lot has been written on herbs since ancient time be it in Vedas or granny’s instant remedies. While some folks believe that some herbs are exceptional and sacred, others use herbs for cosmetics or medication or for culinary purposes. Culinary herbs in small amounts provide delicious flavor to food. In terms of medicinal herbs, some herbs, such as mint leaves have a cooling effect, the leaves and extracts of cannabis and cocoa plants contain psychoactive property that has been used for religious/ceremonial and also recreational purposes. Various herbs are used in many religions for different spiritual purposes such as cleansing, smudging, exercises for rites of passages, and so on. As for herbal cosmetics, mixtures and pastes were often used to brighten the face. Now, however, herbal-based cosmetics come in several forms, such as face creams, scrubs, lipsticks, natural fragrances, and essential oils.

So when we know how important herbs are then why not grow herbs at our own home! What better way to get healthy by growing your own herb garden?

Herbs do not have to take up a lot of space and labor. Herb can be moved indoors or out depending on the season and of course space available.

What are herbs? How to grow herbs at home? 

Name of useful herbs?  How to start a herbal garden?

Answering your questions is always our foremost priority. Here we will discuss some tips on getting started with your own backyard herb garden. So without wasting much time let’s start our own herbal garden and for this, first you need to understand which type plants are called herbs.

Read: Vertical Gardening Ideas for Beginners.

What are herbs?

Word “herb” is referred to any green or leafy part of a plant or any plant utilized for seasoning and flavoring a recipe, but not used as the main ingredient. We can also call herbs those plants with savory or aromatic properties that are used for flavoring and garnishing food, medicinal purposes. The culinary uses of herbs are what differentiate them from spices.

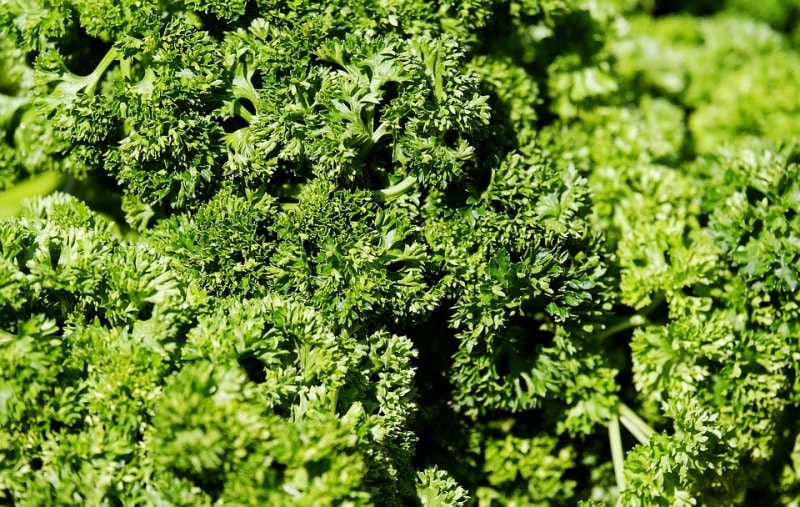
Parsley Herb.
Parsley Herb.

How herbs differ from spices?

The fundamental difference between herbs and spices lies with what part of the plant they are derived from. A herb is a leafy or other green parts of the plant. While Any other component of the plant would be considered a spice—including dried bark, the roots, a berry, seeds, twigs, or other plant matter that is used for seasoning or enriching flavor a dish. For example, cinnamon is the bark of a tree. Cardamom is a seed pod. Cloves are dried flower buds and bright fragrant saffron is the stigma of a flower. These are all examples of spices. So we can conclude that spices are used in dried form while herbs can be used either fresh or dried.

Steps for herb gardening:

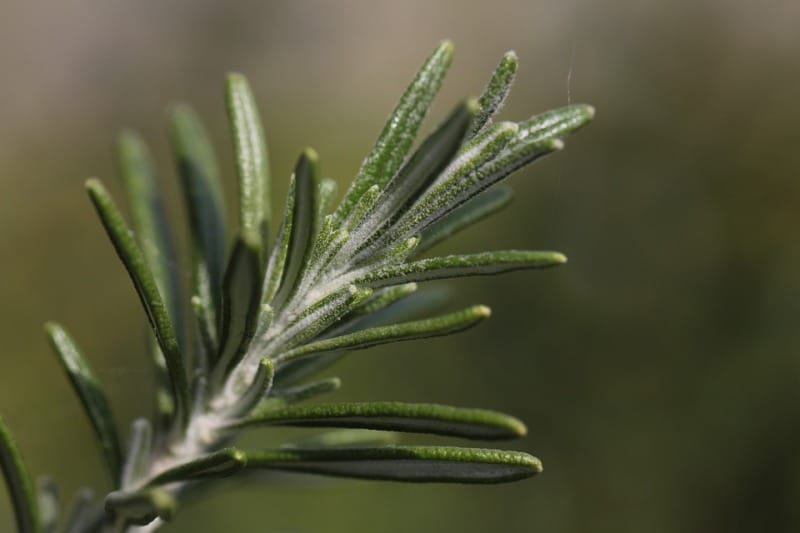
Rosemary Herb.
Rosemary Herb.

Starting a herb garden is one of the easiest things you can do without putting many efforts. Growing herbs is an easy way to start gardening. So just keep reading to learn about the steps for making a herb garden in your yard.

A necessary thing to Grow Herbs is to put them in The Right Place

The prime requirement for growing Herbs is growing them in the proper location. First, you should decide the location for growing herbs. Most of the herbs that you can grow easily at home need two things proper sunlight and well-drained soil. This means that when considering places in your yard for planting a herbal garden, you need to look for a location that gets at least six or more hours of sunlight per day and soil that is well drained.

Read: Organic Fertilizers for Home Garden.

Herbs can be grown in a variety of places such as containers, pots; however, the herbs always prefer to be grown in the ground where they can spread out. Some herbs grow quite large (4-6 feet), and when they are placed in pots they can become stunted and can get stressed. But If you are short on garden space, put your herbs in pots. That way, you can always bring them indoors when it starts getting hotter. People usually prefer their convenience when selecting a place to start growing a herb garden. Planting near your kitchen makes it easier to harvest herbs from the herb garden.

Pick desired herbs that work the best for your purposes.

Which herbs you grow in your garden depends mainly on what you would like to grow and why. Almost all herbs will grow for at least one season means they are annual rarely they grow year after year. Most herbs are easy to grow but pick ones you will actually use or ones that work well as companion plants to other plants that you are already growing.

Some common herbs that people grow when first starting a herb garden as starter herbs are:

  • Mint
  • Basil
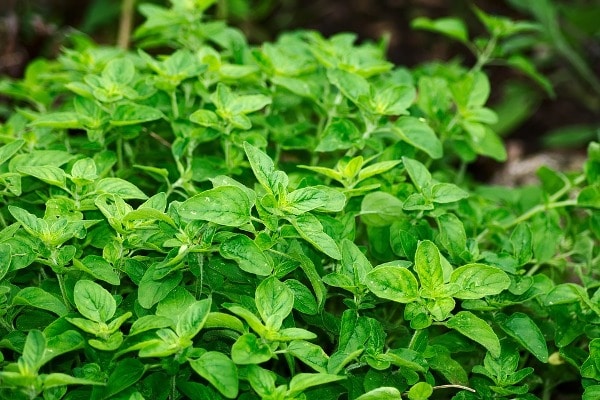
  • Oregano
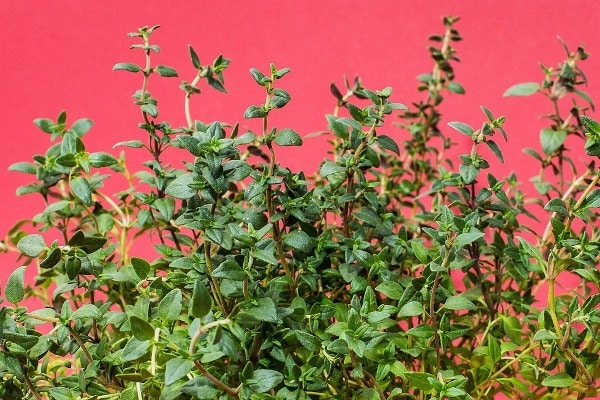
  • Thyme
  • Rosemary
  • Sage
  • Cilantro
  • Parsley
  • Coriander (leaves)
  • Garlic (leaves)
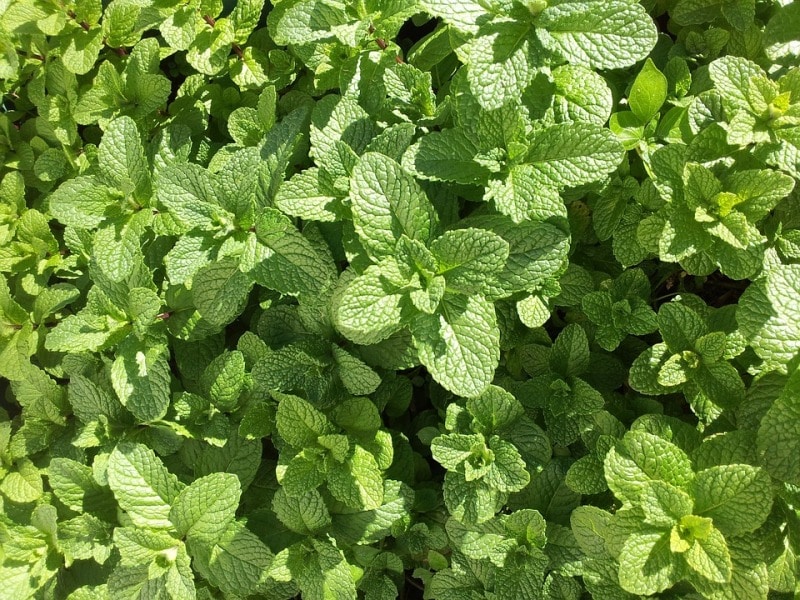
Mint Herb.
Mint Herb.

Preparing the Soil:

Shortcuts here are terrible for your little plants. Once you have chosen the location for growing a herb garden, you will need to prepare the soil beds. For preparing the herb garden soil, dig with a large garden fork so that it loosens soil that has become compacted over the years. This permits water to drain and creates space for plant roots to reach down into the soil. If soil is sandy or clay heavy, add plenty of compost. Adding compost to your soil, about an inch or so on top and then mixing it into the soil, helps prevent drainage problems and provide nutrients to the herbs while they are growing. Even if your soil is in quite a good condition, adding some compost into the soil will help. You don’t need to add anything extra when growing herbs, do not use composted manures in the herb garden. These are bulky and normally high in nitrogen, which will make the herbs grow quickly but will reduce their flavor.

Harvesting herbs

Mainly herbs are useful for their leaves rather than their flowers, stem or root, so pinching them off and harvesting them simultaneously can be a good way to keep the focus on vegetative growth over flowers. Frequently harvesting herbs will result in more production and more foliage, which ultimately increases the amount you are able to harvest. For harvesting, you can simply cut off about 1/3 of the branches when your herb reaches at least 6-8″ of height. By cutting closer to a leaf intersection, your plants re-grow very quickly. Some herbs, such as parsley, growth of new leaves occurs from their center. In this case, the older branches need to be totally removed, leaving the new tiny branches growing from the center.

After harvest, you can also preserve some of your herbs for later use. Drying herb is one popular method of preparing herbs for storage. Some herbs, such as parsley and chives, should only be used fresh, as they do not retain their flavor well when they are dried. Freezing herbs is also one of an innovative way to store herb for later use. One fun way to freeze herbs is to create little flavored ice cubes with them that can be simply added to cold water, soups, stews or other dishes. They either melt into the water for a tasty and healthy drink or cook into the dish being prepared and enrich their flavor.

That’s all folks about herb gardening design techniques. Keep gardening!.

Read: Sericulture Training in India.

Aquaponic Gardening Techniques; Ideas; Tips

Aquaponic gardening tips and benefits

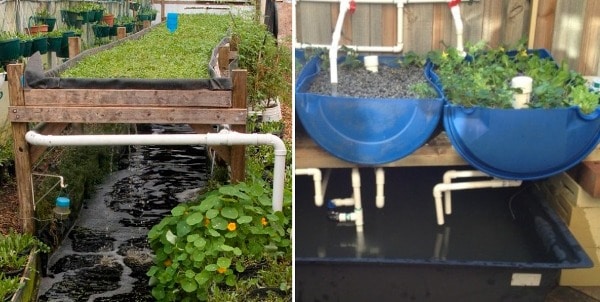
Today, let us jump into home aquaponic gardening ideas. Aquaponics can be defined as a combination of hydroponics which involves growing plants without soil and aquaculture which involves raising of fish. The waste produced from fish will act as an organic source of food for plants and the plants will filter the water in a natural way for the fish.

Despite fish and plants, the other participants in aquaponics are microbes. These are the bacteria which convert ammonia which comes from the waste of the fish into nitrites and then to nitrates. Nitrates are one form of nitrogen which plants can take and make use of it for their growth. Fish waste which is in the solid form is converted into vermicompost which also acts as a source of food to plants.

By the combination of the hydroponic system and aquaculture systems, aquaponics will take advantage of their benefits and eliminates the drawbacks of both the systems.

To set up an aquaponic garden, you will need to have proper planning, mainly for the beginners so that it would be a success. If you are a beginner, you can also go through aquaponic gardening books in order to get some information about aquaponics. You can also go through aquaponic gardening videos and aquaponic gardening blogs to get the information you need.

Aquaponic gardening benefits:

Advantages of Aquaponics Garden.
  • This will play a vital role in the protection of the environment because of the less amount of water it uses and less amount of waste which it generates. The system which is self-contained will recycle the water thereby removing the pollutants. Very less amount of water is wasted.
  • There is no requirement of fertilizer in the aquaponic gardening system. But making use of beneficial bacteria, it is produced in an organic way from the waste produced by the fish and cutting the expenses of the fertilizer.
  • Aquaponic gardening is very easy to adapt at home and also for small scale needs.
  • This type of gardening will yield both carbohydrates and proteins in the form of fish and vegetables.
  • Fish will not have exposure to mercury, any pollutants or PCBs. There is no need to use any sort of antibiotics or hormones for growth which is generally used in commercial aquaponics.
  • The growth of the fishes and plants would be quick and healthy which will decrease the insect problems.
  • There is no requirement for weeding.
  • Gardening beds are mostly placed on the top of the tanks in which the fishes are raised which brings them to a comfortable height so that the work will be made easy for the growers. There is no need to bend or stoop.
  • This can be carried out in the off-season too.

Read: Techniques of Vertical Gardening.

Aquaponic gardening plants:

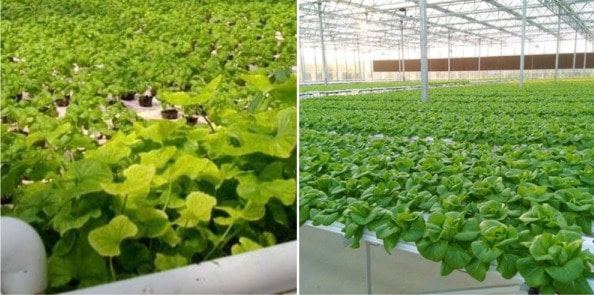
Not all the plants will be suitable for aquaponic growing. Basically, the vegetables which do well in the hydroponics can be grown in the aquaponic systems too. This will include leafy vegetables like lettuce, cucumbers, tomatoes, strawberries, and herbs like mint, basil, chives, etc.

Root vegetables like carrots and turnips can also be grown if the media of planting is sufficiently deep.  They are tough to grow in setups which are like floating rafts where they can produce roots which are of strange shapes and are also twisted.

Best fish for aquaponic gardening:

Aquaponic gardeners will not grow fish for consumption. The fishes will give fertilizers to the plants. While you are growing fish for consumption, you need to take into consideration their hardiness, growth rate, requirements of water temperature. The fishes which are grown in aquaponics are:

Tilapia: These are the ones which are at present the most popular ones and can be easily grown as the food for fishes. They will reach the size of harvest very quickly and will also tolerate a wide range of pH and temperature of water levels than most of the fishes. Tilapia are the fishes which are carnivorous and generally will not feed on the small fishes. Trout: These are the favorite food for fish but are very tough to grow. They will need water temperatures which are cold. Water which has a temperature of 55 degrees will have an effect on the vegetable grown. Lettuce and other crops which grow in cool temperatures will grow gradually with water at a cool temperature. Cucumbers, tomatoes and other crops which grow in warm season are not suitable for the systems which are growing trout or other species which grow in cold water. Carp: These are the fish which grow in a wide range of environmental conditions. This will make them a very good option for beginners. The carp which you grow in an environment which is clean and aquaponic water will not have any taste of mud.

Goldfish: These are the popular ones and are also non-harvestable options for home aquaponic systems. These are easy and hardy to get. These will add some sort of decoration to the system.

Other kinds of fishes which are used in aquaponics systems will include bass, perch, bluegills and several types of non-fussy fish which are grown in aquariums such as guppies.

Calculation of density of the fish to the water present in the tanks is very important. Less fish means there is less nourishment to the plants in the aquaponics system.

Aquaponic gardening tips:

  • When you are adding new fishes to your aquaponic system, contain them in the first place for at least five days in order to ensure that they will not introduce disease into your tanks.
  • Do not make use of copper tubes in your aquaponic setup. Copper is poisonous to fish.
  • Fishes are sensitive to quick changes in temperature. You need to keep the temperature of water in fish tanks as frequent as possible.
  • Do not expose outdoor fish tanks to the sun which will give rise to fluctuations in temperature of water in tanks.
  • Always make sure that you are providing shade for the prevention of algae from growing in the fish tanks.
  • Water heating in the fish tank in order to maintain it at the proper temperature will be consuming the power of your aquaponic system. Insulation has to be done as much as possible. Outdoor systems which are located against the house will help in the gradual loss of heat.

Read: Aquafeed Formulation.

Organic Gardening Fertilizers; Manures

0

Organic gardening fertilizers

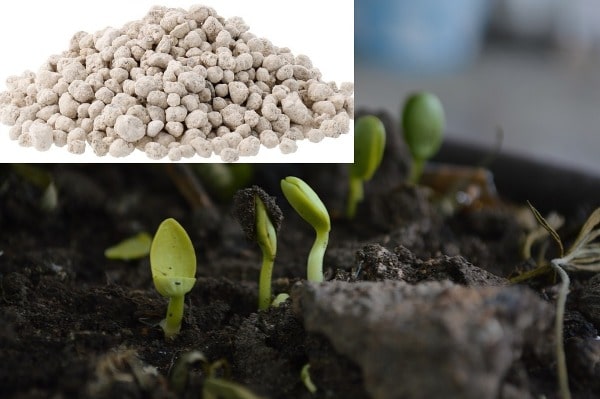
Today, we are into a discussion of Organic Gardening Fertilizers and Manure. Organic fertilizers are the ones which are taken from the excreta of the animals which can also be termed as manure, human wastes and vegetable wastes such as compost and residues of crops. The fertilizers which occur naturally will include the wastes which are taken from the processing of meat, manure, peat, guano, slurry. If you are into gardening, you must be aware of Organic Gardening Fertilizers. For healthy plant growth and higher yields, you should apply organic gardening fertilizers.

Organic fertilizers advantages:

  • Organic fertilizers will provide the plants with all the required nutrients but in limited quantities.
  • It will help in the maintenance of Carbon and Nitrogen ratio in the soil and also enhances its productivity and fertility.
  • It plays a major role in the improvement of physical, chemical as well as biological properties of the soil.
  • Because of the rise in the biological activity, the nutrients which are present deeper will be provided to the plants.
  • Organic fertilizers will work in such a way that they reduce the loss of moisture from the soil caused by evaporation.

Organic Sources available:

  • Carbon which is present in the soil is an organic matter form. The organic material will be mostly used for the improvement of conditions of soil and fertilization is Farmyard manure, animal excreta, residues of crops, green leaf manures, preparations of microbes, vermicompost preparations, biodynamic preparations.
  • For all the organic matters, carbon dioxide is the one which acts as the main source of carbon. The conversion of carbon dioxide is done to organic form by the photosynthesis process and once it is done, the carbon will not be available for usage in the generation of plant life.
  • Carbon dioxide will include only 0.03% of the atmosphere of the earth. It is being estimated that the vegetation on the surface of the earth will consume about 100 billion kilograms of carbon dioxide per year.
  • As there is very less availability of carbon dioxide, it is always suggested to recycle it. When the plants and animals are dead, then the metabolism will play a major role in the cyclic sequence. The tissues which are dead get added to the soil and get decayed. These then undergo transformation into microbial cells.
  • As per the several stages of decomposition, the organic matter in the soil will become available in different amounts. Farmyard manure is made from the cattle dung and other animal wastes, tissue of animals. Compost is prepared from rural wastes and urban wastes. Green manure and crop residues are combinedly called as bulky organic manures as their content of major nutrients are low whereas the materials like fish meal, poultry manures, an animal meal which contain a higher amount of plant nutrients come under concentrated organic manures.
  • In normal organic manures which consist of up to 2% of Nitrogen come under the bulky category and the ones which have more than 2% of Nitrogen are considered as the concentrated ones.
  • No matter what the source and composition are when the organic matter is added to the soil, it will undergo microbial delay and will become the food for microbes. Even the cells of microbes will act as a carbon source for the next generation of microbes.

Read: Home Gardening Requirements.

Green manures:

  • Green leaf manuring can be defined as a method of ploughing the green plant tissues which are not decomposed into the soil. This is done for the improvement of the fertility of the soil and the physical structure.
  • Green leaf manuring is the main supplementary to organic matter of the soil. The green manure crop will supply organic matter and also some sort of additional nitrogen mainly if the crop is a legume, because of its capability to fix nitrogen from the air by making use of the bacteria in its root nodule.
  • The green manure crops will also take a protective action towards leaching and soil erosion. The green manure has to be put in the soil before the plants start flowering as they are raised for their green leafy material which has a high content of nutrients and protects the soil in a wider way.
  • Green manures will not break the soil rapidly, but slowly, they will add nutrients to the soil for the succeeding crop.

Advantages of Green leaf manures:

Utilizing green leaf manures is very beneficial for crops as well as soil.

  • Green manures will decompose quickly and hence it is very simple to retain the organic matter present in the soil.
  • Green manures play a major role in the improvement of physical properties and chemical properties of the soil.
  • Green manures are the major source of energy to the microbial organisms.
  • They are the source of nutrients to the present crop and also to the succeeding crop.
  • Adding the green manure plants to the soil will serve as mulch and helps in the prevention of soil erosion.
  • Nutrient leaching in the soils which are light can be avoided by adding green leaf manures.
  • Planting green manure plants will help in regulating the weeds.
  • Most of the green manure plants like legumes can be used to minimize the use of nitrogenous fertilizers.

In organic gardening, the options for fertilizers which occur naturally is very less and they are difficult to be found in the stores. Even though there are many organic fertilizer companies, the ones which are available are very costly and we cannot believe if there is really organic content present in them. Luckily, you can make your own fertilizers in an organic way which would be simple and also inexpensive by using the components which you have around your house. To start, you need to have a look at the basic things which help in making a good fertilizer and also traces the nutrients which are required for the plant food which is much more specialized.

The formula for organic gardening fertilizers:

Unless and until you are completely new to the gardening, you would have seen the three numbers which will be listed on the label of most of the premixed fertilizers. Those numbers are the ones which represent the content of Nitrogen, Phosphorus and Potassium. Their important nutrients are required for strong growth of the plants, development of their roots and complete health of the plant respectively. You will need to know about these three components in a clear way as these are important for the creation of good food for your garden. If you are thorough bout the formulas of the organic fertilizers, you can prepare organic fertilizers for a vegetable garden or organic gardening fertilizers for vegetables and fruit garden too.

Trace nutrients:

  • Just like the humans who need proteins, carbohydrates and fats in their food, plants will not be able to live only with Nitrogen, Phosphorus and potassium alone. There are thirteen more elements which should be used to maintain the health and productivity of your organic garden.
  • Putting aside N, P and K, plants will also need Calcium, Magnesium, and Sulphur as secondary minerals.
  • At the time of photosynthesis, plants will make use of sunlight in order to break water and carbon dioxide into Oxygen, Carbon, and Hydrogen and these will act as food. Coppe, Boron, Chloride, Iron, <molybdenum, Manganese, and Zinc are the important micronutrients for the plants and they will need to obtain all these from the soil which is surrounding them.
  • The type of minerals you want to add to your fertilizer is completely based on the type of soil in your garden. The soils which are acidic, that is which has low pH seem to lack macronutrients like N, P, K, Ca, Mg and S whereas the soils which are alkaline, that is which are having high pH which have insufficient micronutrients like B, Fe, Cl, Mn, Mo, Cu, and Zn.
  • The soil of the garden which has neutral pH will contain a very good amount of both macro and micronutrients which will help the plants to grow in a healthy way.

Read: Homemade Hydroponic Nutrient Solution.

Fertilizers for tomatoes:

Calcium is mostly loved by tomatoes. Moreover, the excessive growth of leaves will discourage fruiting and blossoming. Because of this, tomato plants will do their best when provided with a very good amount of Nitrogen. Once the establishment of vines takes place, you will need to change over to a fertilizer which is rich in the content of potassium and phosphorus and has a low content of nitrogen. Tomatoes will also have great advantages with magnesium which produces more sweeter fruit when it is supplied in a gentle way as a secondary mineral.

Fertilizers for rose:

There are very few gardening tips which help in the growth of perfect roses. Roses will require continuous attention to them. You will need to take care of their pruning, weeding, training and moreover, feeding. You will need to get the right fertilizer for your roses as it will have a great impact on the quantity and appearance of your roses. You can use coffee grounds and vinegar to provide acid to the soil, banana peels for the sake of potassium, the remaining water after cleaning fish tank can also be poured to the rose plants as they contain high amounts of nitrogen.

The fertilizers which are created from the wastes:

  • There are many common items which are used in the household which will act as good fertilizers than the waste bin-fillers. When you throw items in the dustbin next time, it would be better if you think of using them for your garden instead.
  • You will need to mix the coffee ground with the waste in the yard such as leaves which are dead and clippings of grass for the addition of nitrogen to the soil. As long as they are being mixed with a neutral soil medium, the pH will not change. This fertilizer will be very helpful for plants like roses, azaleas, and hydrangeas which will love to be in the soil which is acidic.
  • Eggshells are the ones which contain calcium in them up to 96%. When they are used as fertilizer, they will play a major role in strengthening the cellular structure and also help in the transportation of nutrients into your plants.
  • If you are growing freshwater fish, make sure that you are not discarding the water after you clean the fish tank. The water which is used from the fish tank contains a high content of nitrogen and trace nutrients which will help in the improvement of the health of the garden. Make sure that this applies only for the freshwater tanks and salt water will be very harmful to the plants in your garden.

Epsom salt for an organic garden:

  • Epsom salts which are also called as Hydrated Magnesium Sulfate will contain two main elements which are required by plants for the maintenance of perfect health.
  • Magnesium will play an important role at the time of photosynthesis and is needed by plants for good functioning of many processes. Seeds will also require magnesium for the process of germination. Sulfur aids plants will have many functions including production of amino acids, growth of roots and chlorophyll formation.
  • Fertilization of onions, cabbages, and broccoli can be done by using Epsom salts in order to get healthy and tasty vegetables. You can also use Epsom salts for tomatoes, roses, and pepper for the growth to be stronger.
  • As a fertilizer which is generally used, Epsom salt is a cost-effective way which will give your garden a good amount of nutrients. The solution which is made of Epsom salt is the best way to restore the levels of magnesium and sulfur in the potting soil medium which is depleted.
  • You can mix one tablespoon of Epsom salt with one gallon of water. Then, start applying it to the garden plants as a foliar spray once in every 15 days. When you are feeding roses, you can use a tablespoon of Epsom salts per one foot of the height of the plant and mix it with one gallon of water.
  • You can spray it one time in the spring when the leaves start appearing and again after the blooming of roses is done. When you are using Epsom salt for vegetables, you can sprinkle one tablespoon of Epsom salt around the seedling when their transplantation is done.
  • For the plants which are in pots, you will need to dissolve two tablespoons of Epsom salt in one gallon of water and make use of this solution in the place of general watering for one time a month.

Vinegar uses for an organic garden:

White vinegar which is plain is inexpensive and also an effective fertilizer for the plants which love acid such as roses, berries, etc. You can mix one tablespoon of vinegar one gallon of water and make use of this solution instead of watering once in three months. Make sure that you are testing the soil before changing the pH. Most of the plants survive in the environment which is acidic, but you should check if the pH is too low as it is very harmful to the plants.

Composting for an organic garden:

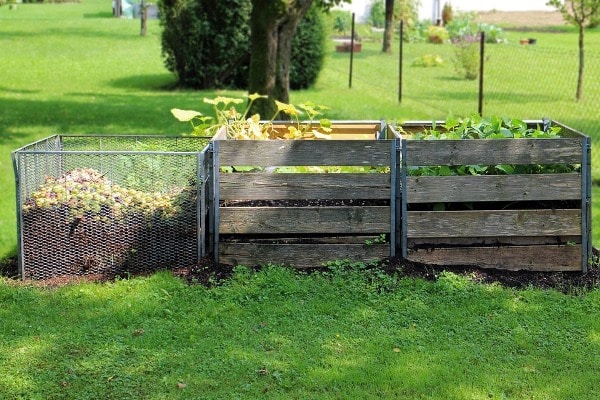
Organic Compost Grinder.
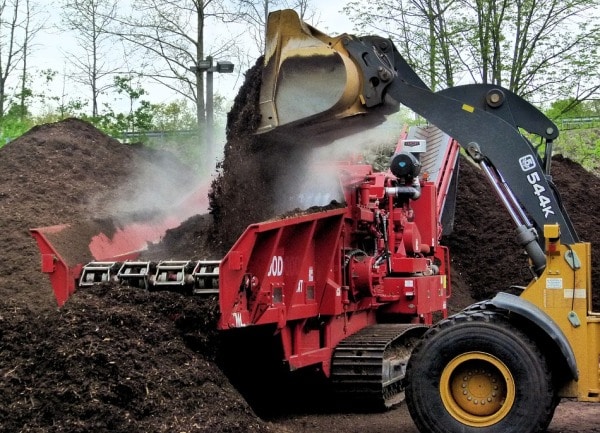
  • Composting is the process in which waste materials are recycled and fed to the garden. This process is becoming very popular these days mainly in terms of organic gardening. The ingredients which will help us make an effective compost are
  • Water and air will help the beneficial bacteria to sustain. These bacteria are the ones which are responsible for the decomposition of the organic matter.
  • Dry brown material which is a source of carbon is obtained from leaves which are dead, dry straw, and other dry waste from garden and yard.
  • Wet green material which is a source of nitrogen such as chicken manure, clippings of grass and plant matter which is a fresh one. You will need to prevent weed seeds in the mixture you are preparing. The compost which you prepared may not be sufficiently hot to kill them.
  • For your composting to be successful, it is very important to maintain the carbon and nitrogen ratio at 30:1.
  • It is very important to cook you compost slowly when there is manure involved as it will kill the pathogens which are harmful and are living in the material which is rotting.

Compost tea:

  • Once the compost is completed, you can add it to the garden directly or you can make it into a tea for your plants.
  • For this, you will need to fill a bucket of 5 gallons with ⅓ rd of the compost. Then add water until the bucket is full. You can leave half an inch from the lip of the bucket.
  • The mixture has to be left to steep and stir it frequently. After four days, the compost has to be strained by making use of porous fabric such as cheesecloth.
  • Put back the solid material in the pile of compost or you can also feed it to your organic garden.
  • The liquid which you prepared has to be diluted to about one section of the tea and ten sections of fresh water. The solution has to be applied directly to the ground or it can be applied as a foliar spray.

That’s all gardeners about Organic Gardening Fertilizers!.

Read: Methods of Seed Sowing.

Rooftop Gardening Ideas, Tips, Techniques

0

Rooftop Gardening Ideas, Tips, and Techniques.

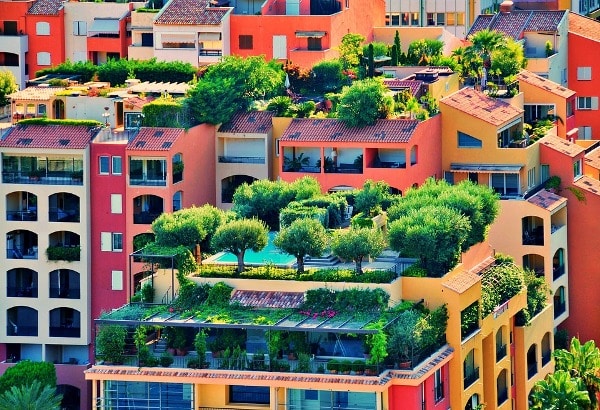
Today, let us get into rooftop gardening ideas for beginners. What is a Rooftop garden? The Rooftop garden also known as terrace garden or balcony garden; it is a garden that is used to grow vegetables, fruits or flowers on the terrace, balconies or roof of buildings. The kitchen garden, a standard in every Indian household, has shifted to the roof due to constraints of space, & called a terrace garden.

A Rooftop or terrace garden is a garden on the roof of a building. Rooftop farming is generally done using green roof, hydroponics, aeroponics or air-dynamics systems or container gardens. Rooftop gardens are man-made green spaces on the topmost levels of industrial, commercial, & residential structures. They may be designed to grow to produce, provide play space, give shade and shelter, or basically be there as a living, green area.

Two main divisions of Rooftop garden types exist, these are extensive and intensive. Extensive gardens require minimal maintenance & behave as another form of roofing material. They are not intended for heavy foot traffic nor do they want to meet any additional safety standards.

The other extreme includes intensive gardens formed with the intent of active human use. These gardens require landscaping & regular upkeep. In some cases, the roof structure must be reinforced during the addition of decking or additional bracing to accommodate the joint weight of soil, plants, & precipitation. Furthermore, intensive gardens may also want to comply with safety regulations regarding decks and public areas on raised structures. These regulations may need some kind of fencing or barrier to being installed with the intent of preventing people from slipping over the edge of the roofline. If you have decided to design a terrace garden, you must have collected the appropriate containers, potting mix, manure, etc. The containers used in the rooftop garden of all sizes, shapes, whether of plastic, ceramic, metal or mud can be used. One should have rooftop gardening ideas for creating beautiful garden.

Rooftop garden design tips:

Roof Garden Design Tips.

Soil and compost: To start with fill the pots with potting mix and include composted cow manure. If you have enough space, you can create your own compost; place the compost bin in a corner of the terrace or roof. This way you will be using all the kitchen scraps for creating the most nutritional mix for the pots. Do not try to begin with seeds. Buy seedlings from the nursery & plant them. This way you will save at least one month, besides saving yourself from frustration because of failure in growing seedlings (increasing vegetables from seeds).

Read: Garden Soil Types and Importance of Soil.

Put the pots in appropriate locations, the sun-loving plants in sun & the shade plants in shade. Most of the vegetables thrive in the sun, but there are a few which grown shade. You may plant a few seasonal plants & a few perennial plants. Put trellises on climbers such as cucumbers, bottle gourd, bitter melons, jasmine plants, and etc. You can train these vines to climb on strings.

Watering: Watering the plants deeply daily, maybe twice in the summers. Put a 3 to 4-inch layer of organic mulch such as sugar cane mulch on the soil. This will keep the moisture inside the soil & also prevent the weeds.

Add some water crystals in the soil while planting or extend them on the surface. Plant drought-tolerant plants to decrease the frequency of watering. Do not grow plants that have deep & aggressive root systems.

The plants need frequent feeding. I feed with liquid fertilizer, high in potassium and low in nitrogen every ten days. High nitrogen will generate excessive leafy growth, while potassium will encourage flowers and fruits. You may buy, a common purpose fertilizer for vegetables and flowers, a slow-release fertilizer or a liquid fertilizer.

Plant carefully

When it comes to rooftop garden plan, ensure you maintain the diversity in the size of the plants. A few large plants, shrubs & small trees, ground covers, annuals must be there. Also, buy containers of different sizes this will provide a great look for your rooftop garden.

Add a focal point

A focal point in the gardening attracts the eyes toward it. A water feature, a tall tree, the attractive arrangement of container plants, a statue, etc.

Do lighting

During the evening, it is very important that your rooftop garden is well-lit. Especially near the stairwell or door, it’s nice to create more bright spots. Moreover, lighting a roof will create it look larger during dusk.

The nice floor is important

Don’t neglect the flooring. Prefer flooring type that fits your budget, suits the climate you live in and accommodate the theme of the rooftop garden.

Rooftop garden ideas:

Several Rooftop gardening ideas are given below;

Edible Roof Garden:

This is one of the most popular ideas to cultivate several edible seasonal plants on a rooftop. It can be more fruitful if you utilize good knowledge of vegetables as well as edible flora. These roof terrace garden ideas will not only fill your house with healthy veggies & fruits but can also work as a profitable business for families.

Cedar Patio Type Rooftop Garden:

A striking form of the roof garden is a design using cedar patio furniture. It will keep you cool in the summer & be comfortable in other seasons as well. This design is gaining popularity nowadays, as one can incorporate attractive greenery, small trees & some brightly colored flowers to make it a dream design.

Rooftop Garden with Lighted Ornamental Plants:

If you are thinking of designing a rooftop with scenic beauty, several lighted ornaments will serve you best. Add some properly cropped ornamental plants to the area & fit some attractive spotlights at different corners in unique colors. Creative lighting can be relaxing & romantic.

Rooftop Kitchen:

One of the most imaginative rooftop garden ideas is to install an open-air kitchen with an amazing garden all around. It is the best option for barbeque lovers & they can install a well-furnished kitchen in this area in order to enjoy a pleasurable cooking experience.

Grow tall plants and trees:

Growing bamboos & grasses is a good combination if you want to make it low maintenance, otherwise, your options are unlimited, develop shrubs and trees.

Create raised beds:

If your roof supports, make raised beds adjacent to the walls is a good idea. You can add wooden raised beds or the ones that are prepared from metal. If you like, you can construct the concrete raised beds 2 feet deep and wide would be a great size, in them, you can even grow tall shrubs and small trees & with the regular maintenance, pruning, and root trimming in every few years can control the plants.

For these raised beds ensure you use waterproofing membrane & lay thick root barriers that can block roots and prevent damage to the roof. One more idea is to create slightly elevated raised beds from the surface that way the raised beds do not touch the surface & roots of the plants may not be able to penetrate.

Read: How to Start a Hydroponic Garden at Home.

Plants suitable for Rooftop gardening:

Roof area can be used to create decorative vegetation or edible garden or to make a low maintenance garden. The rooftop garden is satisfactory to grow various forms of vegetation like shrubs, grasses, annuals, perennials, herbs, vegetables & even dwarf fruit trees depending on what you wish to grow, climate, budget, available space & the functioning of the building.

List of plants that can be grown on a rooftop garden in order to make a perfect look to your roof garden plans;

Dwarf Hinoki Cypress: Yellowish green colors with fanlike foliage are two well-known characteristics of this plant. These plants take a long time for complete growth & demand a regular watering schedule with extended care.

Blue Star Juniper: This Blue star juniper plant shines like a blue star with skinny needles; it can grow up to three feet tall and provides a superior accent to the area.

Kousa Dogwood: This is an excellent selection for rooftop gardens because it can cover a large amount of space & is very attractive. These trees look awesome, with pink color and white color flowers at the peak spring season.

Fanal Astilbe: This is the best choice for shadier rooftop spots. It grows with lovely crimson flowers that usually blossom in the month of July. It grows up to one and a half feet tall & needs properly moist soil for normal growth.

Lavender: This Lavender plant is loved by all for its outstanding scent. Lavender looks amazing with its small height & lovely purple flowers. It can simply be grown in containers as well as in full-fledged beds in a garden.

Vegetable Plants grown in Rooftop garden are;

Beans, Beetroot, Bitter melon, Bottle gourd, Carrots, Cucumbers, Eggplants (brinjals), Lettuce, Okra, Onions, Okra (Ladies Fingers), Peas and Potatoes.

Herbs grown in the Rooftop garden are;

Perennial Herbs Plant, Turmeric, Rosemary, Mint, Annual Herbal Plants, Coriander, Fenugreek, Garlic, and Ginger.

Medicinal Plants grown in Rooftop garden are;

Aloe Vera, Curry Leaf Plant, Stevia (Sugar substitute), Tulasi or Basil.

Fruit plants grown in Rooftop garden are;

Perennial Fruits Plants, Blueberries, Strawberry, Guavas, Lemon, Oranges (Mandarins).

Flowers grown in Terrace or Rooftop garden are;

Arabian Jasmine and Queen of Night Jasmine, both climbers, Begonia, Bougainvillea (climber or bush), Dianthus (Carnations plant, The Flowers of God), Geranium, Gladiolus, Hibiscus, Lavender, Anthurium, Bromeliads, Coleus, and Crotons.

That’s all folks about Rooftop Gardening Ideas and Tips.

Read: Geranium Oil Extraction Process.

Organic Gardening Benefits, Tips, Ideas Guide

0

Organic Gardening Benefits:

Well, we discuss the topic of organic gardening benefits. Organic gardening is the way of gardening which is done by using all the natural resources. The main motto of organic gardening is to not use any sort of synthetic chemicals and fertilizers. Organic gardening strives to maintain harmony with nature by using all sorts of products which are eco-friendly. By inculcating organic gardening at home, you can produce your own food and make sure that your family is living a healthy life. So, we have excellent organic gardening benefits, don’t wait let us grow organically.

Organic gardening benefits:

Decreases the number of pesticides consumed by your family:

Organic gardening will mainly concentrate on the use of the products which are obtained naturally. This will not include any type of pesticides in it. Hence, the crops which are obtained from organic gardening are completely free of chemicals and pesticides. You can lead a healthy life without any sort of worries about chemicals in food.

Organic gardening will offer you with good health as the crops will be free of any sort of ingredients which are toxic and any other synthetic chemicals. The vegetables and fruits which are obtained from organic gardening will not have any residues of chemicals when consumed. The vegetables which come from organic gardening will consist of higher contents of minerals and nutrients when compared to the ones which are using pesticides, chemical fertilizers and herbicides.

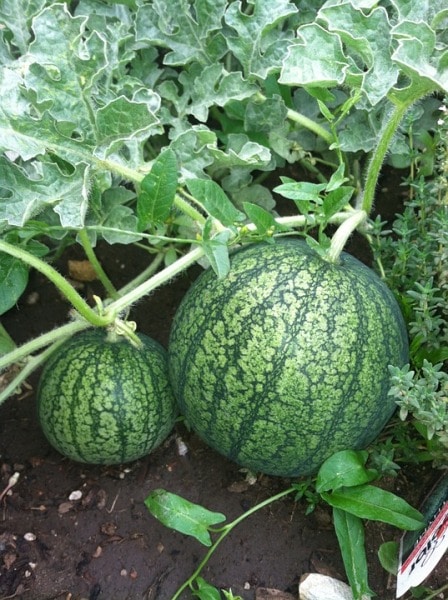
Organic Water Melon.

Urban organic gardening has been increasing because of the pollution which is occurring across the cities. The people living in urban areas have realized the importance of organic gardening as their health is kept at stake due to the content of chemicals in food which they are consuming. People who want to start organic gardening can go through the books which provide organic gardening information.

Moreover, experts in medicine say that there are high concentrations of vitamin C and vitamin D in the food products which are obtained in an organic way. Organic gardening will add an extra benefit of body exercise mainly from manual work which will include plantation, weed removal and harvest. Hence, organic gardening is a meaningful way to enhance physical exercise. The outdoor environment will offer you a connection with nature, air which acts as a stress reliever. 

Read: Home Container Gardening Ideas.

Conservation of environment:

Usage of chemicals on the crops is the main reason behind the polluted environment. The chemicals which are being sprayed on the crops move across the soil into the water. This will cause a risk to the beneficial microorganisms present in the soil. When applying the chemicals to crops, the wind will carry the chemicals into the environment which will, in turn, cause air pollution. Hence, following organic gardening is one of the best ways to maintain an environment which is healthy.

Selection of organic gardening will help in the preservation of the environment. Growth of fruits and vegetables naturally will make sure that the product is healthy and also helps in the promotion of toxic-free and friendly environment. Organic gardening will surely preserve a green environment by ensuring that there is the maintenance of ecological balance and minimizes the disturbances in nature.

Organic gardening also makes sure that the birds, beneficial insects, animals are completely free from harm caused by chemicals in the environment. Organic matter which is used to make the soil will help in the improvement of quality of the soil. Hence, organic gardening will offer the best outcome for maintaining very good environmental health. Organic gardening puts an end to fertilizers and pesticides which will enter into the ground and find a way to enter supply of water.

Decrease emission of greenhouse gases:

Crops which consist of chemicals will release them into the environment in the form of greenhouse gases. These greenhouse gases, when combined with the other forms of impurities in the air, are considered to be a risk to the air which we breathe in. Moreover, these greenhouse gases are the main contribution to the problem of global warming.

Enhances food taste:

The vegetables and fruits which are produced through organic gardening have the taste much better because of their grown which occurs naturally than the ones which are grown in a commercial way by making use of chemical fertilizers and pesticides. The commercially grown vegetables and fruits will not have the natural flavors which are present in the ones which are grown in an organic way.

Saves money :

Organic gardening is the best way to save money. Saving the money is something which each and every individual want to do in their life but it can be done by realizing that this can be done by taking small initiatives like organic gardening. By the means of organic gardening, you can save up to 50% of the money which is used to but fruits and vegetables at markets.

Read: Vertical Gardening Techniques.

Organic gardening tips:

Organic Composting.
Organic Composting.
  • If you are not able to use the compost which is finished for some time, make sure that you are covering the pile by making use of a tarp in order to avoid the nutrients to leave the compost.
  • Companion planting is the best way for the improvement of your organic garden. Few plants will restore the nutrients which are lost by another plant and few combinations will help in keeping the pests away.
  • Make sure that you are drying your herbs at the end of summer by simply tying the sprigs together for the formation of bunches. You need to tie them together by using a rubber band and hang them with their tips down in a place which is dry and out of the sun. The bunches you prepare should be small to make sure that the circulation is happening in an even manner. You can store the dry in canning jars with labels. You can store them as a whole or you can even crumble them. Freezing can also be preferred for the preservation of herbs.
  • Watering should be done in the morning so fungal diseases like powdery mildew and others which are mostly spread when the temperature is highly humid can be avoided.
  • If the growing season is long, then the requirement of compost will also be high in the soil. The soil will also require a number of nutrients and organic matter.
  • Make sure that you are attracting ladybugs into your organic garden by planting the plants which produce nectar such as parsley, fennel, and dill.
  • Coffee grounds are the ones which produce excellent mulch around the plants which love acid.
  • The plants which have thin leaves will require more amount of water in order to survive. The plants which have thick leaves will require less water.
  • Preparation of compost tea can be done by combining equal amounts of compost and water and allow it to sit. This liquid has to be poured directly onto the soil around the growing plants which are healthy. This compost tea has to be diluted to four parts of water to one part of compost when using for the seedlings which are small. Any compost which is not used in any sort of solution can be kept in use in order to make more amount of tea or can be used in your garden.
  • New beds will need a large amount of compost, soil amendments, and double diggings to give an extra boost.
  • The dirt must be cleared from lettuce and leaves of cabbage while they are growing by spreading a 2-inch layer of mulch which is not treated with fertilizers around each plant. This will reduce the weeds from growing.
  • Make sure that you are not using railroad ties in any part of your organic garden. The chemicals which are used as preservatives are now considered to be harmful and also toxic.
  • Jugs used for milk, soda bottles, and few other plastic containers will act as mini covers to cover your plants and also act as a protection from the frost.
  • There are 98% of beneficial insects in the world. Only 2% of insects are harmful.
  • Plucking off flowers very often will encourage most of the annual plants to flower in an abundant way.
  • When you are watering the plants in your organic garden, remember to water them deeply and also perfectly. Watering which is done more often and in a shallow way will train the plants in your garden to keep their roots close to the ground surface which makes them less hardy which will, in turn, make them suffer when there is a shortage of water.
  • Crop rotation should be done every year to decrease the problems caused by pests and diseases as well as the ones which are caused by excess or deficient nutrition.
  • Management of pests starts with the soil which is healthy. It will produce plants which are healthy and are better in withstanding diseases and damage caused by insects.
  • Botanical insecticides are the ones which are derived from plants. These can be more toxic than some of the synthetic chemicals. But they are somewhat better in the long run as they will quickly break down and will not accumulate in the food chain as the synthetic chemicals do.
  • As soon as the sprouting of seed takes place, it should be watered. If the sprout dries, it will eventually die. If the seeds are covered with soil slightly, then they should be sprinkled with water in a gentle manner for once or twice a day in order to maintain moisture in them.
  • Earthworms are the insects which are very much beneficial to the plants as well as soil. They will increase air space by leaving behind the castings of the worm. It would be always suggestible to do everything for the encouragement of earthworms in your organic garden.
  • The soil in the garden which is mulched in a good manner and is amended in a periodic way will need only an inch layer of the compost on a yearly basis just to maintain the quality.
  • To control pests in an organic way, you can build your own soil to encourage beneficial microorganisms and earthworms. Healthy soil will indicate the plants which are healthy. Healthy plants are the ones which would be able to resist the pests and diseases, by decreasing the need for using harmful pesticides.

That’s all for now about Organic Gardening Benefits.

Read: Advantages of Crop Rotation.

Home Container Gardening Techniques, Ideas, Tips

Home Container Gardening Techniques

Let us go through Home Container Gardening Tips, Ideas and Techniques. What is a container garden? Container gardens consist of plants grown in the containers instead of in the ground. Filling pots or buckets of various sizes with a soil-less potting medium creates an economical, simply maintained garden.

How To Start a Home Container Gardening.

Container gardening or pot gardening is ideal for those with little or no garden space. In addition to growing flowers, gardeners limited to a balcony, small yard, or only a patch of sun on their driveway can make a wide variety of vegetable crops in containers. Basil, chives, fennel, thyme, and other herbs also are quite happy growing in pots, which can be set in a convenient spot right outside the kitchen door.

Why container gardening?

There are several reasons why container gardening might make sense for you, including:

  1. You can control the soil mixture, allowing you to grow plants that might not be appropriate to your natural garden soil. Tropical, succulents, and other specialized plants can easily be developed in containers, even if they wouldn’t thrive in your soil or region.
  2. You can move containers around, in effect, “remodeling” landscape whenever the mood hits. Moving containers around lets you take advantage of shifting sun patterns.
  3. Prized plants can be moved indoors when the weather gets cold.
  4. Container gardening saves water, when you water an entire garden, you need a lot of water. Whether you are trying to preserve water to lead a greener lifestyle, or if you are working with partial water supplies, container gardening is a good option.
  5. Container gardening produces healthy plants.
  6. Fewer Pest Issues, You can move container gardens around very easily. This makes life difficult for pests & disease which equates to safety for your garden.

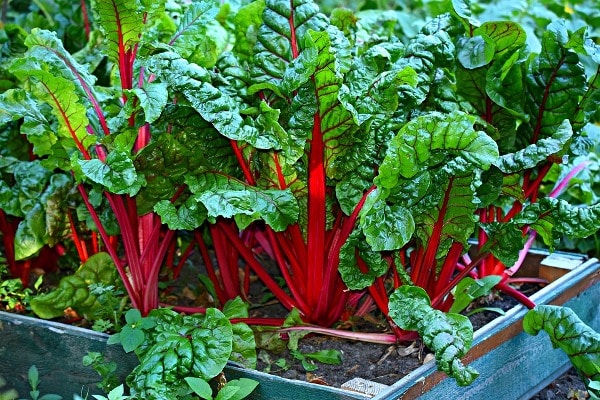
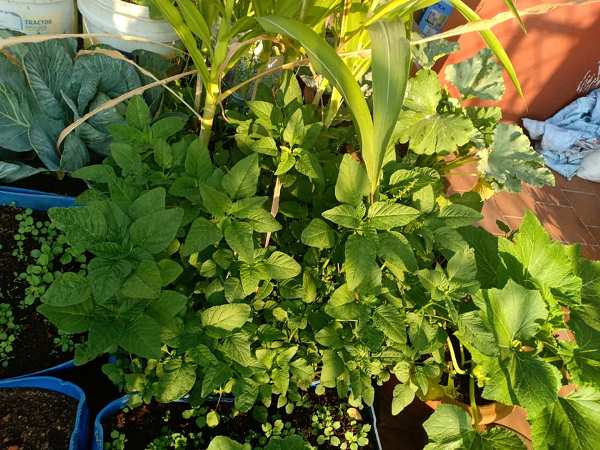
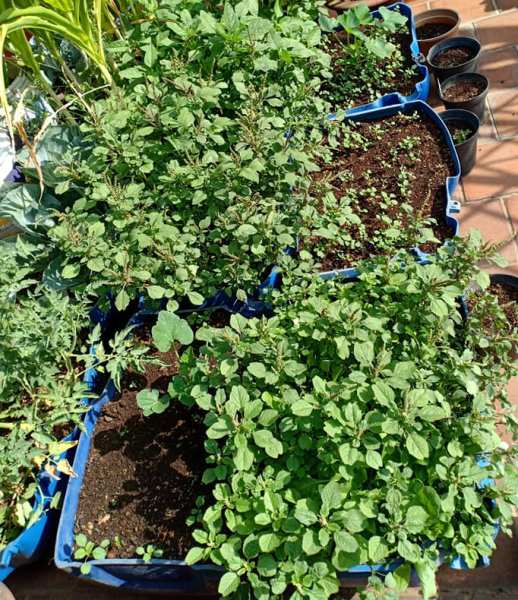
    Growing Swiss Chard in Container.
    Growing Swiss Chard in Container.

Therefore, you can enjoy gardening more instead of spending a large amount of time battling things who want to kill your garden.

What you will need:

Most of the things required for container gardening are;

  • Containers
  • Craft sticks
  • Disposable gloves
  • Drill
  • Hand Trowel
  • Nylon window screen
  • Scissors
  • Soil-less potting mix
  • Water
  • Water-soluble fertilizer
  • Watering can

Container gardening is useful when:

  • You want to move container plants into the house for the winter.
  • Controlling soil quality is preferred.
  • There isn’t much space obtainable.
  • You want to grow year-round herbs & vegetables (or pretty flowers).
  • Adding height, texture & variety to the yard is important.

Type and size of the container:

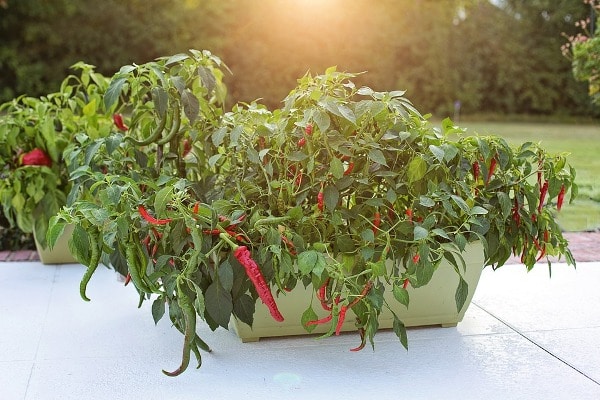
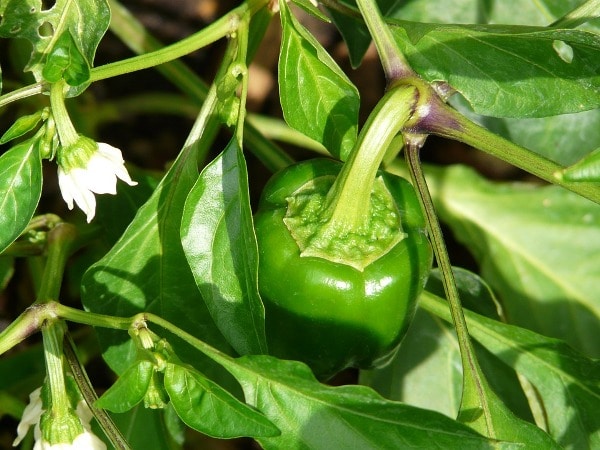
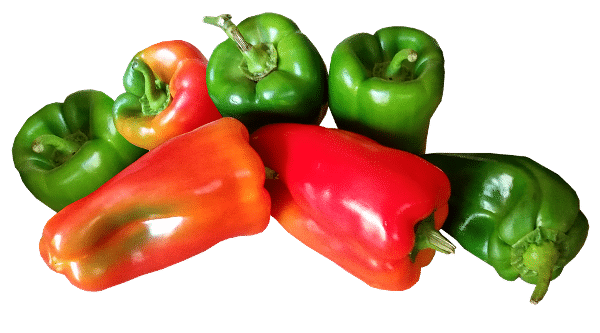
Growing Peppers In Container.

How to choose the right containers:

One of the most vital steps in finding success when container gardening is to pick the appropriate container. The most common pot or container sizes range from 10 inches in diameter to 24 inches in diameter. If you prefer to go with a 24-inch pot, use it for larger vegetables like squash plants or pepper plants.

Terracotta

Terracotta pots are the most regular pots used by most gardeners. Though they are traditional, they contain their downfalls.

These pots can be expensive to purchase, particularly as you purchase the larger options. They can also be heavy to maneuver & are breakable as well.

Ceramic

There are some pots prepared for glazed ceramic. These pots are generally less expensive than terracotta but still carry a decently sized price tag with them. Glazed ceramic is durable & comes in cool colors. Yet, they can be heavy as well & difficult to move around if you need to.

Plastic

Plastic is a great option if you need to start a container garden on a budget. They are durable & inexpensive too. Not to mention, they are also easy to move around if you want to move your garden based on sunlight needs.

Wooden

Most of the people like wooden containers because of their classic appearance. They include a gorgeous look to your container garden with little effort. However, wooden containers can be hard to go when left sitting in the same location for a longer period.

Concrete

If you are looking for a durable planter, you must consider concrete planters. They will end for quite a while. But because these planters are completed from concrete they will need to be placed in a permanent location. They will be particularly difficult to move once placed.

Metal

There are several gorgeous metal planters. They are a great method to add some beauty to your container garden. However, the metal will perform heat. Therefore, metal planters require to be lined with plastic or they’ll cook the roots of your plants.

Window Boxes

Finally, window boxes are a great choice for container garden planters. You can attach them to windows or simply stack them.

Soil requirement:

For the healthy growth of plants, the soil requirement is the key. Provide your plants quality soil so that they’ll get all the necessary nutrients for growth, flowering & fruiting. It is better to buy potting soil, but if you find that it is too expensive, make it at home, also, add a lot of compost or manure in it to develop texture. What is the best soil for container gardening? Most gardeners create potting soil by combining perlite or vermiculite with peat or sphagnum moss. Two other organic materials that you can add to your potting mix are leaf mold and compost, which offer a wide spectrum of nutrients. Potting soils that have fertilizer are available. Although more expensive, they help maintain plants fertilized for the first few months.

Sunlight requirement for container gardening:

Most container plants require at least about five hours of sunlight daily, and they are likely to require daily watering as the soil dries out quickly in the sun.

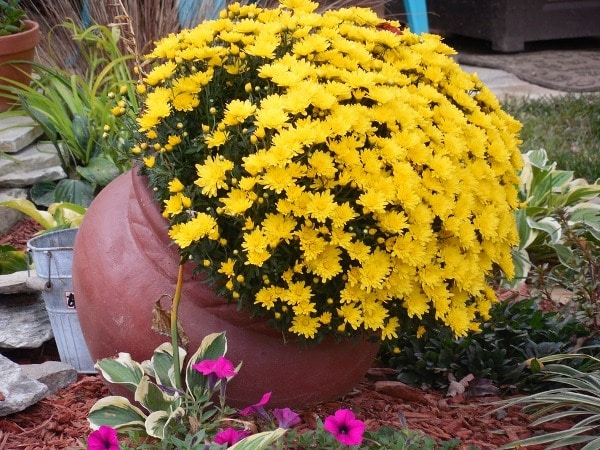
Growing Flowers in Containers-Pots at Home Stairs.

Temperature requirements for container gardening:

Plants grow best in containers at temperatures between 55 and 75°F. Without the insulating earth around them, the roots of container plants get hotter & colder more quickly than their in-ground counterparts. Shift containers inside before it frosts. Give shade (consider grouping pots together to shade each other) when it gets too hot. Some folks “plant” their containers part mode on the ground for insulation.

What you can grow in a container garden:

Container gardening is a compact method of producing an adequate harvest. Here is what you can grow in a container garden;

Herbs, Green beans, Broccoli, Carrots, Cucumbers, Eggplant, Lettuce, Onions, Peppers, Tomatoes, Radishes, Certain corn varieties, Blueberries, and Dwarf fruit trees.

Water requirement for container gardening:

Seeds and transplants need consistent moisture through all stages of growth. Using a watering can or watering hose, slowly add water to the container until it starts to drain from the bottom. Thorough, less frequent watering is more helpful than frequent small watering. Thorough watering assures that the entire root mass has been moistened.

To help prevent fungal diseases, water at the base of the plant & avoid pouring water directly on the leaves, if possible. Make sure the plants have excellent air circulation.

Fertilizer:

About three to four weeks after germination, apply a water-soluble fertilizer to the seedlings. Because most soilless mixes have very few nutrients for plants, this is a critical step. For seedlings, you must dilute the fertilizer solution 50% so as not to burn the young roots.

When the container plants are older, you can fertilize twice a month at full strength. Do not fertilize if the plants are wilted; water first, and place them in a shady spot to recover before fertilizing. Confirm the fertilizer label to see specific recommendations for the type of plant you are growing.

Planting depth:

The roots & soil in the container is known collectively as the “root ball.” After planting, a few small roots at the top of the root ball must always be visible (with the exception of tomato plants, which can grow roots along the stem). Sometimes after watering the plants, the root ball of a newly potted plant will sink. This is why you must plant it a little bit higher. If the root ball does sink, lift it gently & pack more soil around the roots.

Some plants are better suited to containers; these include:

Vegetables: Beans, Beets, Cabbage, Carrots, Chard, Cucumbers, Onions, Peppers, Radish, Spinach, Squash, Summer, and Tomatoes.

Flowers: Alyssum, Bachelor Button, Begonia, Calendula, Candytuft, Chrysanthemum, Columbine, Cosmos, Fuchsia, Geranium, Impatiens, Lupine, Marigold and Roses.

Herbs: Anise, Basil, Borage, Caraway, Catmint, Chervil, Chives, Coriander, Dill, Fennel, Hyssop, Lavender, Lovage, Marjoram and Mint Oregano.

Fruits: Apples (dwarf), Blackberries, Blueberries, Raspberries, and Strawberries.

Planting:

When it is time to put your plants in their pots or containers, follow this simple information;

  • Wash pot or container with warm, soapy water and rinse well.
  • Dampen the potting mix either in the bag (if you bought it) or in the container mixed it in.
  • Partially fill the container or pot with the prepared potting mix. If your container is large or heavy, fill it at the location where it will live. (Do not add pot shards or gravel to the bottom of the container, this will really decrease drainage.)
  • Kindly remove the plant from its original container. If it is root bound, release the roots before planting.
  • Set the plant in the new pot at the same depth as the old container and one to two inches below the rim of the pot.
  • Add soil to the container & pack it gently around the plant.
  • Water carefully with kelp extract or a compost tea to help it adjust to its new home.
  • Then add Spanish moss or mulch to the top to help retain water.

That’s all folks about ‘Home Container Gardening’. Happy gardening!.

Read: How To Grow Roselle Leaves.

Organic Gardening Set Up Guide for Beginners

0

Organic Gardening Set Up Guide

Today, we will discuss the Organic Gardening Set Up Information. Most of the gardeners find it difficult to understand what is organic gardening all about and how to start it. Generally, organic gardening can be defined as a type of gardening which does not use any type of synthetic products such as pesticides and fertilizers. It will make use of only the products which are available naturally for the growth of plants in your garden. There are many benefits of organic gardening. Organic gardening will help to restore the natural resources as it uses them. In organic gardening, your plants will be considered as part of the natural ecosystem which will start with the soil and involves wildlife, water, people and insects. Every person will want to know the food we will serve our families as well as for our environment in order to be safe and also healthy.

You can perform organic vegetable gardening which will help you serve your family with healthy food. An organic gardener will try hard to make sure that his activities in the garden are in harmony with the natural ecosystem and also he aims at reducing the exploitation of nature. He will also make sure that the process is restoring all the natural resources consumed by him and his family. Before starting an organic garden, you can refer to a few organic gardening magazines to know more about organic gardening techniques and how feasible it is to you to maintain an organic garden.

Basics of Organic Gardening.

The basics of organic gardening will need the cultivation which is completely focussed on the creation of an ecosystem which nourishes and also makes the microbes present in the soil to sustain. Moreover, it also benefits the insects instead of keeping the seeds in the ground and allowing them to just grow.

To start with, there are three areas which need to be concentrated for the maintenance of the organic gardening objectives.

Management of soil: This is usually dealt with by making use of fertilizers which are organic.

Management of weed: This is usually managed with the help of manual labor and also by making use of ground coverings which are organic.

Controlling pests: This can be managed by the promotion of the insects which are beneficial and also by companion planting.

The above three are the top important strategies to become an organic gardener. You need to have proper knowledge which is important for organic gardening and you will also need to learn a few fundamental lessons which will help you get reliable results.

Organic gardening at home:

Soil preparation for an organic garden:

The soil is the key resource in organic gardening. Good soil can be achieved through adding of organic matter to the soil regularly by making use of the resources which are available locally in every possible way. If you want your plants to grow healthy, you have to first prepare the soil on which your plants grow.

Just like humans, plants will also need food and food is the one which generally comes from the soil. Hence, you have to make sure that the plants in your garden are getting a large number of nutrients which are fresh. Conditioning of soil in a proper way will give the required nutrients to your plants.

Soil treatments which include chemical will not only spoil the composition of soil but also cause harm to the microbes, worms, and bacteria present in the soil which are important. To start, you need to test the pH of the soil. This test can be done by buying a soil test kit or you can collect a few samples of soil and send them to your local agricultural extension office for testing and analyzing your soil properly.

Preparation of compost:

While you are waiting for the results of your soil samples, you can prepare your kitchen compost from either kitchen waste of through vermiculture. Compost will help in giving your plants nutrients and also helps in the conservation of water. Compost will also be of great help in decreasing the weeds.

You can get compost from the resources which are available locally like leaves, yard garbage, wastes from the kitchen, trimmings of grass. On the other side, compost will always be available for buying from the suppliers of mulch or the centers of organic gardening. You can follow the below steps in preparing the compost.

  • First, you will need the measure space which is of minimum 3 sq ft.
  • After that, you will need to get a bunch of the plants and leaves which are dead.
  • Start adding leaves in the alternate layers, trimmings of the garden which acts as carbon and green materials for nitrogen, for example, leftovers of kitchen and manure, You should separate all of them with a soil layer.
  • Now cover the pile with about five inches of soil.
  • Now turn the pile for each and every addition of new layer to the mixture. While performing this process, make sure that you are adding water to the mixture in order to keep it moist so that there would be an enhancement in the activity of microorganisms.
  • The compost should never smell. If it smells, you need to add few more dry leaves, straw or sawdust and then turn it normally. You need to do this for about 28 to 30 days so that you will have a good compost prepared which is required for your organic garden.

Preparation of Organic garden:

While you are waiting for your compost to get ready, you can start preparing your organic garden. After the local agricultural extension officer gives a positive note about the soil and also about the right soil type, you can start the preparation of your garden area. You can use the gardening tools which are available for the careful preparation of your garden. It is always important to make sure that you are not destroying the soil completely.

Select the right type of plants for your organic garden:

Once you have completed the preparation of your garden, you need to choose the right plants for your organic garden. The sampling of soil and testing it will be of great help in this stage. It is very important to select the plants which will survive well in particular micro-conditions of the type of soil. Select the plants carefully which will survive well in different parts of your organic garden in terms of light, moisture, quality of soil as well as drainage. Always remember that the health of the plants will make them resistant to pests.

Another method of growing plants in an organic way is to choose the plants which are suitable for your garden. The crops which are well adaptable to the climatic conditions of the garden will be able to grow healthier with very less input. Moreover, the crops which are growing and also well adaptable to the area will make sure that they defend the plants naturally from the pests. You will need to pay very little attention to enhance the productivity of the crops.

When you are buying seedlings, make sure that you are choosing the plants which are grown without using any sort of pesticides or synthetic chemicals. Your local market of the farmers is a place where you need to do purchases. Here, you will find the plant varieties and also the ones which are suitable for your locality. Select the plants carefully which look healthy and do not have the roots overcrowded.

Plantation in an organic garden:

When you are ready for the plantation of crops, make sure that you are planting them in beds which are wide. Plantation of crops in wide beds will prevent you from stepping on them and spoiling the surface of the soil at the time of harvest or when you are cutting the flowers. Adding to this, grouping crops will help you by decreasing weeds, water wastage and will make it much easier for you in the application of compost. It will also enable the plants to make use of the nutrients and water available. Make sure that there is a large amount of space in between the rows. This will help in the promotion of circulation of air which will in turn help in facing the attacks caused by fungi.

Read: Requirements for Home Gardening.

Watering:

After the plantation of crops, you will need to start watering them. It is always good to water them as soon as the plantation is done in order to provide them with the water which is much-need. This will enable the plants to continue growing. You should also water the plants every morning as there would be no strong winds at that time. The morning will be cool and the water which is lost in the process of evaporation will be reduced to much extent. Experts in agriculture will always recommend infrequent watering of plants. They must be watered whenever the soil becomes dry. Too much watering may cause rotting of roots.

Watering Organic Garden.

Weeding:

Weeds will decrease the yield of the crop by competing with crops for water, nutrients of soil, light, and space. In the agricultural crops, weeds will decrease the quality of the crop by contaminating the soil. They will work as hosts for diseases or will give shelter to the insects. Though it is tough to pull the weeds manually, it will provide you with the best exercise and fresh air.

Providing nutrients to plants:

When you are working on an organic garden, you will need to check out for the ways which are eco-friendly for the protection of plants from pesticides and fertilizers which are toxic. For this, you will require to ensure that your plants will get sufficient light, moisture, and nutrients which help them to grow in a better way. Also, a garden which is diverse will help for the prevention of pests.

Rather than making use of chemical pesticides, organic gardening will focus on the promotion of insects which are beneficial and companion planting. There will be no need for organic farmers to eradicate the diseases and insects by making use of chemicals. Instead, control of pests is done by keeping pests and diseases below the levels of damage. One of the mechanisms is that the promotion of beneficial insects and the predators of pests such as lizards, toads, bats, birds, and spiders.

The key to succeeding in organic gardening is to grow many varieties of companion crops which support the ecological place of these species. Avoid the usage of synthetic pesticides which will ensure the survival of beneficial microorganisms. Removing the leaves or buds which are infected or infested, uprooting the crops which are infected, crop rotation and manually removing the insect pests and eggs are the best methods to control the population of pests. Cleanliness of the garden is another important tool for pest control to be done in an organic manner.

Sprays or pesticides which are prepared naturally can be used in addition to the pest control methods which are followed culturally. These will be available from the organic garden centers and the products of these will be consisting of the bacterium called Bacillus, minerals such as copper and neem oil. Their capability to break down rapidly has promoted the usage of natural sprays or pesticides in the place of chemical ones. Moreover, there are few vegetables or fruit pests and diseases which are beyond the control of nature. For this, there is a requirement to make use of natural sprays.

Usage of organic fertilizers:

The organic matter and compost will help in the improvement of water and nutrients in the soil. Until this is done, the supply of the nutrients which are needed for the healthy growth of the plants is limited. Organic gardening will need additional fertilizers which are drawn naturally from wood ash, rock phosphate and by-products of animals including manures.

Agricultural lime is also one of the natural products which are added to the soil often for the improvement of the soil quality. This agricultural lime is produced from the limestone which occurs in a natural way and is added to the soil to bring the pH level of the soil to its best if it is too much acidic. pH levels of the soil will change as per the locality. Local extension offices are the ones which will give guidance on the pH levels of the soil by testing them. Most of the soils will not need any sort of additional lime.

Care and maintenance of your organic garden:

There are few organic gardening tips in order to grow your plants healthy. Below are a few practices to be followed:

  • Watering the plants in your organic garden is a must.
  • Make use of compost in place of chemical fertilizers.
  • The manure which is used should be taken from the animals which do not eat meat.
  • Weeding should be done at the right time.
  • Pruning should be done on a regular basis to let proper aeration so that the nutrients and light will be used by the plants in an effective way.

Read: How To Trim and Prune Guava Plants.

Home Gardening Requirements for Dummies

3

Home Gardening Requirements for Beginners

Today, we discuss the topic of Home Gardening Requirements.

The home garden or kitchen garden can be defined as a farming method which combines different physical, economic & social functions on the area of land around the family home. It is a place for people to live in but it also produces a variety of foods and other things for both home use & income.

The main part of a home garden concentrates on three important aspects – the home garden as:

  • The most direct approach of providing daily food;
  • It is a source of income for the purchase of other foods;
  • That means to produce non-food items such as medicinal herbs, spices, and building materials.

The main purpose of the home garden or kitchen vegetable gardening is to provide the family daily with fresh vegetables rich in nutrients & energy. There has been a more or less continuous supply of vegetables throughout the year according to the season. In the kitchen, the gardening emphasis is generally placed on a great variety of crops according to season.

Plant in a sunny location:

Most of the plants need at least 6 hours of direct sunlight per day. The more sunlight they receive, the greater the harvest, the bigger the veggies, & the better the taste.

Planting is a major part of home gardening requirements.

Plant in good soil:

Plant roots penetrate the soft soil more easily, so you require nice loamy soil. Enriching your soil with compost provides required nutrients. Good drainage will ensure that water neither collects on top nor drains away too quickly. What to know about pH level, it’s very important that garden soil has the proper soil pH. A very high or very low soil pH may effect in plant toxicity or nutrient deficiency. A pH value of 7 is neutral; microbial activity is greatest & plant roots absorb or access nutrients best when the pH is in the 5.5 to 7 range.

Some common sources of organic matter include:

  • Compost, homemade or purchased
  • Earthworm castings
  • Manure (should be aged before using in the garden to avoid pathogen spread & risk of burning plants)
  • Fall leaves (use as mulch or till in)
  • Straw & wood chips (best used as mulch on the soil surface)

Plant in a stable environment:

Tomatoes in Home Garden.

Don’t want to plant in a place that’s prone to flooding through heavy rains, or in a place that tends to dry out a lot. You also don’t want to plant somewhere where strong winds can knock over your young plants or keep pollinators from doing their job.

Time for plantation:

Plants, in general, are divided into two groups based on season, i.e. warm season and cool season. Cool-season crops can stand lower temperatures so you can plant them before the soil gets warm in the spring. They can be planted in late summer to yield after the first frost in the fall. Whereas, warm-season crops cannot bear frostiness. It will not produce when the soil temperature is cool so it must be planted after the last frost in the spring & early enough to mature before frost in the fall.

Provide plenty of water:

Watering is key to garden success, especially in warm, dry regions. During the first few weeks after seeds germinate or seedlings are transplanted, watering keeps plants more strong. Deep watering encourages roots to produce deeper in the soil, where they’re better protected.

Weather conditions and the composition of your soil determine when you must water. Clay soil dries out more gradually than sandy soil.  In the sunny, windy conditions dry out soil more quickly than cool, cloudy weather.

Providing frequent water to keep the soil moist and to avoid the plants from drying out, water is a major part of home gardening requirements.

Basic gardening tools

The right tools create works in your garden a pleasure instead of a chore. You don’t use a butter knife to chop up raw carrots, & you shouldn’t use dull or flimsy tools to work in your garden. Basic home gardening equipment includes:

Garden hoe, Scuffle hoe, a Dirt rake, Leaf Rake, Garden Shovel or D handle Shovel and Hand tools.

Read: Complete Gardening Tools Guide.

Suggested plants for a beginner’s home vegetable garden:

The vegetables recommended below are common, producing plants that are relatively easy to grow in home gardens:

Top Vegetables

Tomatoes, Zucchini squash, Peppers, Cabbage, Bush beans, Lettuce, Beets, Carrots, Chard, and Radishes.

Nutrients require for home gardens:

Just like people, plants need nutrients in order to grow healthy & strong (and those nutrients are passed on to us when we eat plants for food). In particular, plants require nitrogen (N), phosphorus (P), and potassium (K). These nutrients can either be derived from the soil (more on that below!) or will want to be manually added.

In-home gardening, one should understand that plant nutrient are a major part of home gardening requirements.

Germinating Seeds:

Germination is affected by 4 environmental factors: water, oxygen, light, and temperature. Manage them correctly & your seeds are sure to sprout. Read your seed packets to recognize the requirements of each crop.

Water requirement:

Drip System in Home Garden.

It’s important to know how much water to provide your seedlings; they will remain dormant if they are too dry & can rot if too wet. Adequate & consistent moisture is ideal. A gentle daily misting with a spray bottle must do the trick. Covering the seeds with a thin coating of vermiculite or peat moss helps.

Oxygen requirement:

From seeds to obtain enough oxygen, your soilless growing medium needs to drain well. Heavy, wet media cause the anaerobic situation, which inhibits germination.

Light requirement:

Plants light requirements vary from crop to crop; where you place your seeds will determine how much light they receive per day.

Temperature requirement:

Temperature affects the number of seeds that germinate & how quickly they germinate. Some seeds have a very specific temperature vary for germination, while others will germinate over a broad range of temperatures. A temperature range 65° to 75°F is typical for most seeds.

Planting seeds and seedlings:

The gardening season is to plant seeds and seedlings out into your garden. For your first garden, I recommend growing everything outside once it’s warm enough, rather than trying to develop your own seedlings indoors prior to the start of the outdoor season. Learning how to start a home garden is busy enough as it is without the added work of indoor seed starting.

Although most types of plants are available as seedlings, some plants are more generally “direct-seeded”, meaning that the seeds are sown directly in the garden once the soil is warm enough. Many gardeners will develop their leafy greens, carrots, and sunflowers from seed directly in the garden, and buy seedlings for their tomatoes & peppers. Sowing seeds, Each seed packet that you purchase for your garden must have specific instructions on it for that crop.

Give attention to the depth of each seed while planting. In general, seeds are planted about three times as deep as they are wide. So, a large pumpkin seed can be planted much deeper than a small carrot seed. Each plant is different though, with some requiring light to germinate & others requiring darkness.

Some of these crops are best grown by setting out started seedlings, but most are easy to develop from a packet of seeds.

Radishes: Radishes do well even in the not-so-great garden soil & are prepared to harvest in only a few weeks. Plant the seeds in spring & fall.

Green beans: Green beans are easy to grow and prolific. If you get a big crop, they freeze well, & they’re also delicious when pickled as dilly beans. Start with green bean seeds after all danger of frost has passed.

Onions: Start with small plants, and if they do well, can harvest bulb onions. If not, can always eat the greens.

Tomatoes: There’s just no substitute for a perfectly ripe homegrown tomato, & it’s hard to go wrong when you start with strong plants. If you obtain a big crop, consider canning or freezing.

Basil: Many herbs are easy to develop, but basil is a good choice because it’s a nice complement to tomatoes. Basil is easy to develop from seeds or from transplants.

Potatoes: Potatoes are an easy-to-grow staple that stores well when kept cool. A simple & low-maintenance approach is to plant potatoes in straw rather than soil. ‘Seeds’ are whole or cut part of potatoes, sold in early spring.

Fertilizing:

The three main nutrients plants need are nitrogen (N), phosphorus (P), and potassium (K). These are available in chemical or synthetic (nonorganic) fertilizers. The numbers of each nutrient show the percentage of net weight contained.

Nitrogen promotes strong leaf & stem growth and dark green colors, such as desired in broccoli, cabbage, lettuce, and herbs. Add aged manure to the soil & apply alfalfa meal or fish or blood meal to increase available nitrogen.

Phosphorus promotes root & plant growth, including setting blossoms and developing fruit, and seed formation. It’s important for cucumbers, peppers, squash, & tomatoes any edible that extend after a flower has been pollinated. Add (fast-acting) bone meal or rock phosphate to increase phosphorus.
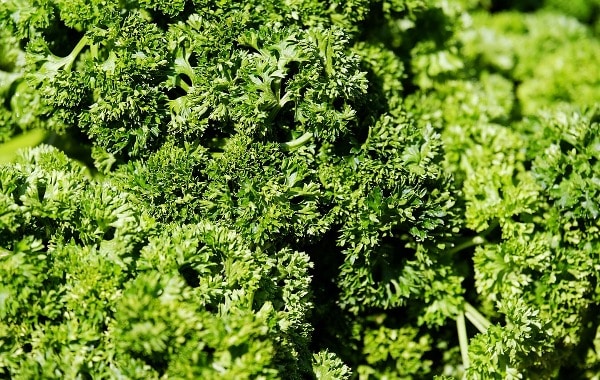
Potassium promotes plant root vigor U disease and stress resistance and enhances flavor; it’s vital for carrots, radishes, turnips, and onions & garlic. Add green sand, wood ashes, gypsum, or kelp to raise potassium.

Harvest season:

The final phase of learning how to start a home garden is enjoying harvest season. This is the phase where you get to enjoy the results of all of your hard work learning how to start a garden.

Harvest your plants in the morning if possible, after the morning dew has dried. The veggies will be fresh & plump with moisture, having not yet been dried out by the hot afternoon sun. They’ll be at the peak of their flavor & perfect for enjoying.

Read: Soil pH Scale, Soil pH Importance.

Vertical Gardening Techniques, Tips, Ideas

0

Vertical Gardening Techniques, Tips, and Ideas

Let us go through vertical gardening techniques and ideas.
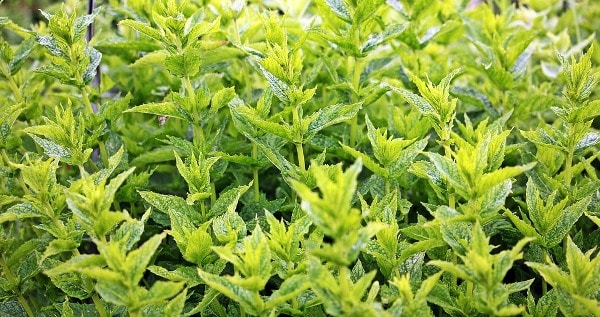
A vertical garden is the one which grows in a vertical direction i.e., upwards by making use of a trellis or any other system of support, instead of growing on the ground. Anything which grows on a trellis including a fence will be considered to be a part of a vertical garden. This particular technique is used for the creation of living screens in between several different areas by providing some sort of privacy for your yard or balcony in your home. In recent days, vertical gardens can also be used for growing flowers and vegetables too. Following the vertical gardening techniques is very easy and a garden beginner can start implementing this.
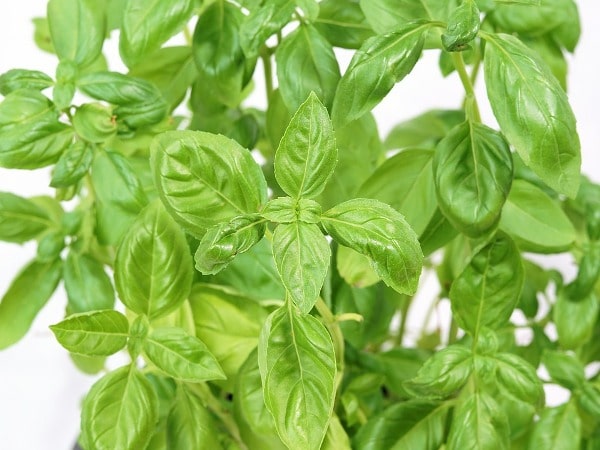
Advantages of vertical gardening:

Benefits of Vertical Gardening.
  • In today’s world, most people do not have outdoor spaces so that we can make a visit to our garden. People who live in apartments will only have very limited area in their balcony for the purpose of gardening and because of this, people need to be very creative to make use of that very little space to its maximum. Vertical gardening systems will use very little space for plantation. You can plant any number of plants by arranging them vertically one by one or by hanging them one over the other. You just have to make sure that there is abundant sunlight available for plants.
  • You also have an option to grow a different variety of plants including decorative and even vegetable plants row by row to give some sense of aesthetic look to the garden. The vertical garden is very much simpler to grow and maintain compared to other types of gardens.
  • The plants will not be grown on the ground which will obviously reduce the problem with pests. This will also protect the plant from the damage caused by the pets which come from the gardens located outdoor.
  • It is a known fact that the plants will absorb pollutants and also any sort of harmful compounds. So for this, when you are growing plants in a vertical garden and that too in a compact method, it will act as a protective cover and provides you with a clean and pure environment to live in.
  • The green living wall which is made for the vertical garden will absorb air pollutants, heat, UV rays, noise, and even bad weather. It will perform regulation of temperature and provides you with a cool climate.
  • The plants which are arranged vertically are easy for reaching. This will, in turn, make fertilization, watering, harvesting, and pruning comfortable for the gardener or grower.
  • The green wall can also be grown outside the windows or you can also grow it a little distance from the door to keep it hidden from the outsiders. It will give you shade in the sunlight and also some sort of privacy from the people who are passing by.
  • A vertical garden can be grown in a container which is wheeled so that it can be kept indoors. This kind of vertical garden can be called an Indoor Vertical garden and this will act as an attractive divider of a room. This particular wheeled container will be of great help for you in moving the garden to the sunlight whenever required.
  • The vertical gardening is one of the types of green architecture which can be made easily by making use of recycled materials such as plastic bottles, a ladder which is broken, shoes, baskets, cans, etc.
  • You can raise the plant varieties with the addition of climbers like cucumbers, melons in the downward direction of the garden and the small varieties of plants on top of it.
  • If the soil on your garden is of poor quality, then there is no requirement to go for high-cost treatment for the growth of your garden. You can always choose vertical gardening by making use of quality soil.
  • In this type of gardening, as the plants will grow in the upward direction, the plants will get exposed to more sunlight which will, in turn, result in a healthy garden.
  • There are many studies which prove that plants play a vital role in decreasing the stress and also promote vegetation in order to have a positive impact on human health.
  • Vertical gardens are like climbing plants on the wall. You can design your wall or any space of your home or balcony into something pleasing and stimulating by inculcating vertical gardening into your lifestyle. Vertical gardening can be used for creating a green wall, decoration of a gate, window boxes, hanging baskets or in anything which will create natural beauty and will also have a very good impact on the person who sees it.

Read: Soil Types of Garden.

Vertical Gardening Techniques and Ideas:

Vertical Gardening Techniques and Ideas.
Planting lettuce vertically:

If you are very much interested in growing lettuce or any other leafy vegetables, vertical gardening is for you. With a minimum amount of space and efforts, you can prepare a vertical planter. This is a very simple thing to do and it also takes a few hours to complete this.

Planting vertically with pallets:

For pallet planting, you can make use of different varieties of plants such as salad greens, herbs, ornamentals which you can grow in the space you have in your balcony or yard.

Creation of a pallet container holder:

You can make this by arranging a pallet board. After that, you can hang as many pots you want on it and place them in your balcony where there is proper sunlight available. This process is very simple and it will also create a large amount of vertical space in your balcony.

DIY Vertical planter:

The DIY vertical planter which can also be called as a DIY stacked planted will make any boring place of your balcony or your garden more attractive. It is very easy to make and it can also be done quickly. It will only need 5 to 6 terracotta pots which are of different sizes, a few varieties of plants which are also your favorite, potting soil and a center rod.

Planting vertically using a picture frame:

This is a very good idea for your balcony garden in order to make it more greener. You can also try by hanging a wall planter of this type in your living rooms too.

Vertical pot holder from pallet planks:

This is very simple. You should just dismantle a pallet board and isolate the pallet planks from it. After that, you will need to nail them on the wall to fix the pots.

Hanging gardens for people living in apartments:

If you are residing in an apartment, then each and every inch of space available is very important and precious. If you have a vertical garden, it will add more amount of space for planting and for your urban container gardening.

Create a hanging gutter garden:

If there any sort of small patio, roof garden or balcony available for you, you can create a hanging gutter garden and grow many varieties of plants.

Arrangement of shelves for keeping pots:

You can also go for the arrangement of the shelves which are old so that you can put your pots there. This will help in the creation of much space in your little garden.

Hanging of terracotta pots:

If you do not have much outdoor area, you can create more space by making use of vertical gardening. You can make use of terracotta pots and hang them with strong ropes.

Read: How To Make Kitchen Compost.

A vertical garden which is cool:

This type of cool vertical garden can be bought or if you have skills of DIY, then you can create one cool vertical garden for yourself. You can make an arrangement of small gardening tools which are useful and watering cans in it.

Plant stand which looks like a staircase:

This will be perfect for the people who are living in cities and have balconies or terraces as the one and only space which is available outdoors. You can put your plant containers on these and start growing herbs or even flowers.

Iron or wood grid potholder:

You can create a grid by welding the rods of iron by making use of any method so that you can hang pots. You can also even paint them in your desired color. The grid can also be prepared from wood.

Herb garden by using mason jars:

If you have wooden boards and mason jars with you, you can create a herb garden to add beauty to your balcony.

Vertical gardening techniques and tips:

  • The entrance of the garden is generally the place which creates the first impressions. Your vertical garden design for entrance should be with some sort of imagination, this entrance can be made as a creative vertical garden. The gate which is attractive will welcome visitors and will also help in sharing some of your personality and mindset too.
  • If your balcony is rented and has a limited sun, then you will have to take into consideration the vertical structures which are really in need for you. You will need to select the materials which are of lightweight and can be removed easily when their job is done or can be moved easily to get access to the sun in the day time. Arrangement of pots on casters by using a tripod for the eatable climbers is an intelligent way to grow food on wheels.
  • Depending on the plant’s position, if they grow in the upward direction, they will obviously block sunlight to the plants which have been growing behind them or shorter than them. For this, you will need to place structures which are vertical such as arbours or tepees where you will need to shade the plants which are under storeyed else if they do not get sufficient amount of sun, they may even suffer. Few plants will love to be in shade or they can also tolerate half shade. You can take advantage of such spaces by starting the plantation of leafy vegetables like spinach, lettuce mainly in the months in which the climate is warm.
  • If you chose to grow a creeper or a vine on a trellis for the creation of more privacy or shade, you need to consider the type of plant you are growing whether you will have to prune it when it matures. If yes, you need to take a call on how much easy it would be to reach the top of the structure. You can read the label of the plant which will help you to select the species which will grow up to a certain height and will not give any sort of work for you in the future.
  • Do not waste walls and fences which will give you blank canvases for displaying your art of the garden. If you are not able to drill into the gate, you can even try by hanging the hooks with planters which are on the top. In the same way, signs and artworks can also be attached with some sort of creative inspiration.
  • The hanging baskets should not be handed very high. If so, it will be very difficult for you to water them and also maintain them. If you have no option about this, then you can invest in a pulley system which will help you to lower the planter when you want to water or fertilize them and later raise it after your work is done.
  • As the hanging baskets are kept overhead, in order to maintain safety, ensure that they are attached in a secure way. You will need to prevent the use of any sort of materials which are of heavyweight and only use plastic or wire. Generally, window boxes are long and narrow and they tend to hold only some amount of soil. Hence window boxes will be best if used for seasonal displays and they also need to be refreshed on a regular basis.
  • You must take into consideration the maximum height the plant would reach when it reaches the stage of maturity. This will have a great impact on the type of structure you are selecting as it will affect the access to watering, maintenance, pruning, and even fertilization. You must keep in mind how much height you can reach and take a call based on that.
  • The weight of the plants when matured will also have a great impact on the selected structure. The structure’s strength should support whatever you are growing. There is no use in growing the crops which are heavy on the fence which is old. The vegetable crops which are heavy such as pumpkins and melons will need some sort of extra care and support. This can be done by tying a small cloth hammock below them till they get ready for harvest.
  • Based on the location of your vertical garden, plants which are not planted in the ground but are exposed to more amount of sun and wind can be watered more often. You can also add some more amount of mulch for the compensation of water in a wise way and select the species of plant in a careful manner.
  • Ensure that you are erecting or installing your structure of vertical support before plantation takes place in order to prevent any sort of damage to the roots once the growth of plants starts.
  • Few plants cannot grow on their own in vertical structures such as tomatoes. They will need some sort of extra care to grow in a vertical manner. If they are trained to grow in the upward direction by making use of appropriate structures such as stakes, cages, trellises with ties or clips which are spaces regularly, they will be much more productive and can also live in a compact space. This will create a beautiful vertical vegetable garden in your balcony.

That’s all guys about Vertical Gardening Techniques, keep gardening!.

Read: Sericulture Training In India.

Gardening Soil Types, Role of Soil in Home Garden

0

Gardening Soil Types and Role of Soil

Today we are into a discussion of Gardening Soil Types. Most brilliants minds on earth spend millions of money and risk their lives in search of slightest possibilities for the life-supporting environment all around the universe. Solar missions are taken seriously and have become measure on one country’s strength and development. Hundreds of high-resolution camera’s and satellites are constantly revolving and being sent as far as they can gaze with those high-resolution telescopes to look for the possibility of life.

But how do we conclude which planet supports life?

They say when this universe was made Lord Brahma (according to Indian mythology) gave three components as life support: water, air, and soil.

Gardening Soil Types.

So all this hard work and capital are being spent to find water, air, and soil all over the universe, ever wondered!!!.

So coming to mainstream we need to know why soil is important for gardening.

Soil is the most wondrous gift of nature to mankind. Development of soil from the earth and the evolution of the human race have gone hand in hand. Soil is a dynamic three-dimensional substance that covers major world’s land surface after water. It differs from place to place, in response to the five factors that form it: climate, topography, organisms, the parent rock below surface, and time. Soil genesis is a slow process, taking nature between 80-750 years to generate one cm of soil.

Soil performs different functions:

Gardening Soil Types.
  • Biomass production
  • Storing, filtering and transformation of nutrients, minerals, organic substance
  • Holding water and moisture
  • Biodiversity sustenance
  • Physical and cultural environment regulation
  • Anchorage
  • Archive of geological and cultural heritage
  • It provides a home for fungi, bacteria, insects, burrowing mammals, and other organisms
  • It is a medium for plant growth. Further reading focuses on this last but not the least function.

What does soil do for plants?

This section will enrich you about the importance of gardening soil. Soil is a dynamic body which renders a number of environmental services, especially to the growing plants.

Anchorage: soil works like a support system for the plant roots extending outward and/or downward through the soil, thereby stabilizing plants.

Oxygen: the spaces among soil particles contain air that provides oxygen and often called air pockets, which living cells (including root cells) use to break down sugars and release the energy needed to live and grow.

Garden Soil Importance.

Water: the spaces present among soil particles also contain water, which moves upward through plants. This water cools plants as it evaporates off the leaves and other tissues; works as a carrier of nutrients absorbed by plant roots;  also helps to maintain cell size so that plants don’t wilt; and serves as a raw material for photosynthesis, the process by which plants prepare their food.

Read: How To Grow Herbs In Your Backyard.

Temperature regulation: soil insulates roots from drastic fluctuations in temperature. This is especially important during the excessively hot or cold season of the year.

Nutrients: soil supplies essential nutrients, and also holds the nutrients that we add in the form of fertilizer.

Habitat for soil organisms: it helps the survival of numerous microorganisms and macro microorganisms through physical and nutritional support which on return increases soil fertility and makes the soil a living body. 

Properties of soil:

Now let’s discuss varies properties which make it so important for the existence of life, it is well-known fact that if plants live, we will live as they are the producers we rely on for breath and food. For the convenience of study soil properties are divided as physical and chemical properties

Physical properties: they play an important role in determining soil’s suitability for gardening. The physical property of soil affects:

  • Supporting capability
  • Movement, retention, and accessibility of water and nutrients
  • Ease in penetration of roots
  • The flow of heat and air
Well Fertile Soil.
Well Fertile Soil.
  1. Soil texture: Soil is composed of both an organic matter (from decomposing plants and animals). The mineral portion of soil is recognized by its texture. Texture refers to the relative amounts of sand, silt, and clay present in the soil.
  2. Soil structure: the arrangement of primary and secondary soil particles. Soil structure usually is described by terms such as blocky, platy, prismatic and angular. This arrangement affects soil properties like soil pores which in return influence almost all the plant growth factors such as water supply, aeration, availability of plant nutrients, root penetration, application of fertilizer, etc.
  3. Pore space: Soil particles rarely fit together tightly; they are separated by spaces called pores. Pores are filled with water and/or air these pores are discontinuous. A well-structured soil has both large pores (macropores) and tiny pores (micropores); for providing a balance of the air and water that plants need. Macropores provide good drainage, and micropores hold water that plants can obtain. This helps to clarify how you can achieve a “well-drained but moist soil”. Air pockets are important because they carry soil air which is as essential as a nutrient, water, and temperature are for plant growth.

Types of garden soil:

After going through varies literature and Google search a gardener often comes across the suggestion that plant should be grown in suitable type of soil, so how does one know what is suitable garden soil?

For this, we are here to help you out let’s see what different types of soil are and how do different garden soils affect the plant growth?

Different types of soil based on their texture:

  1. Sandy soil:

It consists of more than 70% sand and less than 15% clay. It is divided into two classes.

  • Sandy soil
  • Loamy Sand

Sandy or coarse-textured soils are loose, absorbs water rapidly and drain it quickly, it has lower water and nutrient holding capacity, lower organic content and it is also called light soil.

  1. Loamy soils:

Loamy soil is the mixture of sand, silt and clay particles that exhibit properties of these separates in equal proportions. This doesn’t mean that sand, silt, and clay particles are present in equal quantities.

Loamy soil is the most preferred type of soil for the cultivation of plants because of its capacity to retain water and nutrients is better than sandy while its drainage, aeration properties are more favorable than clayey soils.

Loamy soils are subdivided into seven textural classes depending upon which constituent is in high proportion:

  • Sandy Loam
  • Loam
  • Silt Loam
  • Silt sandy clay loam
  • Clay Loam
  • Silty clay loam
  1. Clayey soils:

Also known as fine-textured or heavy textured soil. This type of soil contains at least 35% of the clay fraction. Clayey soil tends to absorb or retain more water, become plastic and sticky when wet, hard and cohesive when dry and difficult to cultivate.

Read: How to Design a Flower Garden.

Clayey soil has, high water and nutrient holding capacity, poor aeration, very slow drainage unless cracked, high to medium organic matter content.

It is subdivided into three textural classes.

  • Sandy clay
  • Silty clay
  • Clay
Soil Types.
Soil Types.

Different types of soil based on soil structure:

Single grained structured: particles are completely unattached to each other as in case of loose sand.

Massive structured: particles are bonded in large cohesive, non-structural mass as in case of surface crust, plough pan, and clay pan.

Blocky soil: promotes good drainage, aeration, and penetration.

Prismatic soil: commonly occurs in subsurface soil in arid and semi-arid regions and in poorly drained soil of the humid region.

Platy soil: Restricted percolation and aeration in the soil.

Spherical soil: formed by biotic activities in the surface horizon and promotes percolation, infiltration, aeration and root penetration in soil.

Other types of soil:

  1. Alluvial soil: rich in plant nutrients but deficient in organic carbon and nitrogen.
  2. Black soil: also called black-cotton soil it is very dark, cracking clay dominated soil. its characteristic black color is due to the clay-humus complex.
  3. Red soil: it is well-drained soil found in semi-arid to warm humid tropical climates. It is slightly acidic to slightly alkaline and has poor organic carbon and P.
  4. Salt-affected soil: these type of soil occurs in arid and semi-arid climates( less than 850mm rainfall).salinity in these soil is due to chlorides, sulfates, and salt developed from weathering from groundwater, irrigation water, and sea. A variety of salt-tolerant crops such as rice, wheat, sugarcane, barley, oats, cotton, karnal grass, Bermuda grass are grown in such soils.

Soil is the epicenter of life on planet earth .its sustainable use; management and conservation are the onerous responsibility of all inhabitants of the earth, it takes around 1,000 years to form 1 cm soil and soil erosion washes it away in less than a year. Hence, sustainable and better soil management is critical for crop productivity. Good management must consist of maintaining the soil’s integrity over time. Poor management can cause soil erosion, loss of soil fertility, deterioration of soil structure hence poor crop yields.

That’s all folks for today about Gardening Soil Types and their facts.

Read: Rainwater Harvesting Methods.

Growing Herbs in Backyard of Home Garden

0

Growing Herbs in Backyard of Home Garden

Today, we are into the discussion of growing herbs in the backyard of your home garden. Growing your own herbs is especially great because they don’t take much space & a little will go a long way into food. There are many types of herb gardens, such as a cooking herb garden, medicinal, ornamental, colonial, and fragrant. Growing herbs are the cornerstone of any delectable dish. The right herbs, complimenting the right meal, are often what creates the difference between good cooks and great cooks.

Choosing a location for starting an herb garden:

Most of the herbs grow at home need two things sunlight and well-drained soil. This means that when considering placing in your yard to plant an herb garden, you need to look for a location that gets 6 or more hours of sunlight a day and that is well drained.

Oregano herb.
Oregano herb.

Herbs flourish under the same conditions that you provide for a flower or vegetable garden. While most herbs will develop in partial shade, it is better if the herb garden receives at least 4 to 6 hours of sunlight a day. A majority of herbs will grow well under a wide range of soil conditions, with the exception of extremely wet, weakly drained soils.  To develop soil fertility and tilth, add several bushels of compost per 100 square feet of soil before planting. Spade it into the soil carefully.

In general, herbs do better in soils of low to medium fertility, so extra fertilizer applications are not needed. Soils with high fertility tend to make lots of foliage that is low in flavor. Where can I Grow Herbs? Natural light: South-facing windows have the brightest light & most hours of sun during the short, cool winter days. Good choices for these locations are plants that come from tropical & semi-tropical climates, such as rosemary, thyme, basil, bay laurel, and oregano.

East- and west-facing windows receive bright sun for about 6 hours in the morning or afternoon, but east windows remain cooler. Good choices include mint, parsley, chives & chervil, which thrive with less intense light and choose the cooler temperatures.

Grow lights: Full-spectrum grows lights are perfect for all herbs. Place plants within a foot of the bulbs or follow the instructions given by your lights. Start by having the lights on for 12 to 16 hours a day for bright-light plants & adjust as necessary.

Classification of herbs:

Herbs are classified either as annuals, biennials, or perennial herbs. Annual herbs are generally grown from seed; they grow, flower, and produce seed during one season, and then die. Biennial herbs develop for two seasons, flowering the second year only. Perennial herbs, once established, over-winter & flower each season. Some herbs are tender perennials; these do not survive severe winters & are best grown as annuals or over-wintered indoors.

Read: Flower Gardening Design, and Ideas.

Soil requirement for growing herbs in the home backyard:

Herbs require a well-drained soil that is not too rich. The soil must have a pH of 6 to 7 and contain a moderate amount of organic matter. Herbs are fast-growing, so your customers won’t have to wait very long to get the tastes & smells they crave. Depending on the type, herbs can thrive in the sun or shade, but the majority of them will need at least 6 or more hours of sunlight a day.

Parsley.
Parsley.

Once the location is decided upon, it’s important to verify the surrounding soil. Be sure that wherever these herbs are planted that they have well-drained soil, a good watering practice & either a bit of compost or fertilizer around them.

If the soil is heavy with clay or is sandy, add an ample quantity of compost to the mix. If the soil is in fairly good condition, working a bit of compost into the soil will help provide it the added nutrition the herbs will need to grow.

However, be sure to avoid composted manures when raising an herb garden. Typically, these are high in nitrogen, which can help create herbs grow more quickly, but it can reduce the flavors they produce.

Green Mint.
Green Mint.

Propagation:

Some herbs are propagated, easy to start from seed, but others take a long time to germinate. Buy slow-growers at a nursery or divide existing plants. In some cases, you can develop new plants from cuttings.

From Seed:

Before sowing any herb, whether in seed-starting trays or directly in the garden, read the seed packet, which will give important information. Herbs that are easy to grow from seed will include:

Basil, Borage, Calendula, Chervil, Cilantro, Dill, Parsley, and Sage.

Basil.
Basil.

From Division:

Perennial herbs can be divided very easily. Use a garden fork to dig up the plant’s root system & either pull the roots apart by hand or cut the root mass into several pieces & replant them elsewhere in the garden. You can also put small divisions in pots to grow indoors through the winter. If the divisions are to be used outdoors, the best time to split falls when they are winding down for the year. When divided & replanted in autumn, plants get established faster.

Perennial herbs that respond well to division include:

Bee balm (monarda), Chives, Garlic chives, Marjoram, Oregano and Thyme

From Cuttings:

Stem cuttings of suitable herbs must be taken in spring or summer when plants are healthy and growing vigorously. Rosemary & tarragon tend to root better in the fall, so use them for cuttings at that time and grow them indoors over the winter. Herbs that are good for cuttings include:

Lavender, Mint, Oregano, and Sage

How to Take Cuttings:

Select stem segments that are tender & about three to six inches long, with at least 5 leaves along the stem. Create an angled cut, just above an outward-facing leaf node. Remove the lower leaves on the stem, immerse the cut end in rooting hormone powder, and plant it about 2″ deep in a 4″ pot of moistened potting soil. And also use vermiculite or perlite.

Cover the cuttings loosely with a plastic bag to create humid conditions & place them away from direct sunlight. Water the plants & water if needed; remove the plastic bag if there seems to be too much moisture. After a few weeks, confirm for new leaf growth, which indicates that the plants are rooting well. Report the plants into larger containers filled with regular potting soil & gradually expose the plants to full sun.

Watering: How to Care for Herbs

Many herbs, particularly those native to the Mediterranean climate, must have loose, fast-draining soil. Soggy soil, mainly in cooler winter temperatures, can be fatal to these plants. Plant rosemary, thyme, oregano & bay laurel in a blend of equal parts of cactus mix & regular potting soil. Allow the soil dry a bit before watering. Other herbs develop well in regular potting soil. Maintain soil slightly moist, but not soggy. Fertilize herbs once or twice a month with a liquid houseplant fertilizer.

Growing Herbs in Backyard.

Some herbs can easily grow at home backyard:

Coriander /Dhania, Spear Mint/Pudina, Curry Leaves/ Kadi Patta, Dill/ Sowa Bhaji, Rosemary, Basil, Peppermint, Chives, Sage, Dill, Fennel, Mint, Parsley, and Sage

Harvesting:

Herbs respond well to harvesting, and will actually grow thicker & bushier with frequent snipping. For best results, harvest in the morning time using a pair of garden shears or kitchen scissors. Never remove more than one-third of the plant, so that it can recuperate & continue growing throughout the season. And, know that herbs taste best before flowering. By pinching back basil as soon as you see blooms beginning to form, for instance, extend the herb’s harvest life.

Drying:

There are a few different drying processes that can use before storing your herbs. The drying process is just as important as the cultivation of the plant as much oils & flavors can be lost during the process.

Air Drying:

Air drying involves simply hanging the plants upside down for about 1 to 2 weeks and is the traditional means of herb drying. This process is favored by most people because as the plant hangs upside down the oils & flavor are pulled into the leaves by gravity.

Place the harvested plants in a paper bag will help them retain their oils while gradually letting unwanted moisture evaporate. Placing them in the dark while the dry will ensure a high flavor herb.

Oven Drying:

Oven drying can be completed using either a conventional oven or a microwave oven. This is done by cooking the harvested leaves for a short period of time, for a conventional oven this is done on a low heat for 2 to 4 hours, for a microwave oven, they are cooked for about 3 to 4 minutes.

Salt Drying:

Salt drying involves placing harvested leaves in a tray of non-iodized table salt for about 2 to 4 weeks. This process can only be used on “non-hairy” leaves but can result in a uniquely flavored herb. After drying, the herbs are then clean, free from any remaining salt, and are then stored in a glass container.

Storing

After the drying process, all herbs must be either ground down to fine powder or they can store in air-tight containers.

For about the first week of storage, it is very important to inspect the stored herbs daily to see if there are any signs of moisture, such as water droplets within the container, or at worst, growing mold.

That’s all guys about growing herbs in backyard of your home garden. Keep gardening!.

Read: How To Grow Dhaniya on the Terrace.

Flower Gardening Design, Ideas, Tips, Techniques

0

Flower gardening design, ideas, and tips

Introduction:

What is a flower garden? A flower garden or floral garden is any garden where flowers are grown & displayed. Planting flowers add color & visual interest to any landscape. A splash of color among trees increases the appeal of outdoor spaces. Additionally, throughout the blooming season, planted flowers provide gardeners with flowers suitable for cutting & bringing indoors saving money that would otherwise be spent at a florist. Flowers planting have environmental benefits. Plants help to remove pollutants from the air. During the process of photosynthesis, the flower’s leaves absorb carbon dioxide & release oxygen. Additionally, planting flowers can help to hold soil in its proper place, reducing erosion & flooding. Growing a flower garden is a beautiful way to explore the world of gardening & create a beautiful landscape for your home. So setting up a flower gardening at home is not that tough.

Flower Garden in Frontyard.
Flower Garden in the Front yard.

Flower garden design:

What is the purpose of a flower garden? While the reason for having a flower garden can be nothing more than for enjoyment & enhancing the landscape, having a focus or theme can create the design process easier. Some possibilities include cut flower, butterfly, moonlight, oriental, water, fragrance, and woodland, a collection of one type of plant or a particular season such as autumn.

Steps for flower garden design:

Select a location:

The best site will be one that gets a lot of sunlight, has rich soil & drains well. Other considerations for sites contain sunny spots along the back boundary, in a corner that hasn’t been planted or behind or beside the garage. Small spaces can hold a set of plants. The basic kinds of flowering plants are Annuals and perennials; As far as gardens are concerned, these are the two basic types of flowering plants. Annuals go through their total life cycle in one growing season. Sprouting from a seed, increasing leaves and roots, producing flowers, creating the seeds and then dying. They are popular with gardeners since, with reasonable care, they bloom their heads off all season. Perennials are plants whose root structures stay alive underground for several years or even decades. The part above the soil may go dormant & die back in winter, but the plant is still alive and will sprout again in spring.

Flower Garden Location.
Soil quality for flower gardening:

Annuals can develop in poorly prepared soil (while a healthy soil contributes to optimum growth), but perennials seldom survive more than one year if the soil is not properly prepared. A rich, black loam high in organic matter is chosen. In the fall prior to planting, incorporate compost, leaf mold, or peat moss to develop soil quality. Spread 4 to 6 inches of the material on the garden & spade it in. In the spring season, before planting, spade the soil again.

Soil fertility and pH requirements:

Generally, flowering plants require a complete nutrient supplement containing nitrogen, phosphorus, and potassium to grow well. The source can be an organic or rock powder produce or a synthetic fertilizer. Some annuals, perennials, and wildflowers will bloom mainly prolifically in rather poor soil. A soil pH range of 6.0 to 6.5 is desirable for most plants.

Bed design:

Using graph paper to design the bed lines & plant placement is the most efficient way to plan the garden. Flower beds can be created by laying flexible garden hose or twine on the ground until the suitable form is obtained or by using a dribble of limestone. Bed lines can be straight or rounded, but curved lines are further interesting. Planning the design with the correct spacing between plants will assure that there is the right number of plants for the design. Stay taller plants to the back of the border, and those that are low in the front. The color choice is personal preference. There are many vibrant primary & soft pastel colors available, so many combinations are possible. Warm reds, pinks, and yellows make a garden appear larger and closer.

Read: Ideas for Urban Gardening.

Propagation:

Flowering plant propagation through from seed, cuttings, or division depending on species. Consult a dependable reference for information on individual plants.

Planting:
Planting.
Planting.

When should you plant flowers? You can start seeds for these and other cool-season plants indoors through early February. Seedlings should be ready for transplant outdoors in March month, depending on the variety. Beginning your year by starting seeds for cool season flowers can effect in a colorful spring garden.

Seed:

Follow seed packet instructions for distance apart, correct depth of planting & proper timing. Timing important because some seeds are not frost or cold tolerant & must be sown when the soil is warm. Seeds sown in the fall or early spring may need freezes to break seed dormancy. Cover the seeds with fine soil & water thoroughly. Biennials & many perennials will not bloom the first year from seed. The fastest-growing flower seeds are those that germinate in 14 days or less & flower within 70 days. These include marigold, nasturtium, annual phlox & sunflowers.

Bulb Planting:

Plant as soon as the bulbs are received from the supplier to prevent drying out, or plant as soon as conditions permit. The ideal time for spring blooming bulbs in September and October month, but bulbs can be planted until the ground freezes. Bulbs found in a forgotten bag can be kept in cold storage, and then planted through a midwinter thaw. Spring-blooming bulbs are planted in the fall so they will have time to form a strong root structure before the ground freezes. Summer blooming bulbs are normally planted on or after the frost-free date in spring.

Depth of planting is generally 2 1/2 to 3 times the diameter of the bulb measured to the bulb’s shoulder. A small deeper in sandy soil, shallower in heavy soils. Individual recommendations for tubers, tuberous roots, & rhizomes do not follow this rule.

Water requirement for flower garden:

All plants require water to grow. For most flowers, one inch on clay soils to 1 1/2″ on sandy soils is enough water for garden beds each week. Use a rain gauge to verify how much rain has fallen, and reduce irrigation by that much. Ideally, water must be applied in the early morning. Water thoroughly so the soil is moistened to at least eight inches deep. Frequent, shallow sprinkling encourages shallow root systems & disease development. Some plants are tolerant to very tolerant of dry rising conditions once established.

Read: Compost Making From Kitchen Waste.

Mulching:

Organic mulches such as grass clippings or inorganic mulches such as black polyethylene weed barrier with slits cut from plants, help maintain even soil moisture and temperature & deter weeds. A small extra fertilizer when using wood mulches offsets the nitrogen used up in the decomposition of the mulch. Sometimes organic mulches harbor pests, such as earwigs and slugs, but this disadvantage is generally offset by the advantages of using organics. Mulch depth must not exceed two inches.

Growing methods:

Lightly scratch the soil surface to check to the crust. Remove weeds to reduce competition for water & nutrients. Take care not to damage the rising roots of desirable plants.

Flower gardening ideas:

Best Ideas for your Garden.

Flower bed with clay pots:

When it comes to convenience, nothing beats flowers planted in clay pots half-buried in a flower bed of gravel. Bulbs do fantastically well with this scheme, with these party-colored tulips.

Flower shaped floral garden layout:

Why not have a flowerbed shaped like a flower? Plant pink begonias for the petals, blue forget-me-nots for the center & a prostrate green plant such as Hacquetia for the curving stems. Make sure to maintain everything trimmed and tidy.

Tile deck with built-in flower beds:

A homeowner who is thinking of adding a deck must think about one with built-in planters. In this case, the deck has a tile floor, but planters can be built into decks made of wood. These beds delight the eye with pure white roses contrasted with purple, lavender & butter yellow sun drops.

Raised block flower and plant bed:

A raised bed made of pre-cut blocks & pavers makes tending to the plants easier, especially if the gardener is getting on in years. Plant some ornamental grasses, turf lily, chrysanthemums, asters, thrift & perhaps a small, ornamental tree.

Perennial flower bed for summer-long blooms:

A flower bed filled with perennials is now the thing for blooms that last the entire summer then returns year after year. Try a flower bed with a serpentine border dominated by pink begonias edged with smaller white begonias. Break up the pink & add height with discreet plantings of boxwood, barberries, daylilies and tall, orange canna lilies.

Gravel yard with plant bed:

A bed in a gravel yard lets the gardener indulge in all kinds of colors, heights & textures provided by aloe and agave plants, ornamental grasses, sedges & a rosemary plant allowed to grow to shrub-size. Blue gravel used both to separate the bed from the yard & as mulch brightens the colors of the plants.

Flower gardening design tips:

Some Tips for Gardening.

Some of flower garden design tips are given below;

  • Most plants are best kept outdoors where they can obtain the most direct sunlight.
  • Flower bed size: Make your flower beds wide enough to include flowering shrubs such as hydrangeas or rhododendrons, and even small flowering trees. Try not to maroon woody plants in a sea of lawn they look better incorporated into the planting beds.
  • Wider beds that are at least five to six feet wide are more attractive & give more planting opportunities for that lush, layered look you’re after.
  • Give individual plants enough space; Place plants about as far apart as each plant’s final spread. For example, a perennial that grows 24 inches wide must be about 20 to 24 inches from its neighbors.
  • Choose a potting soil that includes an organic nutrient source whenever possible. This provides plants with a slow-release source of nutrients throughout the gardening season & skips the synthetic chemical fertilizers that can burn tender roots or lead to leaf tip burn.
  • Add fresh mulch to flower gardens every year. A two to three-inch layer of mulch keeps weeds from sprouting and helps the soil retain water, so you’ll be weeding and watering less often.
  • To keep container gardens from looking too busy, stick with just one or two main focal points per container & surround those featured plants with simpler textures, colors, & forms.
  • The potting soil and compost mixture you used to fill the pots contains nutrients, should still add supplemental fertilizer every 3 to 4 weeks throughout the growing season.

That’s all folks about beautiful flower gardening at your home, keep gardening!.

Read: How To Grow Lettuce In Pots.

Kitchen Compost Making Process Guide

0

Kitchen Compost Making Guide:

Today, let us talk kitchen compost making process.

Homemade nutrients for Kitchen Gardening:

Many of us are eager to eat fresh and organic vegetables that are grown at our own home. However, it is easy to set up the kitchen garden, it may be difficult to maintain it as many of us are unaware of nutrients and minerals that are essential for kitchen garden plants. Like humans, plants also require minerals and nutrients in specific quantities at regular intervals of time. It is easy to prepare homemade nutrients and minerals from kitchen wastes for plants at home with no minimum investment of money. Homemade plant nutrients and minerals are known as Kitchen compost which is the Kitchen waste directly into the garden. It is however easy to prepare Kitchen compost. It can be prepared using the daily kitchen waste at our home. In this post, we will let you know the steps to prepare Kitchen compost and How to apply and when to apply the Kitchen compost to the Kitchen garden plants.

Step by step Procedure to make Kitchen compost:

  1. Dump dry leaves into a 20-liter bucket up to half an inch. The size may vary depending on the availability of the container. More the size, more the duration required to prepare the Organic Kitchen Compost.
  2. Make a short hole on 4 sides of the bucket.
  3. Add coco pit that is available at the nearest coconut shop up to quarter the bucket.
  4. Then, add dry leaves or dry waste which are left out in the kitchen.
  5. Dump the Kitchen waste into the bucket completely. If possible, add in a 1:1 ratio of veg and nonveg wastes. However, you can also add dry waste.
  6. Finally, add waste decomposer or organic kitchen waste of the previous compost.
  7. Within a period of 45 to 50 days, the Organic kitchen compost gets ready. Turn upside down the compost in the bucket twice or thrice in weekly intervals.
  8. Cover the bucket with a thin layer of Coconut pit.
  9. We can get to know the kitchen compost is ready when we get the black sweet and foul smell.
Kitchen Waste.
Kitchen Waste.

Large scale Organic kitchen compost preparation:

It can be prepared in any private or government institutions or colleges. The wastes from the kitchen and daily foods are collected and dumped into Compost bin or compost pit prepared at the backyard of the institutions. It may be prepared in drums or dug pits. We can also add the dry leaves and stubbles to those pits. This compost is useful for application to the landscape plants in their own organizations. Such type of organic composting is nowadays followed in many institutions and organizations in urban areas.

Organic Compost.
Organic Compost.

Application of Organic Kitchen Compost at home

We can apply organic kitchen waste to various types of plants that are grown at our home. The may include Terrace gardens, Balcony gardens, Backyard gardens. However, we can also sell those Organic kitchen Compost to various other domestic kitchen gardeners only when we produce the Kitchen compost in bulk quantities.

Read: How To Grow Mosquito Repellent Plants.

How to apply Organic Kitchen Compos to the Terrace or Balcony garden

Organic compost contains almost all the minerals and nutrients that are required for the plants grown at home. The kitchen compost may contain major nutrients like N, P and K. It also contains minor nutrients like P, Bo, Mg, Ms, S, Ca and others.

Nitrogen in Kitchen Compost

Nitrogen is the major important nutrient that is required for the healthy growth of the vegetable gardens. Nitrogen is the element that is required in large quantities for the Vegetable garden plants. N is responsible for the growth and development of the Kitchen garden plants. In addition, the formation of new leaves and shoots also depends on the availability of N.  Depending on the quantity of N required for the Kitchen garden plants, apply the prepared Kitchen compost as side dressing after germination of plants. Never go for the huge dosage of the Nitrogen to the plants. Nitrogen is present in kitchen wastes fruits and vegetable peels, Coconut husk, paddy grains, and fried items.

Phosphorous (P) and Potassium (K) in Kitchen compost

Next to N, P and K are the major nutrients that are required in large quantities to the Vegetable garden plants. P and K are the nutrients that are necessary for the functioning of the cells. P helps in avoiding major loss of water from the plants. Potassium or K helps in making the plants resistant to various invasive pests and diseases. We have to apply the p and k to the kitchen garden plants in order to avoid wilting of the pants. The deficiency may lead to the weakening of the plants and may also lead to the death of the plants. P and K also help in flowers and fruit or vegetable setting in the Kitchen garden plants. However, never ever apply these nutrients P and K in huge quantities that ultimately leads to the death of the Kitchen garden plants.

N, P, and K are rich sources in Kitchen wastes like pulses and cereal wastes.

Ca, Mg and S

These micronutrients are also present in the Kitchen compost. However, they are available in fewer quantities as compared to the major nutrients like N, P and K. Calcium is necessary for cell division. Magnesium helps in the development of pigments like chlorophyll that assists in photosynthesis of the plants. Sulphur helps in the development of strong and disease resistant roots of the plants.

Other Micronutrients

They may include nutrients like Manganese, Iron, Copper, Zinc, Boron and other nutrients. They are required in a minute or fewer quantities than any other nutrients. The Kitchen, however, contains all these micronutrients as we prepare them for the Kitchen waste.

Precautions to be taken in preparing Kitchen Compost

  • Stir or turn up the compost at regular intervals.
  • Make sure to add Coco pit at the base and top of the Kitchen compost bin.
  • Never add plastic covers or plastic containers to the Kitchen compost.
  • Also, ensure not to add any electronic waste to the Kitchen compost.

Conclusion:

These are the information on preparing Organic Kitchen compost at home. The kitchen compost is almost useful in every household who goes for terrace gardening or kitchen gardening or vertical gardening or any other urban gardening procedures.

That’s all for kitchen compost making, hope you have happy kitchen gardening!.

Read: How to Grow Organic Turmeric.

Growing Mosquito Repellent Plants in Home Garden

0

Growing Mosquito Repellent Plants in Home Garden

Today, we are into growing mosquito repellent plants in your home garden. My apologies to almighty, our creator but certainly mosquitoes are the most irritating livings ever existed, especially in summers when you wish to open your windows to fetch some fresh air but these annoying uninvited guests’ bumps in. During that one-minute advertisement break, you will definitely come across 2-3 advertisements about mosquito repellents sprays and coils as the summer and springs arrive they start gaining more popularity. But there are concerns about the potential toxic effect of these, especially when used by children.

They say where everything fails nature comes at rescue.

So there are biological, natural ways to ward off mosquitoes away besides inhaling poisonous gases of mosquito-killing coils and drowning yourself in mosquito sprays. Few plants help to repel mosquitoes and other insects and they are easy to grow too.  Welcome these plants into your garden for not only their colorful display and fragrance but also their ability to keep those uninvited mosquitoes out.

As we are constantly working to deliver facts about miracles of nature for your use. Today we will discuss plants which are easy to cultivate and having mosquito repelling properties.

Growing mosquito repellent plants in the home garden is not rocket science and a novice gardener can easily do this.

  1. Marigold :

Gardener’s favorite and commonly available plant which is often seen in almost all gardens as an ornamental border plant. These are the hardy annual plants with bright orange to yellow flowers. Marigolds have a distinctive smell that deters mosquitoes. This has a scientific reason behind it; researchers found that marigold plants have several compounds with insecticidal properties, including volatile chemicals called thiophenes. These killed the larvae and adults of both Aedes aegyptii the mosquito that carries the malaria disease, and Anopheles stephensi, the mosquito responsible for carrying yellow fever. Marigolds can be easily grown in containers, pots and you can also place them near your terrace, balcony or entrance to your home to keep nasty mosquitoes away.  Many Asian countries use marigold wall hangings and garlands for decorations.

Marigolds prefer full sunlight and reasonably fertile soil you can raise marigold plants using seeds or seedling which are easily available in gardening stores and for next season you save your own seeds simply from mature marigold flowers. Besides being mosquito repellent it also wards off preys of tomato plants such as tomato hornworms, whiteflies, aphids, and thrips. Its beauty, easy cultivation, and mosquito repelling quality make it a perfect garden flower.

  1. Lemmon grass and Citronella:

Cymbopogon citrates work as a great mosquito repellent. It contains citronella; a natural oil that repels the mosquito or insect. This compound found in long needle leave leaves of the plant gives strong citrusy scent. Lemmon grass has gain popularity fir enriching flavor of different dishes and drinks because of its refreshing lemony scent. Often lemongrass and citronella are more cousins. They almost look the same, they grow the same way, and as essential oils, they are processed the same manner.

Lemon Grass.
Lemon Grass.

But they differ in their botany; Citronella has pseudostems that are reddish in color. Lemongrass, on the other hand, is green. If you are planting both kinds of grass in your gardens, you should know these so that if you’re picking Lemongrass for tea time, you won’t mistake Citronella for it.

Read: Ideas and Tips for Urban Gardening.

Citronella is the most common ingredient used for the formulation of the range of mosquito repellents you can see variety of advertisements of flashcards or incense sticks claiming mosquito killing ability, are being sold as “citronella incense sticks”  because citronella aroma is strong and it masks other attractants to mosquitoes and this scent fulfills the consumer preferences.

Lemmon grass and citronella can be grown directly in the ground for better spread or in a large pot with proper cutting because this grass grows long up to a height of 5-6 feet. You can grow it in your garden, backyard, and balcony and even in your rooms in small planters but with proper arrangement of sunlight. You can propagate it simply by growing stalks of the grass to a different location with full sun and well-drained soil.

  1. Basil:
Basil Plant.
Basil Plant.

Basil is a warm-weather; fragrant herb that is especially known as a culinary herb as it adds tastes in Italian dishes—and let’s not forgets homemade pesto! Along with this basil is dual purpose. Plant some basil.  Not only can you have delicious fresh herb on hand to add to all of your favorite recipes you can also have you will have a quick and easy mosquito repellent. Many expert gardeners recommend trying lemon basil or cinnamon basil to ward off mosquitoes. The pungent smell of the basil leaves is warding off the mosquitoes. Basil is one of the easiest herbs to cultivate due to its fast spreading habit. For growing basil, you can simply plant seeds or transplants and it will yield an abundant harvest within weeks. Basil requires well-drained warm soil and lots of sunlight to thrive. You can easily grow basil in containers, or in the garden, alone or with other flowers.

  1. Rosemary:

    Rosemary Mosquito Repellent Plants.
    Rosemary Mosquito Repellent Plants.

Rosemary is a perennial evergreen shrub well known for its essential oil. Rosemary is an easy maintenance crop and can grow all over the world but it performs well in colder regions because it has excellent ability to withstand frost. Rosemary has a woody stem and linear leaves which are highly aromatic, its typical woody scent is exactly what keeps mosquitoes and other pests away. You can enjoy its scent without letting the mosquitoes disturbing in containers or in the garden by pruning it into all sorts of shapes and sizes and it also makes a great border plant. For its propagation use of seeds is less preferred because of low germination, cuttings are best-suited propagation practice.

  1. Lavender:

One of the important commercial plants. Lavender is a perennial aromatic herb with silvery-green foliage, upright beautiful flower spikes. Lavender is best known for its aromatic and several medicinal properties. Lavender can be grown in garden beds or in pots it can also beautify your garden when used as an informal hedge. Expert gardeners prefer lavender for its mosquito repelling properties because of the presence of camphor content in the plant and even it is argued that lavender oil hinders a mosquito’s ability to smell!. They are various lavender-based products available in the market so cultivating lavender may fetch you good bucks. Lavender is a temperate plant and it can tolerate drought and frost conditions though plat requires good sunlight as it is directly correlated with its yield and oil content. Propagation of the plant can be done by seed, rooted cuttings, and layering.

Lavender Plants.
Lavender Plants.

These were the different plants that can be grown for repelling mosquitoes but only planting do not completely stop these fellows to enter your space.

Some additional points to keep in mind:

  • Plucking the leaves of these plants and rubbing their oils directly onto your skin can amplify their positive effects on repelling mosquitoes. Plus, the scent that leaves behind is another add on.
  • Mosquitoes did not come alone they gate crash with family. For preventing mosquitoes from reproducing in your yard the best way is to get rid of all standing water. Everything that can hold even the smallest amount of rain or any sort of water must be removed or turned over.

So, we have learned of growing mosquito repellent plants, happy gardening!.

Read: Plant Tissue Culture Techniques.

Urban Gardening Ideas, Tips, and Techniques

0

Urban Gardening Ideas

Let us talk about the Urban gardening ideas in India, Techniques of the Urban garden. Urban gardening can be described as a process of growing different types and varieties of plants in an urban environment. This type of gardening can also be termed as urban horticulture. Several concepts of gardening come under urban gardening like container gardening, community gardening, etc.

There is a lot of food produced across the world and we still see people dying out of hunger. Due to the growing population, there is a reduction in the growth space which gave human beings an opportunity to grow their food for themselves. Urban gardening will be of great help to many people to grow their own food which helps them to be healthy as well as social. In the future, we mostly see urban gardening as a primary source of gardening and this is also a good thing. One must have proper urban gardening ideas to establish a beautiful garden.

Benefits of Urban gardening:

Urban Gardening Benefits.
  • Urban gardening will provide a source of food locally.
  • This will also bring together several families or communities.
  • This will educate the children living in urban areas to know about the origins of food.
  • This type of gardening will add green spaces across urban areas.
  • This plays a major role in the prevention of soil erosion.
  • This will reduce the severity of stormwater runoff.
  • This will help in the filtration of air and rainwater.
  • This will also decrease the severity of heat in urban areas.
  • Urban gardening will help in the creation of leisure and helps build up recreational places for human beings.

Urban gardening ideas for beginner:

Urban gardening is not a new thing. It has been here for centuries. The things which are new to this urban gardening is that irrespective of the size of the home, people can grow food for themselves using urban gardening.

Backyard permaculture:

This backyard permaculture is very famous in the suburbs. This is a very good idea for the creation of an ecosystem which is sustainable within your backyard. In this type of gardening, a combination of animals, plants and the micro-climate is done. The gardeners will try to create an ecosystem which is sustainable which will, in turn, provide space for relaxation, enjoyment and even harvest food.

Raising Chickens backyard:

By producing chicken on your own, you can decrease the dependency on industrial agriculture which is mostly done in inhumane conditions. This method of raising chicken in backyards will make you quickly enter into urban gardening without even spending much money. Adding to this, there is no need for much space to so such type of gardening. The chickens will need little space for the eggs and meat which they produce and these are even easy to maintain.

Read: A Guide for Vegetable Gardening On the Terrace.

Container gardening:

In this type of gardening, different types of containers are used such as old tires, buckets, window boxes, barrels, raised beds, watering cans, shoes, etc. These are all used to grow different varieties of plants for the sake of attraction or food.

Indoor gardening:

When there is no availability of decks, patios, balconies or yards for your home, indoor gardening comes into the picture. In this type of gardening, growth of plants can be done in a container as in the container gardening method including the sun houses and indoor greenhouses.

Community gardening:

This method of gardening mostly uses private or public spaces which are located outdoor for the cultivation of gardens wither for the sake of food or relaxation. This will be a great idea for people who have no outdoor spaces.

Guerilla gardening:

This is a somewhat more subversive form of urban gardening. This is a method of addition of plants to the public spaces which do not belong to the gardener such as median, beside a road or highway, etc.

Green roofs:

The roofs which are designed with a medium of growth for the sake of plant cultivation are also a type of urban gardening and this can be used for growing food, trees and other varieties of plants.

Composting:

Composting can be done irrespective of the place and most of the kitchens will save almost 35% of the trash by implementing the method of composting. The traditional bins of compost which are kept outdoor will help in maintaining the garden with soil which is nutritious. Even the gardens which are maintained indoors can make use of composting with the help of worms. There are several options for this and composting is considered to be the best natural and organic way in order to build soil irrespective of the garden type.

Tips and urban gardening ideas:

Tips For Urban Gardening.

Plants will need affection and care for the purpose of growth. The main requirements of a plant to grow are sunlight, water, and light. There is no requirement for the plants to be planted only in the ground. They can also be grown in several ways like containers, tires, etc.

Read: Tools for Home Gardening.

  • Sunlight is very important for the plants to grow in an urban garden. Always ensure that you select a place where the plant will have access to sunlight for at least 8 hours a day.
  • The growth of plants can also be done on a roof, patios, window boxes, and even in the balconies with the help of window baskets.
  • The depth of soil is a very important factor. The plants which are shallowly rooted will need a minimum depth of 6 inches if their height is 1 foot, whereas the plants which are deep-rooted will need a soil depth of 1 foot.
  • Drainage is also an important factor as the plants which are potted should also have a way for the water to escape. Always ensure that the pot which you have selected has holes of drainage to it.
  • Content of soil is very important. It is always better to go with the potting soil rather than the ground soil as potting soil will be lighter and also helps in draining excess water in a better way.
  • Watering the garden on a regular basis is also very important. The containers must be soaked in water completely whenever you water, but make sure that you are not over watering the plant. Also, remember to dump out any sort of excess water in the saucer which is kept under the plant for the prevention of root rot.
  • Always remember to choose the right plants for gardening.
Vertical gardening:

The urban gardeners will not have very big balconies to grow large varieties of plants. But there is a way to make your garden look beautiful. If you have a small balcony, you can go for vertical gardening where you can make use of stack planters, vertical wall planters and hanging baskets for creating an excellent balcony garden.

Wall pocket:

This is another idea for urban gardening. Here, you can include different sizes of plants from filler, thrillers, and spillers without any big commitment. You also have an option of moving it to your desired location.

Railing:

For the people who love to sit in the balcony and have a private space, the incorporation of plants can be done to hide the wall which will not only make it more pleasing to look but also to sit and relax. This will also avoid your neighbors to peep in into your balcony as it will all be covered. The best way for the railing is to grow climbers like jasmine, honeysuckle, vines like passionflower or edible plants like beans, gourds, etc in your balcony garden.

  • If your balcony is so small that you only have space for a table to put, then you can create a succulent bowl. This will look stylish and the cost of maintenance is also less. This can include several plants in very less space and also needs little watering. In order to create a succulent bowl, you will be required to fill a bowl with the potting medium which has been specifically formulated for succulents. After that, pick the centerpiece which is a generally large and colorful plant. After putting that in its place, plantation of edges of the bowl should be done by making use of succulents mix which will complement each other in terms of color and texture. If you find any gaps, you can fill it with aquarium stone or gravel.
Herb garden:

This is another best option for urban gardening in a balcony which does not have a good amount of space. The herbs can provide you with food and also with attraction. Rosemary, basil, Thyme, and sage are the best options for a herb garden. Make sure that the balcony in which you are growing herbs will receive sunlight for a minimum of 8 hours. Most of the herbs and vegetables will need less sunlight for survival.

Hanging baskets:

When you are planning for hanging baskets in your balcony, first make out a way to water them.

Shelving the plants:

When you have a small balcony but you want to make use of it to the maximum, you can install shelves across the walls so that you can let additional green space into it. The plants’ height will lead the eye to the upward direction which will, in turn, create the illusion of a balcony which is more spacious.

Balcony with shade:

Do not get disappointed if your balcony has shades. You can make your balcony face north or east for the plant growth which will tolerate shade or can even grow in less sunlight. The plants which can grow in less sunlight should be chosen like an amethyst flower, begonia, fancy-leafed caladium, etc. Ferns can also survive in shady balconies.

  • Irrespective of the container you select, make sure that it is sufficiently big so that your plants will have more room to grow. You can contact your local nursery to know the amount of soil your plant requires.
  • Always go with potting soil medium for your containers instead of ground soil. As potting soil medium is lighter, it will drain in a better way. This also has the capability to kill weed seeds and also diseases which will cause damage to your plants.
  • When coming to fertilizers, always make use of a slow-release fertilizer which is in the form of a pellet. As you need to water the plants in the container on a regular basis, a regular fertilizer will completely wash out the soil. But when the fertilizer is in the form of a pellet, once applied, it will release the food in a slow manner and can even last for many months.
  • Always prefer to use plastic pots instead of clay pots. Plants which are in the plastic pots will dry out slowly as the pots are not porous like the clay pots. You need to put organic mulch up to 5 centimeters on the soil top in the container in order to decrease the evaporation of water from the soil.

That’s all for urban gardening ideas! happy gardening.

Read: Types of Seed Sowing Methods.

Home Gardening Tools, and Their Uses

0

Home Gardening Tools and Their Uses

Today, we talk about home gardening tools and their primary uses. Beautiful landscape, trailing vines, beautiful flowers with delicious fresh fruits all together is no less than a dream. But have you wondered how it can turn into reality!!. Some say, purchase some seeds drop it on soil, water it and that’s it, rest nature does the wonders itself. But that’s not the complete story. I would rather say gardening is an art which needs hard work and nature’s touch both.

When our ancestors “the cavemen” started growing their own food very first they invented their tools to culture plants on the soil. They understood the dynamics of gardening and hence they made it clear that for successful gardening you not only require land, water, and seeds but also reliable tools and this was the rise of agriculture and gardening.

So, Gardener’s recipe is, one part soil two parts water, a handful of seed and lot field pampering

For pampering your soil you need the right tools because they are the gardener’s weapon. Gardening tools have evolved a lot with time according to our convenience and with creativity. From ploughing the land to sowing seeds to harvesting fruits and flowers we have a variety of tools.

What are the basic tools for home gardeningHow to use gardening tools?

If you are a budding gardener and figuring out the nuts and bolts, there are many gardening tools available that you should consider adding to your basket and might get overwhelmed by the range of tools offered at your local gardening supply store. All of the gardening tools have their uses, but certain tools are more necessary than others. The best way is to familiarize yourself with some of the most basic tools so you have everything that you require to grow an attractive garden.

So we have answers to all your questions we have figured out we’ve zero down some of the must have gardening tools and their uses especially for the home gardening purpose

List of basic gardening tools for home gardening:

Varius Gardening Tools.
Garden Gloves

Technically it is not a gardening tool but I believe gloves to be an indispensable item used in gardening. Gloves not only shield your hands from getting muddy but also protect you from injury. Especially when you have to deal with thorny branches or prickly plants, gloves protect your hands and wrists from scratches, scrapes, and splinters. For people with sensitive skin gardening gloves aren’t optional.  Gloves are essential in the garden to avoid rashes and allergic reactions from plants, fertilizers, and other chemicals. Gone are the days when only options were sticky opaque gloves nowadays even garden gloves have enough variety and shades. Even if you are fond of listening to music while gardening touch screen gloves are also available in various online gardening goods site.

Read: How To Grow Bell Pepper in the Backyard.

Hand Trowel:

A trowel is a must tool whether you are gardening in containers, raised beds, or directly in your yard. It is easy to handle and works well for weeding, mixing, digging, turning up the soil. When choosing a trowel, go for a cast or forged style because it resists bending if you encounter rocks in your soil. Hand trowels are perfect for transferring soil into pots or planting seedlings and bulbs. The trowel is scooped shaped so it allows you to lift the plant itself from the soil for transplanting. A hand trowel comes in trendy bright shades of color making it appealing and an easy to spot in your green garden if lost.

Spade:

A spade is one of the must-have gardening tools since it utilized to dig and move soil when planting plantlets. If you need to transplant a plant, a spade is handy as it is perfect to “cut out” the plant from the dirt and then dig a new place for it. It usually has a flat, rectangular blade that allows you to dig with carefully and with accuracy especially in established gardens where you don’t want to disturb already existing plants. It can also be used to rogue out weeds that have deep root systems especially those stubborn unwanted plants that can’t pull out by hand. A spade can also be used for breaking up roots, sod and weeds because its tip is usually pointed. You should opt for a spade with a smooth metal surface so soil and other materials slide off with ease. The terms spade and shovel are usually used interchangeably, but a shovel characteristically has a curved blade that works best for scooping soil, not digging.

Garden Rake:

My little sisters call it garden broom. Well, a bow rake or lawn rake is used to clear fallen leaves or spread mulch. It’s also perfect for levelling soil in a new or existing bed or breaking up soil clumps for levelled and porous soil surface. Fancy rakes are available with plastic or wooden body but a metal style always standouts as a better option because it is sturdy, durable and is usually more effective in smoothing and breaking up the soil.

Gardening Rake.
Gardening Rake.
Pruning Shears:

There is a variety of pruning shears available in the market with different names such as garden shears or garden scissors. It is another useful and unavoidable asset used in gardening no matter how you garden. A lot of stem cutting and trimming has to be done when maintaining a garden so it can be handled with a good pair of pruning shears. It is essential for harvesting herbs, fruits, and vegetables and also great for cutting thick stems and small branches for new transplanting. Experienced gardeners also utilize this tool for grafting operations.

Loppers:

These are the bigger sister of pruning shears having the same action but loppers are used for cutting and trimming hard stems of trees or shrubs. Loppers are perfect for keeping the growth of your hedge under control or removing diseased branches. While shopping for loppers, make sure you pay attention to the maximum thickness the loppers will cut according to your need.

Weeder:

Also known as a dandelion digger. As we know weeds can quickly take over a garden or yard if they are not removed so there weeder comes at rescue. It is a basic gardening tool which eases your pain of uprooting obnoxious weeds with a taproot. A hand weeder is small, about the size of a regular garden trowel and has a similar handle in size and shape. Its handle is attached to a long, thin metal pole that ends in two forking tines. Simply use your other hand to hold the top of the weed and push the hand weeder to handle down like a lever toward the soil to pull the root of the weed up. Like this, it pulls up the entire weed out of the ground without leaving behind any roots that will resprout.

Dibbler:

Commonly known as bulb planter which is solid, stainless steel construction with ash wood handles. It is a simple T shaped tool used by gardeners to poke and create holes in the ground. It is useful for creating holes and furrows for sowing seeds or seedlings into the soil. A dibbler is used for planting bulbs, tubers, small plants, and sometimes seeds. It comes in many different shapes and sizes. A dibbler is used by pushing the tapered end into the soil to the depth required by plant seedling and twisting it to loosen the soil.

Read: How To Grow Vegetables In Balcony.

How To Grow Bell Peppers (Capsicum) In Backyard

0

How To Grow Bell Peppers (Capsicum) In Backyard

Today, we talk about how to grow bell peppers in your home backyard. Bell pepper which is also called as sweet pepper or capsicum belongs to the family of Capsicum annuum. Bell peppers can be raised in different colors like red, orange, yellow, green and even chocolate brown. Fresh peppers are raw and these will be used in most of the recipes too. The shape of the peppers is round and hollow which will make them the best fit for stuffing once the core of the seed is removed.

Bell peppers are a perennial crop when coming to tropical areas. But in the areas where the climate is cold, bell peppers are grown as annual crops and they do not have much tolerance to cold temperatures.

Growing bell peppers in the backyard are very easy, but they are fussy about the requirements regarding the temperature. If the climate is irregular as if there is no sufficient warmth, your harvest of bell pepper might not reach your expectation.

Sweet bell peppers are the ones which are popular for their rich content of vitamin C and they also have sufficient amounts of vitamin A and B6.

Climate, water and soil requirement for the growth of bell peppers in the backyard:

Bell peppers will need full sun for optimum growth and the soil which is being used for the growth of bell peppers should be very rich in the content of calcium. Watering should be done on a frequent basis. Germination of seeds will take almost two weeks and the harvest will occur after 2 to 3 months of the plantation.

Seeding:
  • Bell peppers will need a growing season which is long i.e., up to 2 to 3 months. So, the shorter the summer, sooner you will require to start seeds in the indoor locations.
  • Storage of seeds is always possible from the bell peppers which are bought from an organic store. You will need to collect the seeds from red peppers as they will be more mature than the bell peppers which are green. These seeds should be set out dry for some days.
  • After that, you can sow them or you can even store them by using a paper envelope and keep them in a location which is dry and is also safe for keeping.
  • Make sure that you are not putting your bell pepper plant in the outdoor garden till the climate and soil are warm. Start seeding in the indoor environment in order to get your harvest prior to winter.
  • Get to know your last frost date which is expected and start the plantation of your pepper seeds before eight weeks of your expected frost date.
  • Always be ready to pamper your pepper seedlings as they like to be warmth. Pepper seeds should reach half inch depth into the soil and the seed pots should be kept at a temperature of 26°C for the germination to take place in a perfect way.
  • Once you see sprouts, you can decrease the temperature of 21°C but make sure that it is not less than 16°C at night time.
  • If the seedlings are placed in trays, you need to move them into the pots which are of three inches after few weeks so that the roots will get enough time for their growth.

Read: Advantages of Terrace Gardening.

Varieties of bell peppers:

Yellow Canary bell:

These type of bell peppers will take almost three months to reach the stage of maturity. But this would be worth the wait as you will get a chance to enjoy these 4-inch yellow fruits.

Big red:

This will take almost two and a half months to harvest. This will turn from green color to red color as it ripens. This sweet pepper will have flesh which is thick and is a mixture of 3 to 4 lobby blocky fruits.

Red Bell Peppers.
Red Bell Peppers.
Coral bell:

Coral bell has a vibrant orange color and these will add additional beauty to the backyard. These will grow vigorously and produce four-lobed fruit which will reach about the size of 4 inches at the stage of maturity.

California wonder:

This type of bell pepper will be delicious if picked when it is in green color. Else, it can be left on the pepper plant and allow to ripen for a red pepper which is sweeter.

This is a four-lobed fruit which is pepper which is deliciously stuffed. It will have a size of 4 inches. These are the fruits which are resistant to the Tobacco Mosaic Virus and these will reach the stage of maturity in 75 days.

Purple beauty:

This is an heirloom pepper which will look striking with a deep purple color. The flesh of this fruit will be thick and the size of the fruit will be 4 inches maximum. These will take approximately 70 days to reach the maturity stage.

Chocolate beauty:

This bell pepper will have a deep brown color whose flesh is also super sweet. The growth of this plant will be too quick and this will reach the maturity stage within 65 days. This bell pepper is also resistant to Mosaic tobacco virus.

Transplantation:
  • You will keep your pepper plants outdoor after about 21 days after the last frost date.
  • The soil must be dug thoroughly and make sure that you are adding extra compost so that it acts as a feed for your peppers. Lime will add more amount of calcium to your pepper plants and will also help in the prevention of blossom rot.
  • The holes should be of sufficient depth for the accommodation of the roots of seedlings, but make sure that you are not planting it deeper. The stem of the plant should not be covered. You will be required to have about 10 inches of space between the pepper plants as they will not grow larger than that.
  • When you choose a site for your pepper plants, they will require full sun and they should also be protected from winds. Placing the pepper plants near a wall will be a good idea as long as it does not shade the plants.

Read: Homemade Hydroponic Nutrient Solution.

Care and Maintenance:

Care of Bell Pepper.
  • If you allow your pepper plants to over dry too often, the peppers will have a bitter taste. Ensure that you are watering the plants on a regular basis so that there would be the right development of fruit.
  • The fertilization can be done all around the growing season, but make sure that you are not using the formulas which have high levels of nitrogen. High amounts of nitrogen will give rise to very leafy plants with tiny fruit or sometimes there would not be any fruit. Fish emulsion will increase the levels of phosphorus too.
  • Once the peppers start growing on your plants, you will want to stake them. Peppers which are large will be slightly heavy for the small plants making them bend.
  • The cages which are used for growing tomatoes will be of huge help in this case but you will need to keep the cages in place when the pepper plants are still small. Do not try caging a pepper plant which is fully grown. If you do so, you will cause damage not only to the roots of the pepper plant but also to its branches.
  • As peppers love to be in warmth, most of the gardeners will use a plastic cover which is black in color on the soil rather than a normal mulch. It will help to maintain heat and moisture in the soil. This will also help in eradicating the weeds.
  • Though heat is loved by the peppers, the blossoms will be dropped without any sort of development in fruit if the temperature rises above 32°C during day times. It will not cause any permanent damage to the pepper plant and the fruit setting initiates once the climate goes back to the temperature ranges which are preferred for their growth.

Containers:

The production of peppers will have small plants and they work very fine when placed in containers. A pot which is of 12 inches will be able to handle pepper plants. The potting soil should be mixed with some amount of compost for the sake of nutrients and the watering should be done on a regular basis.  The containers should be placed along a sunny wall so that the wall will be able to reflect the heat onto the plants which will give additional warmth to the pepper plants.

Few varieties like blushing beauty will look small for containers but actually, any type of bell pepper can be raised in a pot.

Pests and diseases:

  • The pepper plants will be usually affected by tobacco mosaic virus. So make sure that you are never touching your pepper plants after handling any sort of tobacco. Tobacco also means cigarettes. The symptoms that the pepper plant is affected by this type of virus is that the leaves become yellow and mottled and the growth of the plant gets stunted.
  • Mosaic can also be spread by aphids. So take proper care to control any sort of infestations of aphid by using the sprays of insecticides. Aphids will be eaten by ladybugs and they will be of great help in eradicating the pests from your pepper plants. You can also buy varieties of pepper which are resistant to mosaic virus.
  • Once the fruits start growing, you will see that the end where the blossom starts will turn into black color and soon rots.
  • It is actually called blossom end rot and this occurs when there is no sufficient amount of calcium in the soil. You will not be able to save the fruit which is rotting, but when you add lime to the soil, it may help in the prevention of problem with other peppers present in the plant.
  • Do not allow the accumulation of water and leaf debris under the plants and treat them with a fungicide if you come to see such kind of development. As soon as the lesions grow around the stem of the pepper plant, it will mostly die.

Harvesting and storage:

Storage of Bell Peppers.
  • From a bell pepper plant which is healthy, you can mostly harvest 6 to 10 number of peppers which are of good size. The fruits will be firm and they will be of any color they are supposed to be like yellow, red or green. You can start picking them when they are small as long as they are firm so that they can be used. But, in this case, the content of vitamin gets reduced.
  • Be very careful while picking the bell peppers so that you will not cause any harm to the rest of the bush. You can either snip them by making use of garden clippers or you can even twist them by holding the pepper plant with your other hand.
  • When you have large peppers and their color has been finalized, make sure that you are not leaving them on the plant for much time. This will trigger the pepper plant which will make the plant stop flowering and will cut short your period of harvest.
  • Peppers which are fresh can be stored in the refrigerator for about seven days. Bell peppers which are raw can be made to freeze once they are cored.

Read: Types of seed sowing.

Terrace Gardening Advantages; Disadvantages

1

Advantages and Disadvantages of terrace gardening

What is a terrace garden? The terrace garden is also called a roof garden, it is a garden in which vegetables, flowers, and fruits are developed on terraces, balconies or roofs of buildings. The kitchen garden, a normal in every Indian household, has now shifted to the roof due to constraints of space and is known as a terrace garden. Increasing pressure on land and escalating costs have added to its growing popularity.

Advantages of Terrace gardening:

Advantages of Terrace Garden.

The advantages of terrace gardening are given below;

Some of the benefits to health, aesthetics and the environment include:

  • Reduce the indoor temperature by 6 to 8°C and can reduce air conditioning cost
  • Reduce overall heat absorption of buildings and insulate the building against heat & cold
  • The convenience of safe, pesticide-free, healthy green and fresh fruits or vegetables
  • Conducive to a regular of physical exercise, clean air and being close to nature
  • Terrace garden increases the amount of oxygen in the air
  • It reduces sound pollution
  • Perform as a habitat for city-weary birds

Fresh and organic produce: Having a terrace or roof garden gives you direct access to fresh vegetables and fruits. Nothing tastes improved than food cooked with vegetables plucked straight off the plant, or fruits are eaten in their freshest form.

It brings one closer to nature: Nature is always has been man’s best friend. Terrace gardens bring a piece of nature to the house.

Helps in reducing pollution: Terrace garden plants increase oxygen production in the air. Having a garden means increasing the flow of oxygen and thus reducing pollution. The plants capture airborne pollutants & filter toxic gases. They potentially control the quantity of carbon-di-oxide and other pollutants constantly released into the air. Your children breathe in the fresh air your garden brings in, which in turn helps them to increase a stronger immunity system.

Read: Terrace Vegetable Gardening.

Improvement to the environment: Our home prior to the terrace garden was extremely warm in the summer time.  We have reduced the amount of light or heat being reflected off the roof.  In addition, the garden plants are reducing the carbon monoxide from the environment. How does terrace farming impact the environment? Graduated terrace steps are normally used to farm on hilly or mountainous terrain. Terraced fields decrease both soil erosion and surface runoff, and can be used to support growing crops that require irrigation, such as rice. 

Helps in rainwater harvesting: Terrace gardens retain rainwater & thus help in moderate the temperature. They also arrest the flow of stormwater, therefore decreasing the pressure on sewer systems when the flow is forceful.

Keeps the temperature cooler: The regular dew and evaporation cycle keeps the surface of the roof cool and thus provides a cool environment inside the house. Another fact that maintains the heat in check is that the light that is absorbed by all the vegetation on the terrace garden would otherwise be converted into heat energy in the absence of the plants.

Aesthetic benefit: Create your house visually appealing to the existence of a terrace garden. It beats any pricey & modern uplift that you can do to your house.

Prevents soil erosion & makes more efficient use of water: Just like the rice terraces throughout Asia, garden terracing can solve the trouble of soil erosion and water runoff. For instance, if you have a graded lawn that slopes to the street which regularly sends dirt & water into the gutter system, a terrace will naturally retain that water on flat planes instead. That way, you can use your hill & save the drainage system from flooding.

This is a good thing because some municipalities are writing legislature taking away government liability for flood damage to homes caused by sewage backups. The newer homes that are built on green spaces, the additional sewage backups will become a regular thing. Where can one start a terrace garden? Terrace gardens can be created on almost all types of buildings like residential flats, individual houses, commercial hubs, godowns, and factories.

Read: How To Start Hydroponics At Home.

Creates natural steps & a flat space for gardening: If you have a sloped lawn, you know how difficult it can be to apply it for play or gardening. With the addition of some earth or compost, a terrace can include quite a few extra square feet for those purposes. The possibilities are continuous.

The greatest advantage of terrace gardening is that you relax in the lap of nature when you want. Apart from health & environment, it has an aesthetic benefit too. It can make your home cooler by 6-8°C. Thus a big saving in air conditioning cost. You can also get fresh, clean air right at your home and enjoy the healthy and organically grown green & fresh vegetables grown on your terrace.

Disadvantages of Terrace gardening:

One major disadvantage of terrace gardening is rainwater saturation of the ground. This happens when terracing retains too much water, which is absorbed into the ground or soil. The problem with ground saturation is that it can lead to water overflow through periods of heavy rains. This can end up source more damaging runoff than in unterraced areas. Additionally, if not accurately maintained, terraces can lead to greater soil erosion, often downslope from the terracing, than in non-terraced areas.

Terrace garden requires huge inputs of labor to construct & maintain, and when not properly maintained, the effects can be catastrophic. Unmaintained terraces can lead to mudslides, the creation of deep gulleys and increased soil erosion, mainly in sandy soils or on extremely steep terrains. Terracing also has been exposed to reduce soil quality via the leaching of important nutrients from the soil in some areas.

Read: How To Grow Dhaniya On Terrace.

Homemade Hydroponic Nutrient Solution Guide

Homemade Hydroponic Nutrient Solution

Today, we are into a discussion of homemade hydroponic nutrient solution.

Making your own Hydroponic Nutrient Solution

When Plants are grown in the soil they can easily get essential nutrients from the mother earth, but in a hydroponic system, you become the guardian. It’s up to you to make sure everything they require is in the nutrient mixture that you are providing that too in appropriate proportions so that you can witness their best yield.

Sure, you could just buy a premixed ready to use nutrient solution with one click, but what’s the fun in that?

Having a hydroponic garden is itself a reward and motivation. For managing your hydroponic garden relying on the readymade premixed nutrient solution is only a quick fix. To obtain a better yield from your hydroponic garden you need to understand what nutrients they need and most important when and how much they need? All you need is to have some time, the right procedure for making a tonic for your little hydroponic plants.  And for this, we are here to tell what’s and how’s of making a nutrient solution.

So be ready for an easy and rewarding process of making own hydroponic nutrient solution at home.

Making your own nutrient solution allows you to fine-tune the level of each nutrient to your plants’ exact requirements, and you can save a lot of money in the long run.  Preparing your own hydroponic nutrient solution is easy. It simply needs some preparation and a keen eye.

Before moving to full flash steps of making hydroponic nutrient solution first we need to understand what are nutrients? Why do plants require nutrients? What nutrients do? How do they work?.

So first you should know your plants, and know what and how much they need before you begin because each nutrient corresponds to a different function within the plant and also individual plant needs different types of nutrients.

Hydroponic Garden.
Hydroponic Garden.

What are hydroponic nutrient solutions?

Plants require nitrogen, phosphorous, and potassium (N-P-K), and numerous trace elements for their growth and development. Nutrients are categorized into two classes on the basis of their amount required: macronutrients and micronutrients or trace nutrients. Essential elements categorized as macronutrients are elements that are used in higher concentrations than micronutrients. Even though micronutrients are used in lower concentrations, it doesn’t mean they are any less essential. There are six essential elements classified as macronutrients: nitrogen (N), phosphorus (P), potassium (K), calcium (Ca), magnesium (Mg), and sulfur (S). The eight essential elements categorized as micronutrients: iron (Fe), manganese (Mn), chlorine (Cl), boron (B), zinc (Zn), copper (Cu), molybdenum (Mo), and nickel (Ni). Collectively these 14 mineral elements make up the essential elements that are found in a complete hydroponic nutrient regiment necessary for the growth of plants. The liquid nature of the hydroponic nutrients allows them to be applied directly to the plant’s root system and nourish the plants under cultivation.

Read: How To Grow Vegetables in Terrace Garden.

Types of hydroponic nutrient solution

All plants depend on the same type of primary macronutrients and micronutrients, but their concentration in solution will vary based on what you are growing. The ratios of the micronutrients, macronutrients and beneficial elements in a hydroponic solution will vary depending on a spectrum of factors. The type of crop, stage of growth and various environmental factors all come into play when fine-tuning a hydroponic nutrient solution. The hunt for a one-size-fits-all nutrient formulation has been largely indecisive. Although the following standard formulas are widely used:

Hoagland Solution

The nutrient solution commonly famous as the “Hoagland solution” was formulated and published by D.R. Hoagland and D.I. Arnon in 1950. The duo measured the concentration of nutrients in a tomato plant (Lycopersicon esculentum) growing in a hydroponic solution. From that analysis, they determined which nutritional elements the plant drew from the solution and their function. The formulation is reasonably high in nitrogen and potassium, and it is mainly well-suited to large fruiting plants such as tomatoes and peppers (Capsicum spp.). Nutrient solutions based on the Hoagland formula are widely utilized by hydroponic growers.

For curious minds the recipe of Hoagland solution  with nutrient  solution composition is as follows:

Reference: Hoagland and Arnon, 1950

The Recipe of Hoagland Solution.

The procedure of making Hoagland solution as part of a homemade hydroponic nutrient solution:

Stock Solution

  1. Take 6 plastic bottles and wash them thoroughly. Label each bottle with the help of a marker pen from 1 to 6 or as desired.
  2. Prepare a molar solution of macro-nutrients and mM solutions for micro-nutrients by dissolving the quantity given in the “Amount required for Stock Solution” column in above table carefully.
  3. Put each nutrient stock solution in a separate bottle to avoid confusion. All macro-nutrients will be combined in one bottle. Have patience and do not mix unless needed because it would precipitate immediately.
  4. Store in a refrigerator at 4˚C.
  5. Remember these calculations are per liter basis. To calculate different molarity for different volume, you will need to recalculate the given quantities.

Read: A Guide for Starting a Hydroponics at Home.

For the working solution
  1. Take one liter of water (tap or distilled) in an open container so that it facilitates mixing.
  2. Use the given quantity of stock solution from each bottle as shown in “Volume of stock solution per liter of final solution” of the table say if you would need 6 ml of KNO3 from bottle 1 per liter of water.
  3. Suppose if you wish to prepare the half-strength Hoagland’s nutrient solution, just double the quantity of tap water (i.e. 2 L) or you can use half quantity of stock (e.g. 3 ml of KNO3 per liter).

Precautions to be taken when preparing Hoagland nutrient solution:

For stock solution

  1. Preferably use laboratory grade salts from reliable sources to prepare stock solutions.
  2. Keep each stock solution in a separate labelled bottle and do not mix before use.
  3. Keep the stock bottles tightly sealed means airtight.
  4. Do not use the STOCK solution if you observe any precipitation in the stock bottle.
  5. The shelf life of stock solution is about 6 months (after proper storage) unless any precipitation occurs earlier.

For a working solution

  1. Always freshly prepare working solution just before use by mixing the given quantity as shown in the tables above.
  2. Never store the working solution for more than 3 days.
  3. Check the pH of working solution, and if necessary adjust to pH 5.8 to 6.3 with addition 1M KOH (base) or HCl (acid). If you do not want to change the K concentration then opt for NaOH but be sure because it adds Na.
Steiner Solution

Rather than focusing on the nutrient uptake of a particular plant, Abram Steiner in 1968developed a formula for a nutrient solution with the conjecture that a universal proportion of nutrients would be most favorable for all plants. He explained that plants are capable to take whatever nutrients they require from a solution as long as the nutrients are available and that plants would pay out less energy absorbing nutrients when the nutrients are present already in an optimal ratio, which allows a more accurate control that offers  potential for increased production and improved quality of plants under cultivation. Steiner solution provides a bunch of micronutrients suitable for foliage and flowering plants than a solution developed for fruiting plants.

The pros of using Premixed Solutions:

  • Hydroponic hobbyists and small-scale growers often prefer premixed solutions that eliminate the headache of calculating nutrient ratios.
  • These solutions are easily available in the market in both liquid and powdered forms.
  • They are relatively less expensive when compared to the cost of buying the individual elements for mixing to create a solution.

The cons of using Premixed Solutions:

  • Premixed solutions, don’t allow for adjustments based on the particular needs of the plants being grown. Hence usually commercial growers tend to use self- tailored nutrient formulations.

Points to be taken care of in a homemade hydroponic nutrient solution:

  • If the container of your hydroponic system holds a lot of water, mix nutrients in more than one batch.
  • Don’t overfill your container or the nutrients may spill and get wasted when you mix them.
  • Used the nutrient solution immediately once it’s mixed, since it may lose some of its strength when stored and even may get precipitated.
  • If the water level drops between changes, due to evaporation or absorption, use only plain or water for replacing it. Adding new nutrient solution to the older one can cause an imbalance and fabricate unwanted salts that can harm your plants.

Read: How To Grow Hydroponic Lettuce.

Vegetable Terrace Gardening – A Complete Guide

0

Vegetable Terrace Gardening

Today, we are into a discussion of vegetable terrace gardening/How to grow vegetables on the home terrace? What is the home terrace garden? Home terrace garden also called a roof garden; it is a garden that cultivates vegetables on the terrace, balconies or roof of buildings. The kitchen garden, a standard in every Indian household, has shifted to the roof due to constraints of space, and known as a terrace garden.

Prepare the soil:

Get some soil and natural manure, and combine it well with the peats. If you want to maintain it organic, add cow dung or goat dung manure to the mix. Stay this mix aside for a few days. Meanwhile, when peeling veggies, etc.; do not throw away the skin.

Create raised beds on the terrace:

If you’re looking for a practical way to make a terraced vegetable garden. Make a raised bed; in raised beds, you’ll be able to develop lots of vegetables in comparing to containers. Plants will thrive better with less care & maintenance, plus they are cheap. The raised bed on the terrace does not differ fundamentally from those will see in a regular garden. Just ensure before installing it that the surface of the home terrace below it is waterproofed efficiently or not.

Fill raised bed with soil: If you fill the raised bed with soil, consider preventing voles & pests from entering the bed. To make soil, just mix quality garden soil, ripe compost & manure. Probably the greatest advantage of a raised bed is, of course, its height & wideness on a terrace.

Containers used for the home terrace garden:

Containers for Vegetable Gardening On Terrace.

What type of containers can I use? Containers of all different sizes, shapes, whether of plastic, ceramic, metal or mud can be used. Your coke bottles, take away plastic boxes, old sacks, coconut shells, old broken buckets, UV treated grow bags, cement pots, your dented kitchen pots, just about everything can be recycled and used as containers.

Containers are the key to setting up plants. Whatever containers you use, they want to have a small opening at the bottom to release any extra water that pours for the plants. However, this small hole must be blocked with a small piece of flat stone to prevent the soil from draining away as well.

Plant propagation:

There are Various ways to propagate plants, Plant propagation from seeds, cuttings, stems, potted or bare root seedlings, corms or bulbs, etc. Vegetable plants are propagated directly from seeds, broadcasted on the surface, or planted deep. Usually, seeds are planted at a depth of three times their thickness; some plants are raised in beds or pots & are then transplanted [generally after 5 to 6 weeks].

Read: How To Start Hydroponics At Home.

Vegetables suitable for Terrace gardening:

Tomatoes:

Tomatoes don’t always need sprawling spaces to grow. They can grow well even in hanging baskets, planter pots, window boxes & many other types of containers. You can easily produce them in any sized container, almost throughout the year. Make sure that the container is spacious or large enough to grow your tomato plant without hassles. Start with tomato seeds or starter plants, whichever you like. Also, you can add a cage to the outside of the container for additional support as the tomato plant gets taller.

Radishes:

The best part of growing radishes is that they can develop well, even in small-sized plastic or wooden planter pots. You must scatter the seeds at the top point of a container. Make sure to water them religiously, which helps in maintaining the soil moist diligently. To get the best results, emphasize on using the organic soil conditioner.

Potatoes:

Potatoes are probably one of the easiest planter vegetables to grow on the terrace. It is always fun to develop potatoes in a planter pot. You need a container, which is about 10/12 inches deep. In these pots, you can easily plant three to four potatoes. Since potatoes require adequate water, plastic planter pots are advisable. Therefore, make sure to water them adequately, so that potato plants grow healthy and start to produce soon. Moreover, make sure their stems are fully covered with soil. The potatoes will grow within a couple of months.

Onions:

Onions usages are uncountable. From making salads to spicing up a dish, onions top the priority lists of many cooks. Onions are small in size and can easily fit in your terrace. Especially, green onions are known to develop well in small containers. All you require is a planter pot or container, which is about 5/6 inches deep. Within the size, you can develop onions with ease.

Carrots:

Another brilliant option for home terrace grown vegetables is the carrot. Just like tomatoes, the carrots can be grown in planter boxes or small containers. Carrots have different varieties such as short & sweet, little fingers, Thumbelina, etc. If you religiously water the plant, you are more likely to produce healthier plants. If you are looking to have longer plants, then make sure to choose spacious planter pots or containers.

Cucumber:

If you are interested in rising cucumber in containers, then always go for “Salad Bush” or “Bush Pickle” varieties.

Capsicum:

With a little patience & care, you can grow capsicums in a planter box. Start with a pot or container of good seeding mix. Tickle the top of the soil with your finger, and then sprinkle the seeds over the top of your container & add up a little more soil to get it fully covered. Give it a little water, just enough to obtain the soil damp. However, make sure the soil is not too wet.

Eggplant:

Any pot which has the capacity to hold up to five inches depth can be used for growing eggplant.

Lettuce:

If you are looking for good container vegetables, then your choice would be lush greens & lettuce. In this case, the size of the pot or container does not come into a count. Take some fertile soil, add the required seeds & keep the soil moist so that you can get lovely salads from the home garden.

Chilies:

The teeny tiny chilies can fit in any size planter pots on the terrace. Make sure the weather is warm to put them outside. Water the chilies sufficiently before transplanting, so that the soil of the container does not fall apart while they are removed from the planter pot. Be careful whilst removing the seeds from the container. Water sufficiently, as it works great in growing chilies.

Tips for home terrace gardening:

Vegetable Terrace Gardening Tips.

Salt water must not be left on the plants. Specifically, in pots plant growers are using one and a half feet repeatedly in wood & cement plants for planting to be comfortable. Pots of red soil, sand, manure & mix well and to be applied. Plants were irrigated in the morning & evening. After the plants are grown with natural fertilizers in the growing of vegetables, the taste is good with the quality.

Vegetable Seeds for Home Vegetable Terrace Gardening:

You’ll need good quality seeds to produce your veggies. You can generally start with tomatoes, lady’s fingers, and bitter gourd. Seeds can be picked up from local nurseries or you can source them from the vegetables purchased at the market. If you’ve got kindly neighbors, you might even request them for seeds & saplings.

Pick the right veggies: To start with, just one or two vegetables, and then go in for more veggies. Tomatoes, chilies, and spinach are easy to grow, so start with them. Sometimes you might need to net out the seeds and the saplings as they grow, to keep pesky sparrows & other birds from feasting on them.

Water quantity:

Watering is the key factor, Water the vegetable plants regularly, as and when needed. Excess water often causes damage & decay to plant roots, and it also washes away the nutrients of the soil. Also, post every heavy rainfall; remember to include manure to the soil.

You can use a hose to water the plants in your terrace or buy a small watering pot or kettle if you prefer. Alternately, you can simply fill a bucket of water, carry it around the terrace & pour water using a smaller container. If you travel often and don’t have anyone to help with the watering, you can consider drip irrigation. Again, you can go creative and use plastic bottles to set it up or buy a ready-made system & have a professional set it up for you.

How to build a home terrace garden? Building a home terrace garden can be a labor-intensive project and should only be attempted if you are in excellent physical condition & have had some prior carpentry or landscaping experience. If you choose to build the terrace garden on your own, it’s essential that you determine the rise & run of the slope you are working with. The run is the horizontal measurement between the hilltop & its bottom. The rise is the vertical distance from the base of the slope to the top of the slope. Use the rise & the run measurement to determine the height and width of each bed, depending on the number of beds you wish to have.

Begin the home terrace garden at the bottom of the slope. Dig a drain for the first tier. The more levels will have in your garden, the deeper the trench should be. Make sure your trench is level & place your foundational terrace layer into the trench. Next, you’ll require digging a trench for the sides of the terrace. It’s necessary that the bottom of the trench is level with the first trench. Attach building materials with spikes. Layer your next level on top of the first & anchor them together with spikes. Dig up the soil in the back of the terrace box to the front, until the box is the correct level. Add additional soil if needed.

Pesticides:

Pests are going to be visiting your garden no matter what type of protection you take. And the best way to combat them is by using pesticides, not the dangerous artificial ones existing in the market, but natural ones you can prepare at home yourself. A mixture of baking soda, cooking oil & water can be sprayed on plants to avoid fungal infections; beer is an easy distraction for slugs & neem oil is the aphid’s nightmare. Don’t forget controlling pests in home vegetable terrace gardening is an utmost priority.

Integrate Vegetable Patch on the Terrace:

You can also integrate a vegetable patch on your terrace & grow vegetable on the surface itself. But doing this is good on large rooftops. Vegetable patch is similar to producing a normal garden bed.

The integrated bed ought to be filled normally with soil like a regular garden bed. Addition of compost in soil is a great natural fertilizer for most of the plants.

Cost of home terrace gardening:

A 500 square foot terrace garden can be set up with an initial investment of Rs 10,000 to 15,000. This also includes the cost of fertilizers which can be alternated with homemade compost. Within this space, one can develop a dozen vegetables.

Maintenance of the garden:

An hour in your garden is enough to stay it maintained once it is established. It is quite therapeutic working in the garden, tending the plants & benefitting from it. The freshness of the garden will fill you with fresh energy.

Read: How To Grow Vegetables Vertically.

Starting Hydroponics Gardening At Home

Starting Hydroponics Gardening At Home

Today, we are into “starting hydroponics gardening at home”. In the era of an ever-expanding population and depleting resources, it is very difficult to get our share of fresh and chemical free food in our plates. Every day we come across drastic effects of poor eating and chemical based food products. So the best way to keep ourselves healthy and our surroundings clean is to have our own producers.

Gardens?????

Gardens for family living on top floors of urban societies!!

Gardens for people working 9 to 5!!

Gardens for 2BHK restricted space!!

The solution is innovative farming at your own home “Hydroponics”.

What is hydroponics?

Hydroponics is an emerging sustainable soil-less gardening. It basically involves raising healthy plants without the use of a traditional soil culture by using a mineral-rich water hydroponic nutrient solution instead. It is one of the famous modern farming technologies emerging successfully across the globe.

Advantages of hydroponics:

Hydroponics Benefits.
  • Availability of produce throughout the year, even farmers can maximize their profits.
  • Faster growth of plants than conventional gardening due to the constant and readily available nutrients.
  • It is a Green practice, as it is good for the environment because of minimal demand for herbicides and pesticides than soil gardening.
  • Plants are free from soil-borne disease infestation, unlike soil gardening.
  • Water usage is very less than soil gardening as there is no loss of water by drainage or evaporation instead water used for hydroponics can be recycled and reused, making it sustainable practice.
  • Best suited for urban areas because of less arable land and gardening space.
  • Hydroponics can be utilized for aesthetic purposes like decorating balcony, indoor gardening, and vertical gardens.
  • Plants under hydroponics system can easily be maintained and look after as growers can have total control over the climate – temperature, humidity, light, the composition of the air.
  • Hydroponics system can be used for the experimental purpose in various research laboratories.
  • Can be a great help in raising transplants for plant nurseries in less cost and space.
  • Hydroponics is free from weeds and so is grower free from the stress of timely weeding, hoeing, etc hence it is a time saver and labor free.
  • Stress relieving hobby regardless of your small apartment space you can enjoy gardening even after your exhausting work hours without putting much more efforts. So hydroponics is the best way to be in touch with nature.

The principle behind effortless home gardening with hydroponics:

Growing plants, fresh veggies, and alluring fruit vines in our small balcony is no longer a wish and dream. You can now fill your home with green herbs and fresh fragrance of blooming flowers now in your small bedroom spaces. Thanks to HYDROPONICS.

Hydroponics originated from the Greek word hydro means: water and ponos mean: working. Since our elementary school, we know plants grow by the process of photosynthesis a process in which chlorophyll pigment present in green leaves convert carbon dioxide (a gas in the air) and water into glucose (a type of sugar) and oxygen in presence of light. Hence our plant requires light, carbon dioxide and water to grow. Hydroponics utilizes this principle for growing high volume plants in less space.

The underlying principle behind the science of soil less culturing is to provide a pre-calculated and estimated nutrient concentration in continuously agitated water in a closed container. Pre-estimation of hydroponics farming nutrients is done on the basis of requirements of a particular plant. For more convenience nutrient solutions with desired mineral concentration are already available in the market online as well as offline.

Read: How To Grow Vegetables On Home Terrace.

Requirements for building a hydroponics system:

Water:

Supreme of all, water is the medium that will provide all necessary nutrients to the developing plant as well as it behaves like a solvent for the nutrients and air. Loss of water is less than the soil gardening due to less evaporation and drainage.

Light:

Critical for photosynthesis. When plants are grown hydroponically outdoor one may rely mostly on sunlight while growing plants indoor it is necessary to provide artificial illumination or balanced exposure to solar radiation as required by the plant. For artificial illumination combination of fluorescent tubes and ordinary sodium lamps are proven useful in past nowadays LED light emitters are also preferred depending upon the size of hydroponic system setup.

Inorganic mineral nutrients:

For a number of reasons, hydroponic nutrients differ from nutrients (fertilizers) used to raise plants growing in the soil. Ready to use nutrient solutions are easily available in the market you can buy a proven formula from a reliable manufacturer

Aeration:

For proper growth of a plant in the hydroponic system proper aeration which enables availability of oxygen plays a key role. Because in order to absorb water and nutrients, the roots require a certain amount of oxygen. Plants do not show good growth characteristics in waterlogged and anaerobic conditions. For proper oxygen supply provision of aeration should be made for this circulating hydroponic setup can be done or bubbling of water medium by using electric or mechanical aerators can be done. Aerators or water pumps are also easily available in the market.

Anchorage:

Anchorage or support also plays an important role in plant growth for plants’ growing in soil anchorage is not a hitch. However, when plants are grown in soilless culture, it is essential to provide some means of support for the seedlings (like clay balls filled in the plastic mesh cups). Substrate like clay balls, cocopeat, vermiculite, rock wool, etc is easily accessible in stores online as well as offline. Anchorage materials are inert and they don’t provide any nutrients it is only needed for support. Choice of anchorage or medium depends on circumstance or gardening comfort, the material should not absorb water if it becomes soggy it will cause roots to suffocate due to less oxygen.

Container or hydroponic system:

The container is the setup of any hydroponic system it contains nutrient medium and plant. You can build a reservoir out of any plastic that holds water. The container shouldn’t leak, hold enough water, and must be clean before it can be used as a reservoir. A reservoir also needs to be opaque or light proof, as algae and microorganisms can begin growing with even low light levels. The trick for selecting light proof container is, hold the container to be used over your head and see light coming through it if light passes it’s not light proof. Well, any container can be made waterproof easily to make any container light proof by painting it, covering it, or wrapping something like bubble wrap insulation around it.  Coloured and containers of unique shape also add on to the aesthetic value of your plant growing in it. Systems are available from a variety of commercial suppliers. An advantage to putting together your own system is that you just will customize the look to suit your house and also the varieties of plants you would like to grow.

Guide to start home gardening with hydroponics:

Now, most awaited treat for our gardeners. With these simple steps, you can plant your first plant by using hydroponics.

Requirements for starting hydroponics gardening:
  • A small container or bottle or bucket or buy the readymade hydroponic system
  • The nutrient solution for hydroponics
  • Any plant seedling
  • Anchorage material such as rock wool, small clay rocks
  • Fresh Water
  • An aerator or small water motor
  • pH testing kit including pH buffer solutions
  • Planting cups
Determine the Location

Select the location where you want to keep your hydroponic system. The floor should be levelled to ensure even coverage of water and nutrients to the plants in the system. Locate electric sockets or electric board in case of using water aerator or artificial lighting. If you wish to keep your hydroponic system outdoor make sure too much of sunlight do not fall on your plants this will cause a high rate of water loss by evaporation. Availability of sunlight should be maintained according to the growth habit of the plant so locate your hydroponic system accordingly. The location also plays a major role in starting hydroponics gardening.

Assemble the Hydroponic System
  • Assemble your system you can buy your setup from the market or you can make one.
  • Fill your hydroponic system with water and mix the nutrient solution in water as per recommended ratio.
  • Now fix water motor or aerator (easily available as aquarium aerators) inside the system or container.
  • Plant baskets or standard cups are usually installed on the hydroponics system our next step is to put the desired plantlet inside these small baskets. If you have started your own seedlings in starter cubes, just fill the basket with growing media and set your seedlings in it. But if you are starting with potted plants in potting soil, wash off all the soil from the roots in running water gently.
  • Next, put anchorage material such as small clay balls inside these small baskets without hurting the plantlet. The clay balls should not be soaking wet. It’s fine and even helpful if the top inch of the growing media is fully dry, but 2-3 inches down should be moist (not soaking wet).
  • Now your system is ready to install in your selected location.
  • As soon as the plant is planted in your hydroponic system monitoring period starts, measure the pH of the solution by available pH meter kits and keep monitoring the growth of the plant in the system.
  • Carefully observe any symptoms of a disease or pest infestation in the plant after a certain day’s interval also looks for fungal growth or any accumulation in the container.
  • Water should be transferred after some days and fresh water and nutrients should refill.

Well, hydroponics is no rocket science, with this information and little care you can beautify your space by growing different plants without much time and stress.

So happy gardening!

Read: Methods of Seed Sowing.