Introduction to Kale seed germination: Kale is a member of the cabbage family and it is a healthy leafy green vegetable. Kale tastes better when the plant leaves mature in cold weather. Kale is versatile in the garden, growing in traditional beds or raised beds and containers. Kale is easy to grow from seeds, directly seeded into the soil, or started indoors and then transplanted. In this article we also discussed below topics;
- Process of growing Kale from seed
- Time to take Kale seeds take to germinate
- How do you germinate Kale seeds
- Kale seed germination temperature
- Process for Kale seed germination
- Kale seeds germination period
- Tips for Kale seed germination
- Germinate Kale seeds indoors
- Paper towel germination method for growing Kale
A guide to Kale seed germination process, time, temperature
Kale plants can be direct seeded in the garden or started indoors and set out as transplants. Start Kale plants indoors about 6 weeks before your last expected frost date. Seeds germinate quickly in warm soil and should be up within 5 to 8 days. Kale can be started by seed in the garden 6 weeks before the last frost. The seeds will germinate even in soil that is only 45°F. And you can start a few seeds indoors to get a jump on the season. It takes about 3 months to get full-sized plants.
Conditions for growing Kale from seeds
Requires well-drained soil – Kale prefers well-drained, fertile soil high in organic matter, pH 6.0 to 7.5. Kale can tolerate slightly alkaline soil and prefers plentiful, consistent moisture. If you don’t have the space to grow Kale in the garden then you can grow it in a pot or other soil-appropriate container. The pot or container must have at least 6 square inches of space for the plant to grow in. Plant your seeds or starts in the center of the pot, following the same fertilization and depth, suggested for garden planting (a good layer of compost, with seeds planted about ½ inch deep). Make sure to move Kale grown in pots into a partially shaded area when summer arrives.
Starting Kale Seeds
Kale will produce in warm weather; it has a tendency to become woody and also bitter. It’s best when allowed to mature in cool temperatures. Start spring seeds indoors approximately 6 weeks before the last frost to give plants a chance to mature before summer’s worst heat.
Direct seeds will mature in about 55 to 75 days, while transplants will speed up the process, ready for harvest in about 30 to 40 days. Plant your crop again in the fall, 6 to 8 weeks before the first expected frost you can keep harvesting even after snowfall. Plant more seeds or transplants every 2 to 3 weeks for a long, continuous harvest.
Plant from early spring to about 3 months before expected fall frost. For bunching, sow 3–4 seeds every 12–18 inches, ½ inches deep, in rows 18–36 inches apart. Thin to 1 plant per group. For baby leaf production, sow 60 seeds/ft. in a 2–4 inches wide band ¼ to ½ inches deep.
Temperature for Kale seed germination
Optimum soil temperature for Kale seeds to germinate is between 45°F to 75°F, with 65°F being very comfy. The Kale seeds will sprout fairly quickly when soil is at the optimum temperature; it can take as little as 5 days up to eight to see sprouts poke through the surface of the soil. As the ambient air temperature and soil heat up to 80°F and beyond, Kale will grow, but it’s going to end up like an old naked guy getting some steam in a sauna flaccid, bitter and just not that appetizing.
Kale growing methods
There are mainly two methods of growing Kale by seeds. You can directly sow the Kale seeds right into the garden soil or can start the seeds indoors in seedling trays and transplant the seedlings later in the soil.
Direct sowing method of Kale
You require loose, well-drained soil to grow Kale. Make even rows about 18 inches apart, and direct sow your seeds about 0.5 cm deep. Cover seeds with soil and water them well to settle the soil around the seeds.
Thinning – Once the Kale seedlings emerge, thin them to be 18 inches apart that means remove the extra crowded seedlings.
Transplantation method of Kale
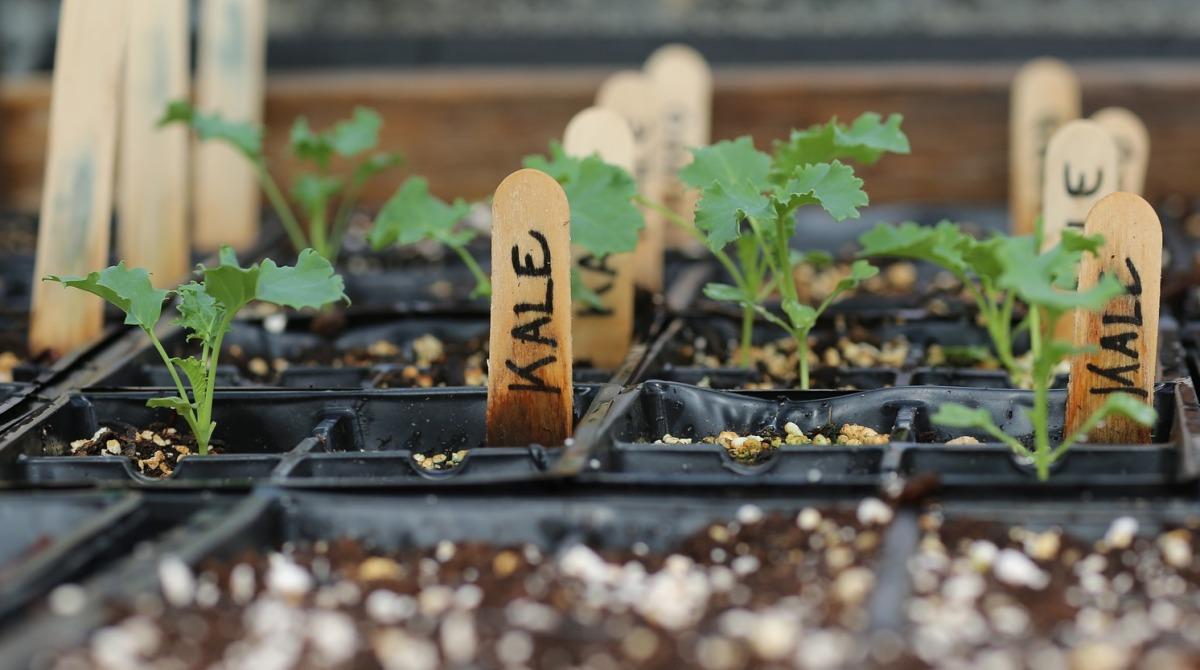
Sow the Kale seeds in seedling trays filled with seed starting mixture like the organic veggie mix. Sow 2 seeds in each cell and transplant seedlings after 5 to 6 weeks. To plant, dig a hole in the soil twice the size of a root ball. Put the root ball even with the soil level and backfill the soil.
In case if you miss this: How to Grow Turmeric in Pots.

Hardening – When you have started Kale plants indoors, you slowly acclimate them to outdoors. Hardening is done to seedlings by exposing them to more and more sunlight every day, eventually transplanting them into the soil.
Fertilizers for Kale plants
Kale is a leafy green; you want a fertilizer that is high in nitrogen. You can use all-purpose organic fertilizers like cow manure and mix the organic manure in the soil before planting.
How to sow Kale
Kale plant needs plenty of room to develop properly. To make the most of the space you have it’s almost always better to start plants off in plug trays. This way you can get seedlings growing other crops are still in the ground. Once you’ve harvested the previous crop, sturdy young Kale seedlings will be ready to plant.
Fill plug trays with multipurpose potting soil. Firm it in with your fingertips then make holes about half an inch or 1cm deep. Sow 2 seeds per plug or pot, cover, and water. Depending on how soon you plan on planting your Kale you may need to pot seedlings on into larger containers. Then, about a week before planting, start moving Kale plants outside so they can acclimatize. Leave them out for gradually longer periods until they are staying out all day and night.
Planting and spacing of Kale plants
If you’re planting seeds, sow about ¼ to ½ inch deep into well-drained, light soil. After 2 weeks, thin the seedlings so that they are spaced 8 to 12 inches apart. If you’re setting out plants, and plant them at the depth at which they are growing in the container. Space about 18 to 24 inches apart.
After planting, water Kale plants well. For row planting, sow seed 1/2-inch deep spaced 3 inches apart, and then thin plants to about 12 inches apart when they are 4 to 5 inches tall, and throw those tender young leaves into a soup or stir fry. Space rows about 12 to 18 inches apart. In every square foot of garden where you want Kale, plant just 4 seeds distributed evenly.
Seeds will germinate in cool soil, but they sprout best when the soil temperature range is around 70 degrees. If you’re starting them inside, then so 5 to 7 weeks before the last expected frost. If you’re direct sowing the seeds outside, so 2 to 4 weeks before the last frost and/or anytime at least 10 weeks before the first frost of the next season. No matter when you plant, the soil temperature should be at least 40 degrees or higher for good germination.
Sow seeds in small pots filled with a mix of soil and organic fertilizers/compost. Place the seed at least about ½ inches deep. Keep the soil around the seedling evenly moist throughout growth, but allow the top layer of soil to dry between watering. Or you can directly sow seeds in the garden starting about 2 to 4 weeks before the last frost date or as soon as the ground can be worked in the springtime.
Water and feeding for growing Kale
Kale plant likes the wet stuff, but not too well. Just don’t let them get overly dry or the plant leaves will end up tough, like some punk kid smoking unfiltered cigarettes outside of the mall. Add well-aged compost into the planting bed before adding seeds or transplants, and side-dress the plants with aged compost every 6 weeks, or water them with compost tea.
Gardening tips for growing Kale indoors
You should not miss the Onion Seed Germination, Time, Temperature, Process.

- You can grow Kale indoors as it does not need much space like most leafy vegetables. It requires a good amount of sun.
- Growing Kale indoors reduces the chances of diseases and infection.
- The best variety to sow indoors will be Dwarf Kale as many varieties can grow up to about 3 feet tall. This one is ideally appropriate for indoor space.
- Place the pots at a spot receiving at least 8 hours of sunlight a day.
- Keep plants well-watered and weeded, particularly during the summer as they settle in and establish. Remove damaged or yellowing Kale leaves as they appear.
- Kale tends to be less prone to the catalog of pests and also diseases that afflict other cabbage family crops. However, it’s worth taking a few precautions against possible attacks.
How to germinate Kale seeds on a paper towel
All you need is a plastic or container with a tight lid. Clear ones will make it easier to see through, but not necessary as the seeds don’t need light to send out roots. Then, put a piece of paper towel or white paper on the bottom of the container, add water till the paper towel is thoroughly moist, but no puddles of water.
Sprinkle seeds in groups on the damp paper towel, close the lid, and create a note to yourself what type of seeds are where, particularly when you have seeds that look identical, for example- broccoli, Kale, and cauliflower.
Use a permanent marker to write the type seed you are germinating on plastic zipper bag. This is helpful if you are germinating a lot of different types of seeds. Then, open each plastic zipper bag and flex the opening a few times to loosen it. This will make it very easier to slide the paper towels containing the seeds into them.
Dampen a paper towel with water. Wring it out carefully than that it is thoroughly moist but not dripping and spread the damp paper towel out on a clean surface. Place seeds on one half of the paper towel, leaving some space between them. Don’t overcrowd the paper towel.
Fold the empty half of the paper towel over the Kale seeds, being careful not to squash them. Place the folded paper towel into the labeled plastic zipper bag, and seal the bag. Repeat with remaining seeds. Place the zipper bags of Kale seeds in a warm place away from direct sunlight. The top of the refrigerator is generally a safe place for the seeds to rest undisturbed, but any area that is out of direct sunlight and maintains a temperature between 70 and 80°F will do.
Check on the Kale seeds every other day. Open the zipper bag to allow fresh air to enter, and check to see if seeds have sprouted. Times will change according to the type of seed you are germinating. Once your seeds have sprouted, plant them in pots, discarding any seeds that did not germinate.
Harvesting of Kale
- Kale is usually ready for harvest 70 to 95 days from seed and 55 to 75 days from transplanting, depending on the variety you are planting.
- Kale is ready to harvest when the plant leaves are about the size of your hand.
- Pick about one fistful of plant leaves per harvest. Start harvesting the oldest leaves first from the lowest section of the Kale plant. (Discard any yellowed leaves.)
- Avoid picking the terminal bud (found at the top center of the plant) as this will help to keep the plant productive.
Frequently asked questions about Kale growing from seed
You may also check the Growing Hydroponic Radish.

Should you soak Kale seeds before planting?
Soaking Kale seeds for 24 hours before planting can significantly cut down on germination time and overall effort. To soak seeds, just put them in a cup of water for about 24 hours. Most seeds must not be soaked for more than 24 hours.
Why is Kale turning brown?
As Kale ages, then it will begin to lose moisture. The plant leaves will change from rich dark color to a pale greenish-yellow, and eventually, turn brown. After too long, the wilted Kale leaves will become soggy and liquid will leak out.
Why is Kale dying?
After bolting, the Kale plant begins to wilt and die naturally. Replace Kale plants before they bolt for an ongoing supply of fresh Kale. It’s normal for Kale to wilt during the day, and recover as temperatures cool in the evening. Harvest leaves in the morning before they wilt for the best flavor.
Why Kale turns yellow?
While yellowing can simply be a sign that crop has gotten old, it may also be due to improper storage or disease. If it is in your fridge, yellowing is a sign of chlorophyll and the pigment responsible for the green color breaking down as the leaves age. As a result, storing Kale for too long can result in Kale leaves turning yellow over time. Though, if it was fairly fresh, then you may not have been storing it properly, causing it to age and go bad more quickly.
How many times can you harvest Kale?
Only cut the stems of the plant leaves that you want to pick, and leave the root alone. Return in 1 week and then pick the new large leaves. Kale plant needs to be harvested routinely. If you don’t harvest for more than a week, the Kale plant could be eaten by pests.
The conclusion of Kale seed germination
Well, this some or all information may be used for growing Kale on the terrace, growing Kale in pots or containers, growing Kale in hydroponics, growing Kale in Polyhouse or greenhouse, and growing Kale on raised beds. You may be interested in Basil Pests and Diseases, Control Methods.