Green Chilli Growing Tips, Ideas, secrets, and Techniques
Hello gardeners, we are back with a new topic today. The topic is all about green Chilli growing tips, ideas, and techniques. Do you want to grow green Chilli and do you want to know all about growing tips, ideas, and techniques? Well, and you will need to follow the complete article to know about all the tips, ideas, and techniques.
Introduction to Green Chilli Growing
Green chiles are tasty mild peppers that can be used in lots of food dishes. If you are hoping to grow your green chiles, purchase some green Chilli seeds or harvest some from an overripe Red Chilli. By giving your green Chilli plant full sunlight, water, soil, and attention, you will be enjoying fresh green chiles in a couple of months.
A Step-By-Step Guide for Green Chilli Growing Tips (Peppers), Ideas, Secrets and Techniques
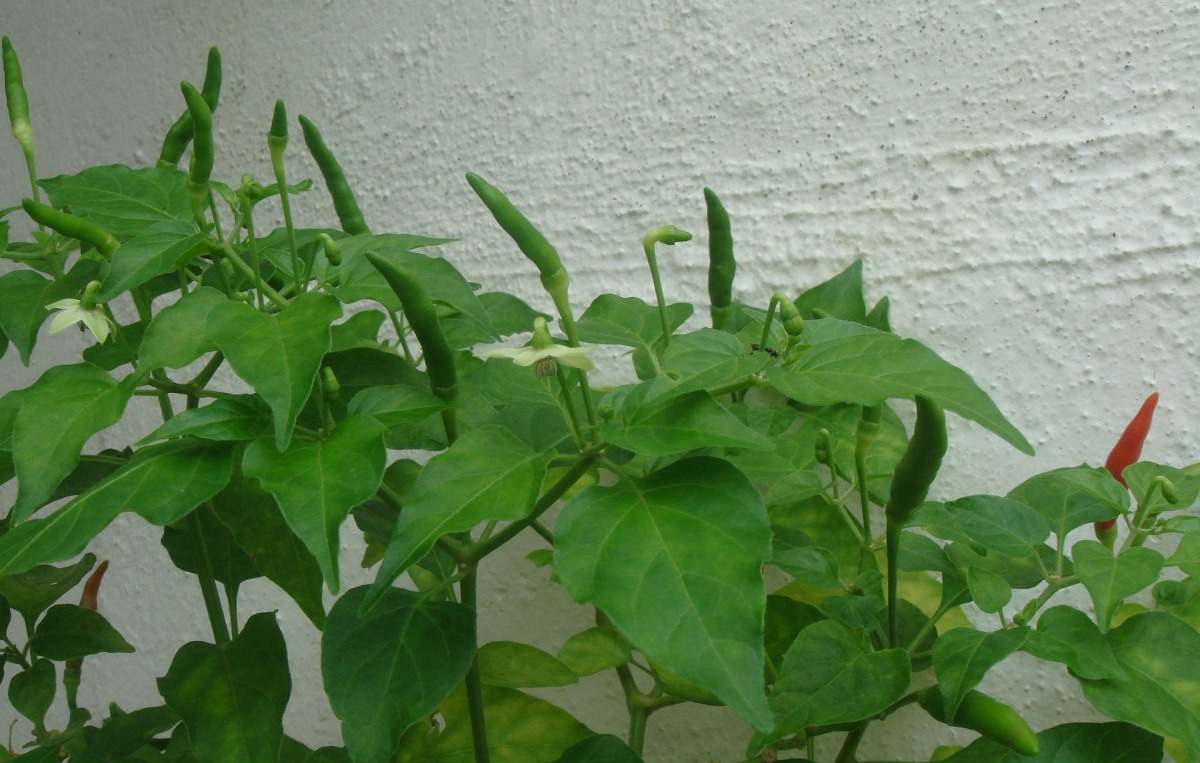
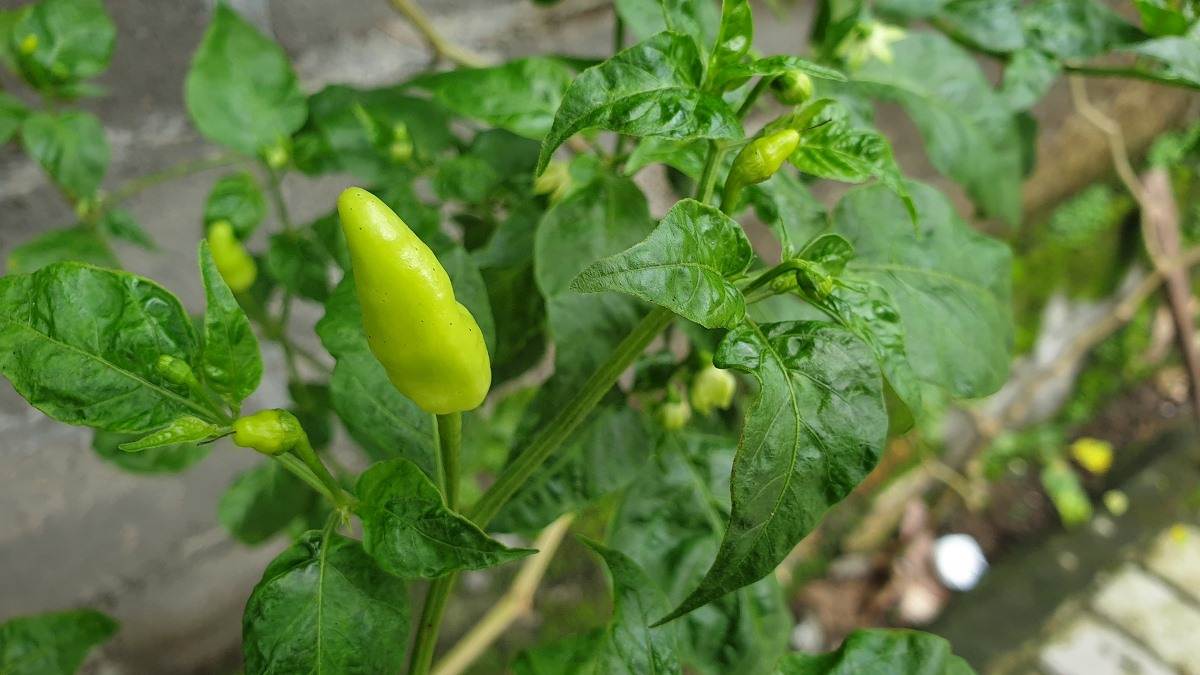
Green Chilli plants grow into very small to medium-sized shrubs from knee-high to two meters or six feet tall. How big they get depends on the species, genus, and variety. There are different species of green Chillies. Most green Chillies are grown as annuals even though they can live for a few years in warm climates. Some green Chilli varieties are true perennials. Green Chilli peppers are green to start with. Most of them mellow to a rich red Chilli but they can also be orange, yellow, purple, or brown Chillies. They may hang down or stand up like little colourful light. There are even attractive varieties that are spotty and freckled.
Green Chilli Growing Stages
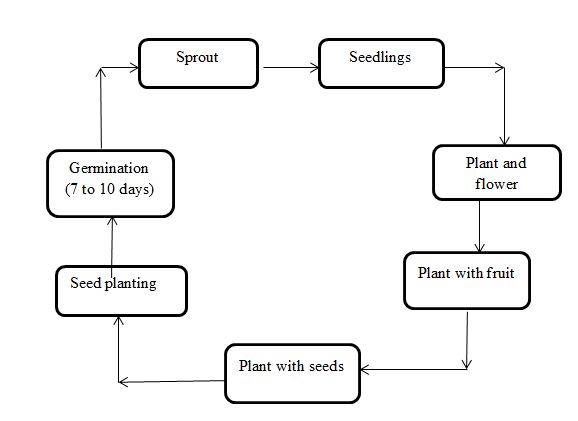
For the green Chilli seeds to germinate very well, a seed tray up to 2- 3 inches deep supply the most conducive environment. Fill the green Chilli seed tray with soil and spread the green Chilli seeds on it. Add only a thin layer of loamy soil above the green Chilli seeds and then sprinkle some water. Keep the green Chilli seeds warm and moist and they will start germinating in a week or two weeks.
Green Chilli Growing Requirements
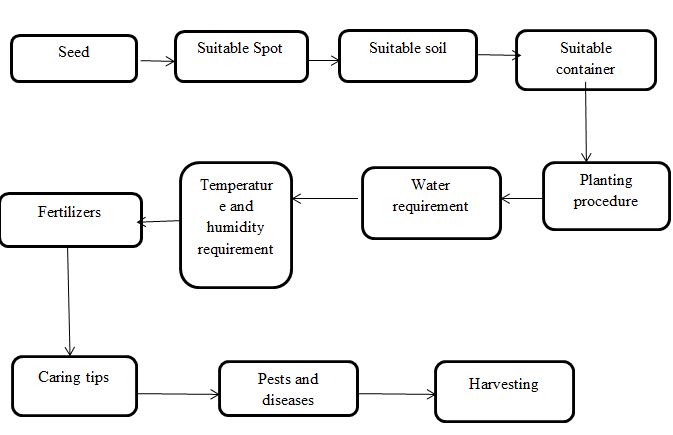
- Temperature: Green Chillies grow very well in warm and temperate climates. The perfect and suitable temperature for growing green chillis is 20-25°C.
- Soil: Although green Chillies can grow very well in a variety of warm soils with neutral pH, black soil is suitable for rainfed conditions. On the other hand, soils most like sandy loam, which are well-draining and rich in organic matter work better with proper water facilities.
- Sunlight: These plants need full sunlight to prosper well, so, pick a sunny spot, but remember to stay the plants under shade.
- Water: The green Chillies do not require a lot of water, so water only when the topsoil dries. Moreover, ensure to maintain previous soil, as the plants cannot withstand moisture for a long time and may rot.
- Fertilizers: Fertilize your plants with cow dung manure or Gobar ki Khaad at regular intervals, as the soil requires to be rich well-drained in organic matter for plants to grow well.
How to Grow Green Chilli from Seed?
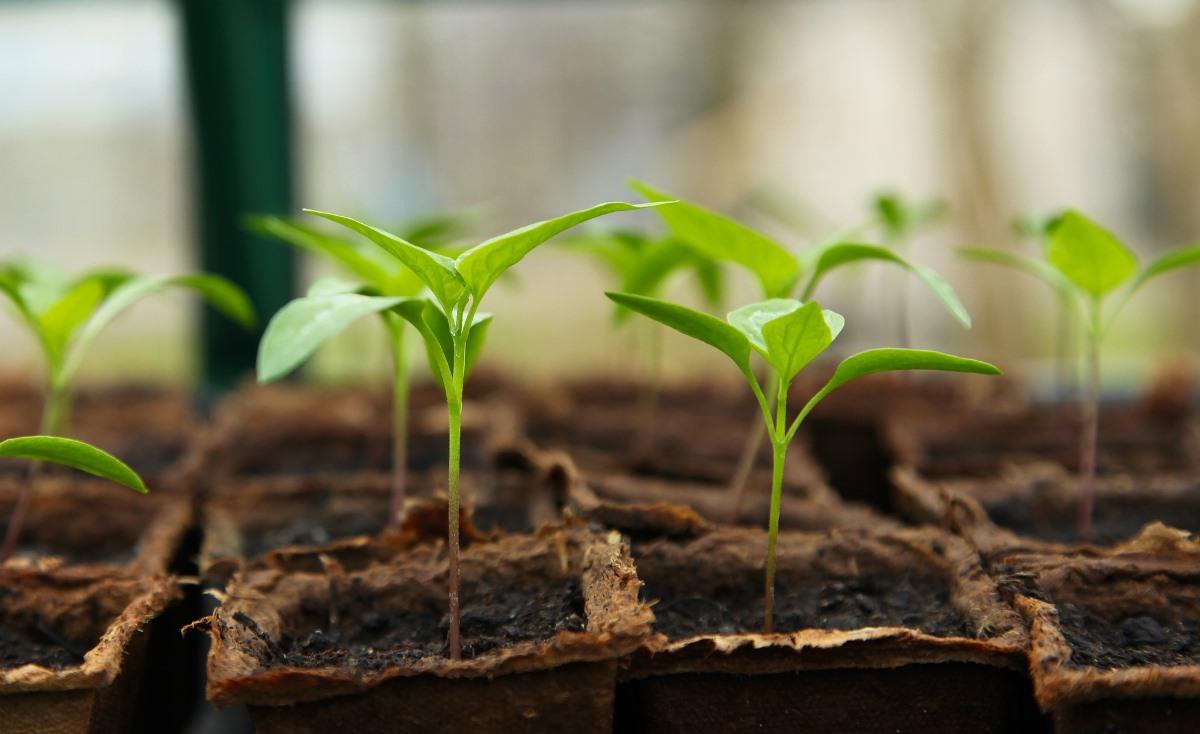
If you’re not able to go to the green Chilli plant nursery and get your hands on a container of green Chilli seeds, worry not take your suitable type of green Chilli pepper, slice it and reduce all the seeds. Spread the green Chilli seeds on a paper napkin and let them dry for 2-3 days. Once they have dried up, follow the steps below. Please make sure that you are always wearing gloves while handling Chillies and their seeds. To avoid touching your eyes, face, and any sensitive skin, and always wash your hands afterwards.
Spread opens a paper napkin; place all green Chilli seeds evenly on it. Then spray some water on them and turn up the paper napkin close. Now keep this aside for about a week while making sure that the paper towel is routinely sprayed with water to keep it moist and humid. Keep it in a warm and humid place.
Alternatively, you can skip this entire step. First, wet the seeds nicely and sow them in the soil at a bottom of about 2-3 cms. The green Chilli seeds will germinate in about 1 week. Water them every alternate day, keep the soil moist and ensure they are not exposed to hard winds or strong sun.
Green Chilli plants normally require well-drained and loamy soil. Add a very little bit of compost to it and give it a good mix. Keep the soil moist but don’t overwater it. You need to water every other day or every 2-3 days depending on the weather. Ensure there is a wet-dry-wet-dry cycle of watering. The green Chilli seeds will germinate and you will see two small leaves on the surface of the soil within 7-10 days of planting the green Chilli seeds. Keep watering them every alternate day and make sure they are exposed to 4-6 hours of sunlight daily.
Once the green Chilli plant is about 8-10 inches in height, it will bring out small sprouts which will blossom into very cute little white flowers about 1-1.5 months after planting them. The flowers will constant on the plant for about 7-10 days, then fall off. Then you will see a cute baby Chilli growing in its place.
Regularly water and feed the plant and the green Chillies will grow bigger and bigger. The bigger they are the stronger their spiciness is. Once the green chill is about 5-7 cms long you can pick off it to cook with it. However, If you want it to be very spicier you can leave it on the plant itself. If you leave them long enough on the plant, the green Chilli peppers will ultimately turn red. The redder it gets, the hotter the Chilli.
Do you want to try this: How To Grow Organic Leafy Vegetables.
Germinating Green Chillies Seeds on a Paper Towel
Requirements are listed below:
- Chilli seeds
- Paper towels
- Container
- Potting soil
- Seedling tray
A method is mentioned below:
#1 Prepare paper towels
Moisten a paper towel until it is moist by misting with a spray bottle or wetting the paper towel and then squeeze it out. The paper towel should be moist, but it should not be soaking wet.
#2 Place pepper seeds on a paper towel
Turn your moist paper towel in half. Position the green Chilli seeds so they are about an inch apart on one half of the paper towel, then turn over the other half over the green Chilli seeds.
#3 Put paper towels in a container
If you are using a container, place the paper towel in the container and close the bag, leaving a 1-inch opening for air movement. If you are using a plastic bakery container or egg carton, just place the paper towel in the container and separate it closed.
#4 Move sprouted seeds to soil
Sprouted green Chilli seeds have graceful roots, so take care with this step. Use tweezers to handle the sprouts by the green Chilli seed bodies or cotyledons, or use scissors to cut the paper towel around the sprouted seeds. Use your thumb to make holes in your potting soil or soil blocks, then transfer one sprouted green Chilli seed to each hole. Shelter gently with dry potting soil, ensure that any true leaves same above the soil, and mist the soil surface.
Green Chilli Growing Secrets
Here top 6 secrets of growing green Chilli. They are:
- Prepare the site: The right site can make all the difference in how well green Chilli performs. To pick a sunny, well-drained spot where green Chilli hasn’t grown recently. The soil should be deep, rich, well-drained, and loamy. If yours isn’t, change it with about 1-2 inches of compost. To avoid adding too much nitrogen to the loamy soil, however. Extreme nitrogen can aware the green Chilli plants to grow too fast, making them more vulnerable to disease and less productive.
- Harden off seedlings: Before you plant your green Chilli seedlings, you will require hardening them off by normally exposing them to outside conditions. This process helps seedlings adjust, so they will be less stressed when you green Chilli plant them. And less stress means bigger, more productive green Chilli. When daytime temperatures reach the mid-60s, set the seedlings in a protected location outside, such as next to the house or garden, for a few hours each day for three or four days. Over the next week, very slowly extend that outside time. Meanwhile, as the green Chilli seedlings become accustomed to the outside, you can warm the green Chilli bed by
- Plant: Consistently reached 60 degrees and all hazard of frost has passed. If possible, set out your green Chilli on a cloudy day to help remove stress on the green Chilli plants. Space the green Chilli plants 12 to 20 inches apart, depending on the grown-up side of the variety, and set them a bit deeper than they were in their containers. Like tomatoes, Chillies grow extra roots from the secrete portion of the stem. Stem or cage taller varieties so that the stems do not break in strong winds or due to a massive fruit load. After you plant the green Chilli seedlings, water them very well.
- Water and Mulch: Around the green Chilli growing season, ensure your green Chilli plants collect at least an inch of water a week. Check the green Chilli frequently during periods of extreme heat and dry spell, when each plant can very easily take a gallon of water a day. If you live in a very hot, dry region, add a thick layer of mulch to help keep soil moisture and moderate the soil temperature. But does this only after your loamy soil has warmed mulching cool soil will keep it too cool and stunt the green Chilli plants’ growth.
- Pinch off the First Flowers: As unnatural as it may seem, pinch off any early blossoms that appear on your green Chilli plants. This won’t harm the green Chilli plants. It helps them direct their strong energy into growing, so you get lots of large fruits later in the winter season and higher overall plants instead of just a few small fruits early on.
- Harvest your Green Chilli: You can harvest the green Chilli at their unripe green or purple stage, but the flavor will be sweeter if you wait for them to reach their mature color usually red, but sometimes golden yellow or orange. Italian fryers, jalapenos, and Cubanelles are possible assumptions. Many people prefer the flavor of this green Chilli when they are full size but still green. To harvest the green Chilli, cut them off with hand pruners. Pulling them off by hand can damage the green Chilli plant.
Green Chilli Fertilizer and Compost
The best fertilizer for your green Chilli plants depends on your warm soil. It’s a smart idea to get it tested to find out the nutrient content before making modifications. However, adding compost to the entire vegetable bed before planting is always a good idea too.
Generally, a balanced fertilizer works for green Chilli. But if your warm soil testing shows you have sufficient phosphorus, you should pick a low- or no-phosphorous fertilizer. Nitrogen is particularly very important for stimulating good green Chilli growth, but you have to know the best time to fertilize green Chilli to get the very best results.
Composting Basics
A great many benefits are associated with the use of compost:
- It can increase the soil, building up the structure and appearance
- It increases airflow and water maintenance
- Compost also balance pH levels and supports essential bacteria
- Compost allows green Chilli plants to extremely use nutrients for achieving healthier growth as very well.
Also, the organic matter found in compost supports earthworms, which also help ventilate the soil. Other well-being includes soil erosion control and the reduction of soil-borne diseases.
Compost is made up of organic materials that break down in the soil, enriching its structure and adding suitable nutrients. To understand the composting procedure, it helps to look at the natural decomposition process found in nature. For instance, wooded areas are filled with natural materials trees, leaves, etc. Over time these substances slowly decompose, or break down, with the help of micro-organisms and earthworms. Once the other substance has decomposed, they turn into humus, a suitable element in the production of rich, well-drained fertile soil that is also responsible for producing healthy green Chilli plants. This prefers is similar to garden composting. Once decomposition has taken place in the compost pile, the solution should be similar to that of humus with a dark, crumbly, soil-like material.
When to Water Green Chilli?
Most green Chilli plants die because they are not watered suitably. If should be careful, the root ball will not dry out. Should it happen for a short time, the green Chilli plants will recover fastly after watering? Standing moisture is more dangerous for green Chillies. The symptoms of the dry root ball and waterlogging are similar for green Chillies. Leaves wither ultimately and fall off. Therefore, you should always check beforehand whether it is necessary to provide your green Chilli plants with moisture.
Most problems with green Chilli breeding are caused by incorrect water. No matter if in the high bed, balcony box, bucket, or in the garden. If waterlogging occurs, the roots start to rot and the green Chilli loses its leaves. The quantity of water cannot be fixed. It depends on the substrate, plant container, sunlight, location, and variety.
The right quantity of water reaches the structure of roots. The easiest way to check this is to accumulate some moisture in the coaster. But be careful if the soil has become too dry, it cannot absorb the water so fastly. The water simply runs through the substrate. Then pour in particular small portions. Feel with your finger whether the moisture takes place at the roots. With your finger, you can very easily check whether the root ball is still moist. To do this, enclosure your index finger into the substrate. At a bottom of 3 cm, it should be moist, but not wet.
Take the green Chilli in the flower container in your hand before watering. Over time you will develop a feeling for the right pressure. So you can fastly notice whether the green Chilli plant requires new water. Pay awareness to the colour of the warm soil. With green Chilli plants, the top layer should dry off. Mould can then very easily form.
Rainwater is best suitable for watering green Chilli plants. Green Chillies do not grow extremely well in calcareous tap water. Maybe you can set up a rain tub. Alternatively, you can boil tap water or lose calcium compounds with a water filter. If you do not have many green Chilli plants, you can be mixed distilled or osmosis water with tap water.
Many growers use chamomile tea to soak green Chilli seeds in it. This has some advantages because chamomile is providing anti-bacterial. Bacteria and fungi on the seed coat cannot spread as fastly until the green Chilli develops its defences. There is no reason why you should not water it with diluted chamomile tea later on. The water should be assumed to the soil temperature. Leave the water to stay away from some time.
Green Chilli Growing tips in Containers
Growing green chilli in containers is even very easier than growing them in the garden. Besides, you can enjoy fresh and organic green chillies from containers anytime to plant the green chillies in containers, firstly, you have to pick a container that is big sufficient for the plant. A container of size 11-15 inches, with perfect drainage holes, is ideal.
You can use the seeds from green chillies in your kitchen or get a green plant from a nursery. Prepare a mixture of part soil and part cow dung manure Gobar ki Khaad and green chilli plant the seeds into the container avoid putting them deep into the warm soil. Lastly, place your container in a sunny place and water as and when needed. Ensure to supply Gobar ki Khaad from time to time.
Green chillies grow very well in containers but they do have some specific requirements. To discover the tricks of the trade, I met up with and filmed professional green chilli grower, Steve Waters. Few other plants can match green chillies for the ‘flavour for space’ ratio. One plant will frequently give you a hundred green chillies or more. So, all but the most dedicated green chilli eater can usually be self-sufficient in green chillies with just a few plants something very possible, even in a tiny growing space. Any surplus green chillies can very easily be dried or frozen, keeping you in provide all year. A huge benefit of growing your own is the vast array of favourable varieties now accessible you will discover a whole new world of flavour when compared to the ubiquitous, one-dimensional ‘red’ and ‘green’ chillies sold by most supermarkets.
Whether you are looking for amazing yummy taste try Aji Lemon, Fatali or Cherry Bomb, or fiery heat try Bhut Jolokia or something very beautiful to brighten your balcony. You do require a warm, sheltered spot inside or outside with at least six hours of sun to grow green chillies with any reliable success they will be reluctant to fruit without. But with the right conditions, green chillies can do brilliantly in containers.
Green Chilli Maintenance and Care
In case if you miss this: How To Grow Coriander In Greenhouse.
- To supply plenty of light and water
- They are warm-weather green chilli plants, prevent them from low temperatures
- The fruit that is exposed to hard sunlight may lighten on the exposed surface You can move the container to another area at noon, or you can put them close to other plants so they partial shade each other
- They are very hardy, but you must prevent them from extended wind, rain, and hail
- Green Chilli can be planted straight into regular garden warm soil but will benefit from some well-composted dung or compost being blended through at planting time
- Sandy soils should be improved with the addition of quality compost or dung
- Add a controlled-release fertilizer at green Chilli planting time
why my green chilly plant has flowers with 4,5 and 6 petals?