Home Gardening

Outdoor Gardening

Organic Gardening

Modern Gardening

Urban Gardening

Gardening Business

Home Blog

Plantation Ideas for Home Decoration: A Beginners Guide

0

Plantation ideas for home decor are not only trendy but also bring life and vibrancy into any room. In this article, we have various plantation ideas to elevate your home décor and help you create a refreshing and inviting environment.
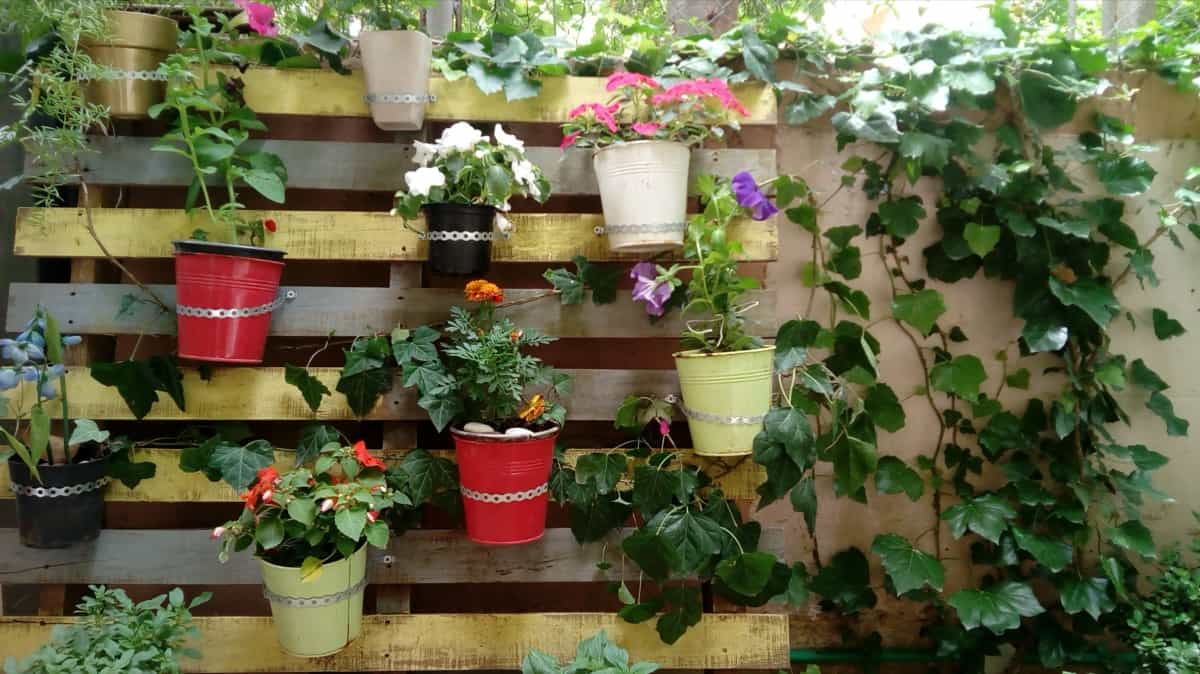
Plantation Ideas for Home Decoration

Indoor Vertical Wall Gardens

Indoor vertical wall gardens are a trendy and space-saving way to bring the outdoors inside. They create a stunning focal point while maximizing limited floor space. These living walls are not only visually appealing but also bring a breath of fresh air into any space. Vertical gardens are versatile and can be customized to suit any style or size of the room.

Whether you have a small apartment or a spacious living area, there’s always a way to incorporate a vertical garden into your interior design. Not only do indoor plants look beautiful, but they also have numerous health benefits, like purifying the air and reducing stress levels.

Terrariums for Small Spaces

These miniature indoor gardens are visually appealing and also easy to maintain, making them ideal for those with limited space and time. Terrariums come in various shapes and sizes, allowing you to get creative with how you display them. Succulents and air plants are popular choices for terrariums due to their low maintenance requirements.

They thrive in the enclosed environment of a terrarium, requiring minimal watering and attention. Terrariums bring the beauty of nature indoors without taking up precious floor space. Placing them on shelves or desks or even hanging them from the ceiling adds a unique touch of botanical charm to any small living area.

In case you missed it: How to Make Kalanchoe Plant Bushy: Home Remedies and Solutions
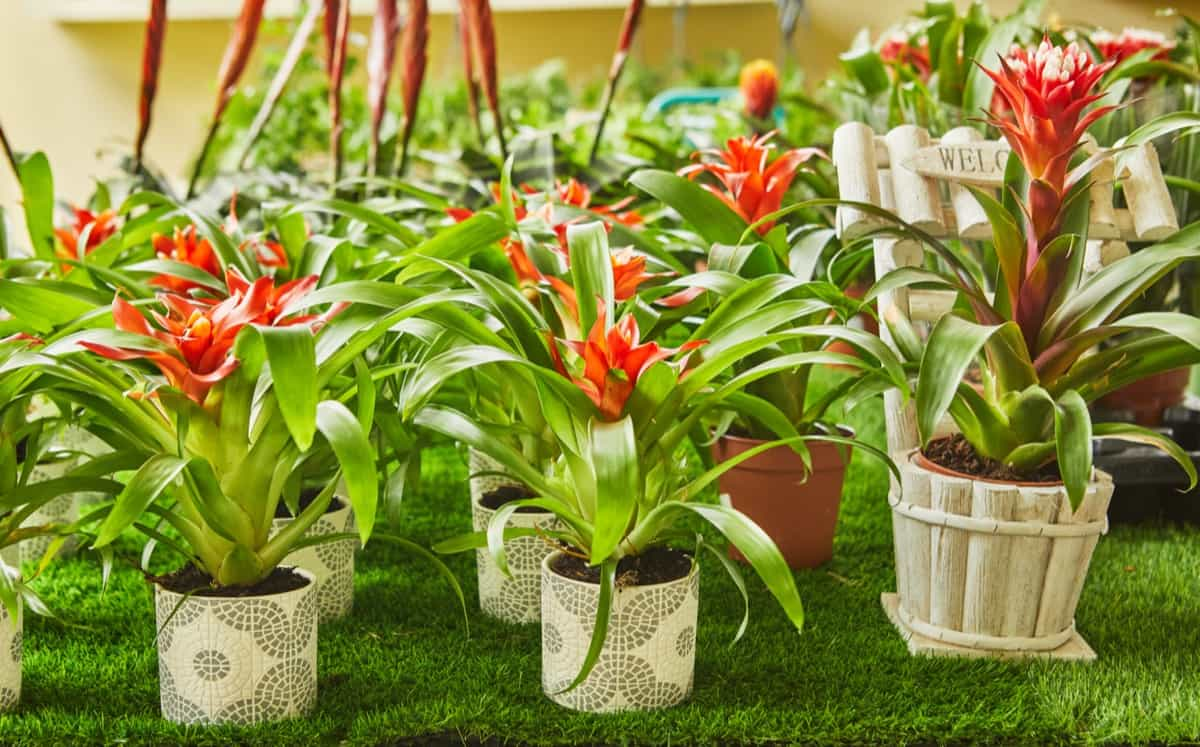
Blooming bromeliads in pots in a home garden

Hanging Plant Baskets

Hanging plant baskets are a fantastic way to bring nature indoors. These versatile planters can be hung from the ceiling or mounted on walls, adding a dynamic element to any room. Choose trailing plants like pothos or spider plants for a cascading effect that adds visual interest. For smaller spaces, opt for compact varieties such as string of pearls or ivy that won’t overwhelm the area but still provide a pop of color.

Mix different textures to create an eye-catching display. Consider incorporating flowering plants like begonias or ferns for added vibrancy. Don’t forget to rotate your baskets regularly to ensure even growth and exposure to sunlight.

Succulent Centerpieces

These low-maintenance succulent plants come in various shapes, sizes, and colors, making them perfect for making eye-catching displays. Succulents thrive in bright light and require minimal watering. Whether you prefer a single-statement succulent or a mix of different varieties, these plants can instantly enhance any room’s aesthetic.

From elegant ceramic pots to rustic wooden containers, there are endless options for showcasing your succulents. Match different textures and heights to create visually appealing arrangements that will elevate your dining table or coffee table effortlessly.

Window Box Herb Gardens

These charming little gardens not only brighten up your space but also provide fresh herbs right at your fingertips. With a well-designed window box herb garden, this could easily become a reality. From traditional terracotta pots to modern, sleek designs, there are endless options to suit your aesthetic preferences. Whether you have a small apartment or a spacious house, window box herb gardens can be tailored to fit any space. They are versatile, easy to maintain, and bring nature closer to home.

Decorative Indoor Trees

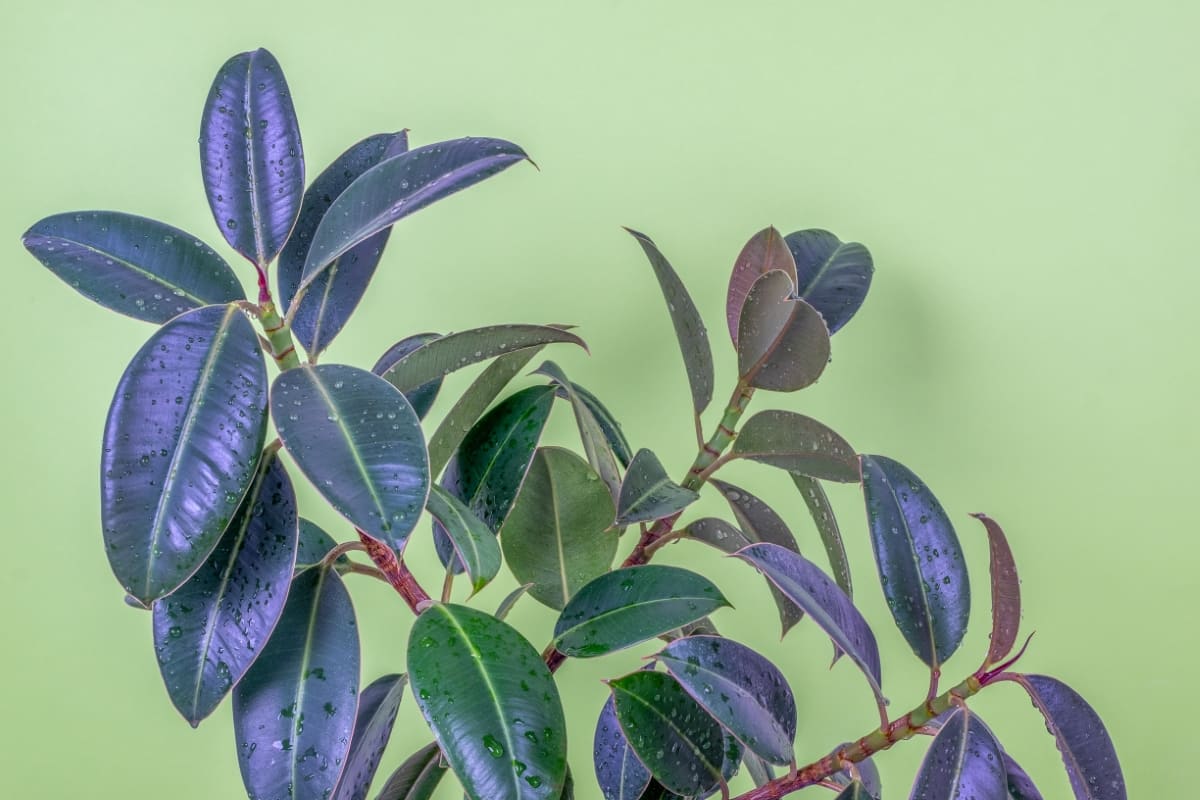
Indoor trees not only bring a sense of freshness and tranquility but also act as statement pieces that can raise the aesthetics of any room. From tall Fiddle Leaf Figs to compact Rubber Trees, there are various options to choose from based on your space and style preferences. These leafy companions thrive in well-lit areas with indirect sunlight, making them ideal for brightening up living rooms, bedrooms, or even office spaces. Their green foliage adds a pop of color that effortlessly enhances the overall ambiance.

In case you missed it: 14 Best Compost Bins for Home in India: For Indoor, Outdoor, and Kitchen Garden
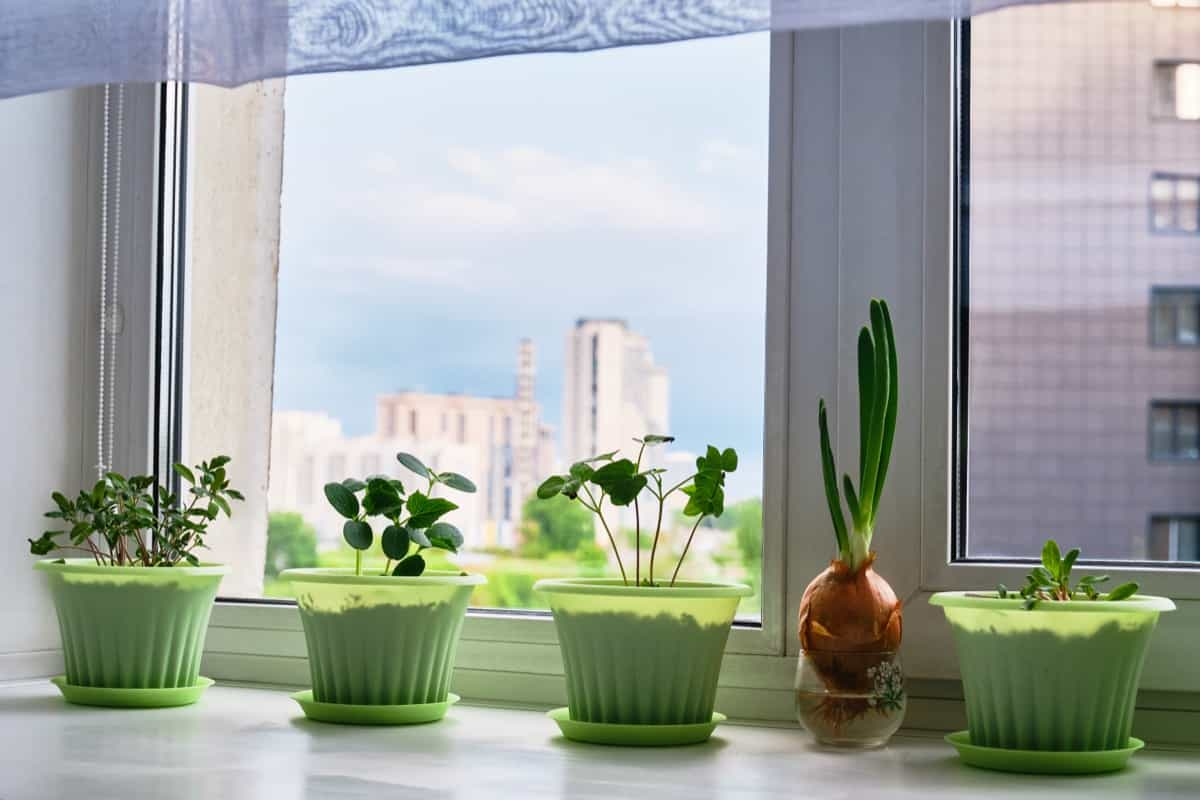
Kitchen gardening plants

Air Plant Displays

Air plants, also known as Tillandsia, are unique and captivating additions to any home decor. Their ability to thrive without soil makes them versatile for display in various creative ways. A popular method is creating hanging displays using decorative holders or macrame hangers. Suspending air plants in the air can add a touch of greenery to any room.

Another option is placing air plants in glass terrariums filled with sand or small pebbles. These enclosed environments create a mini ecosystem that can be both visually appealing and low-maintenance. This organic approach brings a touch of nature indoors while making a stylish statement.

Under-Stair Plant Nooks

With a few shelves or hanging planters, you can create a stunning display of greenery that not only adds beauty to your home but also maximizes the use of space. Under-stair plant nooks are perfect for those who want to add some greenery to their home without taking up too much floor space. You can mix different plants to create an eclectic look or stick with one type for a more uniform appearance. Whether you have an open-concept staircase or a closed-in one, there are plenty of creative ways to incorporate plants into this unique area.

Kitchen Counter Herb Pots

Kitchen counter herb pots not only provide fresh herbs at your fingertips but also serve as decorative elements in the heart of your home. With just a few small pots filled with aromatic herbs like rosemary, thyme, or mint, you can elevate both the visual appeal and flavor profile of your culinary creations.

These herb pots not only bring life and vitality to your cooking space but also offer convenience and practicality. Whether you have a spacious kitchen with ample natural light or a cozy galley kitchen with limited space, there’s always room for some compact herb pots that will enhance both the aesthetics and functionality of this essential room in your home.

Balcony Flower Arrangements

Flower arrangements are a great way to bring color and life into your outdoor space. Whether you have a small balcony or a spacious terrace, there are endless possibilities when it comes to decorating with flowers. Consider mixing different types of flowers for variety and visual interest. Hanging baskets, potted plants, or even vertical planters can all be used to create beautiful displays. Remember the importance of sunlight when choosing your flowers. Make sure to select plants that thrive in the sunlight your balcony receives throughout the day.

In case you missed it: Nourish and Flourish: Top Organic Mulches for Thriving House Plants
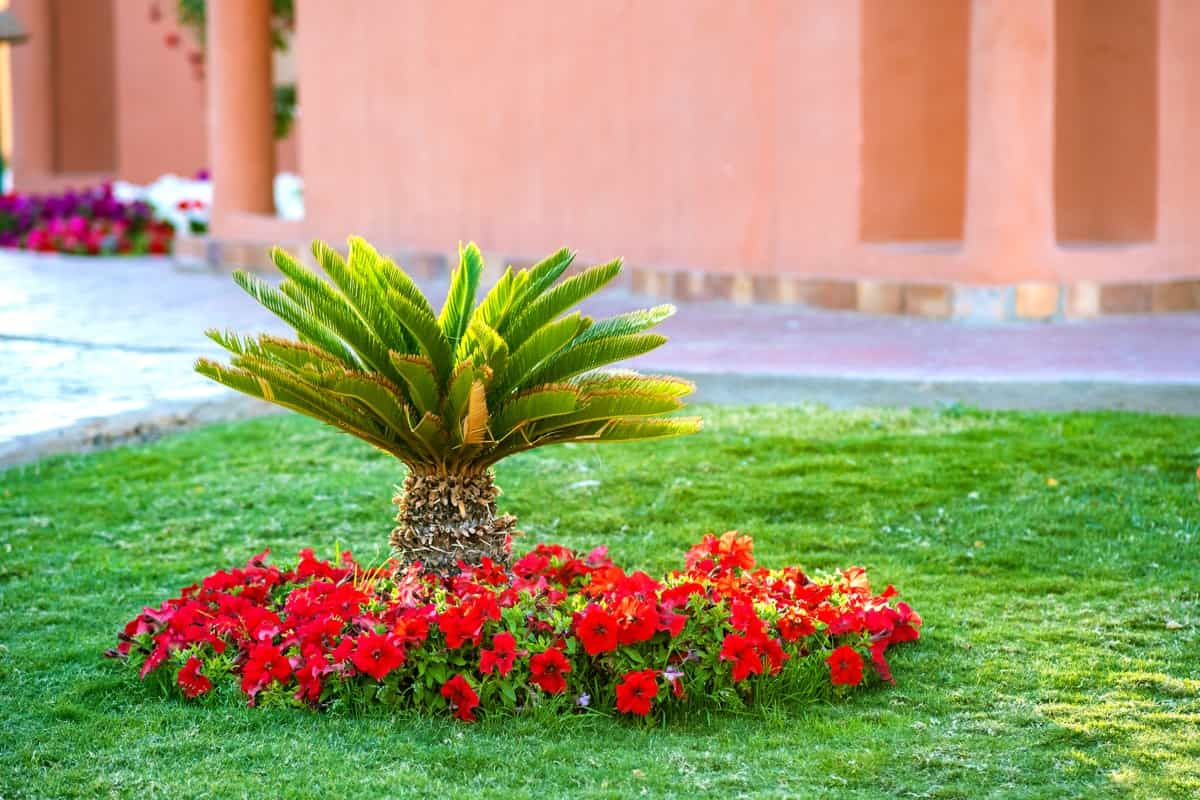
green palm tree surrounded with bright blooming flowers in a home garden

Conclusion

Plantation ideas for home decoration can add a touch of nature and freshness to any room. Decorating your home with plants is a fantastic way to infuse natural beauty and vitality into your living space.

Flower Garden Designs and Layouts for Beginners

0

Flower garden design involves blending different plant varieties, colors, textures, and heights to make an aesthetically pleasing composition. Creating a well-thought-out flower garden design is essential for maximizing the beauty of your space. It allows you to express creativity, showcase your favorite blooms, and create a personalized oasis right in your backyard.

Flower Garden Designs and Layouts

Fundamentals of Flower Garden Layout

The fundamentals of flower garden layout involve considering factors like sunlight exposure, soil quality, and plant height. Begin by sketching out your garden design on paper, taking into account any existing structures or trees that may impact the layout. Consider the bloom times of your chosen flowers to ensure a display of color throughout the seasons. Group plants with water and sunlight needs together for easier maintenance. Experiment with different arrangements until you find one that suits your style and vision for your flower garden.

Seasonal Color Strategies

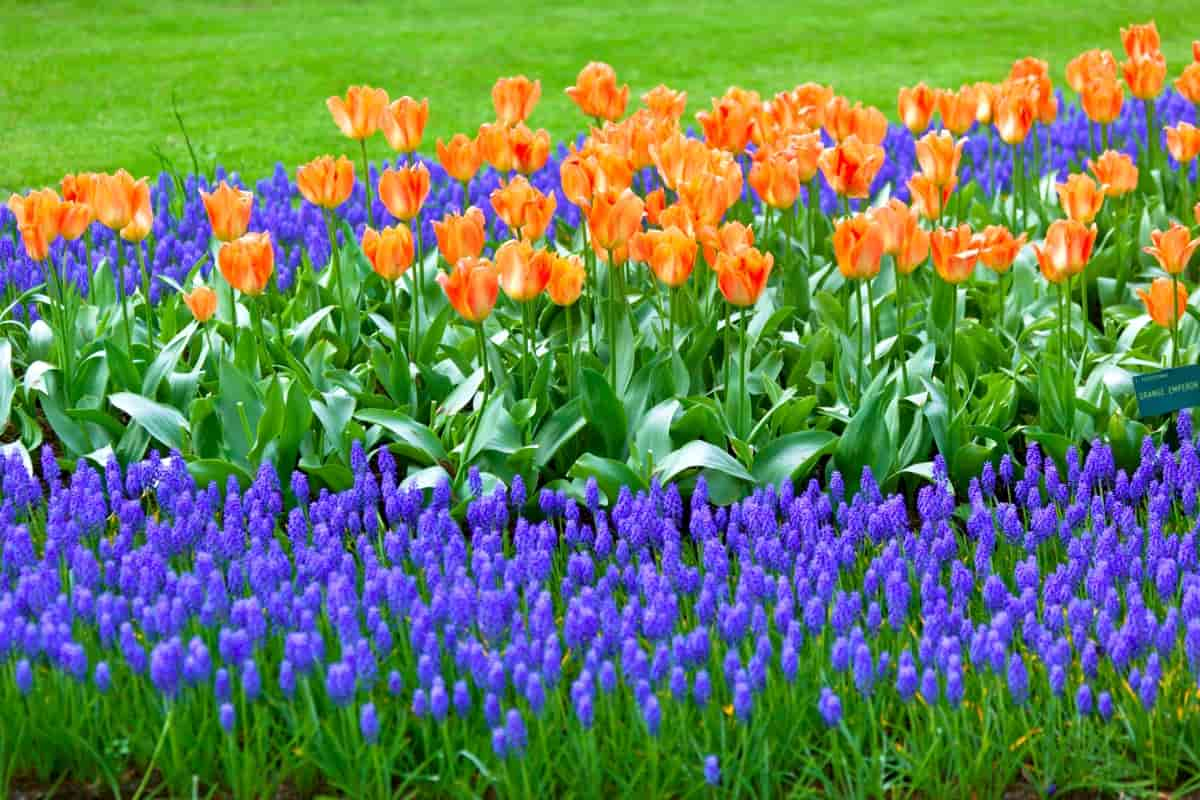
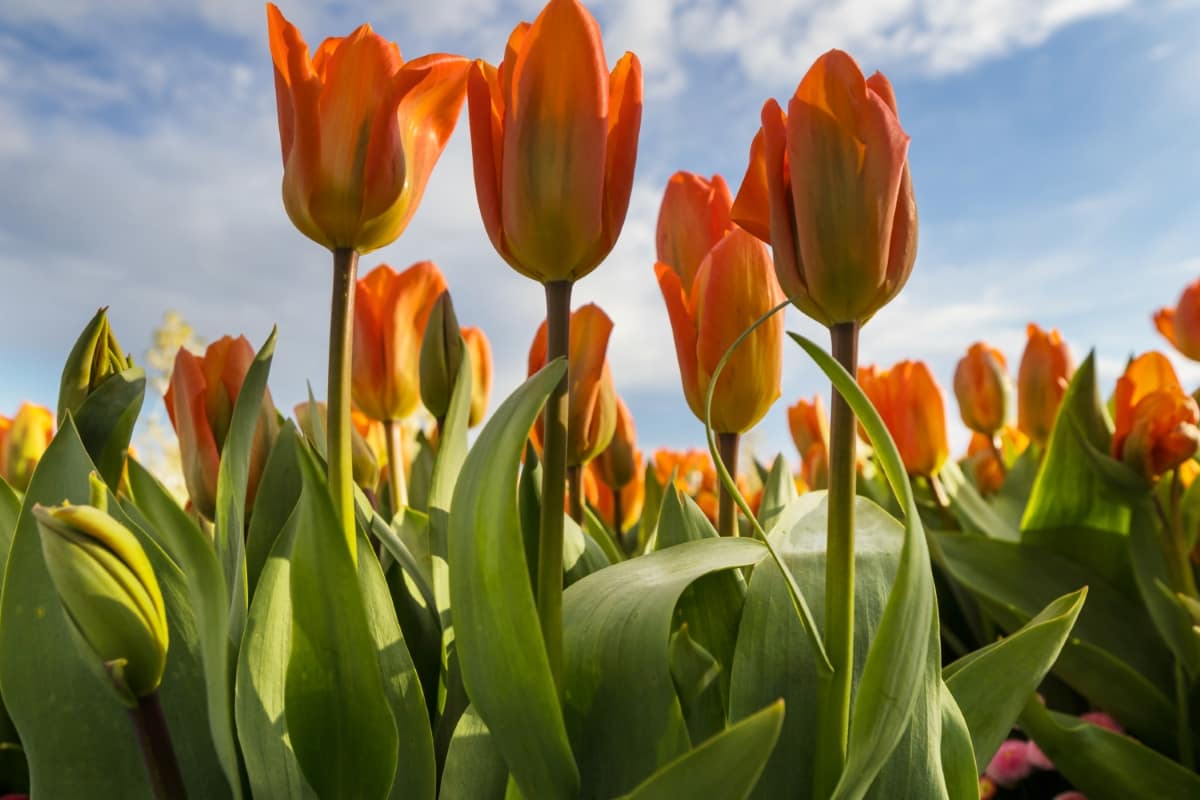
When designing your flower garden, consider using seasonal color strategies to keep it vibrant and visually appealing year-round. Incorporate a mix of plants that bloom at different times throughout the seasons. Choose flowers that bloom in spring, summer, fall, and even winter to ensure there is always something colorful in your garden. For spring, opt for bulbs like Tulips and Daffodils that burst with bright hues. Summer calls for cheerful blooms like Sunflowers and Zinnias to bring warmth to your garden. Transition into fall with rich tones of marigolds and asters. 

Vertical Gardening with Climbers

Vertical gardening with climbers is a fantastic way to add depth to your flower garden design. By using vertical space, create a lush green backdrop for your blooming flowers. Climbers like morning glories or sweet peas can add beauty to any garden setting.

In case you missed it: DIY Succulent Garden Designs for Limited Space

Bright Flowerbed

These climbing plants not only provide visual interest but also help maximize limited space in smaller gardens. You can train plants to grow up arbors, trellises, or even along fences to create stunning vertical displays. Their upward growth habit adds a dynamic element to the overall layout of your garden.

Incorporating Water Features

Water features can add tranquility and elegance to your flower garden design. Consider incorporating a small fountain, pond, or birdbath into your garden layout. These features not only attract birds but also provide a focal point that enhances the overall aesthetic appeal. Water features’ reflections can add depth and visual interest to your garden space. This element adds another dimension to your floral displays, creating a dynamic and captivating environment.

Choose water feature designs that complement the style of your flowers and plants. Whether you prefer a modern look with sleek lines or a more natural feel with rocks and cascading water, there are endless possibilities to suit your taste. Regular cleaning will ensure that your garden remains beautiful and inviting year-round.

Pathways and Walkways Design

When designing your flower garden layout, don’t forget about pathways and walkways. These elements add functionality and also enhance the overall aesthetic appeal of your garden. Consider using materials like gravel, stone pavers, or even wood to create paths that complement your flower beds.

Curved pathways can add a sense of whimsy and intrigue to your garden space, while straight paths offer a more structured look. Mix it up depending on the style you want to achieve.  Pathways are not just practical; they can be an integral part of the beauty of your flower garden.

Mixing Perennials and Annuals

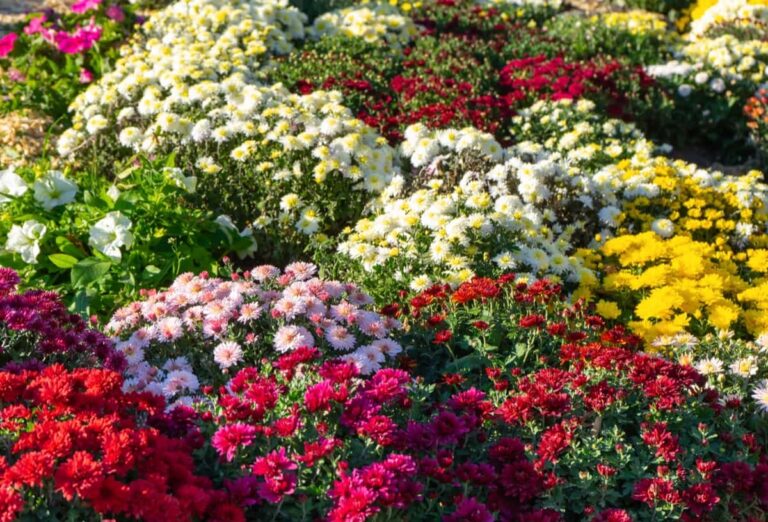
Perennials are beautiful plants that come back year after year, while annuals bring vibrant colors and blooms for just one season. The combination of these two types of plants creates a dynamic landscape that changes throughout the year. By incorporating a mix of perennials and annuals in your garden layout, you can enjoy continuous color from spring to fall.

In case you missed it: Terrace Gardening Design and Best Terrace Gardening Plant Ideas

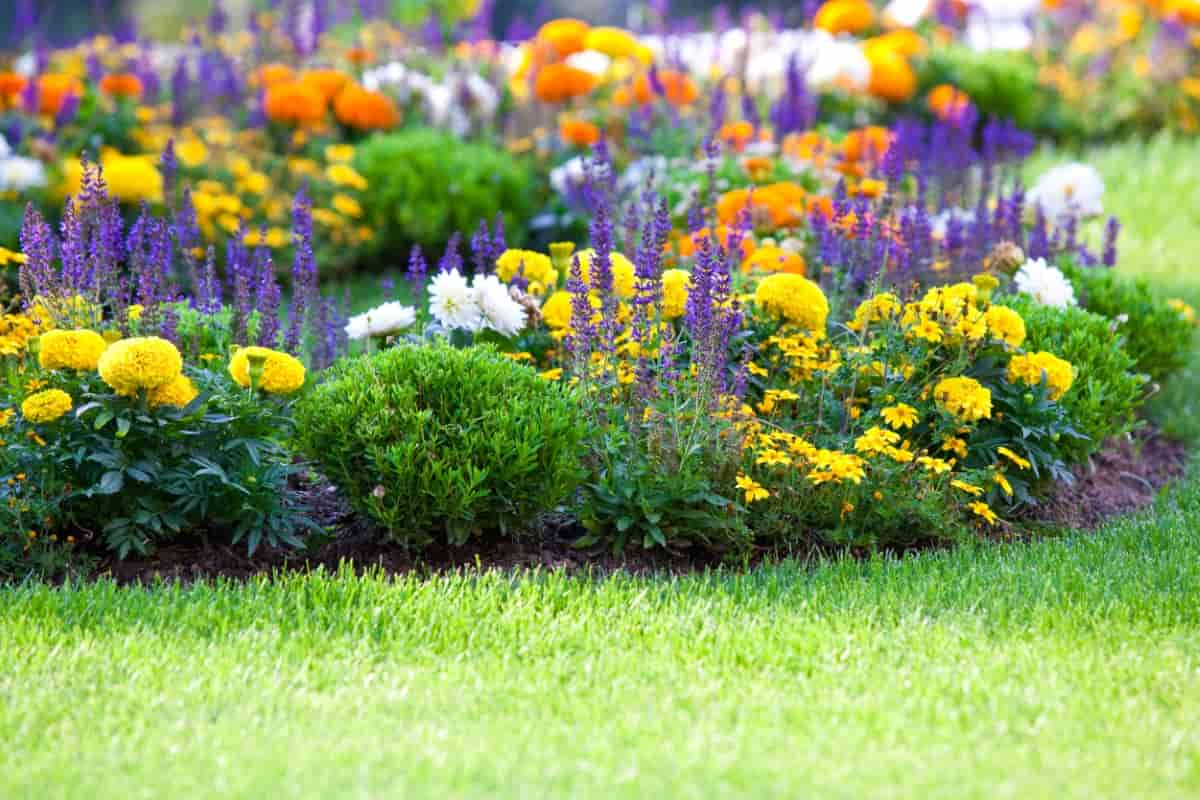
Multicolored Flowerbed on A Lawn

Perennials’ consistent growth provides a solid foundation, while annual’ seasonal pops of color keep things interesting. Pairing tall perennials with low-growing annuals can create depth and visual interest in your flower beds. With some creativity, you can achieve a harmonious balance between these two plant types in your flower garden design.

Shade Garden Considerations

When creating a flower garden in a shaded area, it’s essential to choose plants that thrive in low-light conditions. Shade-loving plants like hostas, ferns, and astilbes can add color to your garden while flourishing in the lack of direct sunlight. Consider the different levels of shade in your garden—from dappled light under trees to dense shade near buildings or walls.

Matching the right plants with varying degrees of shade will ensure a harmonious and thriving garden. Don’t forget about incorporating elements like decorative rocks, statues, or unique planters into your shaded garden design.

Sun-Loving Flower Beds

When designing these beds, consider plants like marigolds, petunias, and zinnias that thrive in full sunlight. Ensure your sun-loving flower bed receives 6-8 hours of sunlight daily for optimal growth. Good drainage is essential too; make sure the soil is well-draining to prevent waterlogged roots. Tall blooms like sunflowers can be complemented by mid-sized flowers such as daisies or salvias, creating a dynamic and eye-catching display.

Sustainable Gardening Techniques

Sustainable gardening techniques are essential for creating a flower garden that thrives in harmony with the environment. The main technique is to use organic fertilizers and compost to nourish the soil naturally, reducing the need for synthetic chemicals. Another method is to practice water conservation by utilizing rain barrels or drip irrigation systems to water your plants efficiently.

In case you missed it: Cottage Garden Ideas on a Budget: Design Tips and Guide

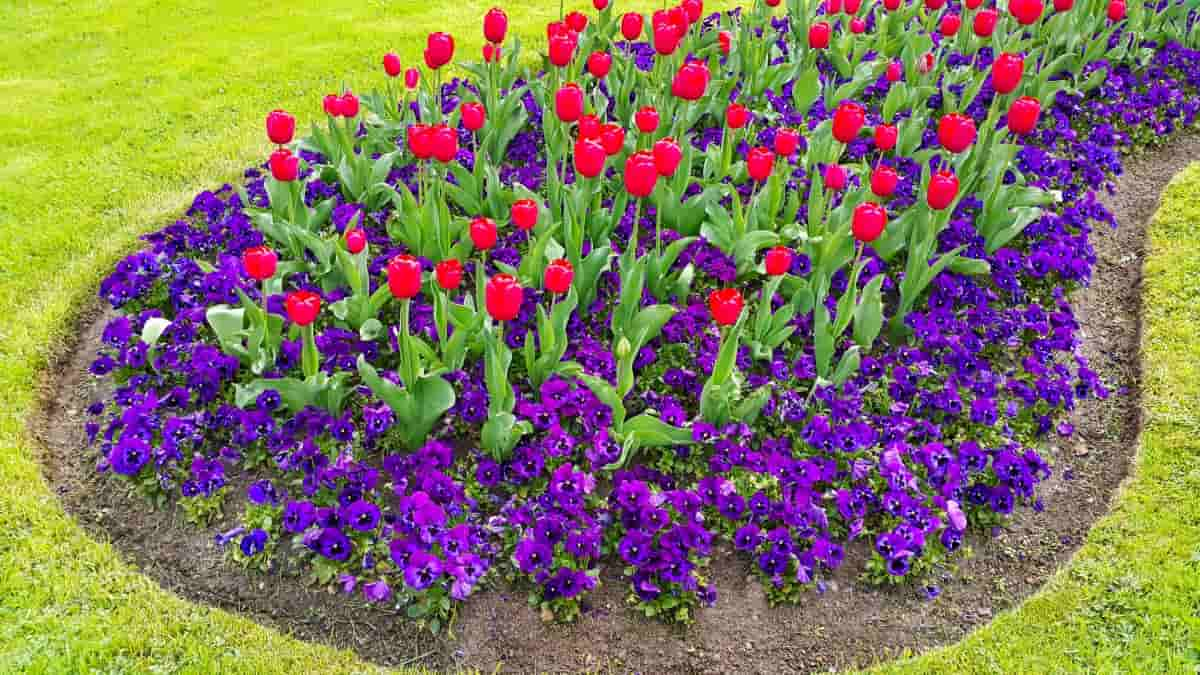
Green Lawn with Beautiful Tulips and Violets

Choosing native plants that are well-suited to your region can help reduce the need for excessive watering and pesticides. Implementing companion planting strategies can also promote natural pest control and enhance plant growth without resorting to harmful chemicals. Additionally, attracting beneficial insects like ladybugs and bees can help maintain an ecosystem within your garden.

Creating Focal Points with Flower Beds

When designing a flower garden, creating focal points with flower beds can enhance the overall aesthetic appeal of your outdoor space. Placing a striking combination of colors and textures in key areas of your garden draws the eye and adds visual interest. Consider incorporating tall flowering plants like delphiniums or foxgloves at the back of a bed to create height and drama.

Pair them with lower-growing varieties such as petunias or marigolds in front for contrast. Grouping flowers with varying bloom times can ensure that there is always something in bloom throughout the season, keeping your focal points looking fresh and vibrant. Making a flower garden can be a rewarding and enjoyable experience for beginners.

Planting and Spacing Techniques in Papaya: A Beginner’s Guide

0

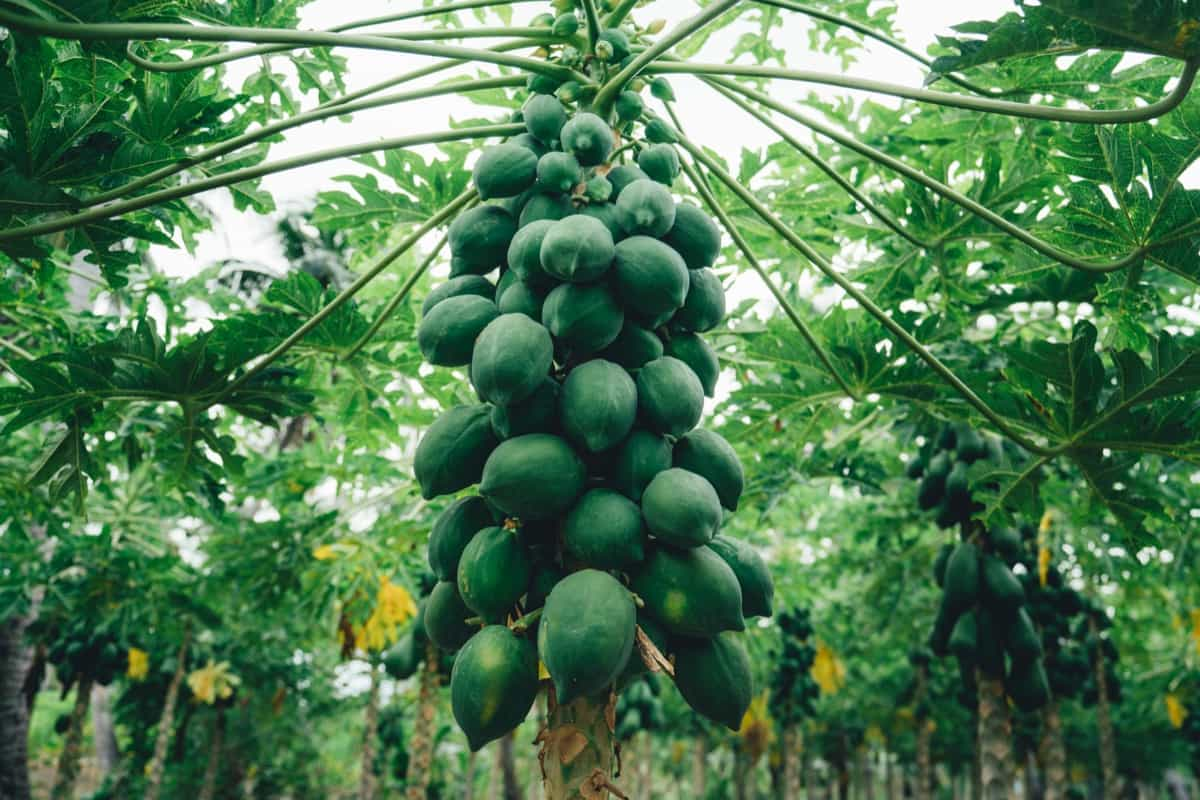
This succulent fruit comes from the Carica Papaya plant, a member of the Caricaceae family. Choosing the best season for planting is essential as it sets the stage for optimal growth conditions. The way you plant your Papaya seeds and space out your plants can significantly impact their development and yield.

Planting and Spacing Techniques in Papaya

Selection of Planting Material

When planting Papayas, selecting the right planting material is crucial for successful growth. Opting for healthy and disease-resistant seedlings or seeds ensures a strong start for your Papaya garden. Look for reputable nurseries that offer high-quality Papaya plants or seeds. Choose robust seedlings with vibrant green leaves and sturdy stems, indicating their vitality and potential for thriving in various conditions.

Additionally, consider the specific variety of Papaya you want to grow based on factors like taste preference or climate suitability. Conduct thorough research to understand the characteristics of each type before making your selection.

Seed Treatment and Germination Methods

Proper seed treatment and germination methods are vital for successful growth. Before planting, ensure that the seeds are fresh and healthy. To improve germination rates, consider soaking the seeds in warm water for a few hours or lightly scarifying them. Another way is to use a damp paper towel inside a bag to create a mini greenhouse effect for faster germination.

Keep the seeds in a warm, well-lit area until they sprout. Remember, each seed is like a tiny possibility waiting to bloom into a thriving Papaya plant. Please treat them with care and attention as you kickstart your journey towards growing delicious Papayas at home.

Best Season for Planting Papayas

Papaya plants thrive in warm and tropical climates, so it’s best to plant them during the warmer months of the year when temperatures are consistently above 15°C. In most regions, spring and summer are ideal seasons for planting Papayas. During these warmer months, Papaya plants have optimal conditions for growth and development. The increased sunlight and longer days provide ample energy for the young plants to establish themselves in their new environment. Proper timing can significantly affect the overall health and productivity of your Papaya crop.

In case you missed it: Top 15 Papaya Varieties to Grow in Your Garden: A Guide for Beginners

Green 'Carica papaya' on a tree

Soil Preparation Techniques

Before planting, it’s essential to assess the soil quality and make any necessary amendments. Start by clearing the weeds and debris to create a clean planting bed. Next, conduct a soil test to determine the pH level and nutrient content. Based on the results, you may need to add organic matter to improve soil fertility. Once the plant is established, consider incorporating a balanced fertilizer high in potassium to promote fruiting. Mix amendments into the soil to ensure an even distribution of nutrients. Loosen compacted soil and create raised beds if necessary to ensure proper drainage.

Optimal Planting Depth and Method

Ideally, it would help if you planted your Papaya seeds at a depth of around 1 inch in loose soil that drains well. This allows the roots to establish themselves without suffocating or becoming waterlogged. Many gardeners use a common method of creating a small hole in the soil, placing the seed inside, covering it with a thin layer of soil, and gently patting it down. Avoid planting too deep, as this can inhibit germination or lead to weak root systems. Conversely, planting too shallow may expose the seed to drying out quickly.

Determining Row and Plant Spacing

The recommended spacing between rows should be around 8-10 feet to allow enough room for the plants to spread out as they grow. For individual Papaya plants within a row, aim for a spacing of 6-8 feet apart. This will ensure that each plant has ample space to develop its root system without competing with neighboring plants.

Proper spacing promotes adequate airflow and sunlight penetration, aids in pest management by reducing overcrowding, and allows for easier access during maintenance tasks such as pruning and harvesting. By carefully planning and measuring the distance between rows and individual plants, you can create a well-organized Papaya plantation that maximizes productivity while promoting overall plant health and vigor.

Use of Planting Aids and Tools

Planting aids such as seedling trays and dibbles can help streamline the planting process, ensuring proper spacing and depth for each plant. Tools like shovels, rakes, and watering cans are essential for preparing the soil and maintaining optimal growing conditions.  By utilizing these planting aids and tools effectively, you can enhance the productivity of your Papaya plants. Remember to choose quality tools that are suitable for your needs for a successful harvest.

In case you missed it: How to Control Pests and Diseases in Papaya: Causes, Symptoms, Chemical, and Biological Management

Papaya plantation

Incorporating Irrigation Systems at Planting

Papaya plants require consistent moisture, especially during the early stages after planting. Drip irrigation is highly recommended as it delivers water to the plant roots, reducing water wastage and minimizing the risk of diseases caused by excess moisture on leaves. Installing a drip system at planting ensures that each young Papaya plant receives adequate hydration without any stress. By providing a controlled amount of water to your Papayas through a well-designed irrigation system, you can promote overall plant vigor.

Mulching for Young Papaya Plants

Mulching is a crucial step in promoting healthy growth and development for young papaya plants. By applying an organic mulch layer around the base of the plant, you can help retain moisture in the soil, suppress weed growth, and regulate soil temperature. Organic materials like grass clippings, straw, or compost make excellent mulching choices.

When mulching young Papaya plants, ensure that the layer is applied evenly around the base of the plant without touching its stem directly. This will prevent rotting and potential damage to the plant. Replace any decomposed or thinning layers with fresh mulch to maintain optimal growing conditions for your young Papaya plants.

Monitoring Initial Growth and Adjustments

Monitoring the initial growth of your Papaya plants is crucial to ensure their healthy development. Keep a close eye on the color and size of the leaves, as any discoloration or stunted growth could indicate issues that need attention. Adjustments may be necessary in terms of watering frequency, sunlight exposure, or nutrient levels in the soil. Make sure to check for pests or diseases that could harm your Papayas. Early detection can prevent major infestations that might irreversibly damage your plants.

In case you missed it: How to Grow Papaya from Seed to Harvest: Check How this Guide Helps Beginners

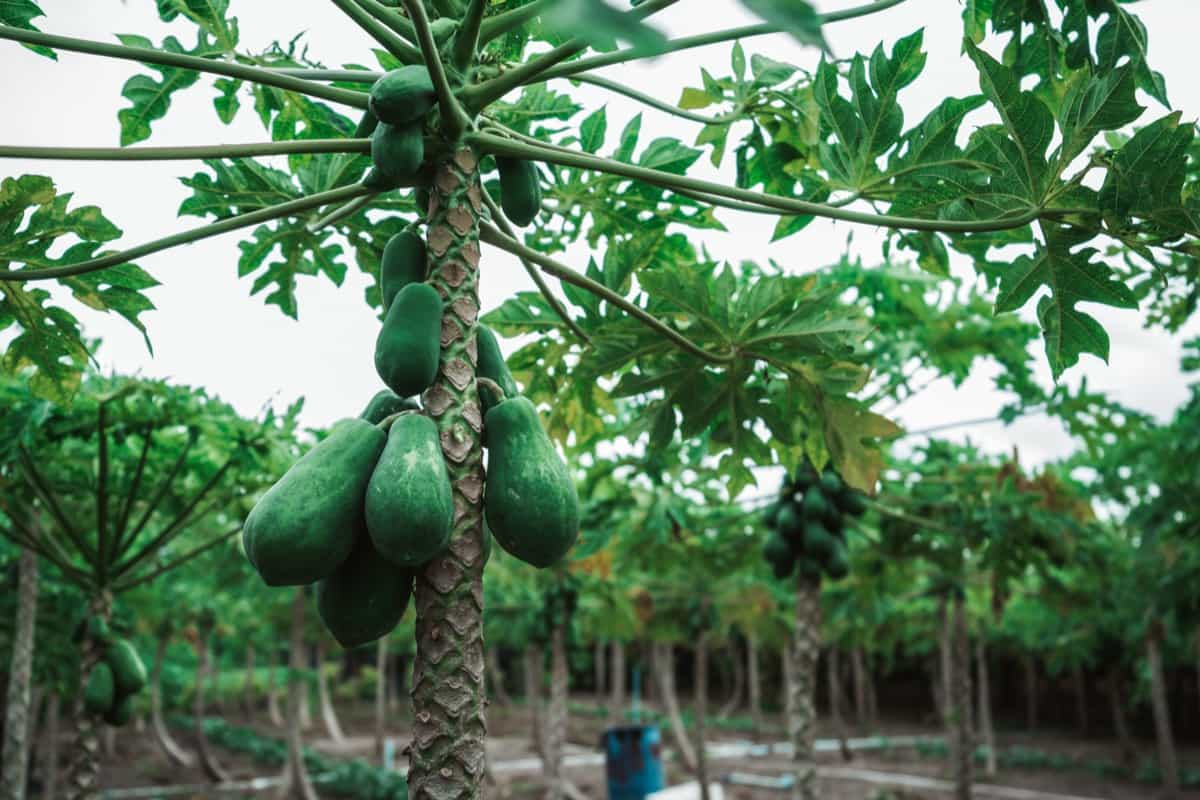
Papaya Trees Growing in a Row in a Farm

Look out for common pests like aphids, mites, or whiteflies, and treat them promptly with natural remedies or organic pesticides if needed. Remember to monitor the initial growth stages and make necessary adjustments along the way to help your Papayas thrive. With the right planting techniques and care, you can enjoy a fruitful garden filled with luscious Papaya fruits for years to come.

Growing Gold: Essential Techniques for Planting Pineapples

0

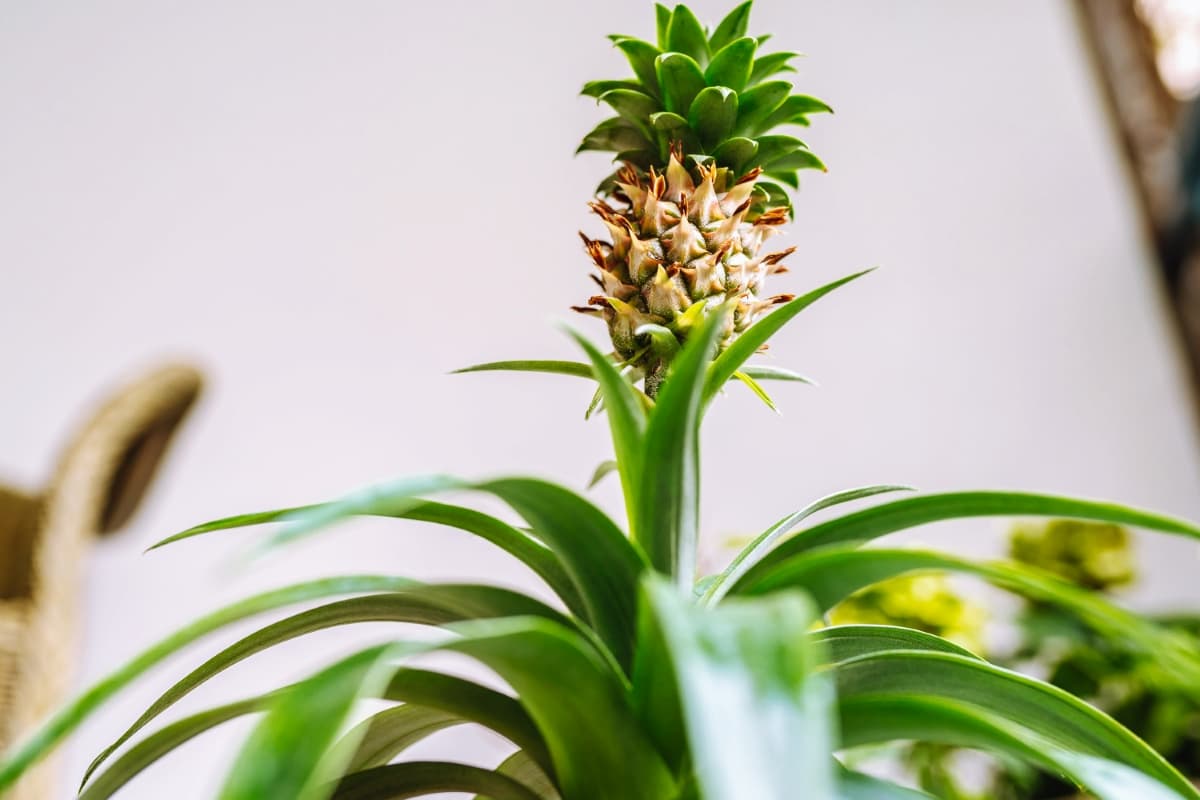
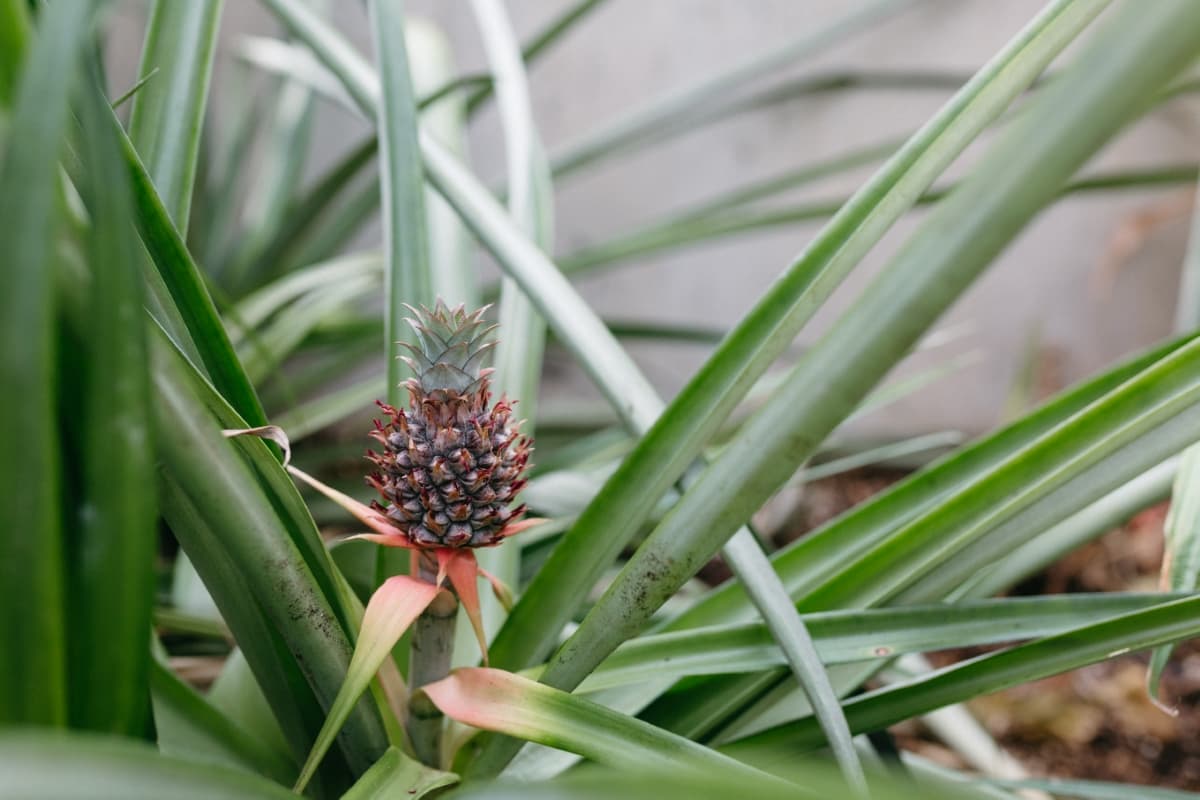
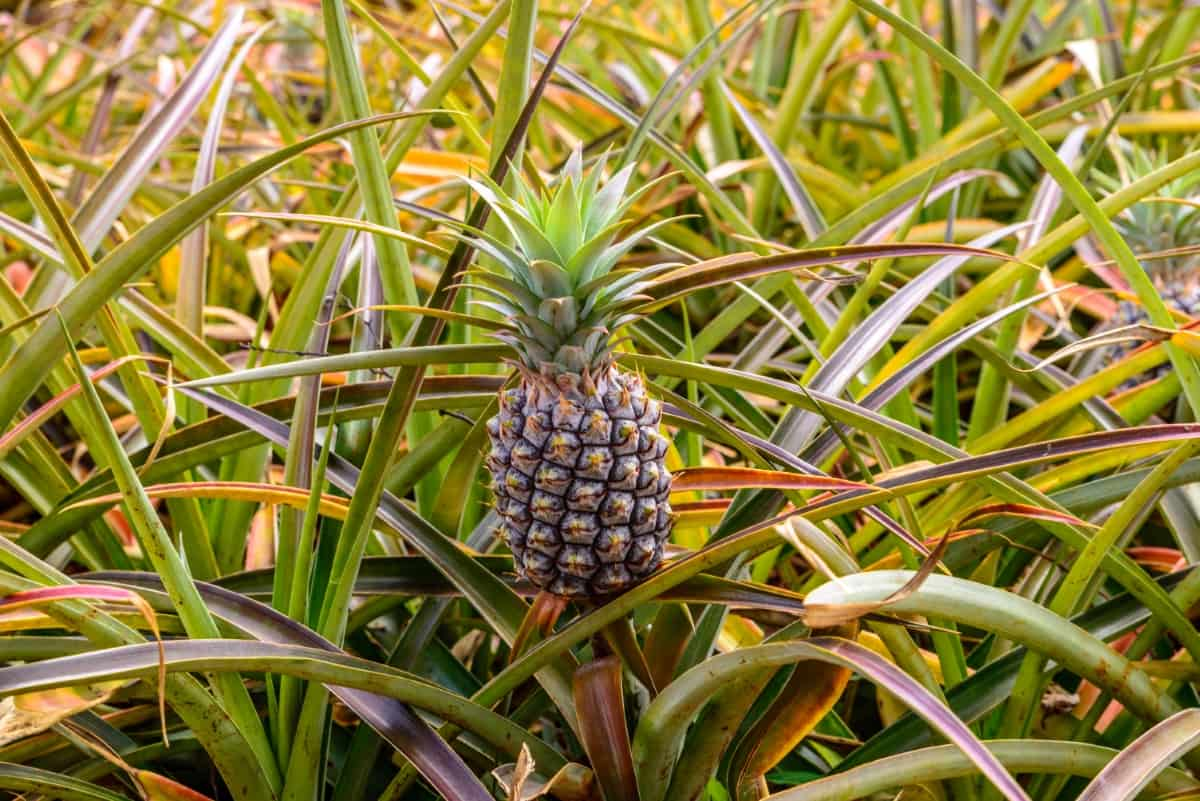
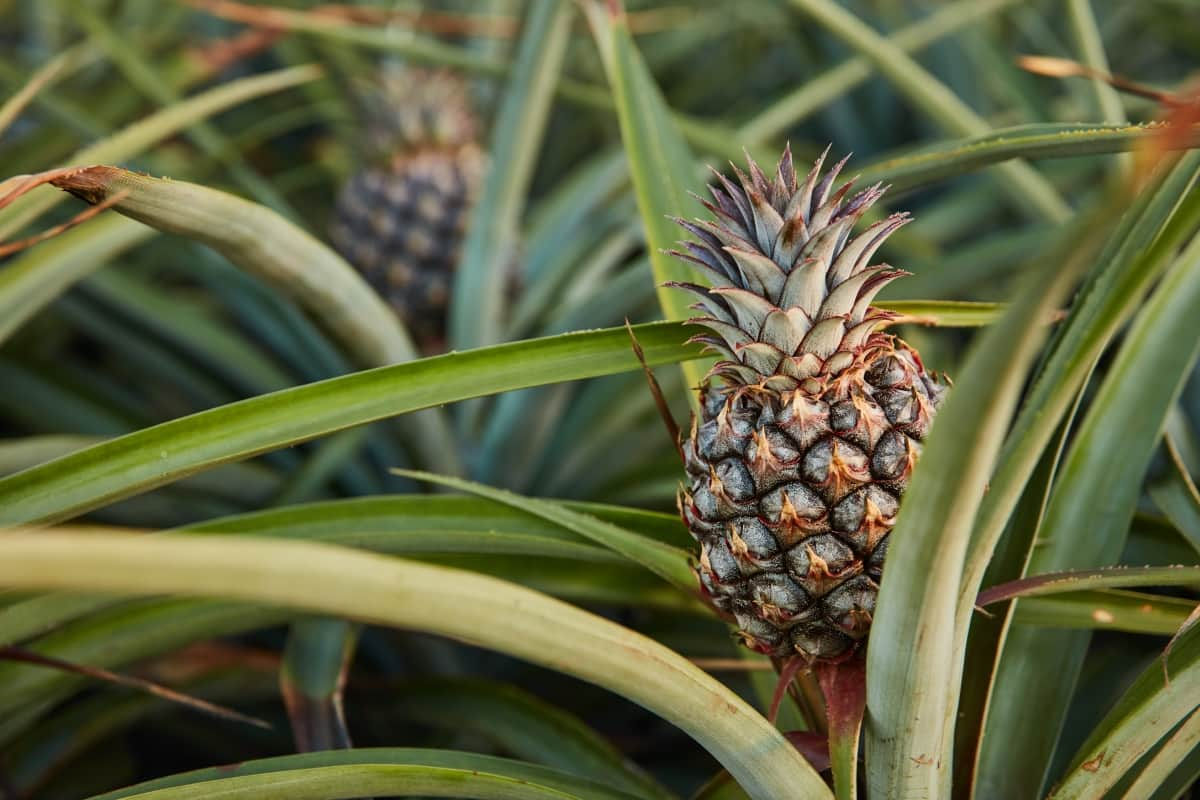
The Pineapple, scientifically called Ananas comosus is a tropical fruit plant, and it belongs to the Bromeliaceae family. Selecting quality Pineapple planting material is essential for a successful harvest. With a little bit of effort and patience, you’ll soon be enjoying the tropical taste of freshly grown Pineapples in your garden.

Techniques for Planting Pineapples

Selecting Quality Pineapple Planting Material

Look for healthy Pineapple suckers or slips that are free from any signs of disease or damage. Choose ones with vibrant green leaves and strong roots. Ensure the planting material is mature enough but not too old, as younger plants tend to establish themselves better in the soil. Avoid using overly small or weak suckers, as they may struggle to thrive once planted. Inspect the base of the sucker or slip for any rotting or discoloration, as this can hinder growth potential. Opt for varieties known for their sweetness and productivity to ensure a bountiful yield.

Understanding Pineapple Growth Cycles

Pineapples have fascinating growth cycles that are essential to understand for successful cultivation. The growth of a Pineapple plant begins with planting the suckers or slips in well-prepared soil. As the plant matures, it goes through different stages of development, from establishing its roots to producing leaves and ultimately forming the fruit.

During the vegetative phase, the Pineapple plant focuses on leaf production and root establishment. This stage is crucial for building a strong foundation for healthy growth and future fruiting. Once the plant reaches maturity, it transitions into the reproductive phase, where it starts developing flowers that eventually turn into Pineapples.

Pre-Planting Soil Preparation

Pre-planting soil preparation is a crucial step in ensuring the success of your Pineapple cultivation venture. Before you even think about putting those suckers or slips into the ground, you need to make sure that your soil is prepped and ready for optimal growth.

In case you missed it: Growing Pineapple from Cuttings, Tops at Home

Baby Pineapple Plant

Start by clearing the area of any debris or weeds that may hinder the growth of your Pineapples. It’s like giving them a clean slate to start their journey towards becoming sweet and juicy fruits. Next, consider testing your soil to determine its pH levels and nutrient content. Remember, healthy soil equals healthy plants.

Methods of Planting Pineapple Suckers and Slips

Pineapple suckers are shoots that grow from the base of the plant, while slips are small offshoots that develop between the leaves. Both can be used for propagation. To plant Pineapple suckers or slips, carefully remove them from the mother plant with a sharp knife, making sure to include some root tissue.

Before planting, allow the cuttings to dry out for a day or two. This helps prevent rotting and promotes healthy root development once planted in well-draining soil. Make sure to plant them at an appropriate depth, ensuring that they have good contact with the soil but aren’t buried too deep.

Optimal Planting Density for Maximum Yield

When it comes to planting Pineapples, achieving optimal planting density is crucial for maximizing yield. Planting too close together can lead to competition for nutrients and sunlight, resulting in smaller fruits. On the other hand, spacing them too far apart might not utilize the available space efficiently.

To ensure maximum yield, it’s essential to follow recommended guidelines for planting density based on your specific variety of Pineapple. This will help each plant receive adequate resources without overcrowding or wasting valuable land. By strategically spacing out your Pineapple plants at the right distance, you can promote healthy growth and development throughout their lifecycle.

Arrangement and Spacing Strategies

Pineapple plants need sufficient space to grow and thrive, so proper planning is essential. Arrange your Pineapple plants in rows that allow for easy access and maintenance. A well-organized layout can make tasks like weeding and fertilizing more efficient. Pineapples need enough space to spread their roots and leaves comfortably. Generally, it is recommended to plant them about 12-18 inches apart in rows that are at least 3 feet apart.

In case you missed it: Pineapple Gardening For Beginners, How To Start

Pineapple

This spacing allows each Pineapple plant to have ample room for root development while also receiving sufficient sunlight and airflow. Providing the right amount of space between plants helps prevent overcrowding, which can be affected by competition for nutrients and water. Additionally, proper spacing facilitates easier weed control and pest management by allowing better access to maintenance activities. Spacing between each Pineapple plant is crucial for optimal growth.

Using Mulches in Pineapple Cultivation

Mulching not only helps retain soil moisture but also suppresses weed growth, reducing the competition for nutrients that Pineapples need to thrive. By applying an organic mulch layer around your Pineapple plants, you create a protective barrier that keeps the soil temperature stable and prevents erosion. This is beneficial in areas with extreme weather conditions.

Additionally, organic mulches gradually decompose over time, enriching the soil with valuable nutrients essential for healthy Pineapple growth. Pineapples have shallow roots, making them susceptible to fluctuations in soil moisture and temperature; mulches help maintain these levels consistently.

Integrating Inter-Cropping Systems

Inter-cropping systems in Pineapple cultivation involve growing two or more crops together to maximize land use and productivity. By strategically planting complementary crops alongside Pineapples, farmers can promote biodiversity and improve soil health. Additionally, intercropping helps control pests and diseases by disrupting their habitats through diverse cropping patterns.

Integrating inter-cropping systems requires careful planning and consideration of each crop’s growth requirements to ensure successful coexistence. By adopting sustainable agricultural practices like inter-cropping, farmers can create resilient farming systems that contribute to long-term environmental and economic sustainability within the Pineapple industry.

Application of Starter Fertilizers During Planting

When planting Pineapples, using starter fertilizers can significantly improve the growth and development of your crop. These specialized fertilizers provide essential nutrients that help jumpstart the plant’s growth right from the beginning. Starter fertilizers are formulated to promote strong root establishment, which is crucial for Pineapple plants to thrive in their early stages.

In case you missed it: How to Prepare the Soil for Pineapple Plants: Best Soil Mix, pH, Compost, and Recipe

Tropical Pineapples

The nutrients found in starter fertilizers play a vital role in supporting overall plant health and vigor. With the proper application of starter fertilizers, you set your Pineapple plants on the path toward robust growth and productivity.

Initial Watering and Care Post-Planting

After planting your Pineapple suckers or slips, the next crucial step is providing them with the right amount of water and care to ensure healthy growth. Watering immediately after planting helps settle the soil around the roots and reduces transplant shock. Remember that the soil remains consistently moist during the initial stages of growth. After planting your Pineapple, it’s crucial to provide it with proper watering and care to ensure healthy growth.

This includes giving the plant enough water without drowning its roots. Pineapples prefer well-draining soil, so be mindful not to overwater them. After planting, water the Pineapple thoroughly, but avoid saturating the soil. By following these growing requirements and providing initial watering and care post-planting, your Pineapple plants will thrive and reward you with sweet, juicy fruits. 

How to Make Kalanchoe Plant Bushy: Home Remedies and Solutions

0

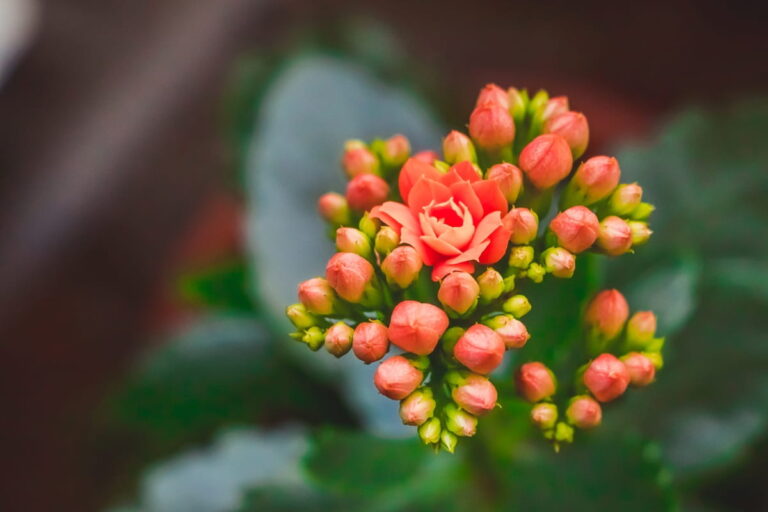
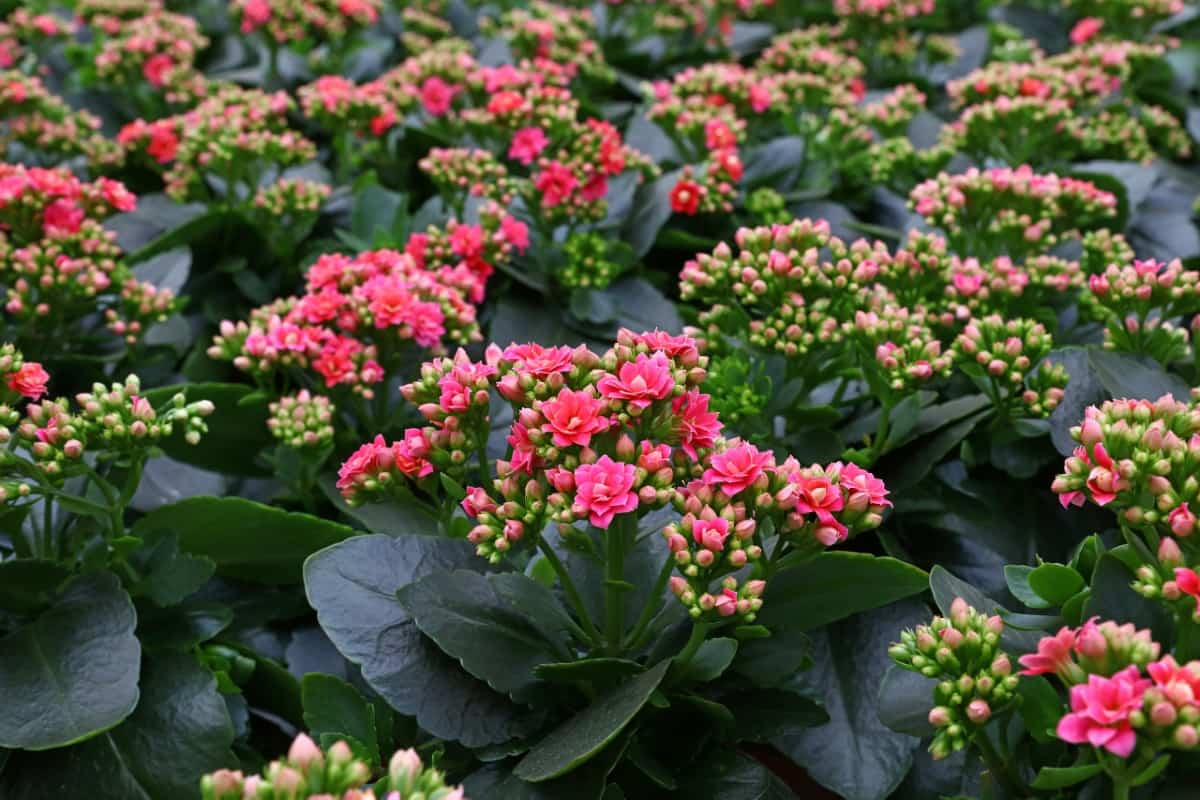
Kalanchoe plants, scientifically known as Kalanchoe blossfeldiana, are beloved for their vibrant blooms and easy care. This vibrant succulent, a member of the Crassulaceae family, is renowned for its colorful blooms and easy growing, making it a popular choice among plant enthusiasts.

How to Make Kalanchoe Plant Bushy

Pruning Techniques

Pruning is a vital technique for keeping your Kalanchoe plant bushy and healthy. By removing dead or overgrown branches, you encourage new plant growth and improve the overall appearance of the plant. When pruning your Kalanchoe, always use clean and sharp tools to prevent damage to the stems.

Focus on cutting just above a leaf node to encourage new growth in that area. This will help the plant fill out and become more lush over time. Remember to remove any yellowing or diseased leaves promptly to prevent further spread of issues within the plant. Regular maintenance through pruning will ensure your Kalanchoe stays vibrant and full of life.

Proper Light Exposure

It is crucial for the growth and health of your Kalanchoe plant. These vibrant succulents thrive in bright, indirect sunlight. Avoid exposing your Kalanchoe to direct sunlight for extended periods, as it may lead to sunburn on the leaves. Rotate the plant occasionally to ensure even light and prevent one side from becoming leggy.

If you notice that your Kalanchoe is stretching towards the light source, it’s a sign that it needs more sunlight. On the other hand, if you see signs of sun damage, like yellowing or browning leaves, consider moving it to a place with less intense light. The right balance of light exposure will promote compact growth and vibrant blooms in your Kalanchoe plant.

Optimal Watering Practices

When it comes to keeping your Kalanchoe plant bushy and thriving, optimal watering practices play a crucial role. Overwatering the Kalanchoe plant can affect root rot, while underwatering can cause the plant leaves to wilt and drop off. Finding the right balance is key. To determine when your Kalanchoe plant needs watering, stick your finger into the soil. If it feels dry an inch deep, it’s time for some hydration.

In case you missed it: How to Grow and Care for Kalanchoe Indoors: A Beginners Guide

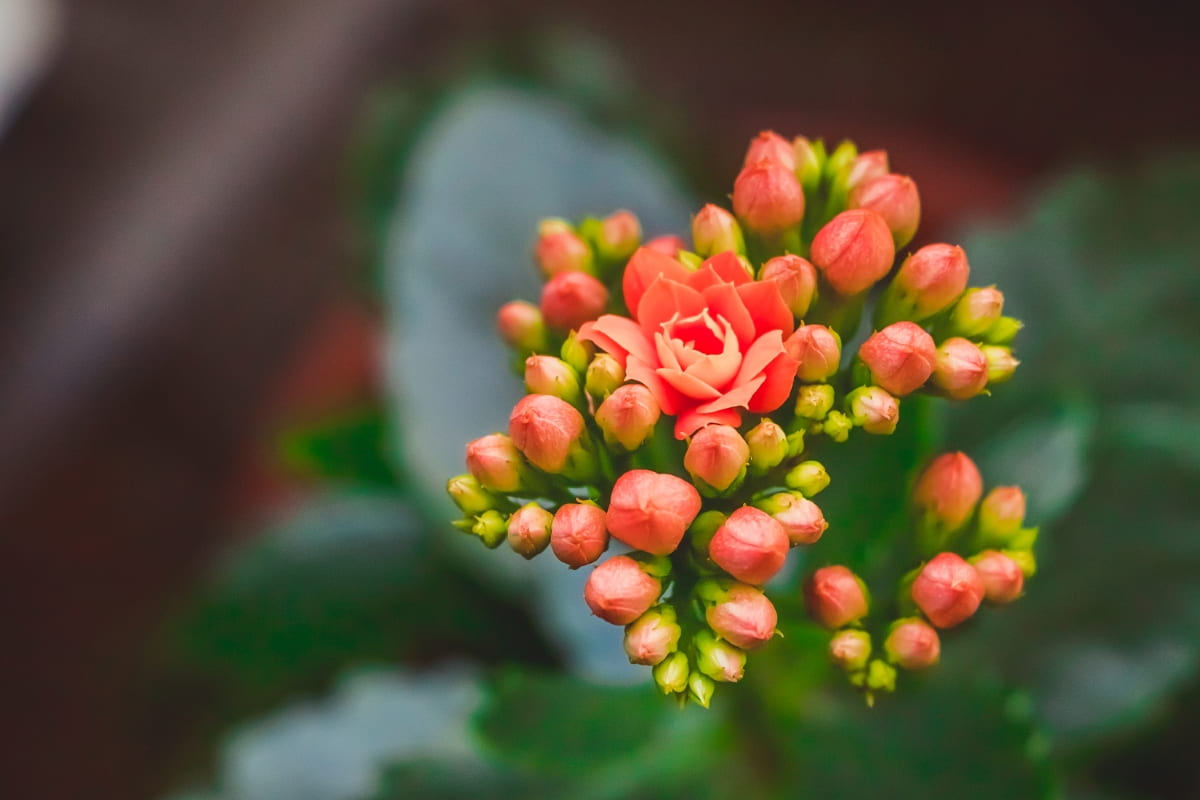
Flowering Kalanchoe

Water the Kalanchoe plant thoroughly until you see excess water draining out from the bottom of the pot. Remember that these plants prefer drier conditions compared to constant watering. Consistency is key to maintaining a healthy watering routine for your Kalanchoe plant. 

Fertilization Strategy

Fertilizing your plant provides essential nutrients that promote healthy growth and vibrant blooms. Choose a balanced fertilizer specifically formulated for flowering plants like Kalanchoes.  During the Kalanchoe plant growing season, which typically spans from spring to fall, fertilize your Kalanchoe plant every 2-4 weeks. To avoid burning the roots, dilute the fertilizer to half of the recommended strength. Always follow the plant growing instructions on the fertilizer package for the best results.

Potting and Repotting

Choosing the right size pot with good drainage is key. Ensure the new pot has enough space for the roots to grow but isn’t too large, as this can lead to overwatering. During repotting, gently loosen the roots and remove any dead or rotting ones before placing your plant in fresh soil. Use a well-draining mix tailored for succulents to prevent waterlogged roots.

Repot your Kalanchoe every 1-2 years or when you notice it is outgrowing its current container. Signs of needing repotting include crowded roots or the plant becoming top-heavy. Remember that proper potting and repotting practices are essential for maintaining a thriving Kalanchoe plant.

Pest Control

It is a crucial aspect of caring for your Kalanchoe plant to ensure it stays bushy and healthy. These little green friends are prone to unwelcome visitors like aphids, mealybugs, and spider mites that can wreak havoc on their leaves and stems. To keep these Kalanchoe plant pests at bay, regularly observe plants for any signs of infestation.

In case you missed it: Jasmine Gardening For Beginners – How to Start, FAQs

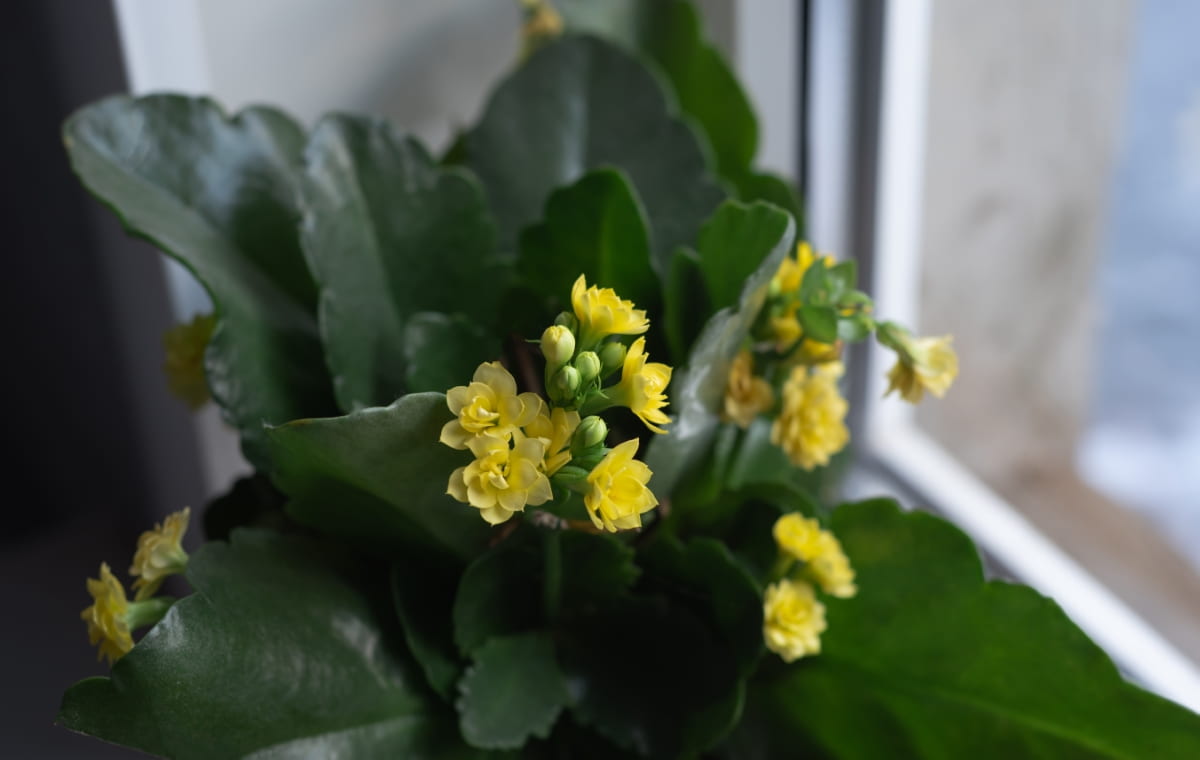
Yellow Kalanchoe

If you spot any critters crawling around, don’t fret – there are natural remedies you can try before resorting to harsh chemicals. The effective method is mixing water with a few drops of dish soap and spraying it onto the affected areas. This solution suffocates the bugs without harming your plant. Another option is neem oil, which acts as a repellent against common pests while also nourishing the soil. 

Disease Prevention

Preventing Kalanchoe diseases is key to maintaining your plant’s health and beauty. The effective way to prevent diseases is to ensure good air circulation around the plant. Proper ventilation can help reduce the fungal infections that thrive in humid conditions. Another important aspect of disease prevention is avoiding overwatering. Excess moisture can make a breeding ground for various pathogens that can harm your Kalanchoe plant. Regularly inspecting your Kalanchoe plant for any signs of disease or pests is essential for early detection and treatment.

Temperature and Humidity Control

Maintaining the temperature and humidity levels is crucial for the healthy growth of your Kalanchoe plant. These plants thrive in temperatures between 15°C to 29°C, so make sure to keep them away from extreme heat sources. During the winter months, be mindful of cold drafts, as they can harm your plant.

In terms of humidity, Kalanchoes prefer moderate levels ranging from 40% to 50%. If you live in a dry climate, use a humidifier or place a tray with water near your Kalanchoe plant to increase moisture in the air. Alternatively, if you’re in a humid environment, ensure proper air circulation around the Kalanchoe plant to prevent fungal diseases caused by excess moisture.

Propagation Practices

Propagation practices for your Kalanchoe plant are essential to ensure a bushy and thriving garden. The most common method is leaf cuttings. Select healthy leaves and allow them to be callous before planting in well-draining soil. Another effective propagation technique is offsets, or baby plants that grow around the plant base. Gently remove these offsets and replant them in their pots to encourage growth.

In case you missed it: Nourish and Flourish: Top Organic Mulches for Thriving House Plants
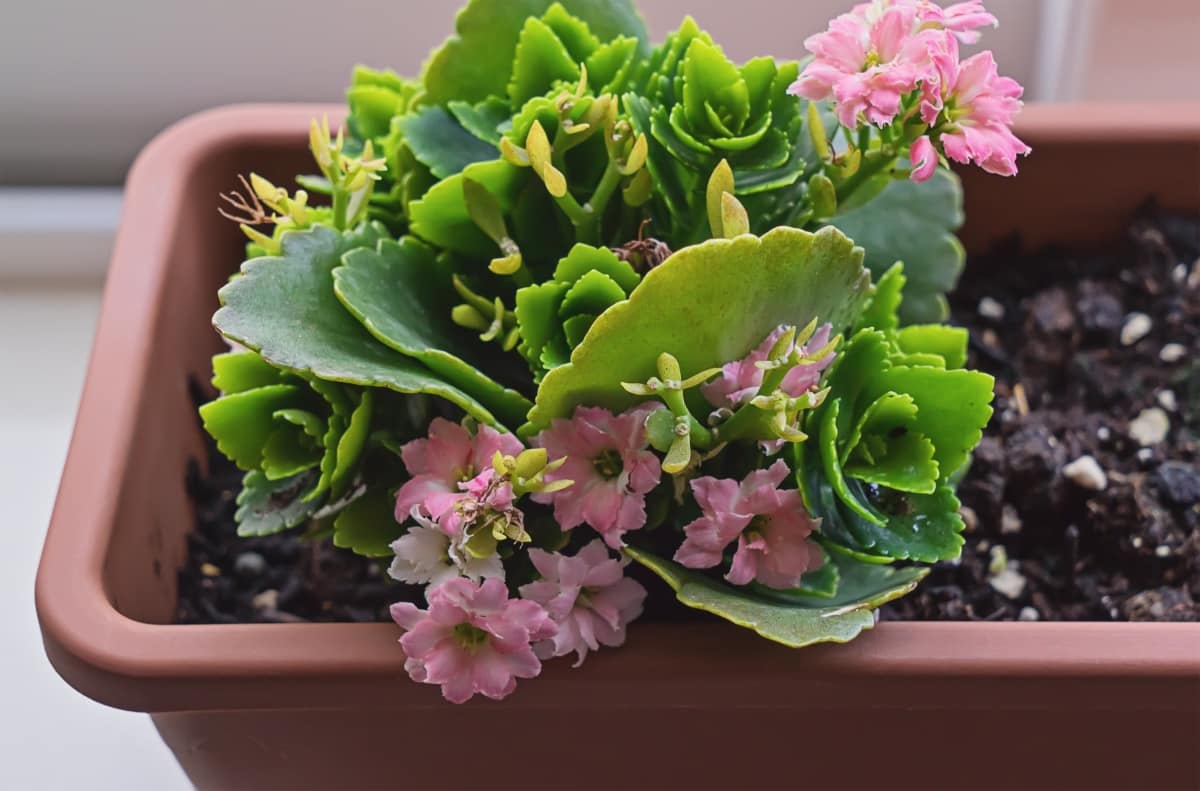
Potted Kalanchoe

Water newly propagated Kalanchoe plants sparingly to prevent root rot. Please place them in a warm, bright location, but avoid direct sunlight until they establish roots. Monitor moisture levels and adjust watering accordingly as they develop into mature plants.

Regular Monitoring

Regular monitoring is a crucial aspect of caring for your Kalanchoe plant to ensure it remains healthy and vibrant. Watch its growth patterns, checking for signs of wilting or yellowing leaves. By observing your plant regularly, you can catch any issues and address them promptly. Regularly rotate your Kalanchoe plant to ensure even growth and prevent it from leaning toward one direction due to uneven light exposure.

This simple step can promote a more bushy and balanced appearance over time. By following these remedies and solutions, you can help your Kalanchoe plant become bushy and lush, enhancing its beauty in your home or garden.

11 Reasons Why Your Gardenia is Not Blooming: Home Remedies and Solutions

0

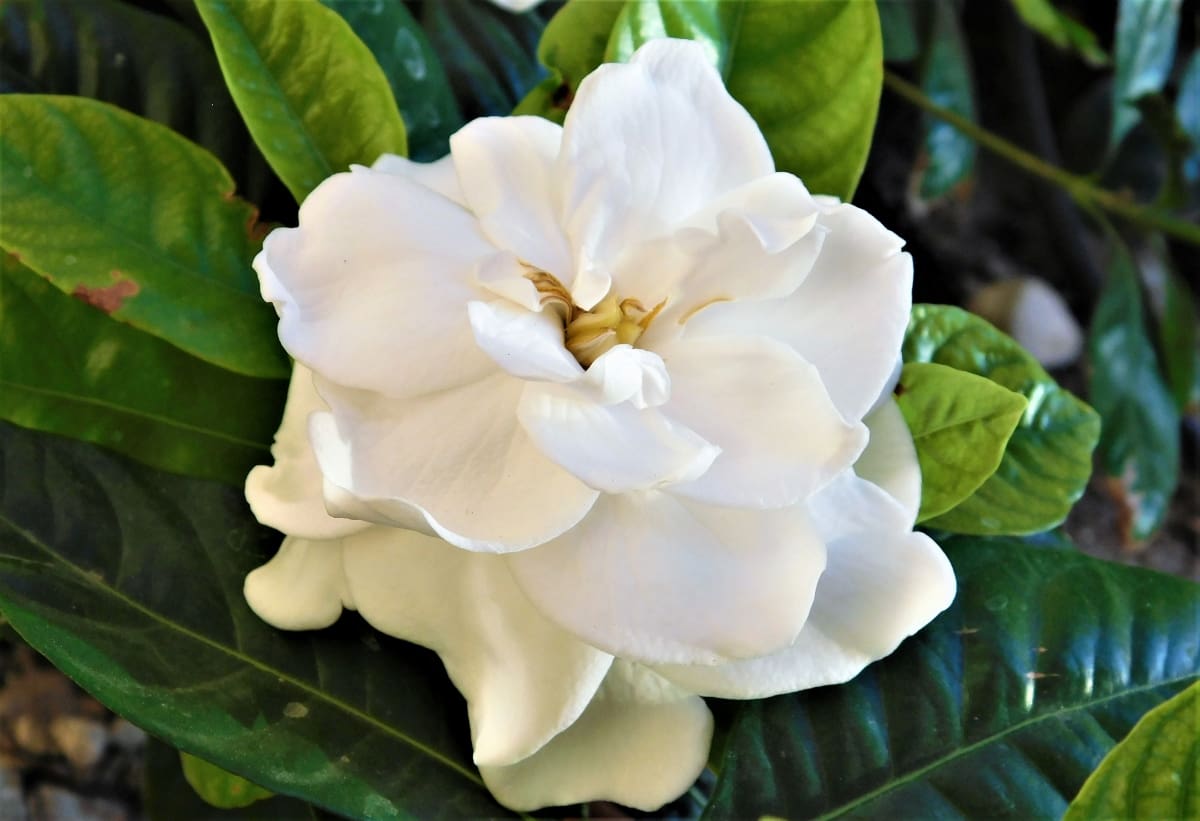
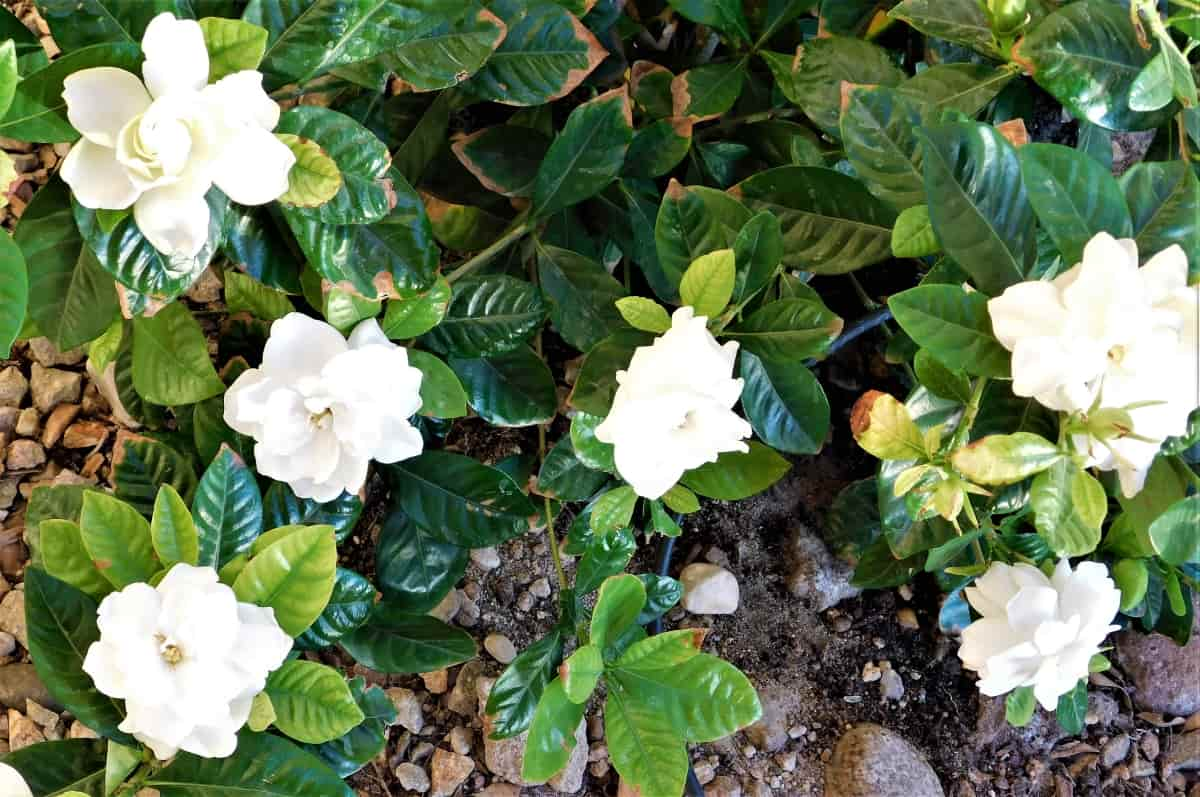
Gardenias belong to the coffee family, Rubiaceae. With their exquisite white blossoms, They add elegance and beauty to gardens and indoor spaces alike. The scientific name for this stunning plant is Gardenia jasminoides. Gardenias are popular choices for gardens and indoor spaces alike. Below are some common issues and potential remedies to help your Gardenia thrive and produce beautiful blooms.

11 Reasons Why Your Gardenia is Not Blooming

Insufficient Light: Remedies and Artificial Lighting Solutions

Gardenias thrive in bright, indirect sunlight, so if yours isn’t getting enough, it might struggle to produce blooms. But don’t worry – there are remedies and solutions to help your plant flourish. Consider moving your Gardenia to a spot with more natural light or supplementing it with artificial lighting. LED grow lights can mimic the sun’s rays and provide the necessary light spectrum for optimal growth. Be sure to position the lights at the right distance from the plant to avoid burning its leaves.

Improper Watering: Adjustments and Monitoring Techniques

Improper watering is often the culprit behind Gardenias’ lack of blooms. Finding the right water balance is key to unlocking the plant’s full blooming potential. Gardenias thrive in moist but well-draining soil. Overwatering the Gardenia can lead to root rot, while underwatering can stress the plant and inhibit flowering.

To remedy improper watering, adjust your watering schedule based on the plant’s needs. Test the soil moisture level—if it feels dry, it’s time to water. Make sure to use a moisture meter for more accurate monitoring. This tool can help you gauge when it’s time to water and prevent over- or under-watering issues.

Nutrient Deficiencies: Organic Fertilizers and Soil Amendments

Nutrient deficiencies can be a common reason why your Gardenia is not blooming as vibrantly. Organic fertilizers and soil amendments play a major role in providing the necessary nutrients for your plant to thrive. Organic options such as compost, manure, or bone meal can help replenish essential minerals in the soil naturally.

In case you missed it: How to Grow and Care for Gardenia in Pots: A Step-by-Step Guide for Beginners

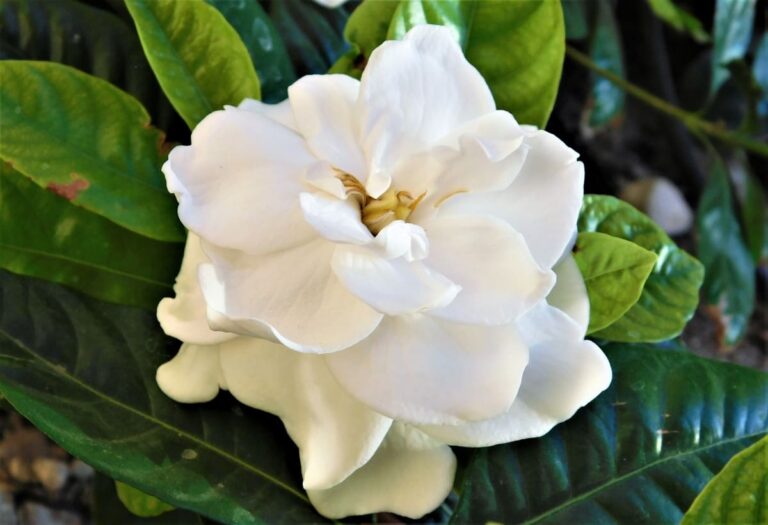
Gardenia Bush in Bloom

By incorporating organic matter into the soil, you ensure a slow release of nutrients, avoiding the risk of over-fertilizing and harming your plant. It’s like giving your Gardenia a balanced diet tailored to its specific needs.

Incorrect Soil pH: Testing and Balancing Methods

The incorrect soil pH can hinder nutrient uptake, leading to lackluster blooms. Testing the soil pH is crucial in determining if your Gardenia is facing this issue. Balancing the soil pH involves using amendments like sulfur or lime to adjust it to the ideal range for Gardenias, which is slightly acidic. Remember, maintaining proper soil pH is an ongoing process, as it can fluctuate over time. Regular testing and adjustments will ensure that your Gardenia has optimal conditions for healthy growth and abundant flowering.

Temperature Stress: Protection Strategies and Microclimate Creation

Temperature stress can be a major factor in preventing your Gardenia from blooming to its full potential. Gardenias prefer consistent temperatures and are sensitive to extreme heat or cold. To protect your Gardenia from temperature fluctuations, consider strategically placing it near larger plants or structures that can provide shade during the summer days. This will help create a microclimate that is more suitable for your plant’s needs.

During colder months, you can use frost cloth or mulch to insulate the soil around your Gardenia and protect it from freezing temperatures. Avoid placing your plant near drafty windows or doors where it may experience sudden temperature drops.

Over-fertilization: Recovery Steps and Controlled Feeding

If you suspect over-fertilization is the culprit behind your non-blooming Gardenia, don’t panic. There are steps you can take to help your plant recover. Firstly, stop fertilizing immediately. Your Gardenia needs time to flush out the excess nutrients before it can resume its normal growth cycle. Consider flushing the soil with water to help dilute and remove any built-up fertilizer residues.

In case you missed it: 8 Reasons Why Your Potted Hibiscus is Not Blooming: Fix it with Simple Solutions

White Flower

After giving your plant a break from feeding, gradually reintroduce a balanced fertilizer at half-strength. This controlled approach will prevent further stress on your Gardenia while still providing essential nutrients for blooming potential. Remember, fertilizer moderation is key when it comes to feeding your plants.

Pests and Diseases: Natural Treatments and Preventive Measures

Pests and diseases can affect your Gardenia’s blooming potential. From aphids to fungal infections, these unwelcome guests can stunt growth and hinder those beautiful blossoms from emerging. The effective method is using neem oil spray, a natural insecticide that keeps pests at bay without harming beneficial insects. Another option is introducing ladybugs or lacewings to your garden as they feast on aphids and other harmful bugs.

Powdery mildew or leaf spot are major fungal diseases; a mixture of baking soda and water sprayed onto the leaves can help prevent their spread. Ensuring proper air circulation around the Gardenia plant can deter fungal growth. Remember, prevention is important to maintaining a healthy Gardenia that blooms vibrantly year after year.

Improper Pruning: Best Practices and Timing

To ensure healthy growth and abundant flowers, it’s crucial to follow best practices and timing when trimming your plant. Gardenias generally benefit from light pruning after flowering to shape the bush and encourage new growth. Use sharp tools to make precise cuts without causing unnecessary damage. Trim back about one-third of older wood each year to promote fresh shoots and increase flower production. Remember that Gardenias bloom on old wood, so be cautious not to prune excessively and reduce next season’s blossoms.

Lack of Acclimatization: Gradual Exposure and Environmental Adjustment

Acclimatization is crucial for your Gardenia to thrive and bloom. When introducing a new plant, gradual exposure to its new environment is key. Gardenias are sensitive to sudden changes, so take it slow. Start by placing the Gardenia plant in a shaded area for a few hours each day before moving it into direct sunlight.

Allow your Gardenia time to adjust to variations in light, temperature, and humidity levels. Pay attention to any signs of stress, like yellowing leaves or wilting flowers; these could indicate acclimatization issues. To help your Gardenia adapt, try misting plant leaves by using water or using a humidifier nearby. By providing a stable and suitable environment, you can support your Gardenia’s acclimatization process effectively.

Seasonal Variations: Understanding and Planning for Gardenia Blooming Cycles

Gardenias have distinct blooming cycles that are influenced by changes in temperature, daylight hours, and overall environmental conditions. During the warmer months, Gardenias thrive in bright sunlight and moderate temperatures. These conditions promote healthy growth and abundant blooming. However, as the seasons change and cooler weather sets in, Gardenias may enter a period of dormancy where blooming decreases.

In case you missed it: How to Grow Gardenias from Cuttings: A Detailed Guide to Planting to Harvest

Gardenia

Adjust your care routine accordingly to plan for these seasonal fluctuations. During colder months, move potted Gardenias indoors or use frost cloth to shield outdoor plants from harsh temperatures. By staying attuned to the natural rhythms of your Gardenia’s blooming cycles, you can better anticipate its needs and ensure a continuous display of beautiful flowers throughout the year.

Root Competition: Space Management and Companion Planting Strategies

Root competition can be a common reason why your Gardenia is not blooming as expected. When the roots of your Gardenia plant have to compete with other nearby plants for nutrients and space, it can hinder its growth and flowering potential. To address this issue, consider implementing space management techniques by providing adequate distance between plants to prevent overcrowding.

Companion planting is another effective strategy to alleviate root competition for your Gardenia. Additionally, regular monitoring of plant spacing and root development is crucial to identify any signs of competition early on. Addressing these potential issues and providing the necessary care can encourage your Gardenia to bloom profusely. Patience and consistent maintenance are key to enjoying this beautiful plant’s fragrant blooms.

Eco Elegance: The Guide to Designing a Drought-Tolerant Landscape

0

 A drought-tolerant landscape is all about creating a garden that thrives with minimal water usage. Instead of relying on constant watering, these landscapes are designed to withstand periods of drought by using plants and techniques that require less water. These landscapes are resilient against dry spells and require minimal intervention to stay healthy and vibrant throughout the year.

Designing a Drought-Tolerant Landscape

Understanding Drought-Tolerant Landscaping: Principles and Benefits

This approach focuses on designing a sustainable garden that can thrive with minimal water usage. By choosing plants that are well-adapted to arid conditions, you’re not only conserving water but also creating a beautiful and resilient landscape. The principles of drought-tolerant landscaping involve selecting plant varieties that require less water, improving soil quality for better moisture retention, and incorporating efficient irrigation systems.

In addition to being environmentally friendly, drought-tolerant landscaping offers numerous benefits. It can save you money on water bills, decrease maintenance requirements, and increase the overall value of your property. 

Selecting Drought-Resistant Plant Varieties

It’s important to select plant varieties that can thrive with minimal water. Look for plants that have adapted to arid conditions, such as succulents like agave and cacti. These succulents store water in their leaves or stems, making them excellent choices for conserving moisture. Consider aadding native plants into your garden design. Grasses like blue grama and buffalo grass are great options for lawns in dry regions.

Herbs like lavender and rosemary not only add fragrance to your garden but also require little watering once they’re established. Ornamental grasses like feather reed grass and fountain grass can provide texture and visual interest while being drought-resistant.

Soil Preparation and Improvement for Water Retention

Soil preparation is a major factor in ensuring water retention for your plants. By focusing on improving the quality of your soil, you can create an environment that helps plants thrive even during dry periods. One key aspect of soil preparation is incorporating organic matter. Another strategy is to till the soil to break up compacted layers and improve drainage. This allows water to penetrate deeper into the ground, more effectively reaching plant roots. Adding mulch on top of the soil not only helps with weed suppression but also conserves moisture by reducing evaporation. 

In case you missed it: Best Drought-Tolerant Garden Plants Which Can Survive with Minimal Water

Path in Tropical Cactus Gardens

Efficient Irrigation Systems for Drought-Tolerant Gardens

Efficient irrigation conserves water and ensures that your plants receive just the right levels of moisture to thrive. Drip irrigation is a popular choice for drought-tolerant gardens. They deliver water to the plant’s roots, minimizing evaporation and runoff. This method reduces water wastage while promoting deep root growth for stronger and healthier plants.

Another effective option is using soaker hoses or micro-sprinklers, which provide gentle and targeted watering and prevent excess moisture loss through wind drift or overspray. By customizing your irrigation system based on your garden’s layout and plant needs, you can achieve optimal water efficiency without compromising the health of your landscape. 

Mulching Techniques to Conserve Moisture

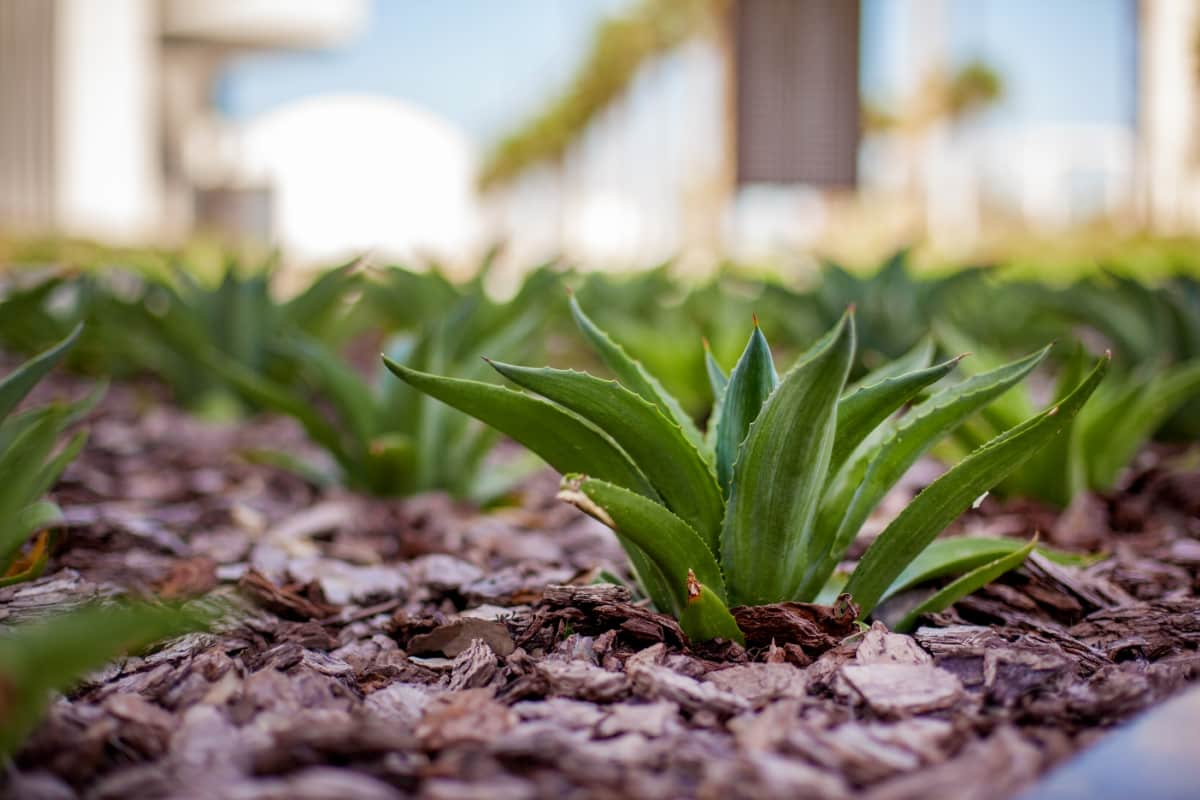
Mulching is a key technique in drought-tolerant landscaping. It helps conserve moisture and reduce water evaporation from the soil. By applying organic mulch layers, such as wood chips, straw, or leaves, around your plants, you can make a protective barrier that helps retain soil moisture and regulate temperature. In addition to conserving water, mulch also suppresses weed growth, and it can compete with your plants for precious water resources.

When applying mulch in your garden, leave some space around the base of plants to prevent rotting or pest infestations. Mulch should be spread evenly but not too thick to allow air circulation and prevent mold or mildew buildup. Consider using different types of mulch based on your garden’s needs—coarse materials like bark are great for retaining moisture in larger areas, while finer materials work well around delicate plants.

Incorporating Hardscaping Elements to Reduce Water Use

Adding hardscaping elements into your landscape design can significantly reduce water usage. By adding features like gravel paths, stone patios, or wooden decks, you create areas that don’t require regular watering. Additionally, using materials like permeable pavers allows rainwater to seep into the ground instead of flowing off-site. This helps replenish groundwater levels and minimizes wastage. Consider installing a rain barrel connected to your downspouts to collect rainwater for use in watering plants or cleaning outdoor spaces.

In case you missed it: Landscape Gardening Ideas, Design, Techniques

Planting New Garden Trees

Creating a Rain Garden to Capture and Utilize Runoff

Rain gardens are a fantastic way to not only add beauty to your landscape but also to help the environment. By capturing and utilizing runoff from rainwater, these gardens can reduce erosion and pollution in local waterways. To make a rain garden, start by selecting an area in your yard that naturally collects water during rainfall. This could be near a downspout or at a low point in your yard.

Next, choose native plants that thrive in moist conditions for your rain garden. These plants will help absorb excess water and stop it from running off into storm drains. Consider incorporating layers of gravel and mulch into your rain garden design to improve drainage and reduce soil erosion.

Designing with Native Plants for Sustainability

Designing with native plants for sustainability is a smart choice when creating a drought-tolerant landscape. Native plants are well growing in the local climate conditions and, once established, require less water and maintenance. By incorporating native species into your garden design, you can promote biodiversity.

Native plants prevent soil erosion because they have deep roots, making them ideal for sustainable landscaping practices. Their resilience makes them valuable assets in maintaining a vibrant garden even during periods of drought.

Landscape Layout Strategies to Minimize Water Evaporation

One effective approach is to group plants with similar watering needs. By clustering them based on their water requirements, you can ensure more efficient irrigation and reduce water loss due to varying hydration levels. Another strategy is to create shade in your garden by strategically placing taller plants or structures like pergolas. This helps prevent direct sunlight from evaporating moisture from the soil too quickly.

In case you missed it: Creating a Tropical Oasis: 14 Palm Tree Varieties for Your Landscape

Rockery Backyard Garden

Additionally, using ground cover plants or mulch around your landscaping can act as a protective barrier, reducing evaporation by keeping the soil cool and moist. Consider implementing drip irrigation systems that deliver water to the base of plants, minimizing waste through evaporation and runoff. Properly spacing out your plantings and avoiding overcrowding also promotes air circulation and reduces the surface area exposed to the sun, further lowering evaporation rates in your garden design.

Maintenance Practices for a Healthy Drought-Tolerant Garden

Maintaining a healthy drought-tolerant garden is crucial to ensure its longevity and vibrancy. Regular monitoring of plant health and soil moisture levels is key. Pruning dead or damaged branches helps promote new growth and conserves water for healthier plants. Weeding regularly prevents unwanted competition for water and nutrients, allowing your drought-resistant plants to thrive.

Adjusting irrigation schedules based on weather conditions ensures that your garden plants receive the right amount of water they need.  By selecting drought-resistant plant varieties and implementing efficient irrigation systems, you can create a beautiful garden that thrives even in times of water scarcity.

Gardening on a Slope: Strategies for Hillside Landscaping

0

Slope gardening involves working with the land’s natural incline to create stunning visual displays while also addressing concerns such as erosion control and soil stabilization. Slope gardening is the art of transforming challenging hillside landscapes into stunning and functional outdoor spaces.

Strategies for Hillside Landscaping

The main challenge of slope gardening is erosion control. Rainwater can easily wash away soil on steep slopes, leading to instability and nutrient loss. However, by carefully selecting plants with strong root systems and incorporating strategies like terracing or retaining walls, erosion can be minimized. On the other hand, gardening on a slope allows for better water drainage compared to flat surfaces. Proper planning can harness this natural runoff to create microclimates that support a variety of plant species.

Assessing Your Slope: Understanding Soil and Drainage

Assessing your slope before planting is crucial for a successful hillside garden. Start by examining the type of soil you have on your slope. Different types like clay, sandy, or loamy soils will affect how water drains and how well roots can establish themselves. Consider the drainage on your slope. Proper drainage is important to prevent erosion and ensure plant health. Perform a simple percolation test by digging a hole, filling this hole with water, and observing how fast it drains. This will give you an idea of how well your soil absorbs water.

Choosing the Right Plants for Slope Stabilization

You’ll want to select varieties with strong root systems capable of holding soil in place. Plants like creeping juniper, ornamental grasses, and groundcovers such as ivy are excellent choices for anchoring the soil on a slope. Consider planting native plant species adapted to your specific climate and soil conditions.

These plants will generally require less maintenance and be more resilient against pests and diseases. Look for plants that can spread quickly to cover large areas of the slope and help prevent erosion. Avoid planting trees with shallow roots or heavy top growth on steep slopes, as they may not provide adequate stability and could potentially increase the risk of landslides.

Terracing: A Step-By-Step Guide for Hillside Gardening

Terracing is a popular technique for hillside gardening that not only adds visual interest but also helps with erosion control and plant growth. To start terracing your slope, begin by marking out the terrace levels using stakes and string to create even-level platforms. Next, dig into the hillside to create flat surfaces for each terrace level. Once your terraces are in place, add a layer of nutrient-rich soil to support plant growth. Select plants that are suitable for specific climate conditions, and consider placing taller plants towards the back of each terrace for a layered effect.

In case you missed it: Landscape Gardening Ideas, Design, Techniques

Garden

Retaining Walls: Types and Installation for Slopes

Retaining walls play a major role in slope gardening, providing stability and preventing erosion. When it comes to types of retaining walls, you have various options to choose from based on your aesthetic preferences and the functionality needed for your particular slope. Installation of retaining walls requires careful planning and consideration of factors like drainage and soil composition.

Whether you opt for a gravity wall design or one that requires reinforcement with geogrids, ensuring proper construction is key to the success of your slope garden. Professional help may be necessary for more complex installations, especially on steep slopes where engineering expertise is vital.

Ground Cover Options for Erosion Control

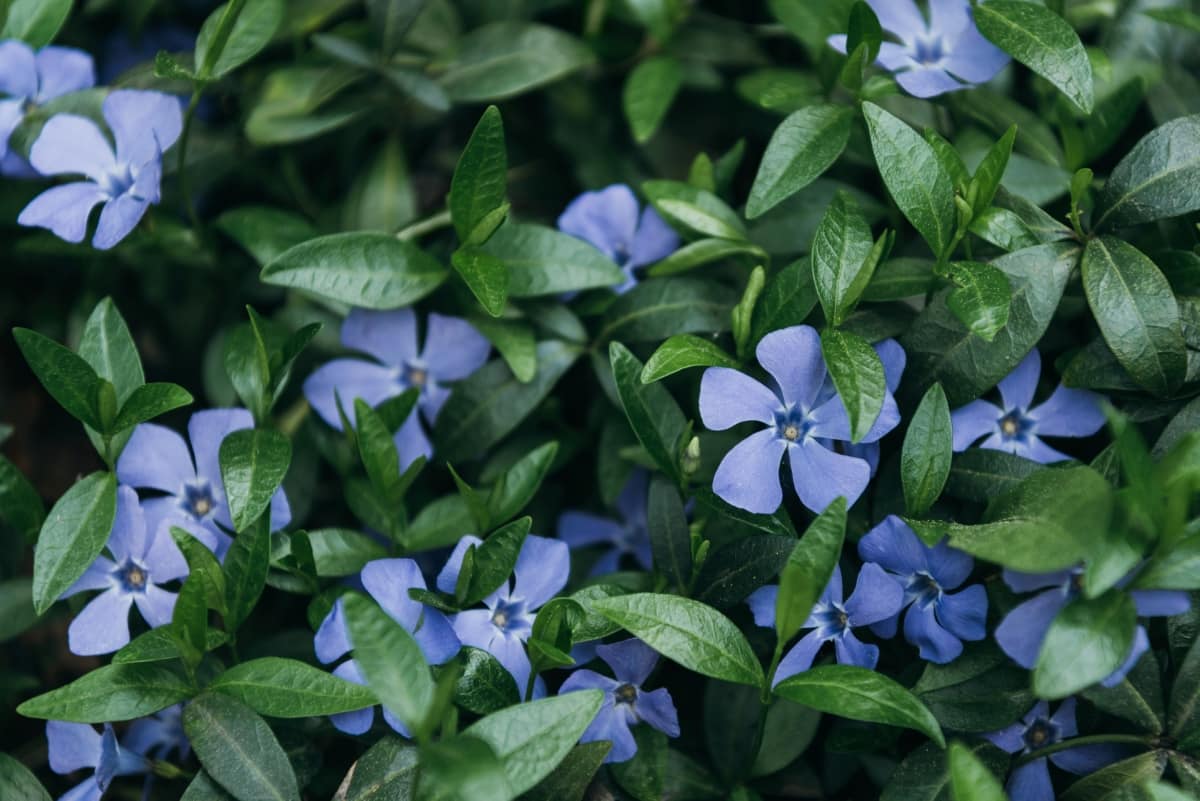
Ground covers not only help stabilize the soil but also add beauty to your hillside landscape. One popular option is planting creeping plants like vinca or ivy, which spread quickly and create a dense mat of roots to hold the soil in place. Another effective choice is using ornamental grasses such as blue fescue or fountain grass, which have deep root systems that can help control erosion on steep slopes.

These grasses not only provide stability but also add texture to your garden design. For a more colorful touch, consider planting low-growing perennials like sedum or thyme. These plants not only help prevent erosion but also create visual interest with their vibrant blooms and foliage.

Water Management Strategies for Sloped Gardens

Water management is important for maintaining a healthy garden on a slope. One effective strategy is to create contour trenches along the slope to capture rainwater and prevent erosion. By redirecting water flow, you can ensure that your plants receive adequate moisture without causing soil runoff.

In case you missed it: Cheap Backyard Landscaping Ideas, Tips, and Secrets

Backyard Garden

Another method is to install drip irrigation systems that deliver water directly to the base of plants, minimizing waste and encouraging deep root growth. Consider planting native vegetation with deep root systems that can better withstand periods of drought. Regularly monitoring your garden’s watering needs based on weather conditions and plant requirements will help you adjust your watering schedule accordingly.

Pathways and Steps: Navigating Your Slope with Ease

Pathways and steps are essential elements in making your slope accessible while adding visual interest to the landscape. When designing pathways on a slope, consider the natural flow of the land. Utilize materials like gravel, flagstone, or pavers for your pathways. These options provide stability underfoot and blend well with the natural surroundings.

Additionally, incorporating steps into steeper areas will make navigating your slope easier and safer. Choose plants that can thrive alongside your pathways to enhance their beauty. Adding lighting along the paths can create a magical ambiance during evening strolls through your garden sanctuary.

Using Mulch and Rocks to Prevent Erosion

Maintaining a sloping garden has challenges, especially when it comes to erosion control. One effective way to combat erosion on a slope is by strategically utilizing mulch and rocks. Mulch helps retain soil moisture while preventing runoff during heavy rain. Choose from organic mulches like wood chips or straws for better water absorption.

In case you missed it: Avoid These 14 Common Landscaping Mistakes to Keep Your Yard Looking Tidy and Beautiful

Decorative Trees

Rocks can also play a crucial role in preventing erosion on a slope. Placing larger rocks strategically along the base of the slope can help slow down water flow and minimize soil displacement. Additionally, smaller rocks or gravel can be used to create pathways that aid in redirecting water away from vulnerable areas. Combining mulch and rocks serves a practical purpose and also adds aesthetic value to your hillside landscaping. 

Maintenance Tips for a Thriving Slope Garden

Maintaining a sloping garden requires regular attention to ensure its health and beauty. Start by inspecting the area for any signs of erosion or soil movement. Check your retaining walls for stability and repair any damages promptly. Prune your plants to increase healthy growth and prevent overcrowding. Monitor the drainage on your slope to prevent water accumulation, which can lead to erosion. Adjust irrigation schedules as needed based on weather conditions and plant requirements.

Keep an eye out for pests and diseases that could harm your plants, treating them promptly to avoid spreading. Gardening on a slope presents both challenges and opportunities for creating beautiful and functional landscapes. By carefully implementing these gardening strategies, you can create a hillside landscape that not only enhances the beauty of your property but also functions effectively and sustainably for years to come.

Nourish and Flourish: Top Organic Mulches for Thriving House Plants
0

Organic mulches are natural materials that nourish and protect the soil around your house plants. By using organic mulches like coco coir or leaf mold, you’re not only benefiting your plants but also contributing to sustainability efforts. These materials are biodegradable and renewable, making them an eco-friendly choice for many gardeners.

Top Organic Mulches for Thriving House Plants

Coco Coir: A Sustainable Choice

Coco Coir, also called coconut fiber, is derived from the husks of coconuts. It’s a renewable resource, making it an environmentally conscious option for mulching. This nutrient-rich material helps improve soil structure by retaining moisture while still allowing for proper drainage. Its airy texture also aids in root aeration, promoting healthy growth for your indoor plants.

Leaf Mold: Nature’s Own Nutrient-Rich Mulch

it’s a nutrient-rich powerhouse that can work wonders for the health and growth of your indoor greenery. Leaf mold is important for creating a rich organic material that boosts soil fertility. This natural process transforms ordinary leaves into a valuable resource for your plants. The best thing about leaf mold is its ability to retain moisture while also promoting good drainage.

By using leaf mold as mulch, you’re not only enhancing the aesthetics of your planters but also providing them with the essential nutrients they need to flourish. Plus, it’s an eco-friendly way to recycle fallen leaves and give back to the earth in a sustainable manner.

Grass Clippings: Easy and Efficient

Grass clippings act as a natural fertilizer, adding nutrients back into the soil as they decompose. The best thing about using grass clippings is how easy and convenient it is. After mowing, collect them and spread a thin layer around the base of your potted plants. This helps retain soil moisture while also suppressing weed growth.

In case you missed it: Garden Mulching Types, Techniques, and Ideas

Trees Growing of Greenhouse

Grass clippings are readily available and completely free if you maintain a lawn yourself.  They also help retain moisture in the soil, reducing the frequency of watering needed. This easy and cost-effective method not only nourishes your plants but also saves you time and effort.

Composted Kitchen Scraps: From Waste to Resource

Composting kitchen scraps is not only eco-friendly but also cost-effective. Composting kitchen scraps reduces waste and enriches the soil with essential nutrients. It’s like giving your plants a well-balanced meal for optimal growth. By composting at home, you’re actively participating in nature’s cycle—turning what would have been trash into valuable resources. The decomposition process breaks down the scraps into nutrient-rich humus that boosts soil fertility and supports plant health. Plus, it’s a rewarding way to connect with the earth and promote eco-friendly practices in your daily life.

Coffee Grounds: For Acid-Loving Plants

These nutrient-rich remnants can be a game-changer in maintaining the pH balance of your plants’ soil. Coffee grounds’ acidity makes them ideal mulch for plants that grow in acidic environments, such as azaleas, hydrangeas, and blueberries. Sprinkle the used grounds on top of the soil to give your green friends a natural boost.

Apart from regulating pH levels, coffee grounds are used as a natural fertilizer, providing your plants with nutrients like nitrogen, potassium, and phosphorus. This eco-friendly approach benefits your indoor garden and reduces waste by repurposing what would have been discarded.

Pine Needles: Perfect for Drainage

These thin, needle-shaped leaves not only add a touch of rustic charm to your planters but also play a vital role in maintaining the right moisture levels for your green companions. Pine needles excel at creating air pockets within the soil and preventing root rot. Additionally, pine needles are acidic, making them an excellent mulch choice for acid-loving plants like rhododendrons and blueberries. As they break down slowly over time, they continue to contribute organic matter to the soil while maintaining its pH balance.

In case you missed it: Importance of Mulch in Your Garden: Ideas, Tips, and Techniques

Wood Chips Mulch

Straw and Hay: Lightweight and Retentive

These natural materials not only provide a protective cover for your house plants but also help retain essential moisture, reducing the need for frequent watering. Straw is known for its lightness, making it easy to spread around your plants without adding unnecessary weight to the soil. It creates a breathable layer that allows air circulation while keeping the soil temperature moderate.

On the other hand, hay brings additional nutrients as it decomposes, enriching the soil and promoting plant growth. Its ability to retain moisture can be particularly beneficial during hot summer days when water evaporation is high. Using straw and hay as organic mulches not only benefits your house plants but also adds a rustic charm to your indoor garden.

Shredded Newspaper: Recycling at Its Best

Newspaper mulch helps to retain moisture in the soil, keeping your plants hydrated and happy. Plus, it acts as a barrier against weeds, saving you time and effort in maintenance. Shredded newspaper breaks down slowly, adding organic matter to the soil as it decomposes. Shredded newspaper can be used as mulch. Spread a mulch layer around the base of your plants. Make sure the layer is thick enough to effectively retain moisture and suppress weeds without suffocating your plants’ roots.

Wood Chips: For a Rustic Touch

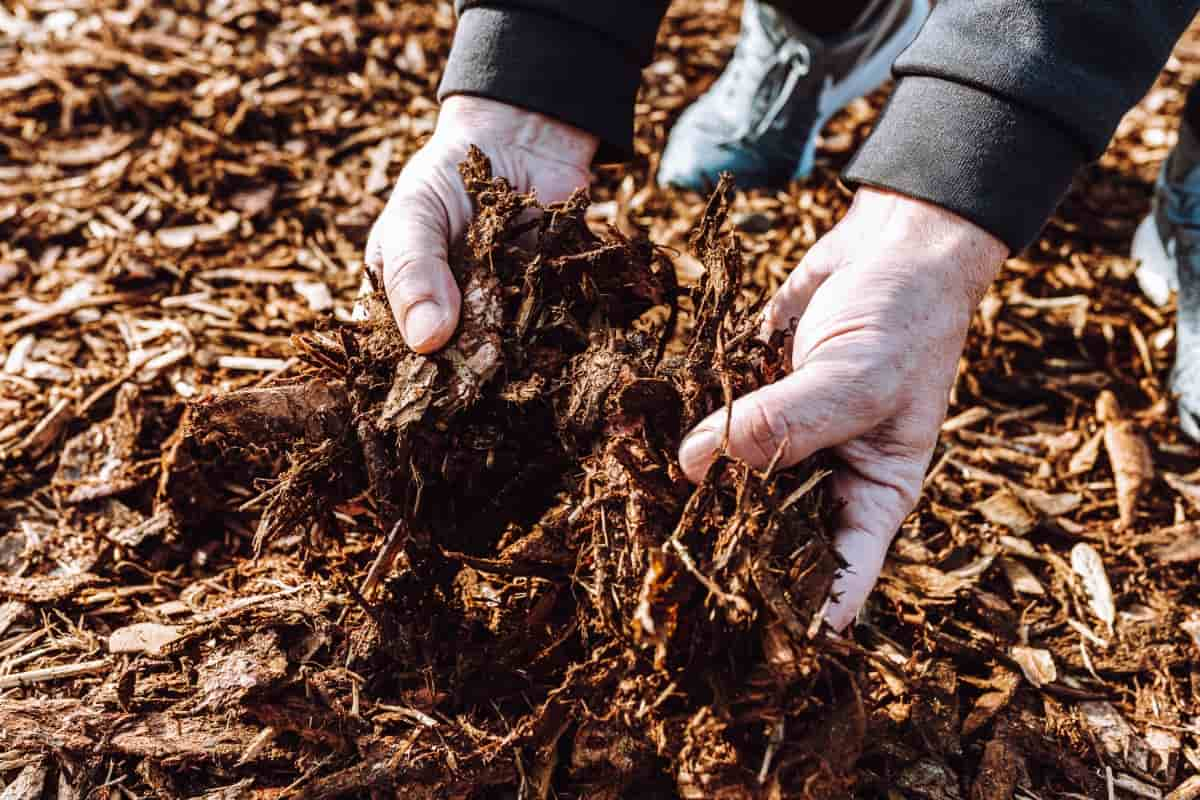
When using wood chips as mulch, opt for aged or composted varieties to prevent nitrogen depletion in the soil. This way, you can enjoy all the benefits without compromising your plants’ growth. Wood chips help regulate soil temperature and retain moisture, creating a stable environment for plant roots to thrive.

In case you missed it: Garden Plastic Mulch, Uses, Advantages, Disadvantages

Aloe Growing in The Ground

Wood chips can also deter pests and suppress weed growth, keeping your plants healthy without the need for harmful chemicals. Whether you prefer a classic hardwood look or opt for more colorful options like cedar or pine, wood chips are versatile and customizable to suit any décor style.

Peat Moss: For Moisture Control

When using peat moss, mix it into the soil or place a layer on top of the potting mix. It creates a barrier against evaporation, reducing the frequency of watering needed for your houseplants. Plus, its acidic nature is ideal for plants that prefer slightly lower pH levels. Peat moss helps retain moisture and improves soil structure by loosening compacted earth and promoting root growth.

Organic mulches provide a range of benefits, including moisture retention, weed suppression, and nutrient enrichment of the soil. By applying organic mulch to your indoor gardening routine, you can make an optimal environment for your houseplants to nourish and flourish, leading to healthier, more vibrant growth and a greener, more enjoyable indoor space.

Everything You Want to Know about Indian Mogra Flower: Discover Uses and Growing

0

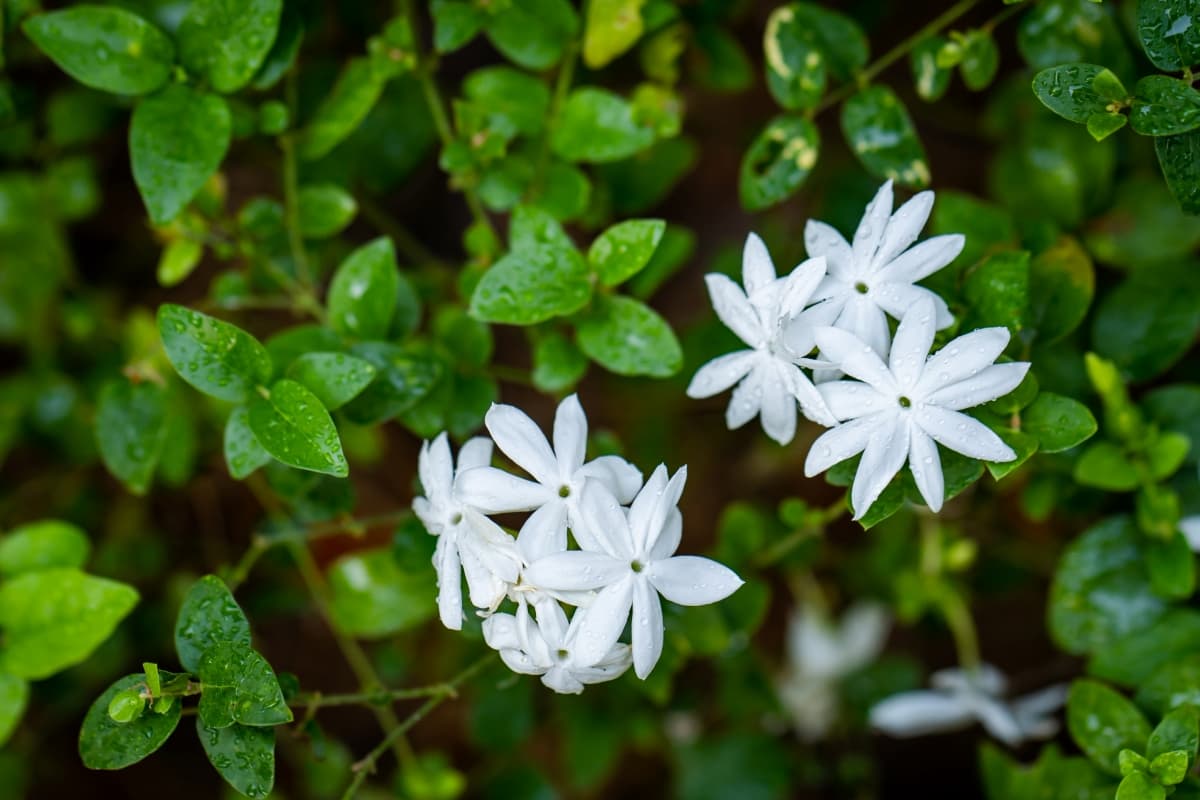
The Indian Mogra Flower, also known as Jasmine Sambac, is a symbol of beauty and fragrance in South Asia and belongs to the Oleaceae family. The Indian Mogra flower, also known as Jasmine, offers a plethora of benefits beyond its enchanting fragrance. This delicate bloom is not just visually stunning but also holds significant medicinal properties.

Everything You Want Know about Indian Mogra

Historical Significance and Cultural Importance

The Indian Mogra Flower holds a significant place in history due to its cultural importance and symbolic value in various traditions and ceremonies. Dating back centuries, the Mogra flower has been revered for its beauty, fragrance, and spiritual connotations. In India, the Mogra flower is often associated with love, purity, and divine grace. It is commonly used in religious rituals, bridal decorations, and traditional festivals like weddings or religious ceremonies.

The delicate white petals of the Mogra are believed to symbolize purity of heart and soul. Culturally, the intoxicating scent of the Mogra flower has inspired poets, artists, and musicians throughout history. Its captivating aroma has been celebrated in literature as a metaphor for beauty. To successfully grow Indian Mogra Flowers, ensure they receive plenty of sunlight and well-draining soil.

Varieties of Mogra Flower

Several varieties of the beautiful and fragrant Mogra flower stand out for their unique characteristics and charm. The most popular variety is the Arabian Jasmine, known for its sweet scent and delicate white petals. Another variety worth mentioning is the Grand Duke of Tuscany Jasmine, recognized for its double flowers and strong fragrance which can fill a room with its captivating aroma.

The Belle of India Jasmine is another stunning variety with large, showy blooms that exude a delightful fragrance. For those looking for a compact plant, the Maid of Orleans Jasmine is an excellent choice, perfect for smaller spaces or containers. 

Climate and Soil Requirements for Growing Mogra

The Indian Mogra flower thrives in warm climates with plenty of sunlight. It is suited for growing in tropical and subtropical regions where temperatures range from 20°C to 32°C. An acidic to neutral pH level between 6.0 and 7.5 is ideal for optimal growth.

In case you missed it: 11 Strategies to Make Jasmine Plants Bloom: Practical and Proven Methods

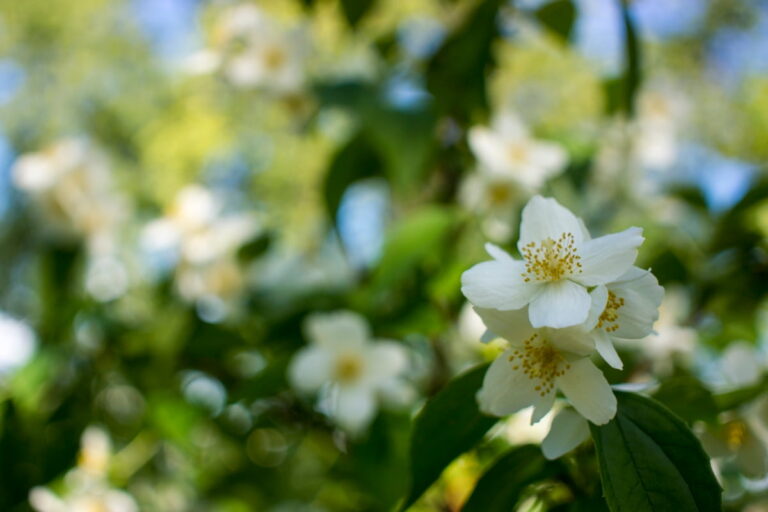
Beautiful White Jasmine Flower

To ensure successful cultivation, the planting area should receive sunlight for about 4 to 6 hours daily and have good air circulation. The Mogra plants should be regularly but infrequently watered to encourage deep root growth. Mulching around the Mogra plant base can help retain moisture and suppress weed growth.

Planting and Propagation Techniques

Indian Mogra can be planted either from seeds, cuttings, or layering.

  • Seeds: Soak the seeds in water for a few hours before planting. Sow seeds in well-draining soil and keep them moist until germination.
  • Cuttings: Take 6–8-inch cuttings from healthy, mature plants. Remove the lower plant leaves and dip the cut end in the rooting hormone. Plant the Mogra cuttings in a pot filled with well-draining potting mix.
  • Layering: Bend a low-growing stem down to the ground and then cover it with soil, leaving the tip exposed. Once roots develop, sever the stem from the parent plant and transplant it.

Care and Maintenance Tips

  • Watering: Provide regular watering, especially during the flowering season, but be careful not to overwater as it can lead to root rot.
  • Pruning: Trim back any dead or overgrown branches to promote new plant growth and maintain a compact shape. Prune after blooming for best results.
  • Fertilizing: Feed your Mogra with a balanced fertilizer during the planting season to provide essential nutrients for strong roots and abundant flowers.
  • Sunlight: For optimal blooming, place your Mogra plant in a location that receives sunlight at least 4-6 hours per day.

Pest Control: Watch out for common pests like aphids or whiteflies and treat them promptly with natural remedies or insecticidal soap.

Common Pests and Diseases

Some of the most common pests that can affect your Mogra plants include aphids, whiteflies, and spider mites. These little critters can suck the sap from your plants, causing damage to the leaves and flowers. To combat these pests, you can use neem oil sprays to keep them at bay. Regularly inspecting your Mogra plants for any signs of infestation is key to catching these pesky bugs early on.

In case you missed it: How to Plant Jasmine from Cuttings: A Complete Growing Guide for Beginners

Jasmine Flowers

In terms of diseases, Mogra plants are affected by fungal infections. To prevent these issues, ensure proper air circulation around your plants by spacing them appropriately and avoiding overhead watering.

Uses of Mogra in Traditional Medicine and Perfumery

The Mogra flower’s enchanting fragrance is not just a treat for the senses; it also holds significant value in traditional medicine and perfumery. In Ayurveda, Mogra is believed to have cooling properties that can help alleviate anxiety when used in aromatherapy or massage oils. Furthermore, the essential oil extracted from Mogra flowers is highly sought after in the perfume industry for its sweet and floral aroma.

It is often used as a top note in perfumes to add a touch of sophistication and elegance. In traditional Indian medicine, Mogra is also known for its skin-healing properties. The flower extracts are used in various skincare products to soothe irritation and promote healthy skin.

Harvesting and Post-Harvest Handling

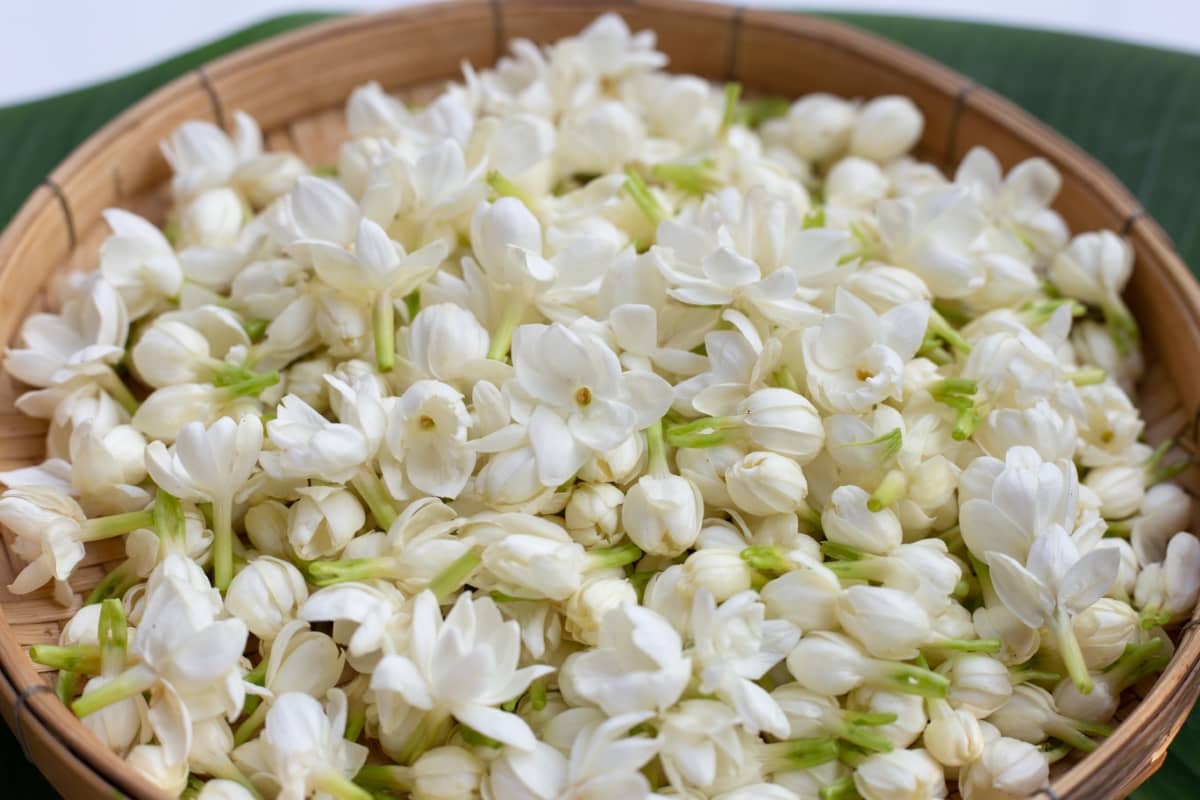
The best time to harvest Mogra flowers is in the early morning when they are at their freshest and most fragrant. It’s important to gently pluck the flowers without damaging them to preserve their beauty and aroma. After harvesting, it’s crucial to handle the Mogra flowers with care during post-harvest processing. Remove any damaged or wilted blooms to ensure only the finest quality flowers are used.

Proper handling techniques include storing the flowers in a cool, dark place away from direct sunlight to maintain their freshness for longer periods. Whether you’re using Mogra flowers for traditional medicine, perfumery, or decorative purposes, proper harvesting and post-harvest handling techniques are essential for preserving their fragrance and beauty.

In case you missed it: 13 Common Jasmine Plant Problems: How to Fix Them, Solutions, and Treatment

Jasmine Flower

Economic Importance and Market Trends

The economic importance of the Indian Mogra flower extends beyond its beauty and fragrance. In the market, Mogra holds significant value due to its uses in traditional medicine and perfumery industries. The high demand for Mogra flowers has created a lucrative market for farmers and businesses involved in its cultivation.

With increasing awareness about natural products, there is a growing trend towards using Mogra extracts in skincare and aromatherapy products. Furthermore, the export opportunities for Indian Mogra flowers have also been on the rise, with many countries appreciating the quality and uniqueness of these fragrant blooms. This presents a promising outlook for those involved in the production and trade of Mogra flowers both locally and internationally.

By following these planting and propagation techniques, you can successfully grow this fragrant and beautiful flowering plant in your garden or home landscape. With proper plant care, you can enjoy the delightful fragrance and elegant beauty of Indian Mogra flowers throughout the growing season, adding charm and allure to your outdoor space.

Green Thumb Success: Expert Tips for Cultivating Greenhouse Pumpkins All Year Round

0

Pumpkins are members of the gourd family Cucurbitaceae, and they are beloved and versatile fruits synonymous with the fall season. They come in different shapes, sizes, and colors, captivating culinary enthusiasts and gardeners alike. By utilizing a controlled environment, you can grow Pumpkins all year round, ensuring a steady supply for personal use or commercial purposes.

Cultivating Greenhouse Pumpkins

Selecting Pumpkin Varieties for Greenhouse Growing

Selecting the right Pumpkin varieties for your greenhouse is crucial. Some popular choices include Sugar Pie, Baby Bear, Wee-B-Little, Lumina, Casperita, Mini-Jack, Munchkin, Fairy Tale, Jack Be Little, and Baby Boo Pumpkins – each with their unique characteristics and sizes that can thrive in a greenhouse setting. These varieties are generally well-suited for greenhouse cultivation due to their compact size and relatively short growing season. Make sure to provide adequate support, water, and nutrients to ensure healthy growth and bountiful harvests.

Optimizing Your Greenhouse Environment for Pumpkins

Start by maintaining consistent temperatures between 21-29°C during the day and slightly cooler at night. Adequate ventilation is crucial to prevent overheating and humidity build-up. Consider using shade cloth during hot summer months to protect your Pumpkins from scorching sun rays.

Incorporate fans for air circulation, ensuring even distribution of heat and moisture throughout the greenhouse. Implement a watering system that provides consistent moisture without over-saturating the soil. Mulching can help retain soil moisture while reducing weed growth. Additionally, consider using organic fertilizers to provide essential nutrients for healthy Pumpkin development.

Soil Preparation and Nutrient Management for Pumpkins

Start by testing the soil pH levels to determine if any adjustments are needed for optimal Pumpkin growth. Consider adding balanced fertilizers with nitrogen, phosphorus, and potassium to promote healthy vine and fruit development. Monitor the soil’s nutrient levels regularly throughout the growing season to make necessary adjustments.

Ripe Pumpkin

Maintaining moisture levels is key to preventing issues like root rot or nutrient deficiencies. Mulching around your Pumpkin plants can help retain moisture and regulate temperature fluctuations in the greenhouse environment.

Planting Techniques for Greenhouse Pumpkins

Start by selecting healthy Pumpkin seedlings or seeds from reputable sources. Ensure your greenhouse environment is warm and well-lit before transplanting. Prepare the soil by using a rich, well-draining mix that is high in organic matter. Plant your Pumpkin seeds or seedlings at the appropriate depth, typically around one inch deep. Space out your plants accordingly to allow for adequate growth and airflow.

Water your Pumpkins consistently, but avoid overwatering. They prefer moist, not soggy soil. Consider using drip irrigation to deliver water directly to the roots. Monitor the greenhouse temperature and humidity levels regularly to ensure optimal growing conditions for your Pumpkins.

Watering and Humidity Control in Pumpkin Cultivation

Pumpkins need consistent moisture to thrive, but overwatering can lead to root rot. Striking the right balance is essential. When watering your greenhouse Pumpkins, ensure the soil is evenly moist but not waterlogged. Investing in a drip irrigation system can help regulate water distribution efficiently, preventing under or over-watering scenarios.

Humidity levels also significantly affect Pumpkin growth. Pumpkins prefer high humidity, especially during their flowering stages. Consider using a humidifier in your greenhouse if you live in a dry climate or during the winter season. Regularly monitor both watering schedules and humidity levels to create an optimal environment for your greenhouse Pumpkins to flourish.

Pest and Disease Management for Healthy Greenhouse Pumpkins

Some common pests that can threaten your Pumpkin crop include aphids, spider mites, and cucumber beetles. These small intruders can wreak havoc on your plants if left unchecked. Powdery mildew and downy mildew are major diseases also to be watched out for in greenhouse Pumpkin cultivation. These fungal infections thrive in warm, humid environments—conditions often found in greenhouses.

Pumpkin Growing in A Garden

Keeping a close eye on the health of your plants and maintaining proper ventilation can help prevent these issues from taking hold. Another common concern for greenhouse Pumpkins is bacterial wilt, which can quickly spread throughout your crop if not addressed promptly. Regularly inspecting your Pumpkin plants for any disease or pest signs is key to keeping them healthy and thriving.

Pollination Strategies for Maximum Pumpkin Yield

Pumpkins are not self-pollinating, so you’ll need to help them along by attracting pollinators like bees or manually transferring pollen from male to female flowers. To attract bees, consider planting bee-friendly flowers near your greenhouse or placing bee houses nearby. If natural pollinators aren’t abundant in your area, you may need to hand-pollinate your Pumpkin plants using a small brush or cotton swab.

Identifying male and female flowers is crucial for successful pollination. Male flowers have a straight stem beneath the flower, while female flowers have a miniature fruit at their base called an ovary. By implementing proper pollination strategies, you can ensure that each Pumpkin plant receives the necessary pollen for optimal fruit development and maximum yield potential.

Pruning and Training Pumpkins in a Greenhouse Setting

By selectively removing excess foliage, you allow more sunlight to reach the fruit, promoting healthy growth. Training vines along trellises or supports helps prevent overcrowding and encourages better airflow, reducing the risk of diseases. Regularly inspect your Pumpkin plants to identify any unwanted shoots or branches that may hinder their development.

Pumpkin  in Garden

Prune these carefully to redirect the plant’s energy towards producing larger fruits. Additionally, training vines horizontally can help distribute nutrients evenly throughout the plant, leading to more uniform Pumpkins.

Harvesting and Storing Greenhouse Grown Pumpkins

For harvesting Pumpkins, timing is crucial. Please make sure the Pumpkin’s skin has turned a deep, solid color and the stem starts to dry out before cutting it from the vine. Handle with care when harvesting – use sharp shears to cut the Pumpkin away from the vine without damaging other parts of the plant. Once harvested, wipe off any dirt and let them cure in a warm, dry place for about two weeks. This process helps toughen up their skin for better storage.

When it’s time to store them, choose a cool, dark spot with good ventilation. Keep them off hard surfaces to prevent rotting, and check for damage signs. With the right approach and techniques, cultivating greenhouse Pumpkins all year round can be a rewarding and fruitful endeavor. By following some tips, such as providing adequate space, temperature, light, and moisture control, you can ensure optimal growth and harvest.

Maximize Growth & Flavor: The Ultimate Guide to Companion Planting in Herb Gardens

0

Companion planting involves strategically placing different plants together to benefit each other, whether by repelling pests, attracting beneficial insects, or enhancing flavors.  It involves strategically pairing different plants together to benefit each other. In herb gardening, this means pairing herbs with other plants that can support their growth and enhance their flavor profiles.

Companion Planting in Herb Gardens

Benefits of Companion Planting for Herbs

The major advantage is natural pest control – certain herb combinations can help repel pests, reducing the need for harmful pesticides. Additionally, companion planting enhances soil health by promoting biodiversity and nutrient cycling. Different plants have varying root structures that benefit the soil in unique ways, leading to a healthier and more fertile earth for your herbs to thrive in.

This practice also helps with weed suppression, as densely planted areas leave little room for unwanted invaders to take hold. Moreover, companion planting encourages pollination by attracting beneficial insects to your garden. These pollinators play a crucial role in ensuring successful herb growth through proper fertilization. 

Herb Companion Planting Basics

Different herbs have specific needs and benefits when paired together strategically. Firstly, consider the growth habits of each herb you want to plant together. Some herb plants thrive in full sun, while others prefer partial shade. Matching compatible herbs based on their sunlight requirements can optimize growth.

Think about the soil preferences of your chosen herbs. For example, some herbs like well-drained soil, while others enjoy moisture-retentive conditions. Pairing herbs with similar soil needs can prevent competition for nutrients. Planting taller herbs at the back of a bed and shorter ones in front maintains sunlight access for all.

Best Companion Plants for Popular Herbs

Some popular herbs have natural companions that not only enhance their development but also help repel pests and attract beneficial insects. For example, basil thrives when planted alongside tomatoes, as the strong scent of basil can deter pests that typically target tomato plants.

In case you missed it: Best Herbs for Tea Garden: What to Grow in a Tea Garden

Planting Variety of Herbs

Rosemary is known to benefit from being near sage or thyme. Mint varieties often flourish when planted near chamomile or parsley, while chives do well alongside carrots or strawberries. These strategic pairings not only promote healthier plants but also contribute to a more vibrant and diverse garden ecosystem.

Designing Your Companion Herb Garden

When designing your herb garden, consider the growth habits, nutrient needs, and compatibility of different herbs to maximize their potential. Grouping herbs that support each other’s growth can lead to healthier plants and increased yields. It is a fun and creative process that allows you to maximize the growth and flavor of your herbs. When planning your garden layout, consider the sunlight requirements of each herb to ensure they thrive together.

Group herbs with similar water needs to simplify irrigation tasks and promote healthy growth. Pay attention to sun exposure and water requirements when deciding where to plant each herb.  Please take into account the height and spread of each plant when arranging them in your garden beds or containers. Experiment with different combinations to discover which plants complement each other best in terms of flavor, scent, and pest-repelling properties.

Managing Pests and Diseases with Companion Planting

By strategically pairing herbs with other plants that have natural pest-repelling properties, you can create a more resilient ecosystem. Some common pests are aphids, those tiny sap-sucking insects that can wreak havoc on tender herb leaves. Caterpillars may also make an unwelcome appearance, munching away at your precious plants with voracious appetites.

Powdery mildew is another sneaky culprit that loves to take residence in warm and humid conditions, coating your herbs with a fuzzy white layer. Root rot can silently strike if soil drainage isn’t optimal, causing wilting and yellowing of leaves as the roots suffocate. For example, planting basil alongside tomatoes can help repel tomato hornworms due to the strong scent of basil. Marigolds are another excellent companion plant known for deterring nematodes in the soil, benefiting neighboring herbs like rosemary or thyme.

Improving Soil Health Through Companion Planting

Certain herbs can attract beneficial insects that help aerate the soil and ward off harmful pests. This natural pest control not only protects your herbs but also enriches the soil without the need for harsh chemicals. Additionally, some companion plants are known for their nitrogen-fixing properties; they can help replenish essential nutrients in the soil. 

In case you missed it: Top 16 Perennial Herbs You Can Plant Once and Enjoy for Years

Cutting Spicy Herbs with Scissors

When herbs are strategically grouped, they can work symbiotically to enhance soil fertility. For instance, planting nitrogen-fixing herbs like clover alongside heavy feeders such as basil can help maintain a balanced nutrient level. 

Watering Strategies for Companion Herb Gardens

Watering your companion herb garden is crucial for the health and vitality of your plants. Each herb has its own watering requirements, so it’s essential to understand each plant’s individual needs. Some herbs, like basil and mint, prefer consistently moist soil, while others, like rosemary and thyme, thrive in drier conditions. 

A good rule of thumb is to water deeply but encourage deep root growth. Early morning is generally the best time to water your herb garden as it allows foliage time to dry before evening, reducing fungal diseases. Observing your plants regularly will help you adjust your watering schedule according to their specific needs.

Harvesting and Utilizing Companion-Planted Herbs

Harvesting is a rewarding experience that allows you to maximize the growth and flavor of your garden. When it comes time to harvest, make sure to pick herbs early in the day when their essential oils are at their peak. This ensures the best flavor and aroma in your dishes. To preserve your freshly harvested herbs, consider drying them by hanging them upside down or using a dehydrator.

In case you missed it: Natural and Organic Ways to Treat Herbs Leaf Curl: Fix With Effective Home Remedies

Herbs and Vegetables

You can also freeze herbs in ice trays with water or oil for later use in cooking. Another option is making herb-infused oils or vinegar to add a layer of flavor to your meals. When cooking with companion-planted herbs, experiment with different combinations to enhance the taste profile of your dishes. Whether you’re adding basil to a tomato sauce or mint to a refreshing drink, incorporating fresh herbs will elevate your culinary creations.

Troubleshooting Common Issues in Companion Herb Gardens

One challenge could be overcrowding – make sure to give each plant enough space to thrive. Another issue is nutrient competition, so consider the needs of each herb when planting them together. If you notice yellowing plant leaves, it might be a sign of nutrient deficiencies. Try adding organic fertilizer or compost to boost soil health. Pests can also cause problems in your herb garden; consider planting pest-repelling herbs like basil or marigolds nearby.

Keep an eye out for signs of disease, such as moldy spots or wilting leaves. Proper watering and good airflow can help prevent these issues. Furthermore, companion planting promotes biodiversity in the garden, creating a harmonious balance that mimics natural ecosystems. This contributes to the overall health of the garden and also reduces the need for synthetic fertilizers, making it a more environmentally friendly approach to gardening.

How to Control Rhododendron Problems Naturally: Home Remedies and Organic Ways to Fix Them

0

This vibrant plant genus, with over 1,000 species, belongs to the heath family (Ericaceae). Rhododendrons are beautiful and vibrant flowering plants that can bring so much joy to any garden. However, like any other plant, they are affected by several problems that can affect their health and growth. Controlling rhododendron problems naturally not only ensures the well-being of your plants but also benefits the environment.

How to Control Rhododendron Problems Naturally

Root Rot

Root rot is a common plant problem that can affect rhododendrons, causing their roots to decay and leading to wilting leaves and stunted growth. This fungal disease thrives in moist soil conditions, making proper drainage essential for preventing its spread. To control root rot naturally, it’s crucial to ensure that the plant is not overwatered.

Allow the soil to dry out to discourage the fungus from multiplying. Additionally, consider applying organic fungicides or beneficial bacteria that can help suppress the disease-causing organisms. Practicing good hygiene by removing any infected plant material promptly can also aid in controlling root rot.

Winter Burn

During the winter months, Rhododendrons can suffer from a common issue known as Winter Burn. This occurs when the plant loses more water through plant leaves than it can absorb from the frozen soil. The result is dried-out and discolored foliage that may eventually lead to damage or death if not addressed promptly.

To prevent Winter Burn, consider protecting your Rhododendrons during harsh winter conditions. One way to do this is to surround the plants with a layer of mulch to help retain moisture and regulate temperature fluctuations. Regularly watering your Rhododendrons in late fall before the ground freezes can also help them stay hydrated throughout the winter months.

Petal Blight

Petal blight is a common issue that can affect the beauty of your rhododendrons. It is caused by a fungus that thrives in wet and humid conditions, typically appearing as brown spots on the petals. To control petal blight naturally, it’s essential to maintain good air circulation around your plants.

In case you missed it: How to Grow and Care for Rhododendrons: A Beginners Guide

Rhododendron

Avoid watering them from above and instead opt for drip irrigation at the soil level. Mulching can also help prevent water from splashing onto the flowers, reducing the risk of fungal growth. Consider planting resistant varieties or applying organic fungicides as preventative measures against petal blight.

Insect Damage

Insect damage is a common problem faced by gardeners, but fear not; there are natural ways to combat these tiny invaders. The most effective method is introducing beneficial insects like ladybugs or lacewings that feed on harmful pests. They act as natural predators and help maintain a balance in your garden ecosystem.

Another approach is using homemade insecticidal soap or neem oil spray to deter and eliminate unwanted bugs without harming the environment or beneficial insects. These organic solutions are safe for your plants and pets too. Regularly inspecting your rhododendrons for early signs of insect infestations can also prevent major damage.

Powdery Mildew

Powdery mildew is a common issue that can affect rhododendrons, causing a white powdery substance to appear on the leaves. This disease mostly thrives in humid conditions and can weaken the plant if left untreated. To control powdery mildew naturally, try spraying a solution of water and baking soda onto the affected leaves. This simple remedy can help control the spread of the fungus without harsh chemicals.

Another organic method is to improve air circulation around your rhododendron by pruning any overcrowded branches. Good airflow can prevent moisture buildup, making it harder for powdery mildew to take hold. Remember to remove and dispose of any infected leaves or debris to prevent further spread of the fungus.

Dieback

Dieback is a common issue that can affect Rhododendrons, causing the tips of branches to die off and turn brown. Environmental stressors like extreme temperatures or insufficient water drainage often cause it. When left untreated, dieback can spread throughout the plant, affecting its overall health and appearance. To naturally control dieback in Rhododendrons, start by pruning affected branches back to healthy tissue.

In case you missed it: Homemade Insecticide for Roses: Homemade Remedies for Natural Pest Control on Rose Plants 
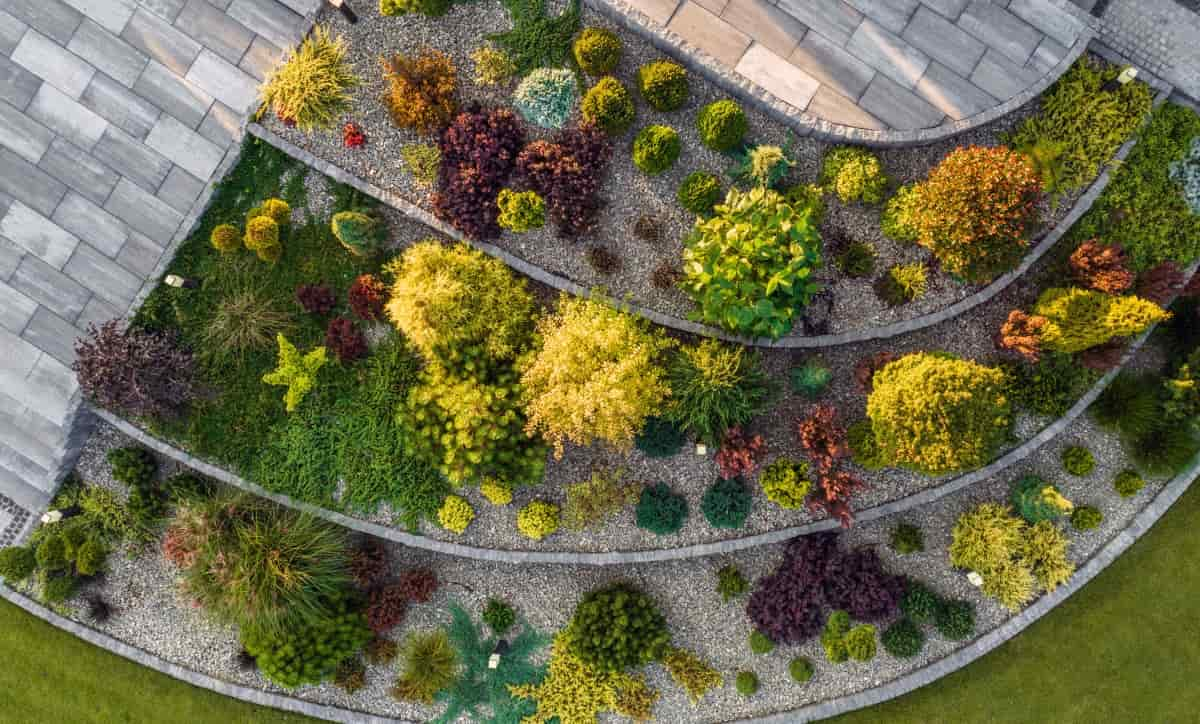
Rhododendron Flowers

Make sure to sterilize pruning tools between cuts to prevent any potential diseases further. Improving soil drainage can also help prevent waterlogged conditions that contribute to dieback. Additionally, proper care, such as consistently watering, mulching around the base of the plant, and avoiding over-fertilization, can help strengthen the Rhododendron against dieback issues.

Weather Damage

Weather can have a major impact on the health of your rhododendrons. Extreme temperatures, strong winds, heavy rain, or prolonged drought can all cause damage to these delicate plants. During hot summer months, make sure to provide sufficient water to prevent dehydration and heat stress.

In cold winter months, protect your rhododendrons from freezing temperatures by covering them with burlap or other protective materials. Avoid pruning during this time, as it can leave them vulnerable to frost damage. Strong winds can break branches and strip leaves off your plants. Consider planting windbreaks or placing stakes for support during windy periods.

Buds Dropping or Not Forming

Buds dropping or not forming on your rhododendrons could be a sign of stress from environmental factors like extreme temperature levels or inadequate sunlight. To combat this problem naturally, ensure your plants are getting enough water and are planted in well-draining soil. Additionally, providing a mulch layer around the plant base can help retain moisture, promoting healthy bud development.

Soil Deficiency/Chlorosis

Soil deficiency and chlorosis are common issues that can affect the health of rhododendrons. When the soil lacks nutrients, such as iron or magnesium, it can lead to yellowing leaves and poor growth. Chlorosis occurs when plants are unable to produce enough chlorophyll, resulting in pale green or yellow foliage.

In case you missed it: Unlock Blooms: 9 Reasons Why Your Potted Chrysanthemum is Not Blooming

Rhododendron

To address soil deficiency and chlorosis naturally, consider incorporating organic matter. This will help improve nutrient levels and enhance overall soil quality for your rhododendrons. Additionally, using natural fertilizers rich in iron and other micronutrients can help combat these deficiencies effectively.

Nitrogen Deficiency

Nitrogen deficiency in Rhododendrons can manifest as yellowing leaves, stunted growth, and poor flowering. This essential nutrient is crucial for the plant’s overall health and vitality. To address nitrogen deficiency naturally, consider incorporating organic fertilizers rich in nitrogen into the soil. Compost, manure, or fish emulsion are great options to boost nitrogen levels sustainably. Additionally, planting nitrogen-fixing cover crops like clover can help enrich the soil over time.

Known for their stunning blooms and lush foliage, Rhododendrons are a favorite among gardeners worldwide. By applying the strategies, you can effectively address common issues such as pests, diseases, and nutrient deficiencies while promoting the overall health and vitality of your Rhododendron plants.

Natural Magic: The Remarkable Benefits of Cinnamon for Plants

0

The Cinnamon, popularly known as Dalchini (Cinnamomum zeylanicum), belongs to the Family Lauracae. Cinnamon on plants plays a crucial role in promoting their overall health and well-being. This powerful spice acts as a natural fungicide, helping to protect plants from harmful fungal infections that can stunt growth and cause disease.

Benefits of Cinnamon for Plants

Fungicide

When used as a natural fungicide, Cinnamon can help protect your plants from harmful fungal infections that can stunt growth and lead to diseases. The anti-fungal properties of Cinnamon make it a great alternative to chemical-based fungicides, especially for those looking for more organic solutions in their gardening practices. Cinnamon can help prevent common plant diseases such as powdery mildew and damping-off. Sprinkle ground Cinnamon around the plant base or mix it with water to create a spray for effective fungal control without any harmful chemicals involved.

Ant Deterrent

The scent of Cinnamon acts as a natural deterrent for ants, preventing them from making a home in your garden. Sprinkle Cinnamon around the plant base or create a barrier with it to ward off these unwanted visitors. Cinnamon provides a safe and effective solution for ant control. Plus, it’s environmentally friendly. By harnessing the power of this aromatic spice, you can protect your garden without compromising on safety or sustainability.

Mushroom Deterrent

Mushrooms can compete with your plants for nutrients and space, disrupting their growth and overall health. By sprinkling a bit of Cinnamon around the affected areas, you can create an inhospitable environment for these unwanted fungi to thrive. The anti-fungal properties of Cinnamon help prevent mushroom spores from germinating and spreading. This natural deterrent not only keeps your plants safe but also maintains the aesthetic appeal of your garden.

In case you missed it: Cinnamon Tree Planting, Tips, Ideas, And Techniques

Misting Plants

Rust Prevention

Cinnamon is not just a flavorful spice for your kitchen; it also has remarkable benefits when used on plants. The advantage of Cinnamon when applied to plants is its ability to prevent rust. Rust, a common fungal disease that causes orange or reddish-brown spots on plant leaves, can weaken and eventually kill the Cinnamon plant if left untreated.

By using Cinnamon as a natural fungicide, you can help protect your plants from developing rust. The anti-fungal properties of Cinnamon can inhibit the growth of fungal spores and prevent them from spreading on plant surfaces. Sprinkle Cinnamon powder onto the affected parts or mix it with water to create a spray solution. Regular application of Cinnamon on plants susceptible to rust can help maintain their health and vitality.

Healing Plant Wounds

Cinnamon possesses anti-fungal properties that can help prevent infections in plant wounds, allowing them to heal more quickly and effectively. By applying a bit of Cinnamon powder to the affected area, you can create a protective barrier that promotes healing and reduces the risk of disease.

In case you missed it: Growing Cinnamon in Pots, And Containers (Dalchini)

Cinnamon Powder

Instead of using synthetic chemicals or harsh treatments on your plants, consider harnessing the power of Cinnamon to aid in their recovery process. Not only is it safe and organic, but it’s also an affordable and readily available solution for nurturing your green friends back to health.

Deterrent for Furry Pests

These pesky critters, like squirrels or cats, can cause damage beyond repair if left unchecked. The strong scent of Cinnamon is a natural deterrent for them. Sprinkling some ground Cinnamon around your plants or creating a barrier with it can help keep these furry intruders at bay. The aroma overwhelms their sensitive noses and deters them from getting too close to your precious greenery. Not only does Cinnamon protect your plants from unwanted visitors, but it also adds a pleasant fragrance to your garden.

Mosquito Prevention

This versatile spice adds flavor to your dishes and also acts as a natural mosquito deterrent for your plants. Mosquitoes are known to be repelled by the strong aroma of Cinnamon, making it an effective and chemical-free way to keep these annoying insects at bay. Sprinkle some ground Cinnamon around your plants, or create a Cinnamon spray by mixing it with water.

By applying Cinnamon to your plant care routine, you can enjoy your garden without having mosquito bites. Plus, you’ll add a pleasant scent to your outdoor space that both you and your plants will appreciate.

Houseplant Care

Keeping your houseplants healthy and thriving is essential for creating a vibrant indoor oasis. Cinnamon can play a key role in taking care of your leafy friends. By sprinkling a bit of Cinnamon on the soil, you can help prevent fungal growth and keep pesky mold at bay. The natural fungicide properties of Cinnamon will ensure that your plants stay disease-free.

Cinnamon can help prevent fungal growth in the soil. Sprinkle a bit of Cinnamon on top of the soil to discourage any unwanted mold or mildew from forming. Sprinkle a small amount of Cinnamon on the soil of your houseplants to help prevent fungal growth and promote overall plant health.

Rooting Hormone Alternative

This versatile spice can also serve as a rooting hormone alternative, promoting healthy root development in new plants. Instead of relying on synthetic rooting hormones that may contain chemicals, dip the cut end of your plant cutting in powdered Cinnamon before planting it. The antimicrobial properties of Cinnamon can help protect the cutting from potential infections while encouraging root growth.

In case you missed it: Growing Clove Plant from Seed, Clove Plant Propagation

Watering Microgreen Sprouts

Cinnamon contains compounds that act as anti-fungal agents, preventing rot and promoting healthy root development. Dip the end of your cutting into some ground Cinnamon before planting it in soil or water. Many gardening experts have praised this cost-effective and chemical-free method for its effectiveness and safety.

General Plant Health and Growth

Cinnamon is known for its anti-fungal properties, helping to prevent diseases that can harm your plants. By sprinkling some Cinnamon on the soil or mixing it with water for a foliar spray, you can give your plants an extra layer of protection. Additionally, Cinnamon can act as a natural insect repellent, keeping pesky bugs at bay without the need for harsh chemicals. This means healthier plants without exposing them to harmful toxins.

With its ability to stimulate root growth and enhance nutrient uptake, Cinnamon is truly a powerhouse when it comes to promoting plant health and ensuring robust growth. Overall, incorporating Cinnamon into plant care routines can yield a range of benefits, from promoting growth and resilience to protecting plants from pests and diseases. Whether used as a foliar spray, soil amendment, or rooting hormone, Cinnamon offers a natural and effective way to support plant health and vitality.

Best Steps to Revive Dying Tulip with Natural and Organic Treatment

0

Tulips are popular spring flowers known for their vibrant colors and graceful appearance. However, like any living organism, tulips can sometimes experience stress and decline. Reviving dying tulips requires understanding their characteristics, identifying signs of stress, and implementing natural and organic treatments. In this article, we will explore the best steps to revive dying tulips using scientifically backed information and data.

Best Steps to Revive Dying Tulip

About Tulips Characteristics

Tulips, scientifically known as Tulipa, belong to the Liliaceae family. They are herbaceous perennials that typically grow from bulbs and produce large, cup-shaped flowers. Tulips come in various colors and sizes, ranging from single to double blooms. They require well-draining soil, adequate sunlight, and proper care to thrive.

Causes of Dying Tulips

  • Shallow planting: Bulbs planted too shallowly are susceptible to weather conditions and pests.
  • Pests and diseases: Aphids, bulb mites, snails, and slugs can damage tulips.
  • Poor drainage system: Excess moisture leads to root and bulb rots.
  • Overwatering: Watering too frequently or during dormancy can cause basal rot.
  • Lack of proper sunlight: Insufficient sunlight affects growth and flowering.
  • Dehydration: Prolonged drought leads to yellow, dry leaves.
  • Natural death: Tulips naturally die after blooming.

In case you missed it: 16 Common Tulip Plant Problems: How to Fix Them, Solutions, and Treatment

Transplanting a Large Red Tulip

Remedies for Dying Tulips

  • Adequate sunlight: Transplant to a sunny spot, but provide shade in intense heat.
  • Avoid overwatering: Water once a week and check soil moisture before watering.
  • Ensure good drainage: Add mulch to absorb excess moisture.
  • Provide space for growth: Divide overcrowded bulbs and replant.
  • Maintain proper planting depth: Plant bulbs 6-8 inches deep.
  • Use healthy soil: Ensure fertility and drainage.
  • Control pests and diseases: Use neem oil, insecticidal soap, and traps; isolate and treat diseased plants.
  • Deadhead to conserve energy: Remove spent flowers to encourage vigorous growth.
  • Fertilize sparingly: Feed in spring and fall with balanced or bulb fertilizer.

Natural and Organic Treatment to Revive Dying Tulips

Identifying Signs of Stress: Before attempting to revive dying tulips, it is crucial to identify the signs of stress. Common indicators include yellowing or wilting leaves, drooping stems, and stunted growth. By carefully observing the tulips’ symptoms, you can determine the specific issues they are facing and address them accordingly.

Organic Amendments for Nutrient Boost: Providing organic amendments can give dying tulips a nutrient boost. During fall or early spring, ground-feeding tulips with an organic high-phosphorus fertilizer can help wake bulbs from dormancy, stimulate root growth, and enhance nutrient absorption from the soil. Organic fertilizers enriched with bone meal, blood meal, or composted manure can provide essential nutrients needed for tulip recovery.

Balancing Moisture Levels: Proper moisture balance is essential for the health of tulips. Reviving dying tulips involves ensuring they receive adequate water without becoming waterlogged. Overwatering can lead to root rot and damage to the plants. It is crucial to consider the soil’s drainage capabilities and adjust watering practices accordingly.

In case you missed it: How to Prepare the Soil for Tulip Plants: Best Soil Mix, pH, and Compost

Red Tulips

Finding the Perfect Spot: Tulips thrive in areas with full sun or partial shade. When reviving dying tulips, it is important to plant them in a location that receives the appropriate amount of sunlight. Adequate sunlight exposure helps tulips regain strength, promotes healthy growth, and enhances their overall resilience.

Preventing Fungal and Bacterial Infections: Fungal and bacterial infections can contribute to tulip decline. To prevent such infections, avoid overcrowding tulips and ensure proper air circulation around the plants. Organic fungicides or natural remedies can also protect tulips from diseases. These treatments can include neem oil, garlic oil, or copper-based fungicides, which are effective against common tulip diseases like botrytis and tulip fire.

Keeping Aphids and Beetles at Bay: Aphids and beetles are common pests that can damage tulips, leading to their decline. To keep these pests at bay, use natural pest control methods. Beneficial insects, like ladybugs and lacewings, can be introduced to the garden as they feed on aphids. Organic insecticides, like insecticidal soaps or oils, can also be utilized to control aphid and beetle populations.

Supporting Weak Stems: Weak stems can cause tulips to droop or fall over. Supporting these weak stems is crucial for the revival of dying tulips. Stakes or other supports can be used to keep the stems upright, ensuring proper growth and preventing further damage. Gently tie the stems to the support, providing stability and promoting healthier growth.

In case you missed it: Growing Tulips Indoors from Seed in Pots, Containers

Tulip

Natural Fertilizers and Compost Teas: Using natural fertilizers and compost teas can provide essential nutrients to dying tulips. Organic mixes containing blood meal, greensand, or bone meal can be used to fertilize tulip bulbs. Applying these natural fertilizers in the fall allows the bulbs to absorb the nutrients they need for healthy growth. Compost teas, made from composted organic matter, are applied as a foliar spray to provide nutrients and promote overall plant health.

Encouraging Strong Roots: Strong roots are vital for the survival and revival of tulips. To encourage strong root development, ensure that tulips are planted in well-draining soil. Adequate water and nutrient supply are also crucial for root growth. By providing proper care, tulips can establish a robust root system, enabling them to absorb nutrients efficiently and withstand environmental stressors.

Preparing for Dormancy and Reblooming: After tulips have finished blooming, it is important to prepare them for dormancy and reblooming. Clip off the dead flowers from the stem, allowing the foliage to die off naturally. Store the bulbs in a cool and dry place in early November, and then plant them in your garden according to your planting zone. This process allows the tulips to rest, replenish their energy reserves, and prepare for the next blooming season.

Reviving dying tulips requires natural and organic approaches. Ensure adequate sunlight, proper watering, and soil drainage. Control pests and diseases with neem oil and traps. Deadhead spent flowers for energy conservation. Fertilize sparingly in spring and fall. With these steps, your tulips can thrive in a healthy, vibrant garden.

10 Reasons Why Your Angel Trumpet is Not Blooming: Remedies and Treatment

0

Are you eagerly awaiting the stunning blooms of your Angel Trumpet plant, only to be met with disappointment? Fear not, as we delve into the top 10 reasons why your Angel Trumpet may not be blooming as expected. From environmental factors to cultural practices, we’ll explore remedies and treatments to revive your plant’s blooming potential.

10 Reasons Why Your Angel Trumpet is Not Blooming

Angel Trumpet Plant Characteristics

The Angel Trumpet Plant, or Brugmansia, is a perennial shrub known for its distinctive large, pendulous flowers that resemble trumpets. These plants are native to the subtropical regions of South America and are admired for their dramatic floral display and sweet fragrance that intensifies at night.

Angel Trumpets can grow up to 20 feet in height and come in a variety of colors, including white, yellow, pink, orange, and red. They thrive in well-drained soil with full to partial sun exposure and require regular watering. Despite their beauty, all parts of the Angel Trumpet Plant are highly toxic if ingested, containing alkaloids such as scopolamine and atropine. Caution should be exercised around pets and children.

Angel’s Trumpet Quick Care Overview

Scientific NameBrugmansia
ClassificationTropical Plant
Common NamesAngel Trumpet, Angel’s Trumpet
HardinessZones 8-11
Temperature60-90°F (15.5-32°C)
FlowersRed, yellow, pink, peach, gold, white; blooms late spring-fall
LightFull sun, bright light indoors
WaterKeep soil evenly moist; avoid overwatering
HumidityAverage-high
FertilizerFlowering plant food in spring-summer
SoilWell-drained, fertile, aerated
Common PestsWhiteflies, spider mites, cabbage worms, aphids

Why Is My Angel Trumpet Plant Not Blooming?

Age
  • Angel trumpet plants typically need 2 to 3 years to mature before they can bloom.
  • Verify the plant’s age if purchased from a grower, as younger plants may not bloom.
Disease
  • Various diseases can hinder blooming, often due to poor care practices.
  • Treatment may be possible for some diseases, while viral infections often require plant destruction.
Malnutrition
  • Insufficient nutrients can hinder blooming and overall plant health.
  • Look for signs of malnutrition, like leaf discoloration or stunted growth.
  • Rule out root rot as a cause and consider switching to liquid fertilizer for better absorption.
Being Rootbound
  • Container-grown plants are prone to becoming rootbound, inhibiting blooming.
  • Repot young plants annually and adults every 2 to 3 years to prevent rootbound conditions.
  • Check for root damage and provide fresh soil if necessary.
Underwatering
  • Angel trumpet plants require adequate water, around 4 to 5 inches of rainfall per week.
  • Underwatering stress the plant and hinder blooming, but avoid overwatering to prevent fungal disease or root rot.
  • Use the soak-and-dry method to water, ensuring soil moisture reaches 2 to 3 inches deep.

In case you missed it: How to Grow Rose Plants from Cuttings to Harvest: Planting Guide for Beginners
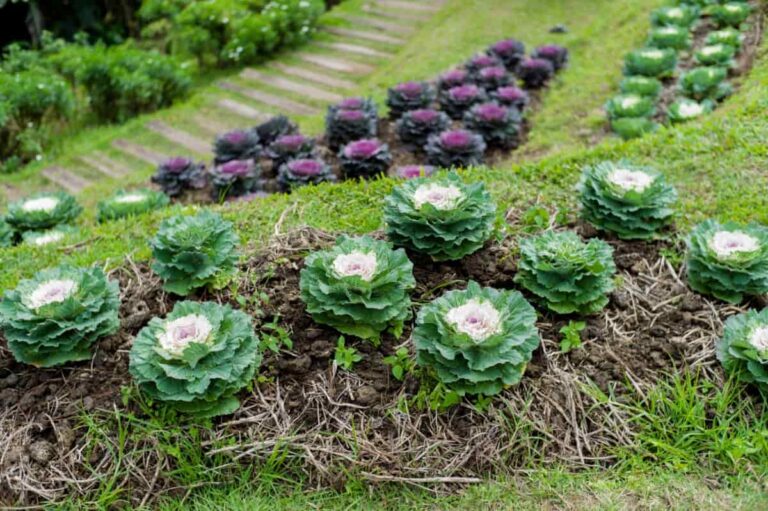
Pink Angel Trumpet Flower

How to Grow Angel’s Trumpet

  • Angel’s trumpet plants thrive in zones 8-11 and require full sun, fertile soil, and average-high humidity.
  • Can be grown in containers indoors and outdoors, provided with adequate sunlight and space for their potential height of 10-20′.
Angel’s Trumpet Plant Care & Growing Instructions
  • Light: 6-8 hours of direct sunlight daily, supplemented with grow lights indoors.
  • Water: Keep soil evenly moist; avoid overwatering, especially in containers.
  • Humidity: Maintain average to high humidity levels, supplementing with humidifiers indoors if necessary.
  • Temperature: Ideal range between 60-90°F (15.5-32°C), protect from extreme cold or heat.
  • Fertilizer: Feed regularly with organic flowering plant fertilizer during spring-summer.
  • Soil: Well-drained, loamy soil mix, suitable for containers or garden beds.

Transplanting & Repotting

  • Transplant or repot during late winter or early spring, every other year as needed.
  • Prune branches and deadhead flowers regularly to encourage new growth and blooming.
Brugmansia Pest Control Tips
  • Monitor for common pests like whiteflies, aphids, spider mites, and cabbage worms.
  • Treat infestations promptly with organic insecticidal soap or neem oil.
  • Maintain good plant hygiene to prevent pest outbreaks.
Dormancy
  • Angel’s trumpet may enter dormancy in cold temperatures, during which growth halts, and leaves drop.
  • Protect plants from freezing temperatures or bring them indoors during winter.
Angel’s Trumpet Propagation Tips
  • Propagate using suckers, stem cuttings, or seeds, with stem cuttings being the most common method.
  • Root cuttings in damp soil and provide warmth and shade until rooted, then transplant or pot up.
Troubleshooting Common Problems
  • Yellowing Leaves: Check for pests or overwatering, and adjust watering practices accordingly.
  • No Blooming: Ensure proper care with adequate light, water, temperature, and fertilization; consider repotting or root pruning if containerized.

In case you missed it: Growing Lotus Indoors from Seed, Tubers in Containers

White Angel Trumpet

10 Reasons Why Your Angel Trumpet is Not Blooming

Insufficient Light
  • Issue: Angel trumpet plants require ample sunlight to bloom adequately.
  • Remedy: Place the plant in a location where it receives at least 6- 8 hours of direct sunlight daily. If grown indoors, use grow lights to supplement insufficient natural light.
Improper Watering
  • Issue: Over or underwatering can stress the plant and inhibit blooming.
  • Remedy: Use the soak-and-dry method to water, ensuring soil moisture reaches 2 to 3 inches deep. Avoid overwatering to prevent root rot and underwatering to prevent stress.
Nutrient Deficiency
  • Issue: Lack of essential nutrients can hinder blooming and overall plant health.
  • Remedy: Fertilize the plant with a balanced fertilizer formulated for flowering plants. Ensure proper nitrogen, phosphorus, and potassium levels for optimal growth and blooming.
Incorrect Pruning
  • Issue: Improper pruning can remove potential blooming sites or damage the plant.
  • Remedy: Prune selectively to remove dead or diseased branches, encouraging new growth and blooming. Avoid excessive pruning, especially during the blooming season.
Pest Infestation
  • Issue: Pest infestations like aphids, spider mites, or whiteflies can damage the plant and inhibit blooming.
  • Remedy: Monitor the plant regularly for signs of pests and treat infestations promptly using natural remedies like neem oil or insecticidal soap. Maintain a clean growing environment to prevent future infestations.
Disease Issues
  • Issue: Fungal or bacterial diseases can weaken the plant and prevent blooming.
  • Remedy: To reduce the risk of disease, practice good sanitation practices, including proper watering and ventilation. Treat infections with appropriate fungicides or bactericides as needed, following label instructions carefully.
Inappropriate Soil Type
  • Issue: Poor soil drainage or composition can affect nutrient uptake and blooming.
  • Remedy: Use well-draining, loamy soil enriched with organic matter to promote healthy root growth and blooming. To improve drainage, amend heavy clay soils with sand or perlite.
Temperature Stress
  • Issue: Extreme temperatures, either too hot or too cold, can stress the plant and hinder blooming.
  • Remedy: Maintain consistent temperatures between 65°F, 80°F (18°C -27°C) during the day and above 50°F (10°C) at night. Protect the plants from frost or excessive heat with mulch or shade cloth.
Plant Age
  • Issue: Young angel trumpet plants may only bloom once they reach maturity, typically 2 to 3 years old.
  • Remedy: Be patient and allow the plant to mature before expecting it to bloom. During this period, ensure proper care and maintenance to support healthy growth.
Over-Fertilization
  • Issue: Excessive fertilizer application can lead to nutrient imbalances, root burn, and blooming inhibition.
  • Remedy: Follow recommended fertilization guidelines and avoid over-fertilizing. Use slow-release fertilizers or dilute liquid fertilizers to preent nutrient buildup in the soil.

In case you missed it: 11 Strategies to Make Jasmine Plants Bloom: Practical and Proven Methods
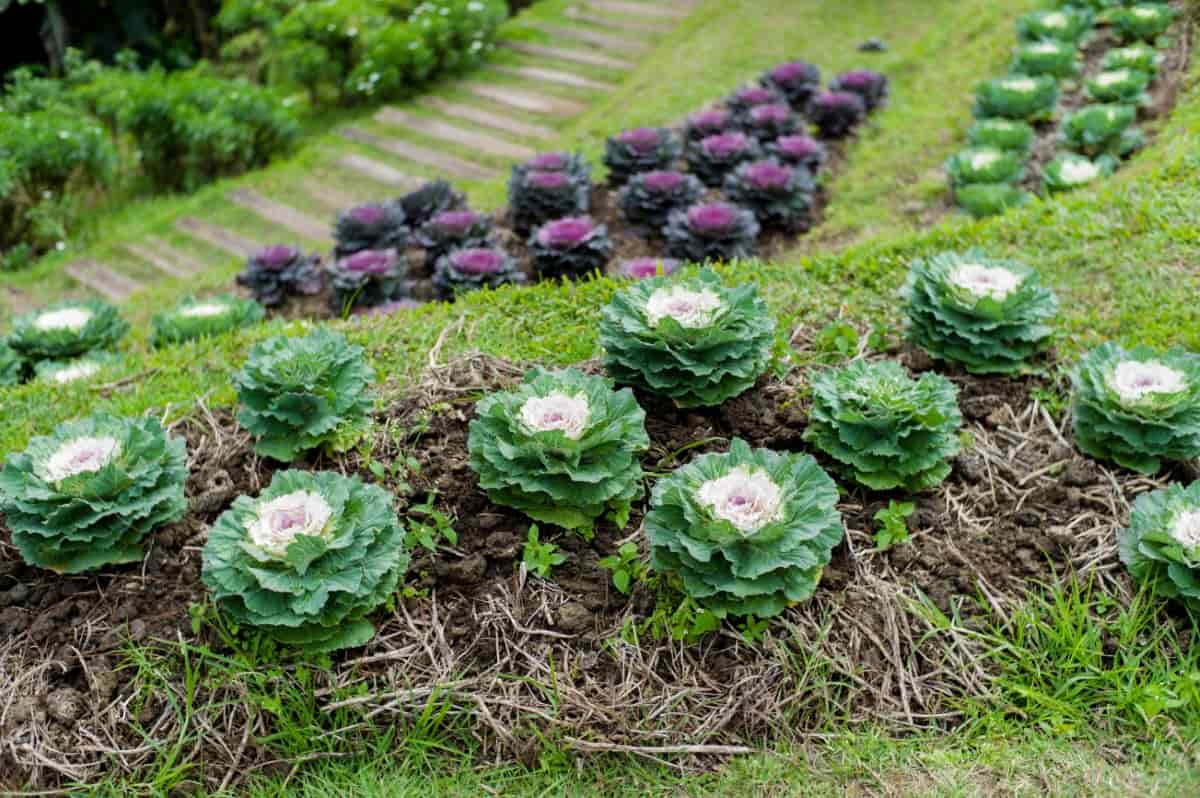
Angel's Trumpet Apricot Color

Addressing issues such as insufficient light, improper watering, nutrient deficiency, and pests can help revive your angel’s trumpet plant’s blooming potential. With proper care, including adequate sunlight, water, nutrients, and pest control, your plant can flourish and produce its characteristic beautiful blooms.

How to Fix Periwinkle Leaf and Flower-Related Problems: Natural Remedies and Solutions

0

The scientific name of the Periwinkle flower is Catharanthus roseus, belonging to the Apocynaceae family. Periwinkle plants can face various issues that affect their health and appearance. Periwinkle is a beautiful and low-maintenance plant that can encounter several leaf and flower-related problems.

How to Fix Periwinkle Leaf and Flower-Related Problems

Yellowing of Leaves

Yellowing Periwinkle leaves can be a sign of overwatering or poor drainage. Ensure that your Periwinkle plants are in well-draining soil to prevent waterlogged roots. Another possible cause of yellowing leaves is nutrient deficiency. Consider feeding your plants with a balanced fertilizer to provide them with the necessary nutrients for healthy growth. Regularly inspect the undersides of the plant leaves for any unwanted visitors that may be affecting the health of your Periwinkles.

Leaf Spot Diseases

Periwinkle plants are a beautiful addition to any garden, but they can be susceptible to leaf spot diseases. These plant diseases are caused by fungi and bacteria that thrive in moist conditions. If you notice black or brown spots on the leaves of your Periwinkle plant, it may be suffering from leaf spot disease.

Leaf spot diseases can weaken the plant and make it more susceptible to other issues like root rot. To combat these pesky diseases, try removing any infected plant leaves and improving air circulation around the plant. Remember always to follow instructions carefully when using chemical treatments on your plants.

Powdery Mildew 

Powdery mildew, a common issue that can plague Periwinkle plants, appears as white powdery spots on the leaves and stems. This fungal disease thrives in humid conditions with poor air circulation. It not only affects the aesthetics of the plant but also weakens it over time if left untreated.

To combat powdery mildew naturally, you can try spraying a water and baking soda mixture on the affected areas. Additionally, neem oil or horticultural oils may also help suppress the spread of this pesky fungus. Properly spacing out your plants to improve airflow can prevent powdery mildew from recurring in the future. Regularly inspecting your Periwinkle plants for any signs of powdery mildew is key to catching and addressing it early on.

Rust

Rust on Periwinkle leaves and flowers can be a frustrating sight for any gardener. It appears as orange or brown spots, giving the plant a weathered look. This fungal disease thrives in humid conditions, spreading rapidly if left unchecked. To combat rust on your Periwinkle plants, start by removing and disposing of infected leaves to prevent further spread. 

In case you missed it: How to Grow and Care for Periwinkle Flowers: A Step-by-Step Guide

Violet Periwinkle

Consider using organic fungicides like neem oil or copper-based sprays to help control rust outbreaks. Regularly inspect your Periwinkle plants for any signs of new infections and take prompt action to protect your beloved Periwinkles from this pesky problem.

Aphid Infestation

Aphids are those pesky little insects that can wreak havoc on your Periwinkle plants. These tiny pests love to suck the sap from the plant leaves and stems, causing them to curl up and wilt. You can notice a sticky substance called honeydew left behind by aphids, which can attract ants.

To tackle an aphid infestation naturally, try spraying your Periwinkle plants with a mixture of water and dish soap. This solution will help suffocate the aphids without harming your beloved Periwinkles. Ladybugs are also beneficial predators that feed on aphids and keep their population in check. Regularly inspecting your plants for signs of aphids is key to catching an infestation early.

Spider Mites

Spider mites thrive in dry conditions, making them a common nuisance for indoor and outdoor plants alike. If left unchecked, these pesky critters can cause significant harm to your Periwinkle’s foliage, leading to yellowing or speckled leaves. To combat spider mite infestations naturally, consider introducing predatory insects like ladybugs or using organic insecticidal soaps.

In case you missed it: How to Fix Zinnias Leaf and Flower Problems: Discover Natural and Home Remedies

Periwinkle

Regularly spraying your Periwinkle plants with a strong stream of water can also help dislodge these tiny pests before they cause widespread damage. Keep a close eye on your Periwinkles for any signs of spider mite activity, and take action to protect your beautiful blooms from these troublesome invaders.

Botrytis Blight

This fungal disease can quickly spread in damp conditions, causing greyish-brown spots on leaves and flowers. Botrytis Blight thrives in humid environments, so proper air circulation is key to preventing its spread. Make sure to water your Periwinkles at the plant base to avoid wetting the foliage, as moisture on plant leaves can promote the growth of this fungal infection.

To combat Botrytis Blight, remove any affected plant parts immediately and dispose of them properly. Consider applying organic fungicides or natural remedies like neem oil to help control the spread of Botrytis Blight and protect your precious Periwinkle blooms from further damage.

Root Rot 

Root rot is a major issue that can affect Periwinkle plants, causing damage to the roots and ultimately impacting their overall health. This fungal disease thrives in overly moist soil conditions, leading to root decay and decreased nutrient absorption. Symptoms of root rot include yellowing leaves, wilting foliage, and stunted growth. To prevent this problem, it is crucial to ensure proper drainage by planting Periwinkles in well-draining soil and avoiding overwatering. Remove affected areas carefully using sterilized tools and replant in fresh soil if necessary.

Fungal Wilts 

These fungal diseases can affect the roots of your plants, causing them to wilt and eventually die. Fungal wilts are often caused by soil-borne pathogens that infect the plant’s vascular system, disrupting the flow of water and nutrients. As a result, the leaves may start to yellow, wilt, or even drop off entirely. Good sanitation measures are essential to prevent fungal wilts from spreading in your garden. Consider using natural remedies like neem oil to help combat fungal wilts in your Periwinkle plants. 

In case you missed it: How to Propagate Pothos from Leaf Cuttings, Stem Cuttings in Water and the Soil

Periwinkle Blue Flowers

Snail and Slug Damage

Snails and slugs can cause damage to Periwinkle plants by feeding on their leaves and flowers. These pests are particularly attracted to the tender foliage of Periwinkles, leaving behind a trail of destruction in their wake. Snails and slugs love to feast on tender Periwinkle leaves, leaving behind unsightly holes and damage. To prevent snail and slug damage, consider using natural remedies such as diatomaceous earth around your plants to make a barrier that these pests will avoid crossing.

Periwinkle plants are beautiful additions to any garden with their vibrant flowers and glossy leaves. It is a popular choice for home gardeners due to its ability to thrive in various conditions. Additionally, selecting disease-resistant varieties can help minimize the occurrence of leaf and flower-related problems.

How to Fix Zinnias Leaf and Flower Problems: Discover Natural and Home Remedies

0

These vibrant flowers belong to the genus Heliantheae in the Asteraceae family. With their scientific name being Zinnia sp., these beauties come in various hues and sizes, adding a pop of color to any garden. Zinnias are a bright addition to any garden, but sometimes, they can face leaf and flower problems. It’s essential to address some issues promptly to ensure your Zinnias thrive.

How to Fix Zinnias Leaf and Flower Problems

How to Fix Zinnias Leaf and Flower Problems

Yellowing Leaves

The common reason for yellowing leaves is overwatering. Zinnias prefer well-draining soil so that excess water can lead to root rot and yellow foliage. Remember to adjust your watering schedule accordingly. Another cause for yellowing leaves could be nutrient deficiencies. Consider adding organic fertilizers rich in these nutrients to give your Zinnias a boost. By addressing the underlying issues causing yellowing leaves, you’ll be on your way to vibrant and healthy Zinnia plants in no time.

Wilting Flowers

Wilting flowers can be a common issue for these beautiful blooms, but don’t worry; there are ways to revive them naturally. The main cause of wilting flowers is underwatering. Zinnias thrive in well-drained soil, so make sure to water them regularly, especially during hot summer months. Another reason for wilting could be excessive heat or sunlight exposure. Zinnias love the sun but can wilt under extreme conditions. Keep an eye out for any signs of infestation and treat accordingly with natural remedies like neem oil or insecticidal soap.

Spotted Leaves

These spotted leaves marks may indicate fungal or bacterial infections, pest infestations, or even nutrient deficiencies. The natural remedy to address spotted leaves is neem oil, known for its antifungal and antibacterial properties. Dilute it with water and spray it on the affected plant parts.

Another way is a mixture of baking soda and water, which can help combat fungal issues causing spots on the leaves. Remember always to test any solution on a small area first to ensure it doesn’t harm your plants further. Proper watering practices, good air circulation, and regular inspection for pests are key preventive measures against spotted leaves.

Fading Flower Colors

Fading flower colors can be a common issue with these beautiful blooms, but there are ways to address it naturally. The possible reason for fading flower colors could be inadequate sunlight. Zinnia plants thrive in full sun, so make sure they are getting enough light throughout the day. 

In case you missed it: How to Grow Zinnias from Seed: A Guide to Planting to Harvesting for Beginners

Blooming Pink Flower Zinnia

Overwatering can also lead to fading flower colors as it may cause root rot, impacting the plant’s ability to absorb essential nutrients. Be mindful of watering practices and allow the soil to dry out slightly between waterings. Consider using organic fertilizers that promote blooming and enhance flower color intensity.

Leaf Curling

Leaf curling can be a common issue with these vibrant flowers. There are several reasons why this might be happening. The possible cause is underwatering – make sure your Zinnias are getting enough water, especially during hot weather. Another reason for leaf curling could be over-fertilization.

Check to see if you have been feeding your plants too much, as this can lead to stress and leaf curling. To fix leaf curling, try adjusting your watering schedule, avoid over-fertilizing, and address any pest issues promptly. By addressing the problem, you can help your Zinnias thrive and show off their beautiful blooms without curled leaves distracting from their beauty.

Browning Leaf Edges

Various factors, such as overwatering or underwatering, can cause this common issue. To address this problem, it’s essential to maintain proper watering practices. Ensure that the soil is well-draining and water only when the top inch feels dry. Excessive sunlight or heat exposure is another possible cause of browning leaf edges.

Additionally, check for any pests that may be feeding on your Zinnias, as their presence can also lead to leaf discoloration. By addressing these potential issues promptly and making necessary adjustments to care for your Zinnias properly, you can help prevent further browning of the leaf edges and promote healthier growth for your beautiful flowers.

Holes in Leaves

Holes in the leaves of your beloved Zinnias could be caused by various culprits, such as caterpillars, beetles, or even slugs. These unwanted guests love snacking on Zinnia foliage, leaving behind unsightly gaps. The effective way to address this issue is to inspect your plants regularly and manually remove any pests you spot. Also, introducing beneficial insects like ladybugs or lacewings can help keep the pests in check naturally. Remember that prevention is important when it comes to maintaining healthy Zinnias.

Drooping Leaves

Drooping plant leaves can be a sign of various issues that are easily fixable with some care and attention. The common reason for drooping leaves is overwatering. Zinnias prefer well-draining soil, so make sure not to drown them in water. Another cause could be underwatering. Check the soil moisture level and ensure your Zinnias are getting adequate hydration.

In case you missed it: Growing Zinnia Flowers Indoors from Seed, and Cuttings

Pink Flower

Excessive heat or direct sunlight can also cause leaves to droop. If your plants are exposed to intense sun for extended periods, consider moving them to a spot with partial shade. Pests or diseases may also be causing the drooping leaves. Inspect your Zinnia plants closely for any signs of infestation or infection and treat them accordingly.

Moldy Leaves or Flowers

Mold is often caused by excessive moisture, poor air circulation, or high humidity levels. To tackle this issue naturally, start by watering the Zinnia plants at the base to avoid getting water on the foliage. Additionally, ensure that there is enough space between plants for proper airflow.

Regularly inspect your Zinnias for any signs of mold and promptly remove any affected leaves or flowers to prevent its spread. Pruning can help increase ventilation and sunlight exposure, discouraging mold growth. Another effective solution is applying a natural fungicide or a mixture of baking soda and water. Remember to also mulch around the base of your Zinnias to reduce moisture near the soil surface.

Stunted Growth

Stunted growth can be frustrating when you’re eagerly waiting for your flowers to bloom beautifully in the garden. There are several reasons why your Zinnias might be experiencing stunted growth. Insufficient sunlight is the common cause of stunted growth in Zinnias. These vibrant flowers thrive in full sun, so make sure they get 6-8 hours of direct sunlight daily.

In case you missed it: 12 Best Water Management Strategies for Flower Gardens

Zinnia

Another factor could be overcrowding—if your Zinnias are planted too closely, they can compete for nutrients and water, leading to stunted growth. To help promote healthy growth in your Zinnias, consider transplanting them to a sunnier spot with well-draining soil and giving them adequate space to spread out and flourish.

Conclusion

Zinnias are beautiful flowers that can brighten up any garden with their stunning colors. However, like any plant, they can sometimes face leaf and flower problems that may affect their overall health and appearance. Understanding the cause of these problems is crucial in effectively addressing them and ensuring the well-being of your Zinnias. By understanding the common leaf and flower problems that can arise, you can take some steps to address them using natural and home remedies.

Organic Steps to Induce Lemon Tree Flowers: A Comprehensive Guide

0

The Lemon tree, scientifically known as Citrus × limon, is an evergreen plant belonging to the family Rutaceae. The plants need well-draining soil and regular watering to keep their roots healthy and strong. By applying organic practices to caring for your Lemon tree, you can encourage it to bloom beautifully year after year.

Organic Steps to Induce Lemon Tree Flowers

Organic Steps to Induce Lemon Tree Flowers

Selecting Climate-Adapted Varieties

Choose a Lemon variety that thrives in your specific growing zone to ensure optimal growth and bloom. Research different cultivars are known for their adaptability to your region’s climate conditions. Consider factors like temperature tolerance, humidity levels, and overall resilience when making your selection. A well-suited variety will have a better chance of producing abundant blooms, leading to an increased yield of Lemons.

Consult local nurseries or agricultural extension services for recommendations on the best Lemon tree varieties for your area. They can provide valuable insights into which cultivars are most likely to flourish in your specific environment. The popular choice is the Meyer Lemon tree, known for its fragrant blooms and juicy fruit. This variety does well in both warm and cooler climates, making it a versatile option for many growers.

Another excellent pick is the Eureka Lemon tree, which produces abundant fruit year-round and tolerates a range of temperatures. For those in hotter regions, consider planting a Lisbon Lemon tree that thrives in high temperatures and produces tangy fruits perfect for cooking or fresh consumption. Alternatively, if you’re located in a cooler area, the Frostproof Lemon tree might be ideal, as it can withstand colder weather without sacrificing fruit quality.

Ensuring Adequate Sunlight Exposure

Lemon trees thrive in bright, sunny locations, so finding the right spot for your tree is key. Aim for a location with 6 to 8 hours of direct sunlight per day to promote flowering. If you notice your Lemon tree isn’t getting enough sun, consider trimming nearby branches or foliage that may be blocking the light. Alternatively, you can also move potted trees to sunnier spots throughout the day to maximize their sun exposure. Remember that consistent and adequate sunlight not only encourages flower production but also enhances fruit quality.

Optimal Watering for Healthy Roots

Watering your Lemon tree regularly is crucial, especially during the growing season. Make sure to water the Lemon plant deeply and allow the soil to dry out to prevent root rot. Avoid overwatering, as it can lead to suffocating the roots and causing nutrient deficiencies. On the other hand, underwatering can stress the plant and hinder flower production.

Consider using drip irrigation or watering in the early morning to ensure proper hydration without excess moisture lingering on leaves, which can invite pests. Remember that different climates may require adjustments in watering frequency, so pay attention to your tree’s specific needs based on environmental conditions.

In case you missed it: The Ultimate Guide to Growing Kagzi Lemons in Home Gardens

Lemon garden in Cyprus ready for harvest

Improving Soil with Organic Matter

Rich, healthy soil is vital for robust root development and overall plant health. Organic matter can significantly enhance soil fertility by providing nutrients and promoting beneficial microbial activity. These natural amendments help create a balanced environment that supports the growth of your Lemon tree. Adding organic matter also improves soil structure, aiding in water retention and drainage, which are key factors for healthy root systems. Furthermore, it helps prevent nutrient leaching, ensuring that your Lemon tree receives the necessary nutrients over time.

Balancing Nutrients with Organic Fertilizers

Organic fertilizers, such as compost, manure, and bone meal, can provide the essential elements needed for healthy growth and blooming. These natural sources are rich in nitrogen, phosphorus, and potassium—the primary nutrients for flowering plants. They release nutrients slowly, promoting steady growth without risking a nutrient burn.

By using organic fertilizers, you nourish your Lemon tree and enrich the soil with beneficial microorganisms that support overall plant health. Avoid synthetic chemical fertilizers, which can harm the environment and disrupt the soil’s natural balance. Opting for organic options ensures a sustainable approach to gardening while effectively feeding your Lemon tree.

Supplementing with Organic Micronutrients

Micronutrients like iron, zinc, copper, and manganese are essential for the lemon tree’s overall health. These micronutrients help in various physiological processes within the plant, promoting strong roots and healthy flowering. Organic sources of micronutrients include kelp meal, bone meal, compost tea, and worm castings. Applying these organic micronutrient sources according to the recommended dosage regularly can help address any deficiencies in the soil and support the Lemon tree’s nutrient needs throughout its growth cycle.

Using Organic Growth Regulators

These natural compounds can help stimulate flowering and fruit production without relying on synthetic chemicals. Organic growth regulators work by mimicking plant hormones, encouraging specific developmental processes like flower formation. By incorporating these regulators into your gardening routine, you can promote a healthier and more robust Lemon tree. When using organic growth regulators, follow the recommended dosage instructions to avoid overapplication. Remember that dosage consistency is key to seeing results with these natural products.

In case you missed it: How to Grow and Care for Organic Lemon Balm: Planting Instructions

Lemon Tree Flowers

Pruning for Better Light and Air Circulation

Pruning your Lemon tree is essential for ensuring better light saturation and air circulation throughout the canopy. By removing dead or overcrowded branches, you allow sunlight to reach all tree parts, promoting healthy growth and flowering. Start by identifying any weak or damaged branches that may be hindering proper airflow within the tree. Trim them back to encourage new growth in healthier directions.

This will also help reduce the risk of pests and diseases finding shelter in dense foliage. When pruning, focus on creating a balanced shape that allows for an even distribution of sunlight and airflow. Aim to maintain an open structure that prevents branches from rubbing each other and causing damage.

Stress Induction with Organic Practices

Stress induction with organic practices may sound counterintuitive, but it can benefit your Lemon tree. By subjecting the tree to controlled stress, such as slight water deprivation or pruning, you stimulate its natural defense mechanisms and encourage flower production. When using organic methods to induce stress, it’s important to strike a balance – you want enough stress to trigger flowering without harming the tree.

Consider adjusting the watering frequency slightly or selectively removing some branches during the dormant season. Organic stress induction is all about gently pushing your Lemon tree out of its comfort zone safely and naturally. Remember that moderation is important when applying these methods – gradual changes are more likely to yield positive results than sudden shocks.

Organic Pest and Disease Management

Maintaining a healthy Lemon tree also involves organic pest and disease management. Instead of applying chemical pesticides that can harm beneficial insects and the environment, opt for natural solutions like neem oil, insecticidal soaps, or homemade remedies using ingredients like garlic and chili peppers.

Regularly inspect your Lemon tree for any pests or diseases such as aphids, spider mites, scale insects, or fungal infections. Early pest detection is key to preventing infestations from spreading and causing damage to your tree. Pruning affected branches and ensuring proper air circulation around the tree can prevent diseases from spreading. Also, maintaining good garden hygiene by removing fallen leaves and fruits can prevent fungal infections from developing.

In case you missed it: How to Grow Lemongrass from Seed: A Detailed Guide for Planting to Harvesting

white lemon flowers

Conclusion

Lemon trees, like other fruit trees, require proper care and maintenance to thrive and produce an abundance of fruit. If you have a Lemon tree in your backyard, you may be wondering how to encourage it to bloom with even more flowers. Inducing flowers on your Lemon tree can lead to a bountiful harvest of delicious fruits. By following organic methods, you can encourage your Lemon tree to bloom with vibrant and fragrant flowers.

Bloom Booster: Crafting the Perfect Homemade Bougainvillea Fertilizer

0

Nestled in gardens and landscapes around the world, Bougainvillea is a stunning flowering plant known for its vibrant colors. In your gardening journey, remember that nourishing your Bougainvillea with a homemade fertilizer can make all the difference in its growth and bloom. By understanding the specific needs of this vibrant plant and crafting a tailored fertilizer blend, you are setting yourself up for success and a garden filled with stunning Bougainvillea blooms. 

Beautiful bougainvillea flowers

Homemade Bougainvillea Fertilizers

Compost Tea 

Ingredients: To make this nutrient-rich fertilizer for Bougainvillea plants, start by gathering compost from your yard or a local supplier.  

Preparation Recipe: Mix it with water in a bucket or large container, about one part compost to five parts water. Let it steep for 2-3 days, stirring occasionally. Once the brewing process is complete, strain out the solids and dilute the liquid with more water. Feel free to add in some molasses or seaweed extract for an extra nutritional punch. Your Bougainvillea will thank you with vibrant blooms and lush foliage. Experiment with different compost blends and brewing times to find what works best for your plants. 

Manure Tea 

Ingredients: To make manure tea for Bougainvillea plants, you’ll need aged manure, a bucket, water, and a stirring stick.  

Preparation Process: Fill the bucket with water and add a shovel of aged manure. Stir the mixture well to ensure the nutrients are evenly distributed. Let the mixture sit for a few days to allow the nutrients from the manure to seep into the water. The longer it sits, the more potent it will become. Once ready, strain out any solid particles and dilute the tea with water before using it on your Bougainvillea plants. Remember that moderation is key when using manure tea – too much can lead to an overload of nutrients in the soil. 

Banana Peel Fertilizer 

Ingredients: To make this nutrient-rich fertilizer, all you need are some ripe banana peels and water.  

Preparation: Start by cutting up the banana peels into small pieces to help them break down faster. Then, place the peels in a container filled with water and let them soak for a few days. As the banana peels decompose in the water, they release essential nutrients like potassium, phosphorus, and calcium that can help promote healthy growth and vibrant blooms in your Bougainvillea plants. After a few days of soaking, strain out the banana peel pieces and use the liquid as a fertilizer for your plants. 

Epsom Salt Solution 

Ingredients: Epsom salt is a fantastic ingredient to boost the blooming power of your Bougainvillea. Its rich mineral content can work wonders for your plants’ health and vibrancy. To create an Epsom salt solution for your Bougainvillea, you’ll need just two simple ingredients: Epsom salt and water. The ratio usually recommended is one tablespoon of Epsom salt per gallon of water. 

In case you missed it: How to Grow Bougainvillea from Cuttings: A Detailed Guide to Planting to Harvest

bright flowers of bougainvillea

Preparation: Preparation is a breeze – simply dissolve the Epsom salt in water until it’s completely mixed. Make sure to use warm water to help the crystals dissolve faster. Once your solution is ready, you can either pour it onto the soil around your Bougainvillea or use a spray bottle to apply it directly on the leaves for quicker absorption. Regular application of this Epsom salt solution can help promote lush foliage and vibrant blooms on your Bougainvillea plant. 

Fish Emulsion Fertilizer 

Ingredients: Crafting your fish emulsion fertilizer can be a game-changer for your Bougainvillea plants. This nutrient-rich concoction is packed with essential elements that promote healthy growth and vibrant blooms. To make this homemade fertilizer, you’ll need some fish scraps or parts and water. 

Preparation Method: Simply combine these ingredients in a container and let them ferment for a few weeks. The decomposition process will break down the fish components, releasing valuable nutrients into the solution. After allowing the mixture to ferment adequately, strain out any solids to obtain a liquid fertilizer ready for use.

Dilute this potent brew with water before applying it to your Bougainvillea plants to avoid burning their roots. Regular applications of fish emulsion fertilizer can enhance soil fertility and improve overall plant health. Embrace the natural power of fish-based nutrients to nurture your Bougainvillea into flourishing beauty. 

Seaweed Extract 

Ingredients: Seaweed extract is a natural and effective fertilizer that can give your Bougainvillea the boost it needs to thrive. Rich in nitrogen, potassium, and trace minerals, it promotes healthy growth and vibrant blooms. To make your own seaweed extract fertilizer, you’ll need fresh or dried seaweed, water, a blender or food processor, and a container. 

Preparation: Start by rinsing the seaweed thoroughly to remove any salt or debris. Then, blend the seaweed with water until it forms a smooth paste. Next, transfer the mixture into a container and let it ferment for several weeks in a cool, dark place. Stir occasionally to aid in decomposition. Once ready, dilute the fermented liquid with water according to package instructions. 

Eggshell Fertilizer 

Ingredients: Eggshell fertilizer is a fantastic way to nourish your Bougainvillea plants naturally. Gather up those eggshells from your morning omelet – they’re packed with calcium that helps promote strong cell walls in plants. 

Preparation Steps: To prepare the eggshell fertilizer, rinse the shells thoroughly to remove any lingering egg residue. Next, allow them to dry out completely before crushing them into small pieces using a mortar and pestle or a blender. Once crushed, sprinkle the shells around the base of your Bougainvillea plant and gently work them into the soil. Over time, as the eggshells break down, they’ll release valuable nutrients like calcium and potassium into the soil, giving your Bougainvillea an extra boost for vibrant blooms. 

Coffee Grounds Fertilizer 

Ingredients: Coffee grounds are not just for brewing a delicious cup of joe; they can also be used as a natural fertilizer to help your plants thrive. To create your own coffee grounds, Bougainvillea fertilizer, simply collect the leftover grounds from your daily brew. 

Application: When applying the coffee grounds fertilizer, sprinkle a thin layer around the plant, being careful not to pile it up against the stem. Water thoroughly afterward to ensure that the nutrients seep into the soil. By incorporating this eco-friendly practice into your gardening routine, you’ll not only support plant growth but also reduce waste by repurposing something that would have otherwise been thrown away. 

In case you missed it: How to Identify and Treat Black Spots on Rose Leaves: Preventative and Damage Control Methods

Pink bougainvillea flowers in the garden

Molasses Fertilizer 

Ingredients: Molasses fertilizer is a sweet and natural way to boost Bougainvillea’s bloom potential. This sticky substance is packed with essential nutrients like iron, potassium, and calcium that can help promote healthy growth and vibrant flowers. 

Preparation Tips: To make your own molasses Bougainvillea fertilizer at home, you’ll need unsulfured molasses, water, and an empty spray bottle. Simply mix one tablespoon of molasses with one gallon of water in the spray bottle. Shake well until fully combined. When applying the molasses fertilizer to your Bougainvillea plant, be sure to do so during the early morning or late afternoon hours when temperatures are cooler. Spray directly onto the leaves and soil around the plant, making sure to cover all areas evenly. 

Vinegar Fertilizer 

Ingredients: This simple DIY Bougainvillea fertilizer solution can help your beautiful blooms reach their full potential. To make your vinegar fertilizer, all you need is white distilled vinegar and water.  

Preparation: Mix one or two tablespoons of vinegar with a gallon of water in a spray bottle. Apply vinegar fertilizer sparingly to your Bougainvillea plants. Too much acidity can harm the plant, so use this homemade solution in moderation to achieve optimal results. 

In case you missed it: 10 Reasons Why Your Flower Plant is Not Blooming: Remedies and Treatment

Bougainvillea Flowers

Conclusion 

Crafting your homemade Bougainvillea fertilizer is not only a fun and rewarding experience but also a sustainable way to promote the health and vibrancy of your plants. By incorporating ingredients like eggshells, coffee grounds, molasses, and vinegar into your fertilizer mixtures, you can provide essential nutrients while reducing waste in an eco-friendly manner. Remember always to monitor the health of your plants and adjust your fertilizing routine as needed. With a little creativity, you can create a bloom booster that will help your Bougainvillea thrive throughout the year. 

Optimizing Growth: A Guide to Applying NPK Fertilizer for Potted Plants

0

NPK fertilizer is like a secret weapon for potted plants – it’s the superhero they need to thrive and grow beautifully. Applying NPK fertilizer to potted plants is a crucial step in ensuring their growth and health. By understanding the NPK ratios, choosing the right fertilizer, and following the proper application techniques, you can provide your plants with the nutrients they need to thrive. Remember to consider the type of plant you are fertilizing and its specific needs when selecting an NPK fertilizer. 
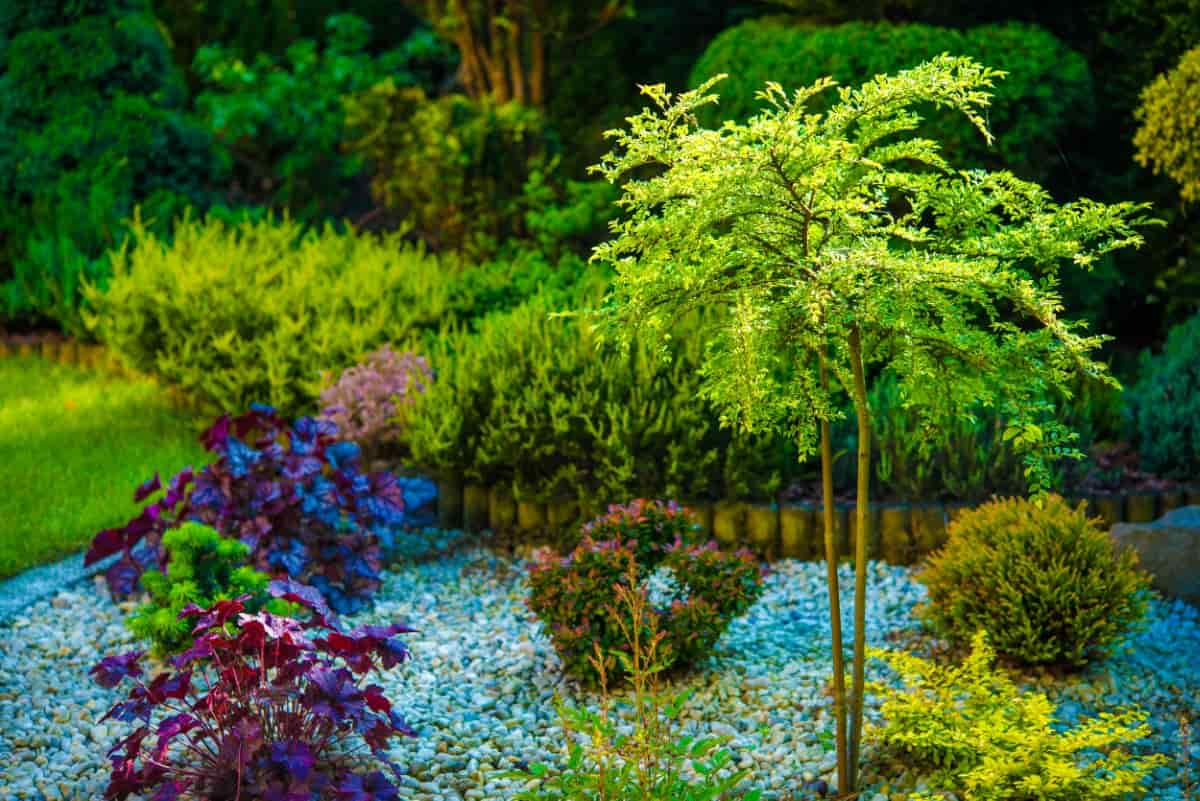
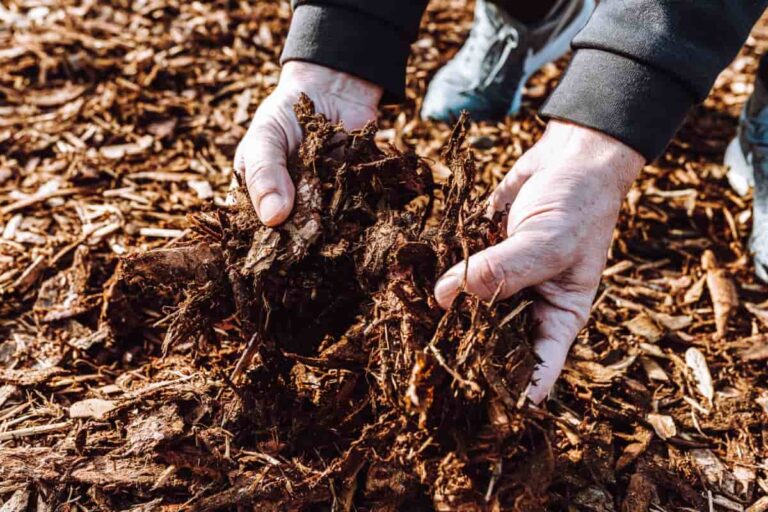
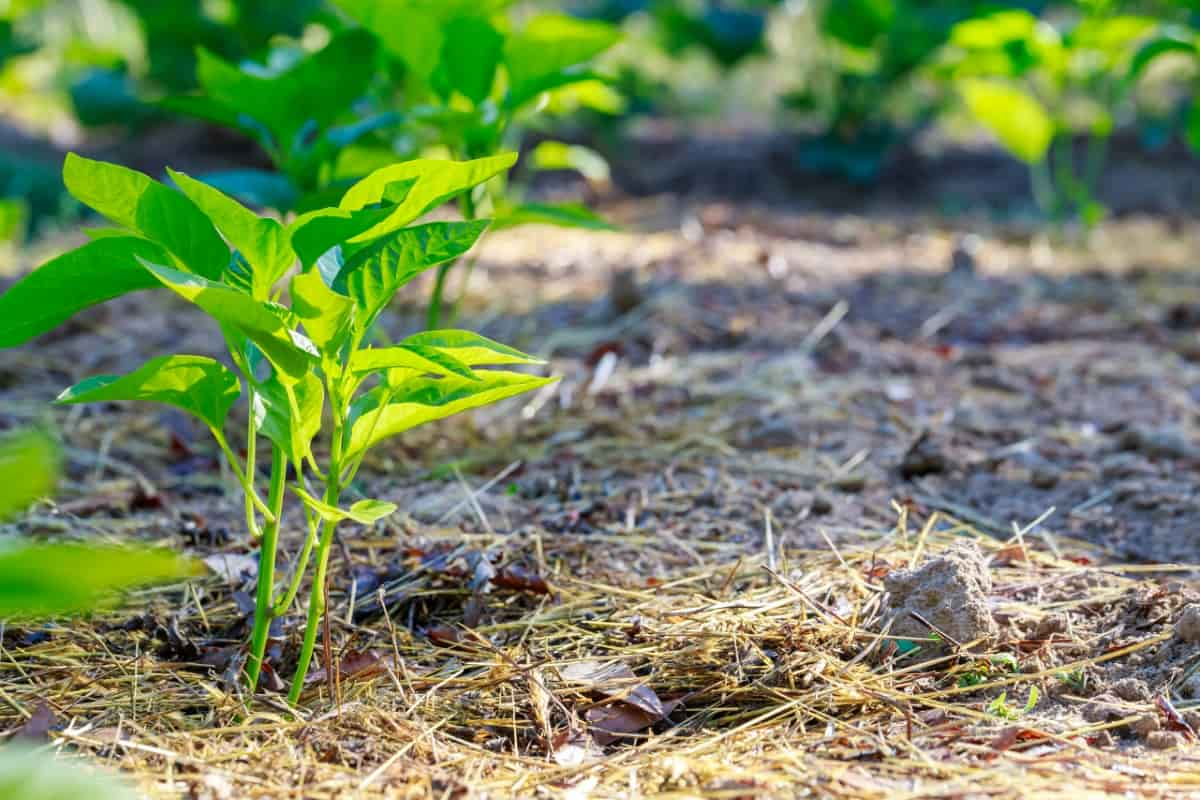
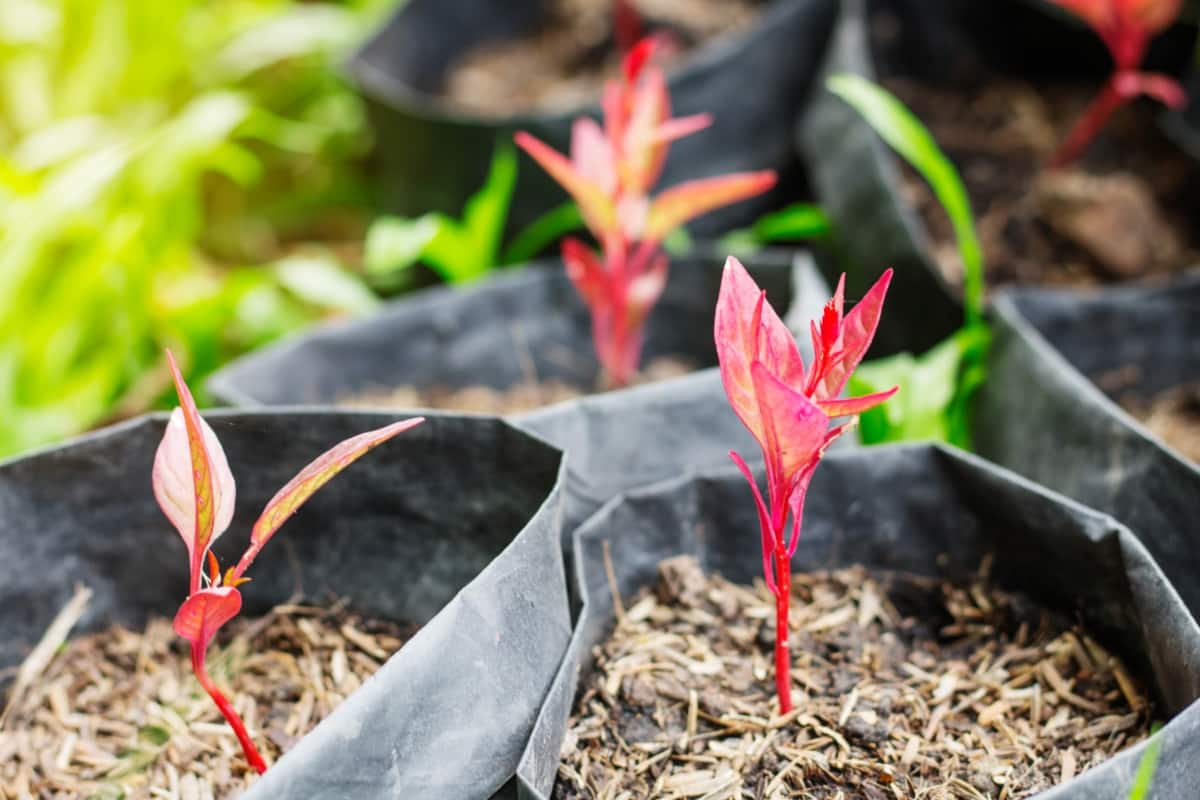
Applying NPK Fertilizer for Potted Plants
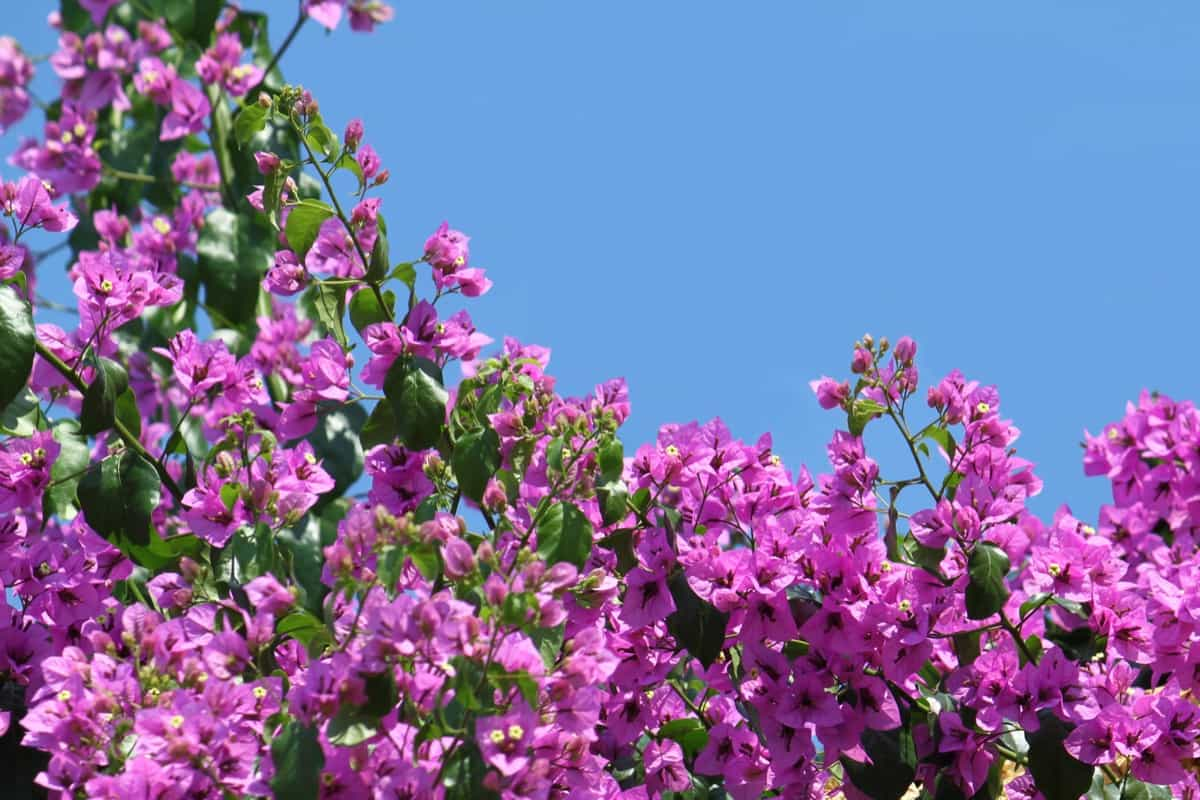
Applying NPK Fertilizer for Potted Plants
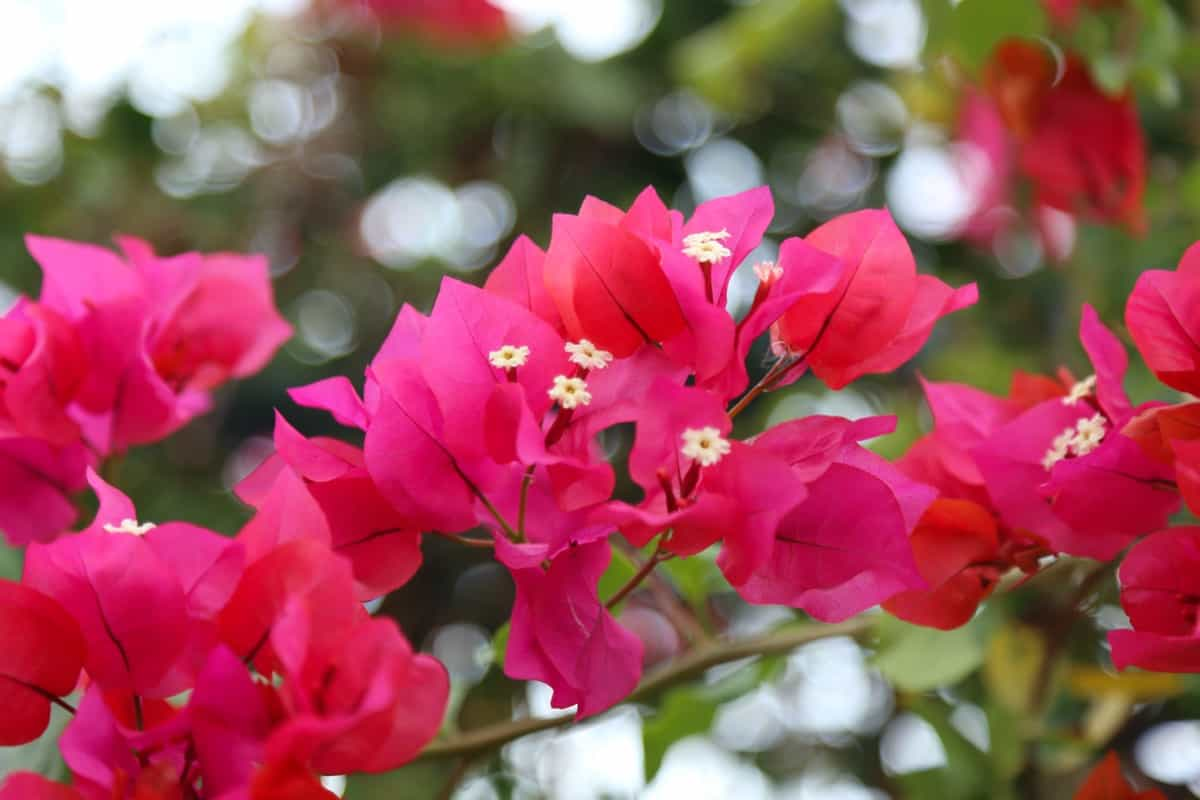
Understand Plant Nutrient Needs 

Plants, like humans, have specific nutrient needs to thrive. Understanding what these needs are is crucial for their overall health and growth. Different plants require varying levels of nutrients, such as nitrogen, phosphorus, and potassium, to flourish. Nitrogen is essential for leafy green growth and overall plant vigor.
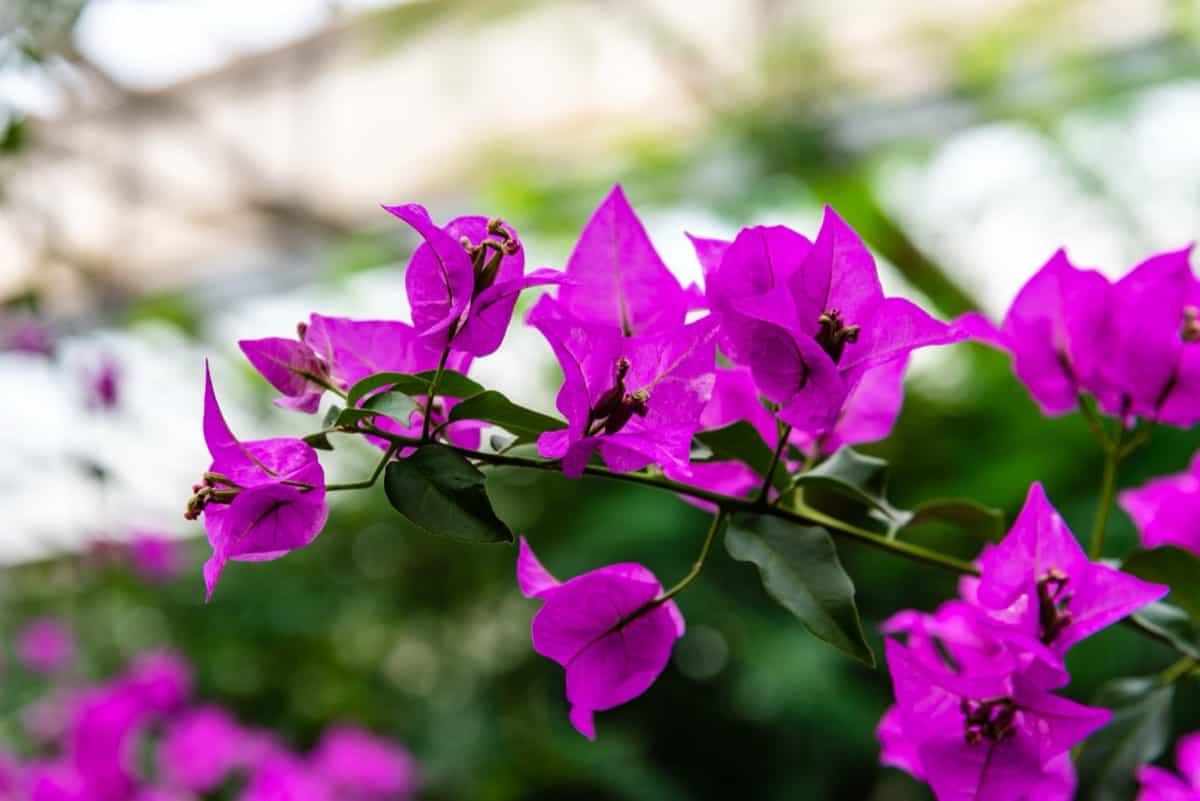
Phosphorus aids in root and flower development. Potassium helps with disease resistance. By familiarizing yourself with the specific nutrient requirements of your potted plants, you can provide them with the necessary elements they need to thrive. This knowledge will help you choose the right NPK fertilizer that suits your plants’ individual needs best. 

Choose the Appropriate NPK Fertilizer 

Choosing the appropriate NPK fertilizer for your potted plants is key to their overall health and growth. Start by identifying your plants’ specific nutrient needs—whether they require more nitrogen, phosphorus, or potassium to thrive. This knowledge will help you select the right fertilizer blend. 
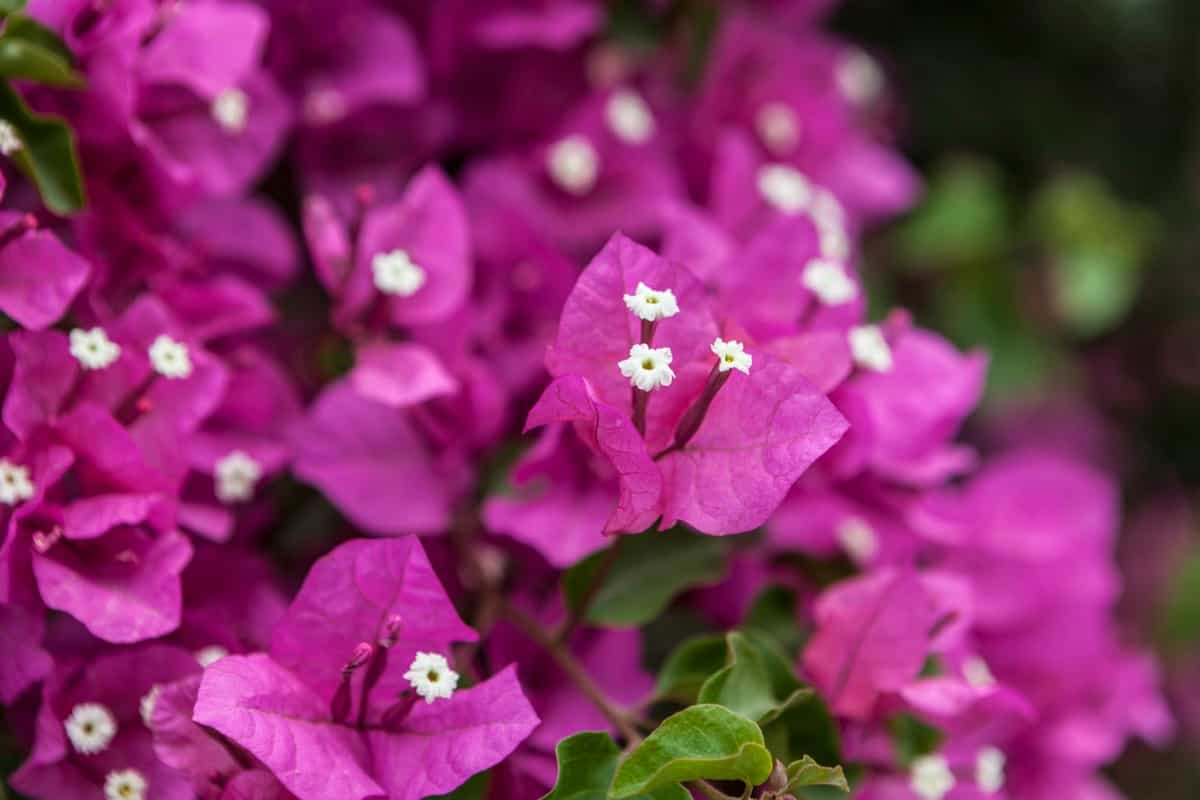
Consider factors like plant type, growth stage, and current soil conditions when deciding on the NPK ratio for potted plants. Different plants have varying requirements, so it’s essential to match them with the correct formulation. Opt for a balanced fertilizer with nitrogen, phosphorus, and potassium if you’re unsure about your plant’s needs. This general-purpose option can provide a good foundation for most potted plants. 
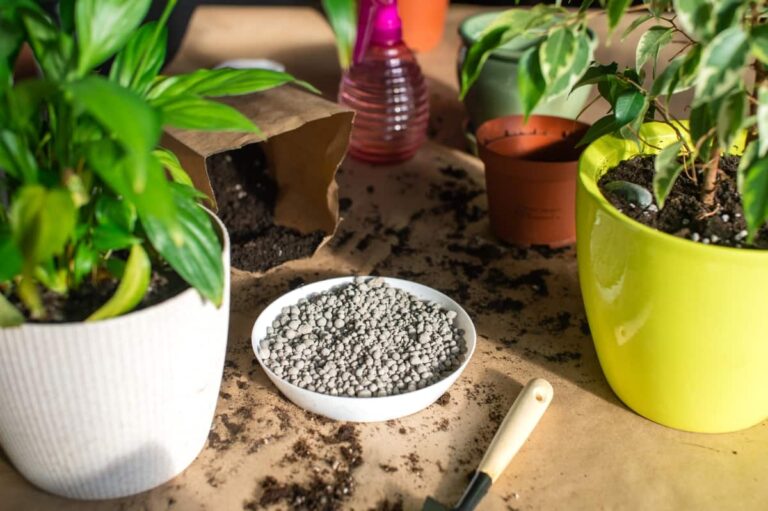
Assess Plant Health 

Assessing the health of your potted plants is crucial before applying any fertilizer. Look for yellowing leaves, stunted growth, or leaf discoloration. Check for pests or diseases that may affect your plant’s overall well-being. Inspect the soil moisture levels to ensure it’s not too dry or waterlogged. 
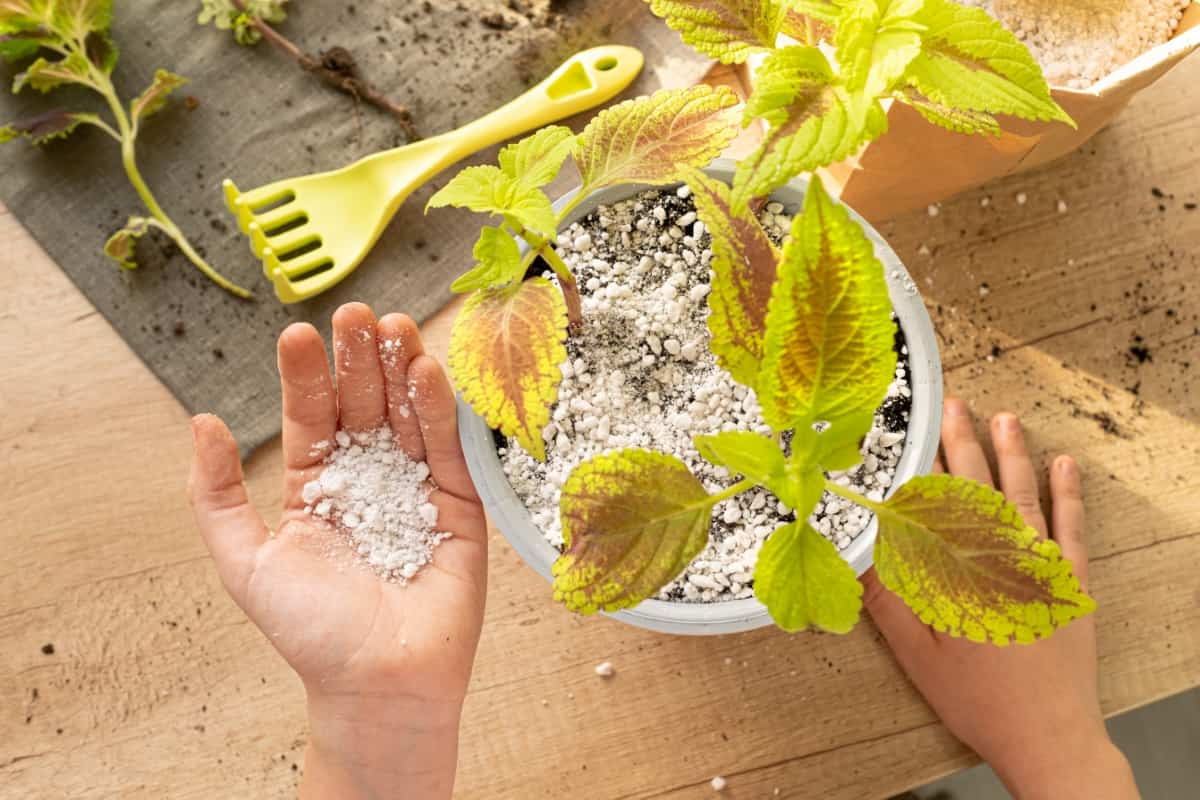
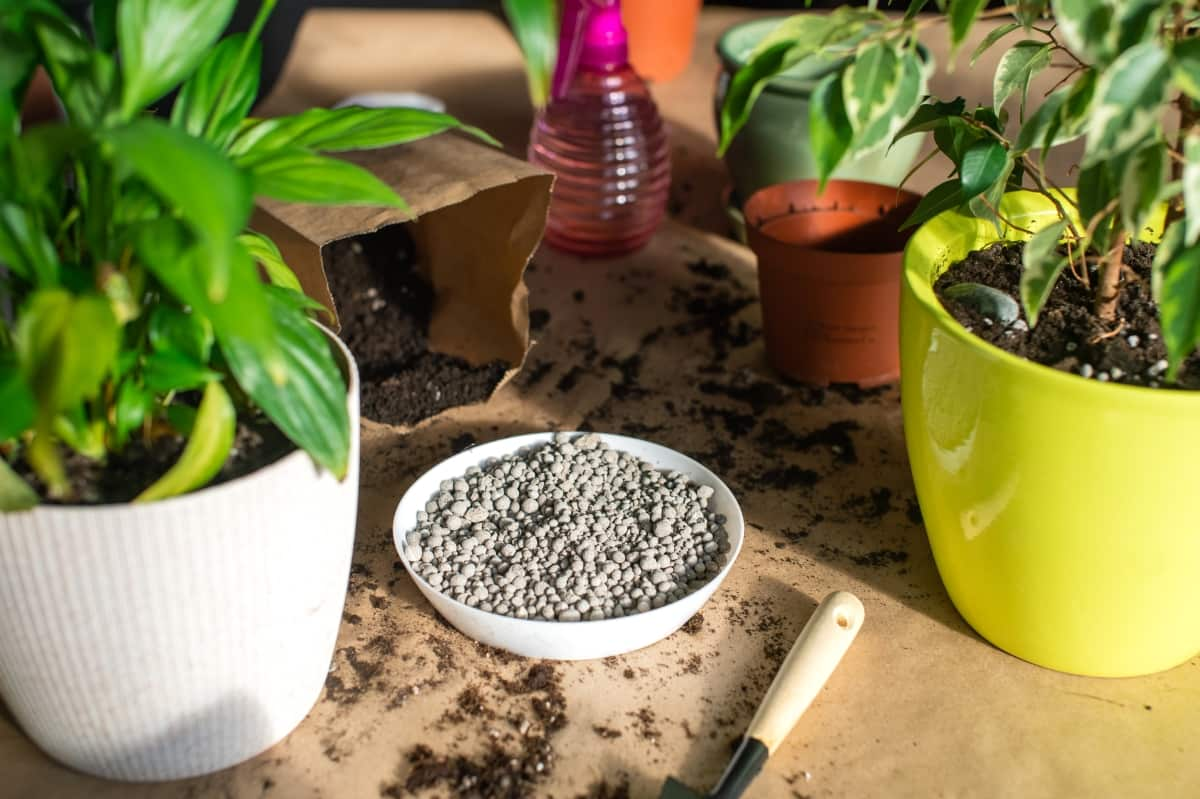
In case you missed it: Nourish to Flourish: The Best NPK Ratio for Houseplants

Replant Indoor Plants

Consider the plant’s specific needs based on its species and growth stage. Different plants require different nutrients at varying times. Take note of any recent changes in your plant’s appearance or behavior, as these could indicate underlying issues. By staying attentive to your plant’s well-being, you can ensure it thrives in your home environment without encountering unnecessary setbacks. 

Follow Dosage Instructions 

To ensure the health and vitality of your potted plants, it’s crucial to follow dosage instructions when applying NPK fertilizer to houseplants. Each type of fertilizer has specific guidelines on how much to use for different plant varieties and sizes. Exceeding or underutilizing the recommended dosage can lead to nutrient imbalances, affecting the overall well-being of your plants. 

Always take the time to read and understand the instructions provided by the manufacturer. These guidelines are designed to help you achieve optimal results without causing harm to your plants. Remember that more is not always better when it comes to fertilizing – stick to the recommended amounts for best outcomes. Over-fertilization can result in nutrient buildup in the soil, leading to root damage and stunted growth. On the other hand, under-fertilization may deprive your plants of essential nutrients needed for healthy development.  

Prepare the Plant and Soil 

Before applying NPK fertilizer to potted plants, it’s crucial to ensure that both the plant and soil are prepared for the process. Start by gently watering the plant a day or two before fertilizing to avoid stressing it. This will also help the soil absorb the nutrients more effectively. Inspect the plant for any signs of nutrient deficiencies or pest issues that may be affecting its health.  

Loosen up the top layer of soil around the plant using a small hand tool like a trowel or fork. This will help aerate the roots and improve drainage, allowing the fertilizer to penetrate deeper into the soil where it’s needed most. Take your time during this step, as proper preparation sets a solid foundation for successful fertilization. By ensuring that both your plant and soil are ready, you’re setting yourself up for healthier growth and vibrant blooms down the line. 

Measure Fertilizer Accurately 

Accurately measuring fertilizer is crucial to ensuring your potted plants get the right amount of nutrients without risking damage. Investing in a good-quality measuring tool, such as a scoop or scale, can help you achieve precision in your application. Take note of the size of your plant containers and adjust the measurements accordingly. Remember that different plants may have varying nutrient requirements. 

In case you missed it: Benefits of NPK in Hydroponic Farming: How it Works and Why it is Important?

Farmer Holding Mineral Fertilizers

Apply Fertilizer Evenly 

Uneven application can lead to some parts of the plant receiving too much while others get too little, impacting overall growth and health. To apply fertilizer evenly, start by dividing the recommended amount into smaller portions. This way, you can cover different areas of the pot more uniformly. Sprinkle the fertilizer gently across the soil surface rather than dumping it in one spot. 

Another tip is to mix the fertilizer with some soil before spreading it over the top layer. This helps prevent concentrated pockets of nutrients that could potentially harm your plant’s roots. Remember to rotate your pot as you apply the fertilizer to ensure all sides receive an equal share. 

Incorporate Fertilizer Into the Soil 

To ensure your potted plants receive the full benefits of NPK fertilizer, it’s crucial to incorporate the fertilizer into the soil effectively. This step allows for better nutrient absorption and utilization by the roots of your plants. Start by gently mixing the fertilizer into the top layer of soil around each plant.

Be careful not to disturb the roots while doing so. You want to create a balanced distribution throughout the root zone. Use a small hand trowel or gardening fork to blend the fertilizer evenly into the soil. This will help prevent any concentrated pockets that could potentially harm your plants or lead to uneven growth. 

Water Immediately After Application 

After applying NPK fertilizer to potted plants, it’s crucial to water them immediately. Water helps the nutrients in the fertilizer dissolve and reach the plant’s roots effectively. Without proper watering, the nutrients may not be absorbed efficiently, leading to potential nutrient deficiencies or even burning of the plant’s roots. 

Watering also helps prevent any potential damage caused by concentrated fertilizer coming into direct contact with delicate root systems. It helps dilute excess nutrients that could harm your plants if left unchecked. Make sure to water thoroughly, but avoid overwatering as it can cause issues like root rot. Monitor how your plants respond after fertilizing and adjust your watering routine accordingly for optimal growth and health. 

Monitor and Adjust Applications as Needed 

It’s crucial to monitor your potted plants after applying NPK fertilizer. Monitor their growth and overall health regularly to ensure they are thriving. Look out for yellowing leaves or stunted growth. Adjust the frequency and amount of fertilizer application based on your plant’s response. If you notice any issues, don’t hesitate to tweak your fertilization schedule accordingly. Remember, each plant is unique and may have different needs. 

In case you missed it: Best Fertilizer for Grapefruit Trees: Organic, NPK Ratio, How and When to Apply

Fertilizer

Stay proactive and observant when caring for your potted plants. By monitoring them closely and making necessary adjustments, you’ll provide the best possible environment for healthy growth. 

Conclusion 

Applying NPK fertilizer to potted plants is a crucial step in ensuring their health. By understanding your plant’s nutrient needs, choosing the right fertilizer, following dosage instructions, and applying it correctly, you can help your plants thrive. Remember to monitor your plants regularly and adjust as needed to keep them happy and healthy. With these essential tips, you can enjoy beautiful and flourishing potted plants all year round. 

10 Best Homemade Fertilizers for Rubber Plant: DIY Recipes and Application Method 

0

Rubber plants, with their glossy leaves and air-purifying qualities, have become a popular choice for indoor plant enthusiasts. These tropical beauties are relatively low maintenance but require proper care to thrive. One essential aspect of caring for Rubber plants is providing them with the right nutrients through fertilization. 

10 Best Homemade Fertilizers for Rubber Plant

Caring for Rubber plants with homemade fertilizers not only promotes healthy growth but also a sustainable and eco-friendly approach to gardening. By utilizing natural ingredients and avoiding harmful chemicals, you are not only benefiting your plant but also the environment. Making your organic fertilizers provides an affordable and effective way to nourish your Rubber plant while reducing waste and minimizing your carbon footprint. 

10 Best Homemade Fertilizers for Rubber Plant

Banana Peel Infusion 

Banana peel infusion is a fantastic homemade fertilizer for Rubber plants. Not only does it provide essential nutrients, but it’s also an eco-friendly way to repurpose kitchen waste. To make this DIY recipe, simply chop up banana peels and steep them in water for a few days. The potassium-rich solution will help promote healthy growth and vibrant foliage. Remember to strain the mixture before using it on your Rubber plant to prevent any clogging issues. You can apply the banana peel infusion every 2-4 weeks for optimal results. 

Epsom Salt Elixir 

This simple homemade fertilizer is easy to make and will help your plant thrive. Epsom salt can benefit Rubber plants by promoting healthy growth and vibrant green leaves. Mixing it with water creates a solution that the plant’s roots can easily absorb. To create the Epsom Salt Elixir, dissolve one or two tablespoons of Epsom salt in a gallon of water. Stir well and pour the mixture into a watering can or spray bottle for application. Water your Rubber plant with this elixir once every month during the growing season to see noticeable results.  

Fish Emulsion Blend 

This organic fertilizer is rich in nutrients that can promote healthy growth and vibrant leaves. To make this fertilizer, simply mix fish waste or scraps with water and let it sit for a few weeks. The decomposition process will create a nutrient-rich liquid that your Rubber plant will love. Fish emulsion contains nitrogen, phosphorus, and potassium, which are vital for strong root development.

In case you missed it: 10 Best Homemade Fertilizers for Peacock Plants (Calathea): Easy DIY Guide

Rubber Plant Leaves

Plus, it’s an eco-friendly option that helps reduce food waste. By incorporating this homemade fertilizer into your plant care routine, you can watch your Rubber plant thrive while also minimizing the use of synthetic chemicals. 

Eggshell Solution 

To create an eggshell solution, simply collect used eggshells, wash them thoroughly, and crush them into small pieces. Place the crushed eggshells in a container filled with water and let it sit for a few days. Once ready, strain the mixture to remove any leftover shell fragments and transfer the liquid to a spray bottle or watering can. Use this homemade fertilizer on your Rubber plant every 2-4 weeks for best results. By using this natural eggshell solution, you’re not only providing essential nutrients to your plant but also reducing waste in an eco-friendly way. 

Compost Tea Brew 

To create a compost tea brew, simply soak compost in water for a few days. The water will become infused with beneficial microorganisms and nutrients from the decomposing organic matter. Once ready, strain the liquid and dilute it with water before applying it to the soil of your Rubber plant. Compost tea is rich in nitrogen, phosphorus, potassium, and other trace minerals that are vital for healthy growth. It also helps improve soil structure and encourages beneficial microbial activity in the root zone. 

Molasses Mix 

Molasses is not just for baking – it can also be a fantastic fertilizer for your Rubber plants. Rich in iron, potassium, and sulfur, molasses can help promote healthy growth and vibrant foliage. To create your own molasses mix, simply dilute 1-2 tablespoons of unsulphured molasses in a gallon of water. Make sure the molasses is well mixed before applying it to the soil around your Rubber plant. 

In case you missed it: Natural Fertilizer Recipes for Flowers: Discover from Banana Peel to Epsom Salt

Modern Houseplants

This natural fertilizer can also stimulate beneficial microbial activity in the soil, improving nutrient uptake and overall plant health. Plus, its sticky consistency helps bind nutrients to the soil for longer-lasting effects. 

Seaweed Extract Soak 

Seaweed extract soak is a fantastic homemade fertilizer for Rubber plants. To create this nutrient-rich fertilizer, soak dried seaweed in water for a few days to allow the nutrients to leach into the liquid. Once ready, strain out the seaweed and use the infused water to nourish your Rubber plant. It’s an eco-friendly option that won’t harm the environment. By incorporating seaweed extract into your plant care routine, you’ll be providing your Rubber plant with all the necessary vitamins and minerals it needs to thrive. 

Coffee Grounds Compost 

If you’re a coffee lover, you’ll be glad to know that those leftover coffee grounds can also benefit your Rubber plant. Coffee grounds help promote healthy leaf growth and overall plant development. To create a coffee grounds compost for your Rubber plant, simply collect used coffee grounds from your morning brew. Allow the grounds to dry out before sprinkling them around the base of the plant or mixing them into the soil. As the coffee grounds decompose, they release nutrients that are beneficial for your Rubber plant’s health.  

Vinegar Dilution 

Vinegar, a common household item, can work wonders in nourishing your Rubber plant. By diluting vinegar with water, you create a gentle yet potent solution that provides essential nutrients to your green friend. To make this DIY fertilizer for Rubber plants, mix one or two tablespoons of apple cider vinegar with water. Be sure to stir well to ensure the ingredients are thoroughly combined. Once mixed, apply this solution to the soil around your Rubber plant. The acidity of the vinegar helps enhance nutrient absorption and promote healthy growth. 

In case you missed it: Natural Fertilizer Recipes for Vegetables: Discover from Composting to Application

Rubber Tree

Aloe Vera Gel Blend 

Aloe Vera is not just great for skin care; it can also work wonders for your indoor plants. This succulent plant contains beneficial nutrients that can help nourish and strengthen your Rubber plant. To make Aloe Vera gel blend fertilizer for Rubber plants, simply mix pure Aloe Vera gel with water in a 1:1 ratio.

You can use fresh gel from the leaves of an Aloe Vera plant or store-bought organic gel. The mixture will provide essential vitamins, minerals, and enzymes to support the growth of your Rubber plant. Apply the Aloe Vera blend to the soil around the base of your Rubber plant once every month during its growing season.  

Conclusion 

Rubber plants are beautiful additions to any indoor space, and with the right care and attention, they can thrive for years. Experiment with different homemade fertilizers to see what works best for your plant. Remember always to follow the proper application methods and not over-fertilize your Rubber plant. With a little bit of love and some homemade fertilizer, your Rubber plant will continue to flourish and bring greenery into your home for years to come. 

How to Boost Female Pumpkin Flowers: Effective Steps for More Flowers and High Yields

0

Female flowers in Pumpkin gardens play a key role in the success of your harvest. These flowers are essential for pollination, leading to the growth of Pumpkins that we all love to carve or use in recipes. Without female flowers, there would be no fruit production, affecting your yield significantly. They are identified by their miniature fruit at the base of the bloom, which will eventually develop into a Pumpkin if successfully pollinated. 

How to Boost Female Pumpkin Flowers

Male flowers alone cannot produce fruits; they rely on female flowers for successful reproduction and fruit formation. Understanding this distinction is vital when aiming for a bountiful Pumpkin harvest. By focusing on boosting Pumpkin female flower production in your garden, you can ensure better pollination rates and increase your chances of higher yields come harvest time. 

How to Boost Female Pumpkin Flowers

Factors Affecting the Production of Female Flowers 

When it comes to Pumpkin gardens, the production of female flowers plays a crucial role in ensuring a successful harvest. Several factors can influence the development of female flowers on Pumpkin plants. One key factor is genetics. Some Pumpkin varieties naturally produce more female flowers than others. Environmental conditions also play a vital role.

Factors like temperature fluctuations, humidity levels, and soil quality can impact flower production. Ensuring optimal growing conditions for your Pumpkins can help encourage the growth of more female flowers. Proper pollination is another essential factor to consider. Bees play a critical role in transferring pollen between male and female flowers, leading to fruit development. Without adequate pollination, you may experience limited female flower production in your garden. 

Effective Steps to Boost Female Flowers in Pumpkin Gardens 

Proper Planting Techniques 

When it comes to boosting the number of female flowers in Pumpkin gardens, proper planting techniques play a crucial role. Start by selecting a sunny place with well-drained soil for optimal growth. Plant your Pumpkin seeds at the right depth of about 1 inch deep and space them properly to allow room for vine expansion. Consider using trellises or supports for your Pumpkin vines to keep them off the ground and prevent diseases. Regularly prune any overcrowded areas to promote air circulation and sunlight exposure. 

Soil Nutrients and Fertilization Tips 

When it comes to encouraging female flowers in Pumpkin gardens, paying attention to soil nutrients and fertilization is key. The foundation of a successful Pumpkin harvest starts with the soil. Ensure your garden soil is rich in essential nutrients like nitrogen, phosphorus, and potassium – crucial for flower development. 

Organic matter can also improve soil fertility, promoting healthy plant growth and Pumpkin flower production. Incorporate a balanced fertilizer with higher levels of phosphorus to encourage more female flowers. Opt for slow-release fertilizers for a steady nutrient supply throughout the growing season. Maintaining proper pH levels is also important; Pumpkins thrive in slightly acidic soil conditions around the 6.0-6.5 pH range. 

Adequate Watering and Sunlight Exposure 

Watering your Pumpkin plants is crucial for promoting the growth of female flowers in the Pumpkin Garden. Make sure to water them consistently, especially during hot and dry periods. Remember, Pumpkins are thirsty plants that need regular hydration to thrive. When it comes to sunlight exposure, find a spot in your garden that gets 6-8 hours of direct sunlight daily. Ensure no obstructions are blocking the sun from reaching your Pumpkin patch. Consider using drip irrigation systems to deliver water directly to the roots. This will help prevent powdery mildew.  

In case you missed it: Pumpkin Seed Germination, Time, Temperature, Process

Pumpkin
Choosing the Right Variety for More Female Flowers 

When it comes to boosting female flowers in Pumpkin gardens, choosing the right variety plays a crucial role. Different Pumpkin varieties have varying characteristics that can impact flower production. Look for varieties known to produce more female flowers, such as ‘Baby Pam’ or ‘Cinderella.’ These types are genetically predisposed to yield higher numbers of female blooms. 

Additionally, consider factors like climate and soil conditions when selecting your Pumpkin variety. Some varieties thrive better in certain environments than others, which can affect flower production. Research the best-suited varieties for your specific growing conditions to maximize female flower output. 

Pest Control Measures for Healthy Pumpkin Plants 

Pests can wreak havoc on your Pumpkin Garden if left unchecked. To keep your plants healthy and thriving, it’s essential to implement effective pest control measures. One way to deter pests is by regularly checking your plants for any signs of infestation. Look out for common culprits like aphids, squash bugs, and cucumber beetles. 

Another natural method to control pests is by introducing beneficial insects that prey on harmful bugs. You can also use organic insecticidal soaps to protect your Pumpkins without harming the environment. Creating physical barriers like row covers can prevent pests from attacking your plants while still allowing sunlight and water to reach them. Additionally, practicing crop rotation can help disrupt pest life cycles and reduce their numbers in the long run. 

Harvesting and Storing Pumpkins with High Yield of Female Flowers 

As the Pumpkin season approaches, ensuring a bountiful harvest of Pumpkins with high yields of female flowers is crucial for a successful garden. When it comes time to harvest your Pumpkins, remember that those with more female flowers tend to be larger and have better flavor profiles.

In case you missed it: Soil Preparation for Pumpkin Plants: Best Soil Mix, pH, and Compost

Pumpkin Patch in Garden

After carefully selecting the ripe Pumpkins from your garden, handle them with care to avoid any damage that may impact their storability. It’s best to store Pumpkins in a cool, dry place with good air circulation to prevent mold growth. Properly cured Pumpkins can last for several months if stored correctly. Inspect them regularly and remove any affected ones promptly. 

Tips for Maintaining High Yields with More Female Flowers 

To ensure high yields in your Pumpkin Garden with an abundance of female flowers, proper care and maintenance are key. Start by providing your plants with adequate sunlight, at least six to eight hours a day. This will help promote healthy flower production in the Pumpkin Garden and overall plant growth. Additionally, make sure to water your Pumpkin plants consistently, keeping the soil moist. Proper hydration is crucial for flower development and fruit formation. Consider using mulch around the base of the plants to retain moisture and regulate soil temperature. 

Regularly fertilize your Pumpkin plants with a balanced fertilizer to provide them with nutrients for robust growth and flower production. Avoid over-fertilizing, as it can lead to excessive foliage growth at the expense of flower formation. Be diligent in monitoring pests and diseases that may affect your Pumpkin plants. Implement preventive measures such as removing diseased leaves to protect the health of your plants and maximize yield potential. 

Common Mistakes to Avoid when Trying to Increase Female Flowers 

When it comes to increasing female flowers in your Pumpkin Garden, there are some common mistakes that you’ll want to steer clear of. One mistake is over-fertilizing, as this can cause an abundance of foliage at the expense of flower production. Additionally, planting Pumpkin seeds too close together can result in overcrowding and competition for resources, hindering flower development. 

Another mistake is not providing adequate sunlight. Female flowers thrive in full sun, so make sure your Pumpkin plants are getting at least 6-8 hours of sunlight per day. It’s also important to avoid using pesticides indiscriminately, as they can harm pollinators like bees, which are essential for flower pollination. 

In case you missed it: Growing Pumpkins from Seed to Harvest: A Detailed Guide for Beginners

Orange Pumpkins

Neglecting proper watering practices can also hinder female flower production. Make sure your Pumpkin plants receive consistent moisture levels throughout their growth cycle to support healthy flower development. By avoiding these mistakes and implementing proper care techniques, you’ll be on your way to a bountiful harvest of Pumpkins with plenty of female flowers. 

Conclusion 

Boosting female flowers in your Pumpkin Garden can significantly enhance your yields and overall success. By understanding the importance of these flowers, recognizing the differences between male and female blooms, and implementing effective strategies to encourage more females to bloom, you can maximize the productivity of your Pumpkin patch. Remember that factors like proper pollination, soil nutrition, temperature regulation, and pest control play crucial roles in promoting female Pumpkin flower production. With a proactive approach, you can create an environment that is conducive to abundant female flowers. 

Transform Your Indoor Garden: Top Benefits of Pink Salt for Houseplants

0

Pink salt contains essential minerals, which are essential for plant growth and vitality. These nutrients are readily absorbed by plant roots, promoting stronger stems and lusher foliage. Additionally, pink salt can improve soil structure by enhancing its ability to retain moisture and nutrients.

potted plants for indoor gardening

By incorporating pink salt into your indoor gardening routine, you can provide the nutrient boost that promotes overall health and resilience. Whether you’re a seasoned plant parent or just starting on your green thumb journey, experimenting with pink salt could be the secret weapon your houseplants need to thrive. 

Benefits of Pink Salt for Houseplants

Boosts Nutrient Absorption 

Enhanced Root Efficiency 

Pink salt might be the secret ingredient your houseplants have been craving. When it comes to plant nutrient absorption, this natural mineral can work wonders for enhancing root efficiency and increasing mineral uptake. By incorporating pink salt into your plant care routine, you’re setting the stage for optimal growth and vitality. Think of it as a powerful stimulant that kick-starts essential growth processes within your plants. You can use pink salt for vibrant houseplant foliage and stronger stems. 

Increased Mineral Uptake 

Not only does pink salt promote better soil quality by improving its structure and moisture retention capabilities, but it also acts as a natural pest repellent. With improved soil pH levels and essential trace minerals supplied directly to the roots, your houseplants will thrive like never before. 

Promotes Healthier Growth 

Stimulation of Growth Processes 

Pink salt is not just a trendy addition to your kitchen, but it also holds amazing benefits for your indoor plants. When it comes to promoting healthier Indoor plant growth, pink salt truly shines. By enhancing houseplant health with salt, it helps them reach their full potential. This means you’ll see improved vitality in your houseplants, with lush green leaves and robust stems. 

Improved Plant Vitality 

The unique properties of pink salt work wonders in enhancing the overall health of your plants. With improved plant vitality, you’ll notice an increase in the vibrancy and resilience of your beloved indoor garden. So, if you’re looking to take your houseplant game to the next level, consider incorporating pink salt into your gardening routine. 

Improves Soil Quality 

Enhanced Soil Structure 

Pink salt might be the secret ingredient you’ve been missing. It works wonders to improve soil quality by enhancing soil structure and promoting better moisture retention. 

Better Moisture Retention

By incorporating pink salt into your gardening routine, you can say goodbye to compacted or sandy soils that struggle to retain essential nutrients for your houseplants. The unique properties of pink salt help create a more balanced and aerated soil structure, allowing roots to spread out more easily and access water and nutrients efficiently.  

In case you missed it: Natural Fertilizer Recipes for Flowers: Discover from Banana Peel to Epsom Salt

Indoor Garden Management

Acts as a Natural Pest Repellent 

Deters Common Houseplant Pests 

Safeguarding your indoor garden from pesky pests is a top priority for plant enthusiasts. Pink salt emerges as a natural hero in this battle, offering a chemical-free solution to keep common houseplant invaders at bay. The mineral properties of pink salt create an environment that pests find unappealing, effectively deterring them from making your plants their home. 

Safe, Chemical-Free Pest Control 

By sprinkling a pinch of pink salt around your pots or mixing it with water to create a spray, you can establish a protective barrier without harming the environment or compromising plant health. Pink salt not only repels unwanted insects but also promotes a healthier, balanced ecosystem within your indoor garden. 

Fights Off Fungal Diseases 

Natural Fungal Resistance 

Pink salt is not just a trendy addition to your kitchen pantry; it also has remarkable benefits for your indoor garden. Its natural fungal resistance properties can be a game-changer for your houseplants when it comes to fighting off fungal diseases. 

Healthier Plant Leaves and Stems 

When it comes to fungal resistance in houseplants with salt, you are helping to maintain healthier leaves and stems by warding off common fungal infections that can hinder growth and vitality. The unique composition of pink salt creates an environment that is inhospitable to harmful fungi, allowing your plants to thrive without diseases. This means fewer instances of wilted leaves or damaged stems due to fungal issues, resulting in overall stronger and more resilient plants in your indoor garden. 

Regulates Soil pH Levels 

Maintains Optimal Growth Conditions 

Maintaining the right soil pH balance for houseplants is key to ensuring their thriving. Improving soil with Himalayan pink salt can help regulate soil acidity, creating an optimal environment for growth. 

Neutralizes Excess Acidity 

By neutralizing excess acidity, pink salt allows plants to absorb nutrients more effectively and increase houseplant root health. When soil pH levels are balanced, plants can access essential minerals more efficiently, leading to improved overall health and vitality. This natural solution helps create a stable foundation for your houseplants to flourish. With pink salt’s ability to regulate pH levels, you can provide your plants with the perfect growing conditions they need. 

Supplies Essential Trace Minerals 

Micronutrient Boost for Houseplants 

Indoor plants need more than just water and sunlight to thrive. Pink salt trace minerals for indoor plants maintain optimal health and growth. Pink salt contains rich minerals and can boost houseplant flowering and fruiting. 

Contributes to Overall Plant Health 

Trace minerals play various plant functions, from photosynthesis to nutrient absorption. By incorporating pink salt into your indoor garden routine, ensure that your plants get all the necessary nutrients they need to flourish. From iron and zinc to magnesium and calcium, these trace minerals contribute to overall plant health by supporting vital processes within the plant’s cells.

In case you missed it: Ultimate Guide to Using Epsom Salt for Potted Plants: Tips, Dosage, and Benefits

Benefits of Pink Salt for Houseplants

This micronutrient boost helps strengthen the plant’s immune system and enhances its resilience against environmental stressors. By adding pink salt as a natural source of essential trace minerals, you are promoting robust growth and development in your indoor garden. 

Reduces Plant Stress 

Improves Plant Resilience 

When it comes to houseplant maintenance with pink salt, it is crucial to ensure that your plants are resilient and can withstand environmental stress. Pink salt has been known to reduce plant stress by supporting their natural resilience. Plants face various forms of stress, from fluctuations in temperature to changes in humidity levels. By incorporating pink salt into your gardening routine, you can help your plants bounce back from these challenges more effectively. 

Supports Recovery from Environmental Stress 

Whether your houseplants have been exposed to harsh sunlight or dry air conditions, using pink salt as a natural remedy can aid in their recovery process. It acts as a supportive agent for plants dealing with the impact of environmental factors. By stress relief for houseplants with pink salt, you are helping them adapt and thrive in less-than-ideal conditions. This ultimately leads to healthier and happier houseplants that can better withstand external pressures. 

Eco-Friendly Fertilizer Option 

Sustainable Plant Nutrition 

When it comes to eco-friendly houseplant care, pink salt reduces the need for chemical fertilizers that can harm the environment. 

Reduces Dependence on Chemical Fertilizers 

Chemical fertilizers often contain synthetic ingredients that may leach harmful substances into the soil. Making the switch to pink salt helps minimize this impact, promoting healthier growth while lessening environmental damage. Embracing an eco-friendly approach not only benefits your indoor garden but also contributes to a greener planet. It’s a small change that can make a big difference in reducing our reliance on harmful chemicals in plant care practices. 

Enhances Flowering and Fruiting 

Supports Bloom Production 

When it comes to enhancing flowering and fruiting in your houseplants, pink salt is a game-changer. By supporting bloom production, pink salt helps your plants produce more vibrant and abundant flowers. The increased yield not only adds beauty to your indoor space but also boosts the overall health of your plants. 

Increases Yield and Quality of Fruit 

Furthermore, with improved fruit quality, you can enjoy a bountiful harvest of delicious homegrown fruits. Whether it’s luscious Strawberries or juicy Tomatoes, pink salt can help elevate the taste and appearance of your home-grown produce. So, if you want to see an explosion of blooms and enjoy a bumper crop of fruits in your indoor garden, consider incorporating pink salt into your plant care routine. 

In case you missed it: Top 18 Best Plants That Tolerate Salty Soil: Every Gardener Must Know

Spathiphyllum Pot

Conclusion 

Incorporating pink salt into your indoor garden can truly transform the way your houseplants thrive. Pink salt for healthier indoor gardens, like improving soil quality, acting as a natural pest repellent, and so much more; the benefits of pink salt for houseplants are vast and impressive. By enhancing plant vitality, regulating pH levels in the soil, supplying essential trace minerals, reducing plant stress, offering an eco-friendly fertilizer option, and even enhancing flowering and fruiting capabilities – pink salt is a powerhouse when it comes to supporting your indoor garden’s health and beauty. 

10 Best Homemade Fertilizers for Peacock Plants (Calathea): Easy DIY Guide

0

Fertilizing your Peacock plants is essential for their growth and vibrancy. By using homemade fertilizers, you not only save money but also ensure that your plants are getting natural and organic nutrients. Experiment with the different organic fertilizers for Peacock plants and what works best for your Peacock Plants. Remember to apply fertilizers sparingly and consistently to avoid overfeeding or underfeeding your plants. With Calathea, sustainable plant care tips keep your Peacock plants healthy and thriving all year round. 

Best Homemade Fertilizers for Peacock Plants

10 Best Homemade Fertilizers for Peacock Plants

Coffee Grounds Fertilizer 

Benefits of Soil Acidity 

Coffee grounds contain essential nutrients like nitrogen, potassium, and phosphorus that help in the healthy growth of your plants. The benefit of using coffee grounds as fertilizer is their ability to improve soil acidity levels. Peacock plants thrive in slightly acidic soil, making coffee grounds an ideal natural amendment to maintain the right pH balance. 

Application Method 

To apply coffee grounds as fertilizer, sprinkle them around the base of your Peacock plant. You can also mix them into the topsoil gently to ensure even distribution. Avoid overdoing it, though, as too much caffeine can harm your plant’s roots. Remember to use spent coffee grounds rather than fresh ones since fresh ones may still have high acidity levels that could be detrimental to your plant. 

Eggshell Tea 

Calcium Boost for Healthy Growth 

Eggshell tea is like a secret potion for your Peacock plants, providing them with a much-needed calcium boost for robust growth. 

Preparing and Using Eggshell Tea 

When it comes to Eggshell tea for Calathea, start by collecting eggshells and crush the clean eggshells into small pieces. The finer the shells are crushed, the better they will infuse into the water. Place these crushed shells in a container and cover them with boiling water. Let this mixture steep overnight to allow the calcium to leach out from the shells. Water your plants with this nutrient-rich concoction once every two weeks to ensure they receive their dose of calcium goodness for healthy growth. 

Banana Peel Fertilizer 

Potassium for Root Development 

Banana peel fertilizer is the best way to boost your Peacock plant’s root development. It’s rich in potassium, a vital nutrient for strong and healthy roots. 

Preparation and Application 

To prepare this DIY Calathea fertilizer, chop up banana peels and bury them around your plant. As the peels decompose, they release potassium slowly into the soil, providing long-lasting benefits to your Peacock plant. This organic fertilizer not only nourishes your plant but also helps reduce waste by repurposing kitchen scraps. By incorporating banana peel fertilizer into your gardening routine, you can promote robust root growth and vibrant foliage on your beloved Peacock plants. 

In case you missed it: Homemade Fertilizers for Malabar Spinach: Get More and Large Green Leaves

indoor peacock plant

Aquarium Water 

Nutrients from Fish Waste 

Aquarium water is a hidden gem in the world of plant fertilizers. The fish waste in aquariums contains valuable nutrients that can benefit your Peacock plants. Instead of disposing of this nutrient-rich water, consider using it to feed your plants. 

How to Use for Watering 

To use Aquarium water as fertilizer for Peacock plants, collect the water during routine tank cleanings. Make sure to dilute it with regular tap water to avoid over-fertilizing and harming your plants. The nutrients present in aquarium water, such as nitrogen and phosphorus, can promote healthy growth and vibrant foliage in your Peacock plants. Additionally, the beneficial bacteria from the fish waste can contribute to soil health and overall plant vitality. 

Epsom Salt Solution 

Magnesium for Chlorophyll Production 

Magnesium is essential for chlorophyll production, which means vibrant green leaves. 

Mixing and Usage Instructions 

Mixing up an Epsom salt solution is easy. Simply dissolve one tablespoon of Epsom salt in 1 gallon of water. Stir well until completely dissolved. When it comes to using this nutrient-rich solution, less is more. Apply it to your Peacock plant’s soil once a month during the growing season. Overdoing it can lead to magnesium buildup and harm your plant. Remember, moderation is key when feeding your plants with any homemade fertilizer.  

Compost Tea 

Rich in Essential Nutrients 

When it comes to compost tea recipes for Peacock plants, they are packed with essential nutrients to help them thrive.  

Brewing and Application Process 

Brewing this nutrient-rich elixir is easier than you think – mix compost in water and let it steep for a few days. The brewing process allows beneficial microorganisms to multiply, creating a powerful cocktail of plant-loving goodness. Applying compost tea to your Peacock plants is a breeze. Just pour it around the base of the plant or use a spray bottle to mist the leaves.  

Green Tea Fertilizer 

Mild Nutrient Supplement 

Green tea is a nutrient-rich solution for Calathea, it can also work wonders as a mild fertilizer for your Peacock plants. To make this natural nutrient supplement, start by brewing a cup of green tea using hot water and letting it cool completely. Once the tea is at room temperature, dilute it further with an equal amount of fresh water to create your homemade fertilizer solution. 

Method of Preparation and Use 

Remember not to use any flavored or sweetened varieties of green tea as they may harm your plants. The subtle nutrients in green tea can help support the overall health and growth of your Peacock plant without overwhelming them with too much fertilizer at once. To apply the green tea to indoor plants, gently pour the diluted mixture into the soil around the base of your plant.  

Rice Water Fertilizer 

Starches for Soil Microbes 

Rice water fertilizer is a hidden gem in the world of plant care. It might sound unusual, but rice water can work wonders for your Peacock plants. The starches present in rice water act as food for beneficial soil microbes, promoting healthy growth and nutrient uptake. 

In case you missed it: How to Grow Tulsi in Home Garden: Discover from Propagation to Planting

Calathea orbifolia tropical plant
Collecting and Applying Rice Water 

To collect rice water for plant growth, save the water you use to rinse uncooked rice before cooking. This starchy liquid contains nutrients that can benefit your plants. After collecting the rice water, allow it to sit for a day or two to ferment slightly, enhancing its potency. When applying rice water to your Peacock plants, dilute it with an equal amount of fresh water to prevent any potential salt build-up. Water your plants as usual with this nutrient-rich solution once a week during the growing season to see vibrant results. 

Wood Ash Fertilizer 

Potash for Flowering and Fruiting 

Wood ash garden is used for Calathea, which can promote flowering and fruiting in your plants. It’s an eco-friendly way to give your Peacock plants the nutrients they need to thrive. 

Guidelines for Safe Use 

When using wood ash as a homemade Peacock plant fertilizer, it’s important to follow some guidelines for safe use. First, make sure the ashes are completely cool before applying them to the soil. Hot ashes can damage plant roots and soil organisms. To apply wood ash to your Peacock plants, sprinkle a thin layer around the plant and gently work it into the soil.

Avoid applying too much ash, as it can raise the pH level of the soil. Too much potash can be harmful to your Peacock plants. Use it sparingly and monitor how your plants respond to ensure they are getting just the right amount of nutrients they need. 

Vermicompost Leachate 

Liquid Gold Nutrient Mix 

Vermicompost leachate, also known as liquid gold in the gardening world. This nutrient-rich liquid is a byproduct of composting with worms and is packed with essential nutrients that will supercharge your plant’s health. 

Harvesting and Fertilizing with Worm Tea 

Harvesting vermicompost leachate is simple – collect the dark-colored liquid that drains from your worm bin. Dilute it with water before using it to avoid over-fertilizing your plants. When it comes to Vermicompost leachate benefits your Peacock plant will thank you for this organic elixir, promoting lush greenery and vibrant blooms. Fertilizing with worm tea couldn’t be easier – pour the diluted vermicompost leachate at the base of your plant, ensuring it absorbs all those beneficial nutrients.  

In case you missed it: Calandiva Plant Care: Pruning, Propagation, and Indoor Care

peacock plant in an indoor pot

Conclusion 

Incorporating homemade fertilizers into your Peacock plant care routine can be a rewarding way to nurture your green companions. By utilizing Peacock plant growth hacks like coffee grounds, eggshells, banana peels, and more, you not only provide essential nutrients for vibrant growth but also contribute to sustainable gardening practices. 

Unlock Blooms: 9 Reasons Why Your Potted Chrysanthemum is Not Blooming

0

By understanding the potted Chrysanthemum flowering problems and taking the necessary steps to address them, you can help your Chrysanthemum thrive and produce beautiful blooms. With proper care and a little bit of knowledge about pests, diseases, and growing conditions, you can enjoy vibrant flowers all season long. 

Reasons Why Your Potted Chrysanthemum is Not Blooming

9 Reasons Why Your Potted Chrysanthemum is Not Blooming

Late-Bloomers 

Just because your Chrysanthemum hasn’t bloomed yet doesn’t mean it never will. Be patient and give it some time. Sometimes, all it needs is a little extra care and the right conditions to show off its blossoms in all its glory. Keep caring for your plant as usual, ensuring it has adequate sunlight, water, and nutrients. With a bit of patience and perseverance, those buds may surprise you when they decide to make their grand entrance into the world of vibrant blooms. 

Lack of Sun 

One potential reason for potted Chrysanthemum not flowering could be the lack of sunlight. These beautiful flowers thrive in bright, indirect light, so if they’re not getting enough sun exposure, they might struggle to produce those gorgeous blooms. Chrysanthemums typically need around 6 hours of sunlight each day to flourish.

If your plant is placed in a shady corner or hidden behind larger plants, it may not be receiving an adequate amount of sunlight. Remember, sunlight plays a crucial role in photosynthesis. Without enough sun, your Chrysanthemum may not have the energy it needs to bloom abundantly. 

Overcrowded Containers 

When the plant’s roots don’t have enough space to spread out and grow, it can impact its overall health and blooming potential. Overcrowding can cause stress on your Chrysanthemum, hindering its ability to focus on producing those beautiful blooms you are looking forward to seeing. 

To encourage potted Chrysanthemum blossoms, consider repotting your Chrysanthemum into a larger container with fresh soil. Make sure there is ample room for the roots to expand comfortably without being cramped. Giving your plant some breathing space may just be the boost it needs to start flourishing again. 

Nutrient Deficiency 

If your Chrysanthemum lacks essential nutrients like nitrogen, phosphorus, or potassium, it may struggle to bloom to its full potential. Nutrient deficiencies can manifest in various ways, from stunted growth to pale leaves and lackluster blooms. To ensure your potted Chrysanthemum gets the nutrients it needs, consider using a high-quality fertilizer specifically formulated for flowering plants.

In case you missed it: How to Grow Chrysanthemums from Seed to Harvest: Planting and Care Guide for Beginners

Chrysanthemum in a pot

Regularly feeding your plant with the right nutrients can help promote abundant blooms. Remember that each plant has unique nutritional requirements, so it’s essential to research the needs of Chrysanthemums to address any deficiencies effectively. 

Inadequate Chilling Period 

One possible common cause of potted Chrysanthemum flower failure could be an inadequate chilling period. Chrysanthemums require a period of cooler temperatures to set buds and bloom successfully. If your potted Chrysanthemum has not been exposed to the right amount of chill hours, it may struggle to go through its natural blooming process. Without this chilling period, the plant may remain in a vegetative state and fail to produce flowers as expected. 

To ensure that your Chrysanthemum thrives and blooms beautifully, it is essential to provide it with the necessary chilling period. This can mimic the conditions it would experience in its natural habitat during the fall season when these plants typically bloom. 

Waterlogged Soil 

When the roots of your plant sit in water for too long, they can’t access the oxygen they need to thrive. This lack of oxygen can hinder proper growth and blooming. To encourage potted Chrysanthemum blossoms, ensure your pot has adequate drainage holes at the bottom. Excess water should be able to flow out of the container freely. Regularly check the moisture levels in the soil. Consider repotting your Chrysanthemum if you suspect that its current container doesn’t facilitate proper drainage.  

Excess Nitrogen 

Excess nitrogen in your potted Chrysanthemum can be a real blooming buzzkill. While this nutrient is essential for plant growth, too much of a good thing can lead to disappointing results. When nitrogen is abundant in the soil, your Chrysanthemum may put all its energy into producing lush green foliage at the expense of blooming flowers. Nitrogen imbalance can throw off the delicate flowering cycle of the Chrysanthemum plant, leaving you scratching your head, wondering why those vibrant blooms just won’t show up.

In case you missed it: Best Fertilizer for Chrysanthemum: Homemade, Liquid, NPK, Organic, and Schedule

Fresh Bright Red, Purple And Yellow Chrysanthemums Bushes in a home garden

It’s like being stuck in traffic when you’re already running late – frustrating and counterproductive. To remedy this issue, consider adjusting your fertilizer routine or opting for a balanced formula with lower nitrogen levels. By finding the right balance, you’ll give your Chrysanthemum the best shot at reaching its full blooming potential and dazzling you with a stunning floral display. 

Pests And Diseases 

One of the common causes of potted Chrysanthemum flower failure is due to pests and diseases. These pesky intruders can damage your plant, affecting its growth and ability to produce those beautiful blooms you’ve been eagerly waiting for. Aphids, spider mites, and caterpillars are just a few of the critters that might be causing trouble in your Chrysanthemum’s pot. Keep an eye out for any signs of infestation, such as yellowing leaves, distorted growth, or visible pests crawling around. 

To combat these unwanted visitors, consider using natural remedies like neem oil or insecticidal soap. Regularly inspecting your plant and removing any affected leaves can also help prevent further damage. In addition to pests, diseases like powdery mildew or botrytis can also hinder blooming. Make sure to provide adequate air circulation around your plant and avoid overhead watering, which can create a damp environment ideal for disease development. By taking proactive measures to address pest and disease issues promptly, you’ll give your potted Chrysanthemum the best chance at thriving and eventually gracing you with its vibrant flowers. 

Pruning 

Pruning plays a crucial role in the blooming of your potted Chrysanthemum. This simple task involves removing dead or faded flowers and trimming back leggy growth to restore blooming in potted Chrysanthemums. It helps redirect the plant’s energy towards producing more buds, resulting in a fuller and more vibrant display. Regular pruning also prevents overcrowding within the pot, allowing for better air circulation around the plant.

In case you missed it: Homemade Fertilizers for Rosemary: A Guide to DIY Organic Fertilizers

Pink chrysanthemum flower pot

This is essential to prevent diseases that can hinder flower production. When done correctly, pruning promotes healthier growth and enhances the overall appearance of your Chrysanthemum plant. Remember to use clean and sharp gardening shears when pruning to avoid damaging the stems. Aim to prune regularly throughout the growing season to maintain a well-shaped plant with abundant blooms. 

Conclusion 

Potted Chrysanthemums are a delightful addition to any home or garden, but it can be frustrating when they fail to bloom. By understanding the common reasons for potted Chrysanthemum not flowering, such as insufficient sunlight, you can take steps to rectify the situation and encourage your plant to thrive. Remember that with proper care and attention, your potted Chrysanthemum will eventually reward you with its beautiful blooms. 

8 Reasons Why Your Potted Hibiscus is Not Blooming: Fix it with Simple Solutions

0

If your potted Hibiscus is not blooming as expected, there are several factors to consider. From inadequate sunlight and improper watering to nutrient deficiencies and pests, identifying the root cause is essential for encouraging blooming. By addressing potted Hibiscus flowering problems and providing the right care, you can help your Hibiscus thrive and reward you with beautiful blooms. Remember that patience and consistency in care are key when it comes to enjoying a vibrant and flourishing potted Hibiscus plant. 

8 Reasons Why Your Potted Hibiscus is Not Blooming

8 Reasons Why Your Potted Hibiscus is Not Blooming

Watering Problems 

One common reason why Hibiscus is not blooming in the pot is due to watering problems. Understanding the watering needs of your plant is crucial for its overall health and flowering potential. Overwatering deprives the plant of essential nutrients and oxygen. On the other hand, underwater can cause stress and hinder flower production. To ensure optimal blooming, it’s important to find a balance in your watering routine. Check the soil moisture regularly. Avoid following a strict schedule and, instead, adjust based on environmental factors.  

Excess Nitrogen 

Excess nitrogen can be a sneaky culprit when it comes to your potted Hibiscus not blooming. While nitrogen is crucial for plant growth, too much of it can lead to lush green foliage at the expense of flowers. The imbalance created by excessive nitrogen levels can disrupt the flowering process and leave you wondering why your Hibiscus isn’t showing off its vibrant blooms. 

One common source of excess nitrogen is over-fertilization. It’s easy to get carried away with feeding your plants, but moderation is key when it comes to nutrient levels. Opt for a balanced fertilizer specifically formulated for flowering plants like Hibiscus, and follow the instructions carefully to avoid overdoing it. If you suspect that excess nitrogen may be hindering your Hibiscus from blooming, consider switching to a fertilizer with lower nitrogen content or adjust your feeding schedule accordingly.  

Too much Phosphorus 

If your potted Hibiscus is refusing to bloom, the culprit might be too much phosphorus in the soil. While phosphorus is crucial for plant growth, excess can cause Hibiscus pot plants not to produce blooms. When there’s an imbalance of nutrients in the soil, such as an abundance of phosphorus, it can disrupt the plant’s ability to uptake other vital elements like potassium and magnesium. This disruption can lead to stunted growth and a lack of blooms on your Hibiscus. 

In case you missed it: 10 Reasons Why Is My Ice Plant Not Blooming: Remedies and Treatment

Pot with Hibiscus

Excessive phosphorus levels can also have negative effects on soil pH levels, making it more difficult for plants to absorb certain nutrients they need to thrive. To maximize potted Hibiscus flower yield, consider using a fertilizer with lower phosphorus content or opting for organic alternatives that promote balanced nutrient uptake by your Hibiscus plant. By being mindful of the phosphorus levels in your potted Hibiscus’s environment, you’ll be one step closer to helping it bloom beautifully once again. 

Poorly-Drained Soils 

One common reason why your potted Hibiscus may not be blooming is due to poorly drained soils. When the soil doesn’t drain properly, it can lead to waterlogged roots, causing stress to the plant. This stress can inhibit flowering and overall growth. Excess water around the roots restricts oxygen uptake and nutrient absorption by the plant, hindering its ability to produce vibrant blooms.

To check if your soil drainage is an issue, observe how quickly water drains after watering. If it sits on top for too long or causes pooling at the bottom of the pot, you might have a drainage problem. To improve drainage, consider repotting your Hibiscus in a well-draining potting mix or adding perlite or sand to increase aeration in the soil. Additionally, ensuring that your pot has proper drainage holes can help prevent waterlogging and promote healthier root growth.  

Too much Shade 

If your potted Hibiscus isn’t blooming, it could be due to too much shade. Hibiscus plants require 6 hours of direct sunlight daily to produce those beautiful blooms. Too much shade can also lead to leggy growth and sparse foliage, further inhibiting blooming. Make sure your Hibiscus is getting the light it needs to grow healthy and vibrant.

Observe how the shadows fall throughout the day in your garden or balcony and find a spot that gets ample sunlight for optimal blooming potential. A little sunshine goes a long way when it comes to encouraging gorgeous Hibiscus flowers. 

Temperature Fluctuation 

Hibiscus plants thrive in consistent temperatures, so that sudden changes can disrupt their blooming cycle of Hibiscus. Fluctuations in temperature, especially drastic shifts between hot days and cool nights, can stress the plant and inhibit flower production. For optimal blooming, it’s essential to provide a stable environment for your Hibiscus.

In case you missed it: 10 Reasons Why My Potted Hydrangea Not Blooming: Treatment and Remedies

Woman Replanting Hibiscus Plant

To help your potted Hibiscus overcome the challenge of temperature fluctuations, consider moving it to a more sheltered location where it is shielded from extreme heat or cold. This adjustment encourages blooming in Hibiscus plants. 

Wrong Time to Prune 

Hibiscus plants generally benefit from light pruning after their flowering period has ended. Avoid heavy pruning in late summer, as this can reduce the number of flower buds for the following growing season. It’s best to prune your Hibiscus during its dormancy period in late winter or early spring before new growth begins. By being mindful of when you prune your potted Hibiscus, you can help ensure that it thrives and produces an abundance of vibrant blooms for you to enjoy. 

Attack by Pests 

One common reason for potted Hibiscus not flowering as expected could be due to an attack by pests. These tiny intruders cause stress and hinder its ability to produce those beautiful blooms you’re eagerly waiting for. Pests like aphids, spider mites, and mealybugs are known culprits that can infest Hibiscus plants. They feed plant sap, weakening it and disrupting its growth cycle. Keep a close eye on the leaves and stems for any signs of these unwanted visitors. 

In case you missed it: 10 Reasons Why is My Goldfish Plant Not Blooming: Remedies and Treatment

Process of Planting Hibiscus Houseplant

To combat pest infestations, consider using natural remedies like neem oil or insecticidal soap. Regularly inspecting your plant for early signs of pests can help prevent a full-blown invasion that could harm your Hibiscus further. By staying vigilant and taking proactive measures against pests, you can help ensure your plant thrives and eventually bursts into a stunning display of colorful blooms. 

Conclusion 

By understanding potted Hibiscus blooming issues and taking appropriate actions like adjusting watering schedules, balancing nutrients, ensuring proper drainage, providing adequate sunlight exposure, maintaining consistent temperatures, timing pruning correctly, and addressing any pest infestations promptly – you can help your potted Hibiscus thrive and bloom beautifully.

Remember that nurturing plants is a learning process that requires patience and observation. By staying attentive to your plant’s needs and making necessary adjustments along the way, you can create an environment where your potted Hibiscus will flourish with vibrant blooms for you to enjoy. 

Unlock Blooms: 9 Key Reasons Your Potted Frangipani Won’t Flower

0

Frangipani flowers, also known as plumeria, are the best addition to any garden or indoor space. Their delicate petals in shades of white, pink, and yellow have a sweet fragrance that captivates the senses. Caring for a potted Frangipani plant can be a rewarding experience. By understanding the blooming process and addressing any potential issues that may hinder blooming, you can help your Frangipani thrive and produce beautiful flowers.

9 Key Reasons Your Potted Frangipani Won't Flower

Remember to be patient and consistent in your care routine, as these tropical plants require time to adjust and bloom. With the right conditions and attention to detail, you can enjoy stunning Frangipani blooms in your home or garden. 

9 Key Reasons Your Potted Frangipani Won’t Flower

Lack of Sunlight 

One of the most common reasons why your potted Frangipani is not flowering is due to a lack of sunlight. Frangipanis are sun-loving plants that thrive in bright, direct sunlight for several hours a day. If your plant is not receiving enough sunlight, it may struggle to produce blooms. Make sure to place your Frangipani in a spot where it can receive at least 6 hours of sunlight daily. If you notice that your plant is not blooming as expected, try moving it to a sunnier location. Remember that proper sunlight exposure is crucial for the overall health and blooming potential of your potted Frangipani. 

Overwatering or Underwatering 

Overwatering or underwatering your potted Frangipani can be detrimental to its blooming potential. Frangipanis prefer well-draining soil that allows excess water to escape easily. When you overwater your plant, the roots may suffocate as they become waterlogged, leading to yellowing leaves and bud drop. 

On the other hand, underwatering can stress the plant and inhibit flower production. Frangipanis are drought-tolerant but still need regular watering during hot periods. To troubleshoot Frangipani plant blooms, ensure that you water your Frangipani deeply but infrequently. Let the top few inches of soil to dry between waterings to prevent issues associated with both overwatering and underwatering. 

Temperature Fluctuations 

One of the reasons potted Frangipanis may not be blooming is due to temperature fluctuations. Frangipani plants thrive in warm and consistent climates, so drastic changes in temperature can disrupt their growth cycle. Fluctuations between hot days and cool nights can confuse the plant, leading to stress and a delay in flowering. It’s important to place your Frangipani in a location with stable temperatures, away from drafts or heating vents. 

In case you missed it: 10 Reasons Why Is My Ice Plant Not Blooming: Remedies and Treatment

Frangipani flower

Extreme heat or cold can also affect Frangipani blooms. High temperatures may cause buds to drop prematurely, while chilly conditions can slow down Frangipani growth and flower production. To help your Frangipani adjust to temperature changes, consider moving it indoors during extreme weather or providing shade during scorching summer days. 

Nutrient Deficiencies 

Nutrient deficiencies can be a significant factor contributing to your potted Frangipani not blooming as vibrantly as you’d hoped. If your Frangipani lacks essential nutrients like nitrogen, phosphorus, or potassium, it may struggle to grow healthy leaves and flowers. Without the proper balance of these key elements, the plant’s overall health and flowering capacity can be compromised. 

To encourage potted Frangipani flowering, consider using a balanced fertilizer designed for flowering plants. This will help provide your Frangipani with the necessary nutrients it needs to flourish and bloom beautifully. Be sure to follow the instructions on the fertilizer packaging carefully to avoid over-fertilizing, which can also harm your plant.  

Pests and Diseases 

Pests and diseases can damage your potted Frangipani, causing it to struggle with blooming. From pesky aphids to fungal infections, these unwanted guests can disrupt the plant’s growth cycle. Aphids feed plant sap, weakening them in the process. Mealybugs are another common nuisance that can infest your Frangipani.

Fungal diseases can also hinder blooming by affecting the overall health of the plant. Ensure good air circulation around your Frangipani and avoid overhead watering to prevent these issues. Regularly checking your plant for pests or diseases is crucial in promoting blooming success. 

Poor Soil Quality 

Having poor soil quality can be a major reason why your potted Frangipani is not blooming as expected. Frangipani plants thrive in well-draining soil that is rich in nutrients. If the soil lacks essential nutrients or has become compacted over time, it can hinder the plant’s growth and flowering capabilities. 

In case you missed it: 10 Reasons Why My Potted Hydrangea Not Blooming: Treatment and Remedies

Plumeria

To ensure your Frangipani receives the proper nourishment it needs to bloom, consider repotting it with a fresh, high-quality potting mix specifically formulated for tropical plants like Frangipani. Regularly check the condition of the soil by observing its texture and moisture levels. Adjust watering frequency accordingly to prevent waterlogged or overly dry conditions that can stress the plant and impede blooming potential. 

Improper Pruning Techniques 

When it comes to improving potted Frangipani plants’ blooms, improper pruning techniques can hinder their blooming potential. Remember, less is often more when it comes to trimming your Frangipani. Avoid using dull or dirty tools for pruning, as they can introduce infections that harm your plant. Always use sharp and clean tools to make precise cuts without damaging the plant.

It’s essential to know where and how to prune your Frangipani correctly. Removing healthy branches or buds accidentally can delay or even prevent blooming altogether. Properly educating yourself on the best practices for pruning Frangipani plants will help ensure a healthy and vibrant display of blooms when the flowering season arrives. 

Wrong Pot Size or Type 

Having the right pot for your potted Frangipani is crucial for its blooming success. The size and type of the pot can greatly impact the plant’s growth and flowering capabilities. If your Frangipani is not blooming, it might be because it has outgrown its current pot. A small or cramped pot restricts root development and can hinder flower production.

On the other hand, a too large pot can lead to waterlogging, causing root rot and nutrient deficiencies. Choosing the correct type of pot is also important. Porous pots like terracotta allow better airflow to the roots. Plastic pots retain moisture better but can sometimes lead to overwatering if drainage holes are inadequate. 

Inadequate Fertilization 

Frangipanis are heavy feeders and require a balanced diet of nutrients to thrive and produce those beautiful blooms. When it comes to fertilizing your potted Frangipani, timing is key. During the growing season, regular feeding every 2-3 weeks with a well-balanced fertilizer will help promote healthy growth and flowering. However, during the winter months, when the plant is dormant, reduce or cease fertilization altogether. 

In case you missed it: 10 Reasons Why is My Goldfish Plant Not Blooming: Remedies and Treatment 

Frangipani

Choosing the right type of fertilizer is crucial for your potted Frangipani’s health. Look for a fertilizer specifically formulated with a higher phosphorus content to encourage blooming. Always follow the manufacturer’s instructions on how much and how often to feed your plant.

Conclusion 

Remember, with the right care and attention, your potted Frangipani can bloom beautifully. By addressing factors like sunlight exposure, watering practices, nutrient levels, pest control, pruning techniques, pot size and type, fertilization routine, and temperature conditions – you can set the stage for a thriving plant. Remember to observe your plant closely and make necessary adjustments along the way.